What's going on in your shop?

What is not presented, however, is what epoxy actually does when a material (steel) that flexes differently than the two pieces it's sandwiched between, like wood, G10 or micarta and pinned or connected with fasteners.
Hmmm..... I might ask him as a follow up question/post/thread...
 
Generally speaking, there is some good information in that thread about bonding two parts together with epoxy, from the engineering perspective from which it is presented.

What is not presented, however, is what epoxy actually does when a material (steel) that flexes differently than the two pieces it's sandwiched between, like wood, G10 or micarta and pinned or connected with fasteners. The resultant conclusion is that the methods employed by a great many established makers is that they're all doing it wrong, with holes, fullering, etc.

The key here being "flex". Exactly how much a full tang flexes under normal use is the basis for how much of a concern this is. The bigger risk is probably shock, such as the knife being dropped on a hard surface. Temperature and humidity are a concern where natural materials will expand/contract at a different rate. This is a real factor on folders in my experience. But this may be one of those times where we can analyze a mountain out of a mole hill. Unless your handles are falling off for no apparent reason, this may be more of an intellectual exercise than is warranted.
 
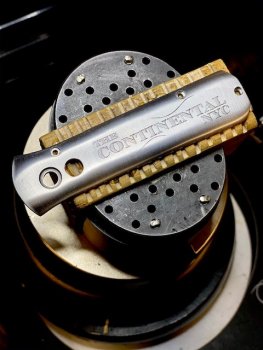
I have managed to engrave the front side of my recent auto knife build. Lettering is harder than scroll engraving. It is much more demanding and you can't hide any mistakes. I practiced this one for 15 hours before I worked up the nerve to cut it on the knife.
continental.jpg

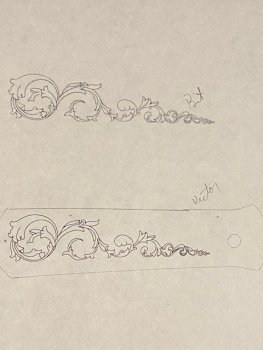
I use an Ipad and Procreate app to draw. After the drawing I export it to Coreldraw where I change it from a bit map file (basically jpeg) to a vector file. The vector allows me to resize the drawing with out a bunch of jagged lines. Below this drawing shows how fuzzy a bit map is compared to the vector version.
bit vs vector.jpg

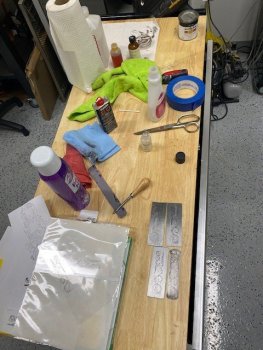
After you get the drawing file sized right, you need to put it onto a stencil medium that you can transfer to your work. This is mostly voodoo. There are several ways to do this and some are better than others. Basically you print out your drawing (in reverse) and then use a chemical to pull the ink from your print out to the work piece. Some printers work, others don't. You have to dig through the web to find which ones to use. In the lower right corner you can see 4 practice plates I will cut before I even consider cutting the actual knife handle on the back side.
stencils.jpg

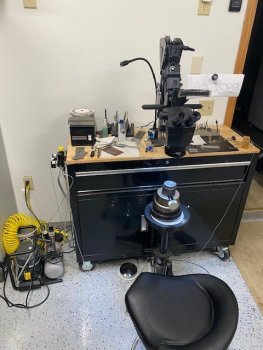
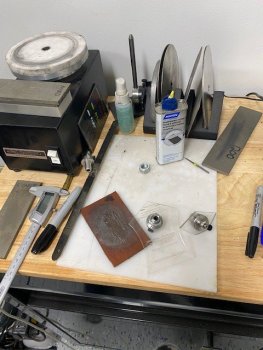
Work space needed for engraving can be very modest. This is in my garage at home.
work station.jpg

I use a Lindsay classic airgraver. Many also use GRS engraving machines. There are also a couple more systems out there like Enset and the digital pulse system I can't remember the name of right now but Lindsay and GRS are by far the most used in the US.
lindsay.jpg

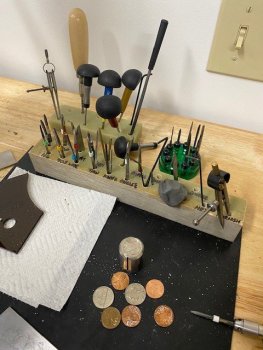
Gravers have different geometry on their cutting end. 90% of the time I use one graver but these others are used with specific cuts.
gravers.jpg

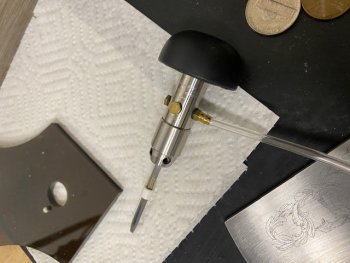
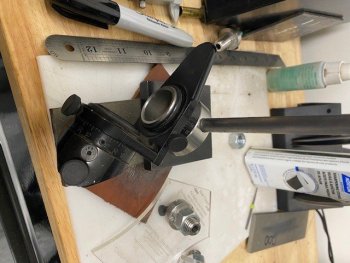
If you engrave, you will need to sharpen - a lot. Engraving is 2 parts engraving and 1 part sharpening. I use several systems to get the graver geometry where it needs to be. Once you sharpen a graver, you inspect it under the microscope and make adjustments. A difference of just a couple thousands in symmetry can really make for a bad cut.
sharpening.jpg
 

Attachments

  • universal sharpener.jpg
    universal sharpener.jpg
    70.8 KB · Views: 2
Last edited:
I have managed to engrave the front side of my recent auto knife build. Lettering is harder than scroll engraving. It is much more demanding and you can't hide any mistakes. I practiced this one for 15 hours before I worked up the nerve to cut it on the knife.
View attachment 75220

I use an Ipad and Procreate app to draw. After the drawing I export it to Coreldraw where I change it from a bit map file (basically jpeg) to a vector file. The vector allows me to resize the drawing with out a bunch of jagged lines. Below this drawing shows how fuzzy a bit map is compared to the vector version.
View attachment 75221

After you get the drawing file sized right, you need to put it onto a stencil medium that you can transfer to your work. This is mostly voodoo. There are several ways to do this and some are better than others. Basically you print out your drawing (in reverse) and then use a chemical to pull the ink from your print out to the work piece. Some printers work, others don't. You have to dig through the web to find which ones to use. In the lower right corner you can see 4 practice plates I will cut before I even consider cutting the actual knife handle on the back side.
View attachment 75222

Work space needed for engraving can be very modest. This is in my garage at home.
View attachment 75223

I use a Lindsay classic airgraver. Many also use GRS engraving machines. There are also a couple more systems out there like Enset and the digital pulse system I can't remember the name of right now but Lindsay and GRS are by far the most used in the US.
View attachment 75224

Gravers have different geometry on their cutting end. 90% of the time I use one graver but these others are used with specific cuts.
View attachment 75225

If you engrave, you will need to sharpen - a lot. Engraving is 2 parts engraving and 1 part sharpening. I use several systems to get the graver geometry where it needs to be. Once you sharpen a graver, you inspect it under the microscope and make adjustments. A difference of just a couple thousands in symmetry can really make for a bad cut.
View attachment 75226
Engraving turned out really nice. That's a very interesting process. Thanks for posting!
 
I could see enjoying engraving...but too many tools, methinks. Thanks for sharing, Boss.

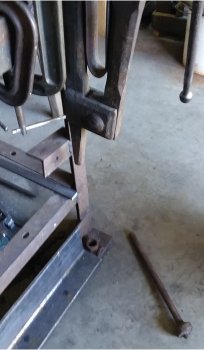
Had a minor mishap during forging yesterday. While forging my heel notch (I'll accept any better terms for this) on a nakiri, I heard a heart-sinking sound not unlike the dreaded 'tink' that happens after quenching, but much lower in tone, followed by the sound of metal landing on the concrete floor. I didn't realize what happened until the next whack with the hammer, when I noticed my post vice bounce around unusually....
20201005_124533.jpg
Good thing there's a spare hiding somewhere in the shed....but that ended the forging for the day.
 
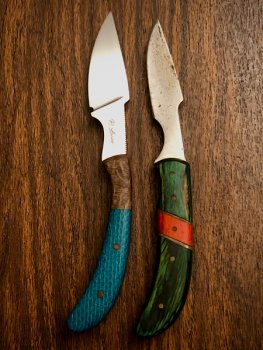
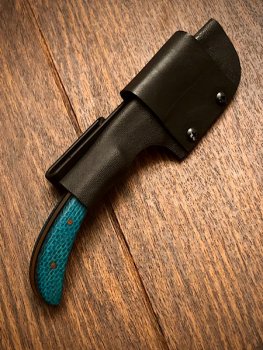
A friend has a cheap Pakistan knife that he likes but since it’s made out of tin cans it won’t hold an edge. He asked if I could make one like it so I gave it a shot. My version is a little skinny but it still feels good in the hand. It’s AEB-L with burlap and canvas micarta. Black liners and natural pins. Kydex sheath.
3FC864BF-5E14-43E3-86EA-B2833B6F862B.jpeg
C13B7630-CD3B-4C63-940C-F8AB41C76710.jpeg
 
Which is a possibility....one can run into when talking to an engineer :eek: .
No offense intended to the engineers in the group.;) I've been accused of similar things when talking about biomechanics tissue healing and other physical therapy related topics....
I think it has potential to be interesting.

The real short version, though, is this. I do not rely on epoxy to hold any sort of handle on a knife. I rely on mechanical fastening of some sort, as I have been able to induce a peel failure on every single thing I've ever tested. And while I have found certain attachment methods sans mechanical fastening to be stronger than others, I've ultimately chosen mechanical fastening is what I'll do.

As such, I do not find ultimate bonding strength as described to be the only consideration in the use of epoxy. Fullering, for example, provides an easier to fit tang for me. The bond is still adequate to seal the seams, and provides a "bedded" fit which maximizes the strength of the fasteners.
 
I do not rely on epoxy to hold any sort of handle on a knife. I rely on mechanical fastening of some sort,
This is the key when using scales.
I think it was mentioned in the thread as well, but it's possible it came up in another thread about the same topic.

I'd recommend to any newer makers that when using scales, do some product testing before putting the knife into use by putting the blade in a vice and try to bend the blade back and forth gently (we're testing the integrity of the scale/tang junction, not the blade itself) and see if there's enough flex to cause the epoxy to fail at the front portion of the scale in front of the front pin/mechanical fastener.
 
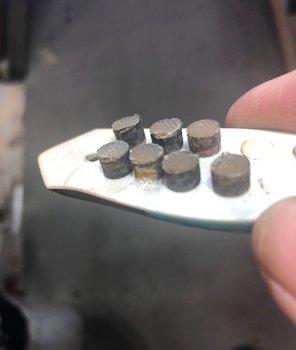
This is what epoxy looks like after you burn a handle off. The only way to get it loose from the scales is to melt it or or take a chisel to it. I always use pins either internal or traditional but I have a lot of confidence in the epoxy. Good material prep will ensure a good bond. I scuff everything with 80 grit and clean with denatured alcohol right before glue up. I don't worry about a handle coming loose. Not gonna happen.

epoxy.jpg
 
This is what epoxy looks like after you burn a handle off. The only way to get it loose from the scales is to melt it or or take a chisel to it. I always use pins either internal or traditional but I have a lot of confidence in the epoxy. Good material prep will ensure a good bond. I scuff everything with 80 grit and clean with denatured alcohol right before glue up. I don't worry about a handle coming loose. Not gonna happen.

View attachment 75245
This is a perfect example of why I pointed out that, while there is good, general adhesive information in the linked thread, it doesn't necessarily apply to making knives, and doesn't consider what job epoxy actually does when holding on a knife handle.

That poster did explicitly state that "pass throughs" formed a weaker bond than a perfectly flat, properly sanded minimally thick joint. Yet, there are many makers who successfully utilize a high degree of skeletonizing to form a strong knife handle.

I don't want folks to think I'm saying that there is no other way than my way. I'm saying I disagree with that poster about epoxy's application in making knives.

I do what I do for the balance of ease of construction, strength, and aesthetics that I'm looking for.
 
That poster did explicitly state that "pass throughs" formed a weaker bond than a perfectly flat, properly sanded minimally thick joint. Yet, there are many makers who successfully utilize a high degree of skeletonizing to form a strong knife handle.
I believe the poster when he implies or says that the pass throughs lead to a weaker epoxy bond compared to a thin, flat joint. But here's where the theory and practice collide. The difference in the strength of the bond could very well be measured using scientific methods and controls, but doesn't make a significant difference for our application. To me, the reason to use holes and pass throughs is to lessen the overall weight of the blade, or change the balance point, not to make a stronger joint.
A similar argument could be made for hollowing/dishing out the tang. Having more epoxy there might make the joint a bit weaker than if it were prepped the 'ideal' way to get the mzximum strength from the epoxy. But even though the bond might be weaker, it makes it much easier to get a clean looking joint, and the loss of strength of the epoxy isn't and issue (especially when using corbys or other mechanical pieces).
 
The only way to get it loose from the scales is to melt it or or take a chisel to it.
I'm curious, as you were chiseling them off, did any of the posts break in the middle? If so, I think this is what the poster of the adhesion thread was talking about. That the epoxy itself isn't very strong, but the bond is. And to get the best bond, do the best surface prep you can.
 
I believe the poster when he implies or says that the pass throughs lead to a weaker epoxy bond compared to a thin, flat joint. But here's where the theory and practice collide. The difference in the strength of the bond could very well be measured using scientific methods and controls, but doesn't make a significant difference for our application. To me, the reason to use holes and pass throughs is to lessen the overall weight of the blade, or change the balance point, not to make a stronger joint.
A similar argument could be made for hollowing/dishing out the tang. Having more epoxy there might make the joint a bit weaker than if it were prepped the 'ideal' way to get the mzximum strength from the epoxy. But even though the bond might be weaker, it makes it much easier to get a clean looking joint, and the loss of strength of the epoxy isn't and issue (especially when using corbys or other mechanical pieces).
That's a great summary. Theory and practice collide.
 
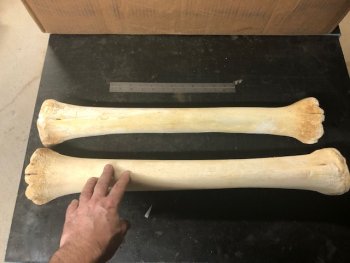
Thanks, Boss. My only experience is with bovine bone when I had my own herd, and did notice that it was quite porous with a large marrow space when giving the bones to my dogs after butchering.
 
Back
Top