You are using an out of date browser. It may not display this or other websites correctly.
You should upgrade or use an alternative browser.
You should upgrade or use an alternative browser.
What's going on in your shop?
- Thread starter Justin Presson
- Start date
52 Ford
Well-Known Member
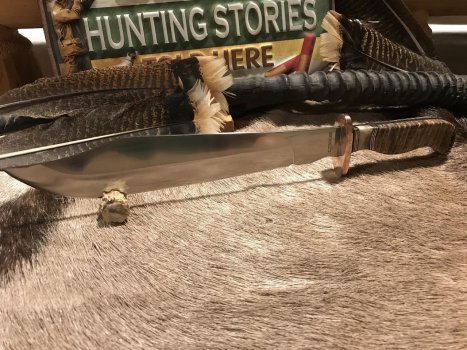
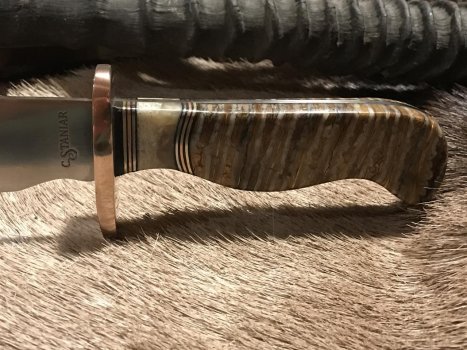
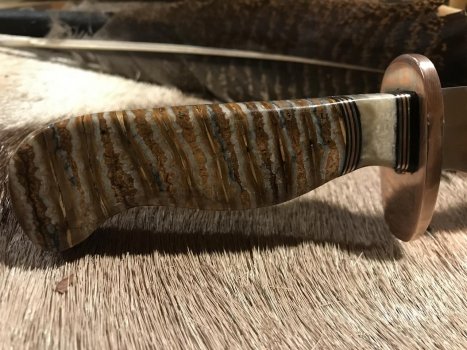
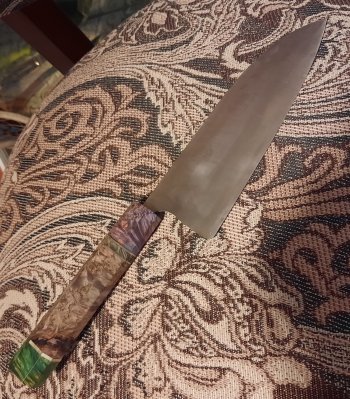
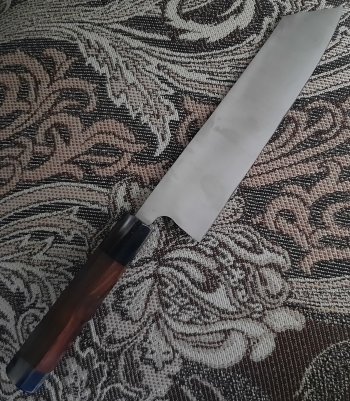
Ya sure that knife is big enough?Finished this up just in time. My Son's 16th bday party is this weekend. Hopefully the case gets here in time. Only sliced myself once on this one!
16" OAL
154-CM Stainless
Mokume Guard
A.Blackwood/Brass/Copper/Stainless accents
Muskox horn
Mammoth Scales
View attachment 81094
View attachment 81091
View attachment 81093
Looks awesome!

Sent from my Champion Forge using Tapatalk
REK Knives
Well-Known Member
Beautiful work, how's it progressing?Gonna try and get this one done before the hammer-in this weekend...need something to show off!ha it's a Lanny clip in cpm154 w some crosscut zebra wood covers...think I'm gonna file work the liners, pinch and flute the bolsters
Sent from my SM-G981V using Tapatalk
Just got it hammered together at 3am last night and put 2nd coat of oil on it this morning! I'll post a finished pic in my thread in the knife pictures section this afternoon! Check it out!!Beautiful work, how's it progressing?
Sent from my SM-G981V using Tapatalk
Here's the next one I'm working on! This will be the 2nd Barlow i've made. This one is in O-1 tool steel with some bone covers that I dyed black (they always turn out kinda funky!ha) 1st attempt at coining the liners and think its gonna look pretty good! Trying to decide if I wanna jig the bone or just leave it smooth and maybe filework the liners on this one too

Sent from my SM-G981V using Tapatalk

Sent from my SM-G981V using Tapatalk
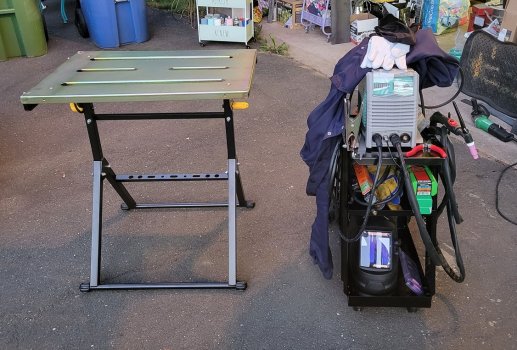
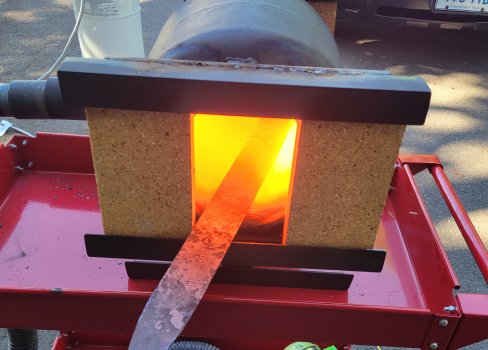
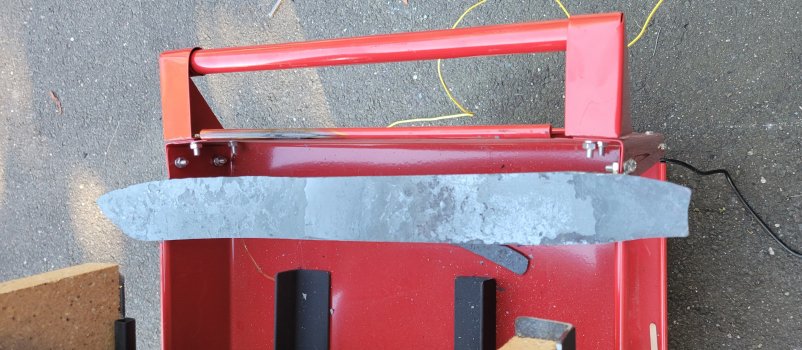
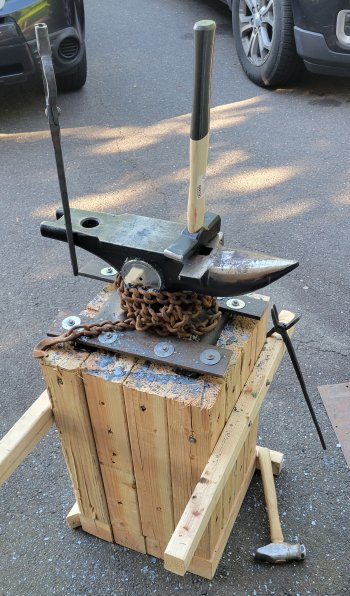
Got my forge done! Also picked up a YesWelder TIG 205DS and have been trying to learn stick welding with it until I get an argon tank to go to TIG. I got to try my buddies MIG welder and did pretty well once I got an idea of how it worked. I am doing OK with stick, but having trouble starting the weld without sticking the electrode to the metal.
Attachments
Next wip's...1st up is a buckeye burl shadow pattern w a drop point blade. I don't make too many fixed blades anymore, but got an order for the skinner, and the other is for a friend whose dad passed away last year after a long sickness... I had some micarta made out of his dads favorite fishing shirt. It's a surprise so hope it turns out cool!


Sent from my SM-G981V using Tapatalk


Sent from my SM-G981V using Tapatalk
52 Ford
Well-Known Member
If you need any guidance as far as stick welding goes, just ask! I've been stick welding for a lil bit.Got my forge done! Also picked up a YesWelder TIG 205DS and have been trying to learn stick welding with it until I get an argon tank to go to TIG. I got to try my buddies MIG welder and did pretty well once I got an idea of how it worked. I am doing OK with stick, but having trouble starting the weld without sticking the electrode to the metal.
What electrode are you using, what diameter, and what amperage?
Edit: I went through my phone and this is the only picture I could find of one of my welds.... not the best, but I'm not in the shop right now, so I can't take a picture of some pretty welds. That's 316 stainless plate (1/8" to 1/4"?) welded with 1/8" 312L.
Sent from my Champion Forge using Tapatalk

Last edited:
Crank the heatI used Forber 3/32" 7018, tried 80-100 amps, sticks bad every time and its hard to lift away to start the arc. I am going to try it on 220v tonight and see how it goes.
52 Ford
Well-Known Member
Gotcha. If you're running on 120V, I suggest bumping the amperage up a bit higher and see if that works (maybe 110A?). If that doesn't work, forget about 7018 on 120V altogether. 110A is a LOT for a 120V circuit. Get some 3/32 6013 and try that.I used Forber 3/32" 7018, tried 80-100 amps, sticks bad every time and its hard to lift away to start the arc. I am going to try it on 220v tonight and see how it goes.
When the machine is only being supplied 120V amp display may be reading higher than what the machine is actually delivering to the electrode OR it could have to do with low voltage. You aught to see a major improvement when you run the machine on 240V.
Pick up some 6013, 6010 (or 6011), and some 7014. Chances are, once you try those 3 rods, you'll forget about 7018.
Sent from my Champion Forge using Tapatalk
240v made a huge difference! 7018 3/32 on 1/4" steel. Not perfect, but I had a much easier time starting the bead. The rod burned down quicker, so I had to get used to that. Tried the Forney and another brand electrode.

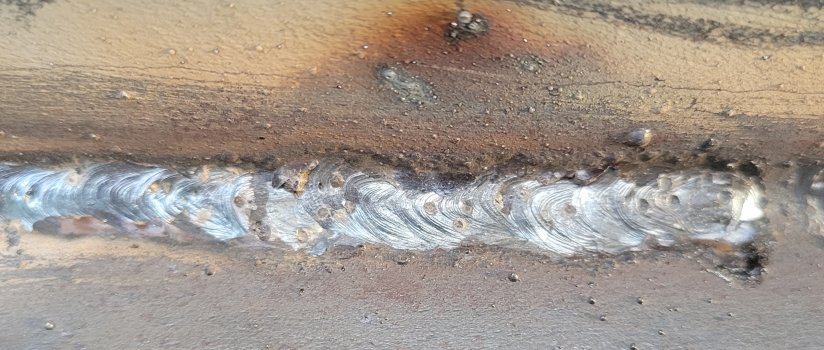
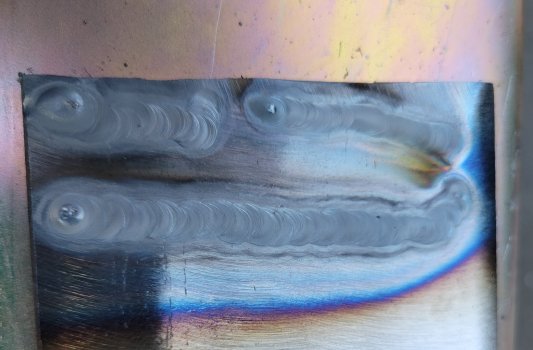
Tig beads on 1/4" plate with no filler rod:
More tig with some 3/32 filler rod
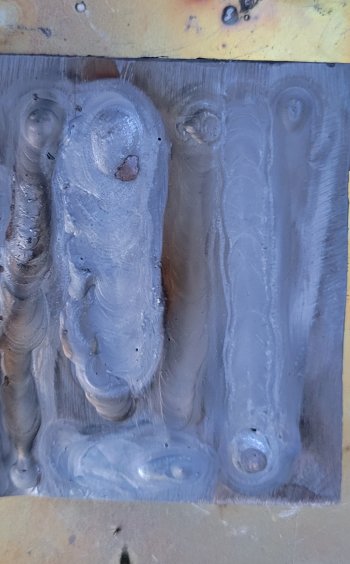
With the filler rod, I had more porosity at the start, but the plate was heating up quick, and the arc was atarting further away. I tried to flood the area with gas first and then get the arc started. Went up to 150amp with the Tig. Not every weld was perfect, but I am better at reading the puddle and arc length


Tig beads on 1/4" plate with no filler rod:

More tig with some 3/32 filler rod

With the filler rod, I had more porosity at the start, but the plate was heating up quick, and the arc was atarting further away. I tried to flood the area with gas first and then get the arc started. Went up to 150amp with the Tig. Not every weld was perfect, but I am better at reading the puddle and arc length
CDHumiston
Well-Known Member
52 Ford
Well-Known Member
The porosity could be caused by a few different things. Make sure you're tungsten is clean, check your CFH on the flow meter, and it can't hurt to give your parts and the filler rod a wipe down with acetone and a clean rag. No matter what welding process, it's always best practice to remove any mill scale. TIG is more picky than stick when it comes to cleanliness.240v made a huge difference! 7018 3/32 on 1/4" steel. Not perfect, but I had a much easier time starting the bead. The rod burned down quicker, so I had to get used to that. Tried the Forney and another brand electrode.
View attachment 81151View attachment 81152
Tig beads on 1/4" plate with no filler rod:
View attachment 81153
More tig with some 3/32 filler rod
View attachment 81154
With the filler rod, I had more porosity at the start, but the plate was heating up quick, and the arc was atarting further away. I tried to flood the area with gas first and then get the arc started. Went up to 150amp with the Tig. Not every weld was perfect, but I am better at reading the puddle and arc length
With stick, try to maintain a consistent rod angle and arc length. The welds look pretty good; you may want to slow down a little.
When you're practicing on plate, I HIGHLY suggest adding some sort of straight line reference to the plate. Whether that's grinding in some shallow lines or just making some deep scribe marks in the plate. Welding without a straight reference still makes for good practice, but you really need to have something to focus on as you're welding. You can get a bunch of strips of steel and butt weld them all together.
Thanks for the info! It may be that the tungsten is dirty. The welder has 4 seconds of post flow, so I hit the button again to try to get more post flow so the tungsten doesnt have the dirty look to it. Running around 17 cfh on the argon and my glass lens kit should be here today, so hopefully that will be a little better gas shield.
Definitely need some straight lines to follow, lol, mine are all over the place! I am using the angle grinder to clean before tig welding, but with the stick, I just go with it for now since it is more practice beads. I will often grind my old weld beads off and keep practicing on the freshly ground plate, too. Gotta cut up some mild steel to do some butt and t joint welds, fillets, etc now that I figured out how to lay a bead down!
Definitely need some straight lines to follow, lol, mine are all over the place! I am using the angle grinder to clean before tig welding, but with the stick, I just go with it for now since it is more practice beads. I will often grind my old weld beads off and keep practicing on the freshly ground plate, too. Gotta cut up some mild steel to do some butt and t joint welds, fillets, etc now that I figured out how to lay a bead down!
Last edited:
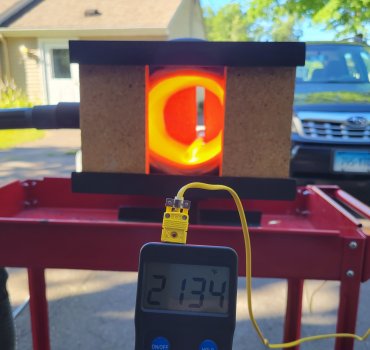
Got my kiln hooked up to the PID and did some auto tuning! 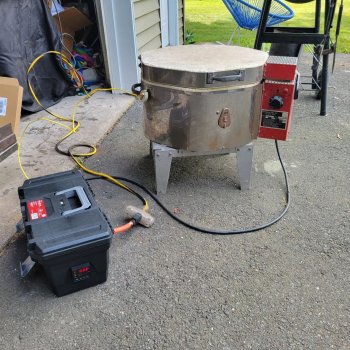
Its nice to open the tool box to let the heat sink cool off a bit. It was warm, but not burning skin warm. I need to mount it better inside the tool box.
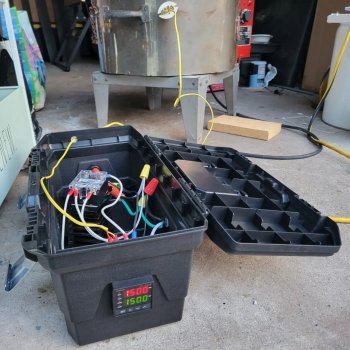
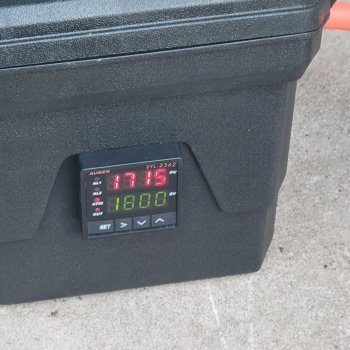
It seems to overshoot by about 8 degrees and then it comes back down and holds nicely. Held at 1500, then up to 1600 and held for a while and them put it at 1800 and it got up to 1715! The Pyrometer dial on the PID seemed to be fairly accurate compared to the thermocouple too, which I was surprised at!
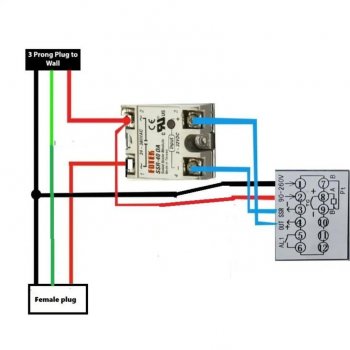
This is how I have my PID wired up for 110V:
I emailed EvenHeat but never heard back. I see they have 240V coils available for the overseas market and am debating going to those instead of the 110V. I want to get an extra set of coils since I don't know how much use is on these. If I get the 240V coils, does anyone know if it would be a straight plug and play swap and change out the internal kiln wiring and PID wiring or would there be more? I am not sure if the rheostat knob would need to be changed? I may call EvenHeat on one of my days off and see if I can get someone on the phone.

Its nice to open the tool box to let the heat sink cool off a bit. It was warm, but not burning skin warm. I need to mount it better inside the tool box.

It seems to overshoot by about 8 degrees and then it comes back down and holds nicely. Held at 1500, then up to 1600 and held for a while and them put it at 1800 and it got up to 1715! The Pyrometer dial on the PID seemed to be fairly accurate compared to the thermocouple too, which I was surprised at!

This is how I have my PID wired up for 110V:

I emailed EvenHeat but never heard back. I see they have 240V coils available for the overseas market and am debating going to those instead of the 110V. I want to get an extra set of coils since I don't know how much use is on these. If I get the 240V coils, does anyone know if it would be a straight plug and play swap and change out the internal kiln wiring and PID wiring or would there be more? I am not sure if the rheostat knob would need to be changed? I may call EvenHeat on one of my days off and see if I can get someone on the phone.
52 Ford
Well-Known Member
Instead of having to open the case up to cool the electronics down, might I suggest adding a 120V cooling fan (like this: https://www.amazon.com/AC-Infinity-...ywords=120v+cooling+fan&qid=1656904307&sr=8-4 )Got my kiln hooked up to the PID and did some auto tuning! View attachment 81163
Its nice to open the tool box to let the heat sink cool off a bit. It was warm, but not burning skin warm. I need to mount it better inside the tool box.
View attachment 81162
It seems to overshoot by about 8 degrees and then it comes back down and holds nicely. Held at 1500, then up to 1600 and held for a while and them put it at 1800 and it got up to 1715! The Pyrometer dial on the PID seemed to be fairly accurate compared to the thermocouple too, which I was surprised at!
View attachment 81161
This is how I have my PID wired up for 110V:
View attachment 81164
I emailed EvenHeat but never heard back. I see they have 240V coils available for the overseas market and am debating going to those instead of the 110V. I want to get an extra set of coils since I don't know how much use is on these. If I get the 240V coils, does anyone know if it would be a straight plug and play swap and change out the internal kiln wiring and PID wiring or would there be more? I am not sure if the rheostat knob would need to be changed? I may call EvenHeat on one of my days off and see if I can get someone on the phone.
Have it push air into the case and stick a dust filter on it. That way you have a positive pressure configuration that'll keep down on dust. Just drill some exhaust holes located strategically so you get good air flow.
Also... tape your wire nuts! Or solder and heatshrink the wires. open wire nuts in something that's going to get moved around a lot is sorta sketchy. Crimp connects are fine, too.

