Bruce McLeish
Well-Known Member
nice, somehow it looks sturdier than mine. Mine's made from PVC tubing!
Very nice Bjmac. I made one with a similar shape a little while back for a lady to test out for me. It was my first kitchen type knife and I wanted some feedback on it. She says she uses it all the time and loves it. I need to make some more.just finished this. It's a prototype kitchen utility knife. 1084 with birds eye maple handle. handle has 9 coats of tru oil to seal itView attachment 69553View attachment 69555
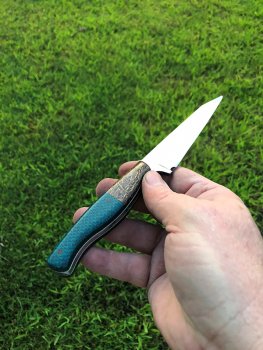
That does look familiar ! My wife (and chief tester and commentator ) hung it on the knife rack...she's adverse to using it because "it's too pretty ." Sheesh , hard to get feedback that way.Very nice Bjmac. I made one with a similar shape a little while back for a lady to test out for me. It was my first kitchen type knife and I wanted some feedback on it. She says she uses it all the time and loves it. I need to make some more.
View attachment 69574
beautiful little kitchen knife!just finished this. It's a prototype kitchen utility knife. 1084 with birds eye maple handle. handle has 9 coats of tru oil to seal itView attachment 69553View attachment 69555
Thanks Ted. I appreciate the comment.beautiful little kitchen knife!
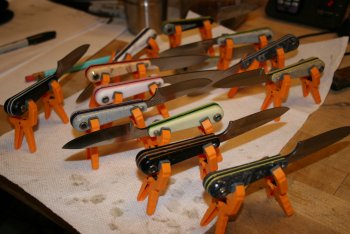
Do you drill any extra holes in your tangs for epoxy to pass through? When I first started I was worried that I might over clamp the scales. Read numerous posts warning about that. Then I had to remove my first handle due to a mistake. Had to almost melt the scales off before it would turn lose. All the extra holes were filled with epoxy and acted as internal pins. I don’t worry about it much anymore after that experience.just epoxied up 13 knives...only one(out of focus at the back) has inlay. These are my simple EDCs...just single colored handles with liners. One thing I've been meaning to share is I groove both the pins and lanyard tube to make a recess that allows the epoxy to lock in the grooves. This can be done in a drill motor at the belt grinder or on a small lathe if you have one. I also went to weaker clamps (shown) and the gluing seems stronger. I feel C-clamps or super strong spring clamps ten to make the bond too thin on the epoxy. I think I have been over clamping in the past.View attachment 69586
![IMG_1125[1].JPG IMG_1125[1].JPG](https://knifedogs.com/data/attachments/50/50474-f3edf24c034b8b0f0a823d8a84cf5f0b.jpg)
![IMG_1124[1].JPG IMG_1124[1].JPG](https://knifedogs.com/data/attachments/50/50475-675e17c2750f5202b9224fac9e8af9ce.jpg)
![WBIM9307[1].JPG WBIM9307[1].JPG](https://knifedogs.com/data/attachments/50/50476-8b0eaca79c28c42847055afa20865e15.jpg)
Do you drill any extra holes in your tangs for epoxy to pass through? When I first started I was worried that I might over clamp the scales. Read numerous posts warning about that. Then I had to remove my first handle due to a mistake. Had to almost melt the scales off before it would turn lose. All the extra holes were filled with epoxy and acted as internal pins. I don’t worry about it much anymore after that experience.Lot of very nice knives you have there. Looking good!!
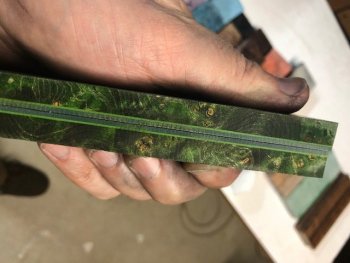
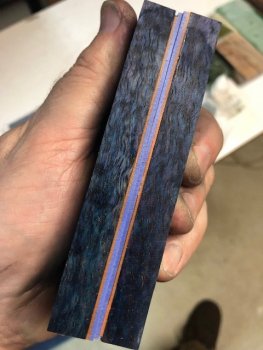
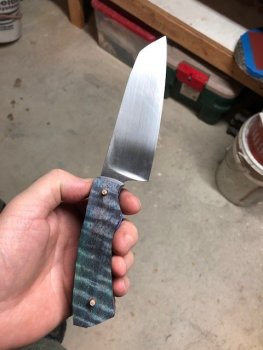
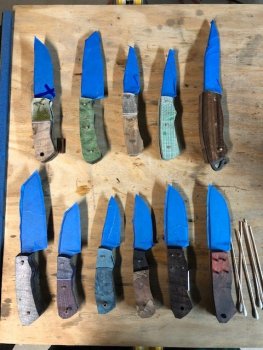
You better y to work , dude. There's alot to do and I ain't got all day to wait and watch.lJust finished gluing everything up. Hoping to get several shaped this weekend. I've been using a lot of G10 liners lately, and have some handle combinations that I really want to see how they turn out.
Has anyone here use G10 pin stock? I found a source and was contemplating using some of the colors.
View attachment 69609View attachment 69610View attachment 69611View attachment 69612View attachment 69613
I cut aII my pins from Iong Ienghts of pinstock and take them to the grinder to taper one end so it seIf guides through the driIIed hoIes better and at the same time run three grooves round the centre of the pin on the edge of the beIt to aIIow for the epoxy to have good grab points, and aIso countersink the hoIes on the inside of the handIe and the tang to create a dam of epoxy for the grooves in the pin to Iock into.just epoxied up 13 knives...only one(out of focus at the back) has inlay. These are my simple EDCs...just single colored handles with liners. One thing I've been meaning to share is I groove both the pins and lanyard tube to make a recess that allows the epoxy to lock in the grooves. This can be done in a drill motor at the belt grinder or on a small lathe if you have one. I also went to weaker clamps (shown) and the gluing seems stronger. I feel C-clamps or super strong spring clamps ten to make the bond too thin on the epoxy. I think I have been over clamping in the past.
Similar...I make the lanyard hole in the blade and liner about 1/16 oversize to make a nice locking foundation. That chunk of epoxy at the center is essential!I cut aII my pins from Iong Ienghts of pinstock and take them to the grinder to taper one end so it seIf guides through the driIIed hoIes better and at the same time run three grooves round the centre of the pin on the edge of the beIt to aIIow for the epoxy to have good grab points, and aIso countersink the hoIes on the inside of the handIe and the tang to create a dam of epoxy for the grooves in the pin to Iock into.
Yes, I have used G10 and Micarta pins quite a bit. Just like liner and scale material, they seem to bond exceptionally well.Just finished gluing everything up. Hoping to get several shaped this weekend. I've been using a lot of G10 liners lately, and have some handle combinations that I really want to see how they turn out.
Has anyone here use G10 pin stock? I found a source and was contemplating using some of the colors.
View attachment 69609View attachment 69610View attachment 69611View attachment 69612View attachment 69613
Same here. Even used a set of fiberglass pins and they worked well too.Yes, I have used G10 and Micarta pins quite a bit. Just like liner and scale material, they seem to bond exceptionally well.
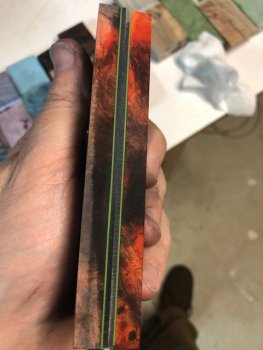
Beautiful! Looks like you just pulled it outta the HT furnace!So I started shaping the handles and had to share this one. This is why I'm addicted to handle material. This is dyed Buckeye burl after the first coat of Tru Oil. It looks like it's on fire...
View attachment 69640View attachment 69641
