What's going on in your shop?

I knew going in a making dual action liner lock would be hard.
It is stupidly hard.

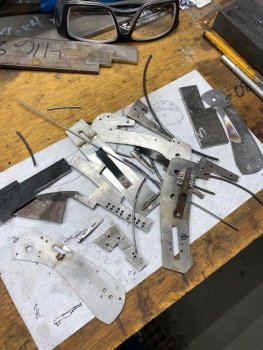
Here are some of my failures. If you learn from failure, I am closing on my Masters degree.
In fairness, each of these fails did teach me something.
IMG_1895.jpg

I switched to Titanium liners. I just didn't like how the 410ss (not hardened) was bending. I just got in some thicker 430ss I will use (maybe) next time when I have hardened it.

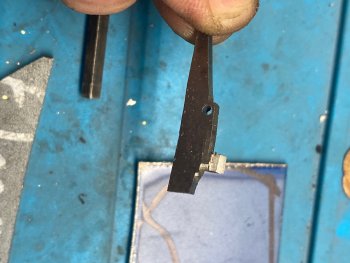
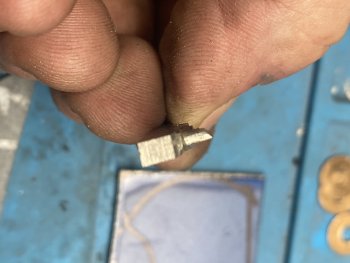
I made another sear switch. Tweaked the hardened spring (which came out decent using 8670), added a stronger spring under the sear switch arm, shortened the arm and did a bunch of other stuff. If you look at the switch below, I used screws to hold the sear switch pivot in place since you can't solder Ti. Most of the day is put it together, identify an issue, fix it, reassemble, cuss, new issue, repeat.

Chuck Gedratis sent me pics of one of his for reference and positive vibes. Thanks Chuck.

He used the term "money click".
I finally heard one today.

Still lot's to do. I have to move the switch completely. I didn't leave enough room at the top to hide it under a scale. Basically, I will modify the drawing, make new pattern templates and start from scratch but I'm closing in on it.
 
I knew going in a making dual action liner lock would be hard.
It is stupidly hard.

Here are some of my failures. If you learn from failure, I am closing on my Masters degree.
In fairness, each of these fails did teach me something.
View attachment 74314

I switched to Titanium liners. I just didn't like how the 410ss (not hardened) was bending. I just got in some thicker 430ss I will use (maybe) next time when I have hardened it.

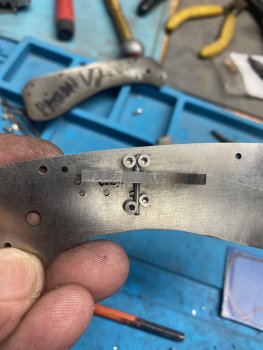
I made another sear switch. Tweaked the hardened spring (which came out decent using 8670), added a stronger spring under the sear switch arm, shortened the arm and did a bunch of other stuff. If you look at the switch below, I used screws to hold the sear switch pivot in place since you can't solder Ti. Most of the day is put it together, identify an issue, fix it, reassemble, cuss, new issue, repeat.

Chuck Gedratis sent me pics of one of his for reference and positive vibes. Thanks Chuck.

He used the term "money click".
I finally heard one today.

Still lot's to do. I have to move the switch completely. I didn't leave enough room at the top to hide it under a scale. Basically, I will modify the drawing, make new pattern templates and start from scratch but I'm closing in on it.
I admire you for sticking with it. I probably would have burnt the shop down by now. :)
 
I bent the spring a touch more, filed the detent flat and relieved the lock spring to reduce friction. Opens and closes like money.
I'll start a new one now after I make some tweaks to where everything lays out so I can get it hidden under a scale. I'll use this one for a reference.

 
I bent the spring a touch more, filed the detent flat and relieved the lock spring to reduce friction. Opens and closes like money.
I'll start a new one now after I make some tweaks to where everything lays out so I can get it hidden under a scale. I'll use this one for a reference.

Pretty sweet there, boss dog. Pretty sweet.
 
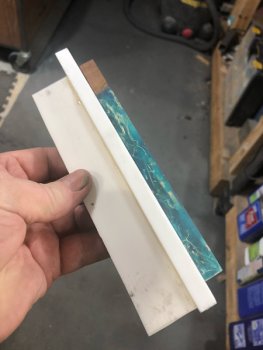
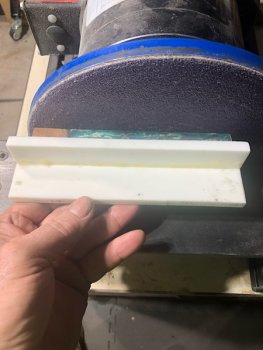
Scale material is usually always too thick. Tried a couple of different ways to thin it down. 4X36 sander is too slow. Had a planer that attached to a drill press. It worked ok but made a mess and you had to be careful with your fingers. So last night I epoxied two pieces of corian together and made a jig. A couple of small pieces of double sided carpet tape and I’m in business. Using a 60 grit disk on my 9” disk sander and it works great.
1B931883-4677-4AC1-ADC4-7B42105A9A81.jpeg
4AA428D6-9A3F-4B26-9849-15BAED27993F.jpeg
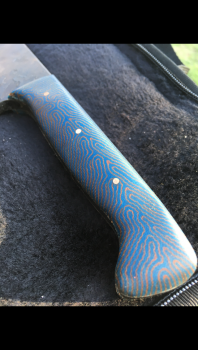
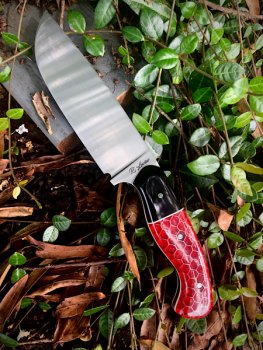
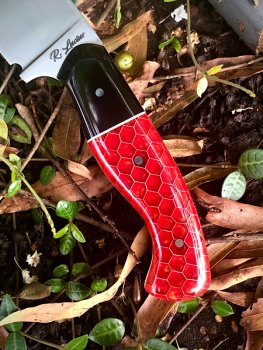
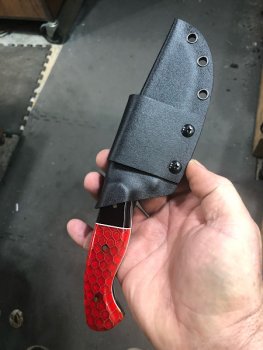
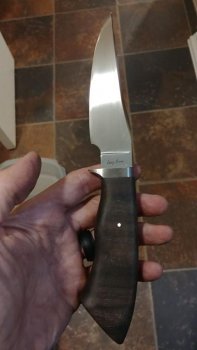
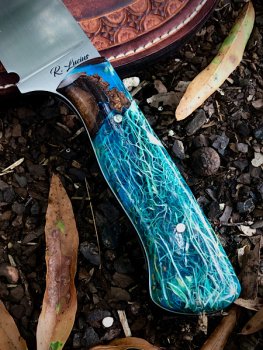
Finished this one up today and made a sheath. It’s a little larger than I usually make. 9 and 1/4” overall with a 5” blade.
D90E49F9-B889-46FD-9D6C-49CC074D8AE7.jpeg
1D62306B-C58E-435D-BFDF-C5FA10284E56.jpeg
F6AAEDFB-1827-49FF-9AEA-CA8A32745B93.jpeg
 
Last edited:
Good idea. I need to make one of those for my disk.

Scale material is usually always too thick. Tried a couple of different ways to thin it down. 4X36 sander is too slow. Had a planer that attached to a drill press. It worked ok but made a mess and you had to be careful with your fingers. So last night I epoxied two pieces of corian together and made a jig. A couple of small pieces of double sided carpet tape and I’m in business. Using a 60 grit disk on my 9” disk sander and it works great.
Finished this one up today and made a sheath. It’s a little larger than I usually make. 9 and 1/4” overall with a 5” blade.
 
more on the dual action liner lock switch

after working on several test builds I am attempting to make one all the way thru. Hopefully it doesn’t end up as another test build.

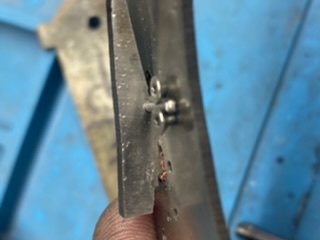
i have settled on four 1-72 flat head screws to hold the 1/16” pin in place. This is easy and quick and offers some adjustability that other methods don’t.

Plan where your sear is going to stick through to hold the kick spring and mill the slot. I used the blade pattern for this. I want the sear pin to hit the sharpening notch on the blade.

the screw heads can each be tightened differently to help get the pin perfectly perpendicular to the switch. By this I mean using the underside of the flat head screws to hold the pin, you can “swivel” the pin slightly to better align the pivot pin so the switch is centered in the slot.
clear as mud.

the screws stick up 1/16“ so there is plenty of room to hide them under a 1/8” scale.
3258175D-8213-4D71-9FA1-2BF68A90C294.jpeg8AA648C1-FED1-4326-8F64-DA569B3B03FC.jpeg


the switch is .125” stainless I will harden.
looking at the sear pin, you can see one side is slanted. This side contacts the kick spring when charging the spring. The slant pushes the switch back as the blade closes. The other side is filed flat to hold the kick spring when charged.
the switch has to fit snugly in the slot or it will move and create problems when charging the kick spring.

the switch is rough cut with the band saw, surface ground to fit the slot exactly and then hand filed.
7D953049-A673-4344-B1E2-07548B849E1C.jpegC0490C1D-091C-4232-8C9C-CB85C75734D2.jpeg
 
Back
Top