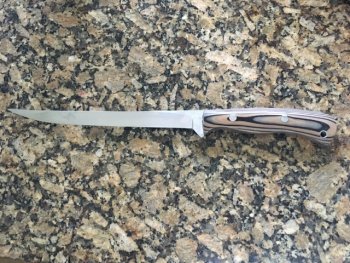
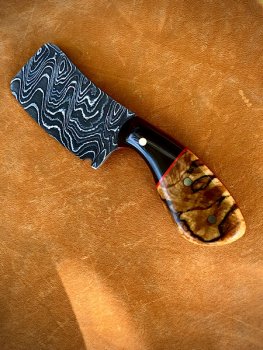
What's going on in your shop?

Just finished this pair. I made one a straight back and the other has a gentle curve along the spine. I’m torn. Personally, I prefer a straight spine when I use a pocketknife but the curve is pleasing to look at.

6-1/4” overall length. Blades are 2-3/4” long. AEBL blade. Liners and bolsters are 416 SS. Scales are Desert Ironwood.

View attachment 74235
Those are a couple of really nice looking folders John !
 
That looks great Randy, I really like how you mask your mark for etching it looks great. I noticed you got shy with that last lightning hole...it almost gotcha didn't it. :D
Yep. It almost bit me:) I used to lay out all the holes nice and precise. After doing a few blades I got over it and just started winging it. Sometimes I have to punt.:)
 
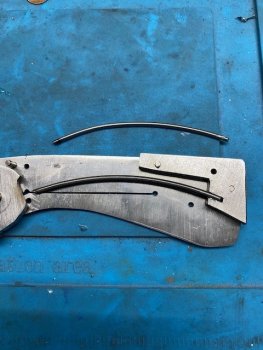
This is where I am at in the open position. The old smaller wire is above. It's amazing how much spring tension is needed.
I started with washers and moved to bearings pretty quick to loosen things up. The drag from the lock bar is significant and needs to be overcome.
This is .050" 410ss and I hate it. It's soft and mushy. I have some 430ss coming and I will harden that but I will probably go back to titanium and screw the sear/switch pivot pin to the liner instead of soldering it.

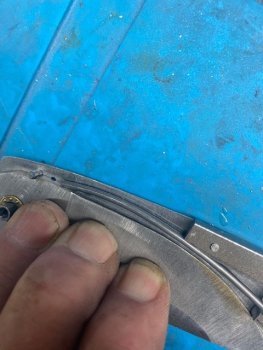
This is the open position. There has to be flat spot on the bottom of the blade for it to ride on as you close the spring so it needs to be just the right length so it doesn't bind.
IMG_1826.jpg

Closed position. The kick spring sear will go right at the plunge cut. Hopefully it will look like a sharpening notch.
IMG_1856.jpg

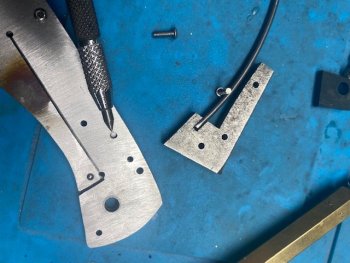
I had to mark the position of the lock sear pin on the lock side and transfer it to the front side with a location hole.
The kick spring is press fit into a slot on the back bar. I ground a small spot on the spring to better fit the undersized slot.
IMG_1857.jpg

I will muscle through this to get the basic action working and then stop. I will use this proto as a pattern for the next one to hopefully take all the way through.
 
This is how the switch is supposed to work.
Naturally it only kind of works. The piano wire kick spring is all over the place. If the blade was thinner the spring would be trapped between the liners but the spring diameter is quite a bit smaller than the space between liners.
I am trying to figure out how to trap/cage the wire so it doesn't flex over the sear pin and have made a new back bar to hold it better in place. It kind of works but I didn't go far enough and will remake it again....next week. Time to go fishing. Have a good weekend.


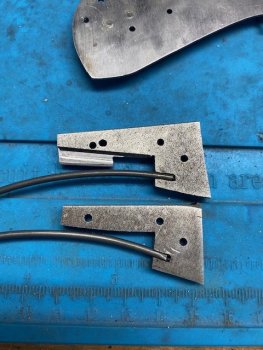
The top one is the latest version. It has a notch milled in to minimize flexing of the kick spring the wrong way. As the blade closes, it pushes the spring into the milled gap trapping the spring to one side so it acts the same every time. It's close but I will redo this one as well. I was trying to avoid making a traditional flat spring but that may be the solution.
IMG_1880.jpg
 
Last edited:
For years I have wanted to get into auto folders. I am finally getting started.

This will be a dual action using a bar lever. Dual action is one you can open manually, just like any other liner lock or open using the button (or lever bar in this case) an it will open like an auto. I hear this often called a double action and I could be wrong but that is more correctly used to describe an out the front that will be both open and close the knife by a slide bar.

the top drawing is for the lever bar. Peter Martin sent me a hand sketch of what he has used so I put it into CAD just to have a reference. I do not have anything figured out for the lever bar pivot pin lugs yet. I will probably make some lugs that screw into the liner. I will try TIG welding some lugs onto scrap and see how it works. Many guys solder the lugs in place also.

The bottom is a "sketch" (basically a solidworks term for not a finished, fully constrained drawing). I print these out, glue them onto pattern material and use the hardened pattern to make the actual pieces. The curved wire from the rear of the knife to the kick face on the blade is the leaf spring. That is held in place, when charged, by the button bar lug. When the knife is closed, the spring is charged and held open by the lug on the button bar. The blade can open and close manually with the spring held in place. The button can be activated, releasing the leaf spring, kicking the blade out. When you close the blade, the spring is charged again.

I am stepping up the detent ball to 3/32" from a 2mm ball because I think it will hold better. The detent ball does not hold the spring back so it all has to be clocked perfectly. I hope I don't screw this up ten times trying to get it figured out.

The two metal pieces just under the sketch are my pattern pieces I made and hardened yesterday.
The very bottom pieces are the liners I profiled, drilled tapped and screwed together to check alignment. The wire is .067" piano wire and will be the kick spring.

At this point I am guessing: I will get the liner lock working, then locate the lever bar and mount that, then work on tuning it, then locate and drill the detent ball socket. There is more but that is enough for now.

View attachment 74143
Great flow IMHO.
 
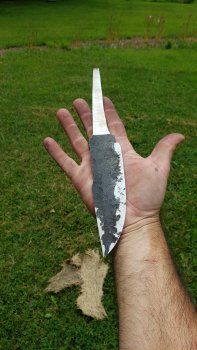
Hey guys long time no see! I am not a great forger....lol but with anything practice is what I need. Hammered this guy out this morning and heat treated it. Who knows how long it will be before I finish it. Had the day off today. I have not had anytime to work on knives due to the house remodel.
20200807_124114-jpg.74276
 

Attachments

  • 20200807_124114.jpg
    20200807_124114.jpg
    1.6 MB · Views: 60
Back
Top