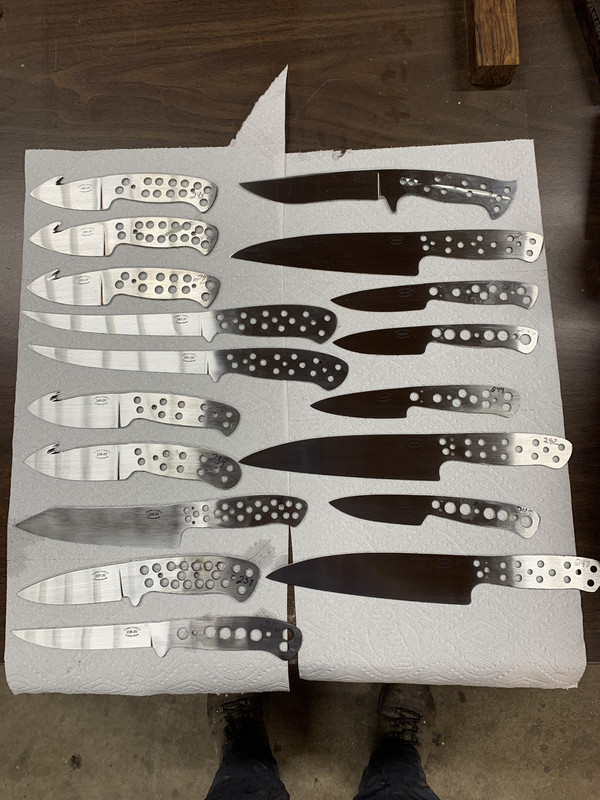
What's going on in your shop?

For years I have wanted to get into auto folders. I am finally getting started.

This will be a dual action using a bar lever. Dual action is one you can open manually, just like any other liner lock or open using the button (or lever bar in this case) an it will open like an auto. I hear this often called a double action and I could be wrong but that is more correctly used to describe an out the front that will be both open and close the knife by a slide bar.

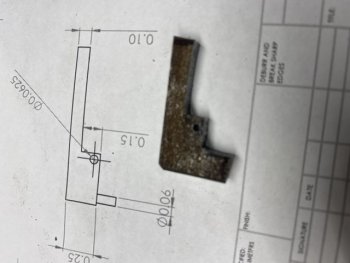
the top drawing is for the lever bar. Peter Martin sent me a hand sketch of what he has used so I put it into CAD just to have a reference. I do not have anything figured out for the lever bar pivot pin lugs yet. I will probably make some lugs that screw into the liner. I will try TIG welding some lugs onto scrap and see how it works. Many guys solder the lugs in place also.

The bottom is a "sketch" (basically a solidworks term for not a finished, fully constrained drawing). I print these out, glue them onto pattern material and use the hardened pattern to make the actual pieces. The curved wire from the rear of the knife to the kick face on the blade is the leaf spring. That is held in place, when charged, by the button bar lug. When the knife is closed, the spring is charged and held open by the lug on the button bar. The blade can open and close manually with the spring held in place. The button can be activated, releasing the leaf spring, kicking the blade out. When you close the blade, the spring is charged again.

I am stepping up the detent ball to 3/32" from a 2mm ball because I think it will hold better. The detent ball does not hold the spring back so it all has to be clocked perfectly. I hope I don't screw this up ten times trying to get it figured out.

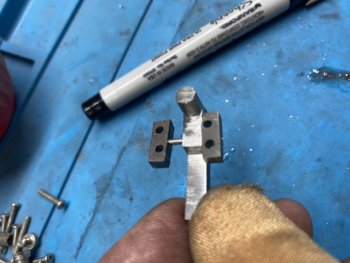
The two metal pieces just under the sketch are my pattern pieces I made and hardened yesterday.
The very bottom pieces are the liners I profiled, drilled tapped and screwed together to check alignment. The wire is .067" piano wire and will be the kick spring.

At this point I am guessing: I will get the liner lock working, then locate the lever bar and mount that, then work on tuning it, then locate and drill the detent ball socket. There is more but that is enough for now.

View attachment 74143
I too am fascinated by auto opened folders.
I will be watching the progress of this knife with bated breath! Thanks for sharing.
 
Last edited:
For years I have wanted to get into auto folders. I am finally getting started.

This will be a dual action using a bar lever. Dual action is one you can open manually, just like any other liner lock or open using the button (or lever bar in this case) an it will open like an auto. I hear this often called a double action and I could be wrong but that is more correctly used to describe an out the front that will be both open and close the knife by a slide bar.

the top drawing is for the lever bar. Peter Martin sent me a hand sketch of what he has used so I put it into CAD just to have a reference. I do not have anything figured out for the lever bar pivot pin lugs yet. I will probably make some lugs that screw into the liner. I will try TIG welding some lugs onto scrap and see how it works. Many guys solder the lugs in place also.

The bottom is a "sketch" (basically a solidworks term for not a finished, fully constrained drawing). I print these out, glue them onto pattern material and use the hardened pattern to make the actual pieces. The curved wire from the rear of the knife to the kick face on the blade is the leaf spring. That is held in place, when charged, by the button bar lug. When the knife is closed, the spring is charged and held open by the lug on the button bar. The blade can open and close manually with the spring held in place. The button can be activated, releasing the leaf spring, kicking the blade out. When you close the blade, the spring is charged again.

I am stepping up the detent ball to 3/32" from a 2mm ball because I think it will hold better. The detent ball does not hold the spring back so it all has to be clocked perfectly. I hope I don't screw this up ten times trying to get it figured out.

The two metal pieces just under the sketch are my pattern pieces I made and hardened yesterday.
The very bottom pieces are the liners I profiled, drilled tapped and screwed together to check alignment. The wire is .067" piano wire and will be the kick spring.

At this point I am guessing: I will get the liner lock working, then locate the lever bar and mount that, then work on tuning it, then locate and drill the detent ball socket. There is more but that is enough for now.

View attachment 74143
That's a neat project. Looking forward to seeing the progress on it.
 
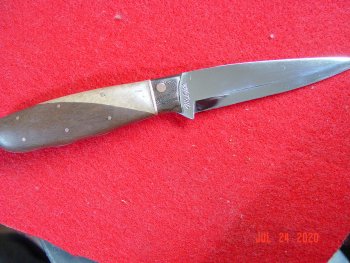
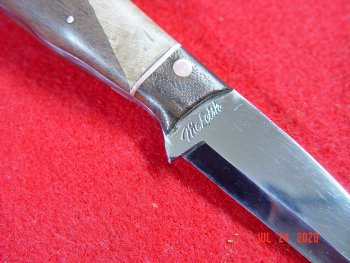
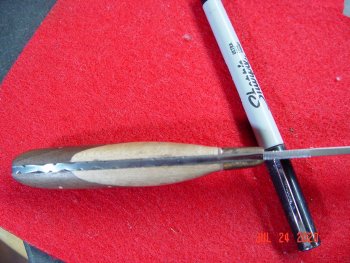
Finally. I got some shop time after doing alot of the normal farm type summer chores, got this one completed today except for a sheath, but that will come soon. 1084 , California walnut and maple scales, zebra wood bolster, copper pins, OAL 8" blade 4". also my first electro stencilDSC01538.JPGDSC01538.JPGDSC01539.JPGDSC01540.JPG
 
Looking good Bruce! Glad to see you back in the shop. You still cutting firewood?
Thanks Randy. Seems you been busy too! Not spending much time here in the doghouse lately.
And...
I'm ALWAYS cutting firewood ! It's how we heat and cook in the cold months . The cold months being Oct. Thru Mar.
 
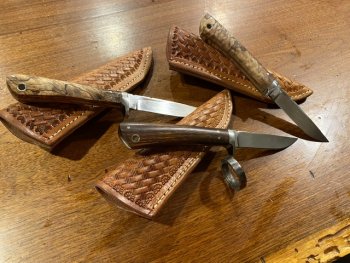
I stepped outside myself with a request from a friend’s son. Getting married in 5 weeks.Thisvspring was firing up the forge and had a lot of play time. I did 9 or 10 blanks to see what he liked. One he chose was 1084 and N200 combo. I don’t have a lathe so much was finished the hard way.
he also needed three knives for the groomsman.8BE2A0BB-1460-40A0-B8B3-72AE8D180A34.jpeg8BE2A0BB-1460-40A0-B8B3-72AE8D180A34.jpeg
 

Attachments

  • 28420F85-ABA5-4DE0-9EB4-4910C067A7B8.jpeg
    28420F85-ABA5-4DE0-9EB4-4910C067A7B8.jpeg
    105.2 KB · Views: 18
Was in the Hot shop this morning, and had to use the grinder....... got there and realized that there just wasn't enough light......change of plans! I scrounged around and found an extra photo reflector that came with my light box photo setup..... welded a plate to the end of a "T" fence post, screwed it to the wall above the window, and mounted the reflector over the grinder. At first I tried an LED bulb....but it wasn't bright enough.....Ah! I remembered buying one of the LED "garage lights"....... put it in.....ran the plug to a surge protector with an On/Off switch.....and BINGO! Enough light to do anything!!!

Just thought I'd share. :)


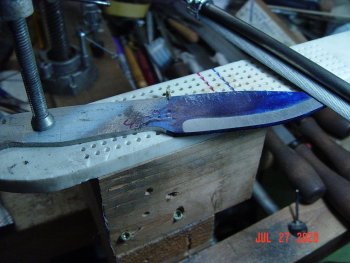
some time ago, one of our members (no names but his initials are John Wilson) posted a beautiful knife that he made at the request of a customer. His title is elk and maple hunter. I was very taken with this knife so I asked John if I could try to copy it with my own "spin" on it. He very graciously said yes , so here is the start of it. I hope he approves. But if he doesn't, too bad. I'm gonna try to keep going anyway.DSC01543.JPG
 
some time ago, one of our members (no names but his initials are John Wilson) posted a beautiful knife that he made at the request of a customer. His title is elk and maple hunter. I was very taken with this knife so I asked John if I could try to copy it with my own "spin" on it. He very graciously said yes , so here is the start of it. I hope he approves. But if he doesn't, too bad. I'm gonna try to keep going anyway.View attachment 74184

looking good!
 
Was in the Hot shop this morning, and had to use the grinder....... got there and realized that there just wasn't enough light......change of plans! I scrounged around and found an extra photo reflector that came with my light box photo setup..... welded a plate to the end of a "T" fence post, screwed it to the wall above the window, and mounted the reflector over the grinder. At first I tried an LED bulb....but it wasn't bright enough.....Ah! I remembered buying one of the LED "garage lights"....... put it in.....ran the plug to a surge protector with an On/Off switch.....and BINGO! Enough light to do anything!!!

Just thought I'd share. :)


I've been seeing ads for those lights and wondered if they put out that much light. I guess the answer is YES! That's a smart setup, Ed.
 
Rough mock up of dual action liner lock button bar.
It needs to be smaller so the blocks fit under the scale. The actual bar will fit in a slot through the scale.
Now I need to shrink the pieces and make another practice piece based on what I learned on this one.

 
Chris Crawford and Keith Johnson stepped in and sent me some pictures on their versions of switches. I copied them shamelessly - which I know they won't mind.
I soldered 3/32" tube that has .014" wall thickness so it works perfect for a 1/16" pin.
I tried soldering this to Titanium and it wasn't having it so I switched to some 410ss and the tube soldered easily.
Now on to version 3 with a tighter slot and less wiggle all around.

I think more than half of my knife making "career" to date has been just practice and that doesn't seem to be changing.

 
Boss, this is very cool. I have plans to start on a Shell Puller Auto. (the knife from The Outsiders). I bought a cheapie lever lock to deconstruct and wasn’t sure how I was going to machine the lever pivots. The soldered tube is a much better prototyping solution. So if you don’t mind, I’d like to shamelessly steal from your design here and see where that takes me. The final knife may end up machined but being able to work out the placement without making an entirely new liner every time is huge.
 
Back
Top