The Strauss Pirate 36 caliber

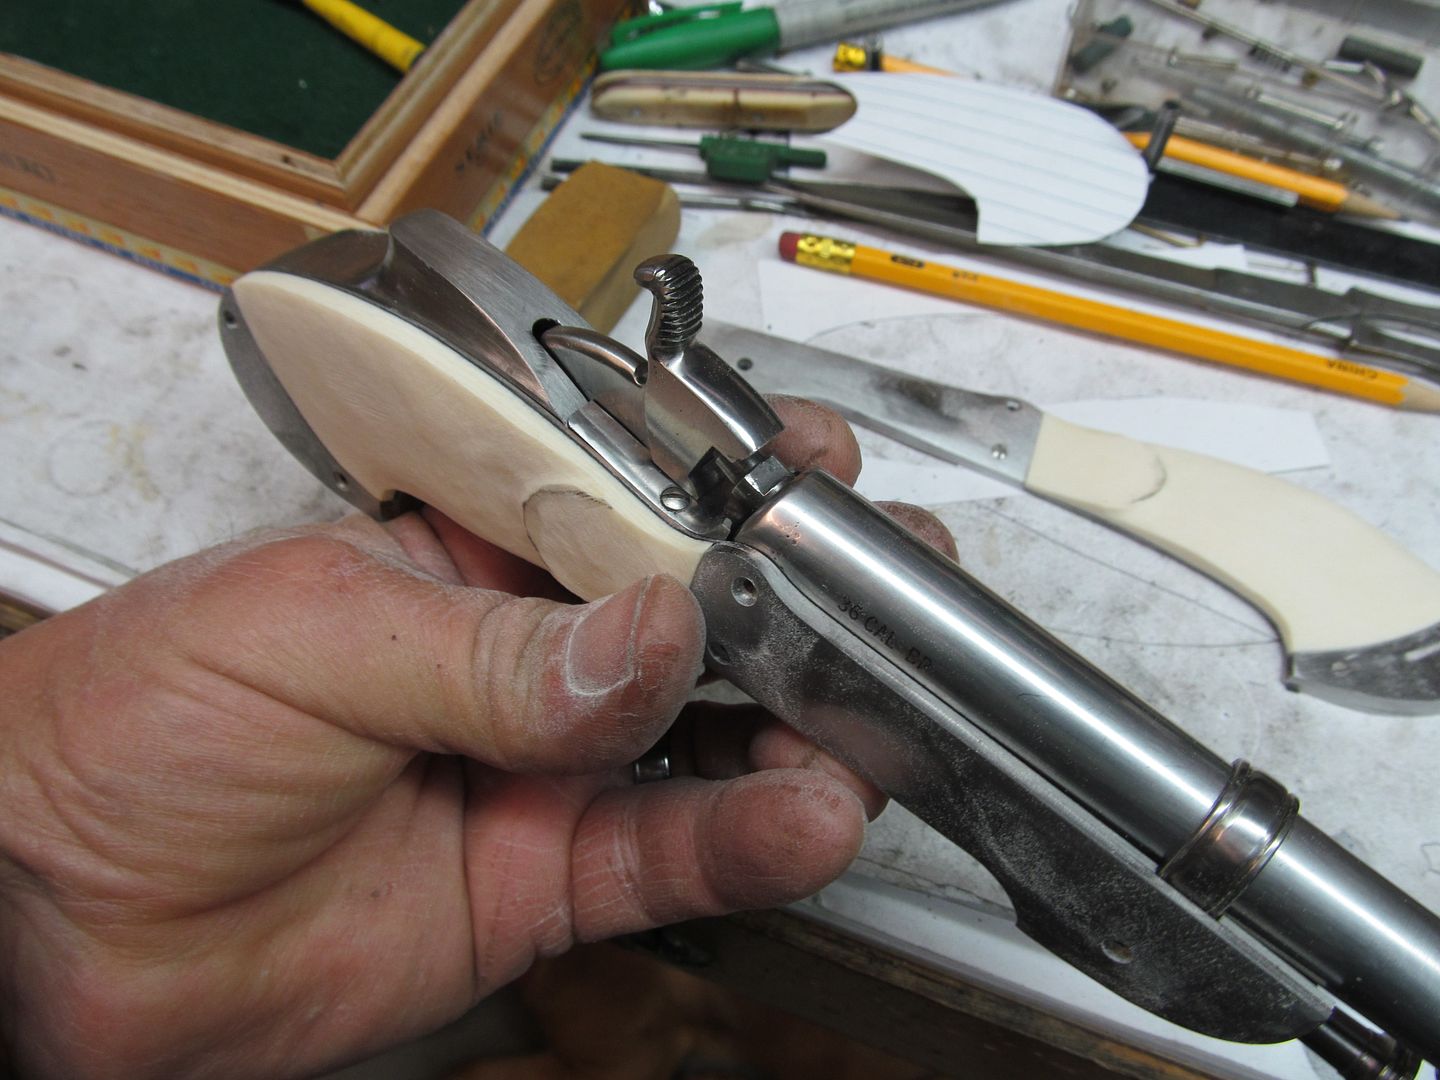
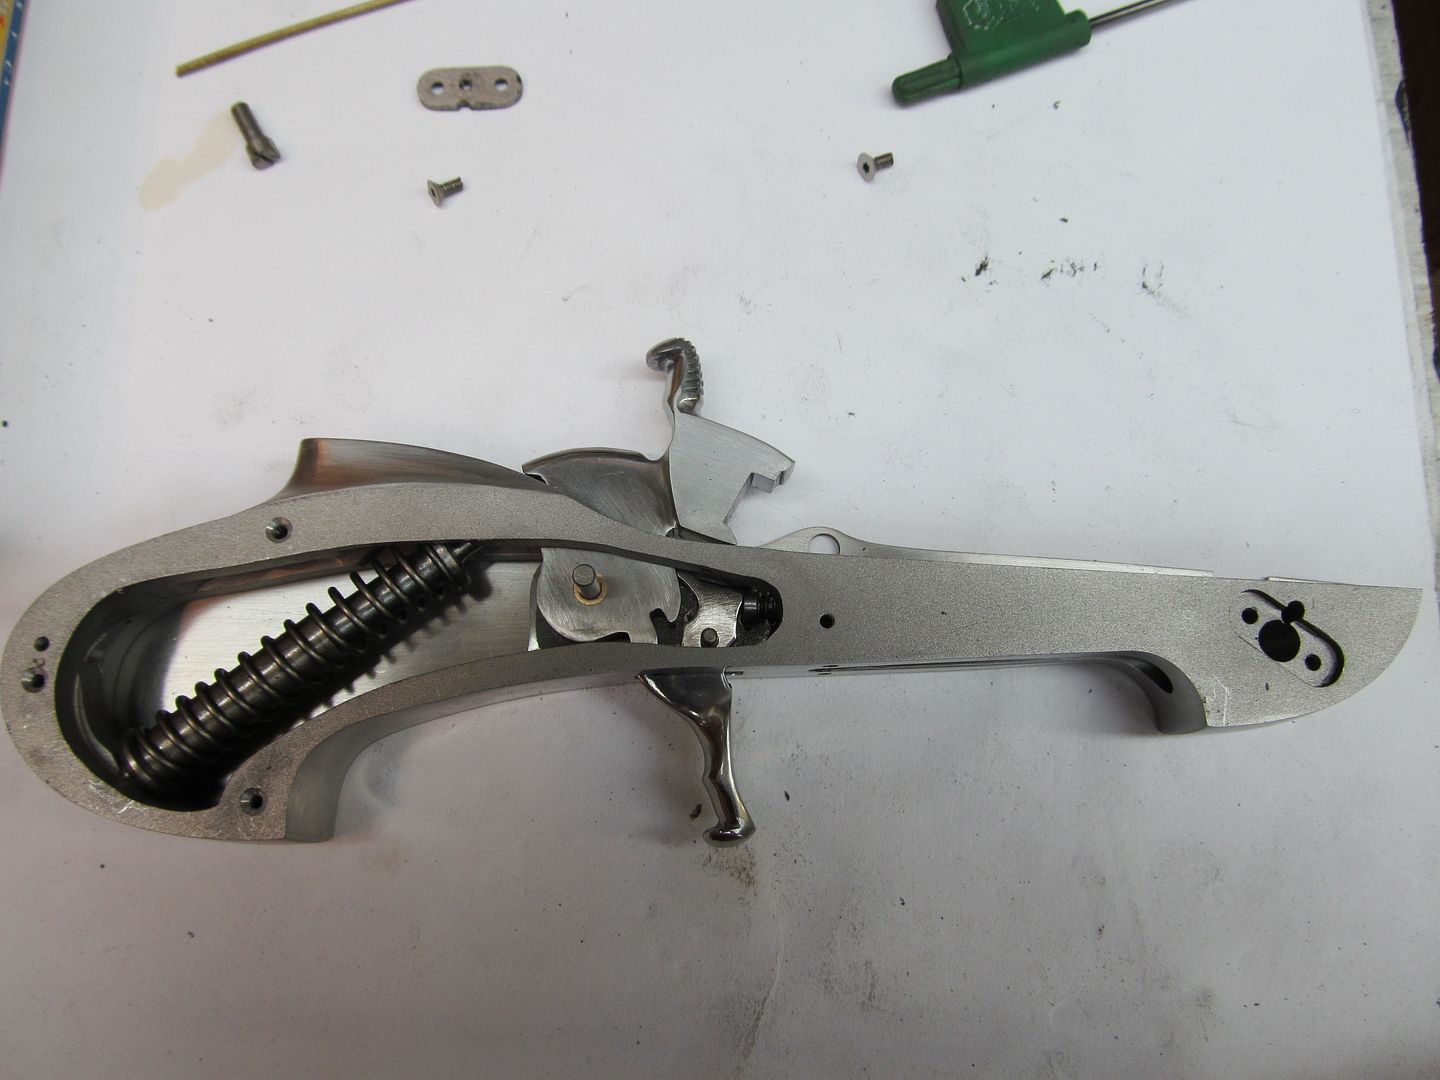
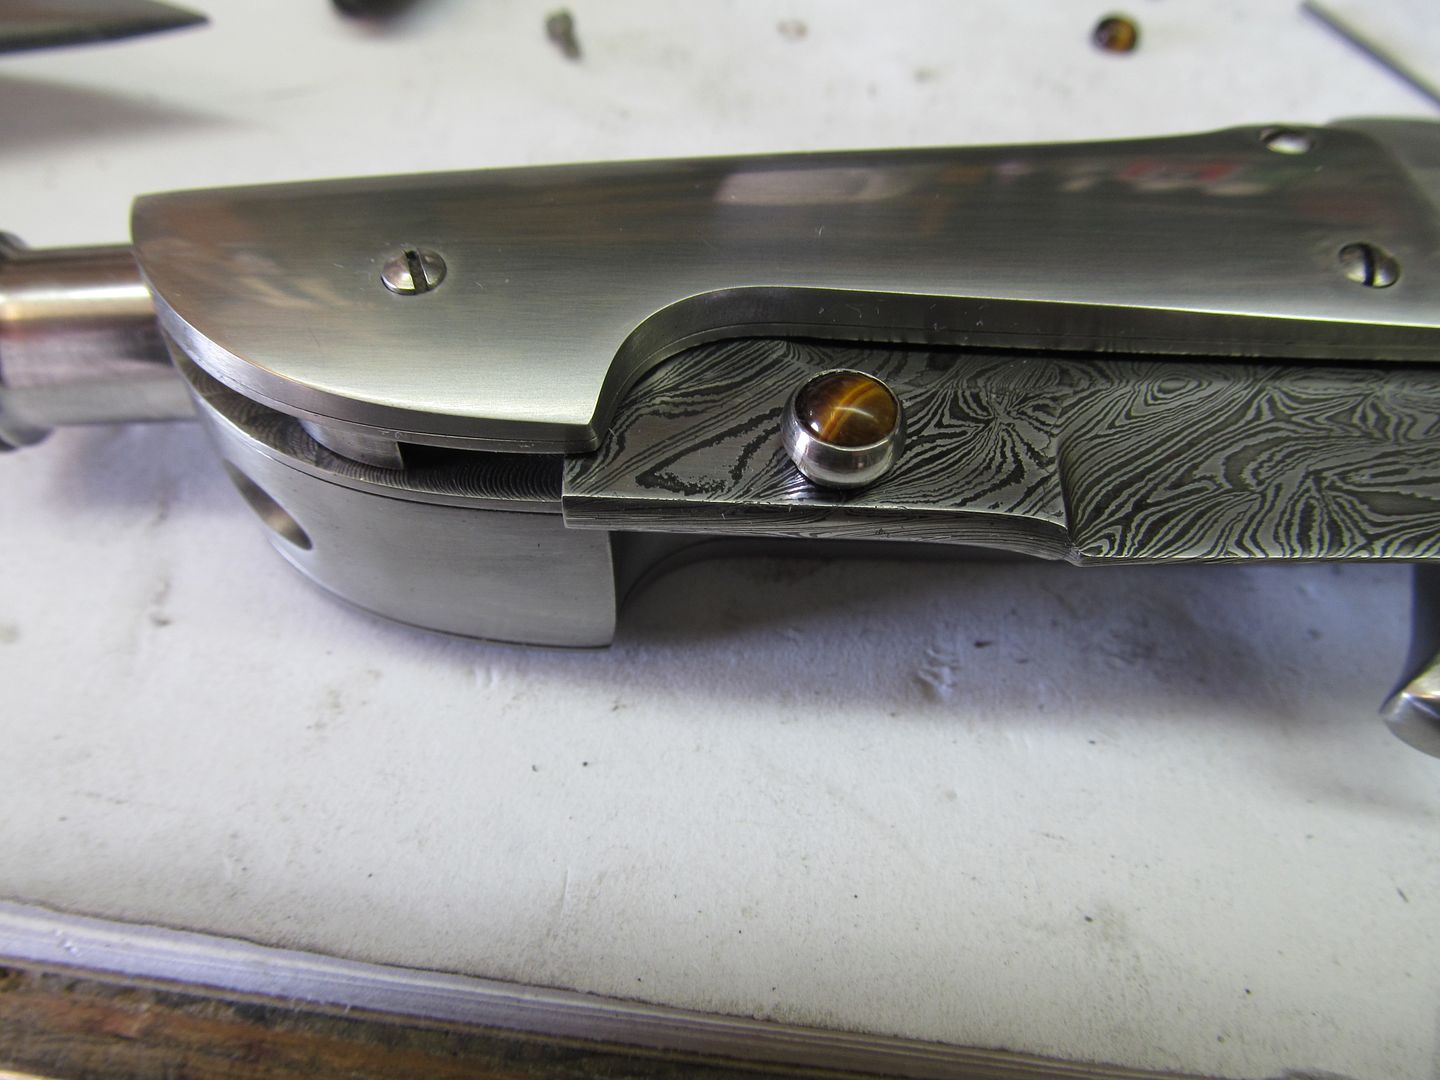
Thanks for the detent view Bruce. The devil's in the details, and that's what makes these WIPs so valuable to me. I'm learning so much it's hard to hold it all in, but I'm having a ball. :)
 
Heres a shot of my Marking Methods Electro Etcher and stencils. I've found this etcher to be top quality and is at least 10 years old now.

PortRoyalivoryfitting005.jpg


PortRoyalivoryfitting006.jpg
 
Yesterday I finished fitting the ivory grips. Basically just super glue them in just a few spots and grind around the edges and begin contouring them. My carpel tunnel syndrome flaired up from hand sanding around bedtime last night. I sure miss the belt finished handle jobs. I'm getting too worn out for this. I decided to just make one pistol per year. All the hand sanding on the frame, blade, lock bar, bolsters and grips are just too much in a 48 hour period. How would a bead blast finish look?

morepistolpartsandgrips001.jpg


morepistolpartsandgrips002.jpg


morepistolpartsandgrips003.jpg


morepistolpartsandgrips004.jpg


morepistolpartsandgrips005.jpg


morepistolpartsandgrips006.jpg


morepistolpartsandgrips007.jpg


morepistolpartsandgrips009.jpg


Heres what $250 worth of sand paper looks like. I like this file cabinet storage system.


morepistolpartsandgrips011.jpg


morepistolpartsandgrips012.jpg


Roger T. brought the mahogany display box today. Lon has the nickel plating done on the oval and the new beveled glass is here also. This project is nearing the light at the end of the tunnel.

morepistolpartsandgrips015.jpg
 
Last edited:
Bruce if any one could make a bead blast finish look good on one of these works of art it would be you. Thanks for sharing you work.

Jim
 
I have the blade sanded to 2000 grit and etched now as well as the lock bar and ram rod. These 3 items are the only parts that are damascus, the rest are 1018 steel for engraving and the hammer and trigger are O-1 and hardened to keep from wearing out at the sear. I have the hammer partially softened to accept some engraving on the sides.

I'm making all new screws now. All the heads are cut on the lathe to the same diameter to match the counterbore I have and the lengths the same on most but some need to be very short so the blade doesnt contact them when closed and other are special lengths for one reason or another. I pit the poor man that takes this apart unless he draws a picture of the screw placements.

I'm assembling it and will take it out for test firing today I hope. I know it will shoot because it fires caps but its never been fired yet.
Hopefully I wont shoot myself in the foot.


copperandgunprogress005.jpg


copperandgunprogress004.jpg


copperandgunprogress008.jpg


copperandgunprogress006.jpg
 
Last edited:
Bruce, I have been following this from the start, and I am more then amazed by your craftsmanship!! Now that the blade is etched, Its all coming together! I can hardly wait to see it completed!!

Thanks for sharing and giving us a little peek of the process! God Bless YA

Randy
 
I did get out to the field and shot the pistol about 8 times. The first two shots were with 27grains of black powder (pyrodex) to test the barrel. No bulges or blow outs so I reduced it to a maximum load of about 18-20 grains for a nice snappy load. It shot flawlessly. The action is very smooth and the trigger pull is good with just a small amount of "creep" so next time its dissasembled I will hone the action a tad more. The hammer pulls back easily due to the placement of the springs push rod. I like the feel.

Cleaning the gun is a pain as with any black powder pistol. This one isnt so bad as the nipple comes out the breech giving easy access to the breech and barrel also the floor plate can be removed and cleaned by removing 2 screws. Soap and water down the bore will remove any residue left from the pyrodex and the flash can be scrubbed off the outside easily. It will require any water blown out with light compressed air and a good gun oil spray down the bore and outside afterward to prevent staining.

Here is our beautiful Blue Mountain foot hills only a mile from our house.

loadedgunandMatthewsparty035.jpg


loadedgunandMatthewsparty033.jpg


loadedgunandMatthewsparty030.jpg


loadedgunandMatthewsparty034.jpg


loadedgunandMatthewsparty036.jpg
 
Last edited:
That's the first picture I've seen of the gun assembled, it looks really good! Can't wait to see the whole thing, engraved and all... Great job Bruce, this is a wonderful thread and a super project. You live in a beautiful place too. Lucky man.
 
Love your filing cabinet Bruce. :D I use a similar idea but in a portable form - expanding file.
 
Congratulations on being in Knives 2012 and thank you so very much for doing this and all the other WIP's. You are one of the most sharing men I have ever known. And that's not flattery - it's fact.
 
Congratulations on being in Knives 2012 and thank you so very much for doing this and all the other WIP's. You are one of the most sharing men I have ever known. And that's not flattery - it's fact.

Thanks Denny. The Allan Pinkerton Bowie. Whoo Hooo!!
 
Today I turned a piece of round stock 416 stainless and drilled it to 2-56 threads and fit a 6mm tiger eye stone in. This is the blade opening thumb stud. The blade is counterbored slightly and the stud has a turned shoulder that fits it. This little shoulder takes the pressure off the small #2 screw when opening the blade.

I also polished all the parts to 2000 and buffed the ivory grips to a nice luster with green rouge on a soft cotton buff. The hammer and tigger are buffed but the rest of the steel is hand rubbed to the 2000. It is completely done now except for the engraving by Brian Hochstrat. Hopefully I can get some shots from him of his engraving art process and/or he can post them here.

There is still work to do on the display box interior.


finishedbeforeengravingpistol003.jpg


finishedbeforeengravingpistol004.jpg


finishedbeforeengravingpistol006.jpg


finishedbeforeengravingpistol009.jpg


finishedbeforeengravingpistol010.jpg


finishedbeforeengravingpistol011.jpg


finishedbeforeengravingpistol012.jpg


finishedbeforeengravingpistol014.jpg


finishedbeforeengravingpistol015.jpg


finishedbeforeengravingpistol016.jpg
 
Last edited:
Man that's beautiful! I love seeing it in all its glory, a wondrous thing. Thanks Bruce, for the time you've taken to guide us through your process on this project. It's been a trip.
 
Something like this leaves me speechless. It's one of those things you look at and just shake yer head in wonder.

Amazing! Thanks for allowing us to follow along.
 
Wow bruce; that is a real beauty, congrats on another master piece:) 
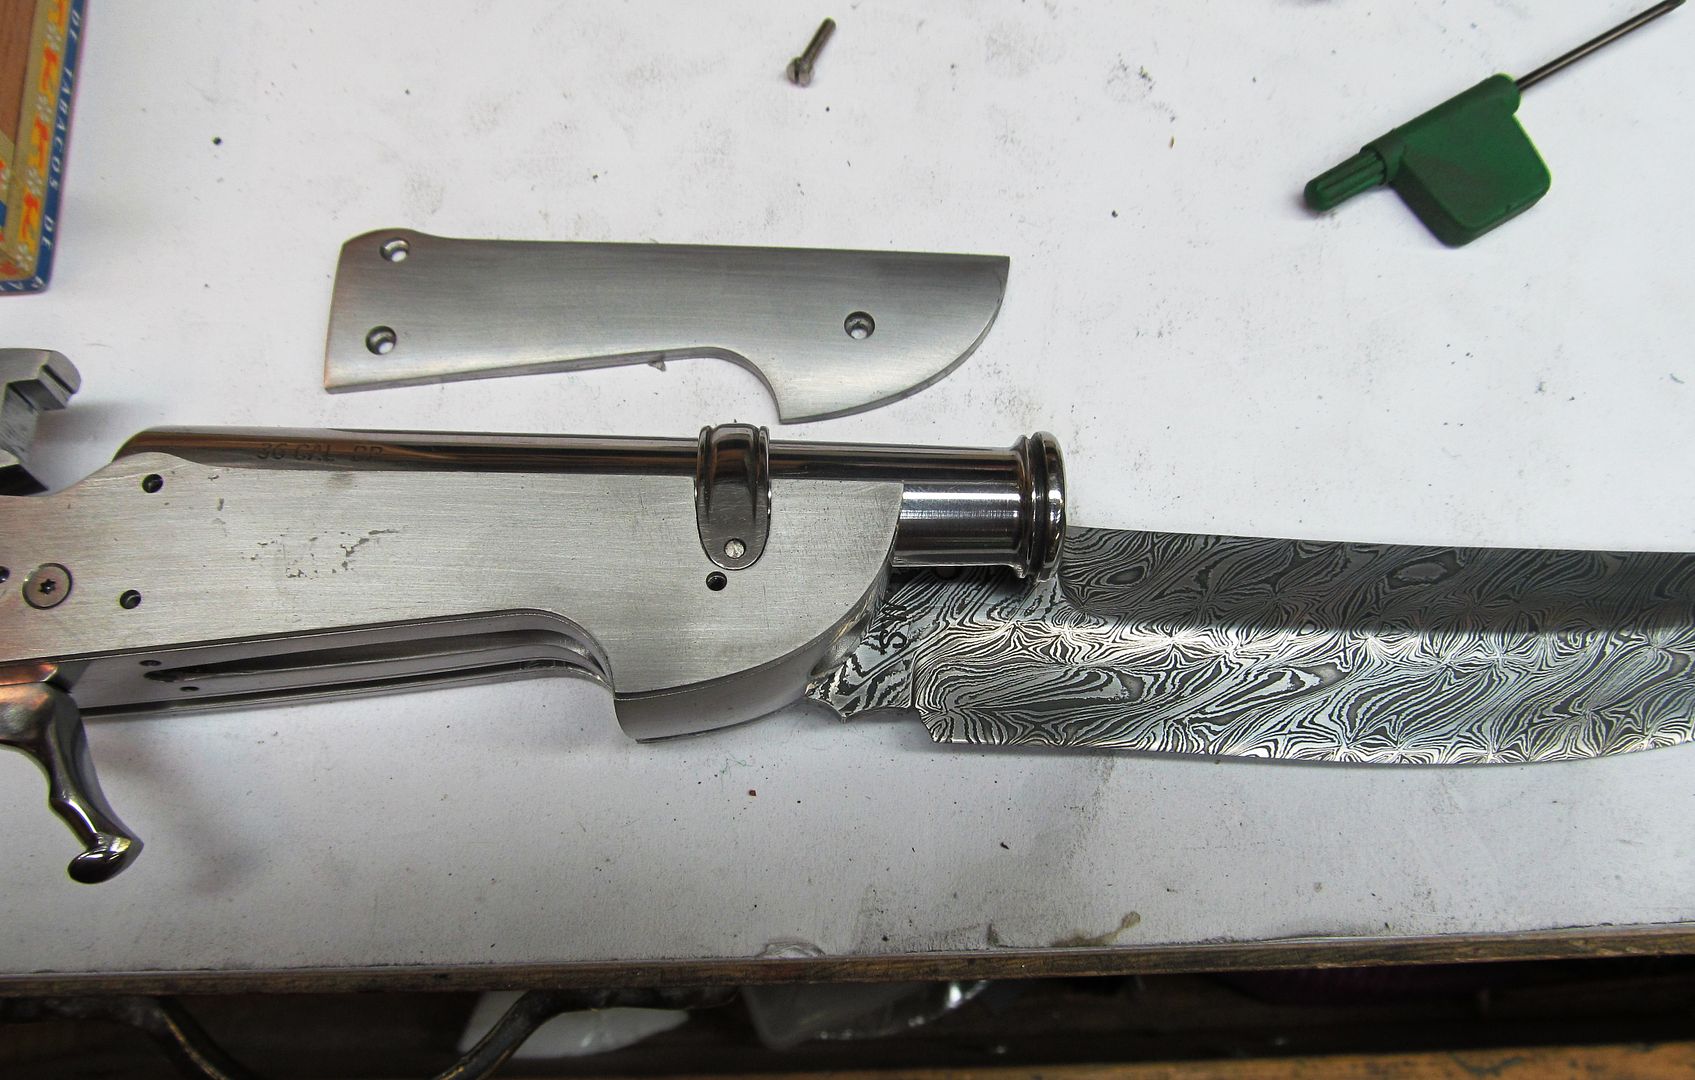
While following this build it got me interested in trying my hand at a combination like this, although a little less complex.

Jim
 
I have been watching this one from the start.

All I can think of is WOW, amazing work. I can't wait to see the pictures after it is engraved.
Brad
 
Back
Top