The BULLDOG WIP by Steve Janik (page 1)

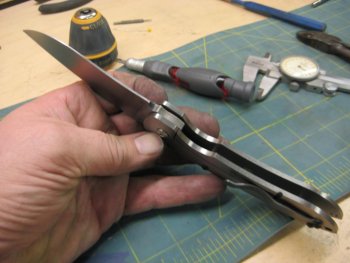
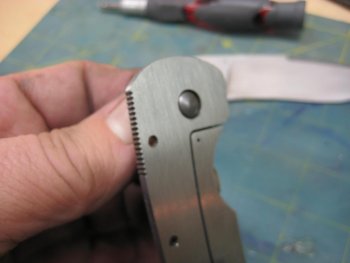
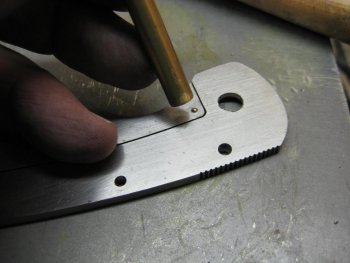
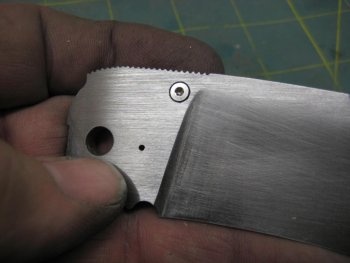
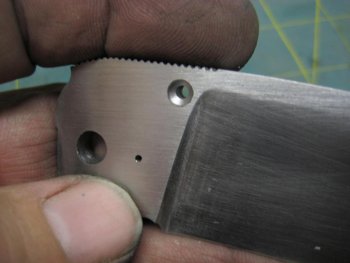
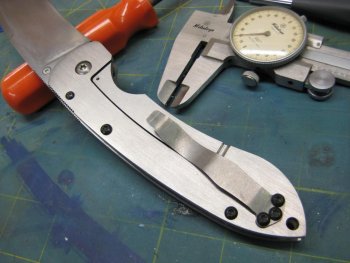
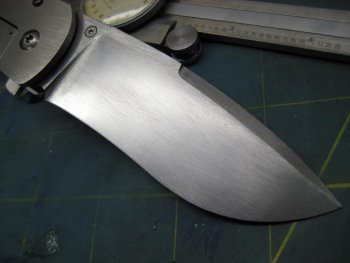
You have to counterbore the stop pin whch has shoulders and I had to take about .003 off the blade thickness to match up close to perfect. This allowed me to get the blade cleaned up nicely.
attachment.php

attachment.php

attachment.php

attachment.php


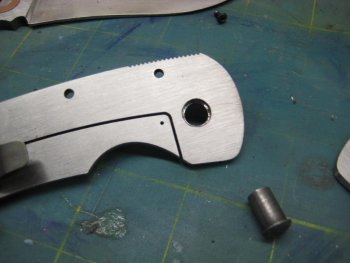
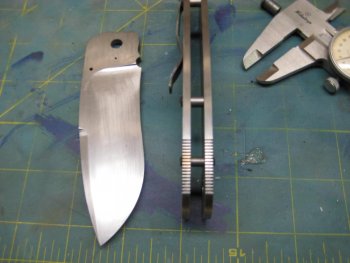
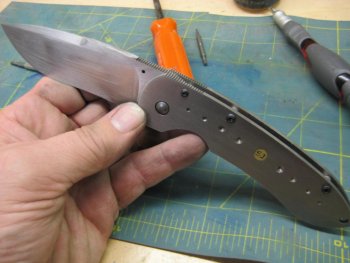
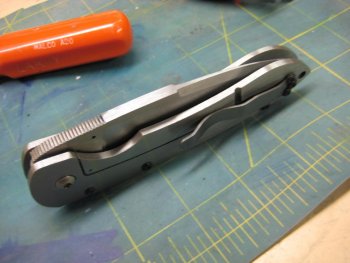
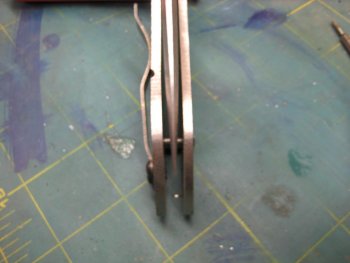
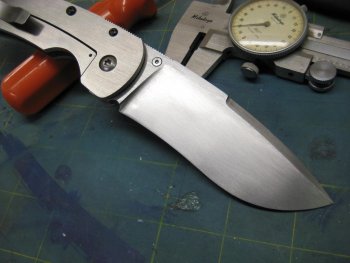
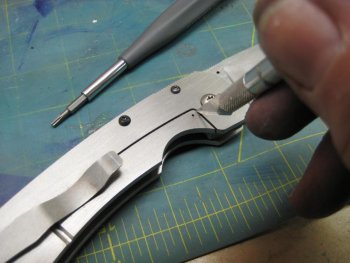
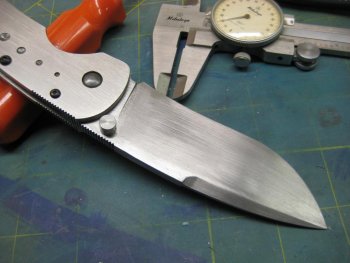
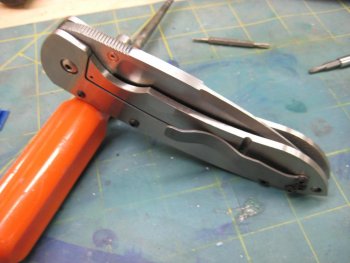
I counterbored the pivot from both sides and did a trial assembly. The stop pin location is perfect and the blade centers up almost dead on without any adjustments. I forgot to photo it but you do have to redrill the pivot holes in the frames and blade. I aligned these with a smaller drill bit, clamped them together and drilled and reamed all three together.
attachment.php

attachment.php

attachment.php
 

Attachments

  • BULLDOG 102.jpg
    BULLDOG 102.jpg
    79.8 KB · Views: 972
  • BULLDOG 098.jpg
    BULLDOG 098.jpg
    76.8 KB · Views: 973
  • BULLDOG 099.jpg
    BULLDOG 099.jpg
    86.4 KB · Views: 976
  • BULLDOG 097.jpg
    BULLDOG 097.jpg
    81.9 KB · Views: 973
  • BULLDOG 100.jpg
    BULLDOG 100.jpg
    75.5 KB · Views: 975
  • BULLDOG 101.jpg
    BULLDOG 101.jpg
    84.4 KB · Views: 972
  • BULLDOG 103.jpg
    BULLDOG 103.jpg
    81.8 KB · Views: 971
I counter bore and countersink the thumbstud screw. I have a new counterbore coming and will clean up this hole, it's got a little chatter. The thumbstud has a shoulder and also needs to be counterbored. Then the thumbstud is installed and tightened up with the hand held drill chuck and a torx driver.
attachment.php

attachment.php

attachment.php

attachment.php

attachment.php


Now bend the lockbar at the relief groove we made earlier.
attachment.php


Re drill and set the detent ball. I have a brass rod with a dimple in the end which sets them to the same depth everytime.
attachment.php


I open the blade fully to the stop pin and mark the lockbar with an exacto knife and hand file the lock to fit later.
attachment.php

attachment.php
 

Attachments

  • BULLDOG 110.jpg
    BULLDOG 110.jpg
    74.6 KB · Views: 28
  • BULLDOG 106.jpg
    BULLDOG 106.jpg
    89.8 KB · Views: 968
  • BULLDOG 114.jpg
    BULLDOG 114.jpg
    90.1 KB · Views: 965
  • BULLDOG 107.jpg
    BULLDOG 107.jpg
    79.5 KB · Views: 968
  • BULLDOG 105.jpg
    BULLDOG 105.jpg
    85.8 KB · Views: 963
  • BULLDOG 108.jpg
    BULLDOG 108.jpg
    89 KB · Views: 968
  • BULLDOG 113.jpg
    BULLDOG 113.jpg
    88.8 KB · Views: 963
  • BULLDOG 111.jpg
    BULLDOG 111.jpg
    79.9 KB · Views: 960
  • BULLDOG 109.jpg
    BULLDOG 109.jpg
    79.5 KB · Views: 963
  • BULLDOG 115.jpg
    BULLDOG 115.jpg
    88.9 KB · Views: 960
Looks great! Are you just gonna stay up tonite and knock this one out?

Any provisions for tip-down carry?
 
A few final pics from this phase. It's fully assembled but still needs work.

attachment.php

attachment.php

attachment.php


Here's my to-do list to properly finish this one up.
1. Final sand and heat treat blade.
2. Final sand and radius edges of the frames.
3. Clean up and sand the clip.
4. Counter bore and replace the screws.
5. Final fit the lock.
6. Sharpen blade.

I'll add a post when the blade is HT.
Thanks for looking, I hope this is of some help.
Don't be shy, ask questions.

All in all, I think this a great kit. It's big for some people, but it is a sweet beast.

Regards,
Steve
 

Attachments

  • BULLDOG 120.jpg
    BULLDOG 120.jpg
    75.8 KB · Views: 956
  • BULLDOG 118.jpg
    BULLDOG 118.jpg
    78.1 KB · Views: 1,078
  • BULLDOG 121.jpg
    BULLDOG 121.jpg
    90 KB · Views: 958
Brad,
It's pre drilled for the clip to be tip up spine forward. You could drill the plain side for a clip that goes around the pivot and be tip down. Everything is also drilled through and you could reverse it for left pocket carry.

I built it Saturday and just got the WIP together.

Steve
 
Last edited:
Excellent WIP Steve! It makes me feel like I should try one of these beasts. I didn't realize just how big that knife is until the pic of you holding it in your hand along your wrist. That thing is a monster - I love it! Looks as if you might need to wear suspenders to keep your britches up if you EDC it. Could you post the weight when you get it finished?
 
Hi Steve...nice work. How did you cut the jimping into the Scales and Blade? The grooves appear to line up perfectly.
 
Last edited:
Great take on it Steve. Using more simple tools is encouraging and useful! Thankyou. :)
 
Emerald,
The jimping was done on the waterjet before the pieces arrived.

Stew,
I do have a mill at the shop but thought this would serve more people if it were done with common tools. Glad you liked it.

Ernie,
You should jump on one of these kits. You will love this knife.

Steve
 
Steve,
thank you for this incredible Tutorial!!!
I'm going to bookmark it (unless you were to,you know,make it a sticky for all us folks who are gonna be buying and building these kits...:biggrin:)
It will be a few months until I'm set up with a decent drill press and grinder, but I WILL be buying a few of those kits!!
 
Stew,
I do have a mill at the shop but thought this would serve more people if it were done with common tools. Glad you liked it.

Yeah, I really want a mill but that shows that maybe I don't need one quite as much as I thought. :)
 
A few final pics from this phase. It's fully assembled but still needs work.


attachment.php


All in all, I think this a great kit. It's big for some people, but it is a sweet beast.

Regards,
Steve

WOW , great WIP and tutorial Steve. Your doing a great job on it , but we wouldn't expect anything else from a pro like yourself.
One question though , is it my eyes ore are the small drill indentations on the handle mis-spaced on the aft portion. They look symmetrical in front of the brass plug.

This looks like a great way for alot of people to build great folders , a Mid-tech knife but clearly handmade.
 
Great WIP Steve, thanks for all the effort posting this up for everyone.
Gonna have to try one of these kits.
 
Back
Top