The BULLDOG WIP by Steve Janik (page 1)

Steven Janik

SUPERMOD & AWARDS BOSS
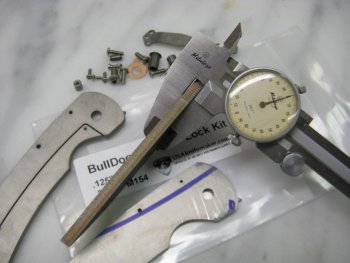
Tracy, with the help of David from Great Lakes Waterjet have come up with the "Bulldog" Framelock kit. The frame and blade are waterjetted and the neccessary harware is included to make a sweet (and large) Titanium framed folder.

Don't think that this is a screw together slammer kit, cuz it's not. But don't think that you can't put this together with some simple power tools. If you have a drill press and a grinder/sander you can come up with a fully functional framelock.

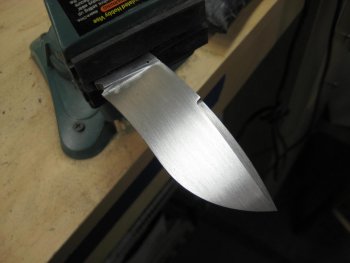
The Boss sold the first six kits at a discount with the stipulation that we get a WIP out of it. So here we go. I made the choice to use the simplest tools I have to show that this doesn't have to be intimidating. I did grind the blade on a 2x72 NWG but did everything else with a small drill press and 4x36 table top sander.

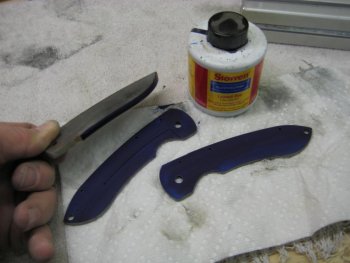
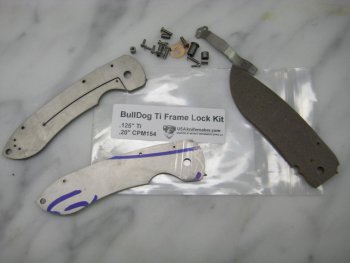
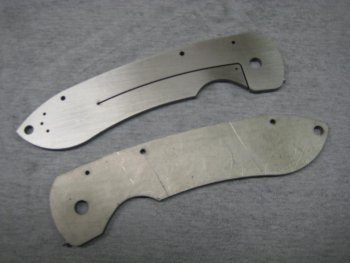
Here's the kit right out of the bag. I sort everything now and put the screws and small parts away.
attachment.php


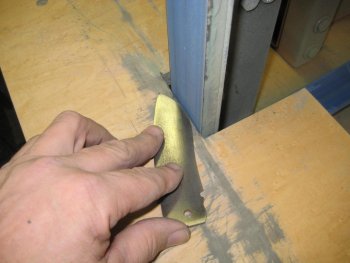
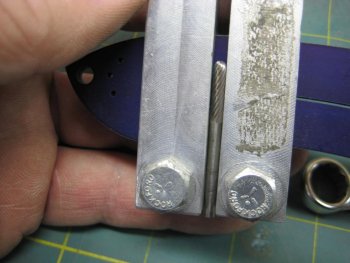
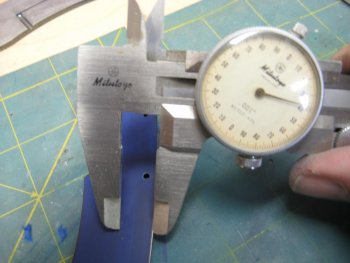
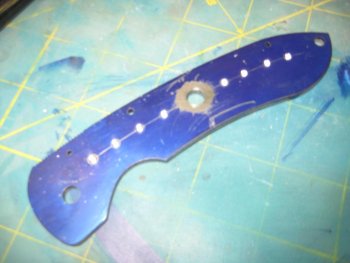
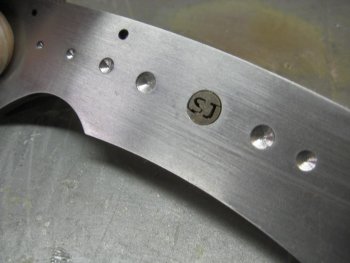
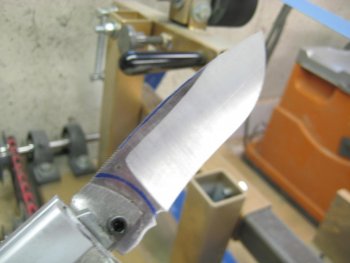
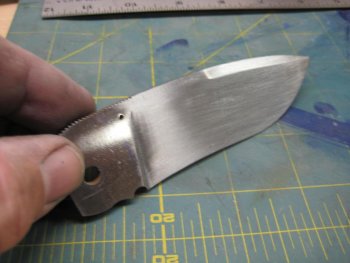
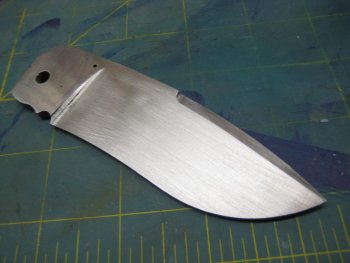
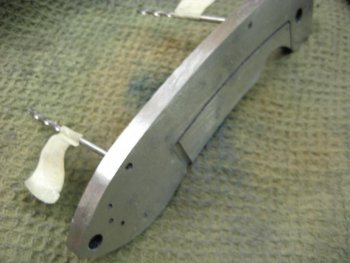
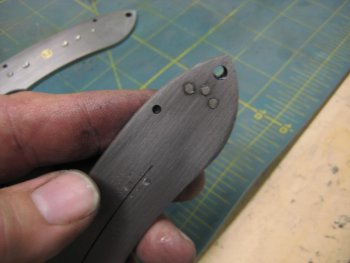
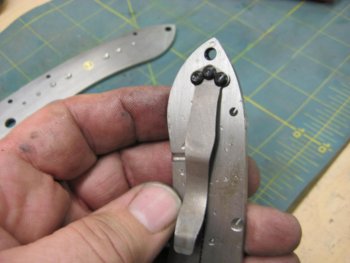
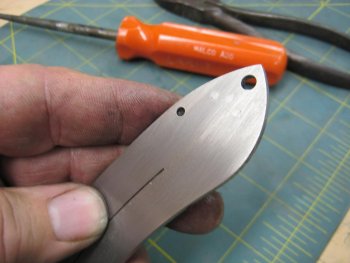
I check the blade thickness, washers and standoff lengths before I start to clean up the blade so I know what I can afford to take off and still be able to use the parts that are included.
attachment.php


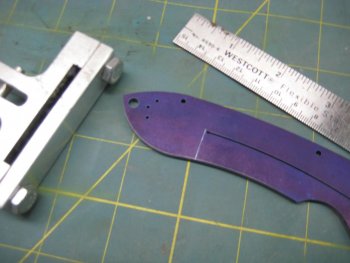
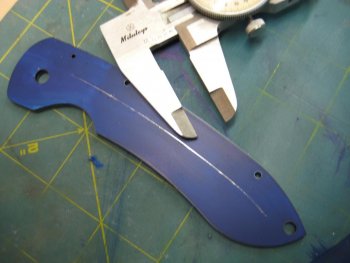
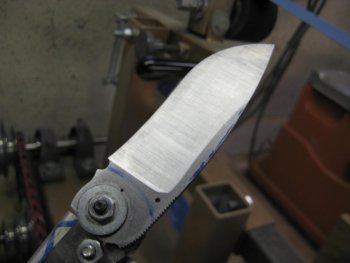
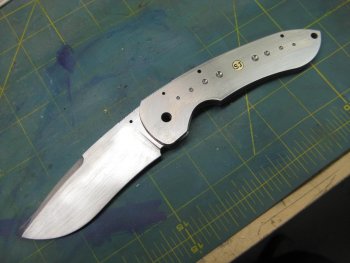
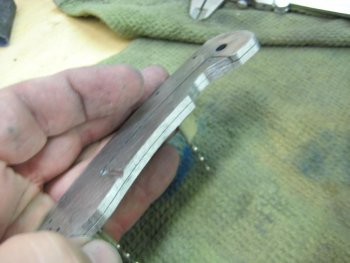
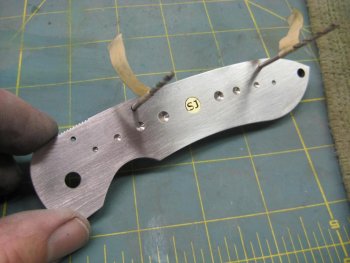
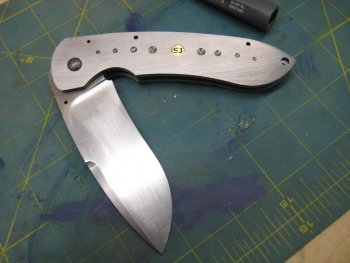
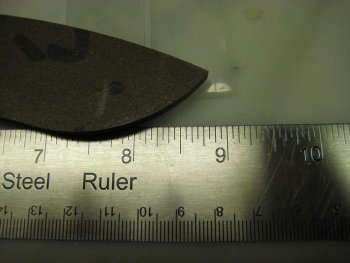
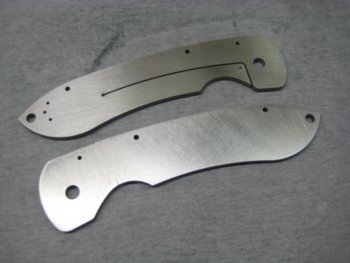
Looks like there is plenty of material to get the blade good and clean. I lay it all together and it looks like the overall length will be about 8.875"
attachment.php


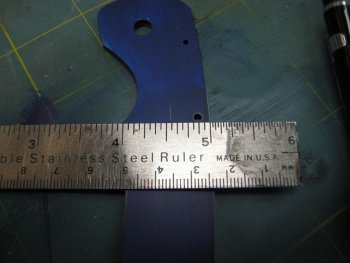
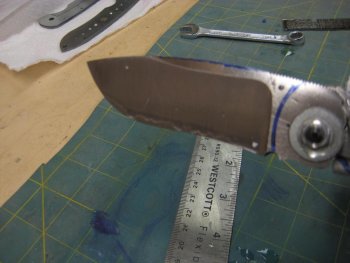
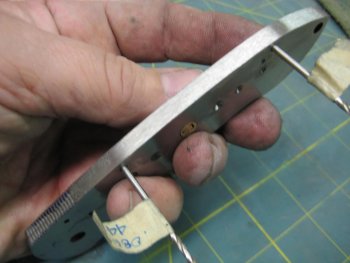
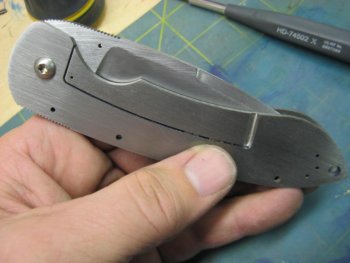
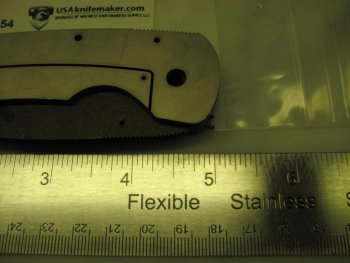
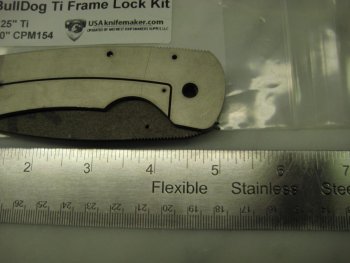
With the pieces stacked in the closed position it measures 5".
attachment.php


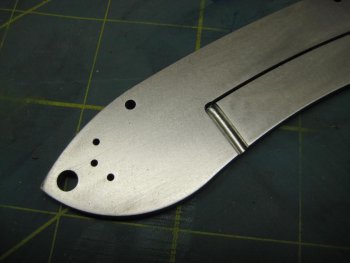
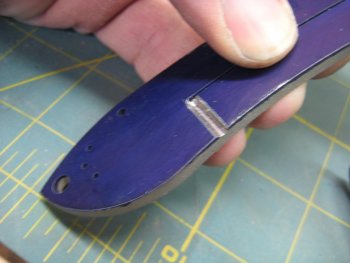
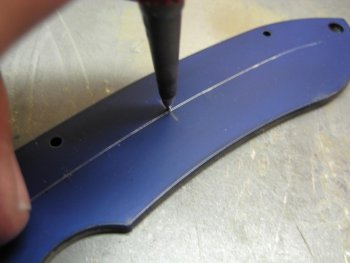
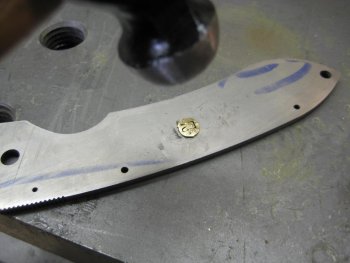
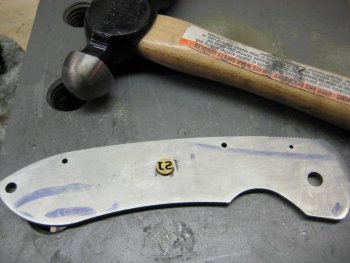
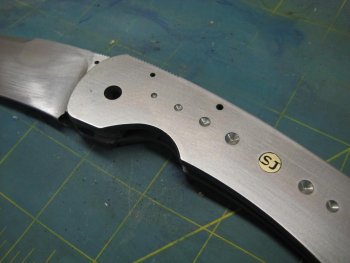
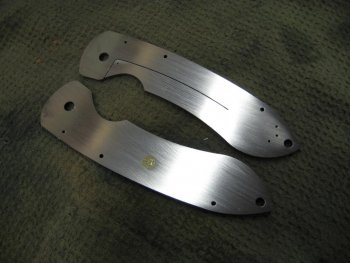
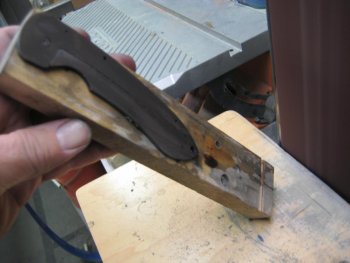
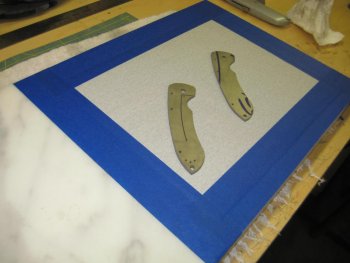
I tape a pc of 180 grit sandpaper on my marble surface plate and clean up the frames while establishing a scratchline. Don't just sand all willy nilly now because you will want a nice even unidirectional scratch on the TI later.
attachment.php


The dark line above the frame turned out to be a dog hair under the paper. I got rid of that and finished the clean up.
attachment.php


more later........
 

Attachments

  • BULLDOG 001.jpg
    BULLDOG 001.jpg
    81.3 KB · Views: 1,897
  • BULLDOG 002.jpg
    BULLDOG 002.jpg
    80.3 KB · Views: 1,902
  • BULLDOG 003.jpg
    BULLDOG 003.jpg
    94.1 KB · Views: 1,892
  • BULLDOG 004.jpg
    BULLDOG 004.jpg
    86 KB · Views: 60
  • BULLDOG 005.jpg
    BULLDOG 005.jpg
    85 KB · Views: 1,901
  • BULLDOG 006.jpg
    BULLDOG 006.jpg
    87.8 KB · Views: 1,898
  • BULLDOG 007.jpg
    BULLDOG 007.jpg
    86.2 KB · Views: 67
  • BULLDOG 010.jpg
    BULLDOG 010.jpg
    86.3 KB · Views: 1,889
Last edited:
Steve texted me earlier today and told me the 4-40 torx screws had a security dimple in them. I never noticed that. I'll be sending replacement screws to those that have these already or on the way.
 
Very cool, I wanna try one of these sometime. Steve, gotta say that I know how that dog hair thing is. Man they get everywhere. HAHAHA
 
That dog hair comes with the kit. It's a Bulldog hair.
 
Since I already have my own bulldog, can I get a discount? :D

Great lookin' kit guys! I think this could could go a long way toward getting some of us into making folders.
 
Steve texted me earlier today and told me the 4-40 torx screws had a security dimple in them. I never noticed that. I'll be sending replacement screws to those that have these already or on the way.

yes my kits had the same problem...
 
I will get replacement screws right out. Sorry guys. I have never even ordered these kinds of screws so I didn't check that.
 
Here I clean up the nibs left by the water jet on the edges of the blade and frames.
attachment.php


Next step is to apply the layout dye so you can scribe your blade edge and also locate the relief groove for the lock bar. This groove prevents the TI from fracturing when you bend it.
attachment.php


I layout the line of the relief cut and normally I would cut this will a ball end mill on the Bridgeport.
attachment.php


Using a 1/8" carbide cutter in a dremel and file stops to align the cutter.
attachment.php


The cutter just fits between the file stops and with light downward pressure I cut the relief slot.
attachment.php

attachment.php


The slot is cut and the frame is cleaned up.
attachment.php
 

Attachments

  • BULLDOG 015.jpg
    BULLDOG 015.jpg
    85.9 KB · Views: 981
  • BULLDOG 012.jpg
    BULLDOG 012.jpg
    87.8 KB · Views: 983
  • BULLDOG 022.jpg
    BULLDOG 022.jpg
    94.1 KB · Views: 984
  • BULLDOG 017.jpg
    BULLDOG 017.jpg
    77.4 KB · Views: 988
  • BULLDOG 021.jpg
    BULLDOG 021.jpg
    79 KB · Views: 986
  • BULLDOG 018.jpg
    BULLDOG 018.jpg
    82.4 KB · Views: 987
  • BULLDOG 020.jpg
    BULLDOG 020.jpg
    89 KB · Views: 988
Last edited:
Here I lay out a line to match the outside curve of the liner to do some minor decoration.
attachment.php

attachment.php


I centerpunch a series of spots for dimples.
attachment.php


The center mark is drilled through to accept my initial lug.
attachment.php


I set and peen the brass lug in from the backside of the frame.
attachment.php


The face is sanded off after the lug is set. This used to be my makers mark, it's a .250" thick brass lug with my initials cut thru it with an EDM machine.
attachment.php
 

Attachments

  • BULLDOG 032.jpg
    BULLDOG 032.jpg
    90.7 KB · Views: 32
  • BULLDOG 024.jpg
    BULLDOG 024.jpg
    79.5 KB · Views: 23
  • BULLDOG 025.jpg
    BULLDOG 025.jpg
    83.7 KB · Views: 975
  • BULLDOG 023.jpg
    BULLDOG 023.jpg
    91.5 KB · Views: 975
  • BULLDOG 026.jpg
    BULLDOG 026.jpg
    87.4 KB · Views: 969
  • BULLDOG 035.jpg
    BULLDOG 035.jpg
    88 KB · Views: 971
  • BULLDOG 034.jpg
    BULLDOG 034.jpg
    90.4 KB · Views: 21
  • BULLDOG 029.jpg
    BULLDOG 029.jpg
    77.8 KB · Views: 974
  • BULLDOG 037.jpg
    BULLDOG 037.jpg
    86.1 KB · Views: 972
Last edited:
I really like that carbide cutter jig for the relief cut.
What is the SJ thing - brass? Where do you get that?
 
The carbide dremel cutter is a great way for someone who doesnt have access to a milling machine to complete this type of kit.

The brass lug is EDM'd from brass bar and I used to set this in the handles of my knives before I started etching my makers mark. I still have some leftover and have imbedded them in different things like tools, guns, etc.
 
I start the grind out with a tall flat grind and stop before it breaks the spine. I don't worry too much about the little belly in the top line as I plan to hand sand the flat grind even to the spine.
attachment.php

attachment.php


Check both sides then I'm going to grind a small falling swedge.
attachment.php

attachment.php

attachment.php


A quick 80 grit hand sand to bring the grind to the spine. I don't file plunge lines so they need a little sanding too.
attachment.php


I lay the parts together several times during the process to keep sight of the finished product.
attachment.php


attachment.php
 

Attachments

  • BULLDOG 050.jpg
    BULLDOG 050.jpg
    83.2 KB · Views: 954
  • BULLDOG 044.jpg
    BULLDOG 044.jpg
    75.4 KB · Views: 960
  • BULLDOG 045.jpg
    BULLDOG 045.jpg
    76.6 KB · Views: 958
  • BULLDOG 043.jpg
    BULLDOG 043.jpg
    88.4 KB · Views: 961
  • BULLDOG 047.jpg
    BULLDOG 047.jpg
    81.6 KB · Views: 963
  • BULLDOG 051.jpg
    BULLDOG 051.jpg
    88.8 KB · Views: 956
  • BULLDOG 048.jpg
    BULLDOG 048.jpg
    85.9 KB · Views: 955
  • BULLDOG 052.jpg
    BULLDOG 052.jpg
    85.7 KB · Views: 959
I use this super sophisticated fixture to clean up the inside of the frames. Now the unknowing amongst you may think that this a stick with a pin in it, but you would be wrong cuz its a small "board" with a pin in it. Hey, it keeps you from burning your fingertips.
attachment.php

attachment.php


To clean up the edges if the frames I use two small drill bits to align them, the side sand the edges til everything is clean and equal.
attachment.php

attachment.php

attachment.php

attachment.php

attachment.php
 

Attachments

  • BULLDOG 075.jpg
    BULLDOG 075.jpg
    80 KB · Views: 944
  • BULLDOG 074.jpg
    BULLDOG 074.jpg
    80 KB · Views: 944
  • BULLDOG 078.jpg
    BULLDOG 078.jpg
    78.6 KB · Views: 944
  • BULLDOG 058.jpg
    BULLDOG 058.jpg
    93 KB · Views: 946
  • BULLDOG 072.jpg
    BULLDOG 072.jpg
    85.6 KB · Views: 940
  • BULLDOG 073.jpg
    BULLDOG 073.jpg
    79.8 KB · Views: 945
  • BULLDOG 054.jpg
    BULLDOG 054.jpg
    80.7 KB · Views: 944
Last edited:
When I have pre threaded parts I always chase the threads with the correct tap. These are cylindrical standoffs and I use a small keyless drill chuck to hold round pieces without marring them. Two of these chucks work great when using two sided thumbstuds. You can crank them down good and tight without marking them up.
attachment.php

attachment.php


The holes for the clip are in these frames but need to be drilled out to the proper size and tapped. Please note that this is .125 thick Titanium and is harder than 6th grade arithmetic so use TiN (titanium nitride) or carbide drill bits. These were going to be 2-56 screws on the clip but I broke a tap in the first hole and after popping the tap out with a small carbide pin punch, I re-drilled and tapped them to 4-40. Once they are in I rough grind the back of the screws down then finish them off with the SSS. (sophisticated sanding stick).
attachment.php

attachment.php

attachment.php
 

Attachments

  • BULLDOG 092.jpg
    BULLDOG 092.jpg
    78.6 KB · Views: 938
  • BULLDOG 081.jpg
    BULLDOG 081.jpg
    76.3 KB · Views: 935
  • BULLDOG 091.jpg
    BULLDOG 091.jpg
    80.2 KB · Views: 939
  • BULLDOG 082.jpg
    BULLDOG 082.jpg
    76.2 KB · Views: 39
  • BULLDOG 080.jpg
    BULLDOG 080.jpg
    79.5 KB · Views: 937
  • BULLDOG 083.jpg
    BULLDOG 083.jpg
    89.4 KB · Views: 45
  • BULLDOG 089.jpg
    BULLDOG 089.jpg
    80.1 KB · Views: 65
  • BULLDOG 084.jpg
    BULLDOG 084.jpg
    82.6 KB · Views: 58
  • BULLDOG 094.jpg
    BULLDOG 094.jpg
    83 KB · Views: 935
Last edited:
Back
Top