You are using an out of date browser. It may not display this or other websites correctly.
You should upgrade or use an alternative browser.
You should upgrade or use an alternative browser.
Post pics here for critique - must have thick skin
- Thread starter BossDog
- Start date
Keyforgeknifes
Active Member
ok thanks.A lot of the guys here use light boxes. I like taking photos outside mostly on cloudy days or early late hours. Your type knife would look good in a woods or rocky staging.
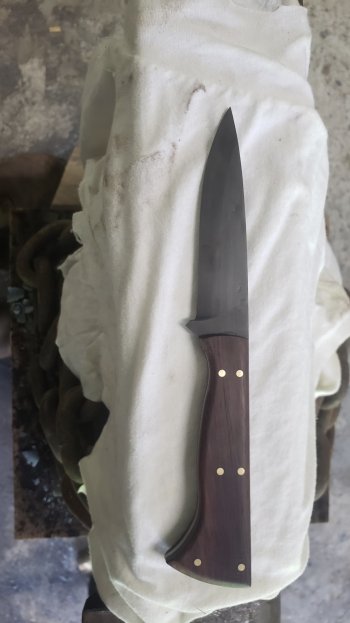
here's another picture of a knife I am working on how can I improve.
thanks Nathan
Keyforgeknifes
Active Member
REK Knives
Well-Known Member
I like the contouring you did on this piece!
For this one, here's some of the major things I see needs improved upon as far as the knife goes:
- pins: looks like they were peened so they have an odd shape on the face. Also, looks like you didn't fully sand them flush. Next time, try not peening but only using epoxy instead, and grinding flush with a hard backing (so they don't sit proud.) you will want them to have a consistent grind direction across the faces, so they match each other, whatever grit you finish with.
- blade: looks like some divots at the base of the plunge that need fixing with grinding. I also see scratches on the blade that should have come out with hand Sanding. Also, how are you hand rubbing your blades? It looks like the grind lines are getting washed out pretty good so I'm guessing maybe just with your thumb behind the sandpaper? Next time, try a hard backing behind the sandpaper, should help
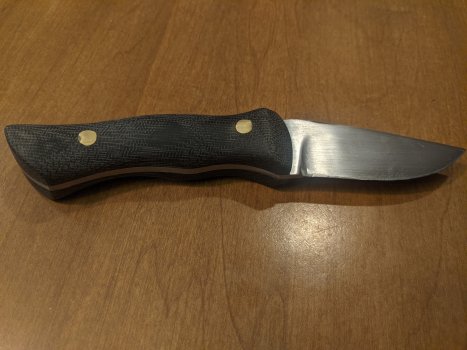
I hate hand rubbing, and barely do it... I'm no expert on hand rubbing so take it fwiw (I have done a fair amount of research though) I did these to 800 grit recently. This was done with the paper wrapped around a piece of steel bar (only 1 layer or you will get more wash out). Then after it's done you go back to the granite plate to touch up the flats and make sure the transition is crisp.

Last edited:
Andre Grobler
Well-Known Member
tkroenlein
Well-Known Member
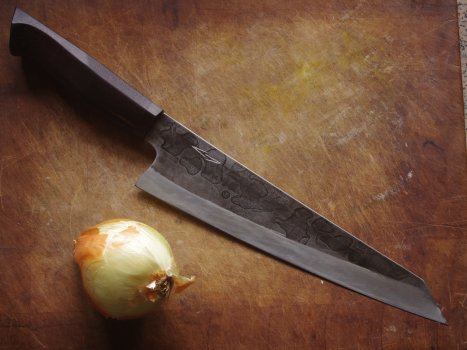
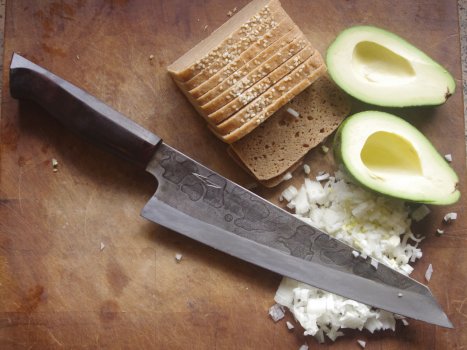
Yup. That makes me wanna buy a chef knife. Especially the one with the bread and avocado.is there space for mood and context in product photography, or should it be about the product only. please critique.
billyO
Well-Known Member
Yes.is there space for mood and context in product photography,
Depending on the blade, make sure you're not diverting the viewers attention from anything on the blade you want to emphasize, though. If you're not familiar with Sharp by Coop, check out his pictures. He does a mix, depending on the blade.
Oftentimes you'll see a combination of both types of photos.
Andre Grobler
Well-Known Member
i am often so fixated on his technicals, that i miss that... i mean, how exactly do you light something that evenly without losing detail...Yes.
Depending on the blade, make sure you're not diverting the viewers attention from anything on the blade you want to emphasize, though. If you're not familiar with Sharp by Coop, check out his pictures. He does a mix, depending on the blade.
Oftentimes you'll see a combination of both types of photos.
Andre Grobler
Well-Known Member
good to hear!Yup. That makes me wanna buy a chef knife. Especially the one with the bread and avocado.
billyO
Well-Known Member
This is why people pay Coop and others a lot of money to get great pics.i am often so fixated on his technicals, that i miss that... i mean, how exactly do you light something that evenly without losing detail...
If you're truly interested, there are a number of threads on various forums that give tips and tricks on how to take pics of knives. My neighbor (someone who does photography for a living), recommended spending $ on a decent photo-editing program and to learn to use it, because most of the things that does physically to improve the photo can be done simply by modifying the various settings on the computer.
One way is to take multiple shots of the knife, with the camera on a tripod and in one place with the lighting set up to highlight different parts of the knife and them merging the pictures on a photo-editing program. Another is multiple shots while playing with the aperture, film speed/ISO, etc... A lightbox or something to diffuse the light source is probably a basic must have.
Heikki
KNIFE MAKER
I've been curious exactly how the professionals use their editing software to enhance the photos. Hadn't really thought about combining multiple images, just adjusting a single one. Caleb Royer offers a service where he uses a photo you send in. The "Before and After" pics on his website are really eye opening as to what can be done with a basic photo.This is why people pay Coop and others a lot of money to get great pics.
If you're truly interested, there are a number of threads on various forums that give tips and tricks on how to take pics of knives. My neighbor (someone who does photography for a living), recommended spending $ on a decent photo-editing program and to learn to use it, because most of the things that does physically to improve the photo can be done simply by modifying the various settings on the computer.
One way is to take multiple shots of the knife, with the camera on a tripod and in one place with the lighting set up to highlight different parts of the knife and them merging the pictures on a photo-editing program. Another is multiple shots while playing with the aperture, film speed/ISO, etc... A lightbox or something to diffuse the light source is probably a basic must have.
Sean Jones
Well-Known Member
One excellent photo editor that is free is Gimp. It's similar to Photoshop.This is why people pay Coop and others a lot of money to get great pics.
If you're truly interested, there are a number of threads on various forums that give tips and tricks on how to take pics of knives. My neighbor (someone who does photography for a living), recommended spending $ on a decent photo-editing program and to learn to use it, because most of the things that does physically to improve the photo can be done simply by modifying the various settings on the computer.
One way is to take multiple shots of the knife, with the camera on a tripod and in one place with the lighting set up to highlight different parts of the knife and them merging the pictures on a photo-editing program. Another is multiple shots while playing with the aperture, film speed/ISO, etc... A lightbox or something to diffuse the light source is probably a basic must have.
Andre Grobler
Well-Known Member
I struggle beyond basic curves and saturation. I have gimp, but need to get into the jargon
KentuckyFisherman
Well-Known Member
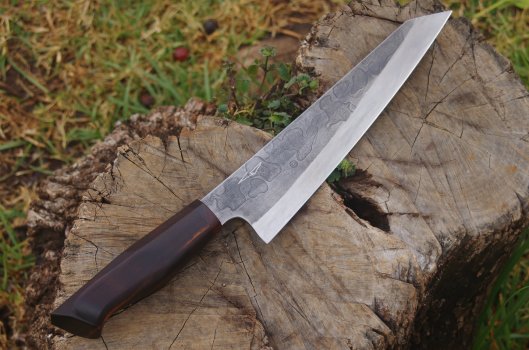
Beautiful little skinner, Wallace. What's the wood? Looks to me like it could be highly figured walnut.Well, other than that, how did you like it? :1:
Wallace
Jason Battisti
New Member
If you want to have your knife pics critiqued, post them here and ask for feedback.
Be ready to hear it if you ask for it.