ricky_arthur
Well-Known Member
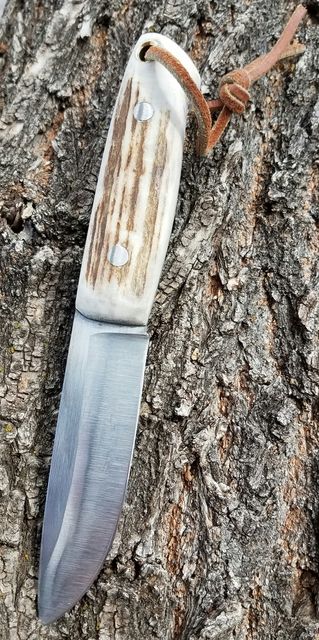
Ok. Here is one for comment and input.

")
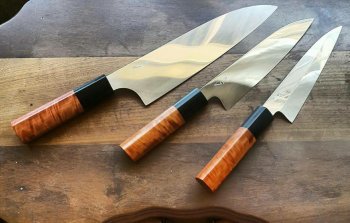
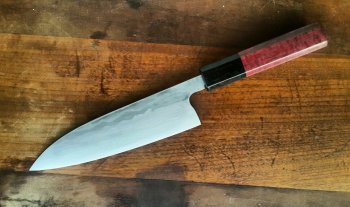
Here are a couple up for critique
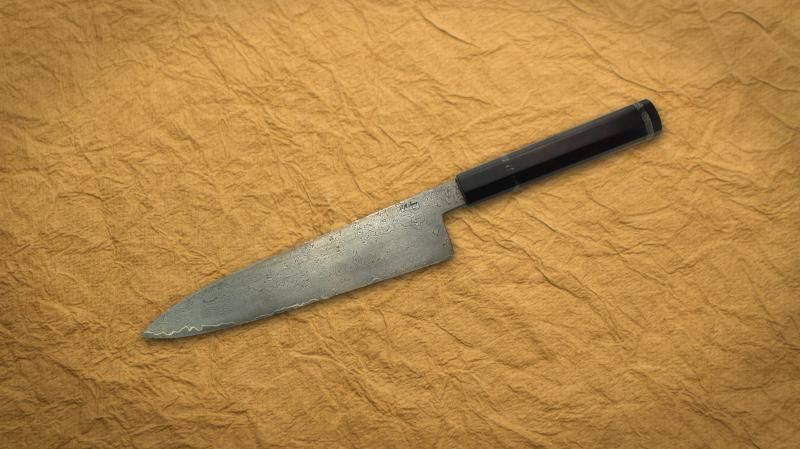


the focus looks soft, especially the back of the handle. It should pop.
brighter lights will allow a smaller aperture and larger depth of field. Use another light on the back of the handle. Occasionally a reflective gray or white card held by hand to reflect more light helps....as long as it isn't picked up as a reflection.
composition wise, the X is harsh, try the sheath in line with the blade.
also, you cropped (or shot) the sheath top out of it.
what software are you doing your post edit with?
Images like this benefit from HDR and using layers with different focus points.
Pro knife photos all have a few things in common.
-multiple light sources, pay attention to the color or K range of the lights - tungsten shades red, fluorescent shades blue, LED can be anything
-2/3's front light, 1/3 back light
- for long knives they use multiple images with different focus points so the whole knife is in focus - each image is overlaid in layers in post edit
- post edit drop shadows add a nice touch - make sure the drop shadows are not conflicting too much from different light angles but that isn't a huge deal
-post edit software is pushed hard to get the sharpness and colors to pop using sharpening and saturation controls
-spot sharpening - this is where you hit it with a sharpening tool in your editing software so you don't pixelize the entire image.
-every pro will tell you the first step is good lighting and at least an OK camera with lights mattering more, they will also have mad skills in post editing software.
We use Photoshop for images here but since we only have one seat, I use Paint Shop Pro which has all the features you need.
GIMP, a free software editor also does a decent job.
Thanks Tracy...i really struggle with knife photos. is the learning curve to GIMP easy? I have used Photo Shop Elements in the past...it's about $90 which if it will do the job isn't too bad. I know I'm battling ignorance. I quit using my son's cell phone for pics and got out my old Canon dslr...and I still stink...but playing with lights I just got as soon as I ship my KITH knife..the focus looks soft, especially the back of the handle. It should pop.
brighter lights will allow a smaller aperture and larger depth of field. Use another light on the back of the handle. Occasionally a reflective gray or white card held by hand to reflect more light helps....as long as it isn't picked up as a reflection.
composition wise, the X is harsh, try the sheath in line with the blade.
also, you cropped (or shot) the sheath top out of it.
what software are you doing your post edit with?
Images like this benefit from HDR and using layers with different focus points.
Pro knife photos all have a few things in common.
-multiple light sources, pay attention to the color or K range of the lights - tungsten shades red, fluorescent shades blue, LED can be anything
-2/3's front light, 1/3 back light
- for long knives they use multiple images with different focus points so the whole knife is in focus - each image is overlaid in layers in post edit
- post edit drop shadows add a nice touch - make sure the drop shadows are not conflicting too much from different light angles but that isn't a huge deal
-post edit software is pushed hard to get the sharpness and colors to pop using sharpening and saturation controls
-spot sharpening - this is where you hit it with a sharpening tool in your editing software so you don't pixelize the entire image.
-every pro will tell you the first step is good lighting and at least an OK camera with lights mattering more, they will also have mad skills in post editing software.
We use Photoshop for images here but since we only have one seat, I use Paint Shop Pro which has all the features you need.
GIMP, a free software editor also does a decent job.
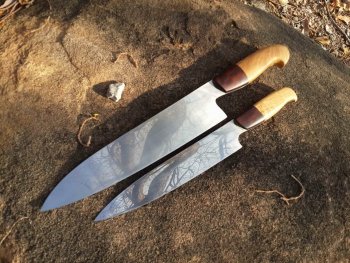
I moved my photo tent out to the shop where I had better light. I still am not getting photos like I wish. Any tips are appreciated.