What's going on in your shop?

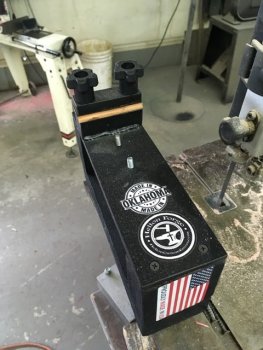
so first, beautiful grinder! ;)
Second, you will love the small wheel. Watch heat buildup on them. they can get so hot the seals leak and the grease leaks out and the bearings fail. The good news is bearings are cheap and easy to replace. We do it routinely in our shop as they see lot of use.

Thanks Tracy it does have a certain ambience doesn't it?.

I've heard about the heat build up, so I'll be careful there.

One of these days I might actually paint the thing...but I'm not holding my breath. :)
 
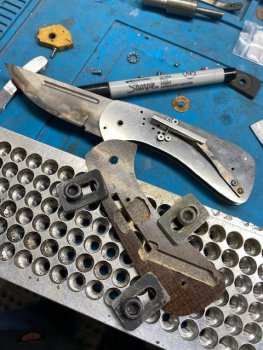
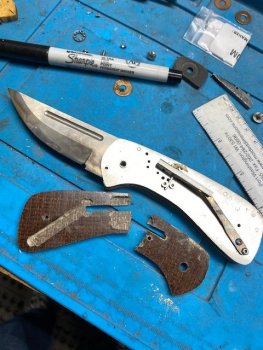
Plodding along on this one. This is my second one. The first was just to see how they work and was never meant to be finished. This one is so I have my fingers crossed.
I had to spend a few days making and heat treating springs. I made three different ones and got one of them to work decent enough.
The spring for the switch is .050" titanium I gave a small taper to. I think it will hold up. I was thinking I should try a Ti main spring also but I'll save that test for the next one.


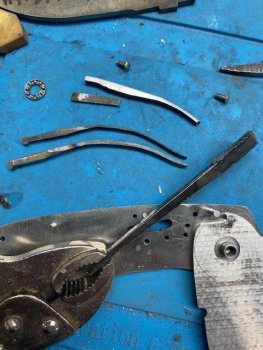
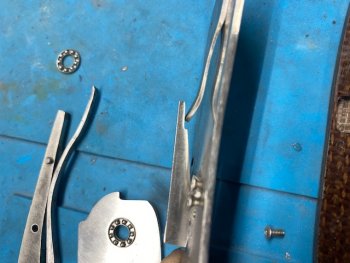
My gallery of spring shame. The top one broke more or less on purpose. I wanted to see what it would take. Not much.
The second from top was too thin. I thought I could just use a propane torch and dunk in oil. That did not work at all. I know now I have to use the oven.
The raw stock in the vice grip is how it starts. I use a small wheel to put in a taper. I used 8670. There isn't a lot of tech info on heat treating this stuff down to the low 50's RC. I guessed. 1525 for five minutes, quench in parks, temper twice at 625. We'll see how it holds up.
IMG_2016.jpg

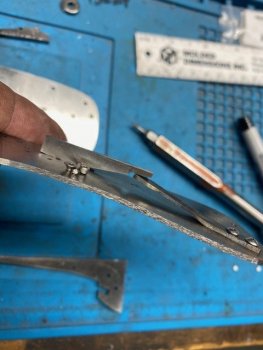
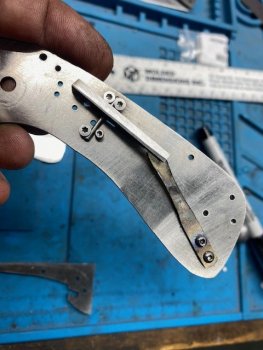
For the switch spring, I used .050" titanium. I bent it under heat and then gave it a slight taper with a small wheel. I like it and will try Ti for the main spring if I ever make another one of these.
IMG_2020.jpg

Everything is tucked in as tight as my skills allow. I don't like how close the two little screws are holding the switch pivot are to the edge but I'll live with it. Some guys are making long bolster and milling in a small channel where the bolster meets the liner to hold the switch pivot pin. That eliminates this whole mess with little screws. I am not practiced enough for that yet.
IMG_2018.jpg
 
Last edited:
They say a bad day fishing is better than a good day at work.

This is a philosophical post.
I need healing. Or a beer.

It has been years and years since I have thrown a stubborn knife project across the room in anger.
I am ashamed to say I did it this morning. I instantly felt foolish and hoped no one else saw it. I did notice no one came around me after that.
I had to crawl and look under the bench to find my parts. I still haven't found my hand file.

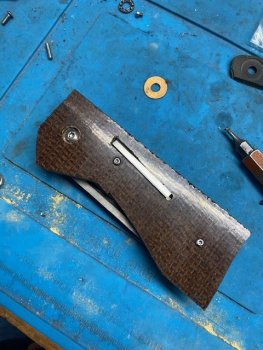
I am milling out the underside of a scale to fit the guts in.
I couldn't get it under a 1/8" scale and that was my goal.
Below is where I have it milled out and it didn't fit.

IMG_2032.jpg

Here is where I was using a hand file to just widen the opening to make it fit and broke it clean in half.

IMG_2033.jpg

I scaled up (bad pun) the size to 3/16" thickness and I can now make it all work but the fit for the switch opening is absolutely hideous.
I will make sure this all works and then use this (hideous) scale to make a new scale that doesn't look like a 10 year old did it.
I can see several issues now with my switch design and spring design I was so proud of yesterday before I started to cover it up with a scale. I hope I can work around them.

It works but it isn't great. I didn't profile this scale as I changed my order of work flow to concentrate on fitting the switch and milling out the pockets needed.
All day: Mill some, check it, doesn't fit, mill some more, check it, doesn't fit, repeat for 4 hours.

I finally got it all together and working.
As it is now, I could clean this up and call it done but I would hate it more than I do already.

IMG_2034.jpg

I am going to have a beer and maybe go fishing.
 
They say a bad day fishing is better than a good day at work.

This is a philosophical post.
I need healing. Or a beer.

It has been years and years since I have thrown a stubborn knife project across the room in anger.
I am ashamed to say I did it this morning. I instantly felt foolish and hoped no one else saw it. I did notice no one came around me after that.
I had to crawl and look under the bench to find my parts. I still haven't found my hand file.

I am milling out the underside of a scale to fit the guts in.
I couldn't get it under a 1/8" scale and that was my goal.
Below is where I have it milled out and it didn't fit.

View attachment 74559

Here is where I was using a hand file to just widen the opening to make it fit and broke it clean in half.

View attachment 74560

I scaled up (bad pun) the size to 3/16" thickness and I can now make it all work but the fit for the switch opening is absolutely hideous.
I will make sure this all works and then use this (hideous) scale to make a new scale that doesn't look like a 10 year old did it.
I can see several issues now with my switch design and spring design I was so proud of yesterday before I started to cover it up with a scale. I hope I can work around them.

It works but it isn't great. I didn't profile this scale as I changed my order of work flow to concentrate on fitting the switch and milling out the pockets needed.
All day: Mill some, check it, doesn't fit, mill some more, check it, doesn't fit, repeat for 4 hours.

I finally got it all together and working.
As it is now, I could clean this up and call it done but I would hate it more than I do already.

View attachment 74561

I am going to have a beer and maybe go fishing.
I'm fishing this week myself. Sorry you had so much trouble. I've come close to throwing more than one project myself.
The bad part was when I used to do software programming. It's kind of hard to throw a computer across the room though. And harder to put parts back together. :)
 
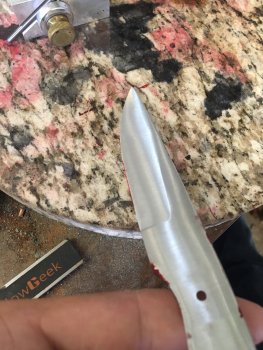
Working on a kitchen knife for my daughter. The grind so far is about as good as I've done. This is at 80 grit now. Since I'm not planning on having a bevel I'm a bit worried about the transition point I'm at. One of the reasons I've stopped here for now.
And tomorrow I go fishing with my daughter. It will be nice to get away for a while.

Don’t be afraid to take that bevel all the way back past the first pin hole. In fact I bring mine all the way back.

When you mix your epoxy, add black dye and use a black liner. That will fill the gap nicely and it will blend perfectly. The reason I do it this way is because with a full length taper its not just a matter of tilting the table on the drill press like you do for a tapered tang. A full length taper on a plungeless kitchen knife is tapered like a wedge in two directions. The tang is actually shaped like a three-sided wedge. So I drill my scales perfectly flat and perpendicular and let the epoxy fill the gap. The gap on a thin kitchen blade is tiny. Once the epoxy cures it matches the liner and it’s imperceptible.
Thanks John. I will put this in my notes. That's very helpful.
 
The thing to do on tapered tangs to make sure your blade is held straight. You then line up your holes and drill straight down through that blade and handle material. If you have a Billy Helton Aligner you have it licked. You have blade held and screws to help supposition when you drill through it. Or similar device!
 

Attachments

  • DBC10ED1-279C-434D-BFBB-ABB7925E6BC3.jpeg
    DBC10ED1-279C-434D-BFBB-ABB7925E6BC3.jpeg
    104.8 KB · Views: 22
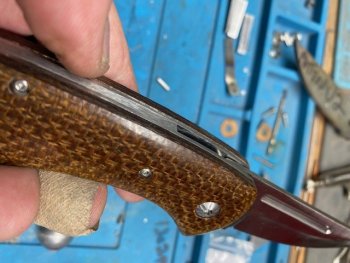
Making progress and now down to a few details left.


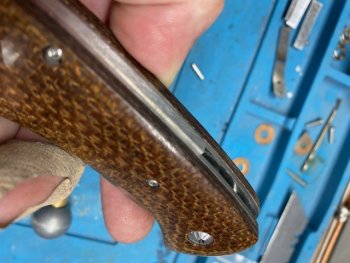
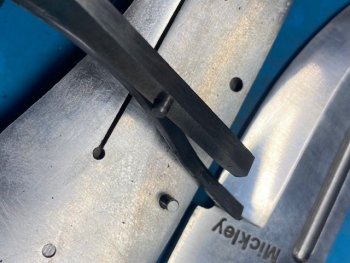
I noticed this happening the other day. The back bar is flush here when the main spring is not under load.
IMG_2042.jpg

With the main spring under tension the back bar pops up nearest the blade end. I have three screws holding this but the tolerance stack on the through holes apparently is huge. To fix it, I'll drill a 3/32" hole through both liners and the back bar as close to the end as I can and pin it. A ten minute job and most of that is just getting the pin to length.
IMG_2044.jpg

The twist damascus pocket clip is in the temper oven now.
At this point I feel ok putting on my makers mark and the steel (Elmax) etch mark. I've learned not to etch a mark in too soon. It's like a jinx.
 
Done finally.


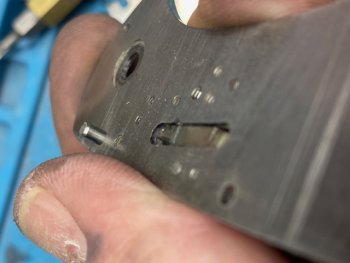
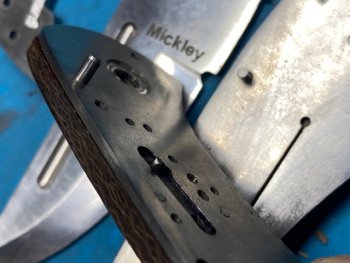
The sear pin is small. It only needs to retract .050" or so. It has a small ramp on the bottom to help push the main spring up and over the sear. The top of the sear is filed flat to help hold the main spring.
IMG_2055.jpgIMG_2053.jpg


The switch spring needed a little curly lift to get out of the way of the scale.
IMG_2054.jpg

I had to add a 3/32" pin to the back bar to pin it to the liners so it didn't flex up.
IMG_2050.jpg

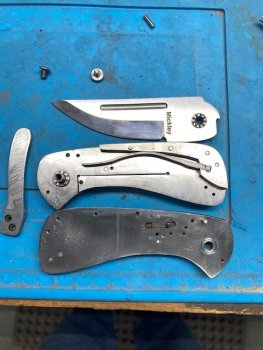
What it looks like inside.
IMG_2049.jpg

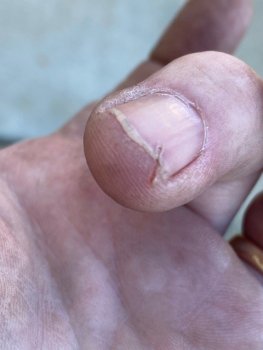
Always use a push stick when using the band saw. If you don't, keep super glue handy.
IMG_2048.jpg

Now it's time to move to coil fired autos for awhile.
 
Back
Top