Justin Presson
Well-Known Member
Some good looking stuff guys.
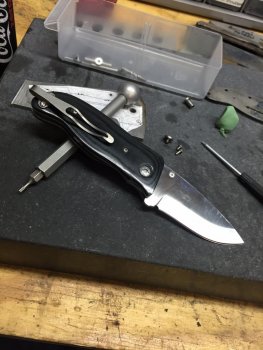
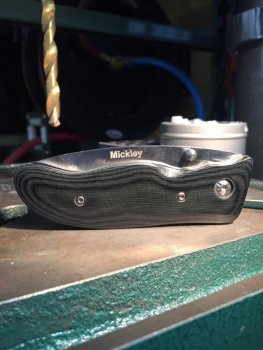
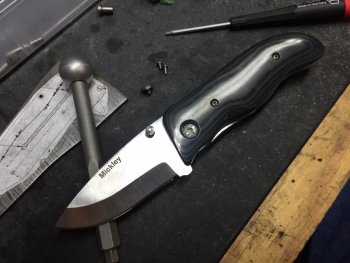
Here are some I got profiled out today. 1084
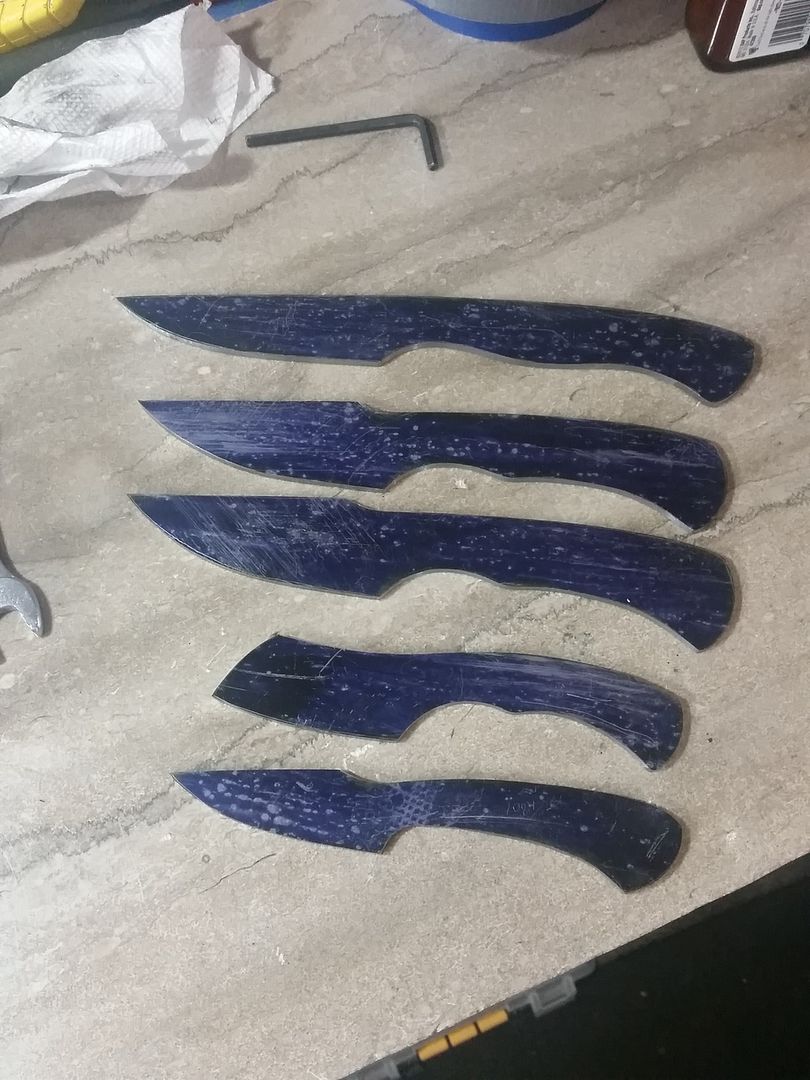
Here are some I got profiled out today. 1084


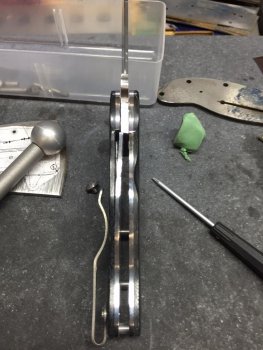
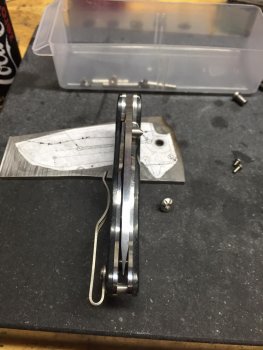
Nice Boss, looks great. I really like the looks when its closed, I don't think a lot of makers plan enough on the "closed" look. Nothing poking out, smooth lines all the way around, and you can even see your mark. Is the flipper going to be pretty much same pattern? Going to use the same 0.070 Ti on it too? I've got my Les/Tracy inspired flipper all drawn out in CAD, ready to start.
Hey, now you if you were selling single knife size Ti pieces I asked you about the other day, you could sell a set of templates, the liners, scales, and a chunk and of blade steel. A "build a folder" kit special.


I have probably not done enough research but he had the stuff so we decided to wing it. I also learned how to Tig weld which is pretty awesome. Here it is so far.
Any of the welds that look good are his, the stuff that looks like birds crap is likely mine...lol
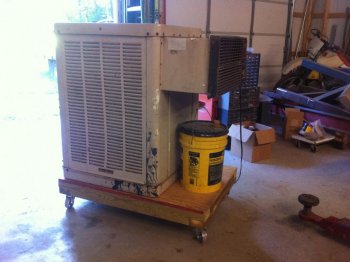
Wow Rex!!! Thank you for typing all that up. The forge is complete and I have used it some but I need to upgrade the burner. Right now I'm just using a bernz o matic torch to fire it. While it does work, I think I can be more efficient with another burner. I was actually thinks ng of making a venturi burner but not sure. I'm going to wait until after the knifedogs hammer in so I can gain some more experience and see what I really need to do.Justin,
Your FORGE looks pretty good, tell me are you planning on an atmospheric type burner or The Blown Propane Gas type? Since I have the most experience with the later, I am a little biased, Ok a LOT BIASED, the Gas Blown Forge is the easiest to control, its the easiest to get to forging temp, and generally works great all the time! There are no little welding tips in it or anything like that, it is the simplest way to build a burner and get awesome results! Now, the burner angle...it's just not the best way to do it, I'm sure you were remembering something about that, the best way to mount the burner is on a Tangent to the forge. A better way to explain it, if you were to draw a circle, and then draw 2 lines an inch apart with the top line about 1 inch from the top of the circle, that one inch is spacing is to accommodate the fiber insulation, the 2 lines below the top of the circle represents the burner, you should be able to 'see' how the burner should look coming into the forge and the angle it will be at. Also a good coat of Satanite, and (if you can afford it) a coating of ITC-100, some Maker's will say its mandatory, others will say its good to use it or Plistix. From my experience, I say go with the ITC 100!!! It is expensive, but it will save you a lot of money in the long run,(it will actually pay you back!), my forge went from getting to forging temp from 15 to 20 minutes to getting to forging temp in around 5 to 10 minutes! That equals savings in GAS!! PLUS, I went from running my forge at 8 to 10 psi to around 3 to 5 .psi! To fill up my 100LB tank is around $95, the last time I refilled it, (Oh! DO GET A 100# propane tank when you can) Another place to visit, when you're ready, and I HIGHLY RECOMMEND YOU CONTACT, High Temp Tools, he has all the correct regulators for Forges, (as well as EVERYTHING ELSE YOU'LL NEED!), The REGULATOR DOES MAKE A DIFFERENCE! The same as using the correct type of blower, sure it would have been cheaper to use a squirrel cage type blower, but as Ed Caffrey explained to me, you can use that kind, but when you buy one, buy 2 or 3 or 10 of them, because they wont last very long, some will last 2 or 3 months while others might last 1 month while others may last a year! If you spend the money, the last time I bought mine, was about 7 years ago, it was around $120.00, I got it from Blacksmith Supply (.com). This one can handle the back pressure created in a Forge while the Squirrel cage blowers can't! That is the way Ed explained it to me, and I take Ed at HIS WORD, I didn't see a need to question it, and bought one of those as soon as I had the funds! It has paid off well to listen to those that have the experience (even if they take too many WORDS TO EXPLAIN IT!) (BTW, THAT HAS BEEN THE ONLY BLOWER I HAVE PURCHASED!!! AND ITS AROUND 7 YEARS OLD NOW!)
If you do not coat the Kaowool, or whatever type of Fiber blanket with Satanite it will allow the fibers to become airborne while the forge is burning, these will get in the air and they will get into everyone's lungs in the shop area. Once they have been freed, they will settle all over the shop, equipment and floor, then when you go in there and sweep or clean it puts those same fibers back in the air! The Satanite will also give you a protective layer to your fiber blanket as well, I used to add a coating of castable refractory to it as well, for an added level of heat retention and protection, every dollar you spend on this type stuff is dollars you will be putting back in your pocket!!!! I'm sure there is a point where you start losing money by adding too much to it, such as adding a 2 inch layer of Fiber Blanket instead of 1" layer, the problem with that is that the forge has to heat up those layers BEFORE it will begin to heat the inside of the forge area. Also, I wanted to explain what the ITC-100 does for your forge, basically it REFLECTS THE HEAT BACK INTO THE FORGE. It gives the heat inside your forge the ability to reflect that same heat back into the forge, from the forge walls. IT IS AN AMAZING DIFFERENCE!!!
I was only wanting to explain the burner tube angle and getting the vortex or swirling fire going around in the forge, it is the easiest, best way to get an even burning forge with almost zero cold spots, and very few if any hot spots! When you don't angle the burner tube, the burner is pointed directly at one spot in the forge, there is a huge HOT SPOT in that area! Also, I would highly recommend a backdoor and a removable door on the front of it,(the front door can be simple fire brick, not the thin ones, those do not reflect the heat, they absorb it, the thicker 3" bricks that are real light, and very porous are the best for this, this is a recommendation, it is not mandatory! The back door, I personally haven't built one that didn't have a back door, it's for heat retention, as well as a convenient prop (when you install a back flap) for when you have a longer piece of steel, you can work on longer pieces by passing it through the forge (and a hole in the back door) and working on a section at a time, that brings me to installing an opening on the back door or even making it removable, I put a window in the back of my first one and then weld a hinge over the opening, all I had to do was push the blade through and hit the back door with it and it would push the "flap" open for me, it was one of the neatest things I did on that forge!
When you pick up your "Black Iron Pipe for the Burner, do not FORGET THE 'P' TAPE! The P is for Propane, very similar to the Teflon Tape used in water pipes, but the P tape is a lot thicker, the Teflon Tape will not work for this! At least I would never trust it!!! Something like this, it does NOT PAY TO SKIMP! Matter of fact it could lead to a catastrophic failure, these things are very easy to build, BUT they can also be very dangerous in the way of gas leaks, that can be going on without your knowing it, until you get a whiff of the Propane FUNK! P Funk is only the warning! If it isn't in a high enough concentration, you may not smell the Funk part of it, until its too late! Remember this too, if you are forging and suddenly start getting a headache, or nauseated feeling, evacuate the shop after CUTTING THE GAS OFF!!! If you're not in a well ventilated area, it would be advisable to get a leak detector. After applying the P tape to the threads, and carefully screwing the pipe together, each and every piece has to be carefully done, if for any reason you don't think it screwed together properly, take it back apart and try again, visually check the threads when you buy the pipe, to make sure there are no burrs or anything that might look like it will keep you from getting a solid connection. That's a tip that could save you a lot of money, depending on how far you live from the store you purchased your parts from, for me, it cost me not only extra gas, but time as well, my store was only open during the week, I had to find a store that dealt in ALL the Black Iron Pipe and ALL of the components, I had to have the fitting for the gas line, Lowe's nor Home Depot carried this fitting or the Needle Valve, your main point of control for your forge!
OH, and don't waste your time talking to them about it, I had one guy tell me that it was NOT used as a gas line, when I told him I knew several people that were using these for a gas line in a gas forge, he gave the, "RCA dog look"! Head crooked all sideways, I think he was thinking something about me writing on someone else's checks! As soon as I said the word forge, he started looking at me funny!!
Building forges is a lot of fun and rewarding, but also dangerous and deadly! But, being very careful and becoming knowledgeable about the products available that make building these possible, and also learning the correct way to apply them is the ONLY WAY TO DO IT! Lucky for you, you have an open library of dozens of the RIGHT PEOPLE, right here(!) that are always willing to help!
One more thing, to correct the tangent of the burner tube, take the legs off, turn the body of the forge a few degree's until you see the tube get to the correct place, depending on how you have the tube in there, it may be easier to remove the tube and re-weld it back on. ( I just pictured the welds on the tube in my mind, the legs will be much easier, but the tube may be at an angle that needs correcting for the new angle of the forge! Keep that in mind, BUT the welds on the burner tube look FRIGGIN PERFECT! And maybe too difficult to remove!) If you need further explanation for the Tangent of the Burner Tube, (or anything else) you can either email me or PM me, I'll be more than happy to help! I might be able to draw it up for you, I can do it on a basic drawing app, none of this is hard, provided you know what a Tangent is!! I didn't, before I learned all this stuff! Matter of fact, before I started making knives, I had never really built much of anything, very basic stuff,(in wood ONLY!!) knife making has allowed me to learn how to do so many things, from welding to wanting to buy a milling machine! The Mill will have to wait, a little while longer, once I get all of my stuff like I want it, I may build another shop, and use the current one for another business I'm considering, none of this would have been possible without KNIFE MAKING!
DANG!!! I'm Sorry this has gotten so long, as my posts tend to do, I also tend to give out too much information, at least more than was asked for, BUT I sincerely hope that this information helps someone that was looking for it!
Your Brada`of the BLADE,
Rex
McClellan Made Blades
")

You got it Boss I will bring it up with me.If you are coming up, I could use a 3' piece.
Just replied i got ya on the list.I sent a PM to you Justin.