You are using an out of date browser. It may not display this or other websites correctly.
You should upgrade or use an alternative browser.
You should upgrade or use an alternative browser.
USAKnifemakers Stage 1 knife kit Tutorial
- Thread starter Josh Dabney
- Start date
Josh Dabney
Moderator
We have two main goals for our sheath.
1. The main purpose of a sheath is to protect the wearer from being cut. We want a nice sturdy sheath that'll remain safe in any situation like a trip and fall or a roll down a hill or whatever comes their way.
2. To protect our knife from being accidentally lost. We didn't do all this work to get home from a trip and find our sheath empty :what!:
An experienced leather worker can make a pattern for sheath in two shakes of a doggie's tail. Were going to need to take our time and put a bit more effort into our pattern if we're going to meet our goals for our sheath. The quality of our pattern is going to determine the outcome for our sheath so take your time.
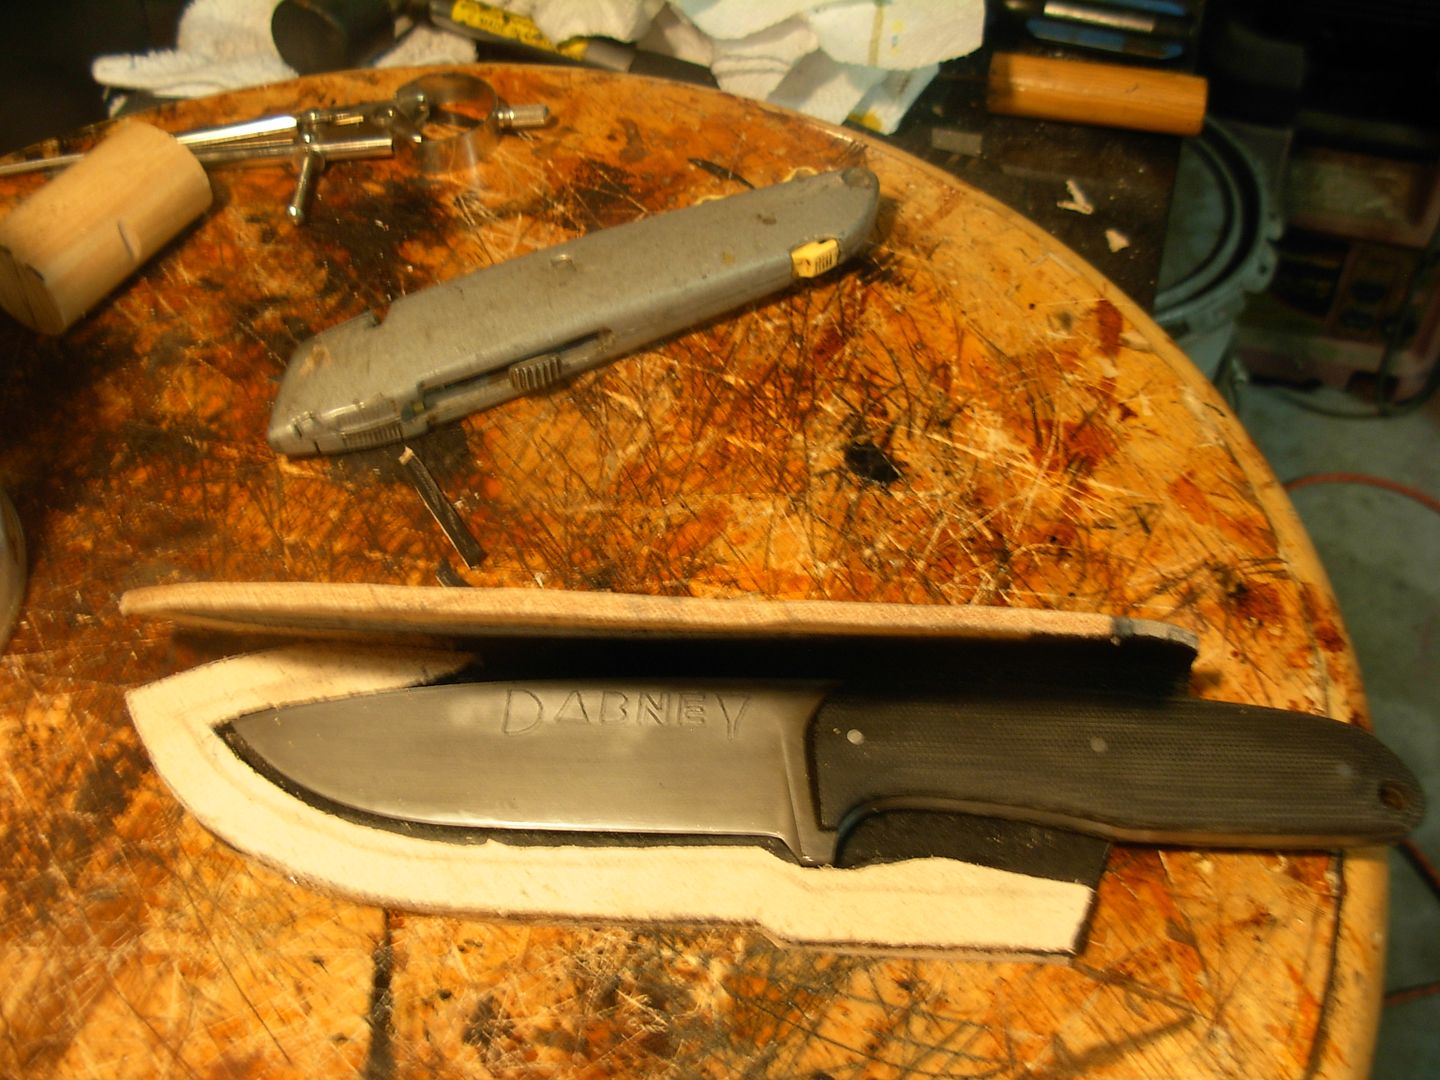
There's about a million and one ways to make a sheath. What I'm going to make here is a Butterfly Sheath which is a pouch style sheath. Pouch style sheaths mainly rely on their depth for retension and have no snaps, studs, straps, keepers, or flaps.
I use Manila File Folders for patterning. They're cheap and work great.
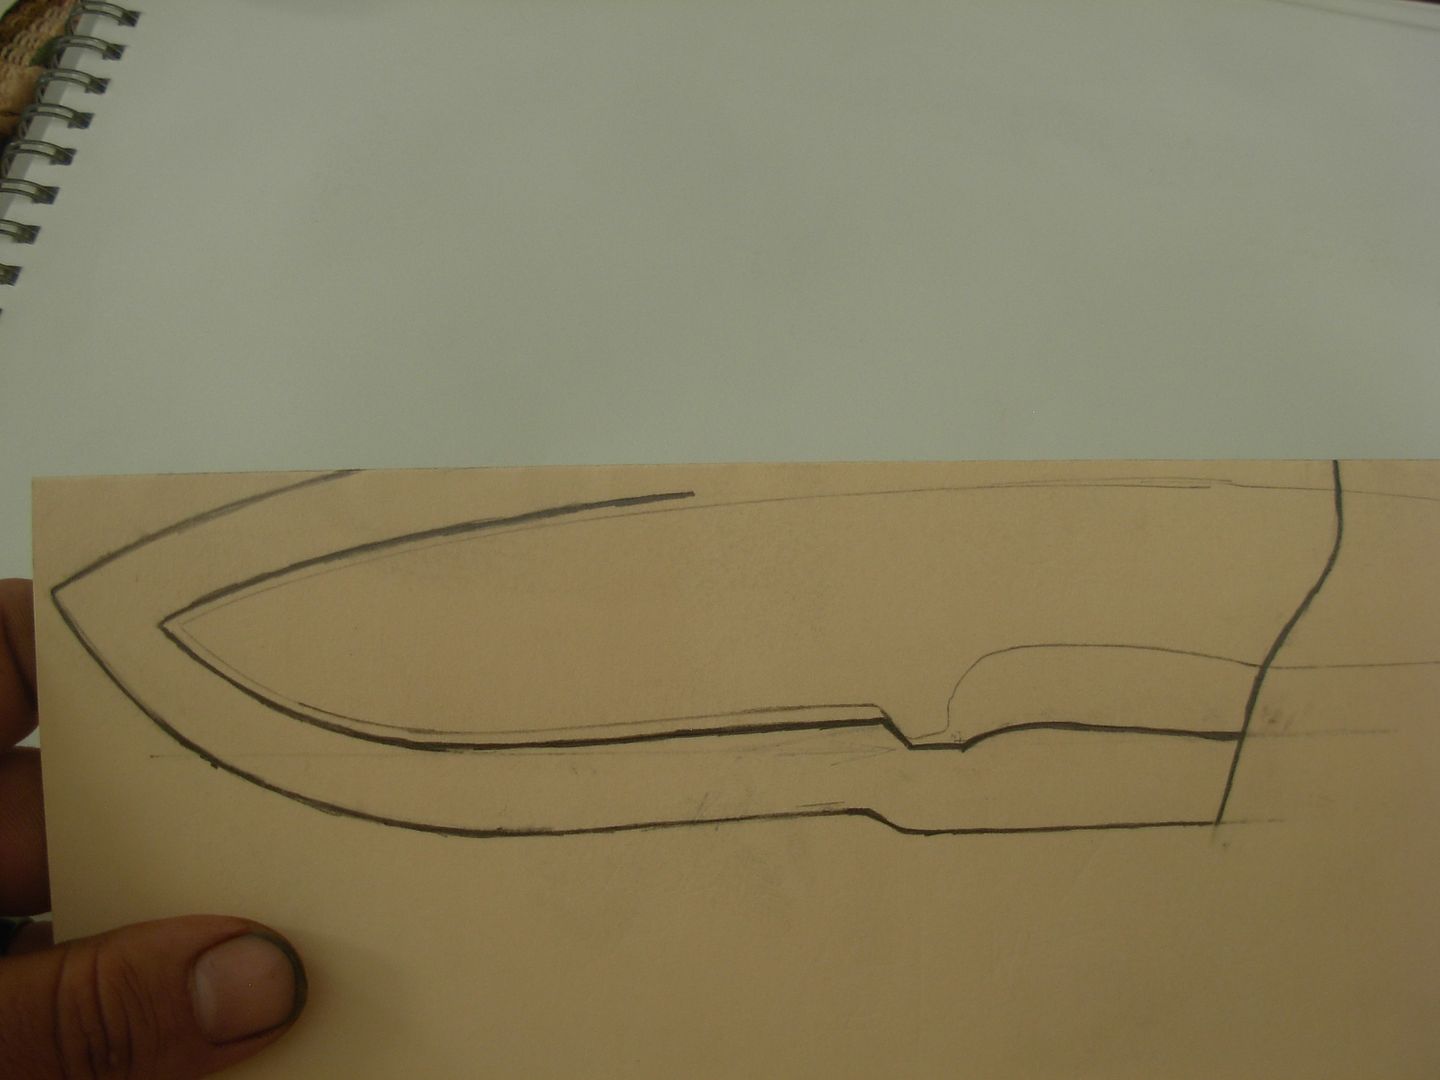
Start by centering the spine of your knife on the fold
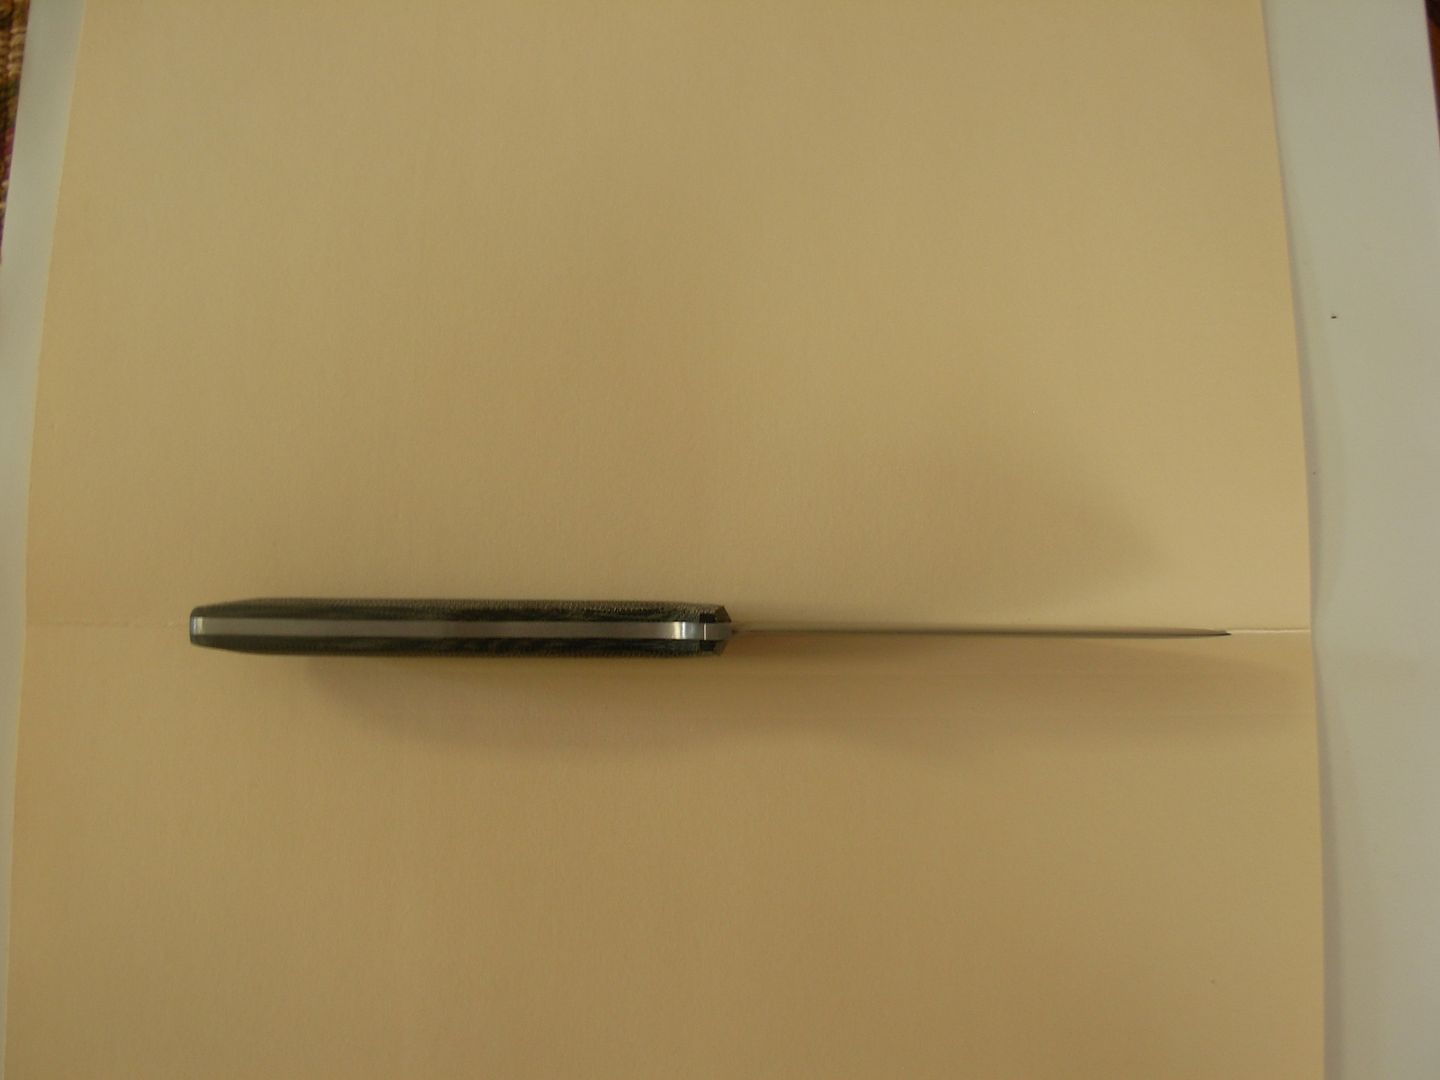
Now roll your knife down around the handle material until it's flat on it's side.
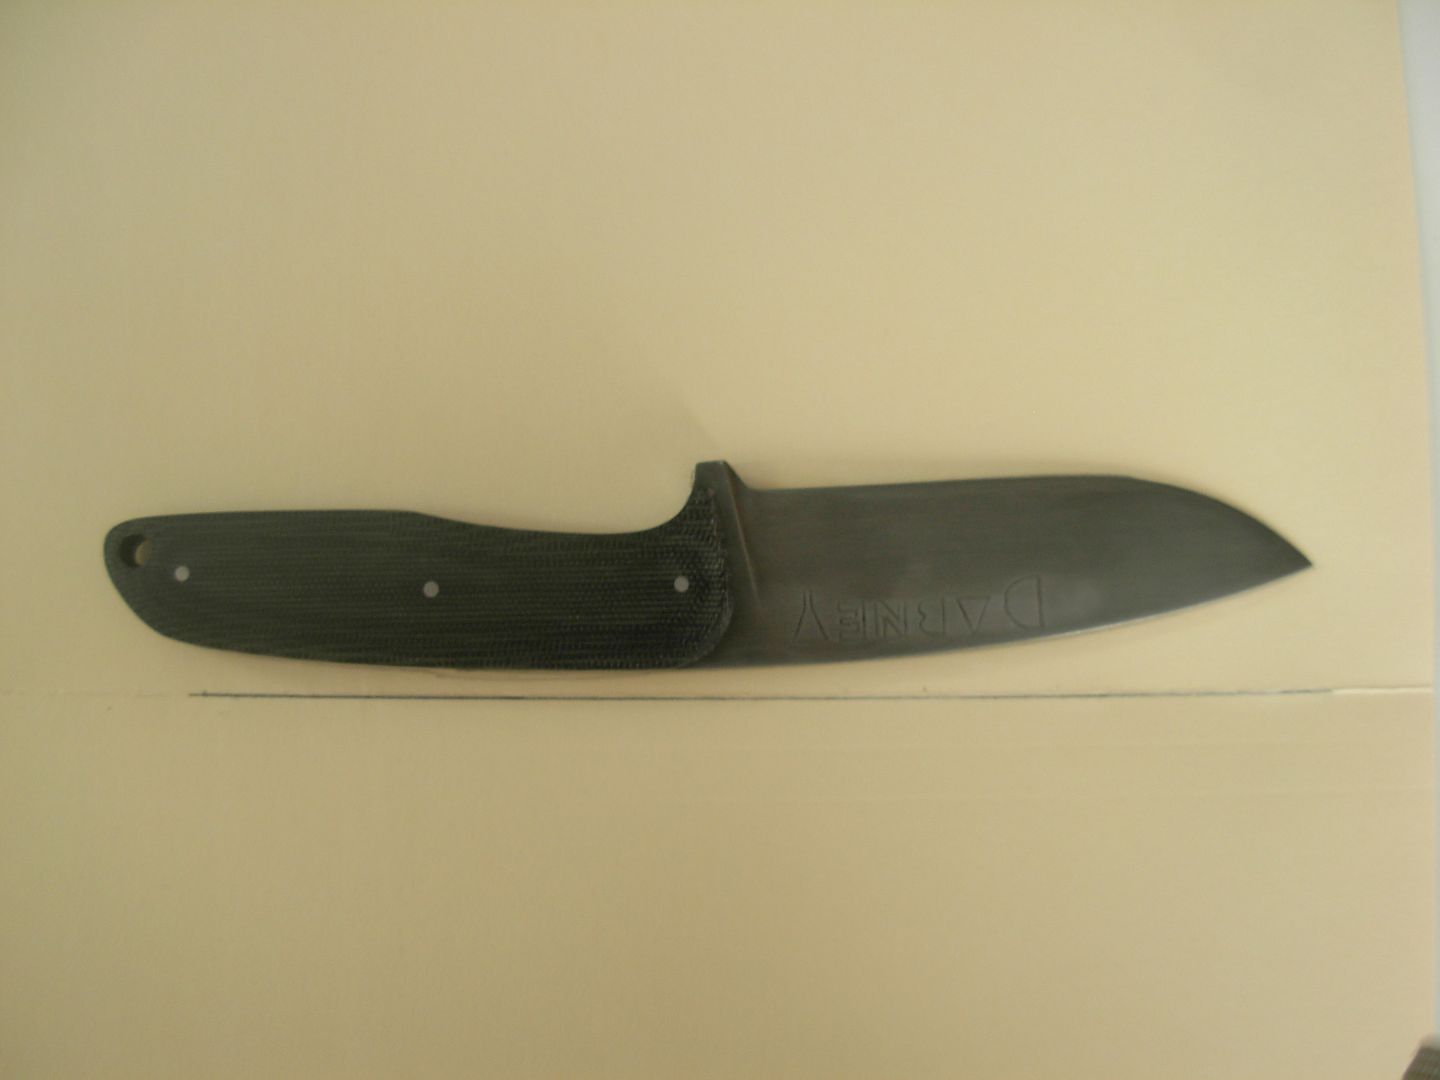
Now trace around the profile of the knife
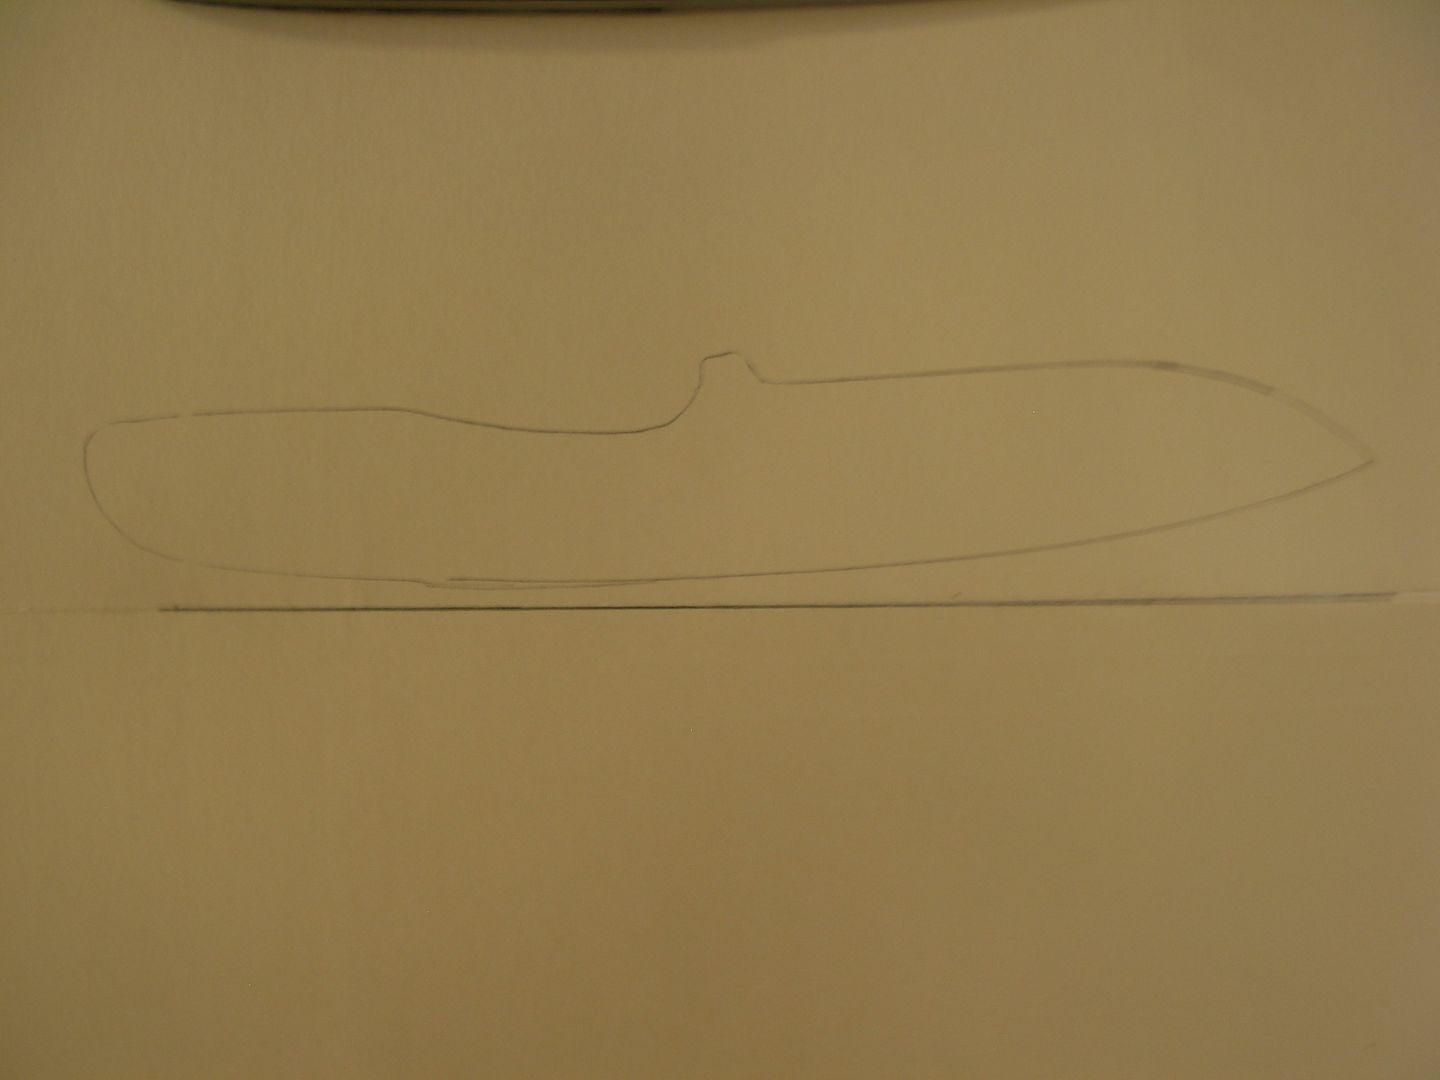
Now make a line parallel with the fold that is as wide as the wides part of the knife
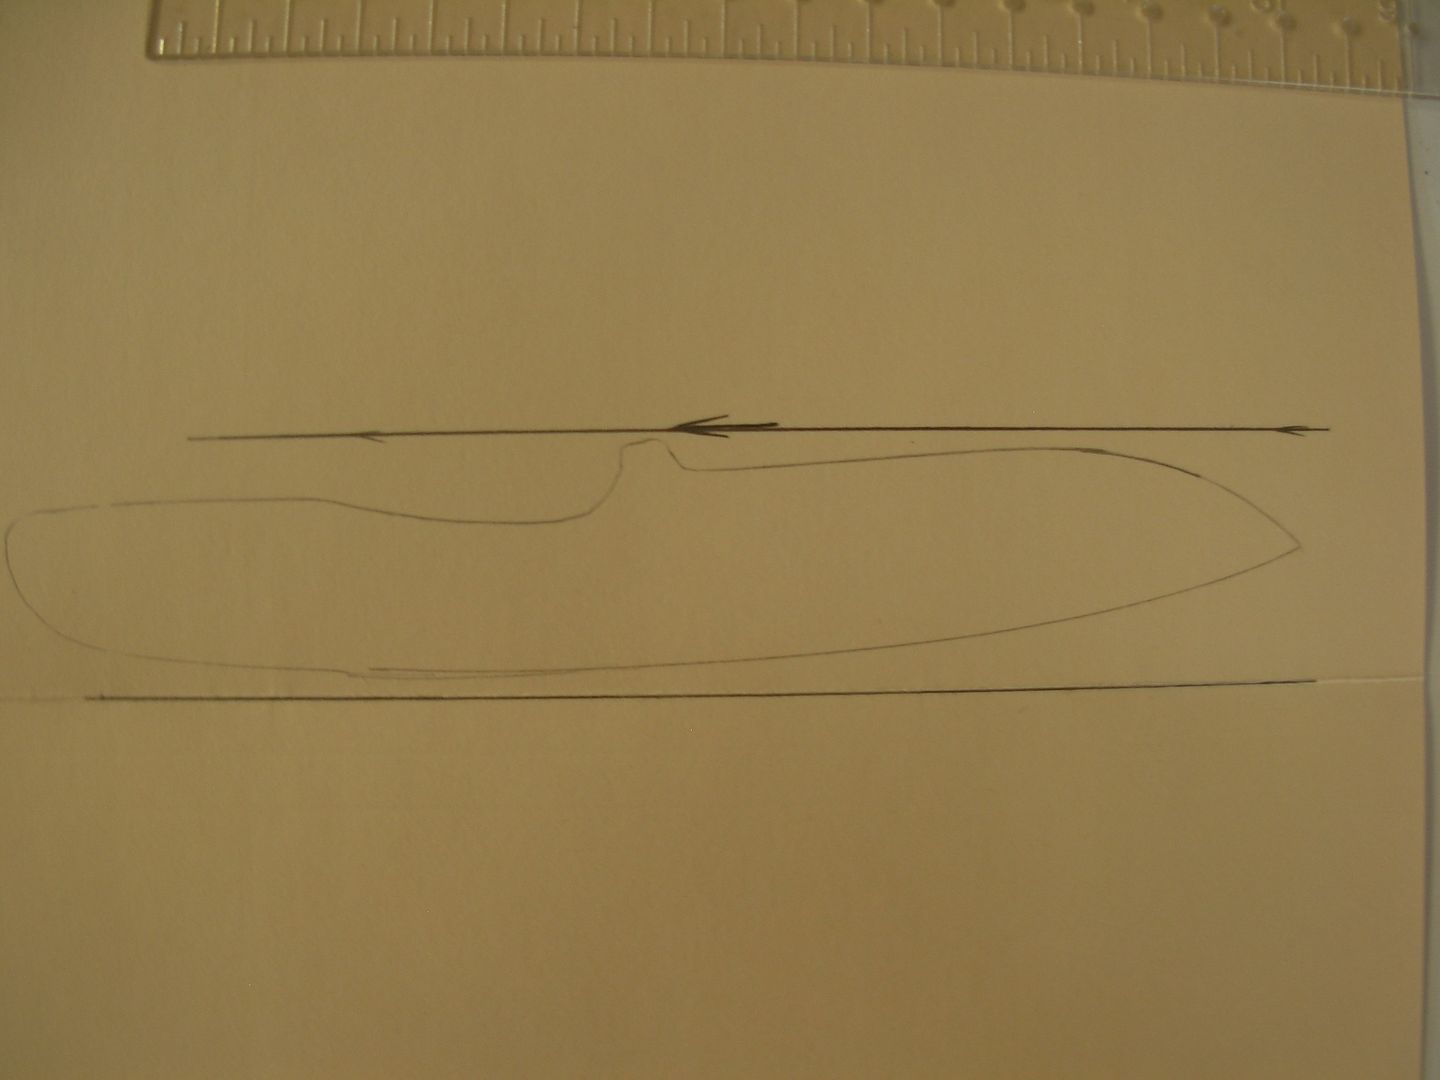
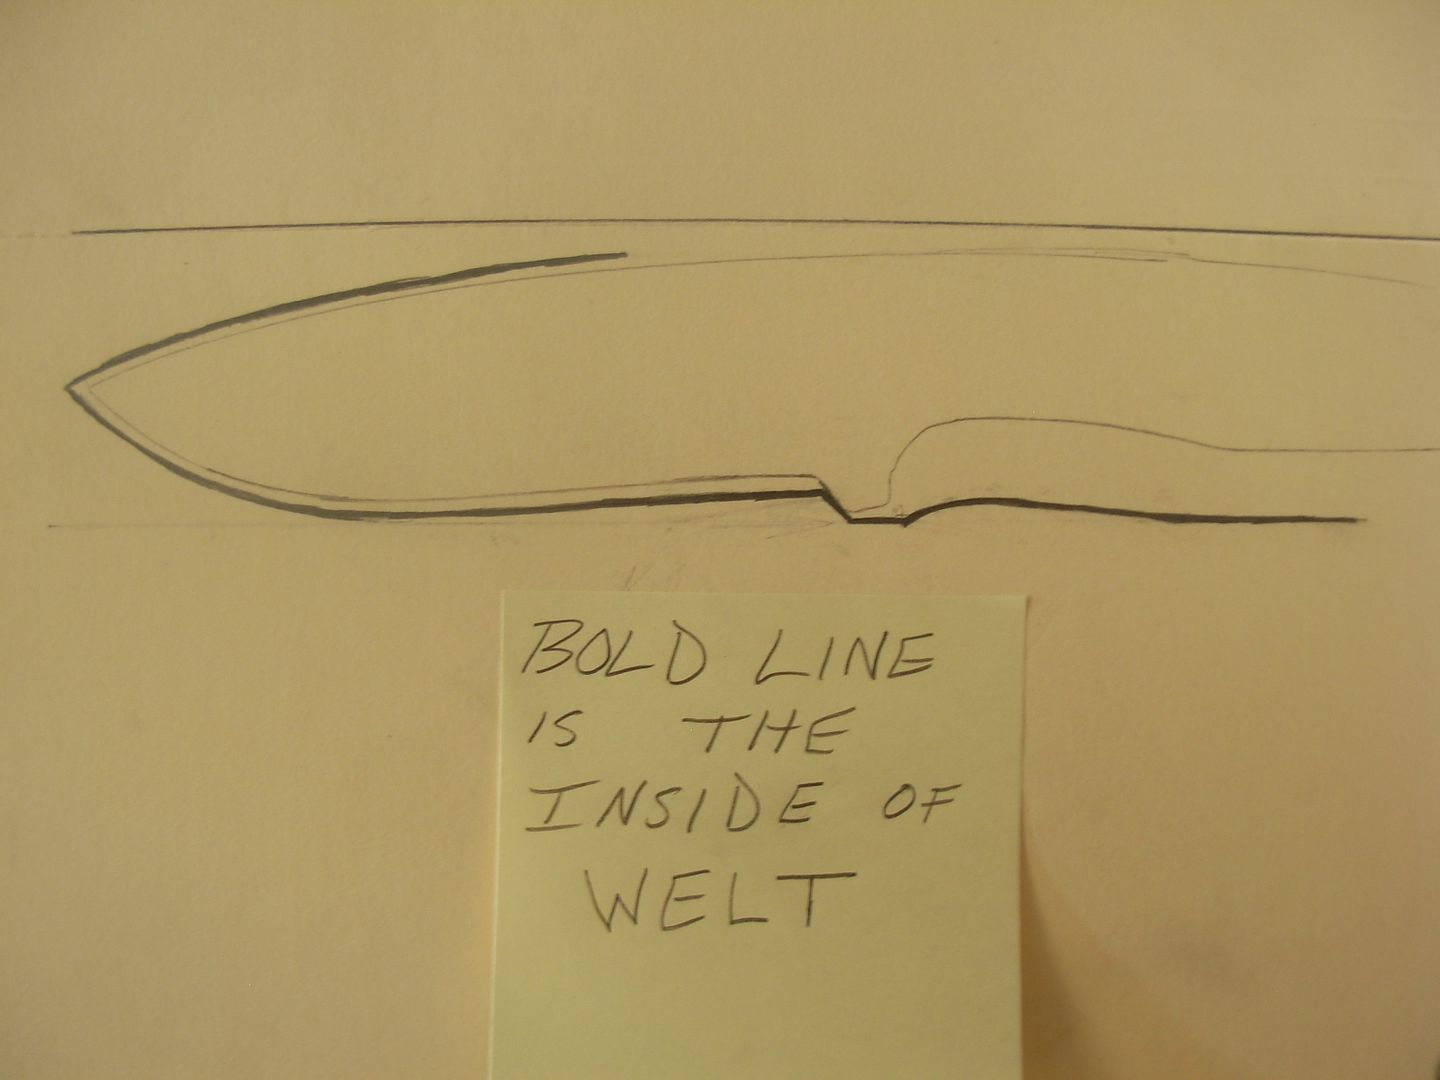
Now draw a line around the blade side leaving just a little space around the blade
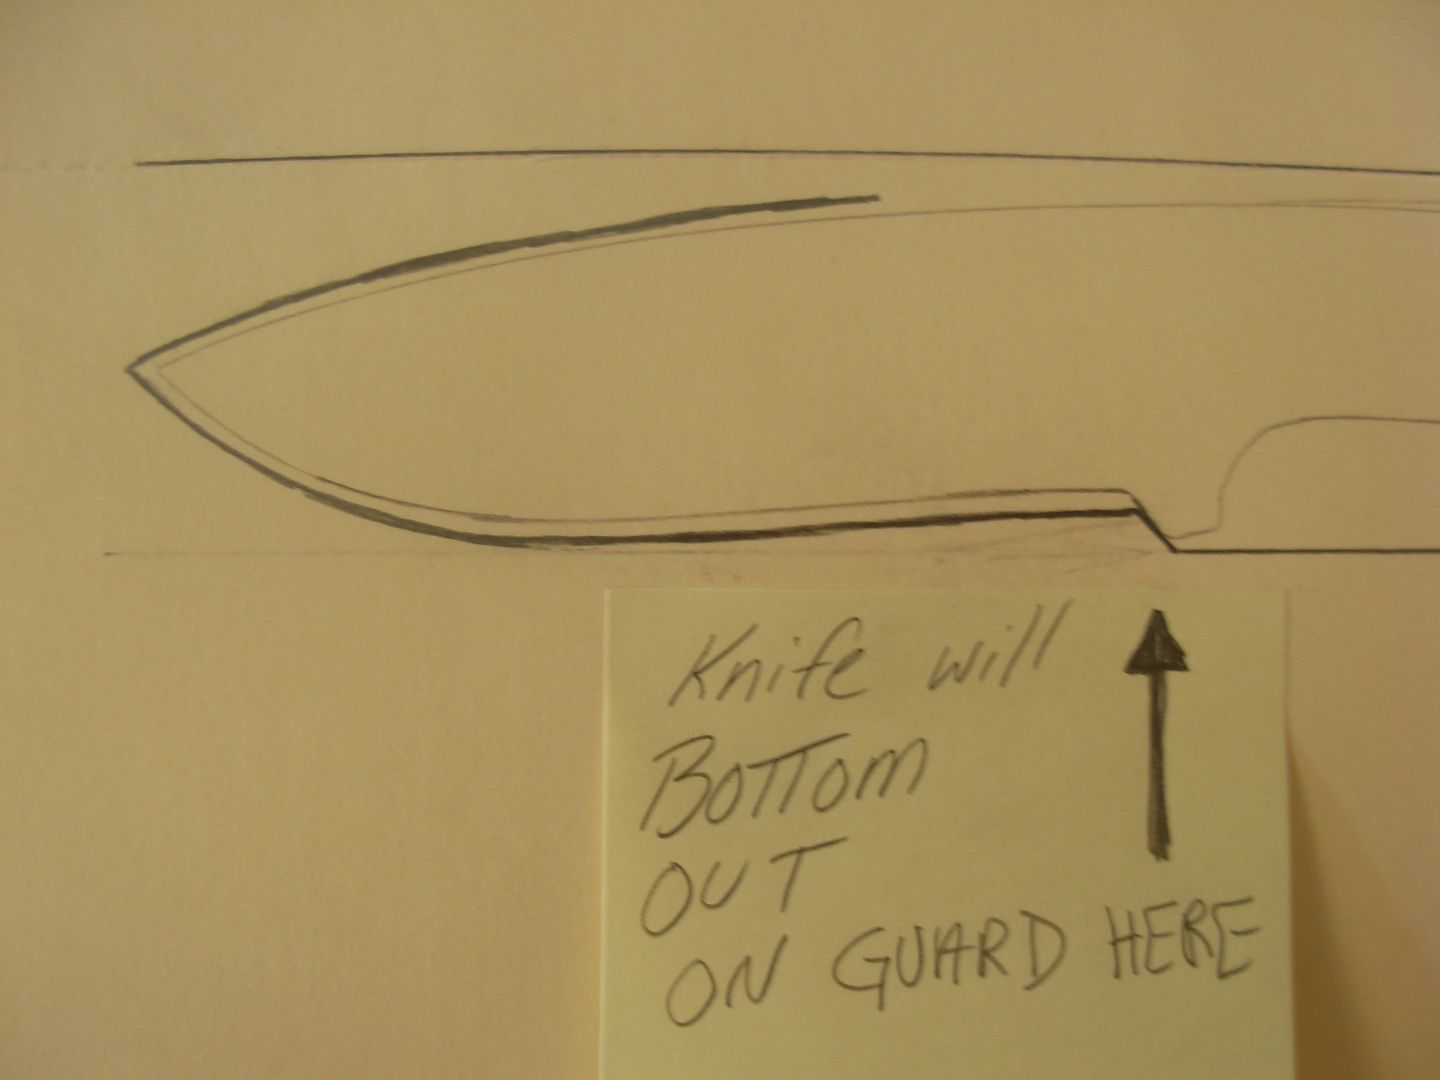
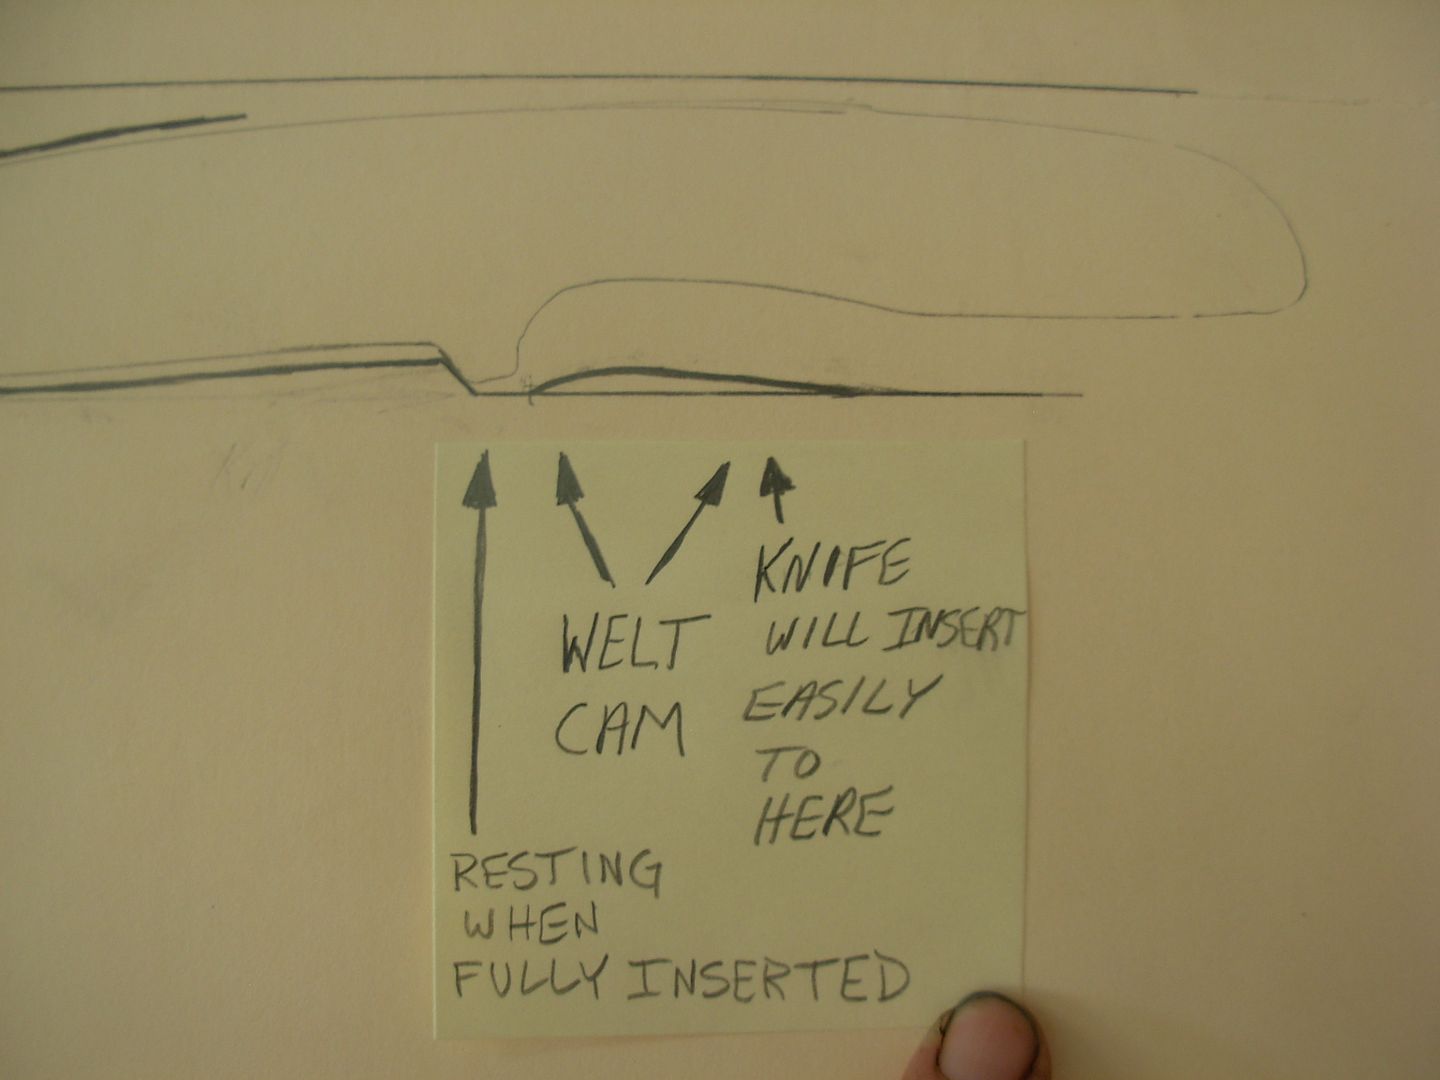
I like to use a cam on my welt whenever the knife design is appropriate. We'll need a good little push or pull to get the "guard" past the cam. The cam method is not a stand alone guarantee of good retension but it helps.
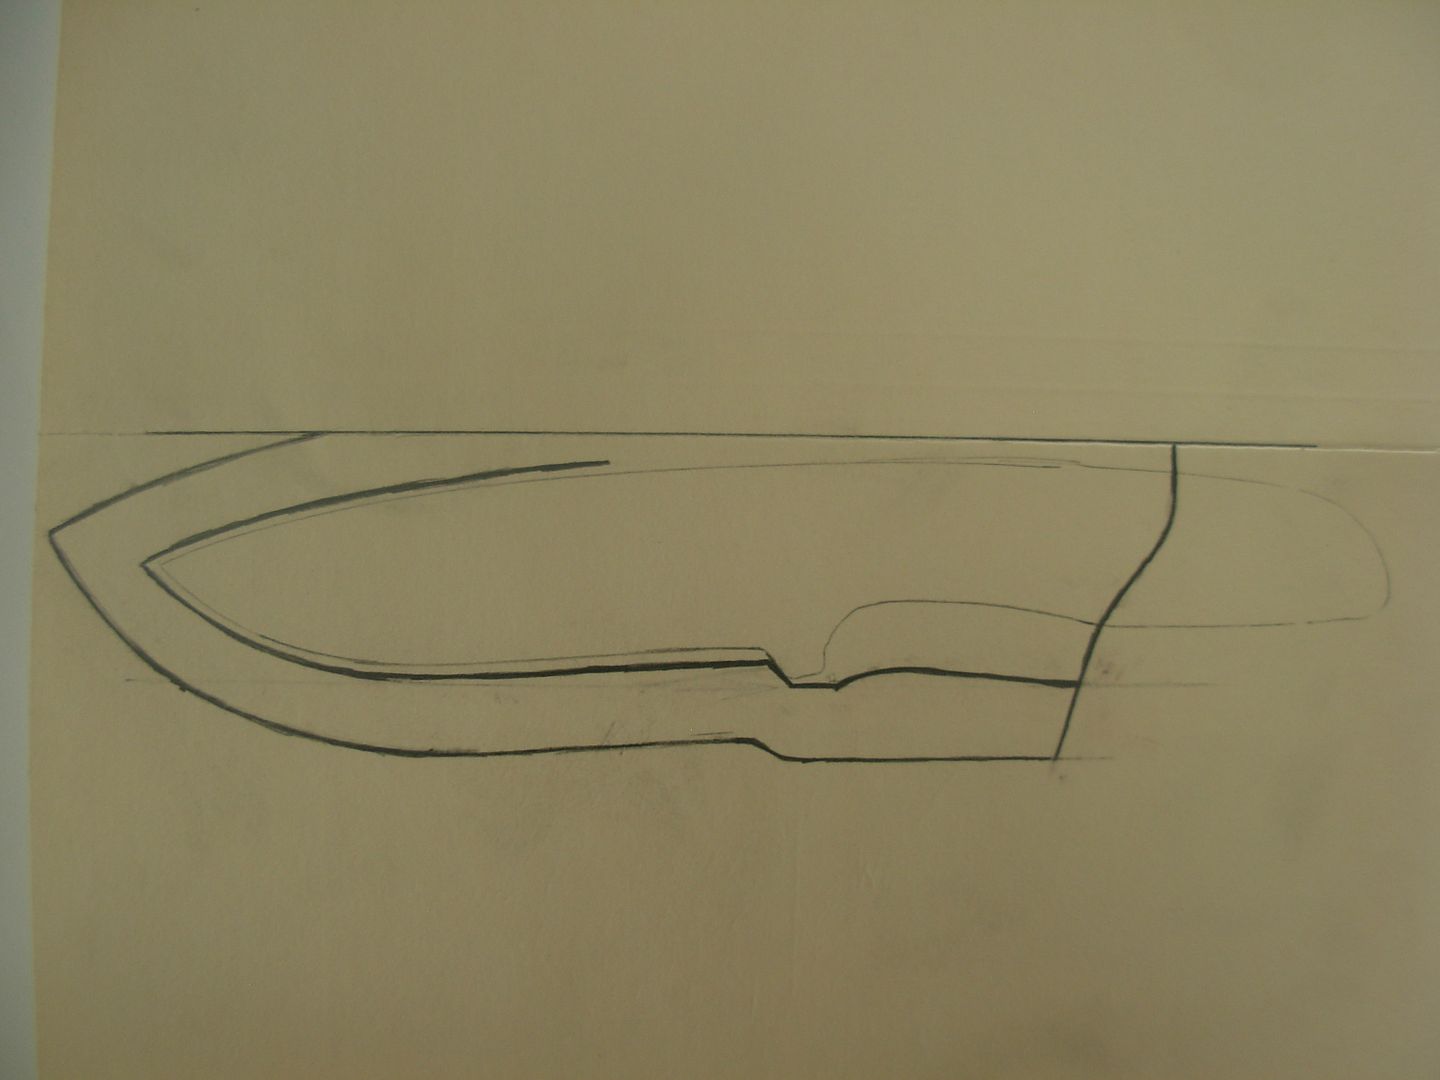
Now were done laying out the inside of our sheath. Should fit like a glove.
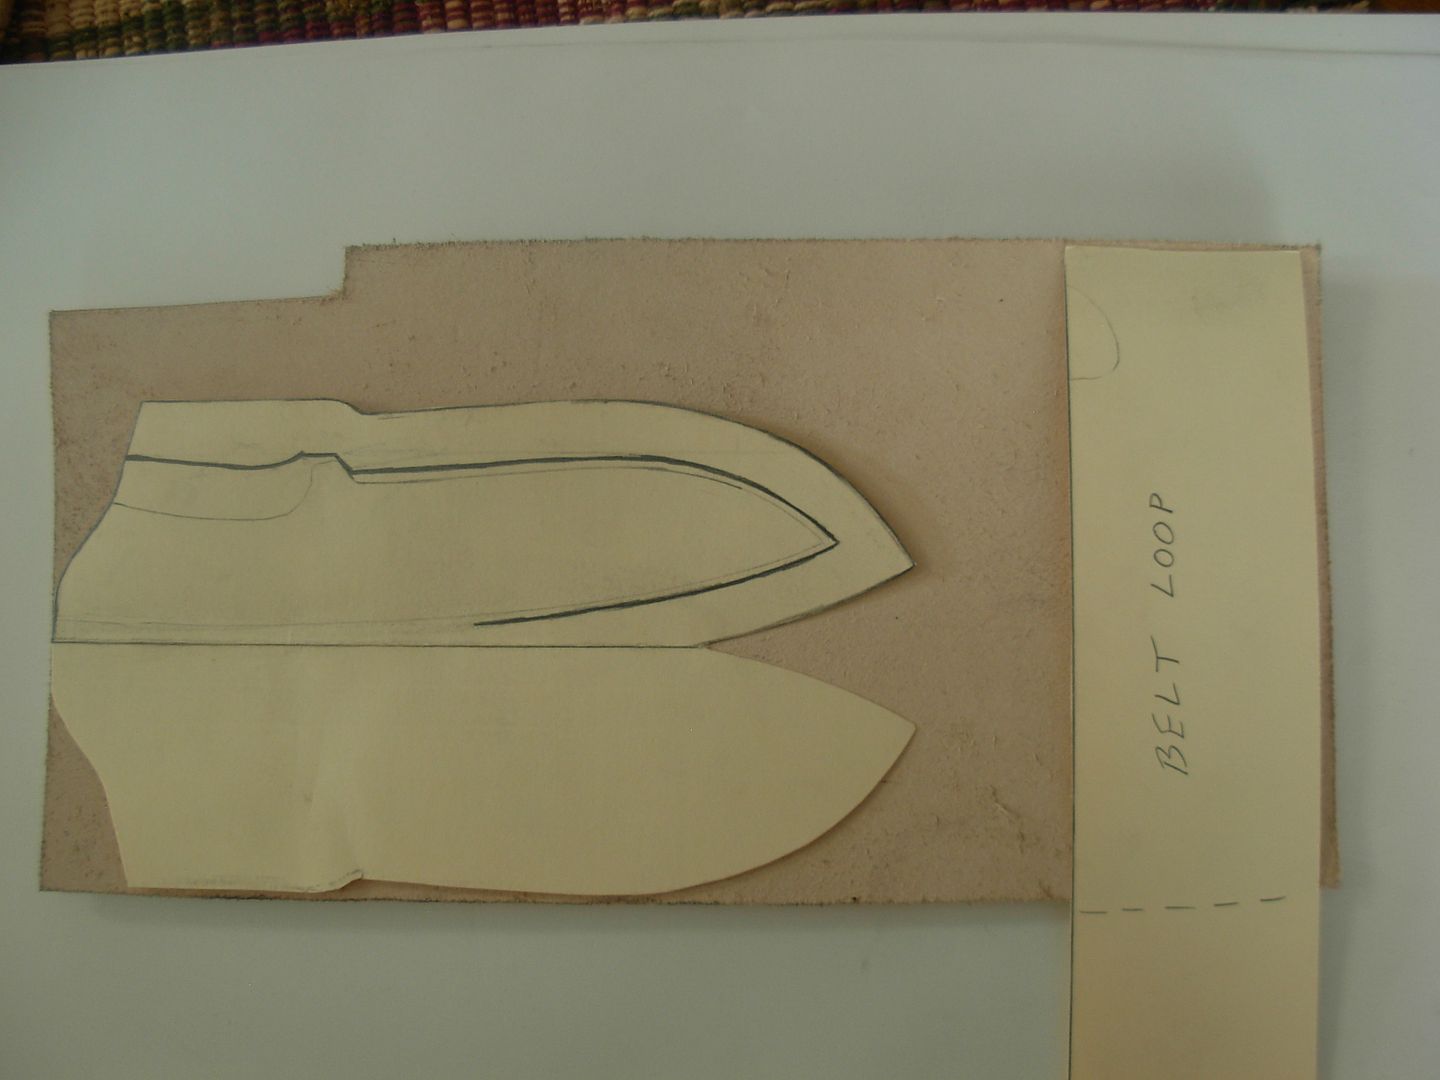
Now layout the outside of the sheath body making it 1/2" around the inside welt line

Now layout the top of the sheath body. A curved design here where the spine side is higher than the welt side is very funtional in use.
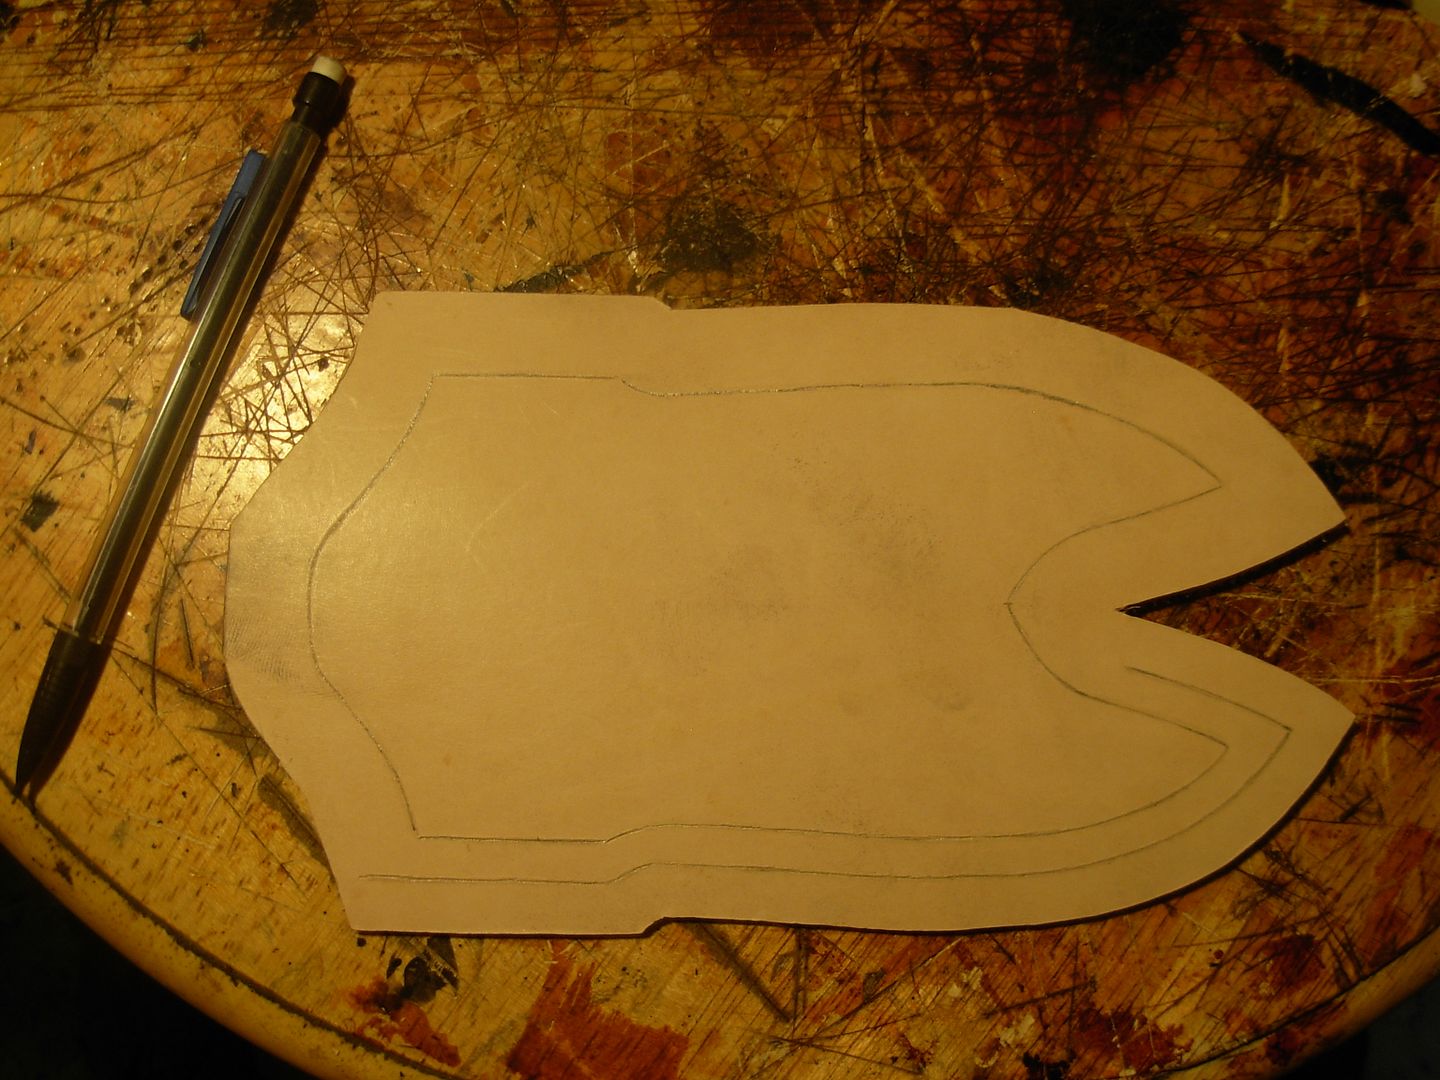
Now fold the folder back on itself and cut your pattern out
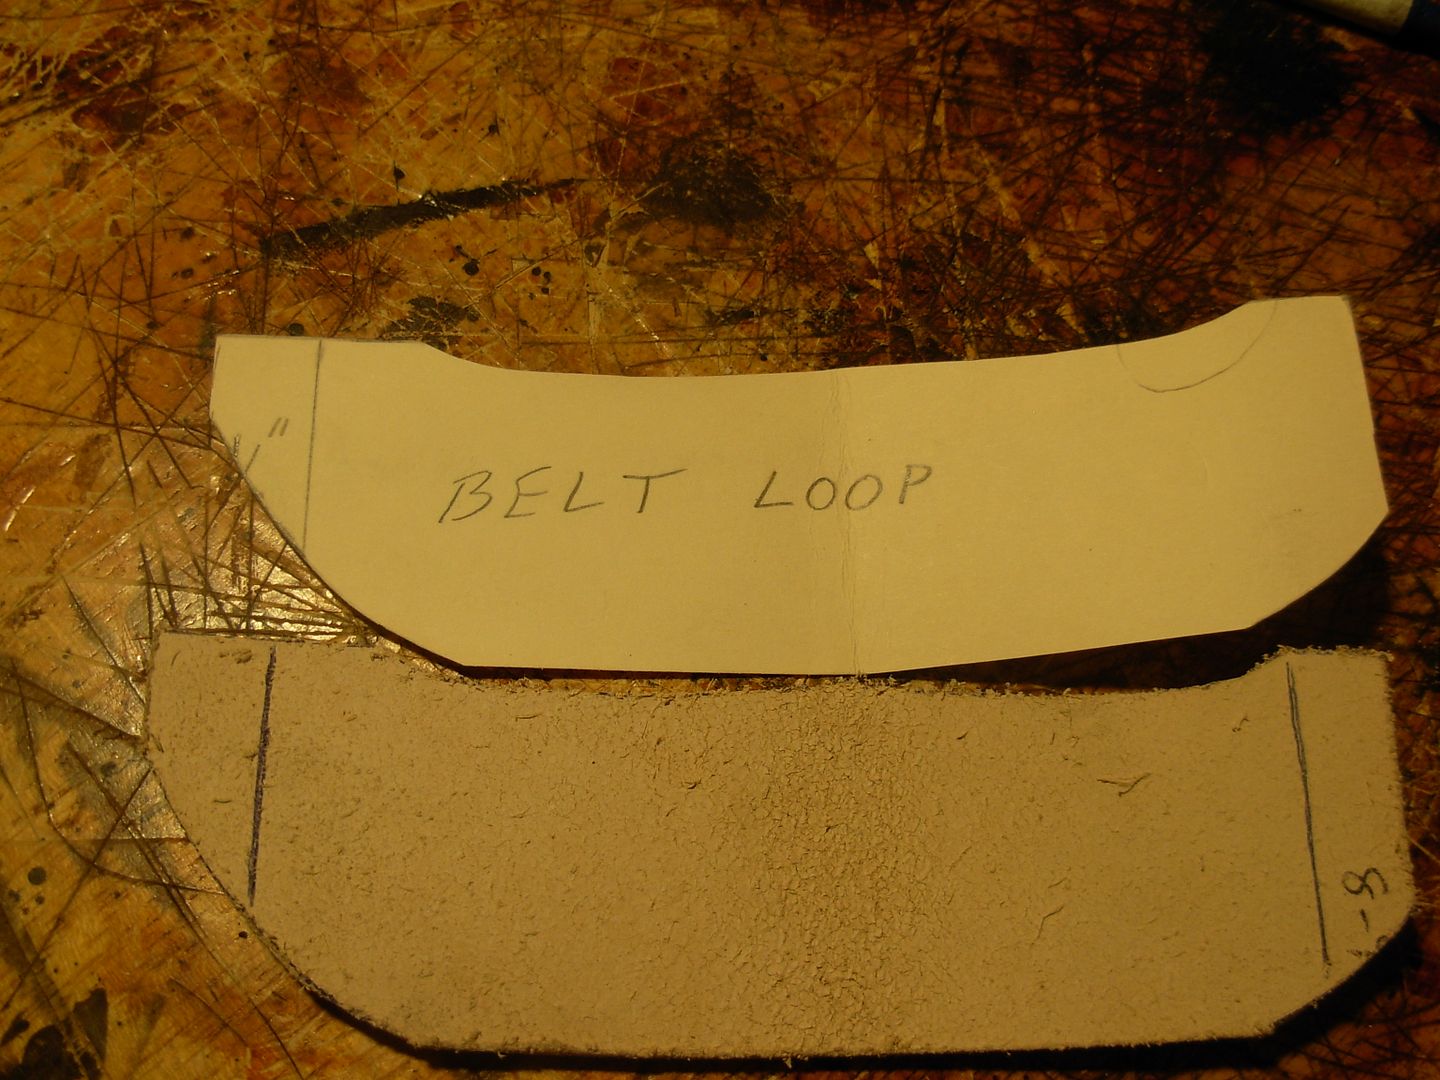
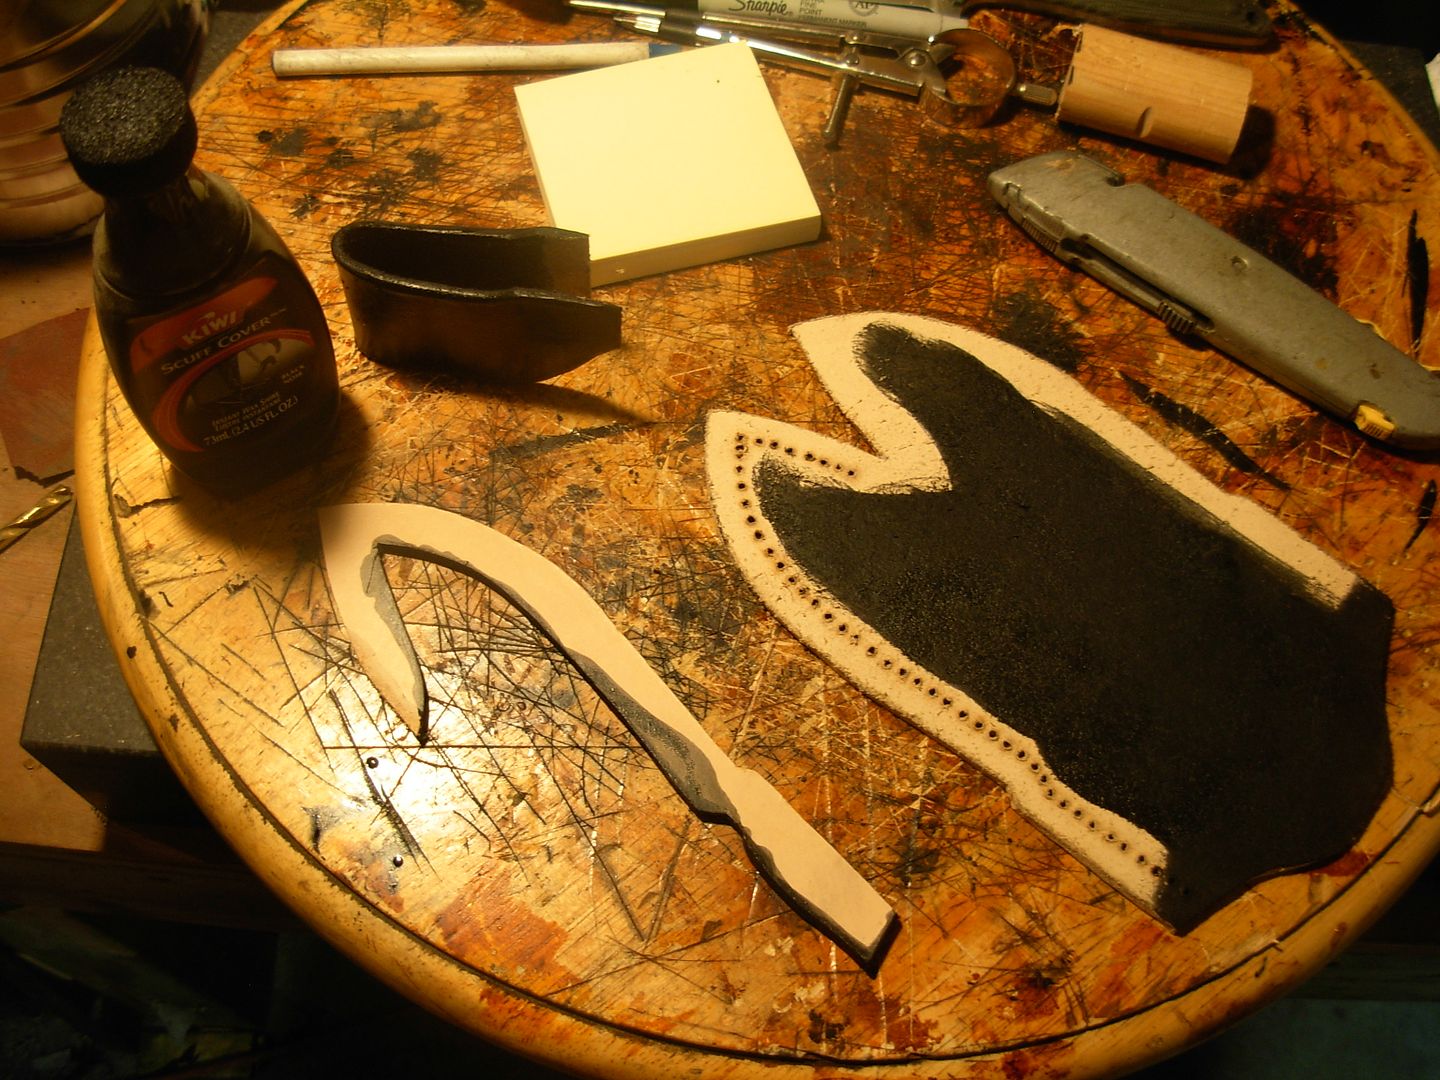
This is the pattern for our sheath body

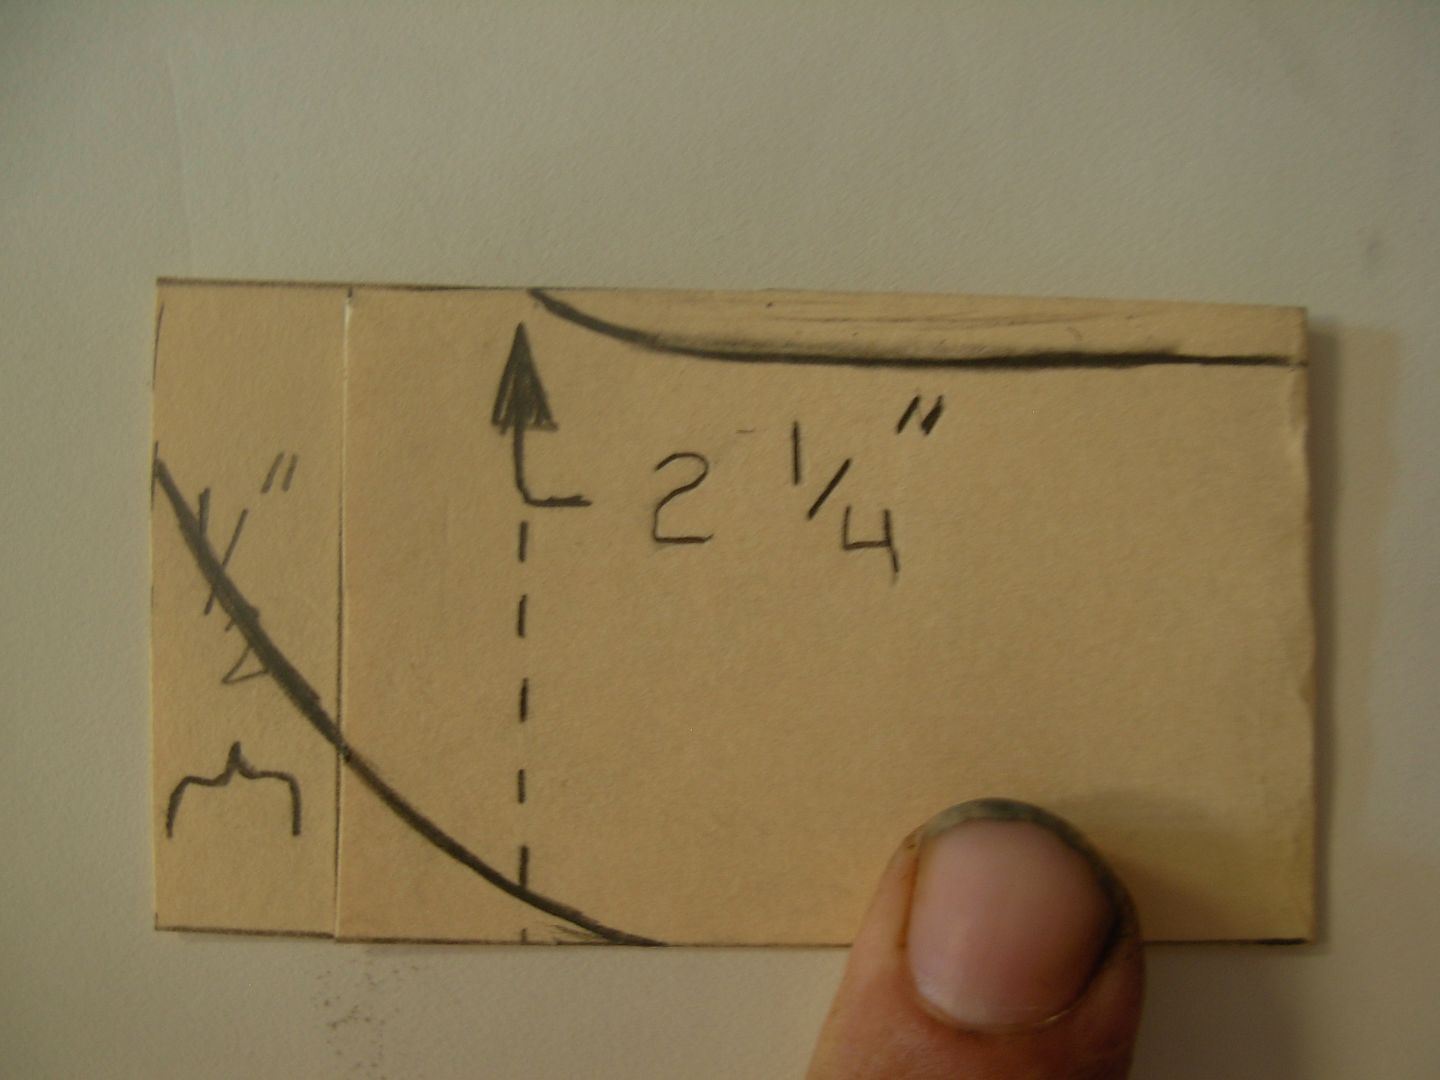
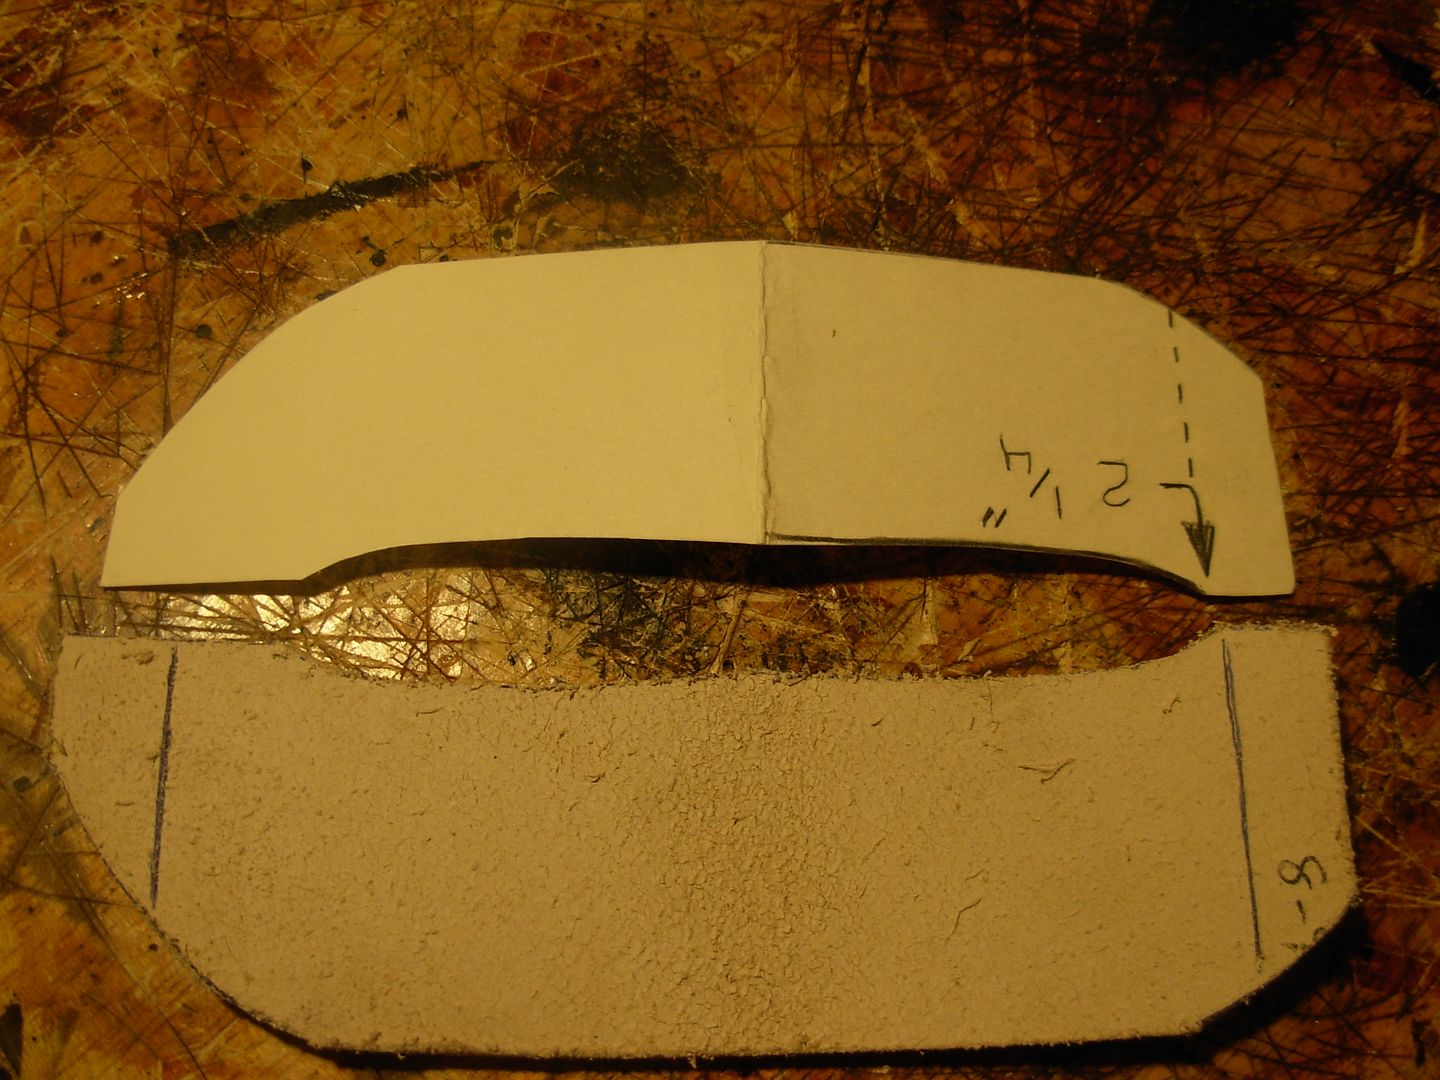
Here I've cut a strip of folder as wide as my sheath to make my pattern for my belt loop. Working with a limited amount of leather we need to layout our patterns right on the leather to determine how we're going to fit our pattern on the leather.
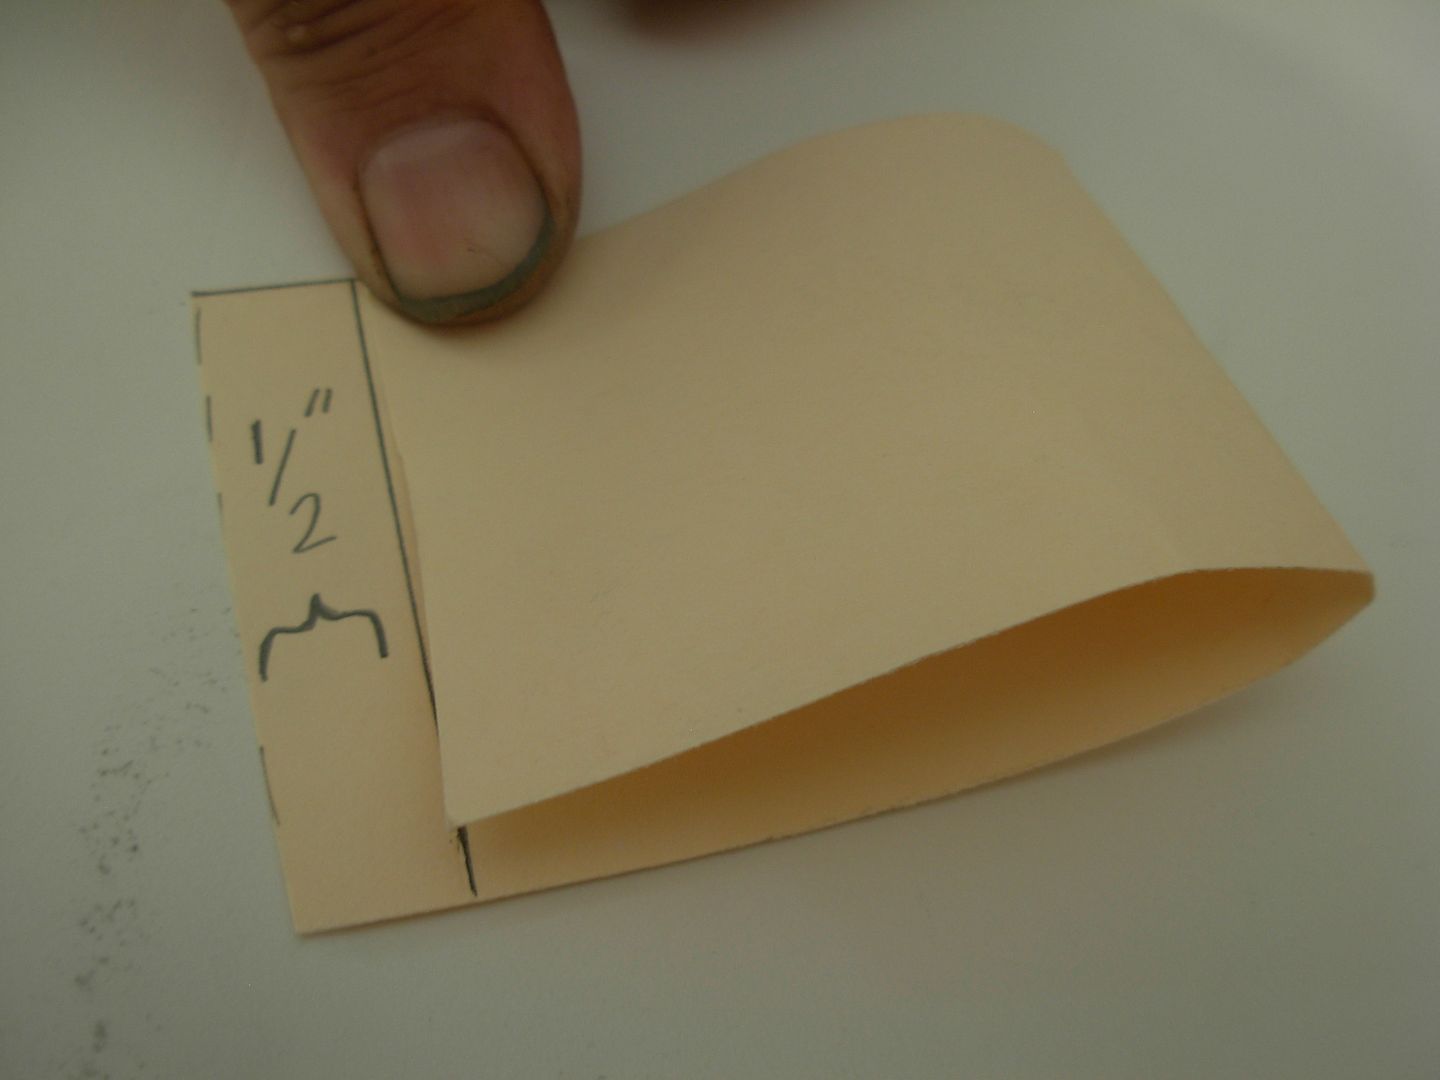
I cut that folder to the width of my leather. Now mar a line in 1/2" in from the edge and fold to that line
I don't want my loop to end up as wide as my finished sheath so I trimmed 1/2" off the length. Now measure back 2 1/4" from the fold and mark it
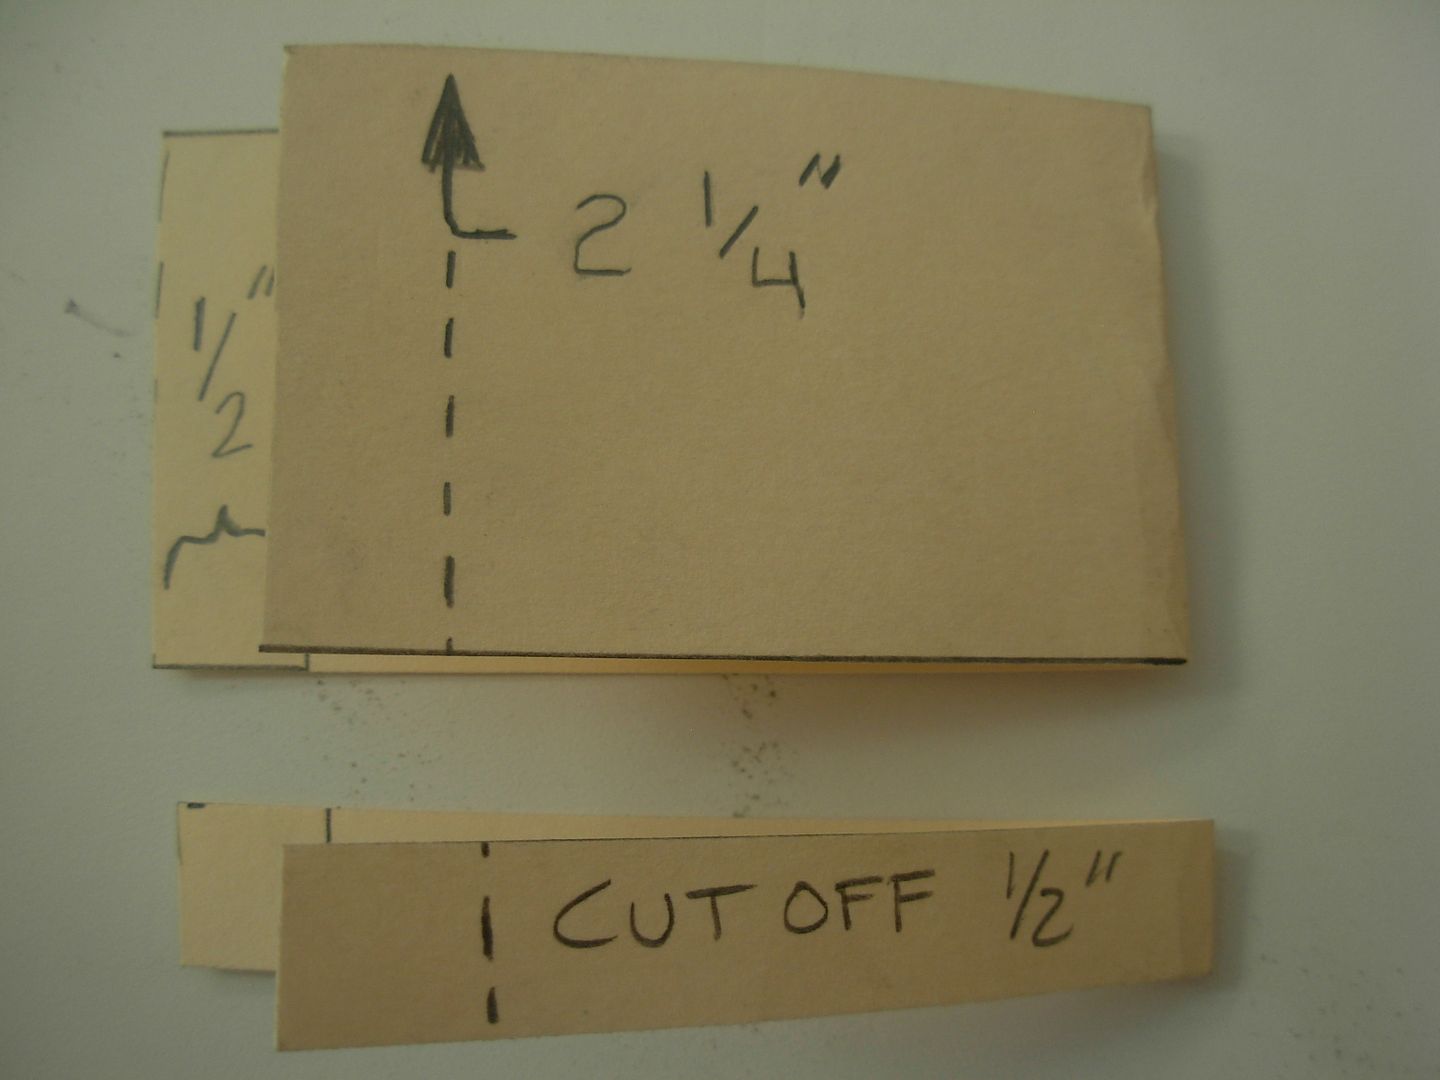
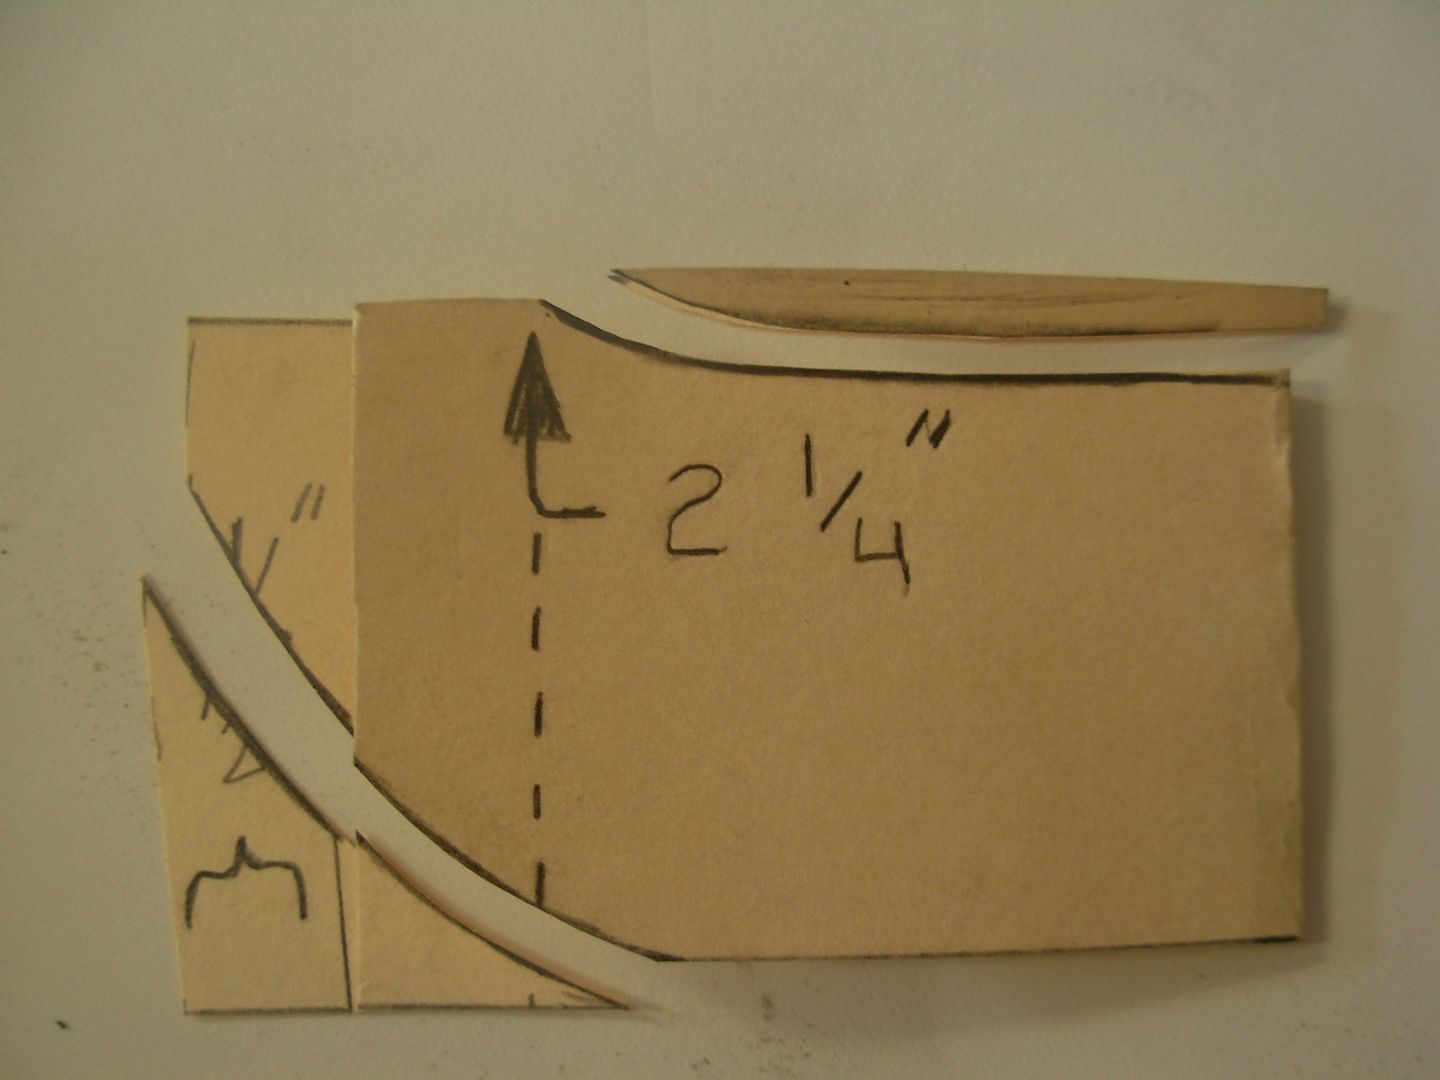
Just freehand draw in some lines to give the loop a smooth appearance
Trim those off
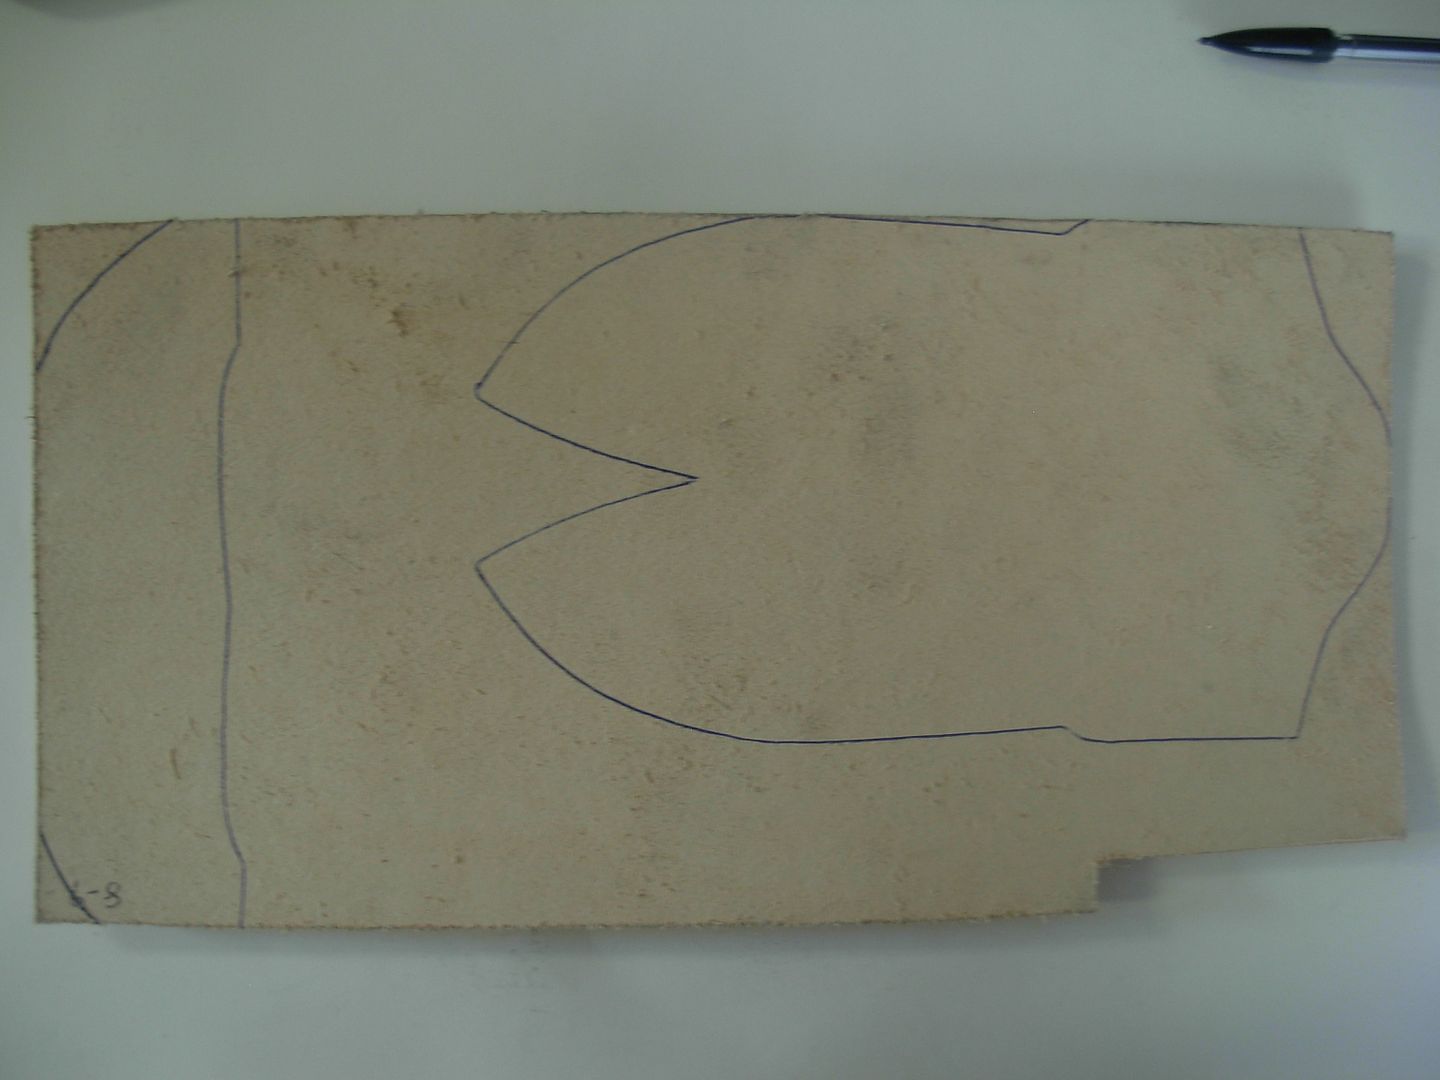
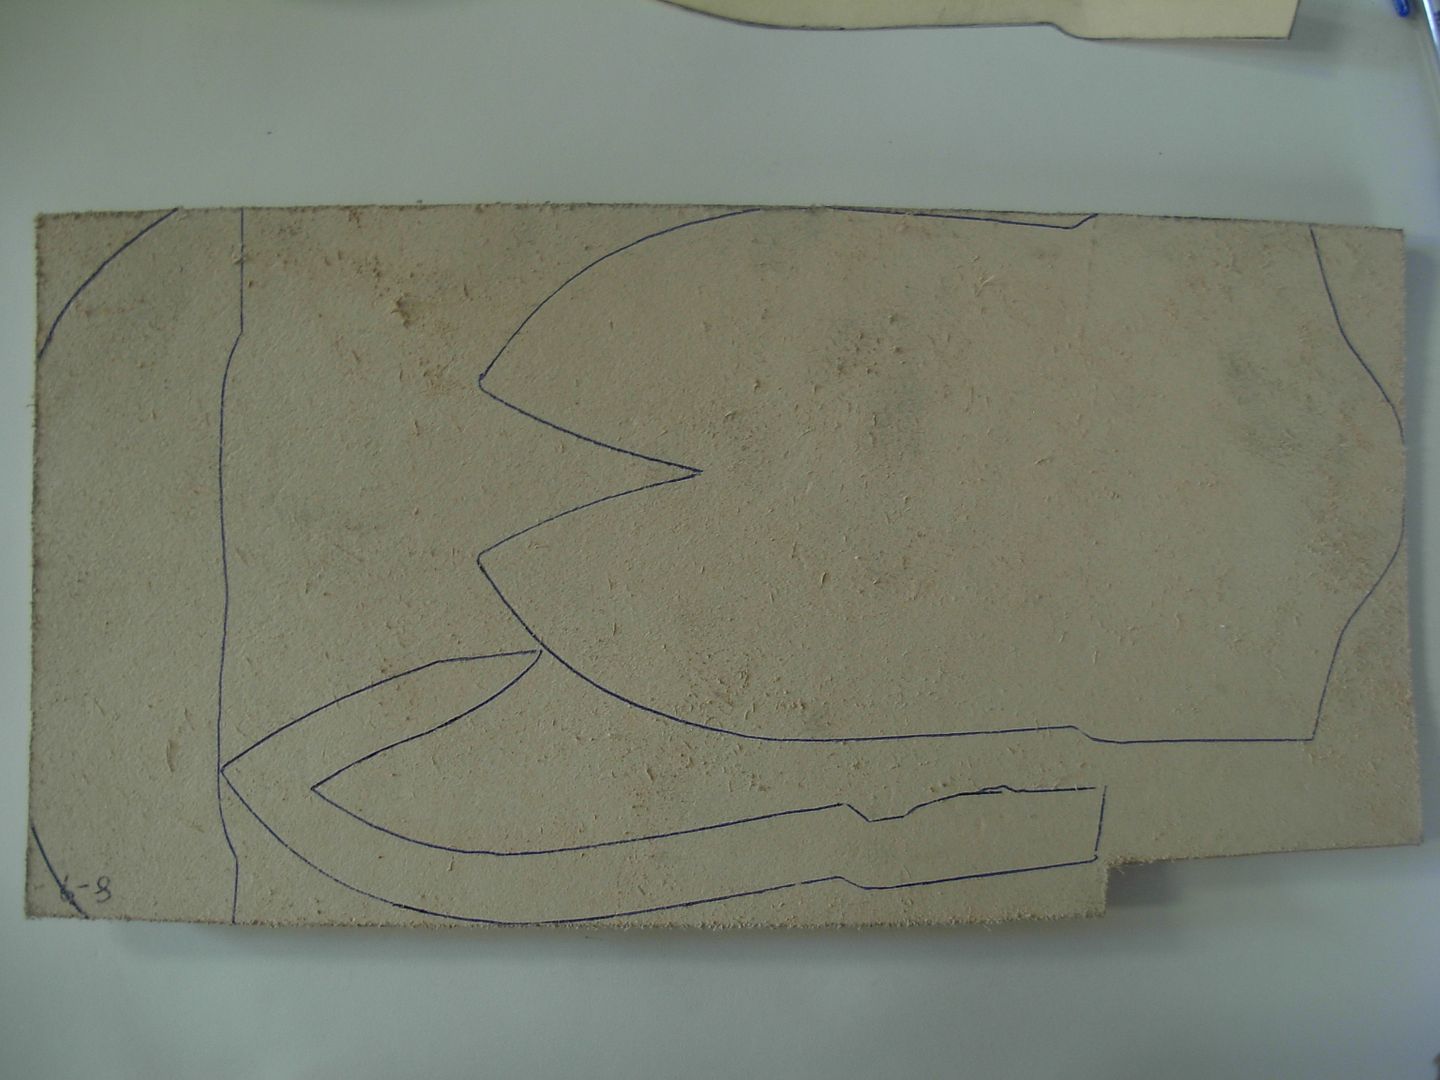
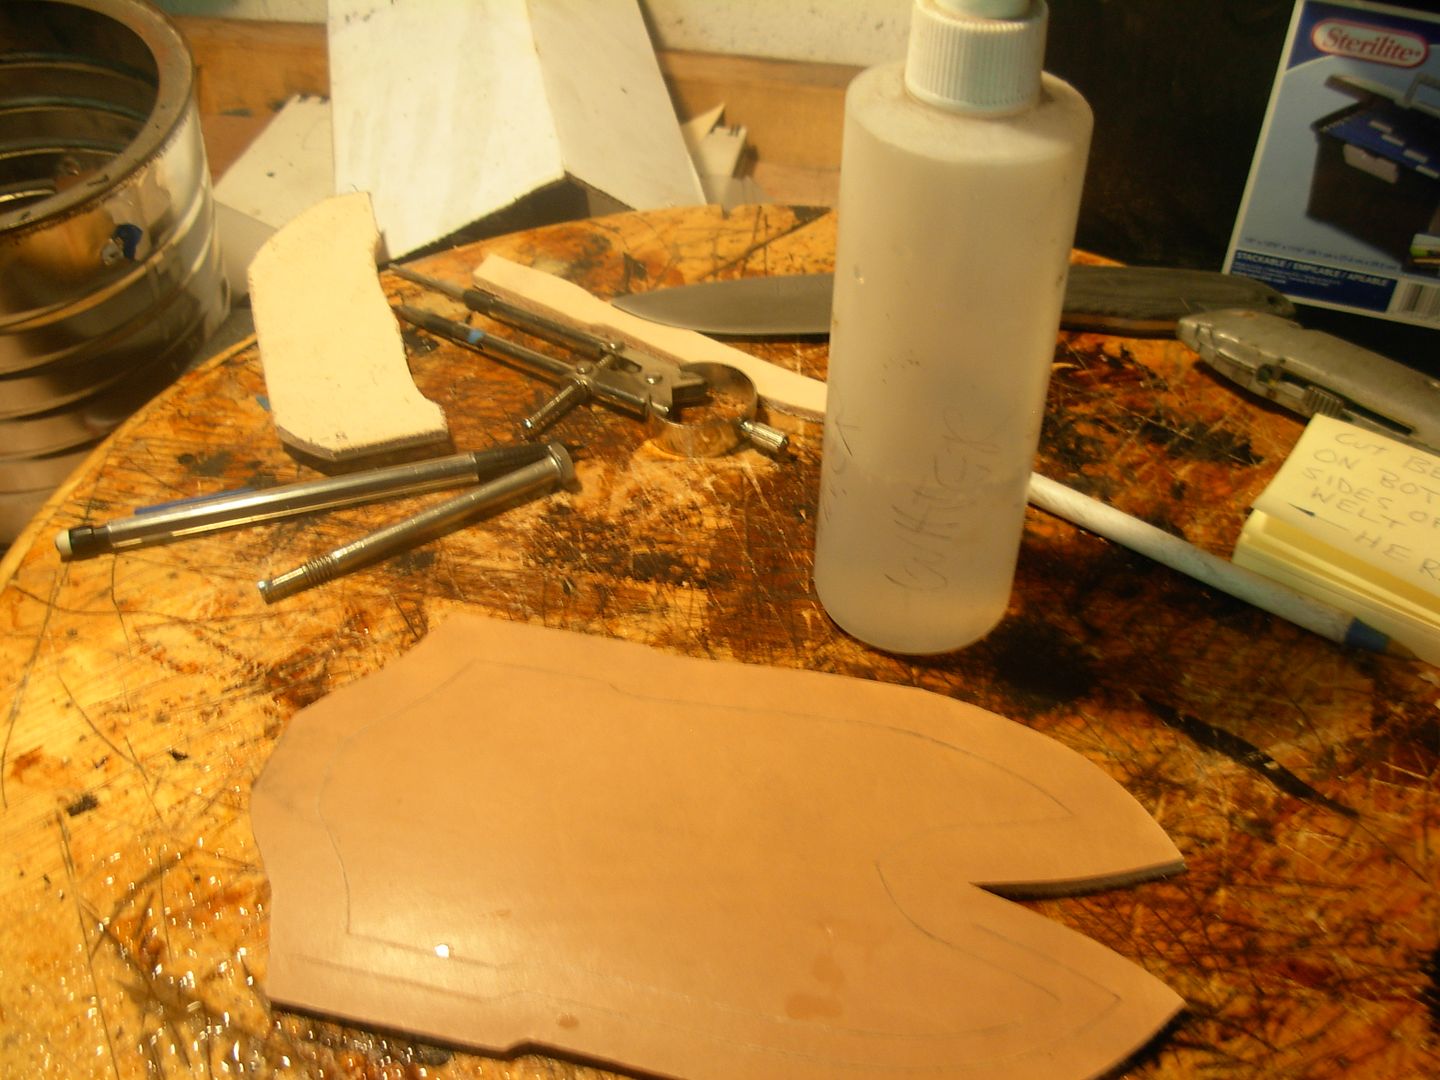
Lay the two patterns on the BACK SIDE of the leather and trace with a pen.
Now that we've traced our body pattern onto our leather cut the welt pattern right from the body pattern and lay it out on the leather. I always make my welt from a single piece of leather but it can be done in two. Here you see the tip is overlapping my body pattern so I need to adjust that with a little trim
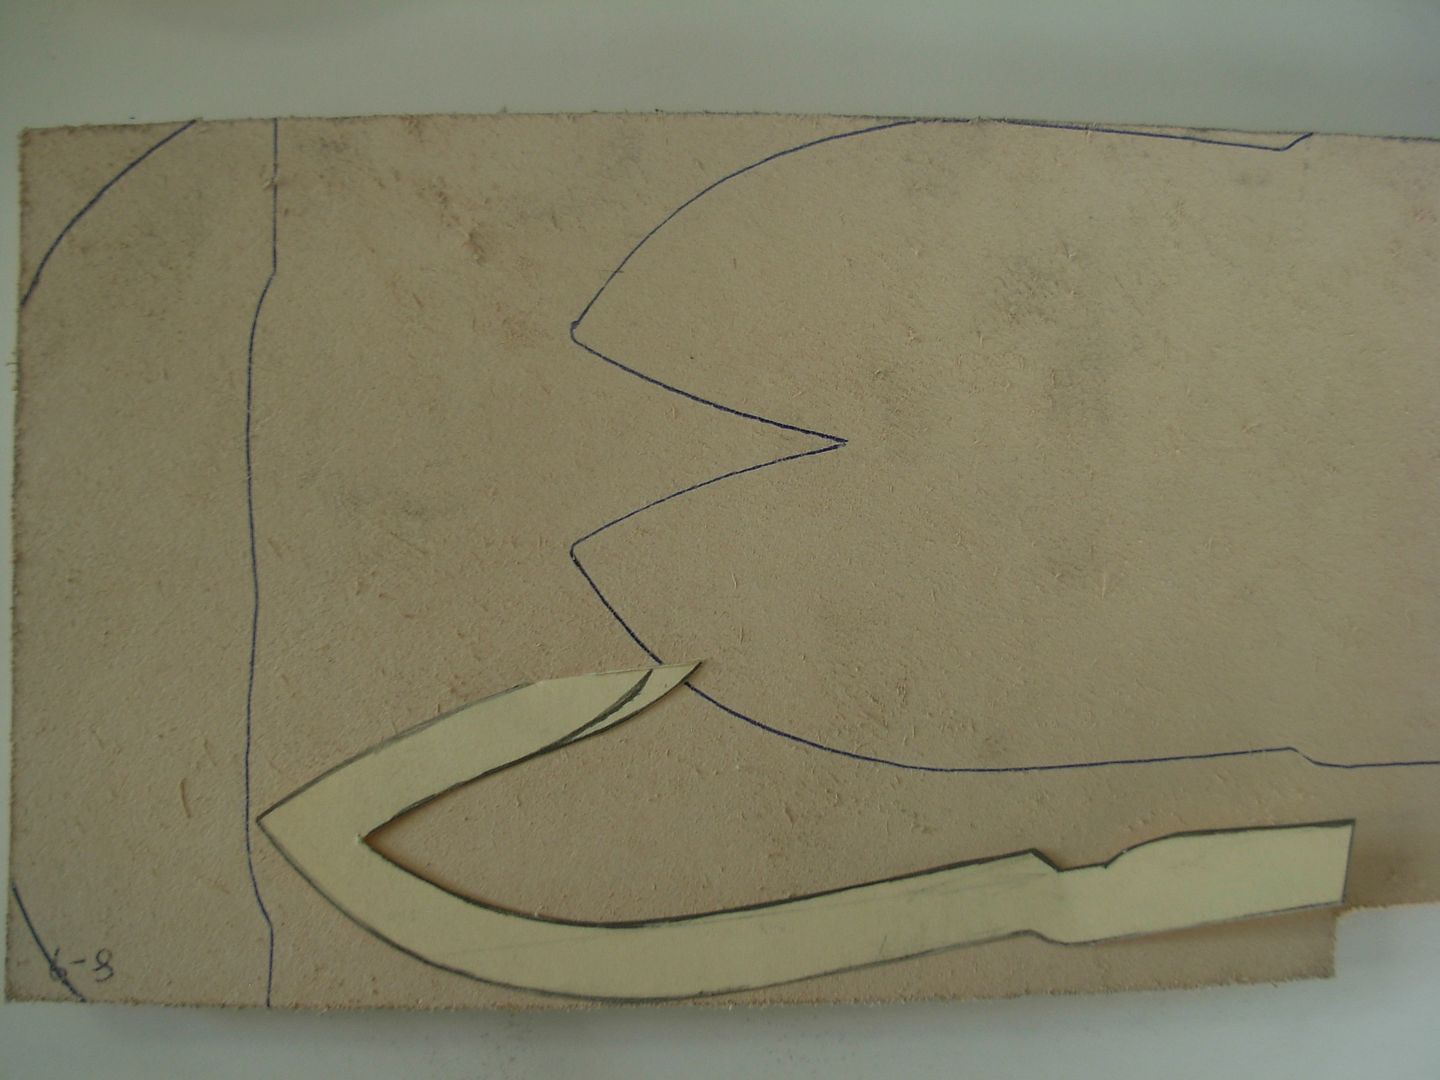
These pieces are my sheath and out patterning is done.
-Josh
1. The main purpose of a sheath is to protect the wearer from being cut. We want a nice sturdy sheath that'll remain safe in any situation like a trip and fall or a roll down a hill or whatever comes their way.
2. To protect our knife from being accidentally lost. We didn't do all this work to get home from a trip and find our sheath empty :what!:
An experienced leather worker can make a pattern for sheath in two shakes of a doggie's tail. Were going to need to take our time and put a bit more effort into our pattern if we're going to meet our goals for our sheath. The quality of our pattern is going to determine the outcome for our sheath so take your time.
There's about a million and one ways to make a sheath. What I'm going to make here is a Butterfly Sheath which is a pouch style sheath. Pouch style sheaths mainly rely on their depth for retension and have no snaps, studs, straps, keepers, or flaps.
I use Manila File Folders for patterning. They're cheap and work great.
Start by centering the spine of your knife on the fold
Now roll your knife down around the handle material until it's flat on it's side.
Now trace around the profile of the knife
Now make a line parallel with the fold that is as wide as the wides part of the knife
Now draw a line around the blade side leaving just a little space around the blade
I like to use a cam on my welt whenever the knife design is appropriate. We'll need a good little push or pull to get the "guard" past the cam. The cam method is not a stand alone guarantee of good retension but it helps.
Now were done laying out the inside of our sheath. Should fit like a glove.
Now layout the outside of the sheath body making it 1/2" around the inside welt line
Now layout the top of the sheath body. A curved design here where the spine side is higher than the welt side is very funtional in use.
Now fold the folder back on itself and cut your pattern out
This is the pattern for our sheath body
Here I've cut a strip of folder as wide as my sheath to make my pattern for my belt loop. Working with a limited amount of leather we need to layout our patterns right on the leather to determine how we're going to fit our pattern on the leather.
I cut that folder to the width of my leather. Now mar a line in 1/2" in from the edge and fold to that line
I don't want my loop to end up as wide as my finished sheath so I trimmed 1/2" off the length. Now measure back 2 1/4" from the fold and mark it
Just freehand draw in some lines to give the loop a smooth appearance
Trim those off
Lay the two patterns on the BACK SIDE of the leather and trace with a pen.
Now that we've traced our body pattern onto our leather cut the welt pattern right from the body pattern and lay it out on the leather. I always make my welt from a single piece of leather but it can be done in two. Here you see the tip is overlapping my body pattern so I need to adjust that with a little trim
These pieces are my sheath and out patterning is done.
-Josh
Josh Dabney
Moderator
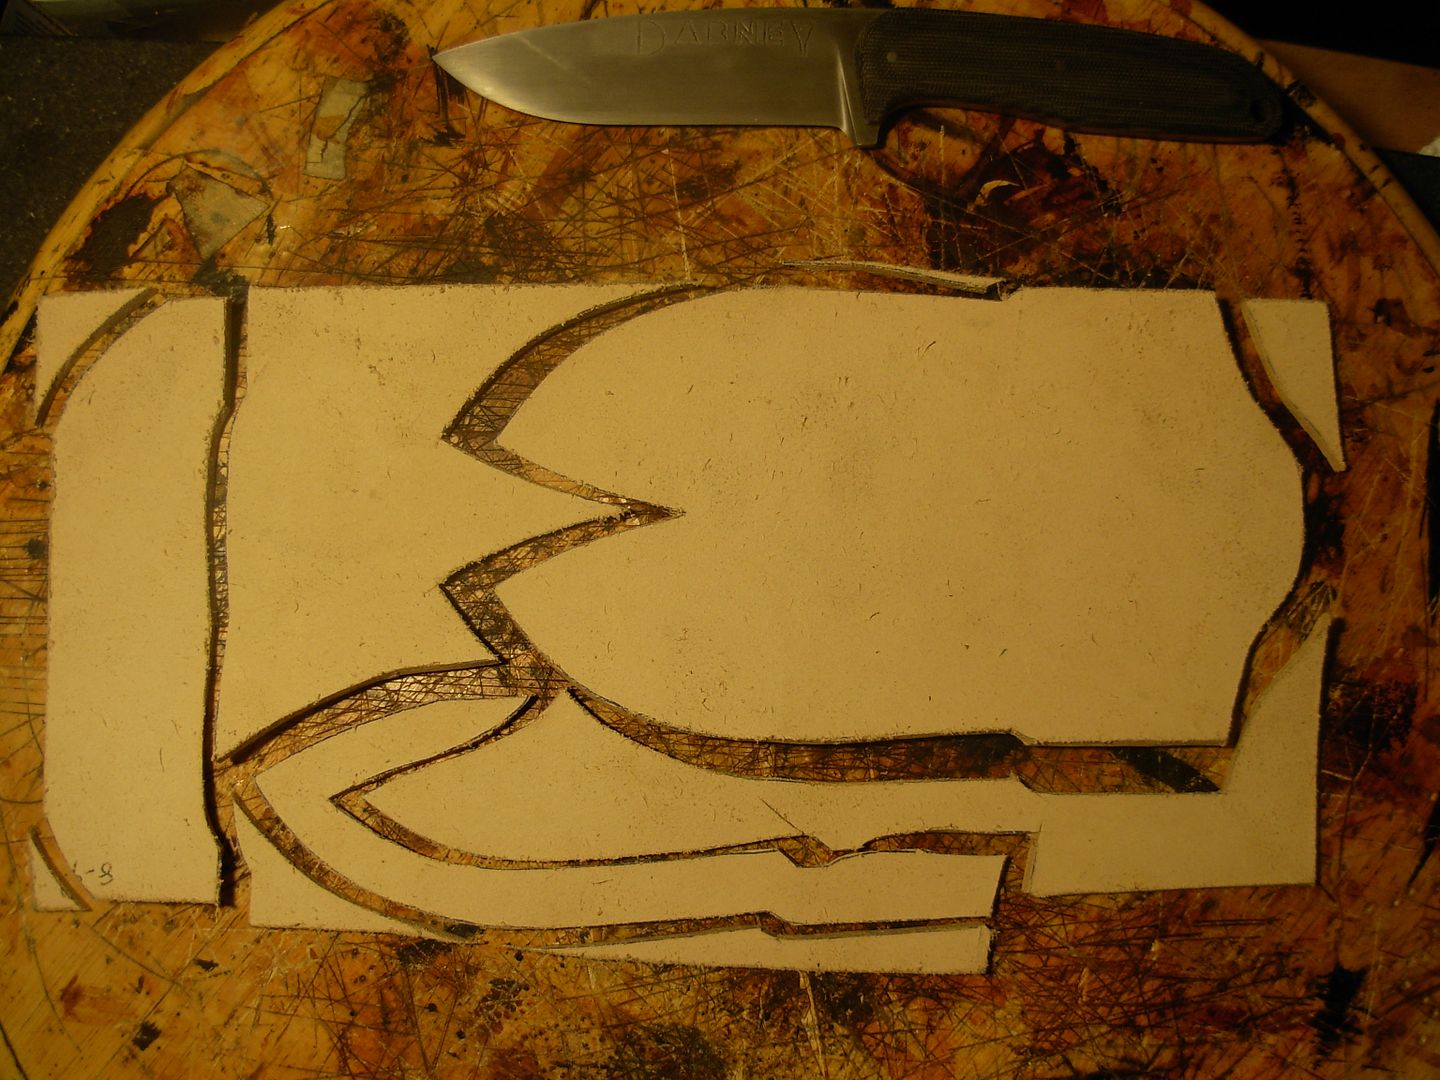
Use a run of the mill utility knife and a brand new blade and you'll be able to cut out your parts EXTREMELY close to exact. Take care to do a good job as a slip could ruin a piece or result in a nasty cut. This isn't difficult but a good job here is going to make glue-up a snap and ensure Our sheath fit's our knife correctly based on our patterns.
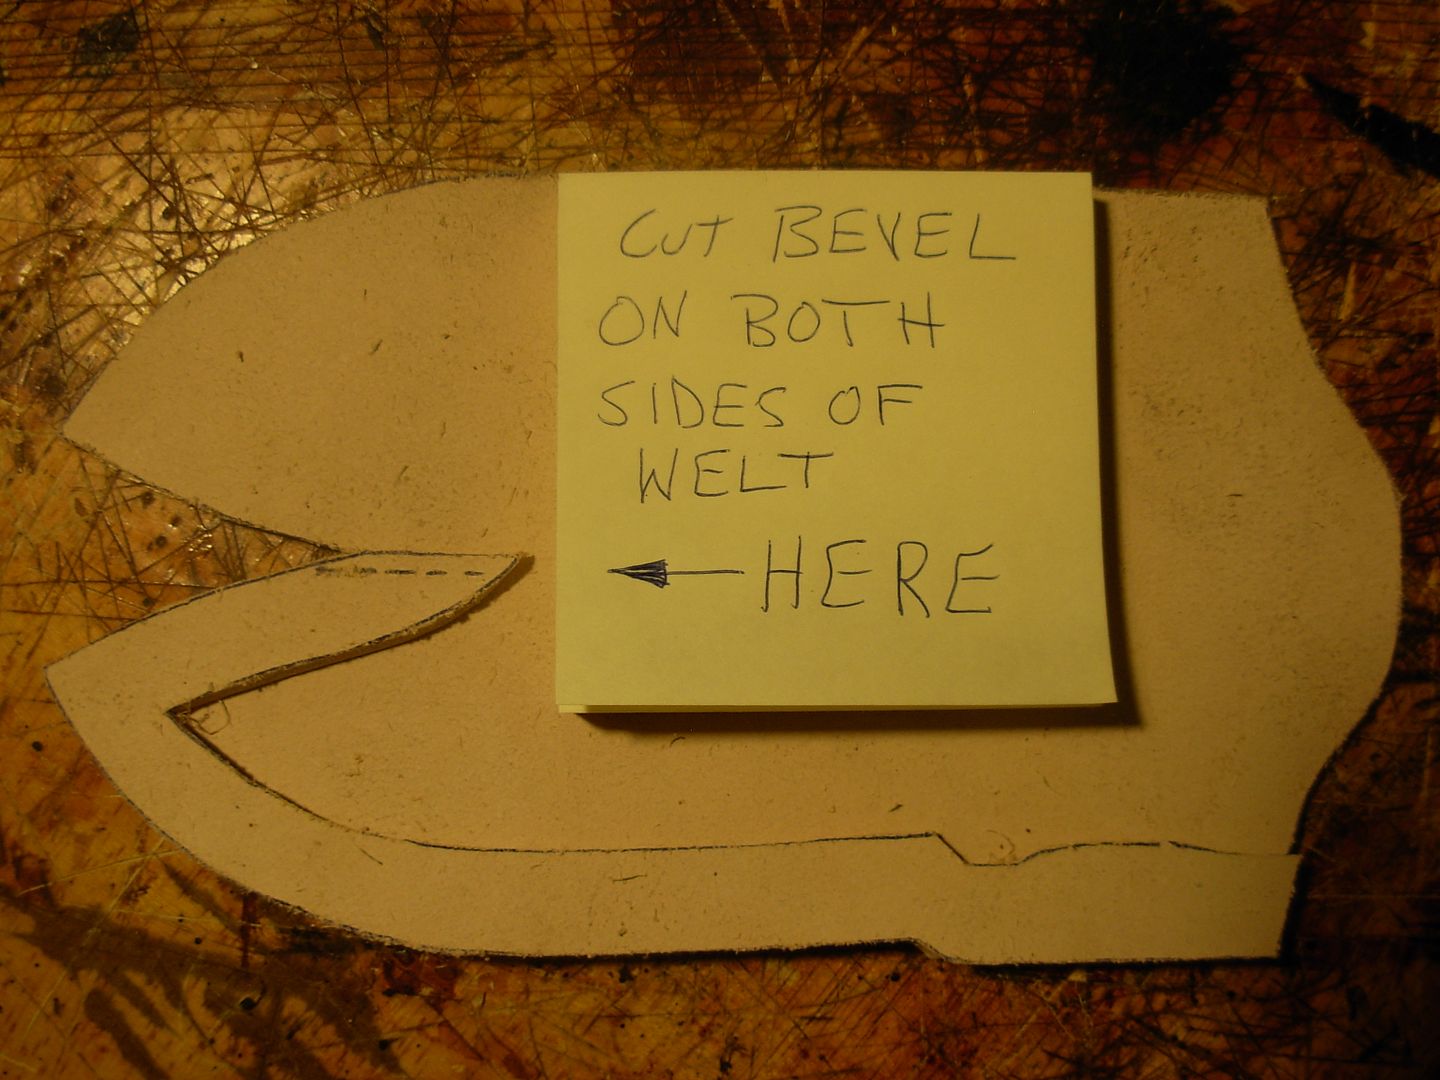
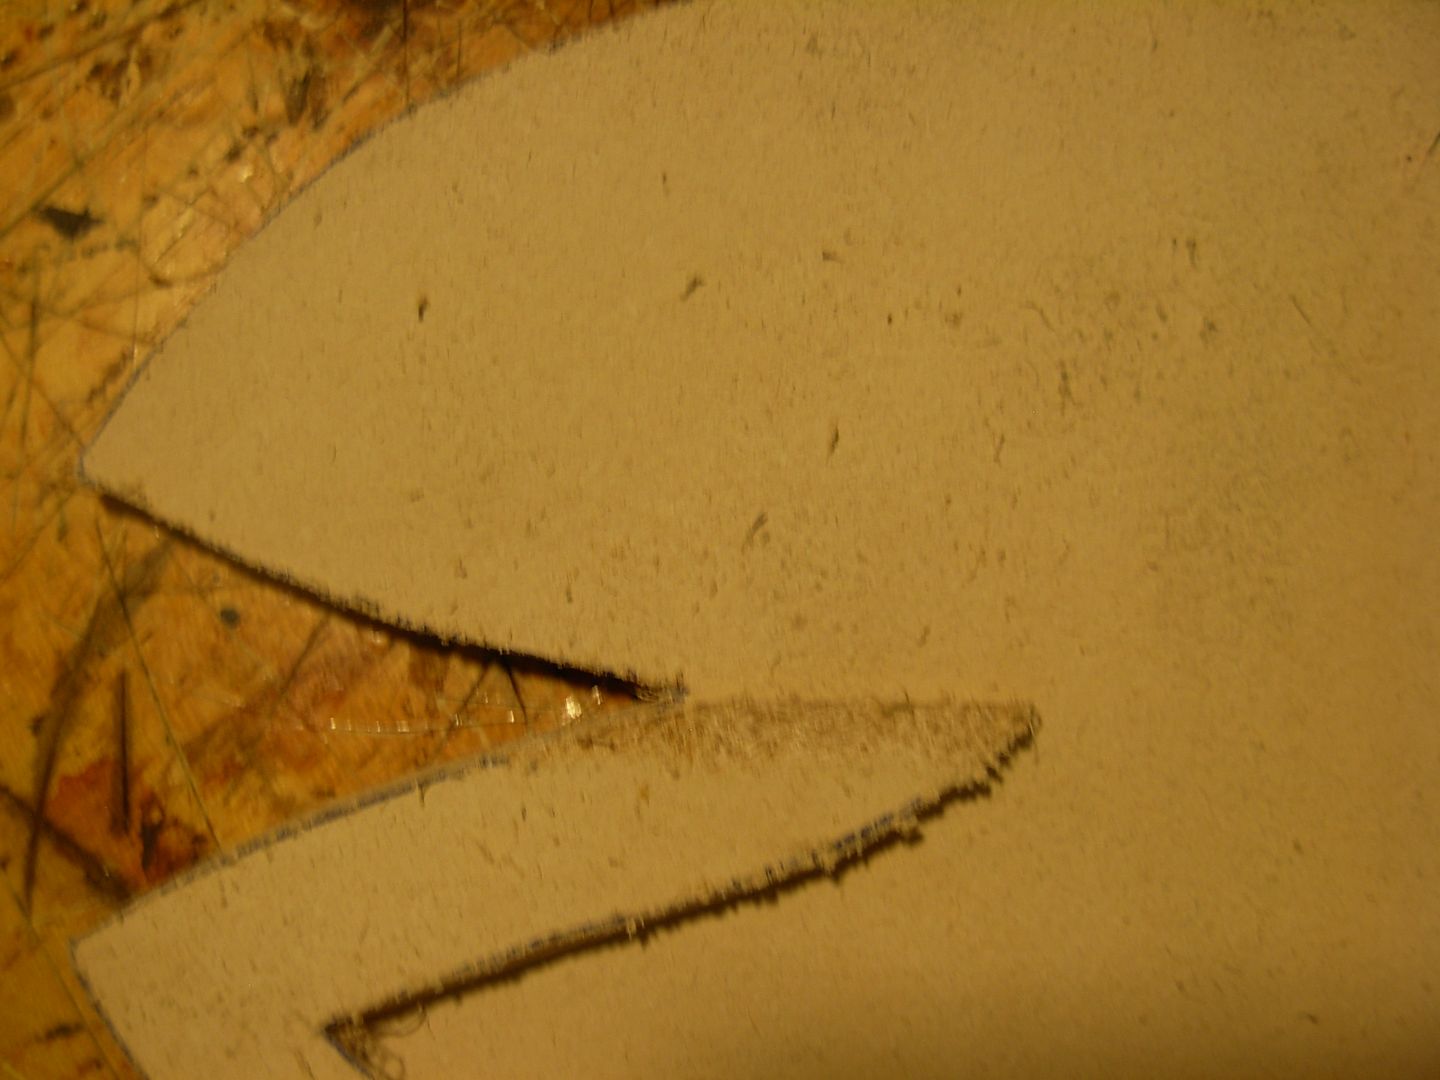
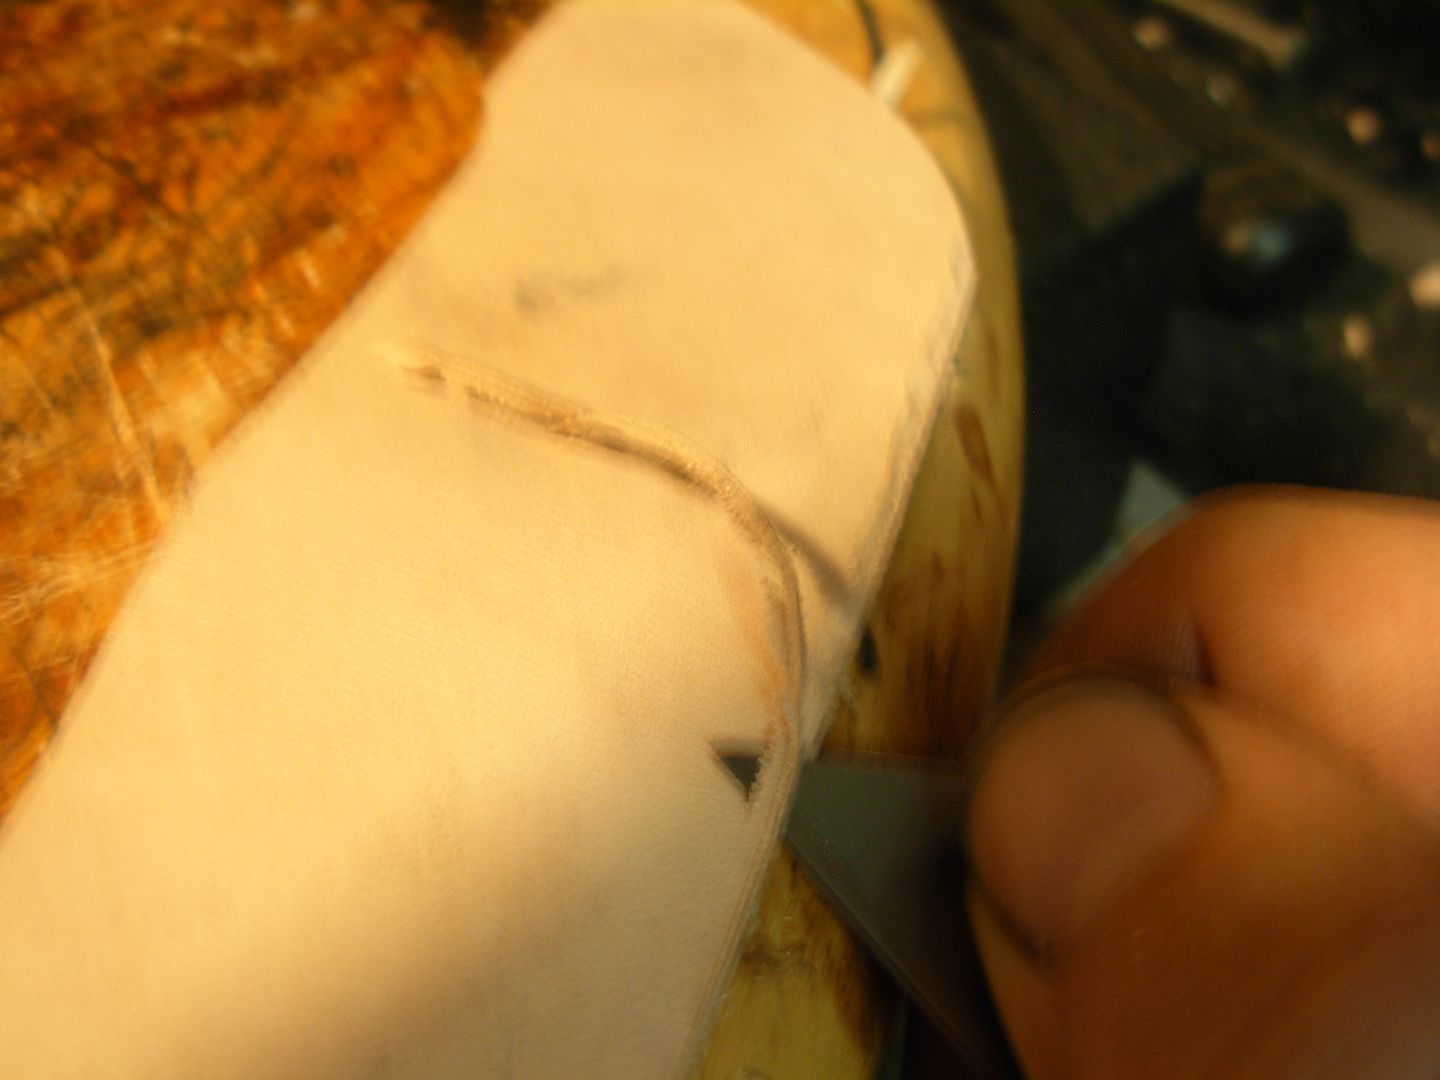
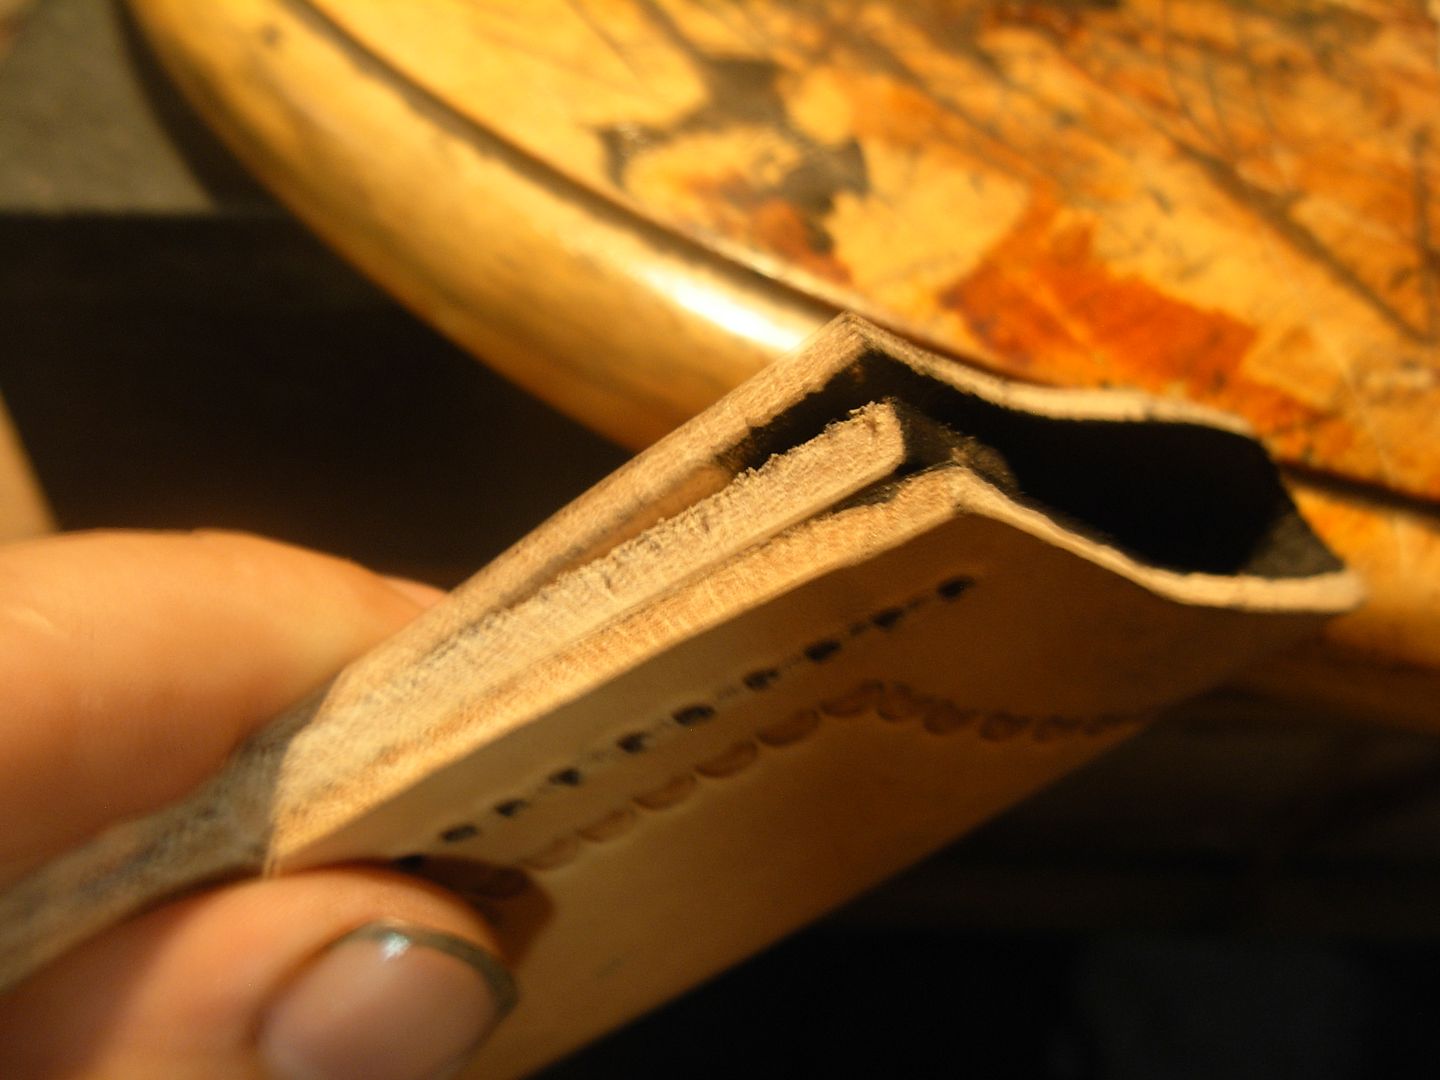
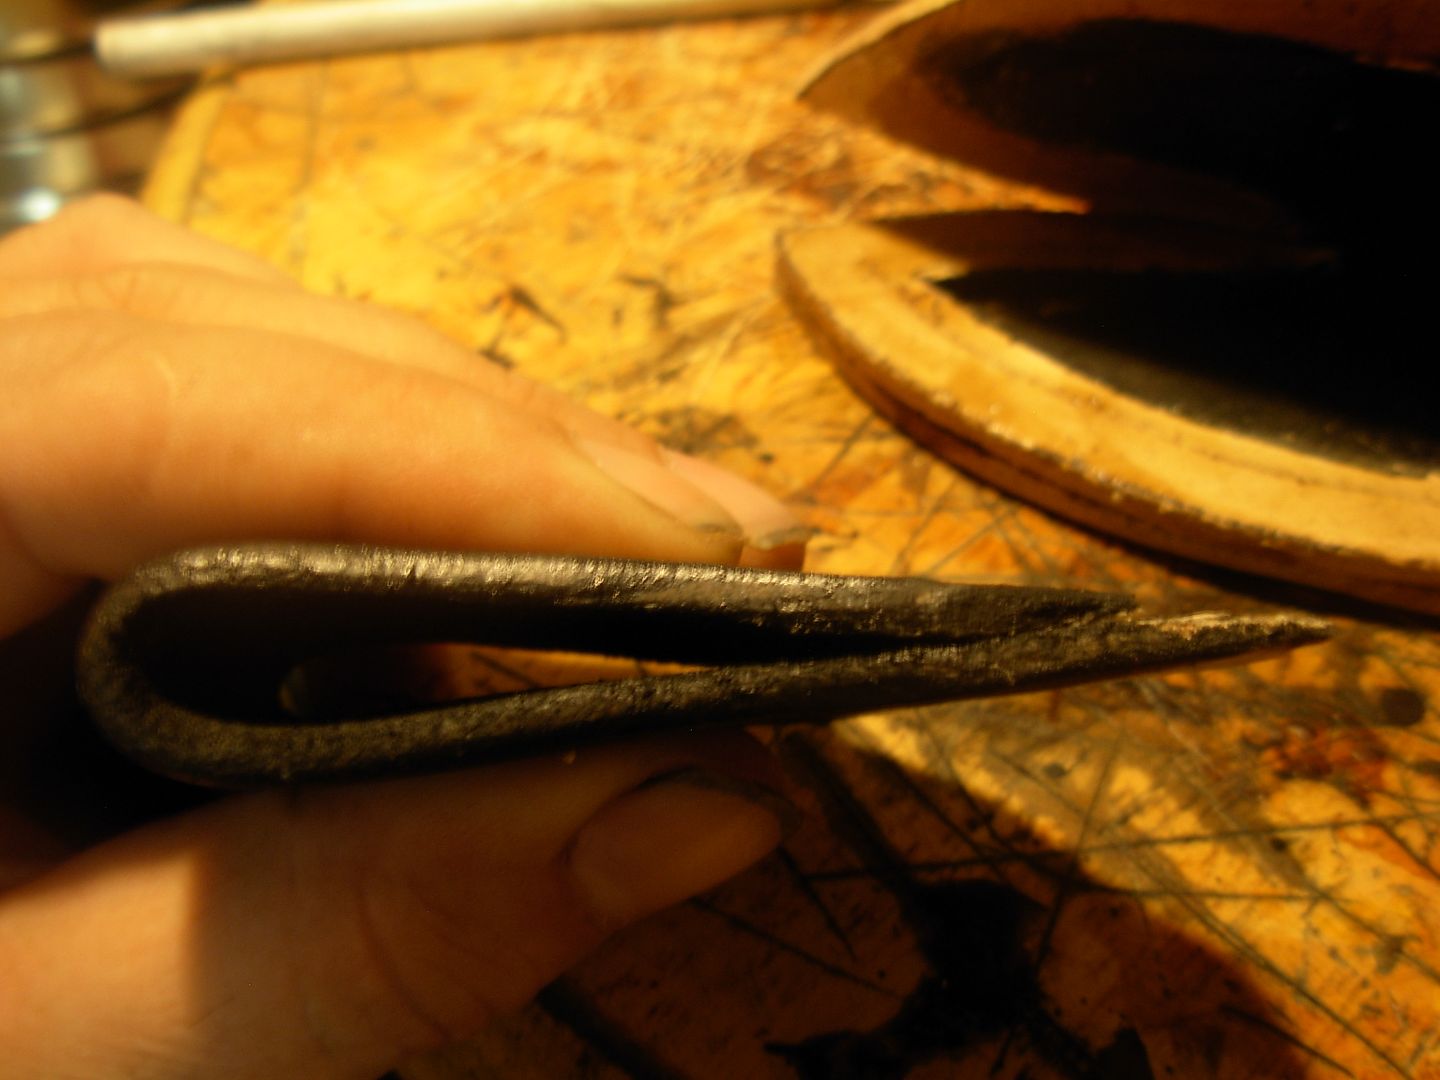
With this area of the welt remaining square cut we won't get a good fit once the sheath body wraps around it so bevel both sides of the welt
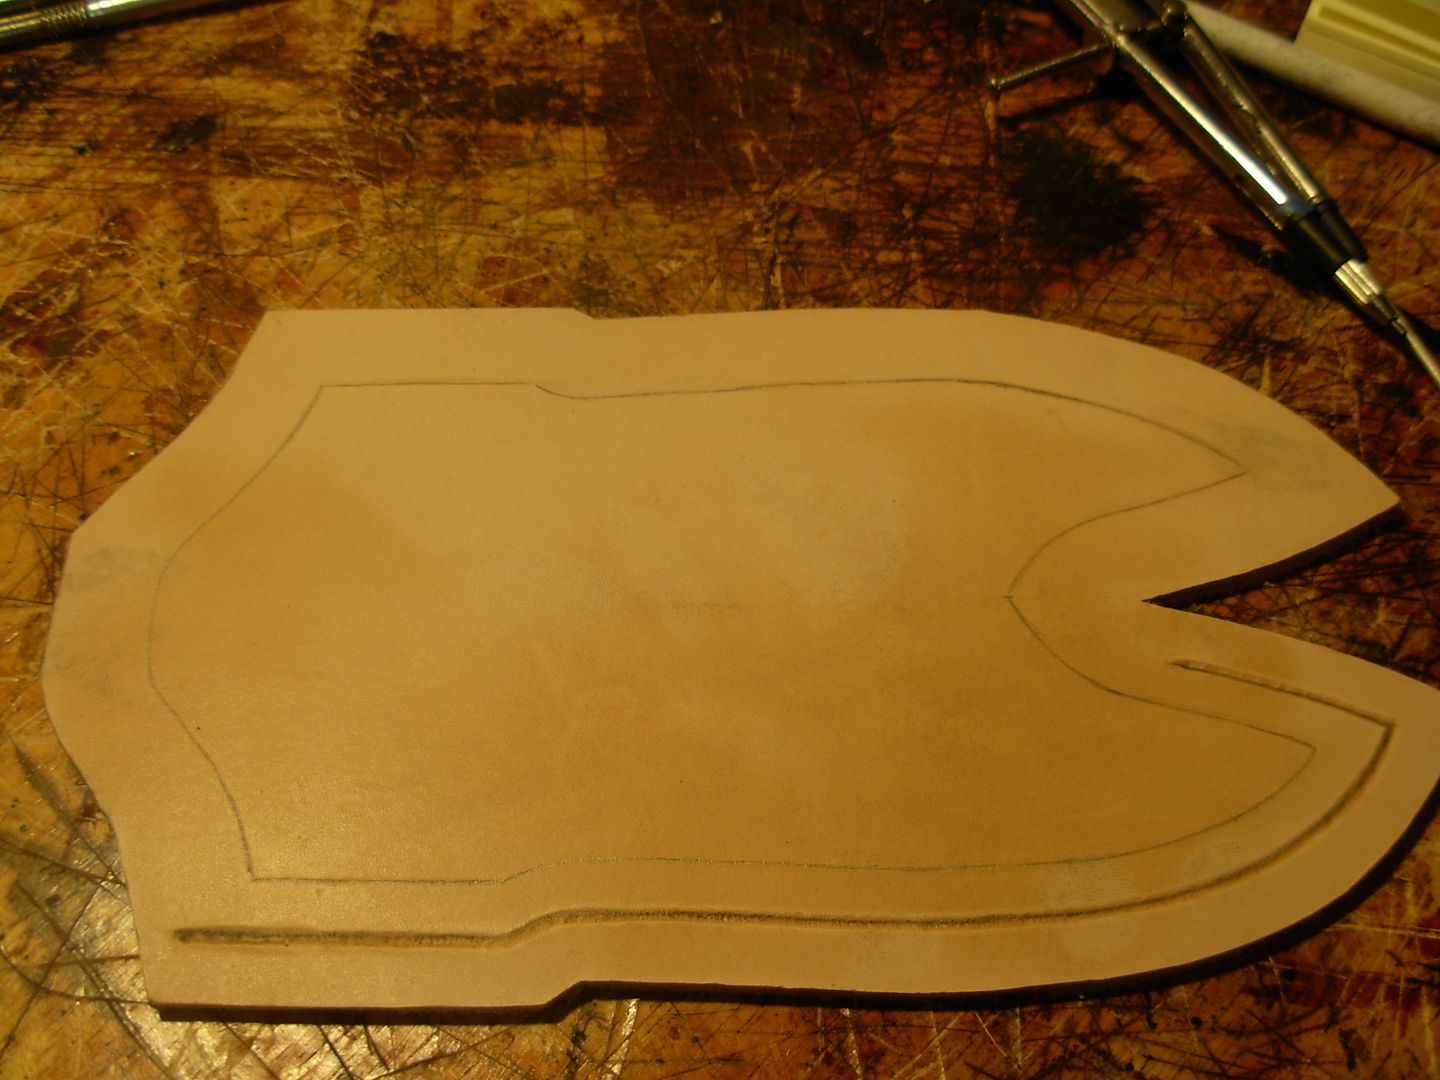
This is just a run of the mill compass available about anywhere they've got pens and pencils. I've removed the point and replaced it with a piece of pinstock for marking parallel lines. Here I'm setting the width for my stitch line. I want my stitches to be roughly 1/8" from the inside of the welt.
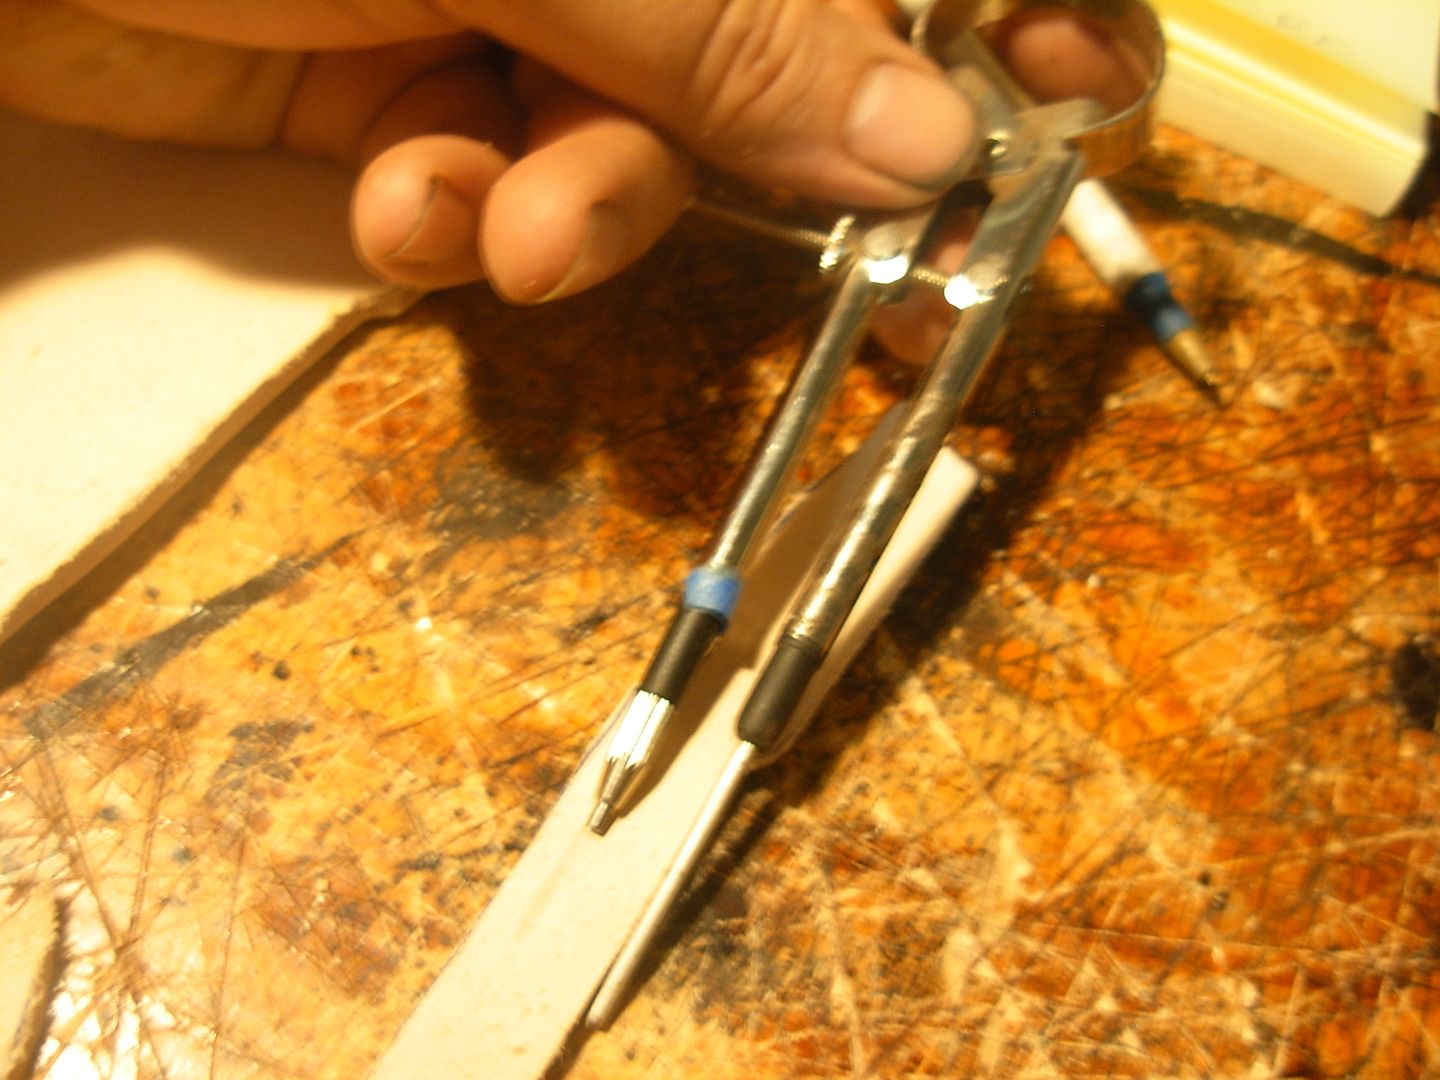
Now I've marked the welt just to be sure I like the location of my stitch line.
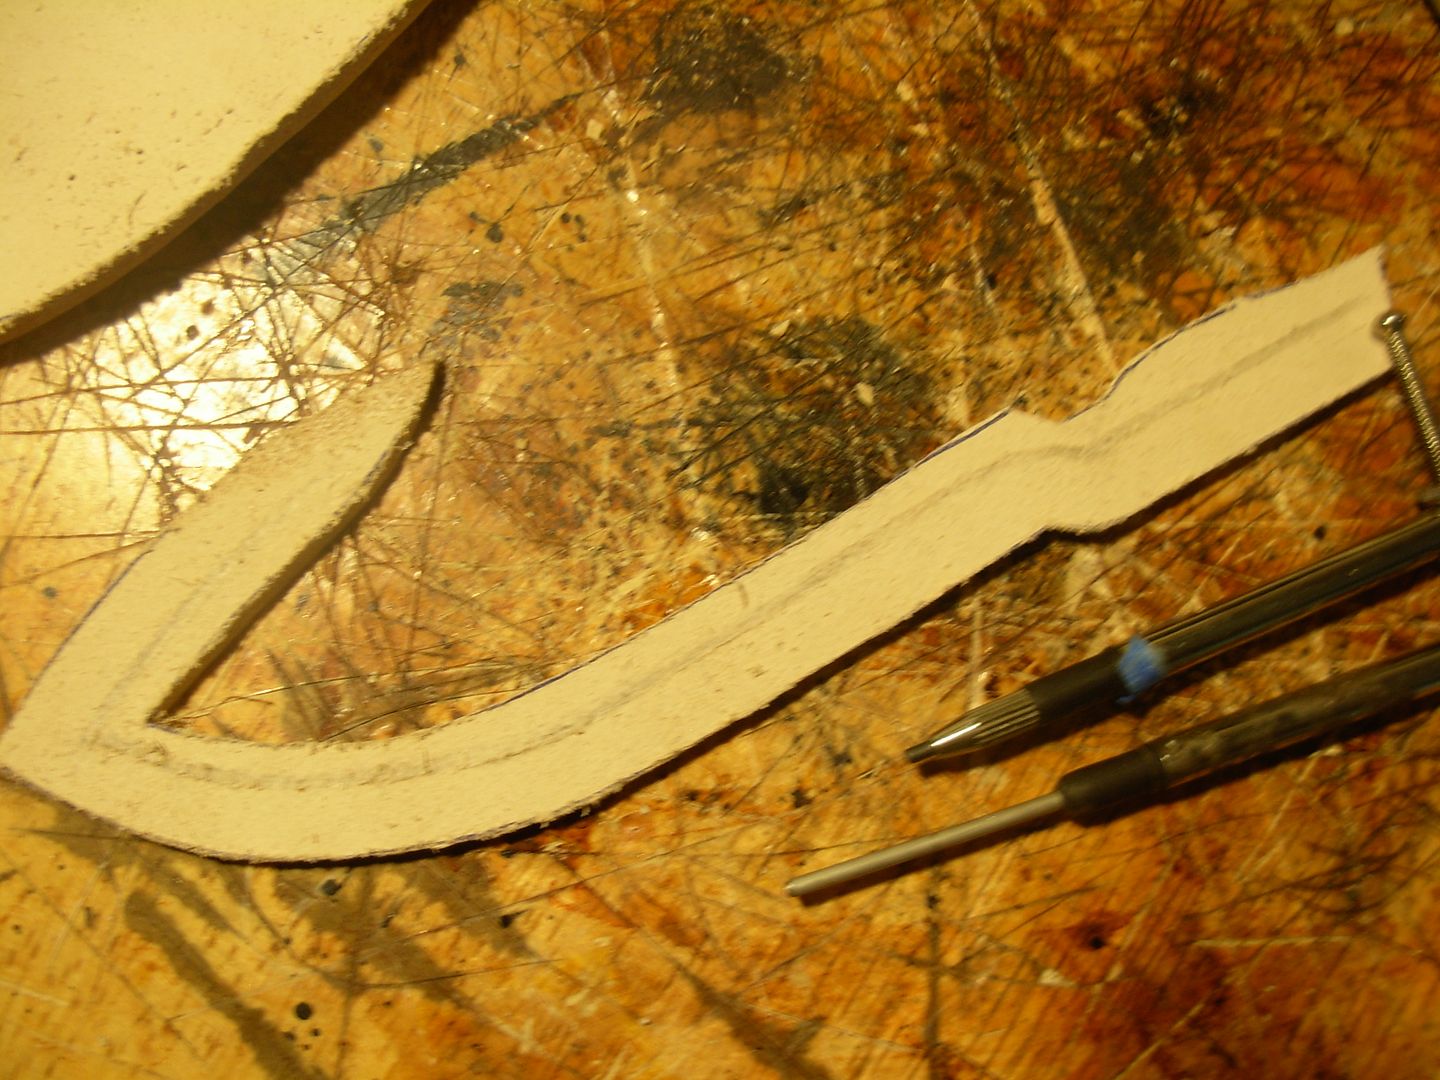
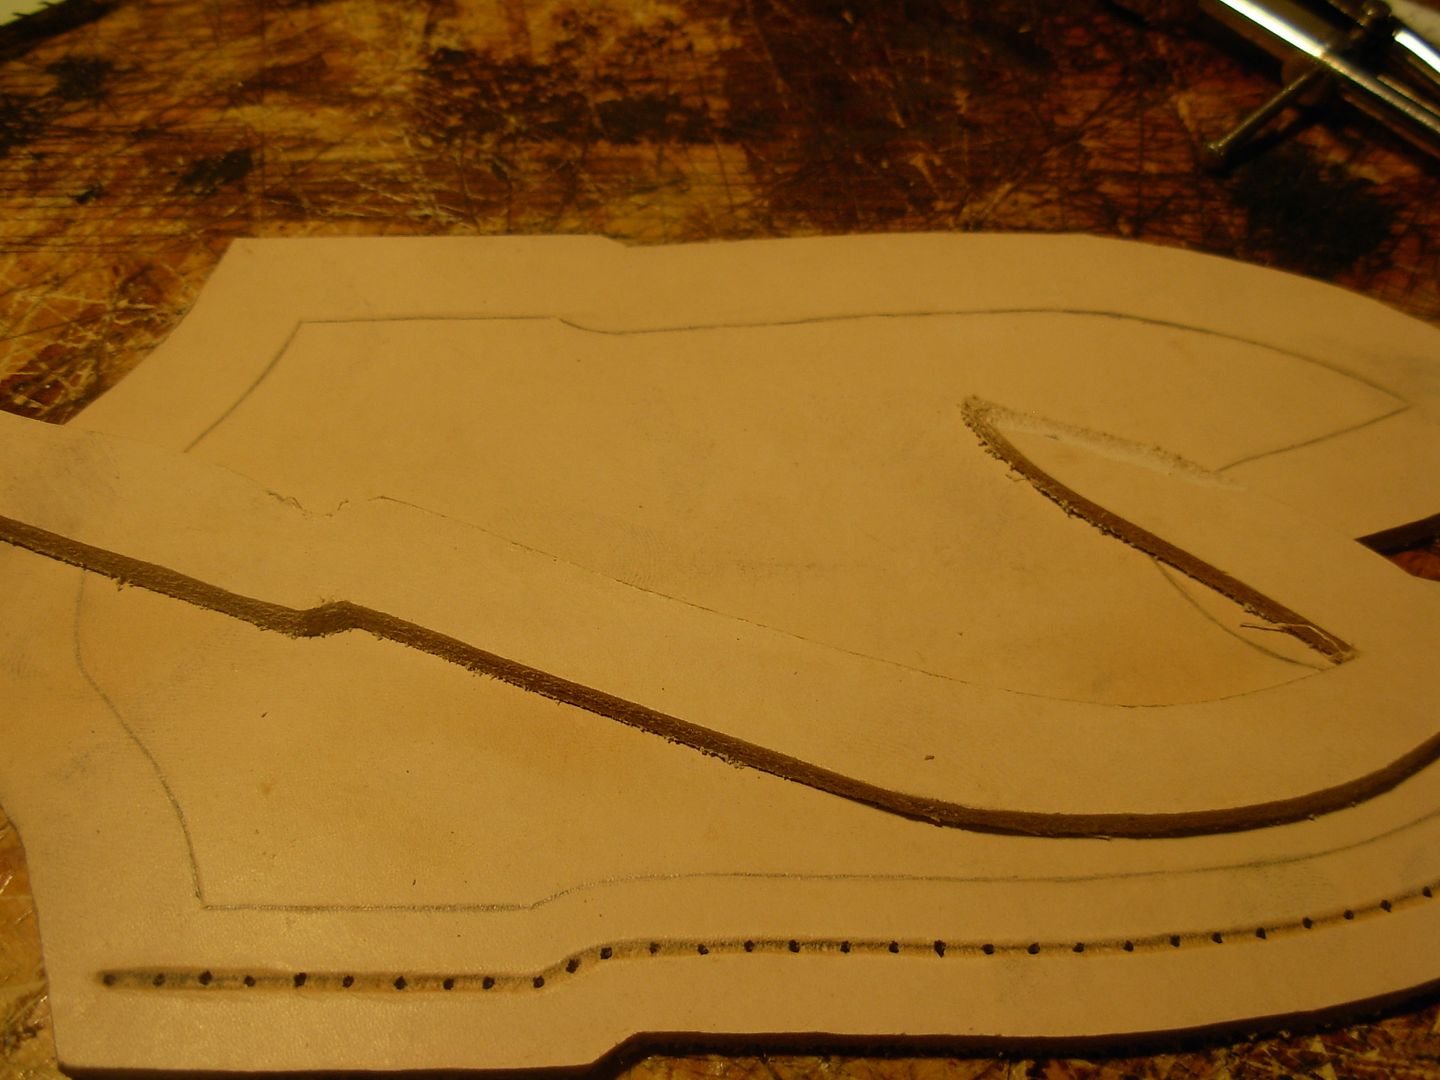
With my width adjusted where I'm happy with it I can now mark out my sheath body for my stitch line.
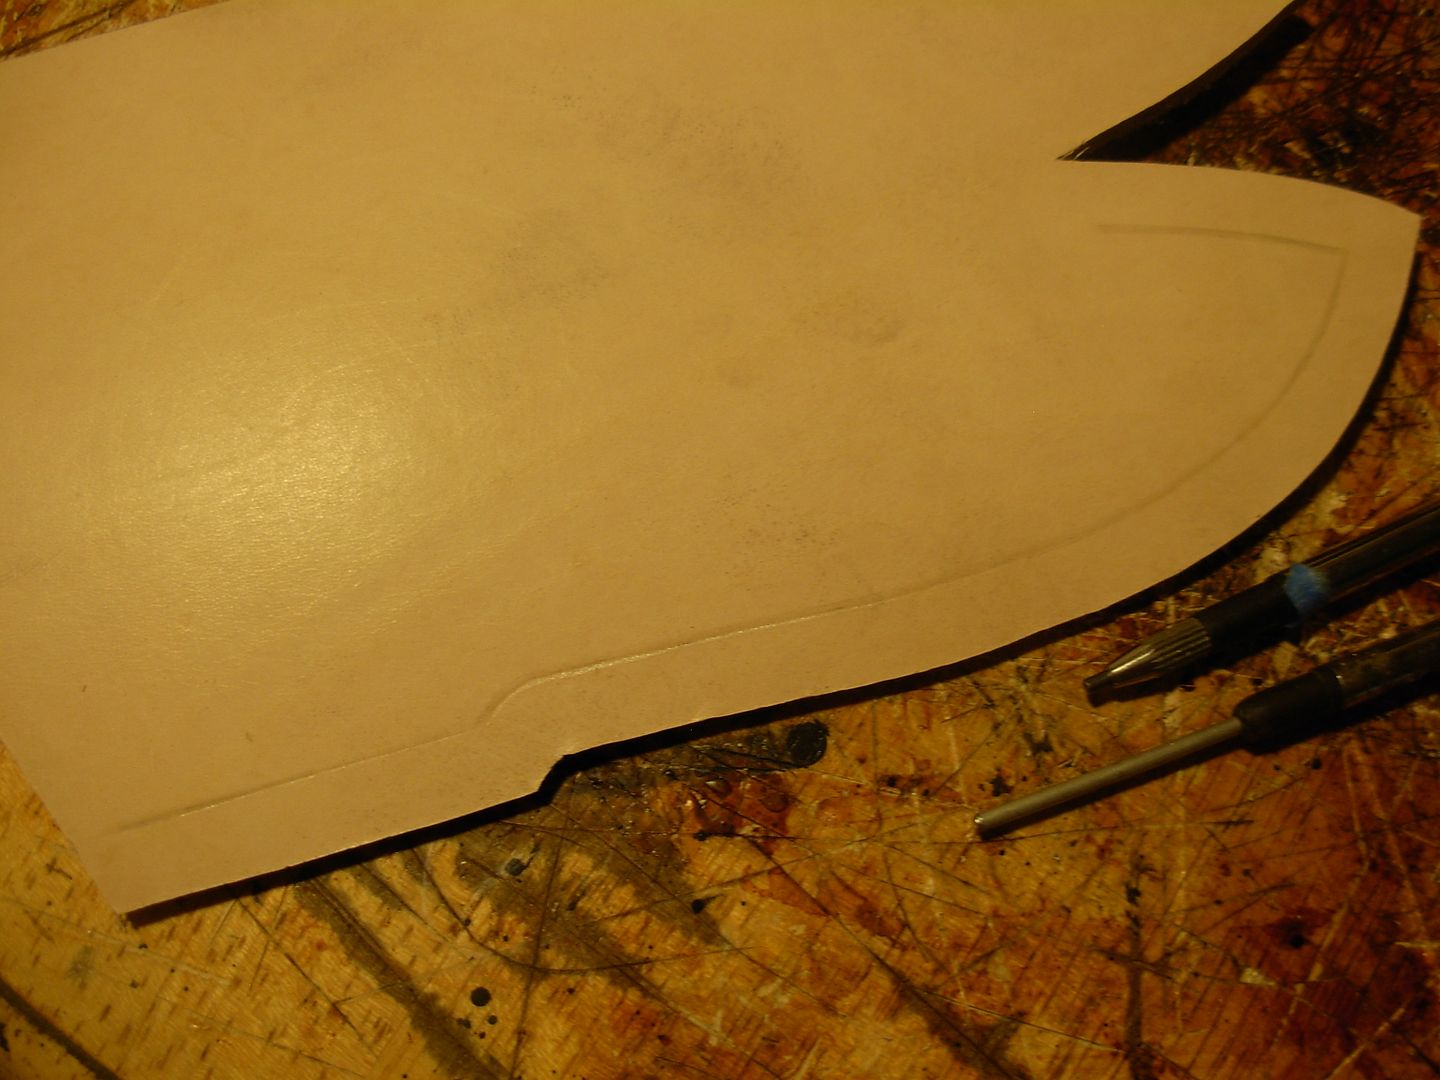
I'm a big fan of Border Stamping. It's a nice little touch on an otherwise plain sheath. Here I've layed my welt on top of my sheath body and adjusted my compass so it'll mark just a little wider than that.
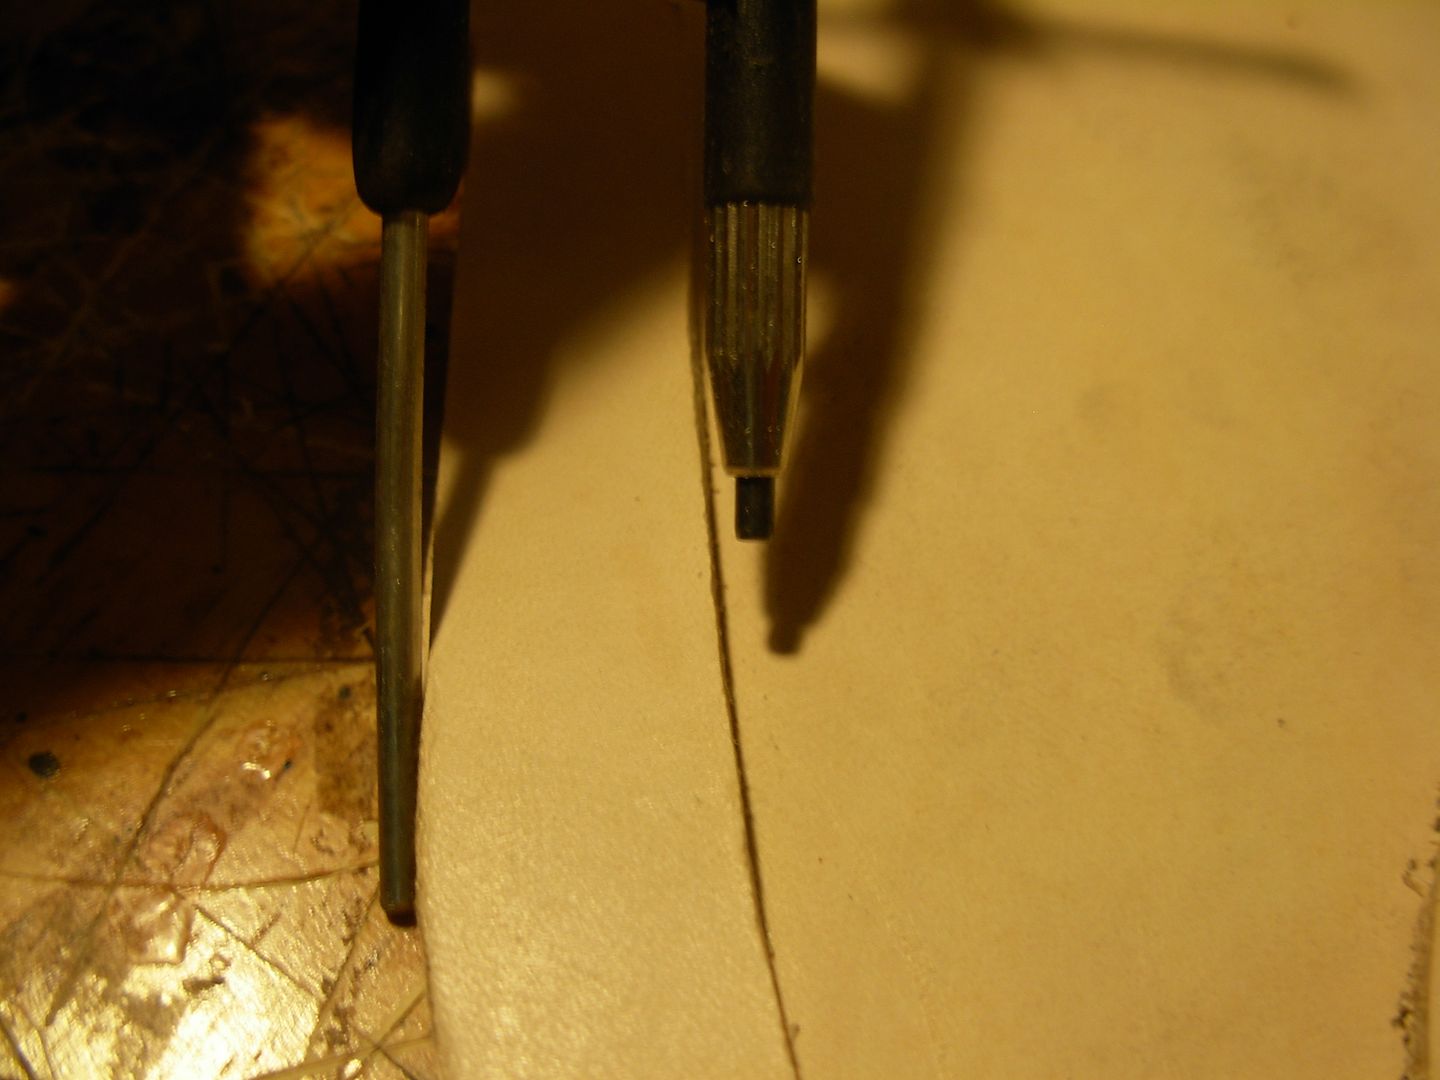
Now I've used my compass to layout my stamp line around my body and traced over my layout lines with a regular pencil
With my layout done I'm ready to " CASE " my sheath body to prepare for stamping. To case the leather we simply wet it with water and let it dry back to it's original color. I use this little spritz bottle and spray my surface intil water lays on the surface then let that soak in. You can plop you piece right into a bowl of water or runit under the faucet for a second. We don't want to fully saturate the leather or it'll take forever to dry out but the amount of water isn't critical, just get it wet and let it dry.
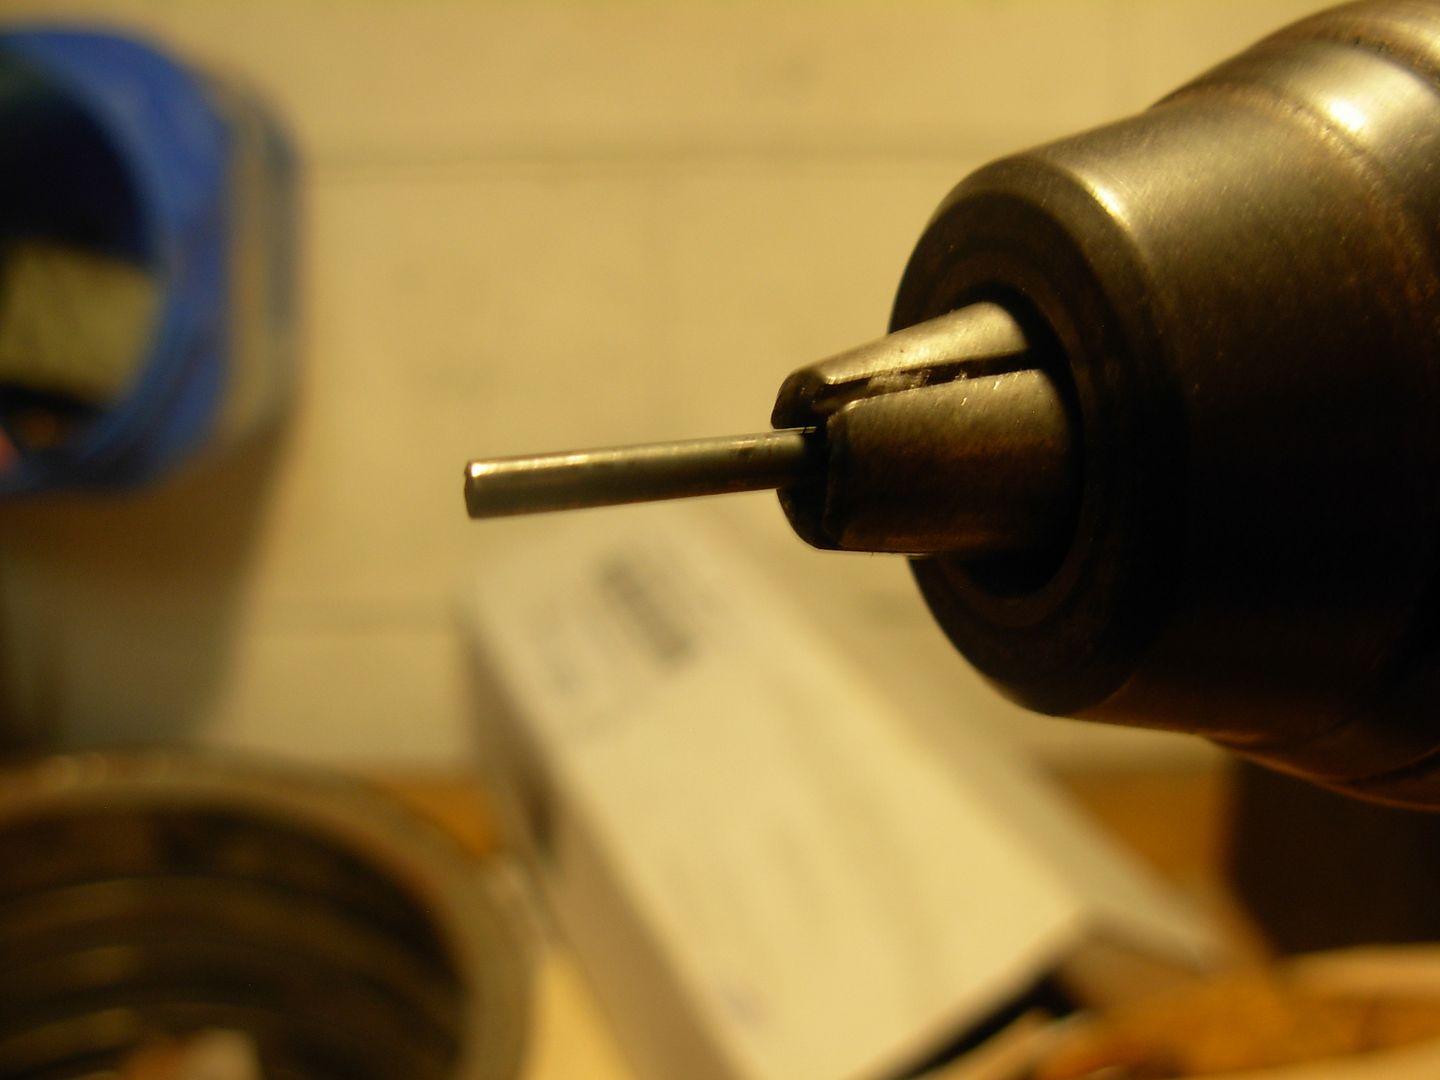
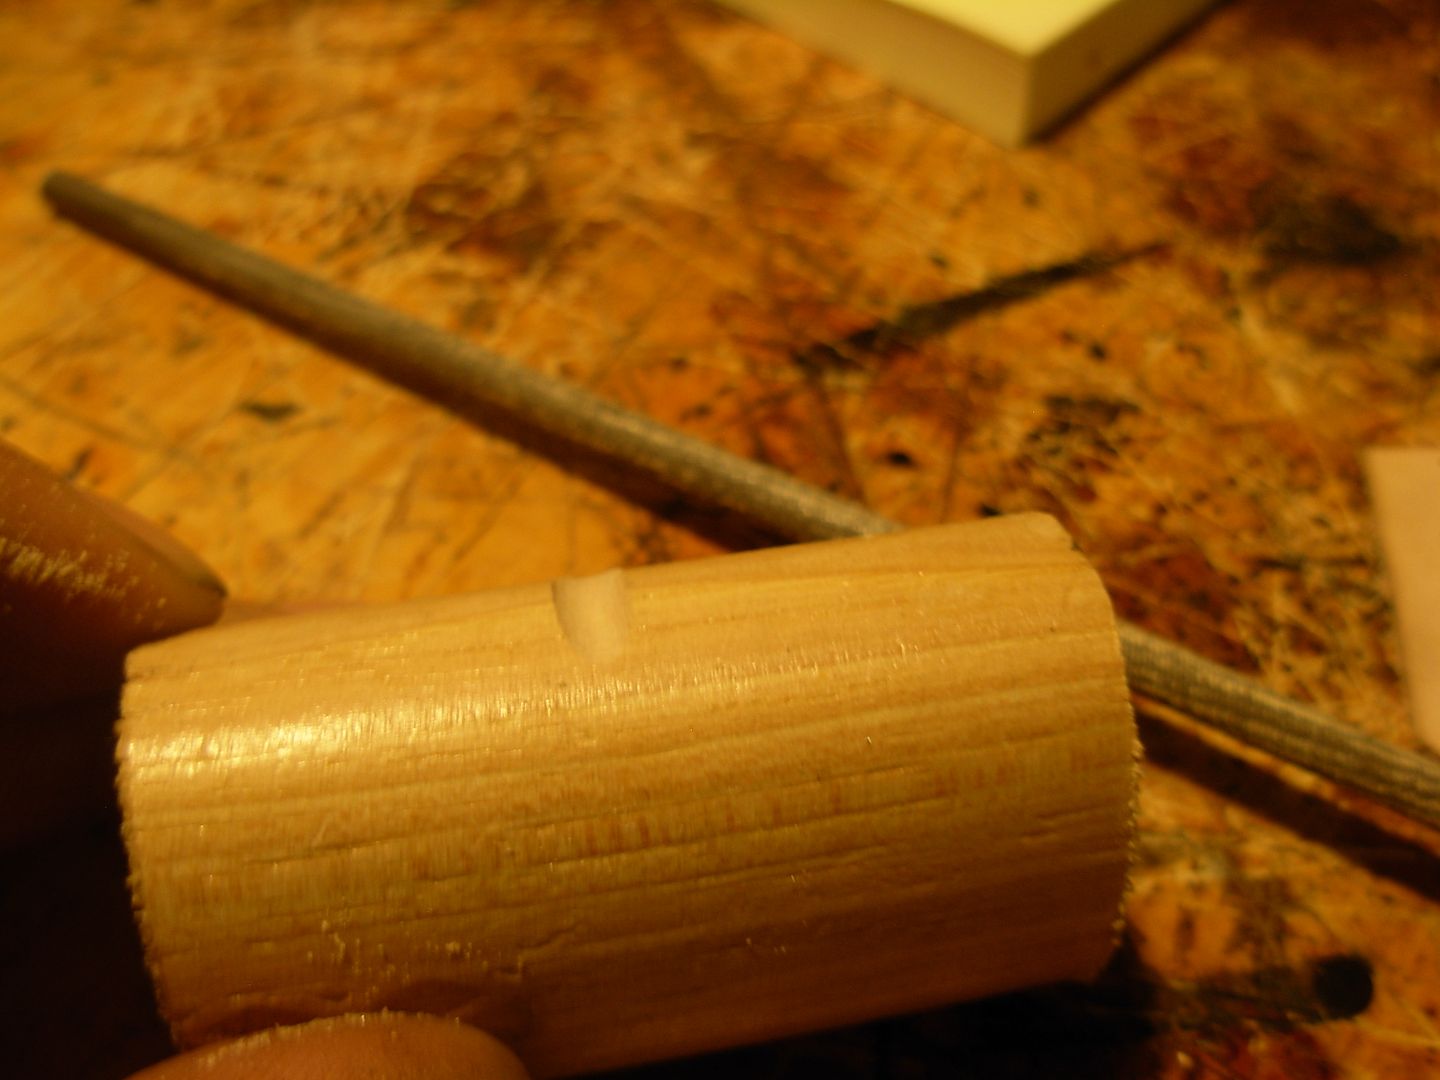
We'll be waiting 10 or 15 minutes for our leather to case so however are we going to make a border stamp without a stamp you say ??? Why we'll just make one of course. This is a 1/4-20 x 3 1/2" Stainless steel bolt. I've ground the threads of the end on my bench grinder
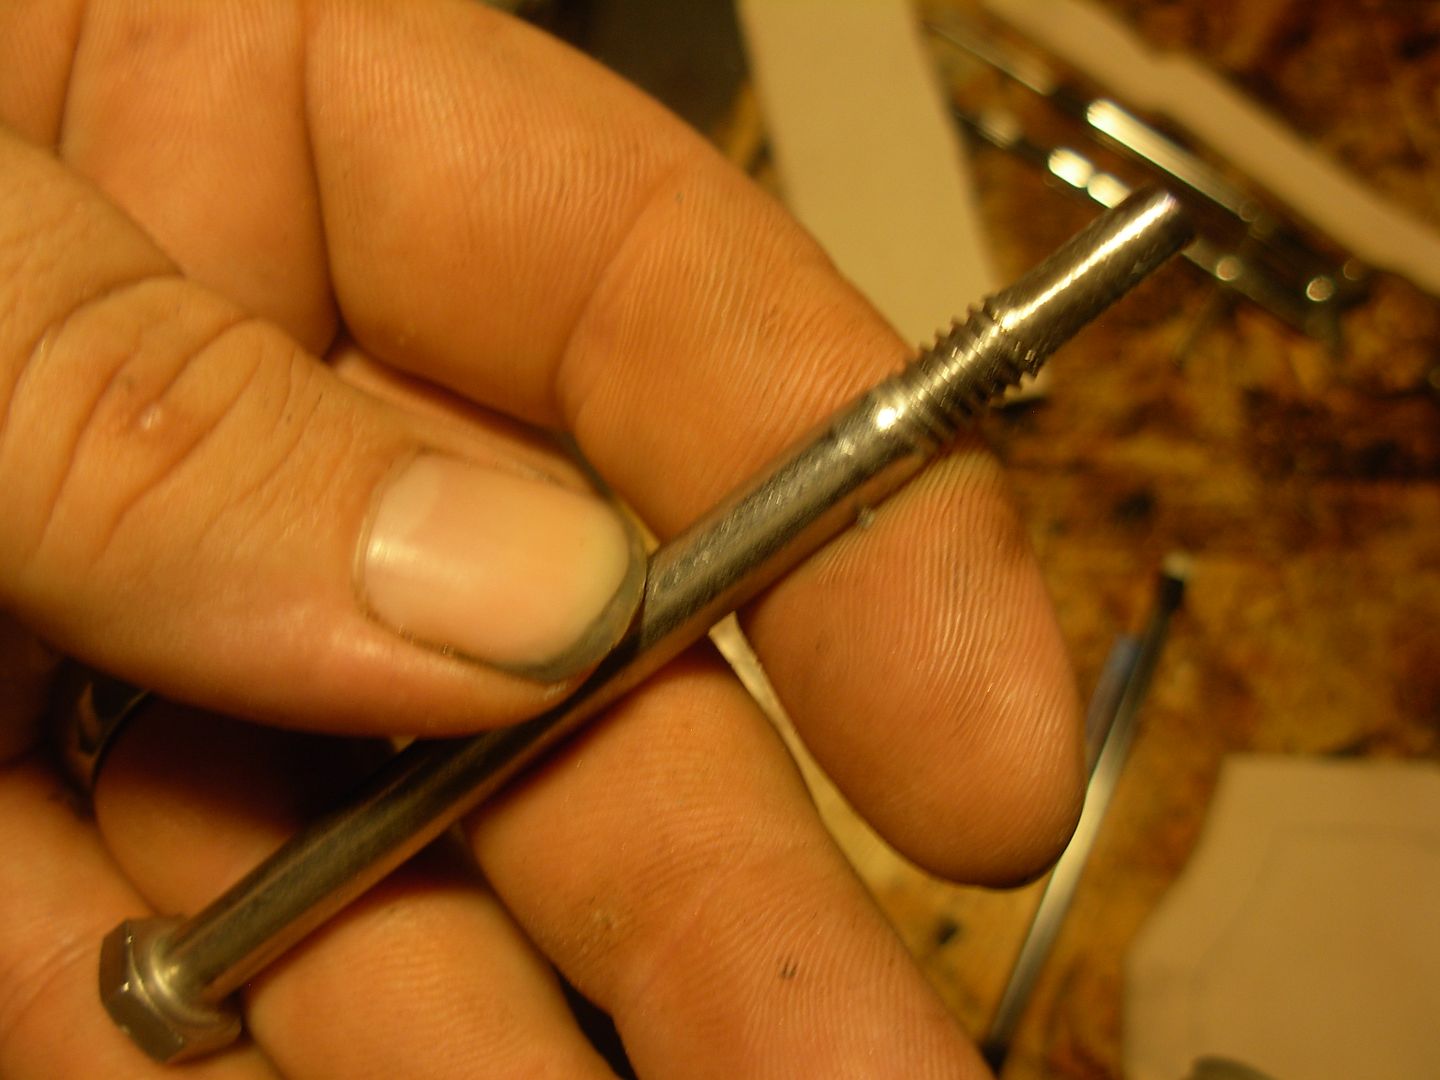
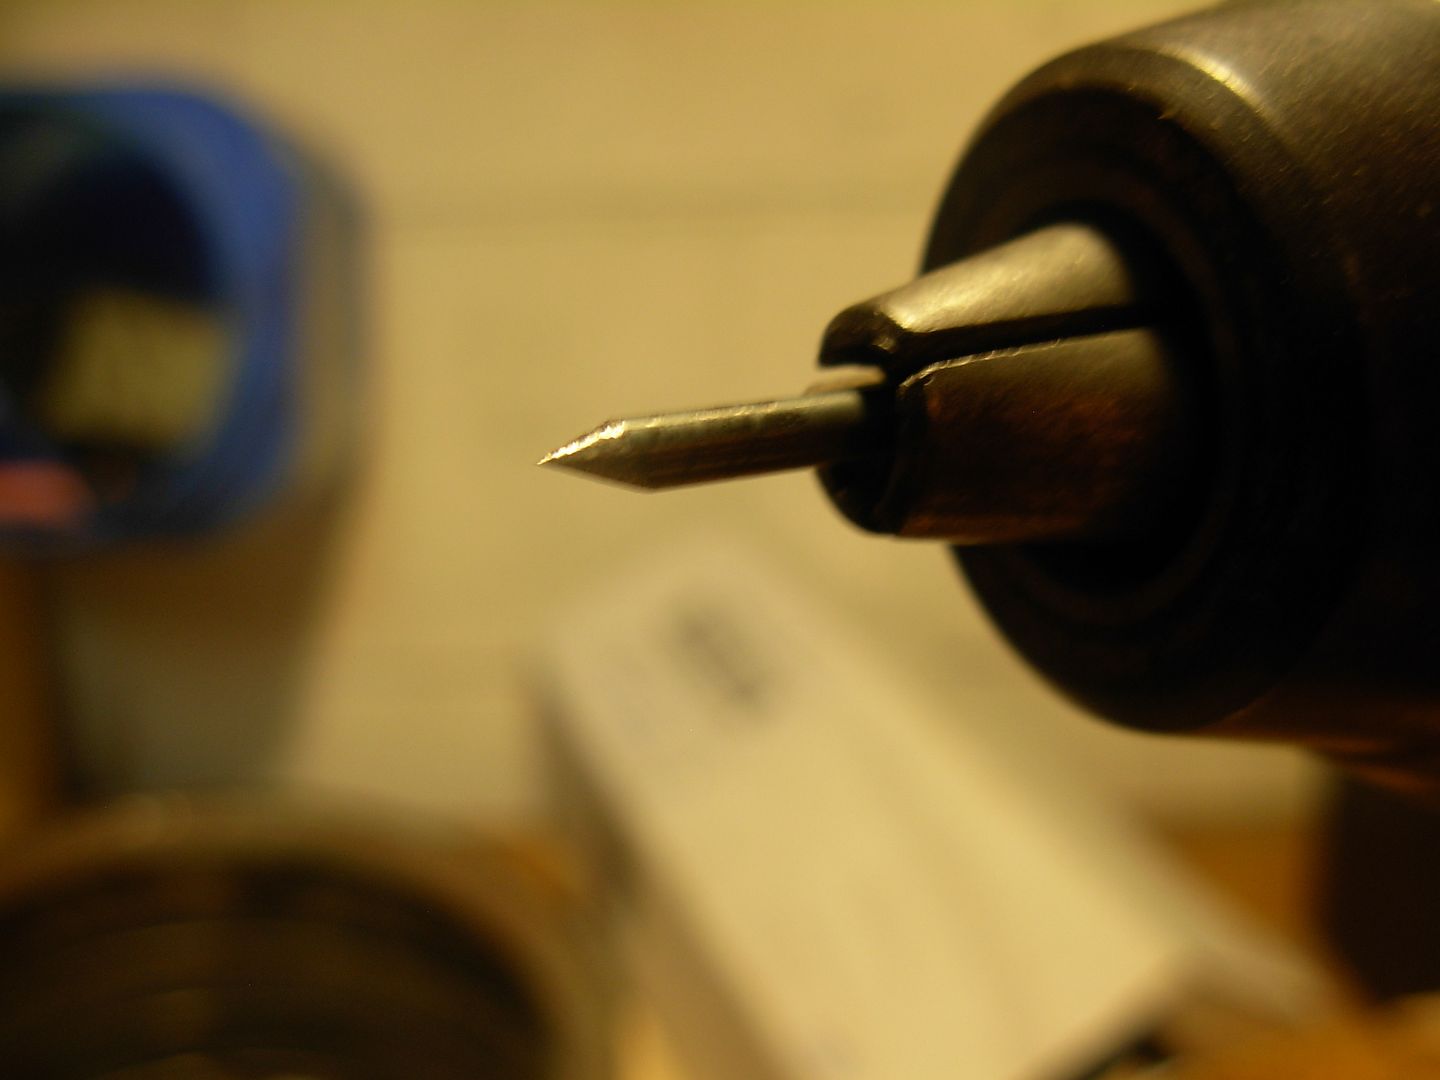
Now I filed my stamp to shape with my chainsaw file. I drilled a 1/4" hole through my work bench to hold the bolt while working it with my file.
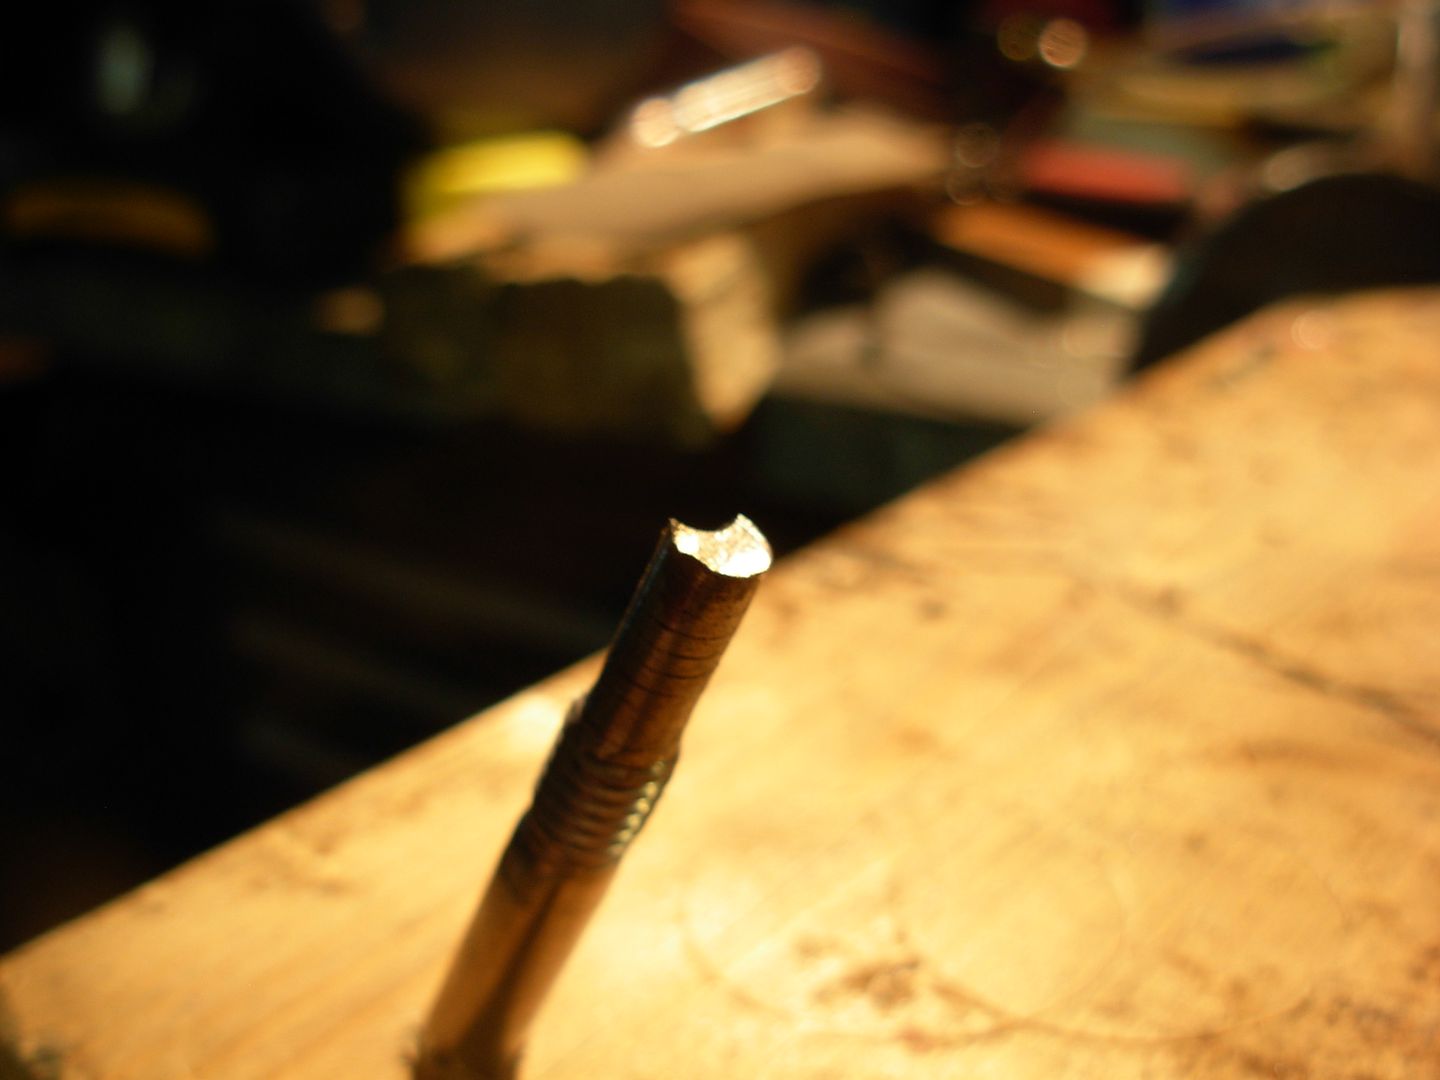
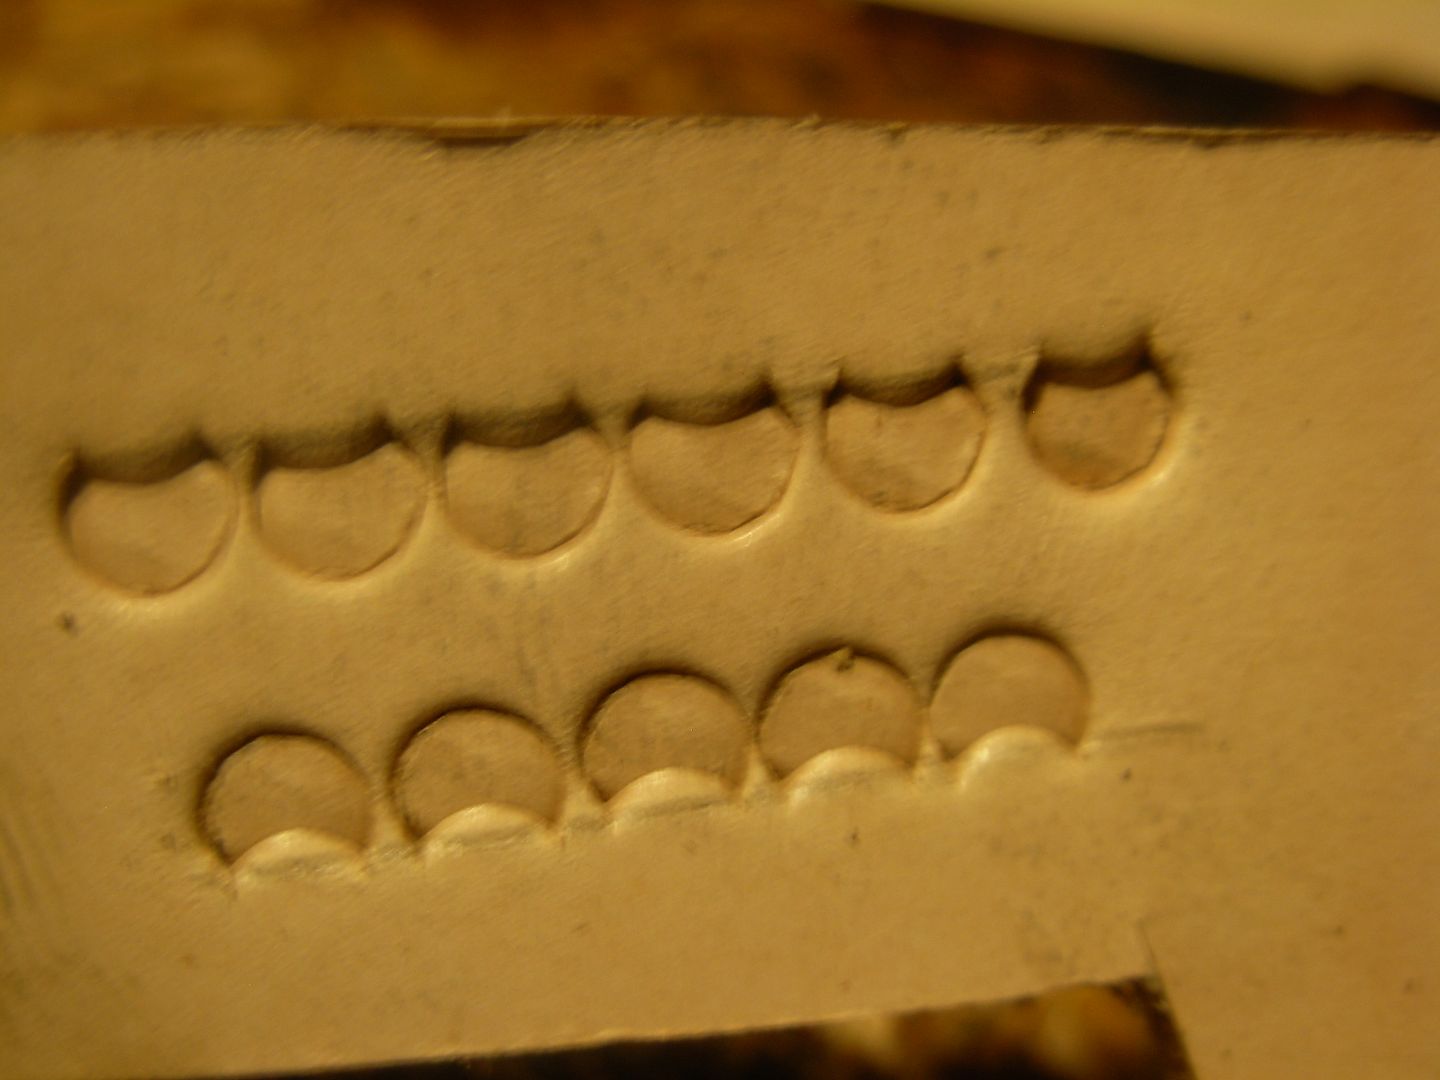
Give it a little test run before trying this on your sheath. Not too bad but I'm going to go a little deeper with my file cut
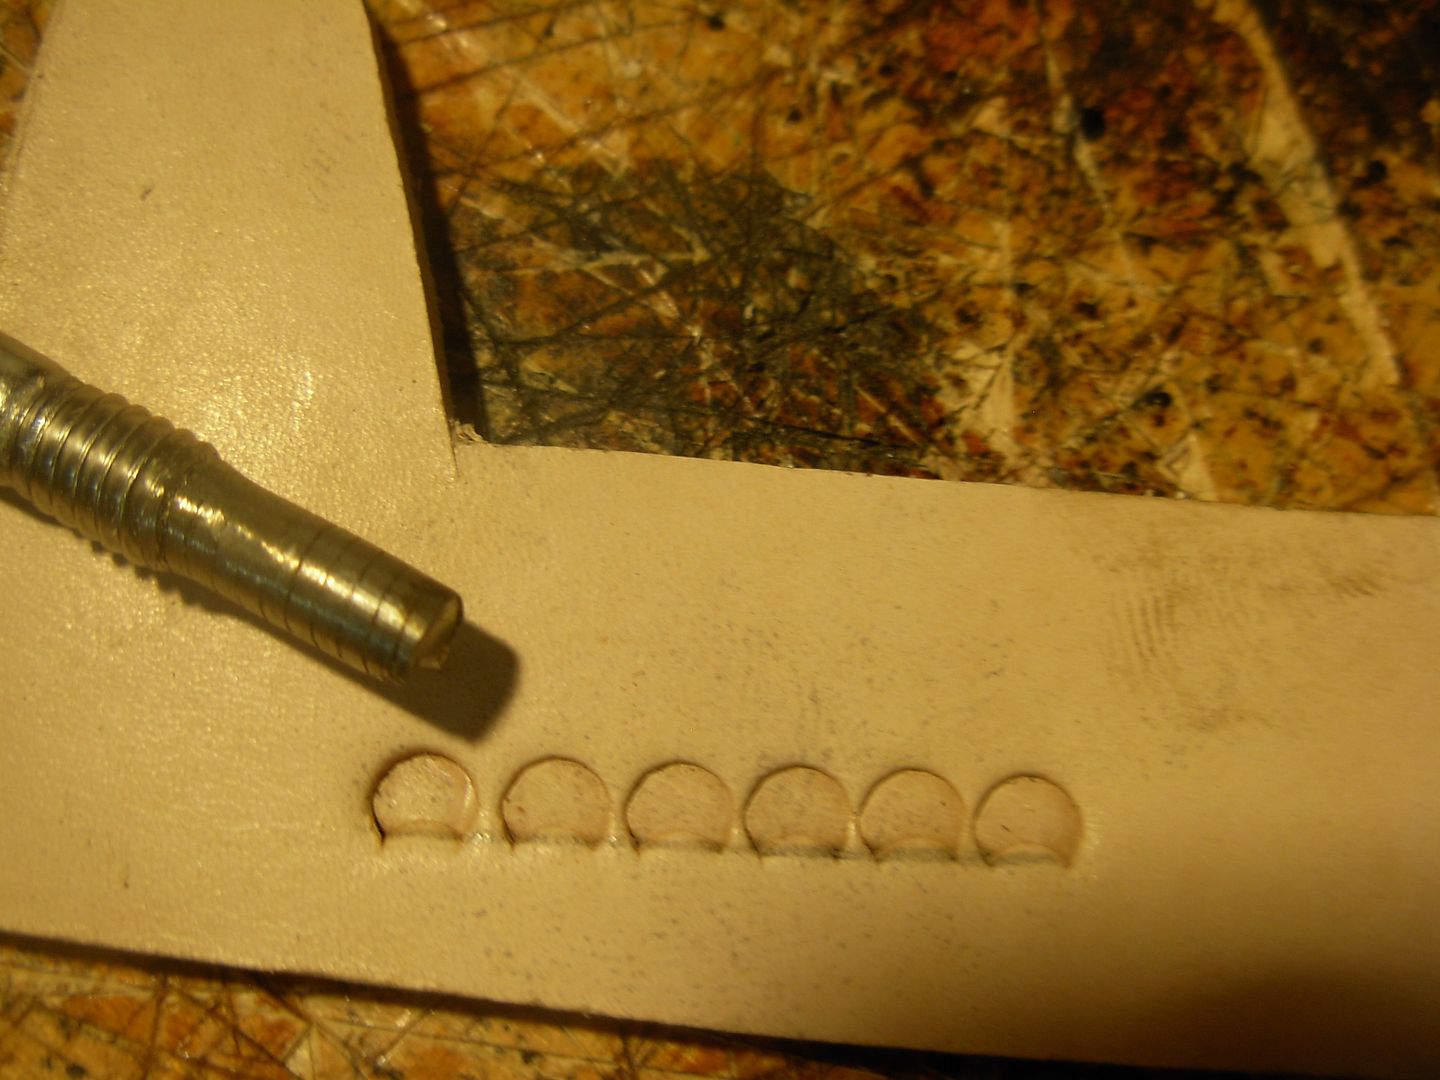
That's the ticket. It took me about 3 minutes to make this simple stamp. You can get as fancy as you wish and make all your own stamps from stainless bolts
With my leather about halfway to being cased I want to burnish in my stitch line. This is the end of my compass pin but you can make something similar from a leftover piece of our 3/32" pinstock. Round the end over and your good to go. To burnish just rub your pin back and forth while pushing down to create a bit of a depression.
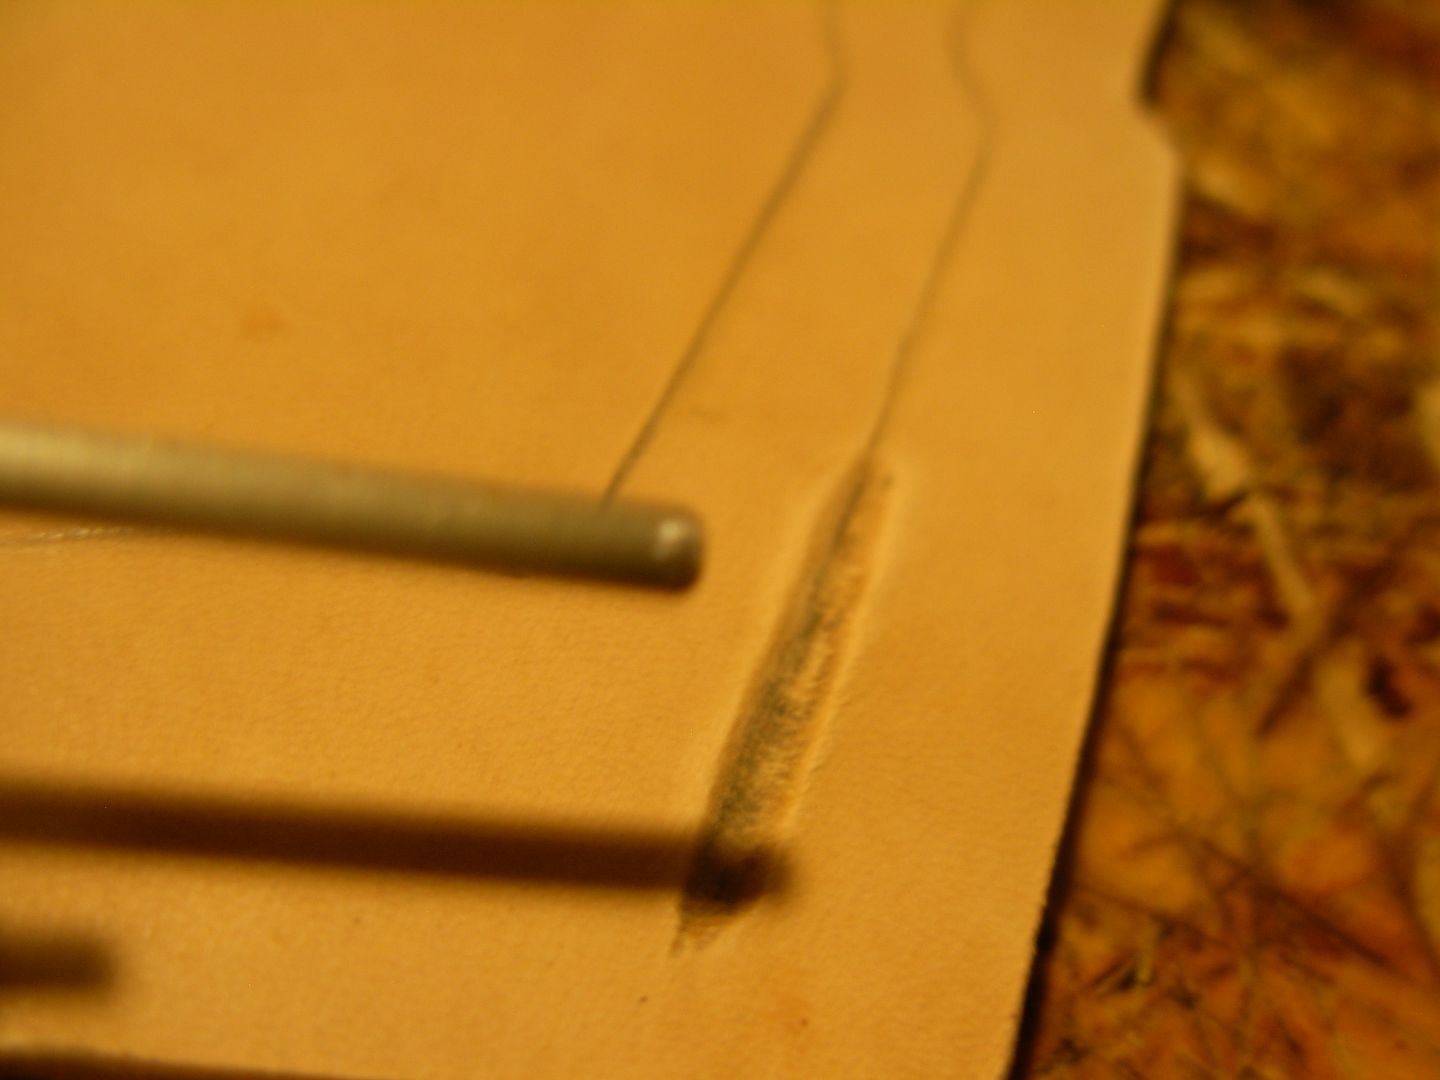
Here you can see that I'm almost cased out but not quite yet as you can see I've still got some dampness down the center so I'll use this time to mark out my stitches
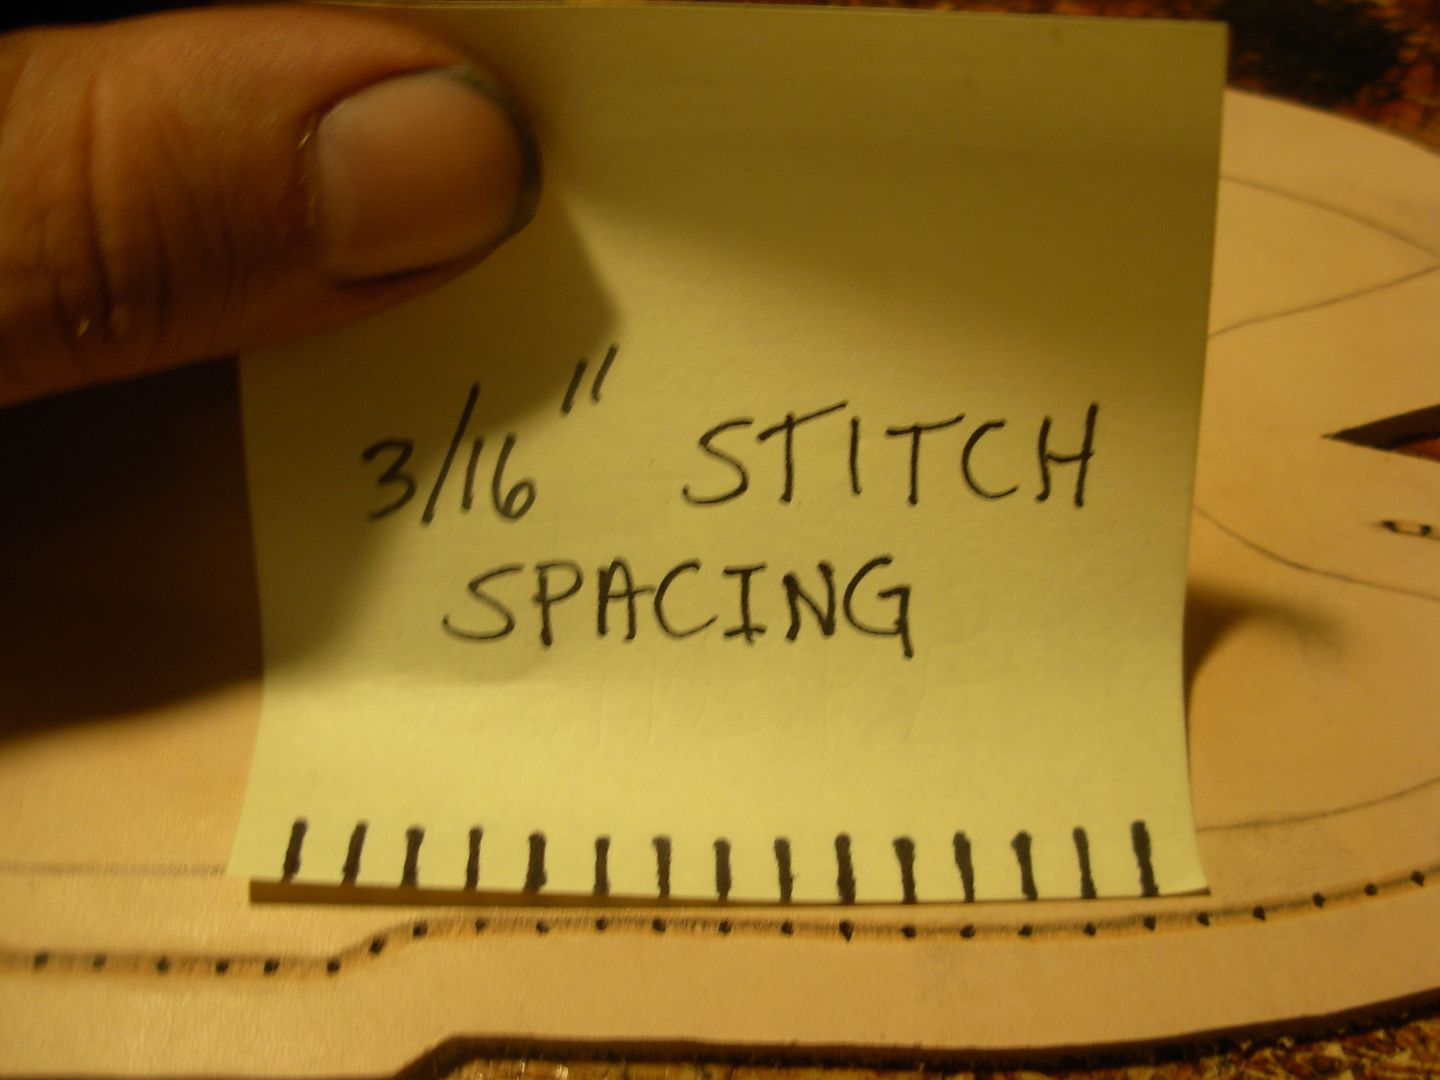
You can use any old ruler to layout your stitches but your eyes will go buggy staring at all those little lines. Here I've whipped up a little stitch guide at 3/16" intervals that's easy on the eyes and makes short work of marking your stitch locations on your stitch line.
This is just to show that my sheath body has dried out to it's original color and is now cased and ready for stamping
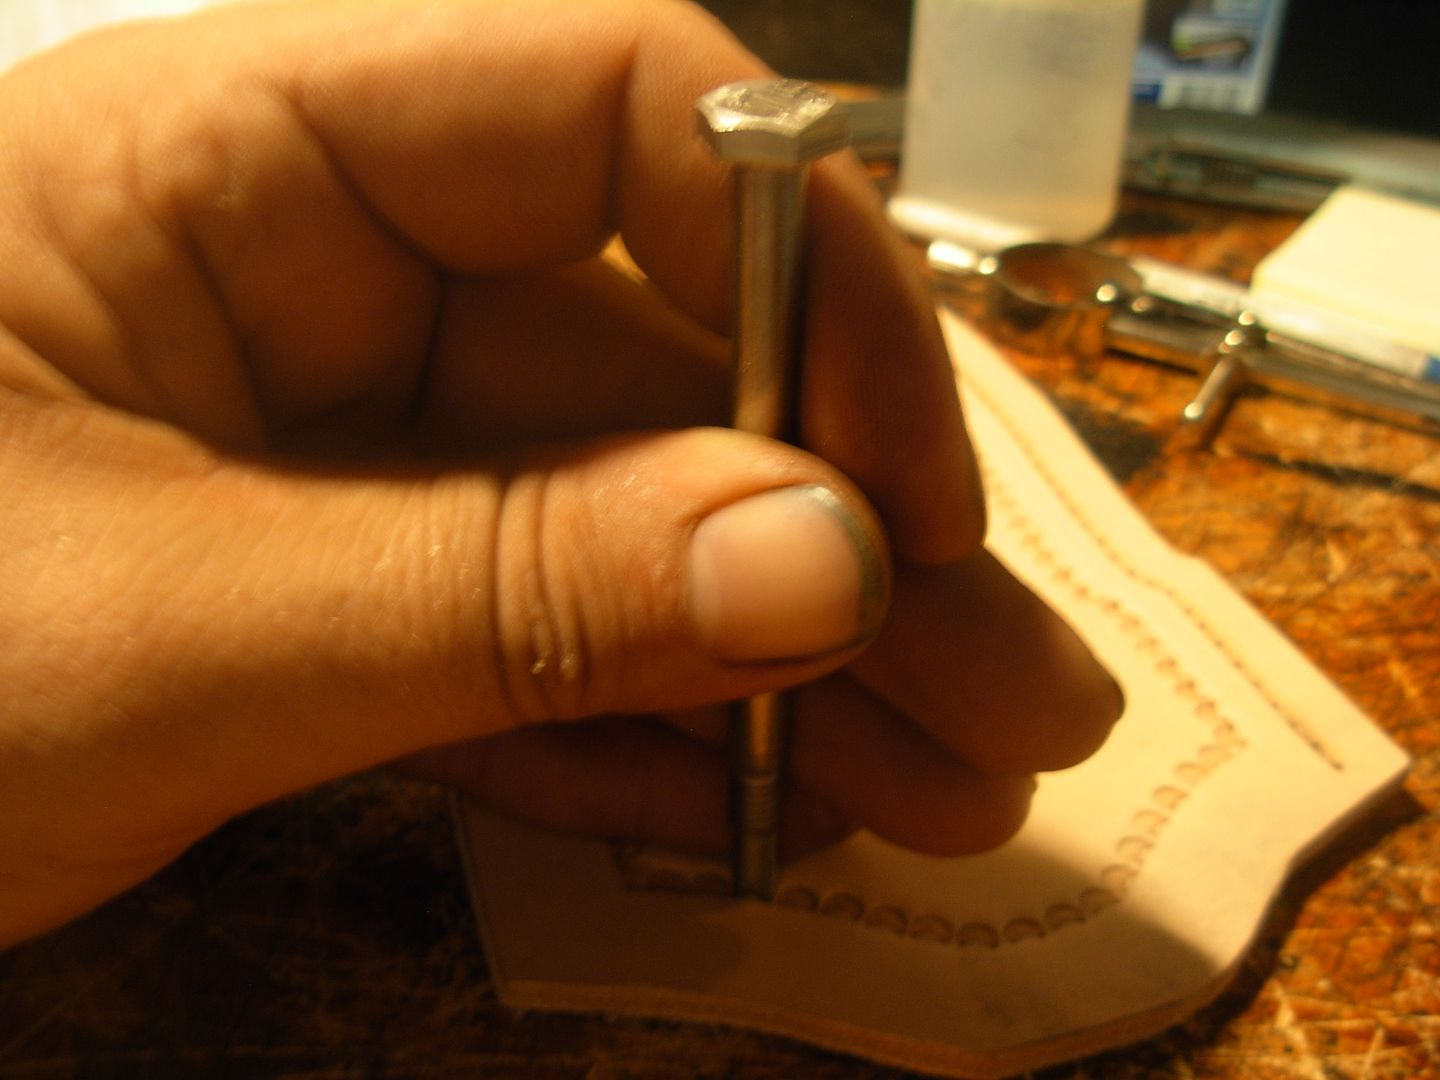
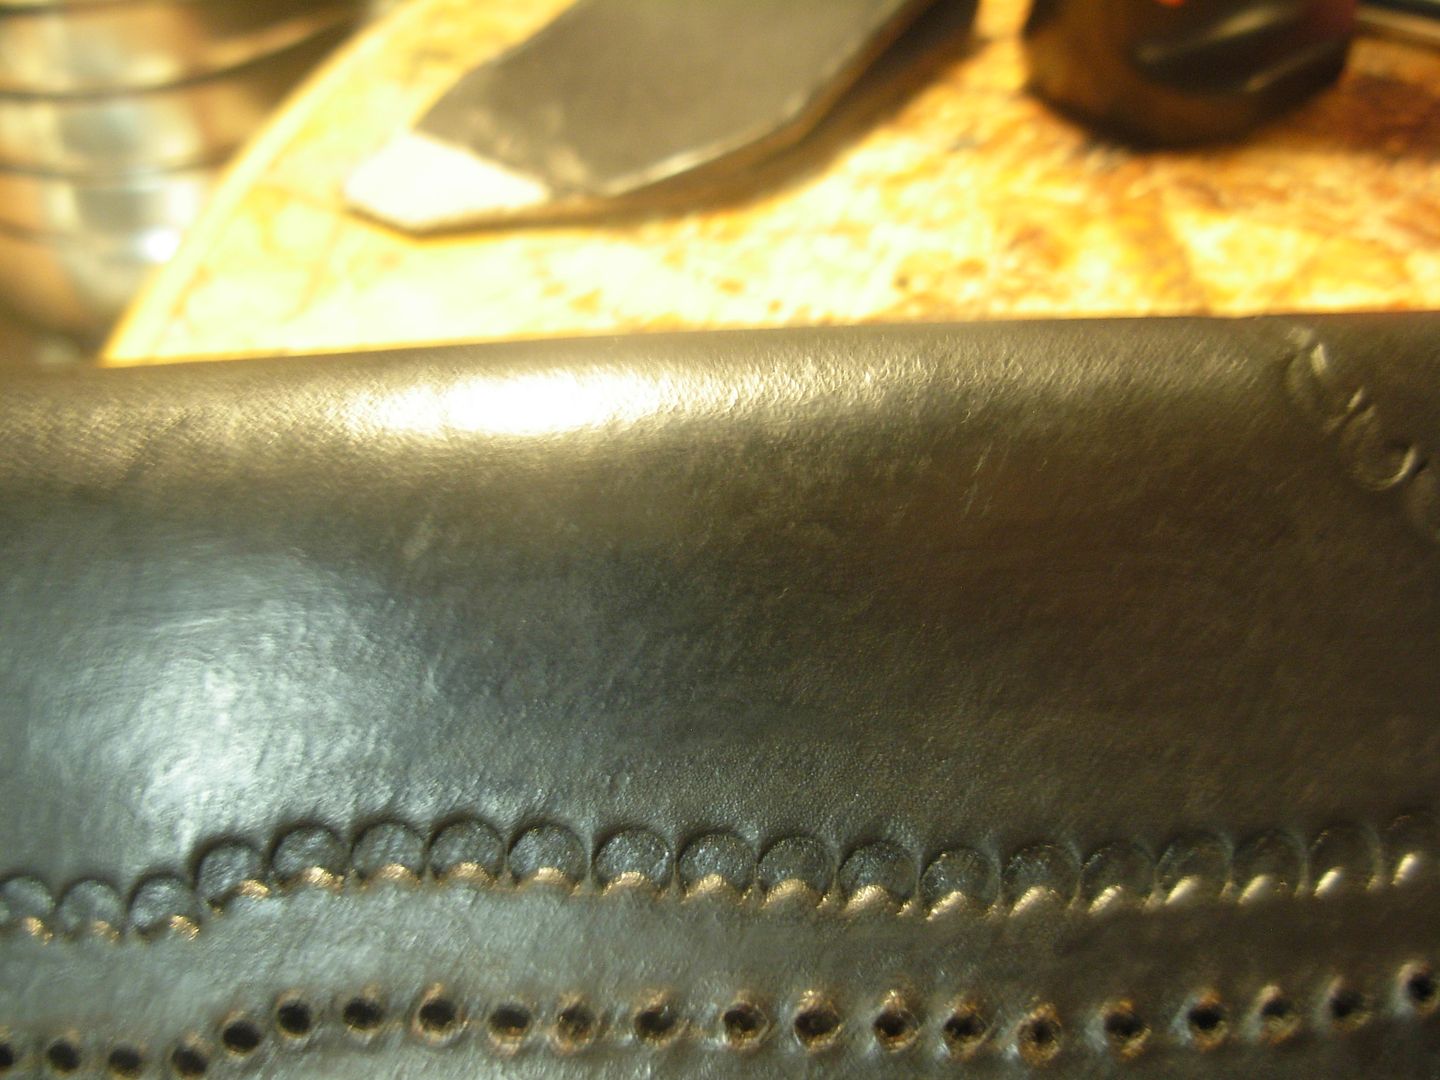
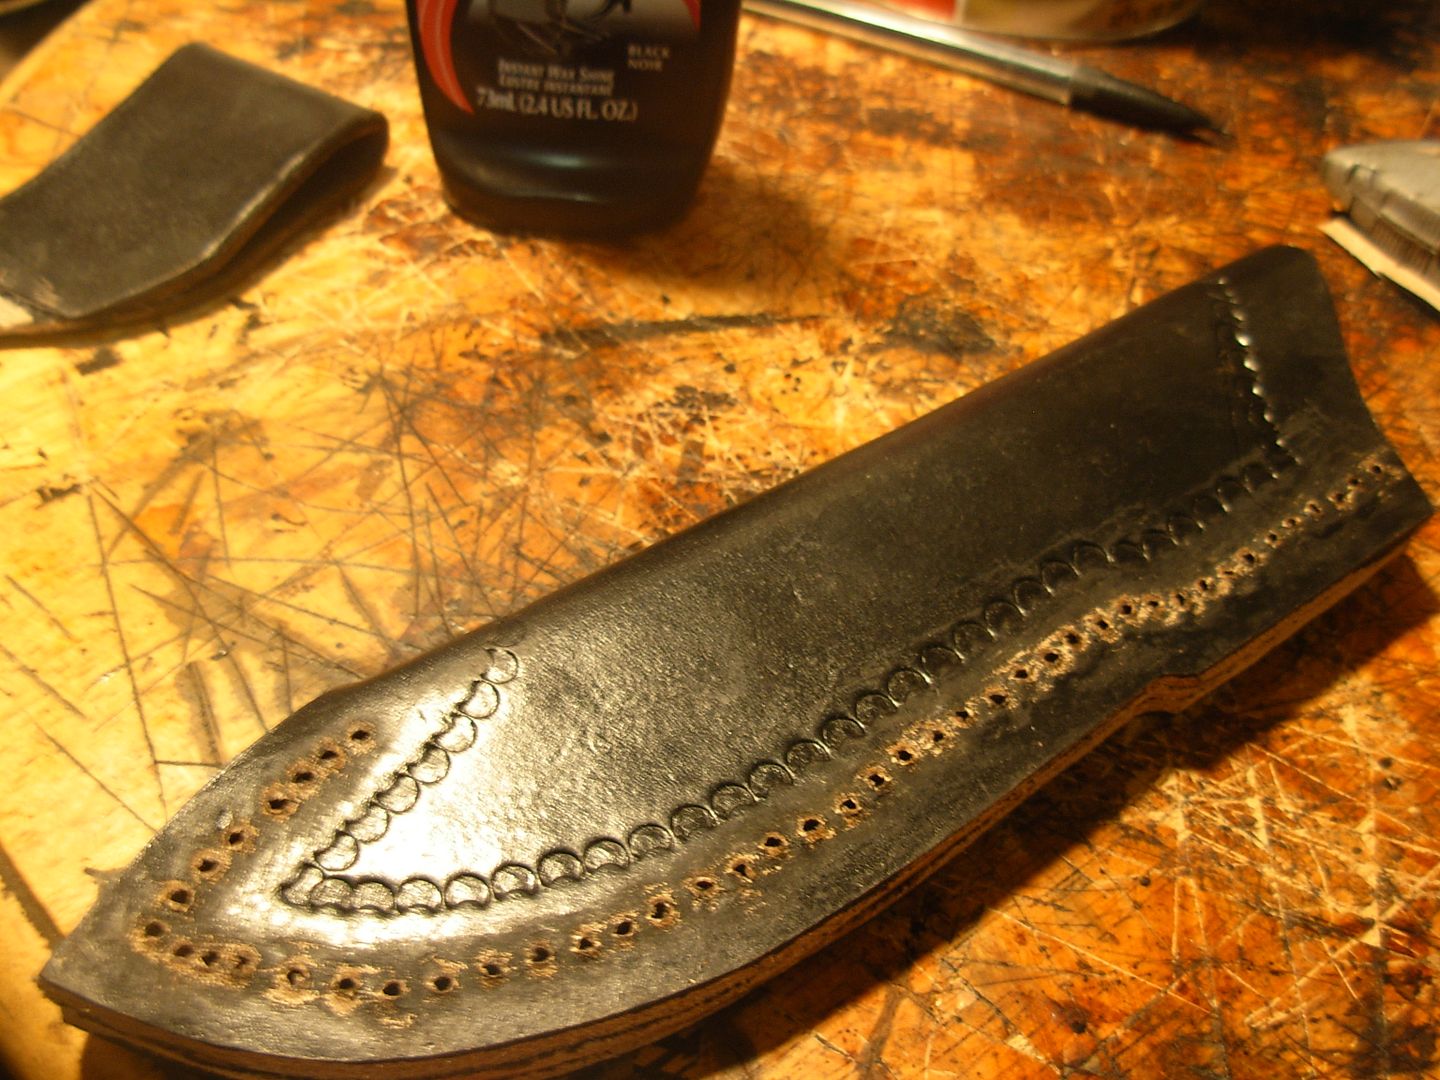
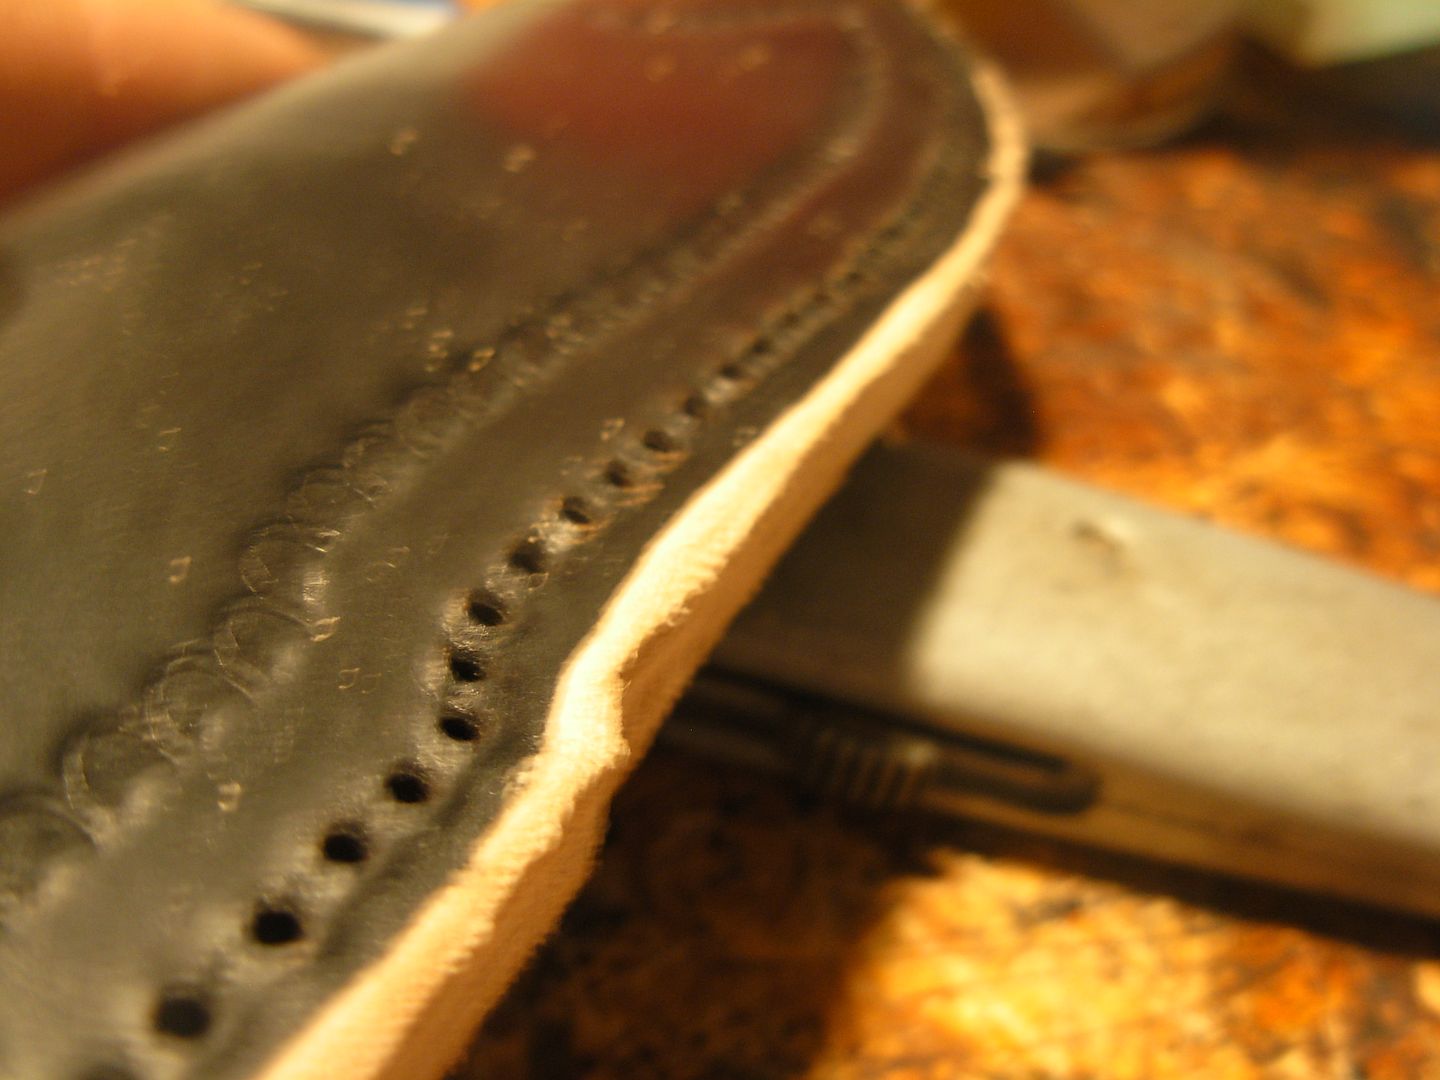
Now line the points of the stamp up on the stamp line and stamp the border in. This is how I hold my stamp with my pinky finger laying on my leather and controlling it's placement. We don't need to hit our stamp very hard at all and it'll be a good idea to practice on your scrap leather to get the feel for it. We don't need to use a standard hammer for this and a mallet is a better choice. A 2x4 with a handle cut on one side would work fine with the skinny edge for striking the stamp. Use whatever you've got or can make.
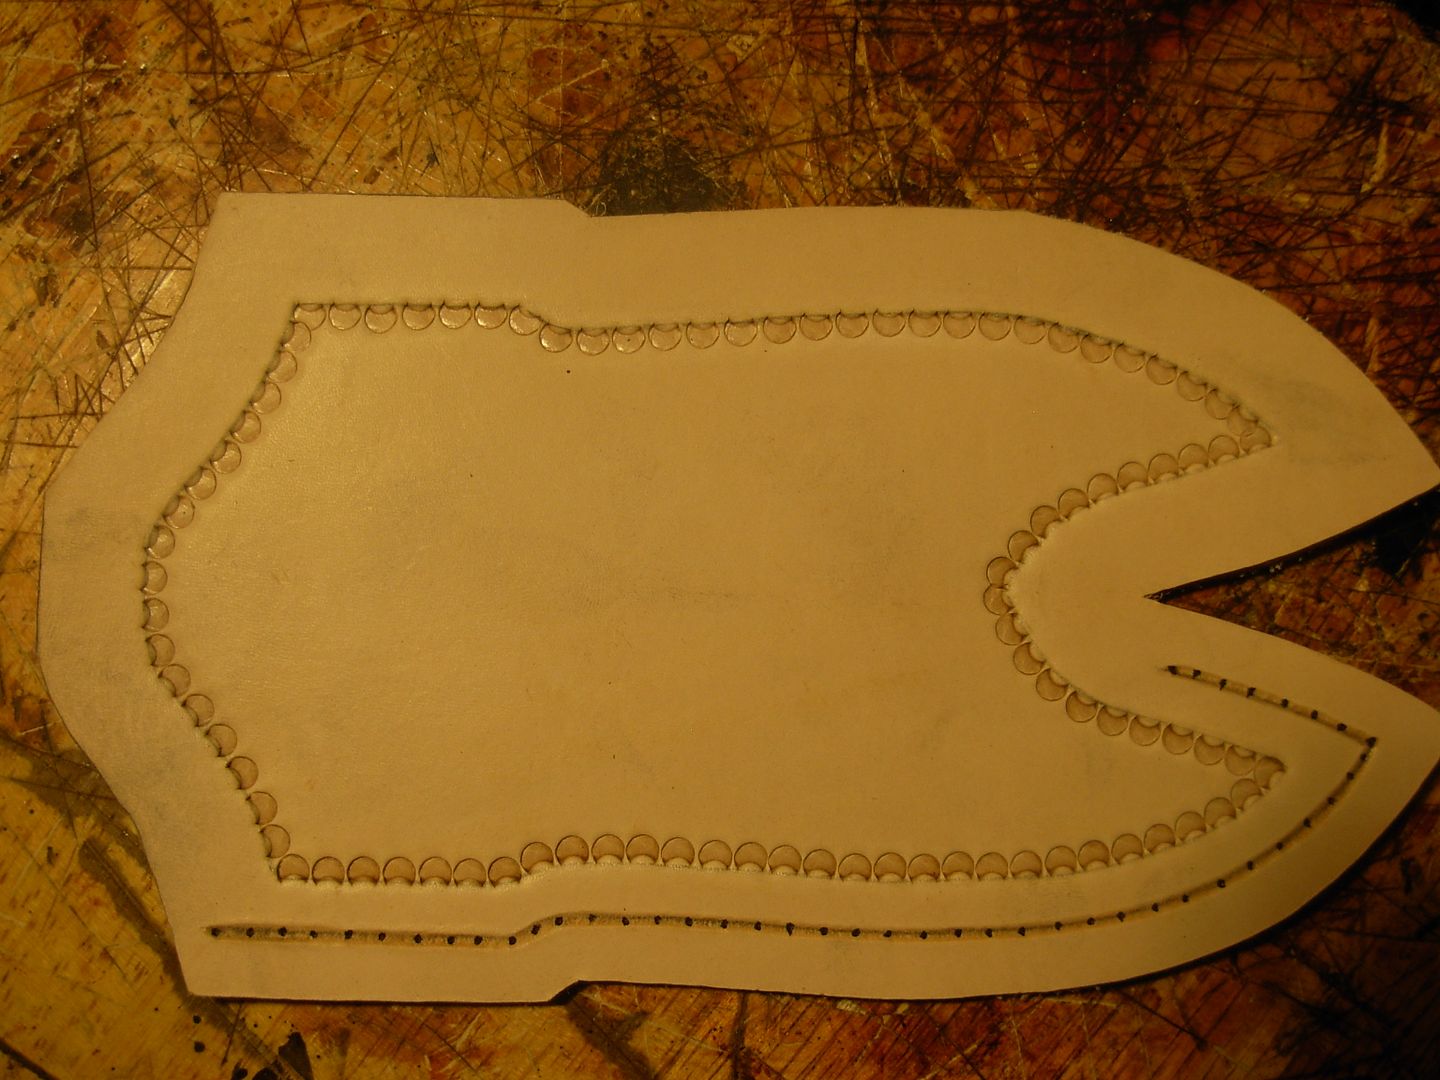
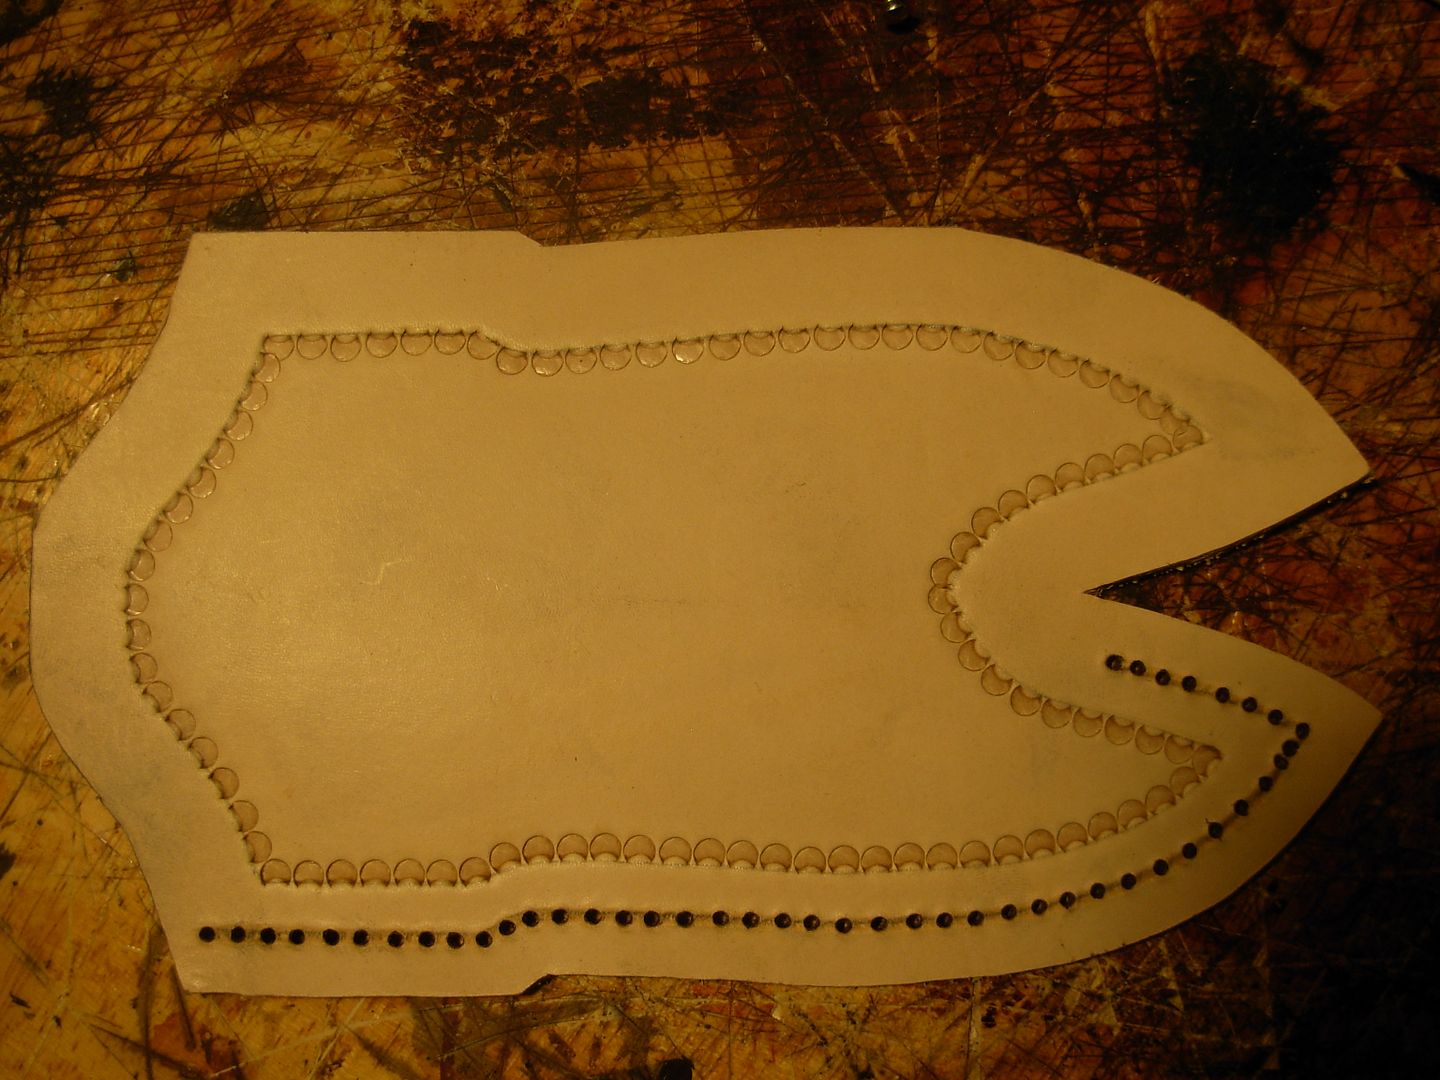
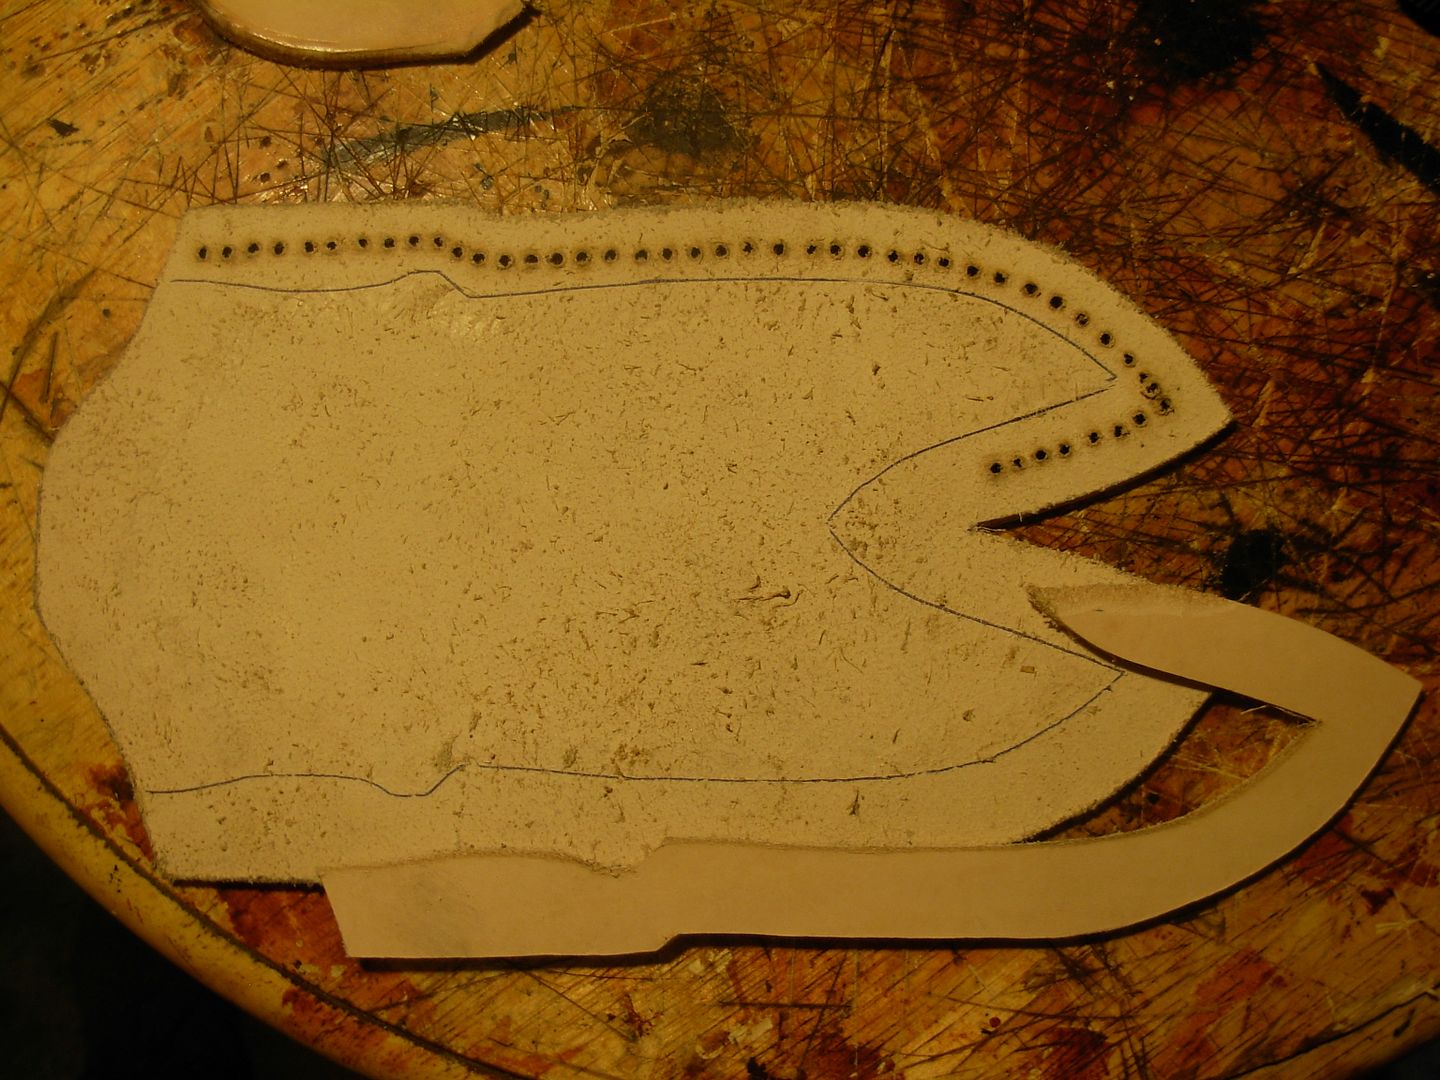
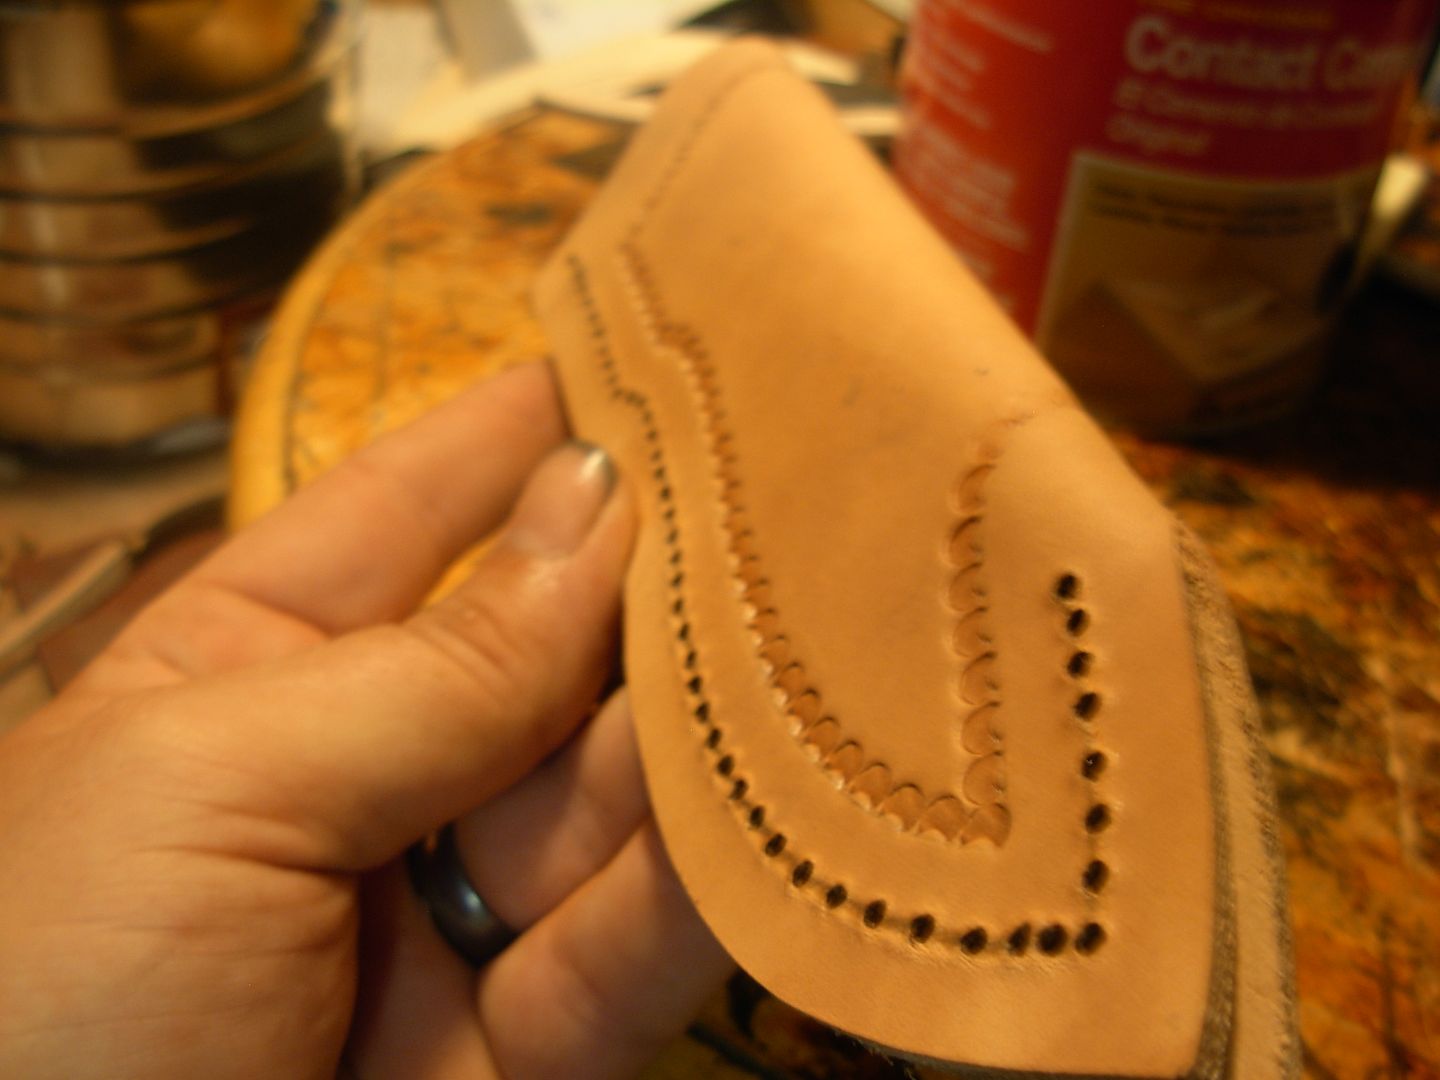
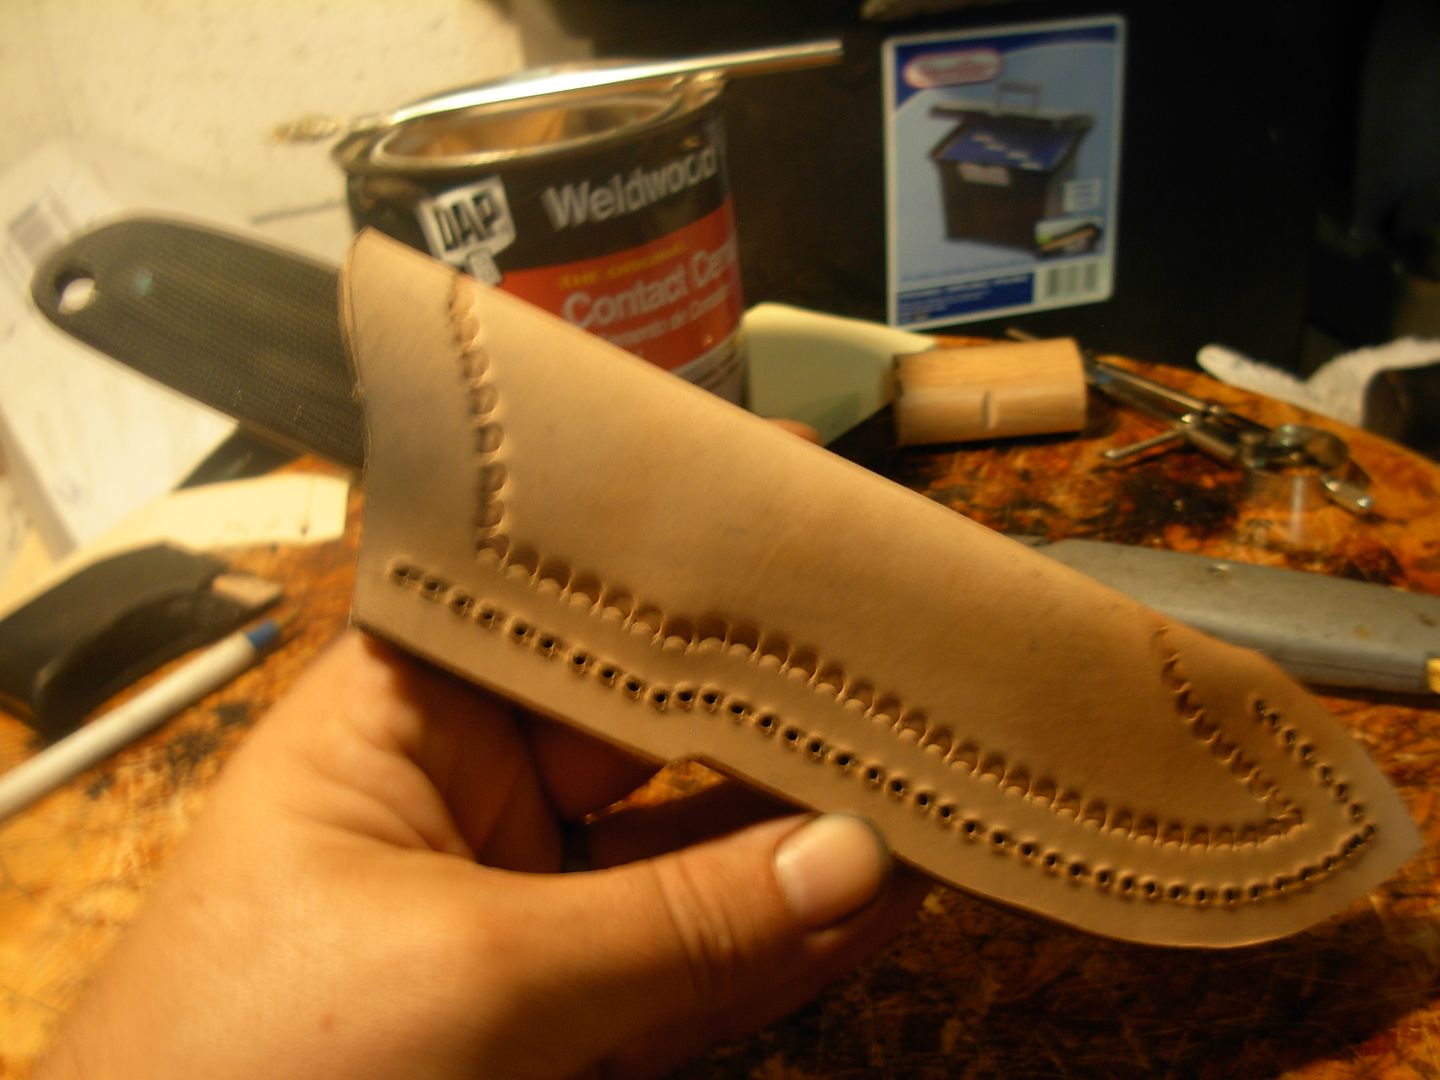
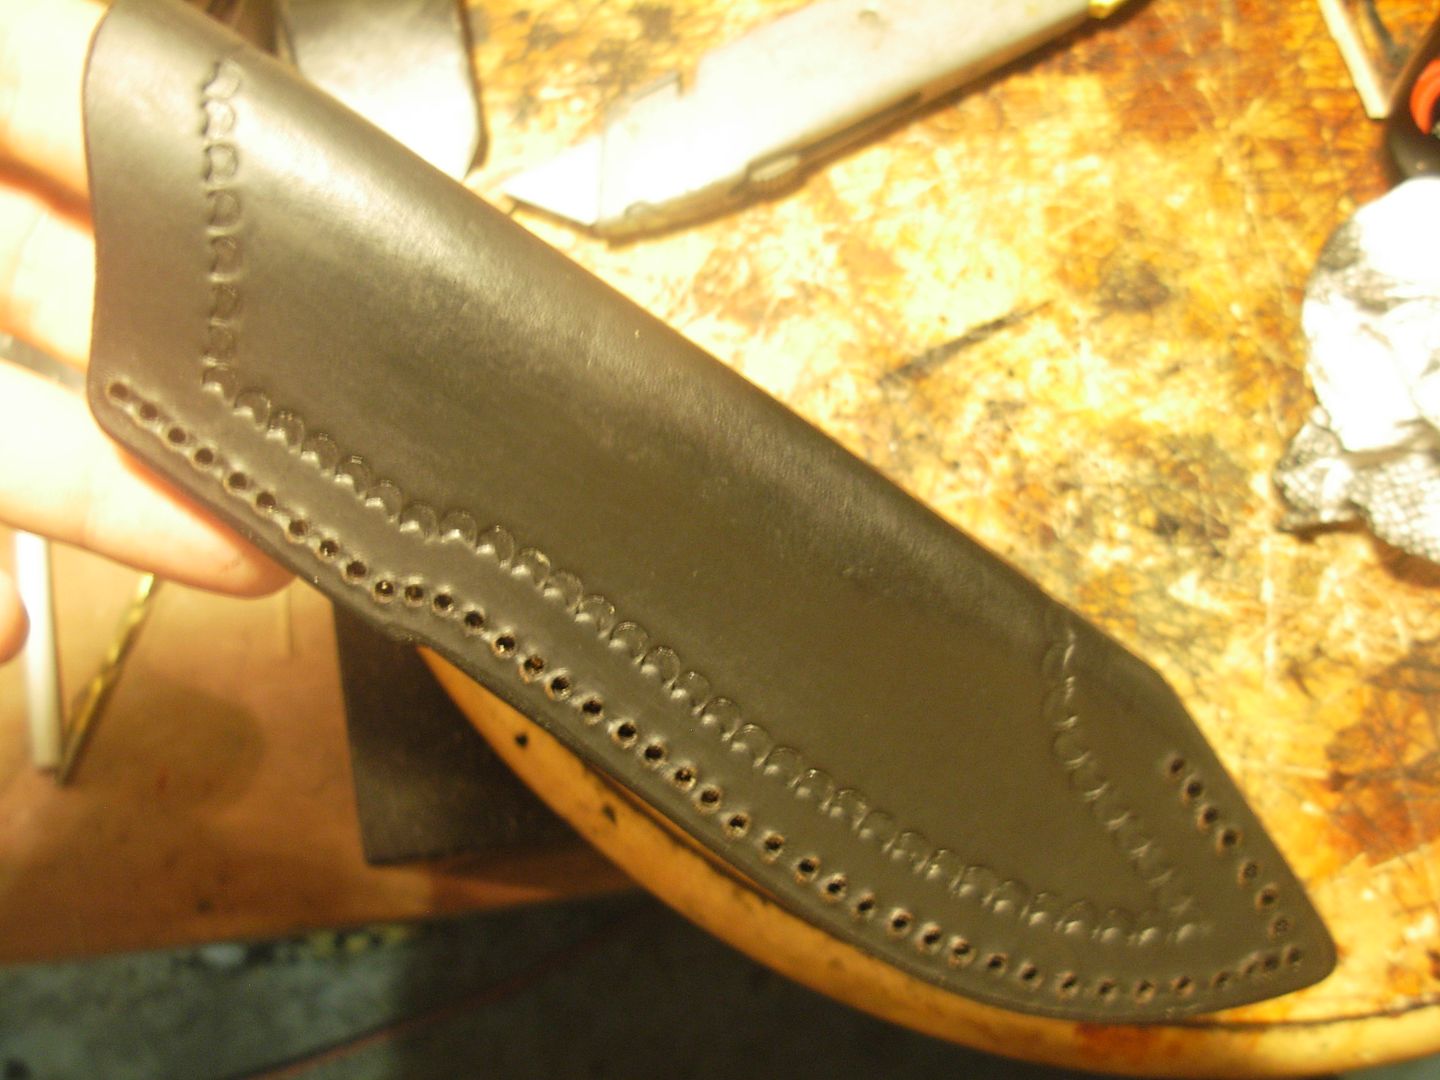
Here's my body fully stamped and layed out for stitches
Now we're ready to make our stitch holes. I'm going to do the body while it's a single layer just to make things easier on myself since I'm using a hand drill. To "drill" our holes we need to modify our 3/32" drill bit. Chuck it up backwards in our hand drill
Now put the drill in reverse and flip on the bench grinder and run the drill while grinding a point on the bit.
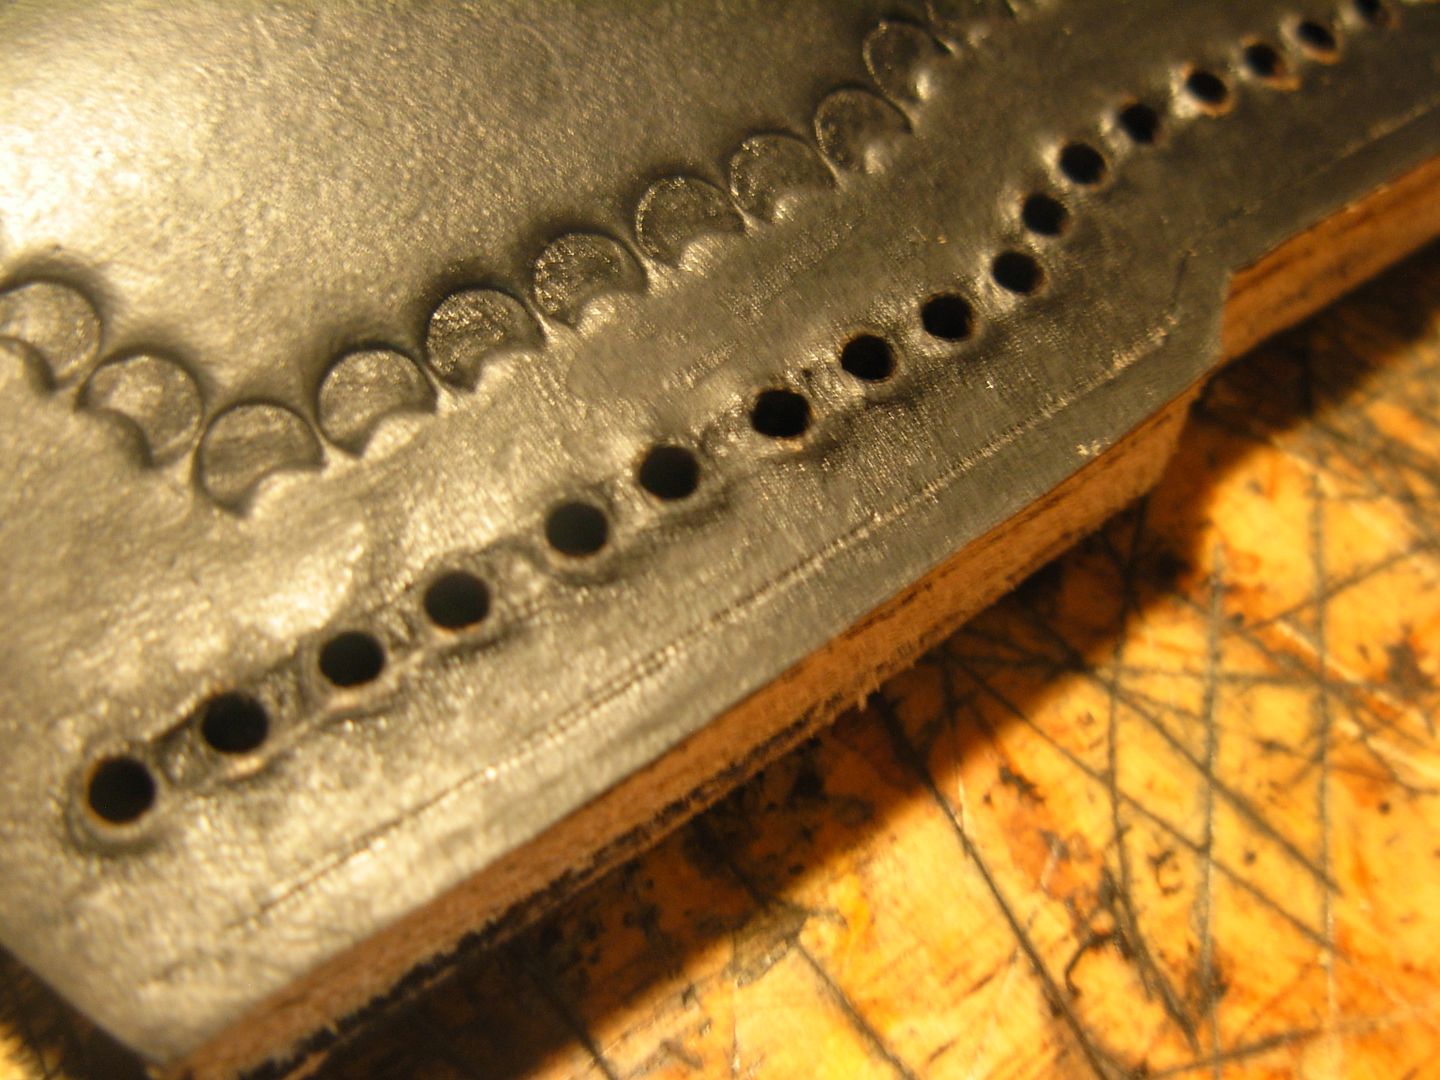
Now use that sharpened point to drill your holes. We're not removing any leather to create out holes this way as the bit burrows it's way through sperating the fibers of the leather not removing them.
-Josh
With this area of the welt remaining square cut we won't get a good fit once the sheath body wraps around it so bevel both sides of the welt
This is just a run of the mill compass available about anywhere they've got pens and pencils. I've removed the point and replaced it with a piece of pinstock for marking parallel lines. Here I'm setting the width for my stitch line. I want my stitches to be roughly 1/8" from the inside of the welt.
Now I've marked the welt just to be sure I like the location of my stitch line.
With my width adjusted where I'm happy with it I can now mark out my sheath body for my stitch line.
I'm a big fan of Border Stamping. It's a nice little touch on an otherwise plain sheath. Here I've layed my welt on top of my sheath body and adjusted my compass so it'll mark just a little wider than that.
Now I've used my compass to layout my stamp line around my body and traced over my layout lines with a regular pencil
With my layout done I'm ready to " CASE " my sheath body to prepare for stamping. To case the leather we simply wet it with water and let it dry back to it's original color. I use this little spritz bottle and spray my surface intil water lays on the surface then let that soak in. You can plop you piece right into a bowl of water or runit under the faucet for a second. We don't want to fully saturate the leather or it'll take forever to dry out but the amount of water isn't critical, just get it wet and let it dry.
We'll be waiting 10 or 15 minutes for our leather to case so however are we going to make a border stamp without a stamp you say ??? Why we'll just make one of course. This is a 1/4-20 x 3 1/2" Stainless steel bolt. I've ground the threads of the end on my bench grinder
Now I filed my stamp to shape with my chainsaw file. I drilled a 1/4" hole through my work bench to hold the bolt while working it with my file.
Give it a little test run before trying this on your sheath. Not too bad but I'm going to go a little deeper with my file cut
That's the ticket. It took me about 3 minutes to make this simple stamp. You can get as fancy as you wish and make all your own stamps from stainless bolts
With my leather about halfway to being cased I want to burnish in my stitch line. This is the end of my compass pin but you can make something similar from a leftover piece of our 3/32" pinstock. Round the end over and your good to go. To burnish just rub your pin back and forth while pushing down to create a bit of a depression.
Here you can see that I'm almost cased out but not quite yet as you can see I've still got some dampness down the center so I'll use this time to mark out my stitches
You can use any old ruler to layout your stitches but your eyes will go buggy staring at all those little lines. Here I've whipped up a little stitch guide at 3/16" intervals that's easy on the eyes and makes short work of marking your stitch locations on your stitch line.
This is just to show that my sheath body has dried out to it's original color and is now cased and ready for stamping
Now line the points of the stamp up on the stamp line and stamp the border in. This is how I hold my stamp with my pinky finger laying on my leather and controlling it's placement. We don't need to hit our stamp very hard at all and it'll be a good idea to practice on your scrap leather to get the feel for it. We don't need to use a standard hammer for this and a mallet is a better choice. A 2x4 with a handle cut on one side would work fine with the skinny edge for striking the stamp. Use whatever you've got or can make.
Here's my body fully stamped and layed out for stitches
Now we're ready to make our stitch holes. I'm going to do the body while it's a single layer just to make things easier on myself since I'm using a hand drill. To "drill" our holes we need to modify our 3/32" drill bit. Chuck it up backwards in our hand drill
Now put the drill in reverse and flip on the bench grinder and run the drill while grinding a point on the bit.
Now use that sharpened point to drill your holes. We're not removing any leather to create out holes this way as the bit burrows it's way through sperating the fibers of the leather not removing them.
-Josh
Steven Long
Well-Known Member
Josh,
This is by far the best tutorial I have ever come across. Thank you so much for taking the time to make this. I have been learning so many things that I feel like I owe you something now.
This could be published into a book, it's so good.
This is by far the best tutorial I have ever come across. Thank you so much for taking the time to make this. I have been learning so many things that I feel like I owe you something now.
This could be published into a book, it's so good.
Josh Dabney
Moderator
Appreciate the comments Fellas ")
Finished working the sheath body for the moment I'm ready to do some work to my belt loop. The first step is to tranfer the lines from my pattern to my leather but I'll put both lines on the back side of the leather.
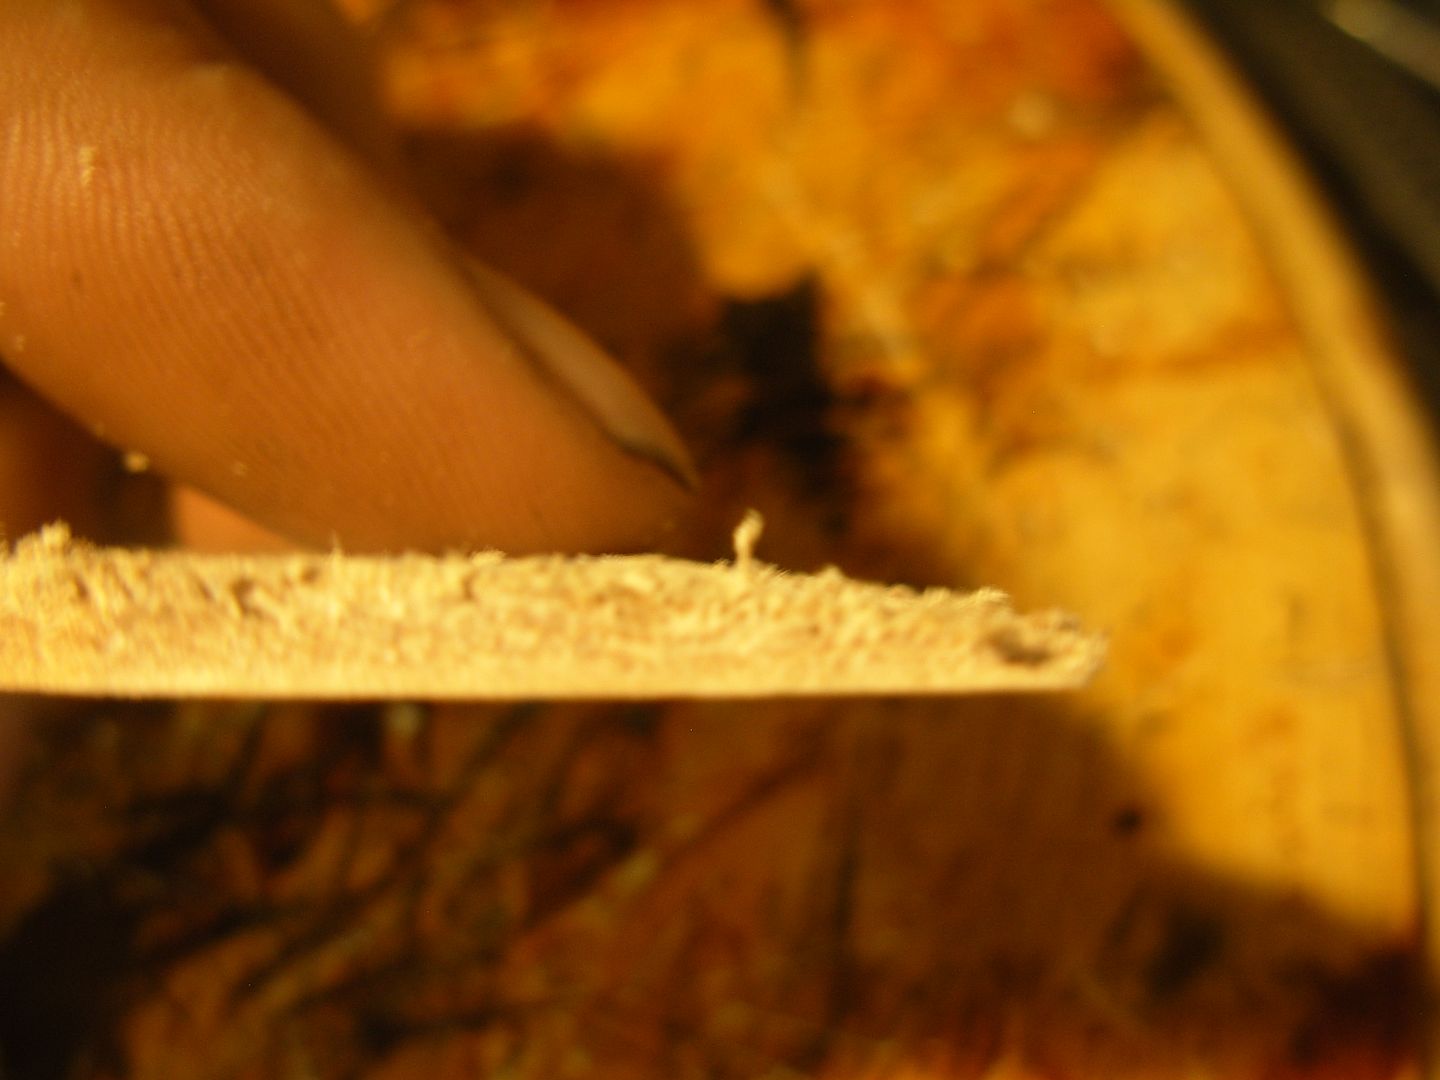
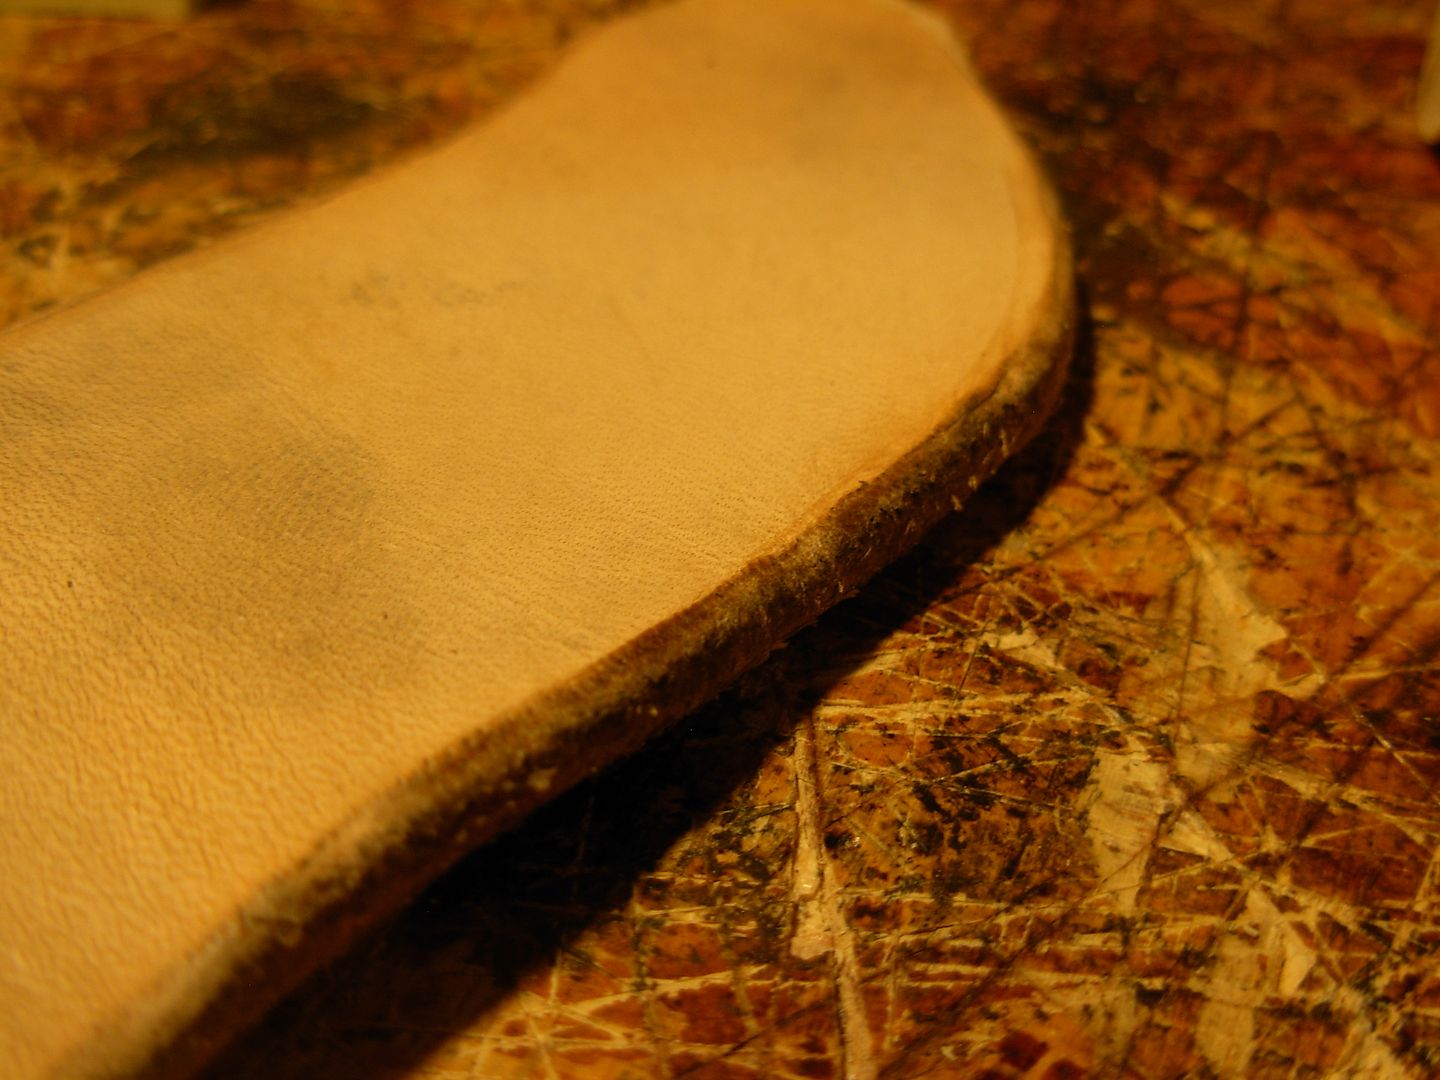
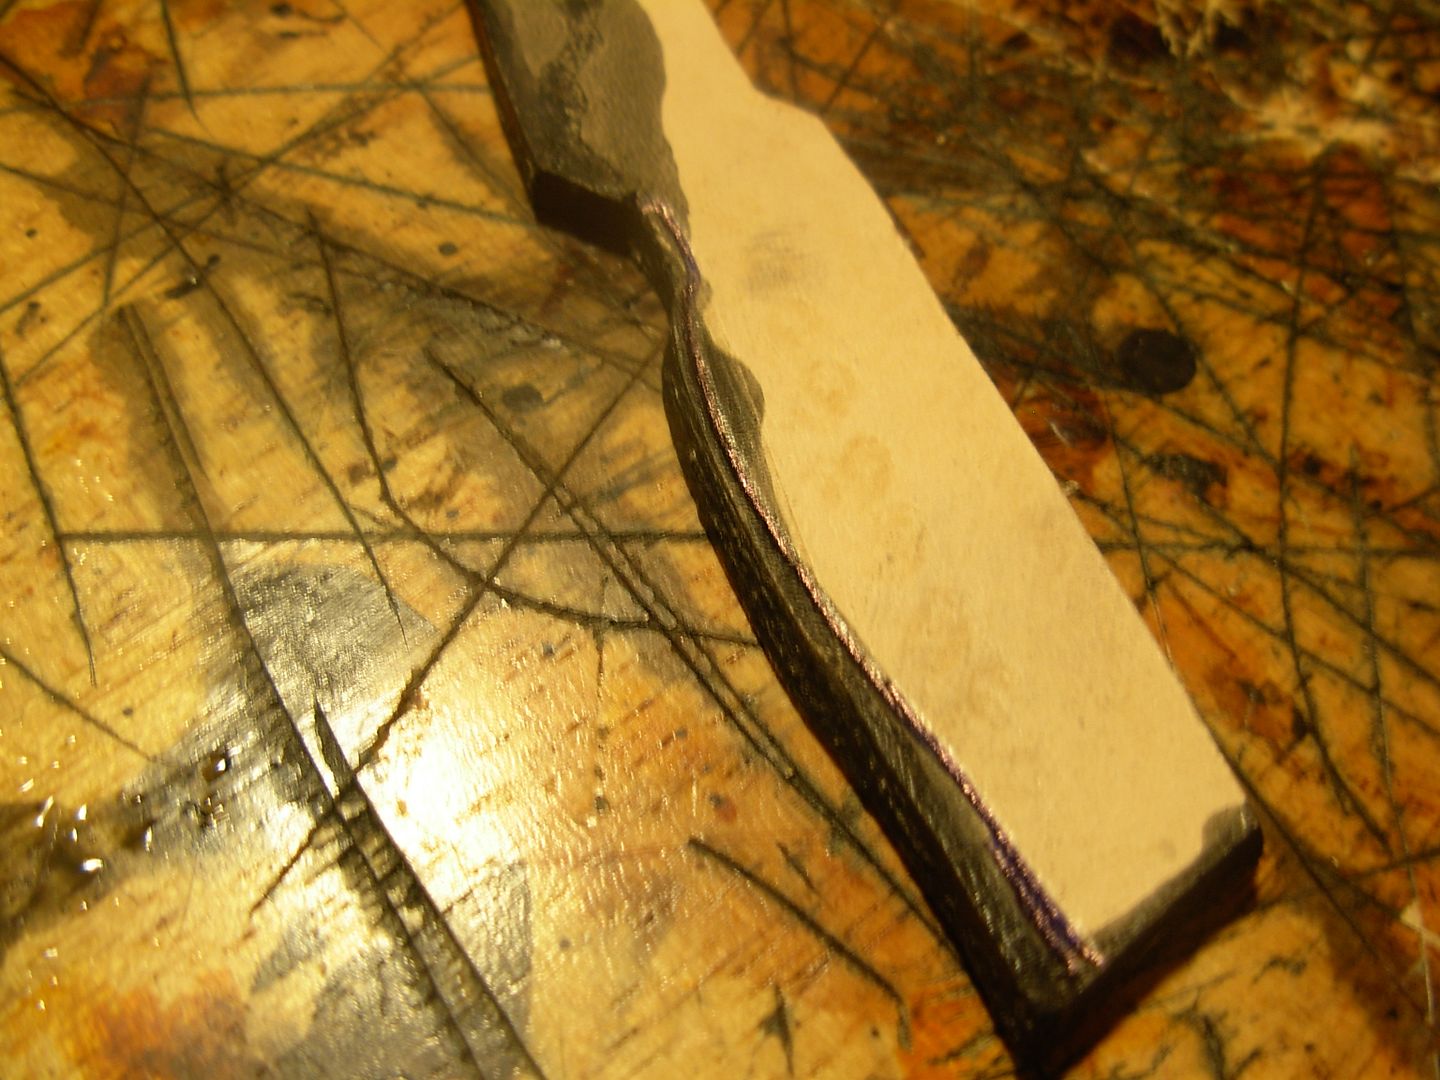
Now I'm going to "skive" the ends of my belt loop. Skiving is thinning out the thickness of the leather like this
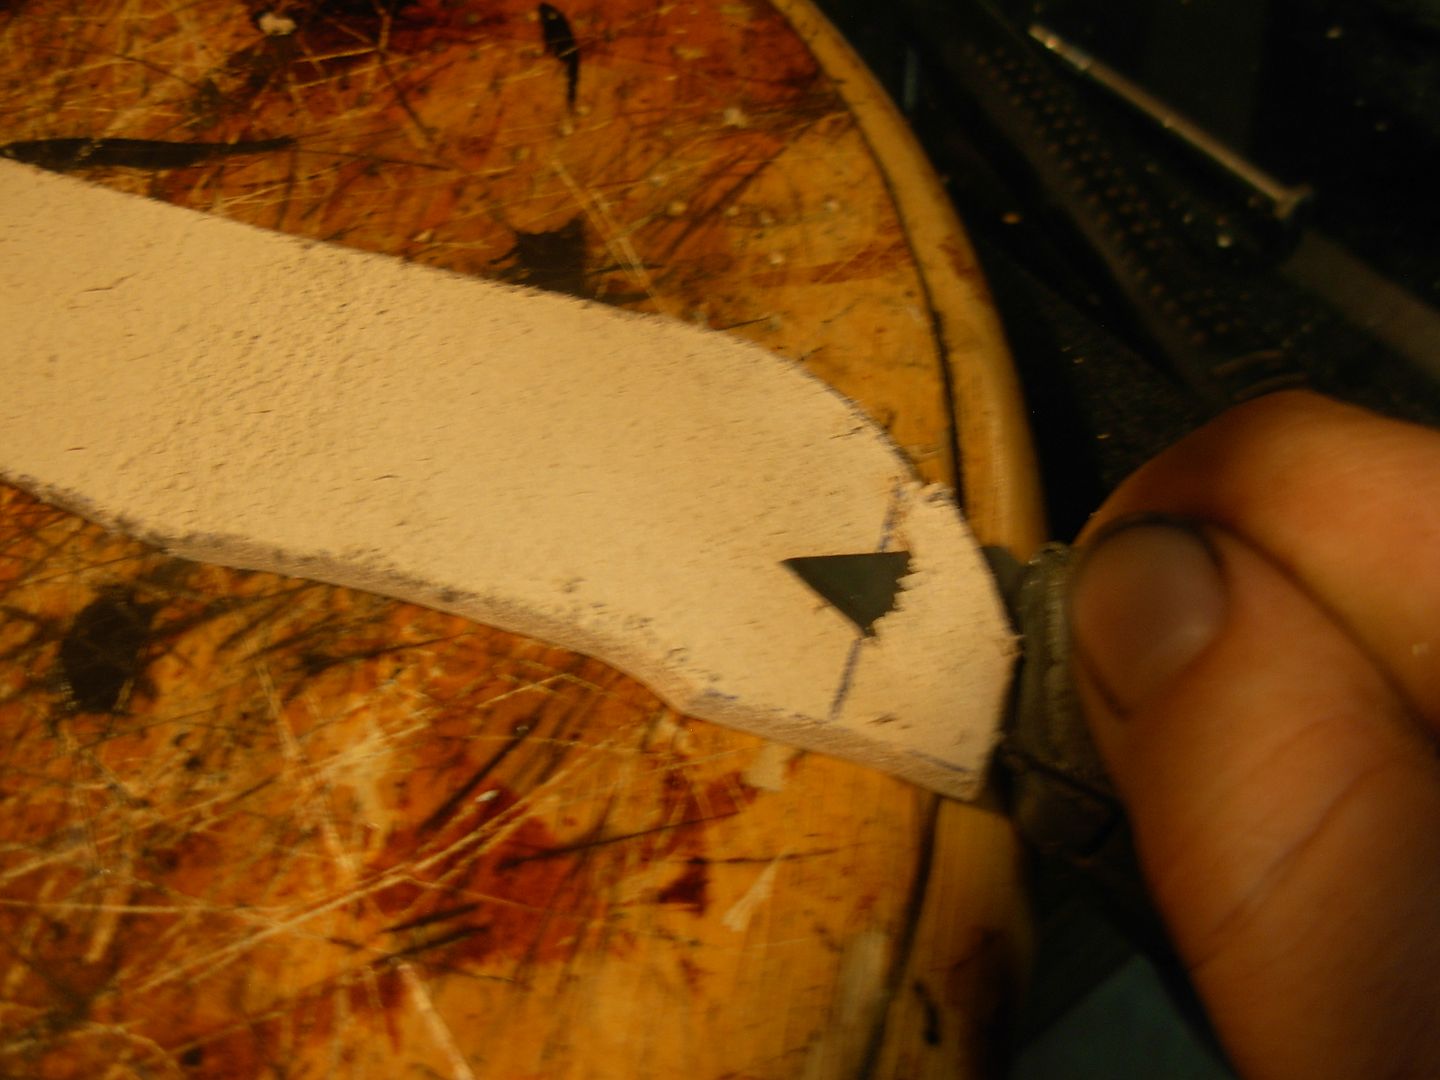
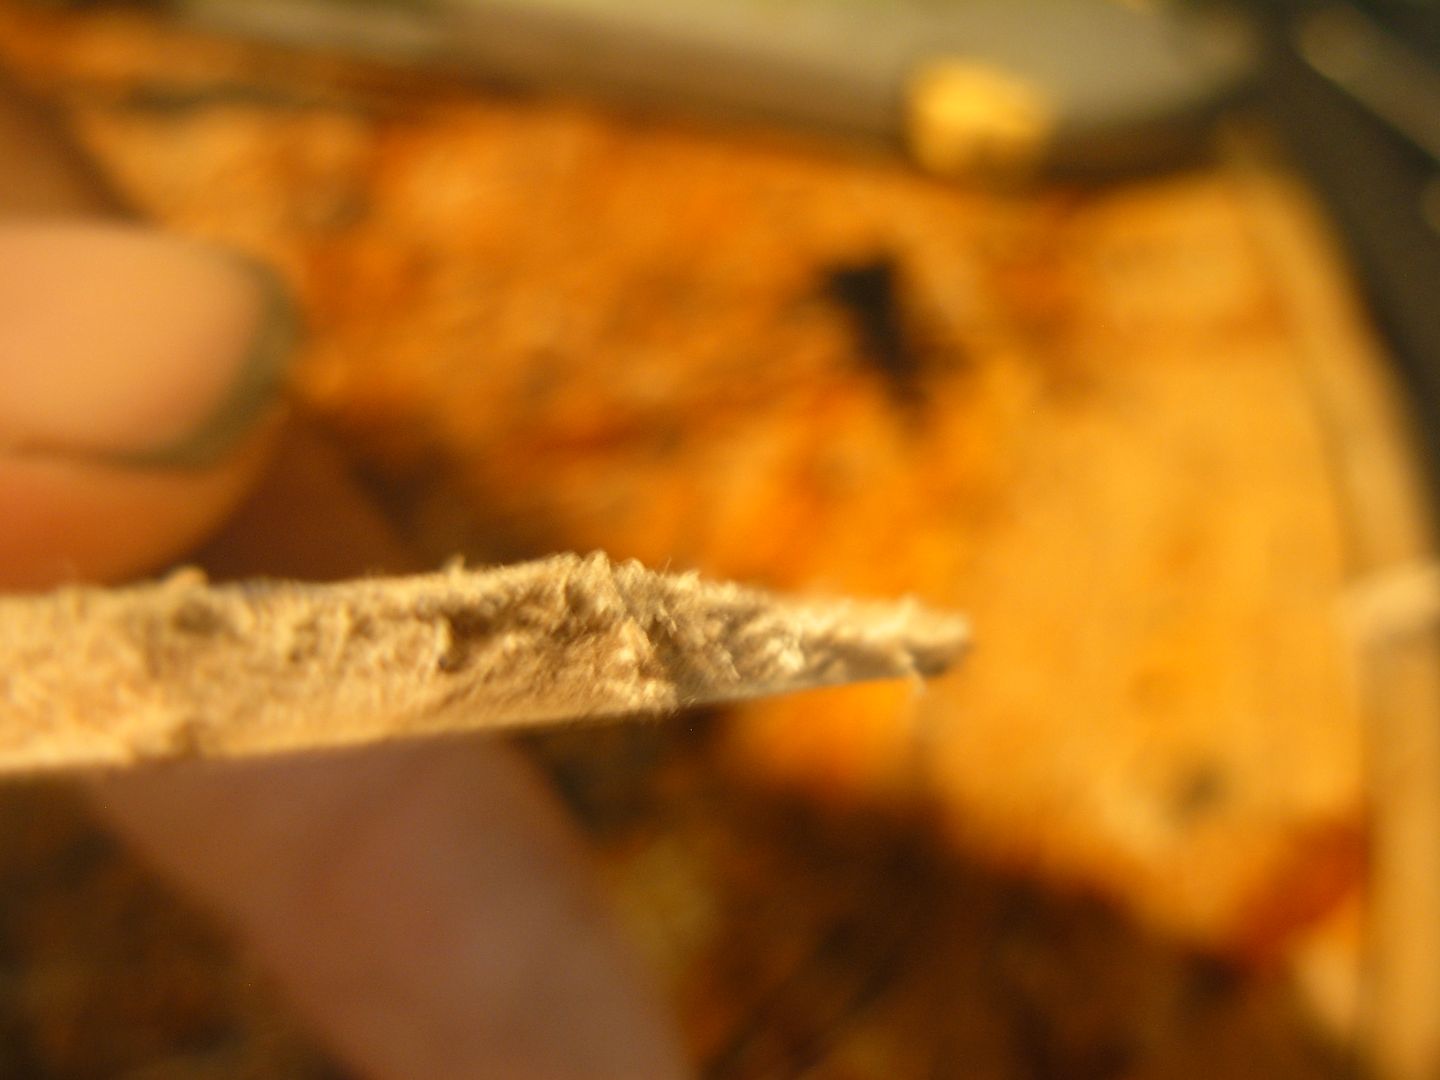
Here you can see the taper skived into the ends. This is going to keep my loop nice and smooth where it meets the body of my sheath
Now I want to round the edges of my loop so I'm trimming a tiny corner off both sides of the leather
Now I need a burnishing tool so I made a cut into this wood scrap with my chainsaw file. The edge will cased and then burnished with this little file cut to round the edge.
Burnishing will form my edge round. It may look like doo-doo now but dying will help significantly and it'll be much better than a straight knife-cut edge
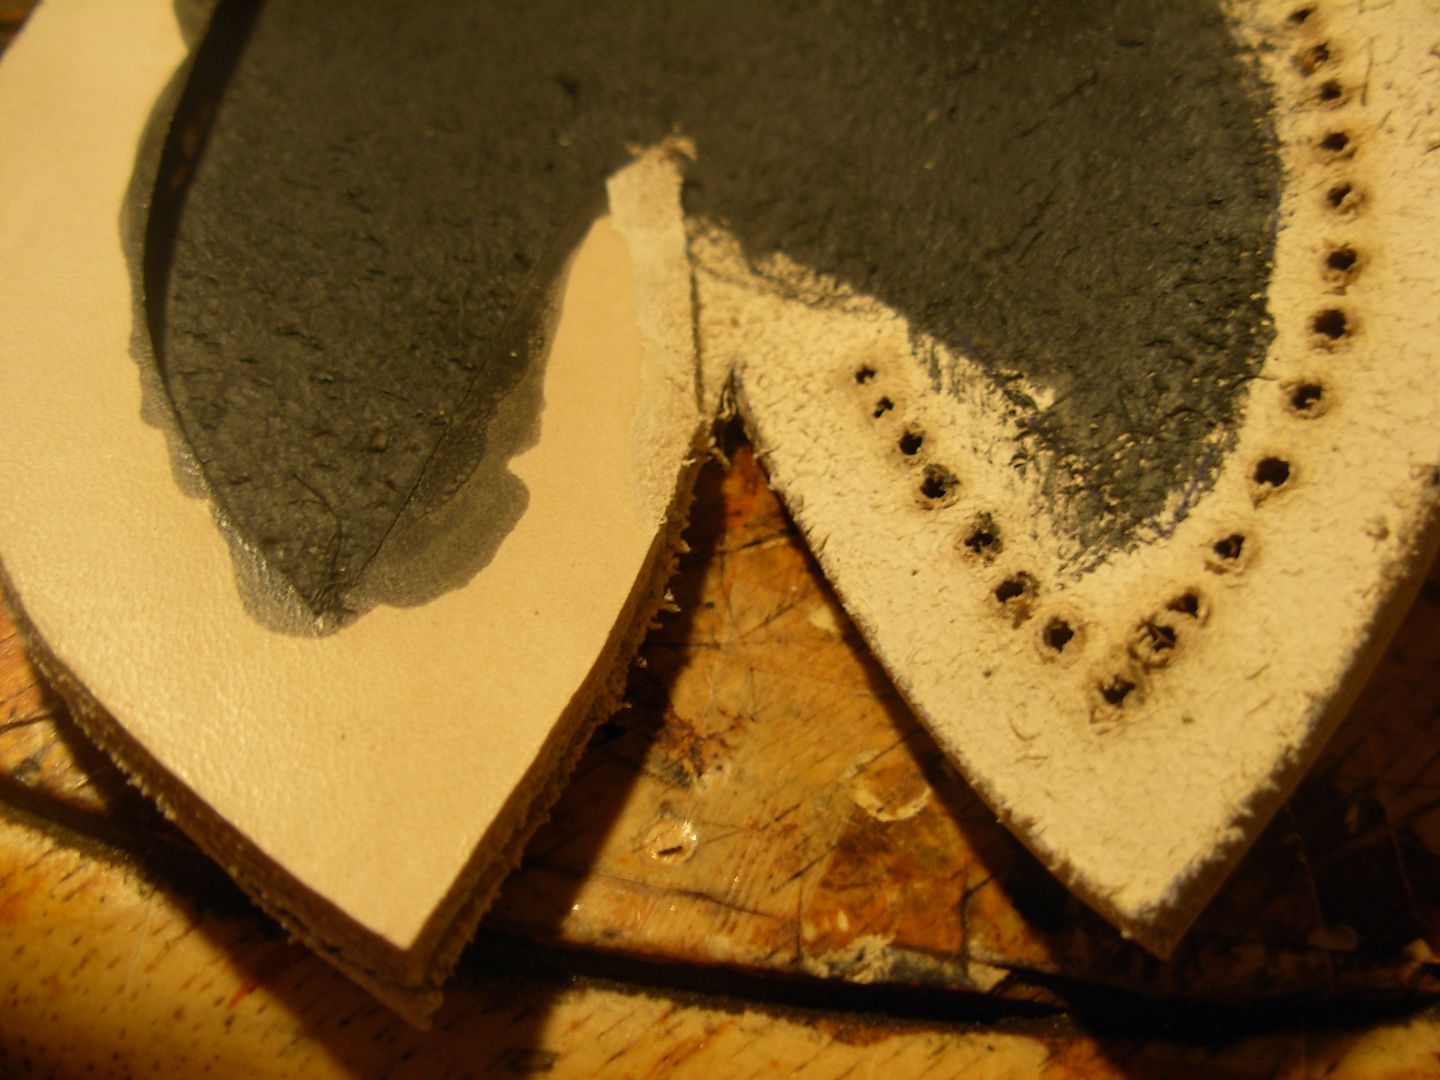
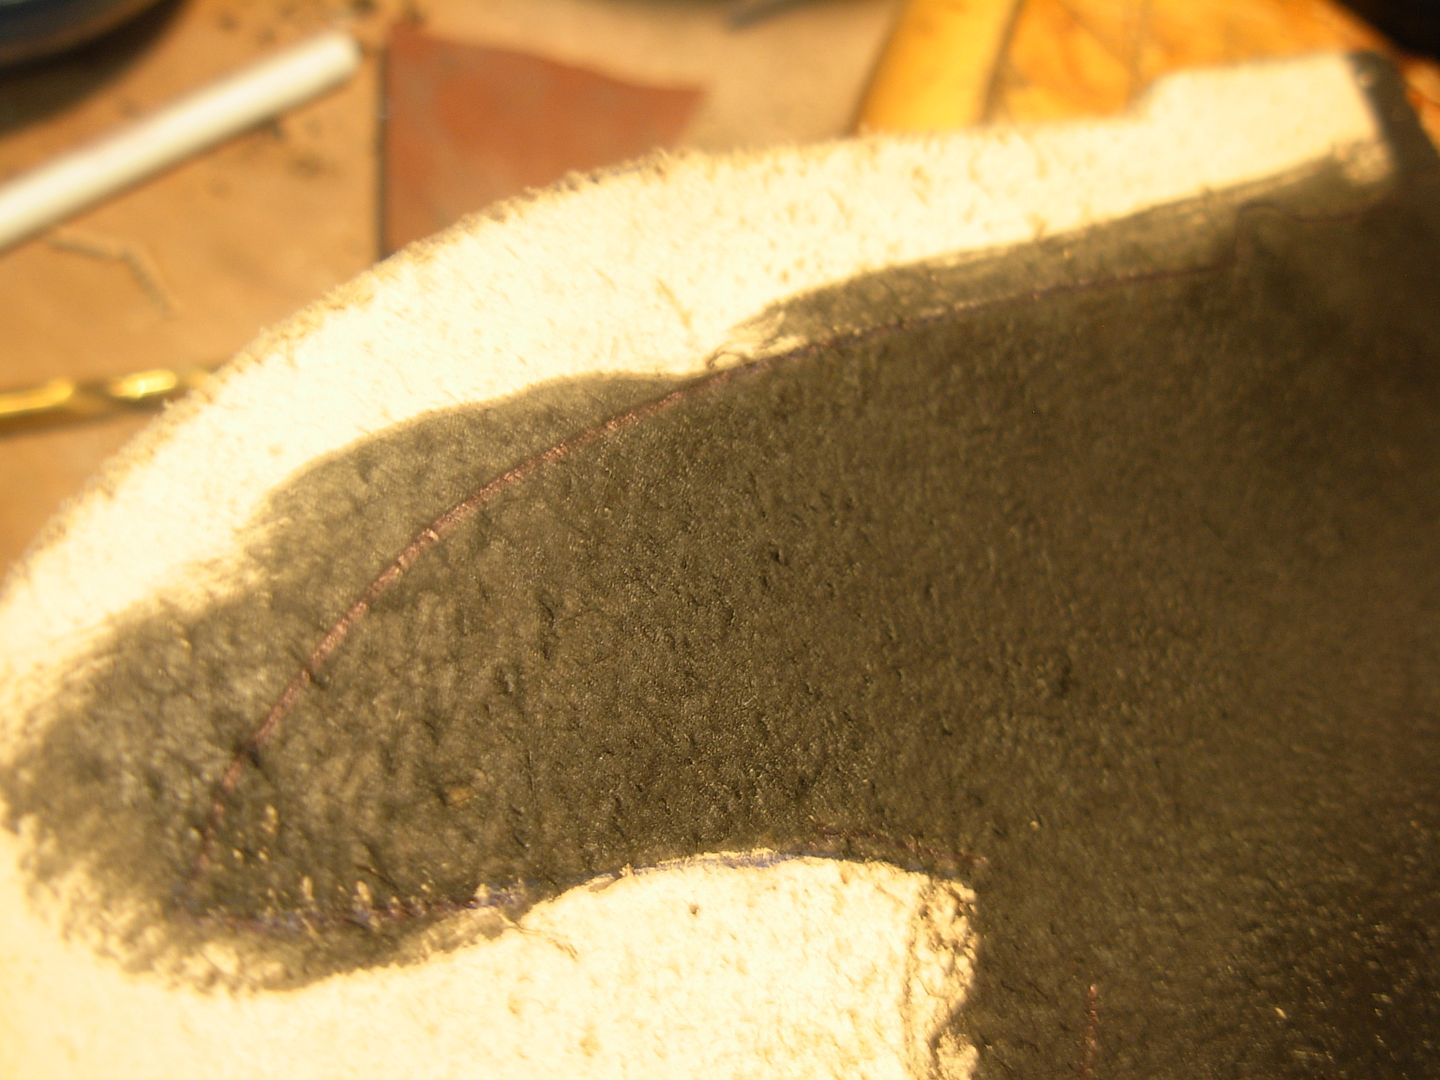
I'll be dying and sealing the inside of my sheath so to prepare for that I line my welt up and trace it on my sheath body. I prefer my glue to be on bare leather so I'll avoid the welt area when dying
Now I went ahead and dyed the inside of my sheath body, the inside edge of the welt itself, and the belt loop. Notice that I folded my belt loop. Once it's dry and sealed it's not going to want to form well so pre-forming while it's wet with dye is the best bet.
Let's talk for a minute about leather dye. If you want pick up some leather dye for your project by all means do so. I recommend Feiblings Pro Oil Dye. I've used all the colors and they'll all give a great result with little hassle. I like a 1" wide foam paintbrush for applying dye. you can find the Pro Oil dye at USAKnifeMakers here-
http://usaknifemaker.com/sheath-making-materials-supplies-c-37/dye-pro-oil-black-4oz.html It does come in different colors so browse through the sheathmaking supplies to find what you're after.
With oil dyes you'll also need a Top Coat to finish the dyed leather. Good results can be had with Satin Sheen or Super Sheen-
http://usaknifemaker.com/sheath-making-materials-supplies-c-37/eco-flo-satin-shene-4oz.html
http://usaknifemaker.com/sheath-making-materials-supplies-c-37/tandy-e-super-shene-4oz.html
DO NOT TRY ECO-FLO DYES ! I haven't met a leatherworker yet who likes these dyes and expect a streaked finish at best with them.
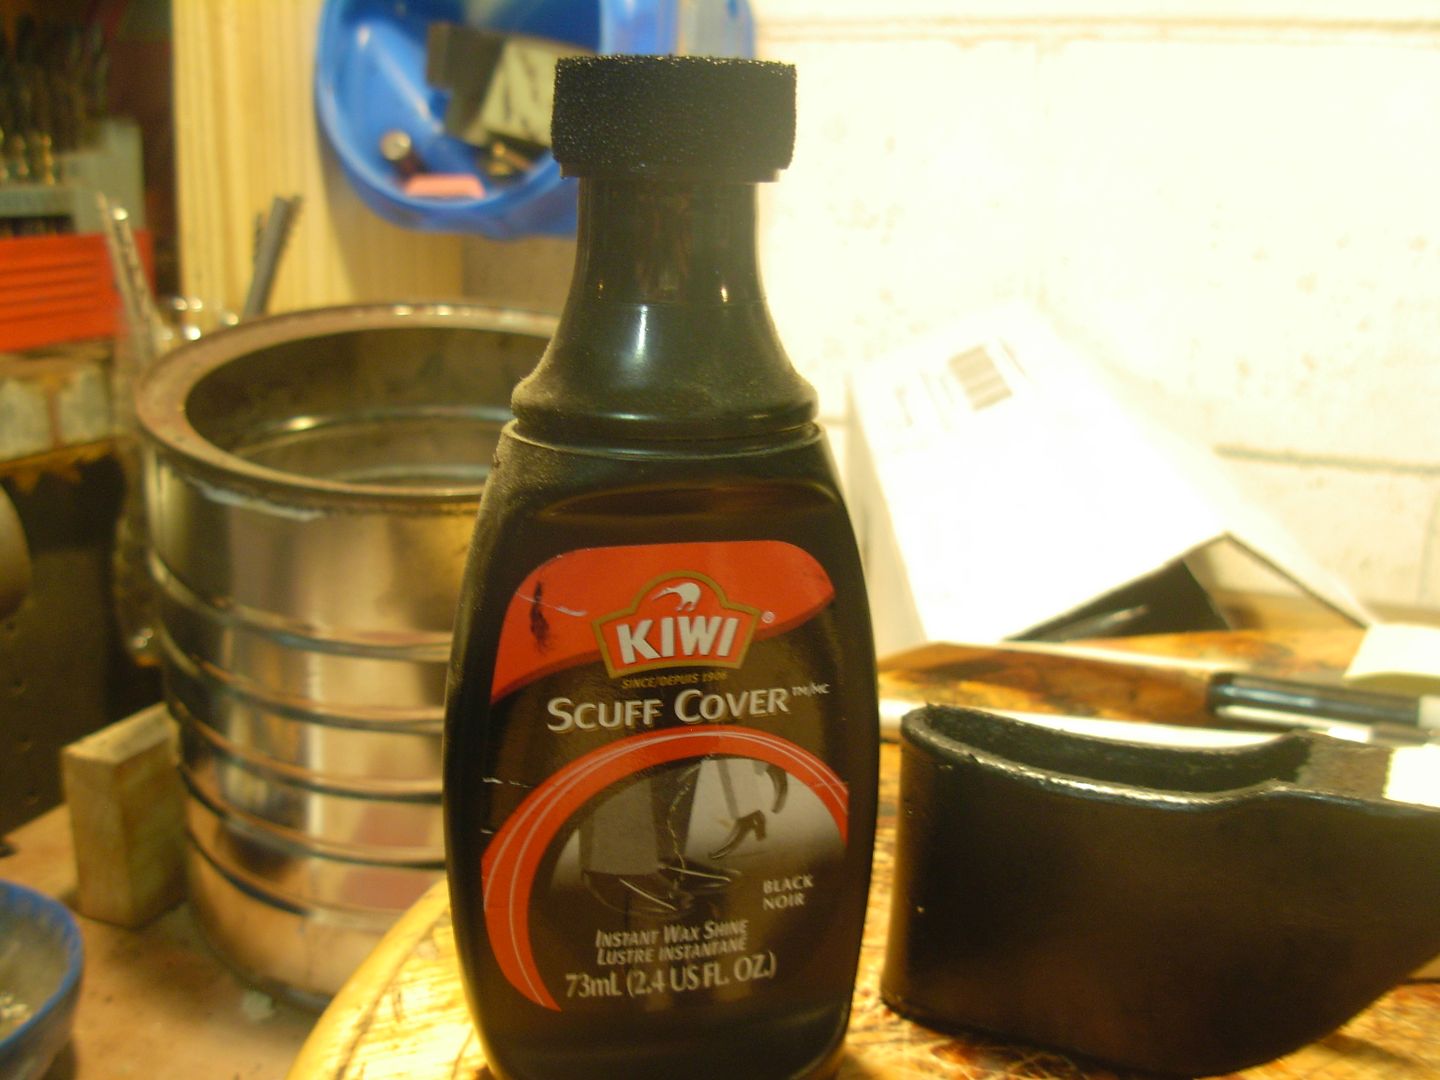
For this tutorial I'm using KIWI scuff cover (shoe dye). It is dye and sealer all in one and available locally for a few bucks. It has a foam applicator built right into the top so press the foam to your leather and GENTLY squeeze the bottle to get some liquid onto your leather and rub it in with the applicator.
This stuff can be found about anywhere
-Josh
Finished working the sheath body for the moment I'm ready to do some work to my belt loop. The first step is to tranfer the lines from my pattern to my leather but I'll put both lines on the back side of the leather.
Now I'm going to "skive" the ends of my belt loop. Skiving is thinning out the thickness of the leather like this
Here you can see the taper skived into the ends. This is going to keep my loop nice and smooth where it meets the body of my sheath
Now I want to round the edges of my loop so I'm trimming a tiny corner off both sides of the leather
Now I need a burnishing tool so I made a cut into this wood scrap with my chainsaw file. The edge will cased and then burnished with this little file cut to round the edge.
Burnishing will form my edge round. It may look like doo-doo now but dying will help significantly and it'll be much better than a straight knife-cut edge
I'll be dying and sealing the inside of my sheath so to prepare for that I line my welt up and trace it on my sheath body. I prefer my glue to be on bare leather so I'll avoid the welt area when dying
Now I went ahead and dyed the inside of my sheath body, the inside edge of the welt itself, and the belt loop. Notice that I folded my belt loop. Once it's dry and sealed it's not going to want to form well so pre-forming while it's wet with dye is the best bet.
Let's talk for a minute about leather dye. If you want pick up some leather dye for your project by all means do so. I recommend Feiblings Pro Oil Dye. I've used all the colors and they'll all give a great result with little hassle. I like a 1" wide foam paintbrush for applying dye. you can find the Pro Oil dye at USAKnifeMakers here-
http://usaknifemaker.com/sheath-making-materials-supplies-c-37/dye-pro-oil-black-4oz.html It does come in different colors so browse through the sheathmaking supplies to find what you're after.
With oil dyes you'll also need a Top Coat to finish the dyed leather. Good results can be had with Satin Sheen or Super Sheen-
http://usaknifemaker.com/sheath-making-materials-supplies-c-37/eco-flo-satin-shene-4oz.html
http://usaknifemaker.com/sheath-making-materials-supplies-c-37/tandy-e-super-shene-4oz.html
DO NOT TRY ECO-FLO DYES ! I haven't met a leatherworker yet who likes these dyes and expect a streaked finish at best with them.
For this tutorial I'm using KIWI scuff cover (shoe dye). It is dye and sealer all in one and available locally for a few bucks. It has a foam applicator built right into the top so press the foam to your leather and GENTLY squeeze the bottle to get some liquid onto your leather and rub it in with the applicator.
This stuff can be found about anywhere
-Josh
Denny Eller
Well-Known Member
Ditto epic!!!! You, my friend, have outdone yourself on this one! The time you have given to doing this for the pack is extraordinary and your methods and improvisations are outstanding. I made my reservations for the Rennaiscance Waverly last night for Blade. Be there and the beer is on me!
Josh Dabney
Moderator
Thanks alot guys, I'll be looking forward to seeing Y'all at the show !
Here you can see the end of my welt is in line with the center of my sheath body. To get a clean wrap around the welt and have the outside edges of my sheath work out at glue-up I need to trim this back just a bit.

Here it is trimmed back about an 1/8" an re bevelled. Had I not done this my welt would've been uneven with the welt sticking out from between the two body pieces. Should be good to go now.
Now I line my welt up and trace in pen so I know exactly where to put my contact cement on the body side
Ready for glue-up I cased out the body again to mold it to shape
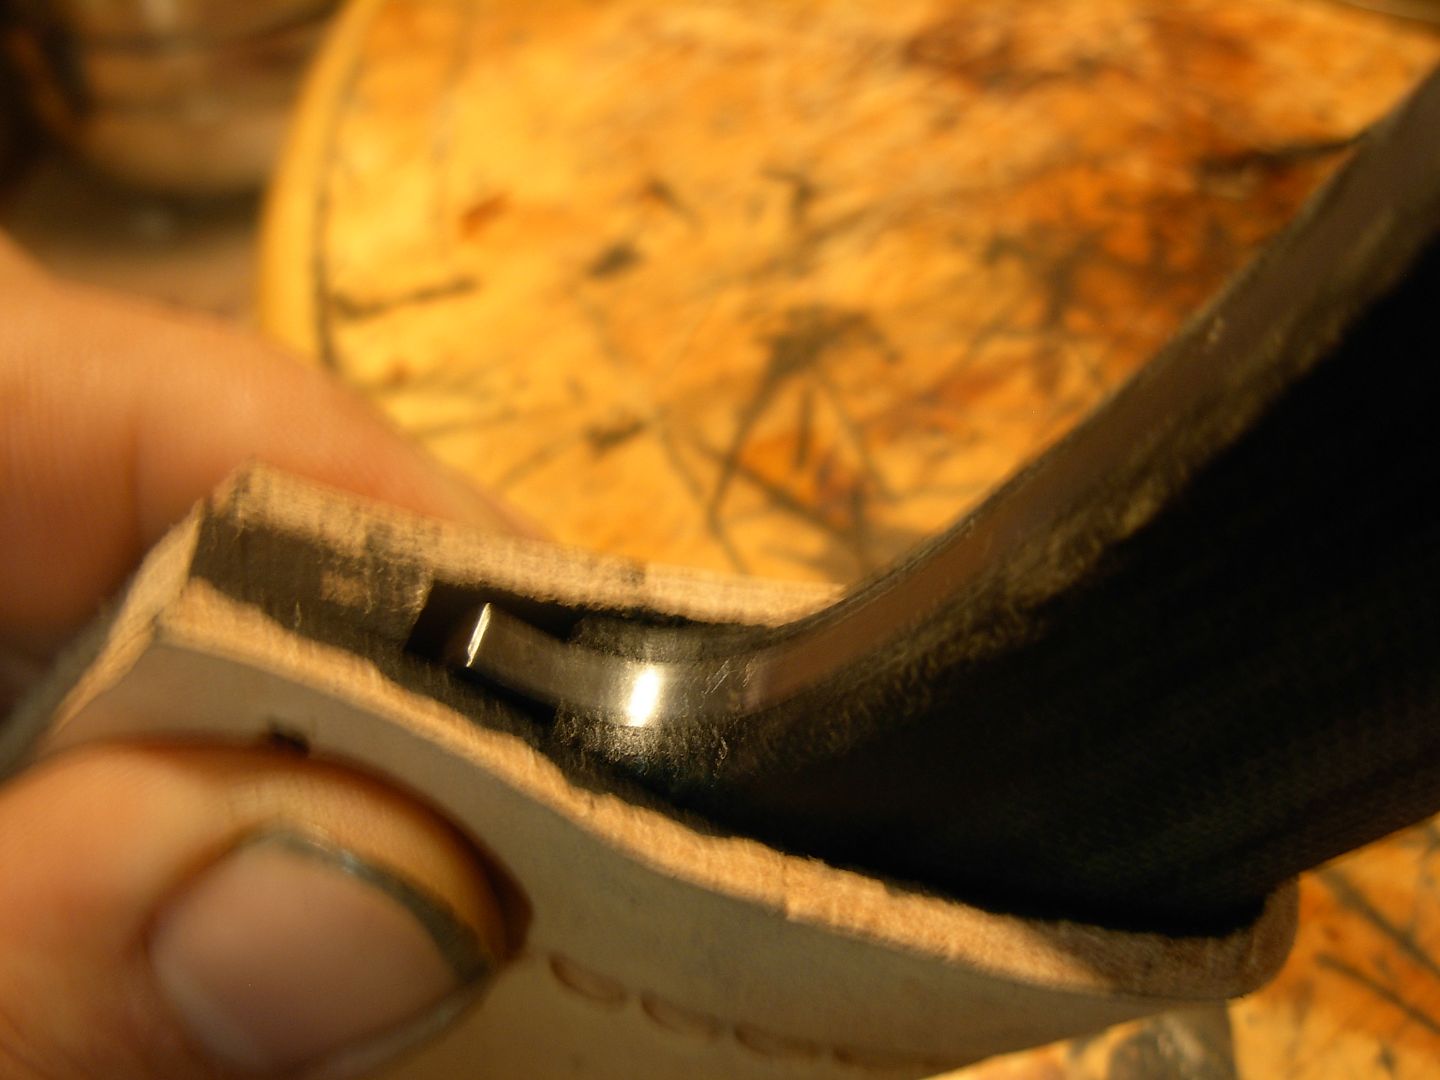
Now we can slip our welt in there and hold things together to check out our fit
You can see my "guard" area is bumping flat into the top of my welt so some trimming is in order
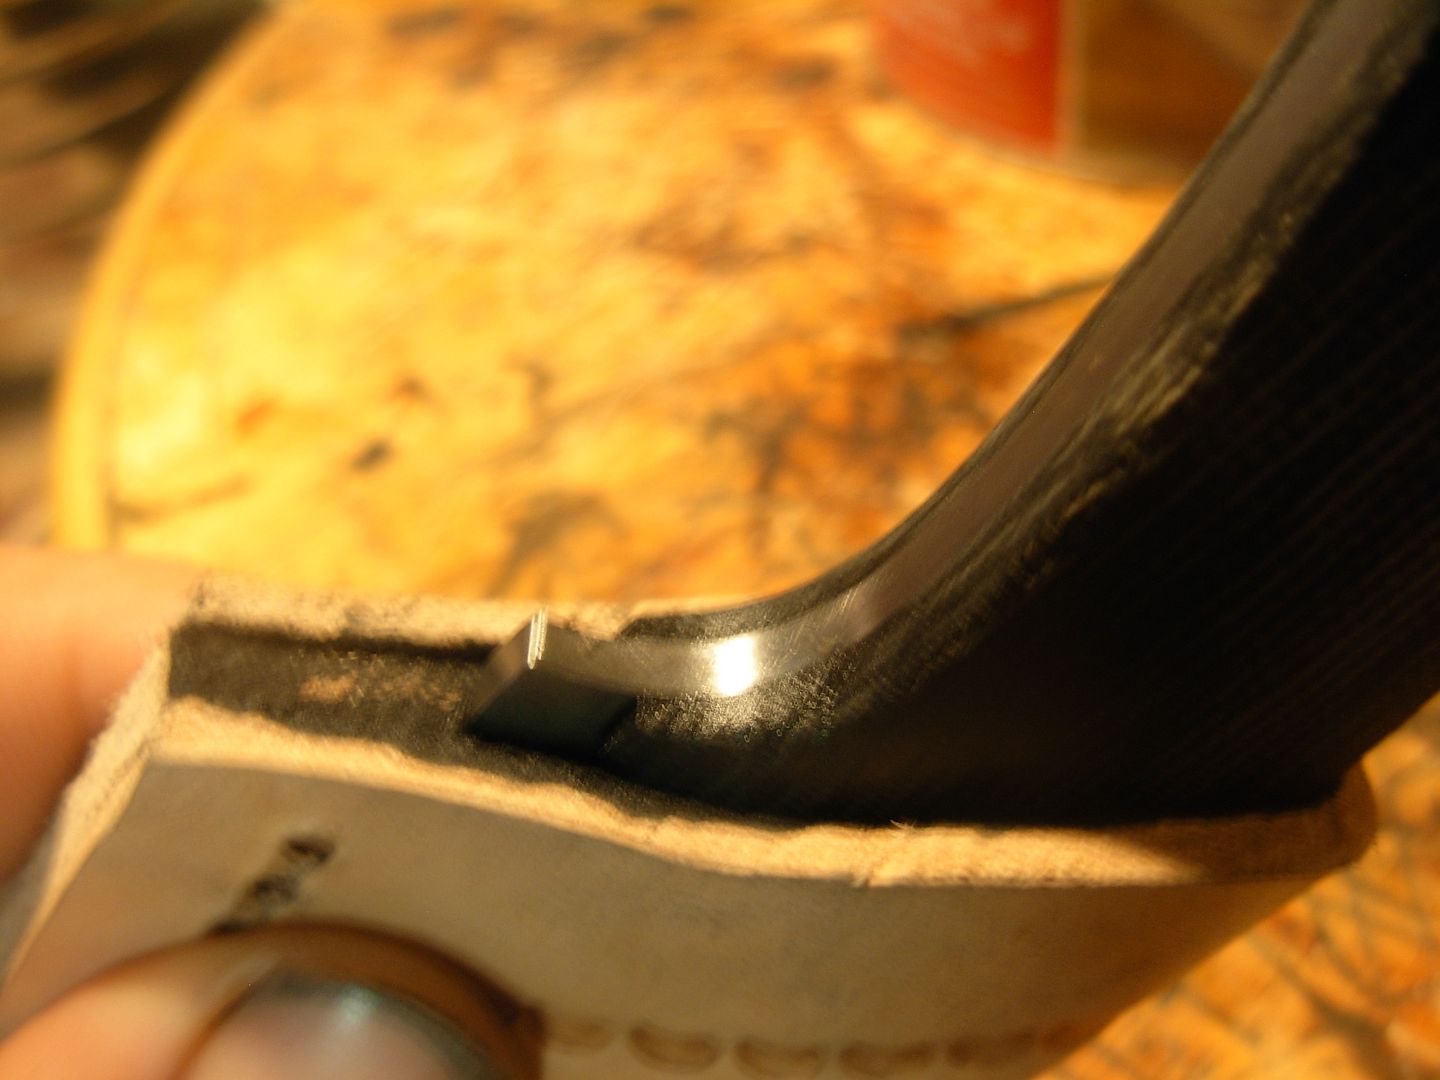
Something about like this should do the trick
Now she'll drop right in like she should
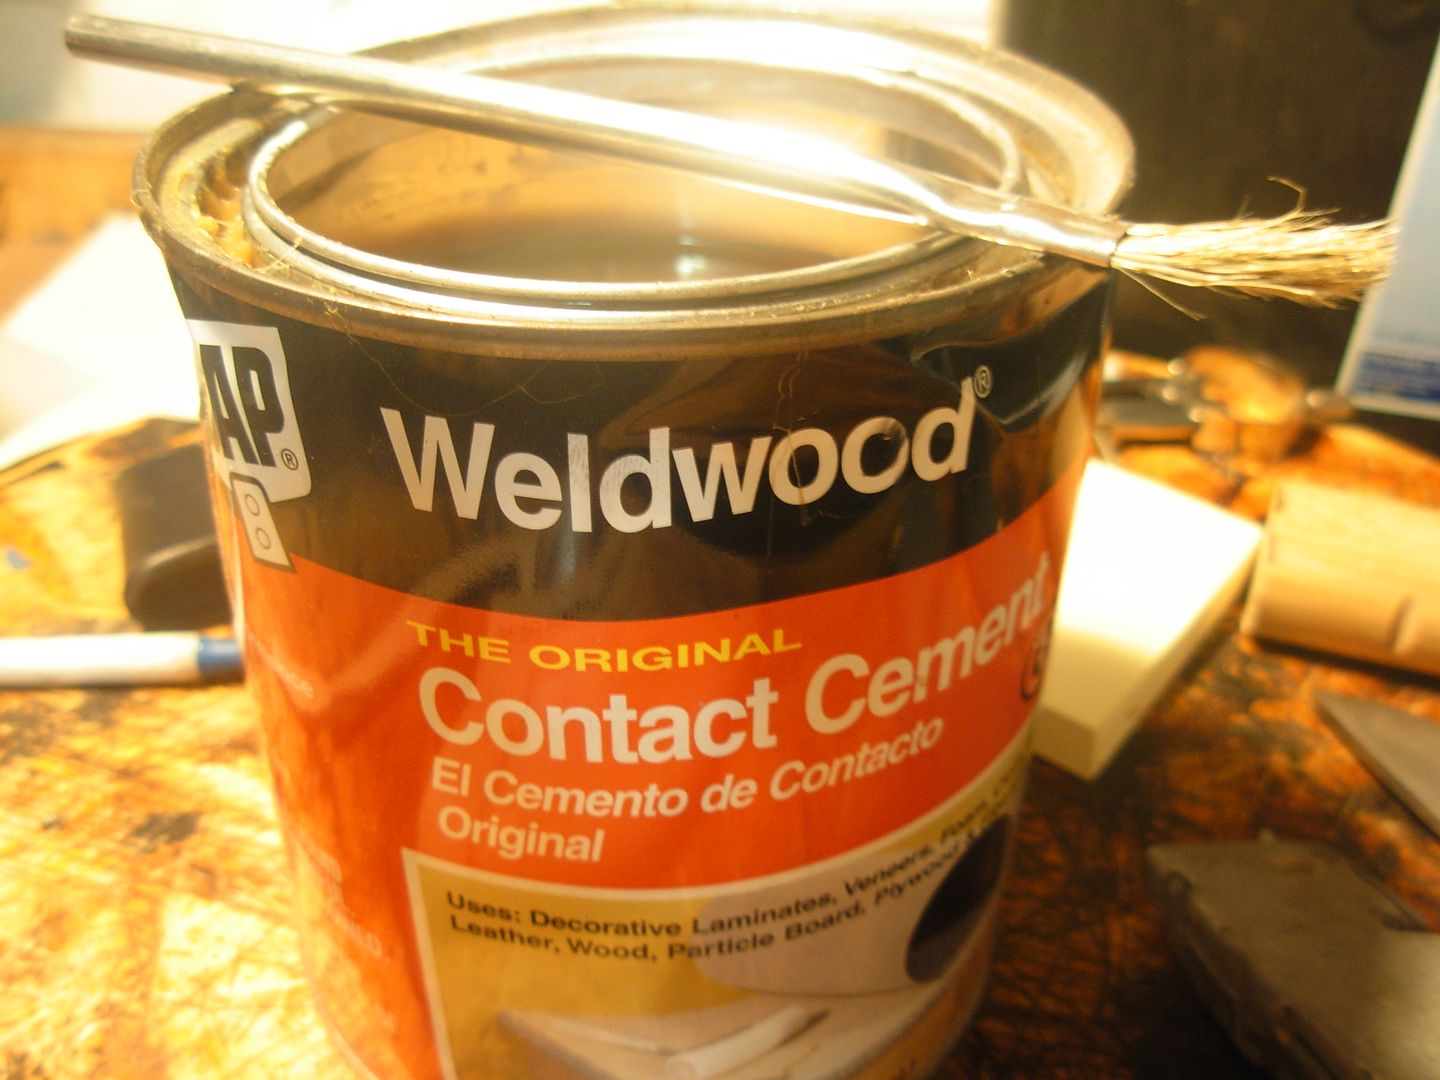
IMHO this is THE product to get for gluing your leather. It's the least messy, sets the quickest, and is available from any hardware or big box store. This is EXACTLY what you want, The Original formula with the red label. Beside it on the shelf will be a Gel Formula with a green label which is NOT what we want. I use flux brushes for applicators and get them in 100 packs from Harbor Freight. Single use then pitch it and always have a nice clean brush instead of a buggered up one to work with.
Contact Cement is really easy to use. Get a nice coat on both pieces that are going to be glued together
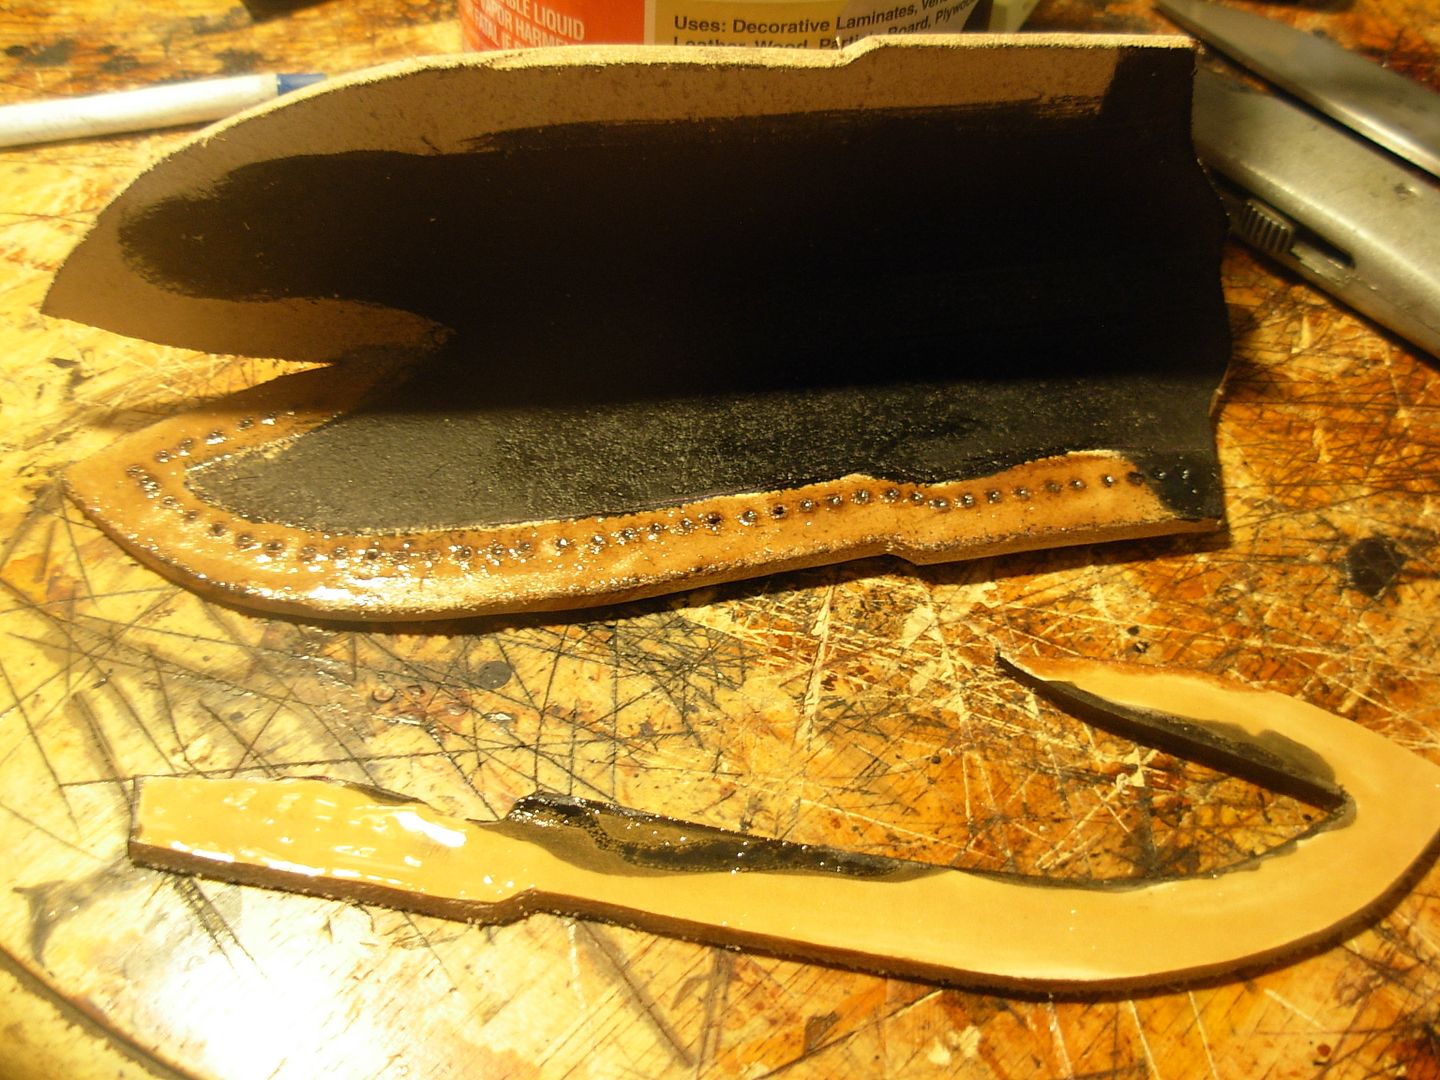
Wait 4 or 5 minutes for the cement to tack-up and then stick your parts together. When first applied it'll look very wet. Once it tacks-up it'll have a more "glazed" appearance. Timing is not crucial either. If you stick it together wet it'll just take longer to set.
Glue the welt on the first side and we can have a look at how our knife is going to fit the sheath
All looks good so cement the other side

While I'm cementing I'll go ahead and cemnt my belt loop together like this
As soon as I stick the second side together I do an immediate test fit. If there's a problem I may be able to pull it back apart to fix it. After just a couple minutes this won't be possible and I'd have to cut the sheath apart.
Now I'm ready to dye the rest of the body. A big puddle of dye like this works well. Not enough dye and you'll get streaking
The dye itself will get a bit foamy. Nothing to worry about just let it sit and dry for a little bit
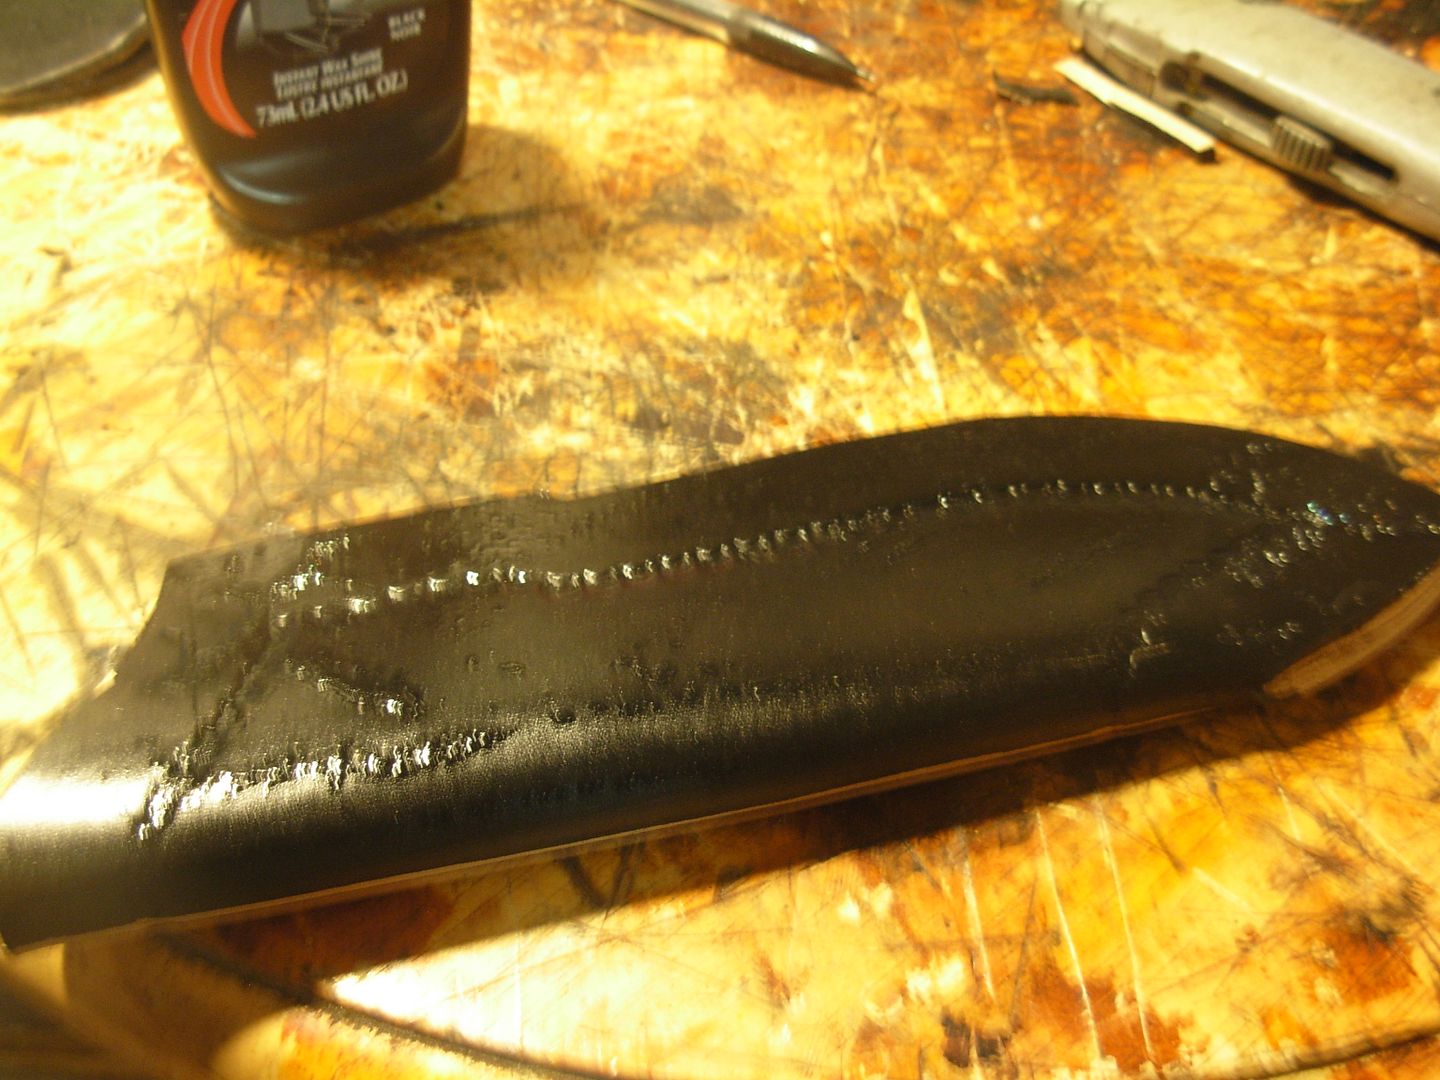
I dab the sponge a little to avoid streaking. The first coat isn't going to come out the prettiest so don't worry much if it looks splotchy
One it sets for a few minutes give it a light wipe down with a paper towel. Here I've missed a little spot
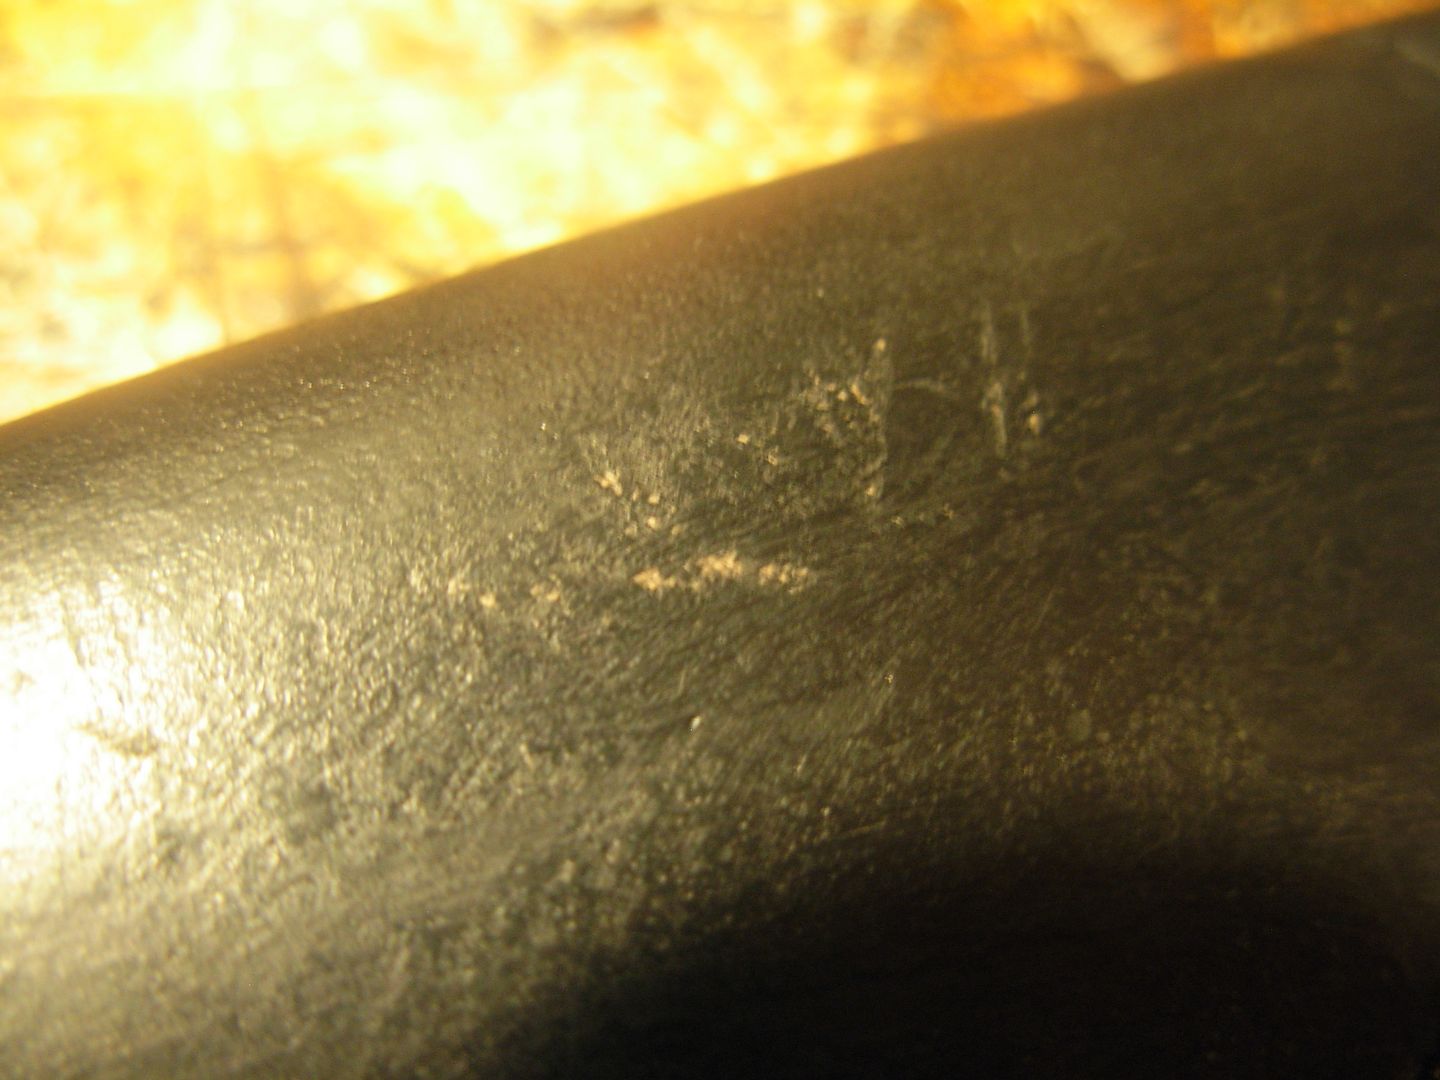
No problem just hit that spot again
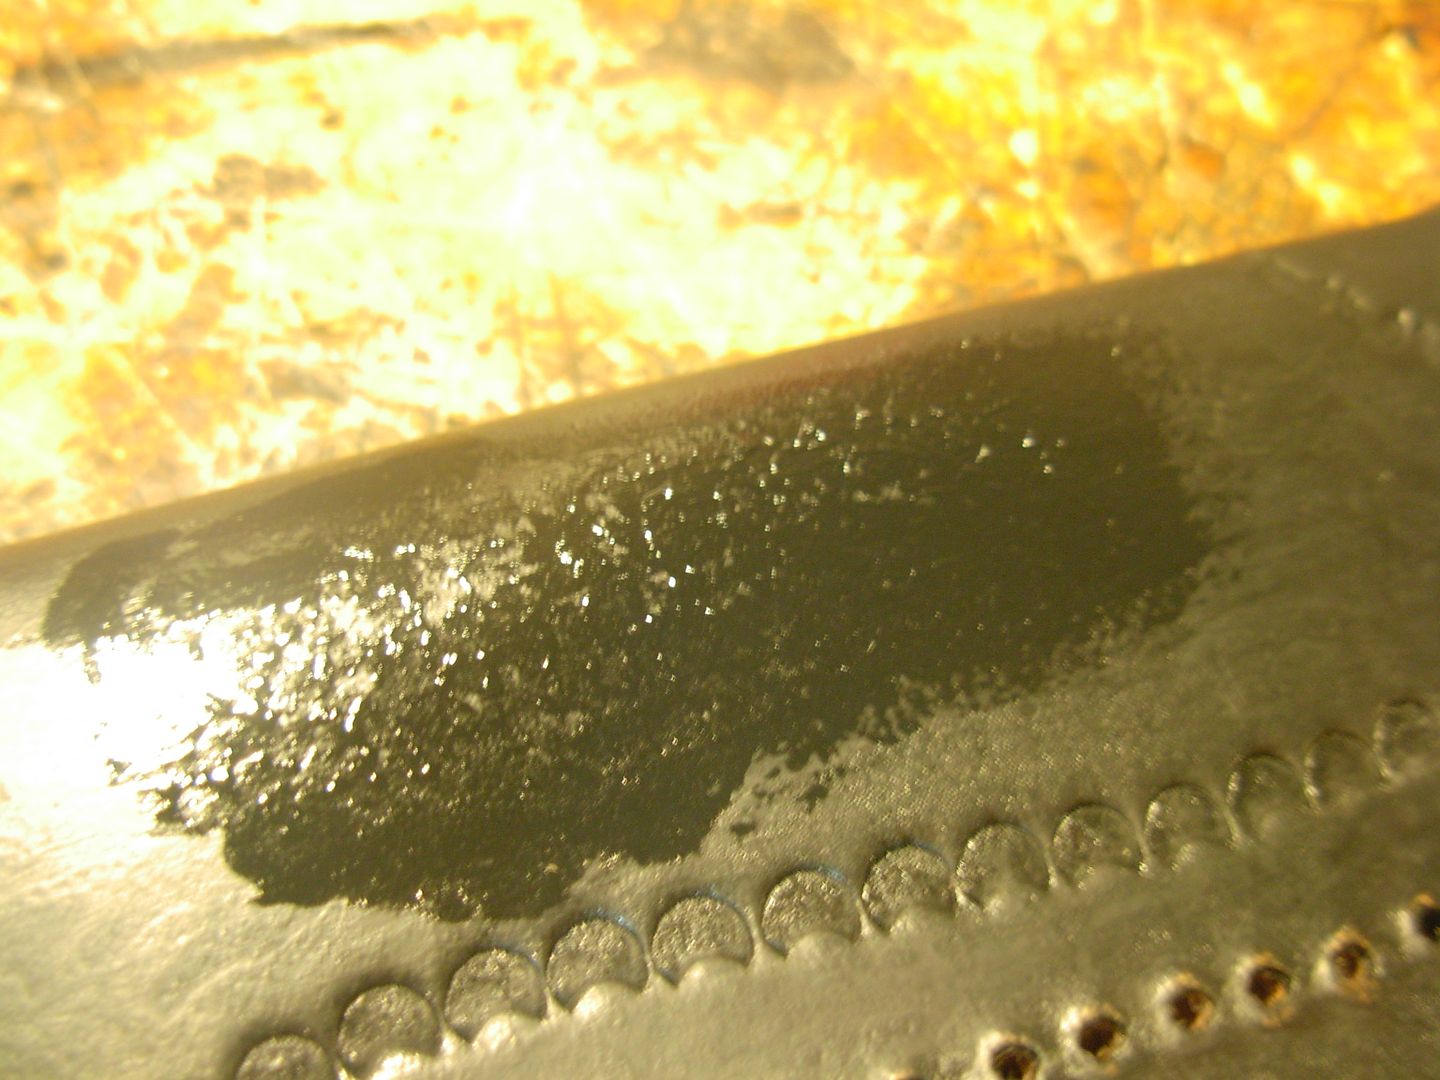
Good to go
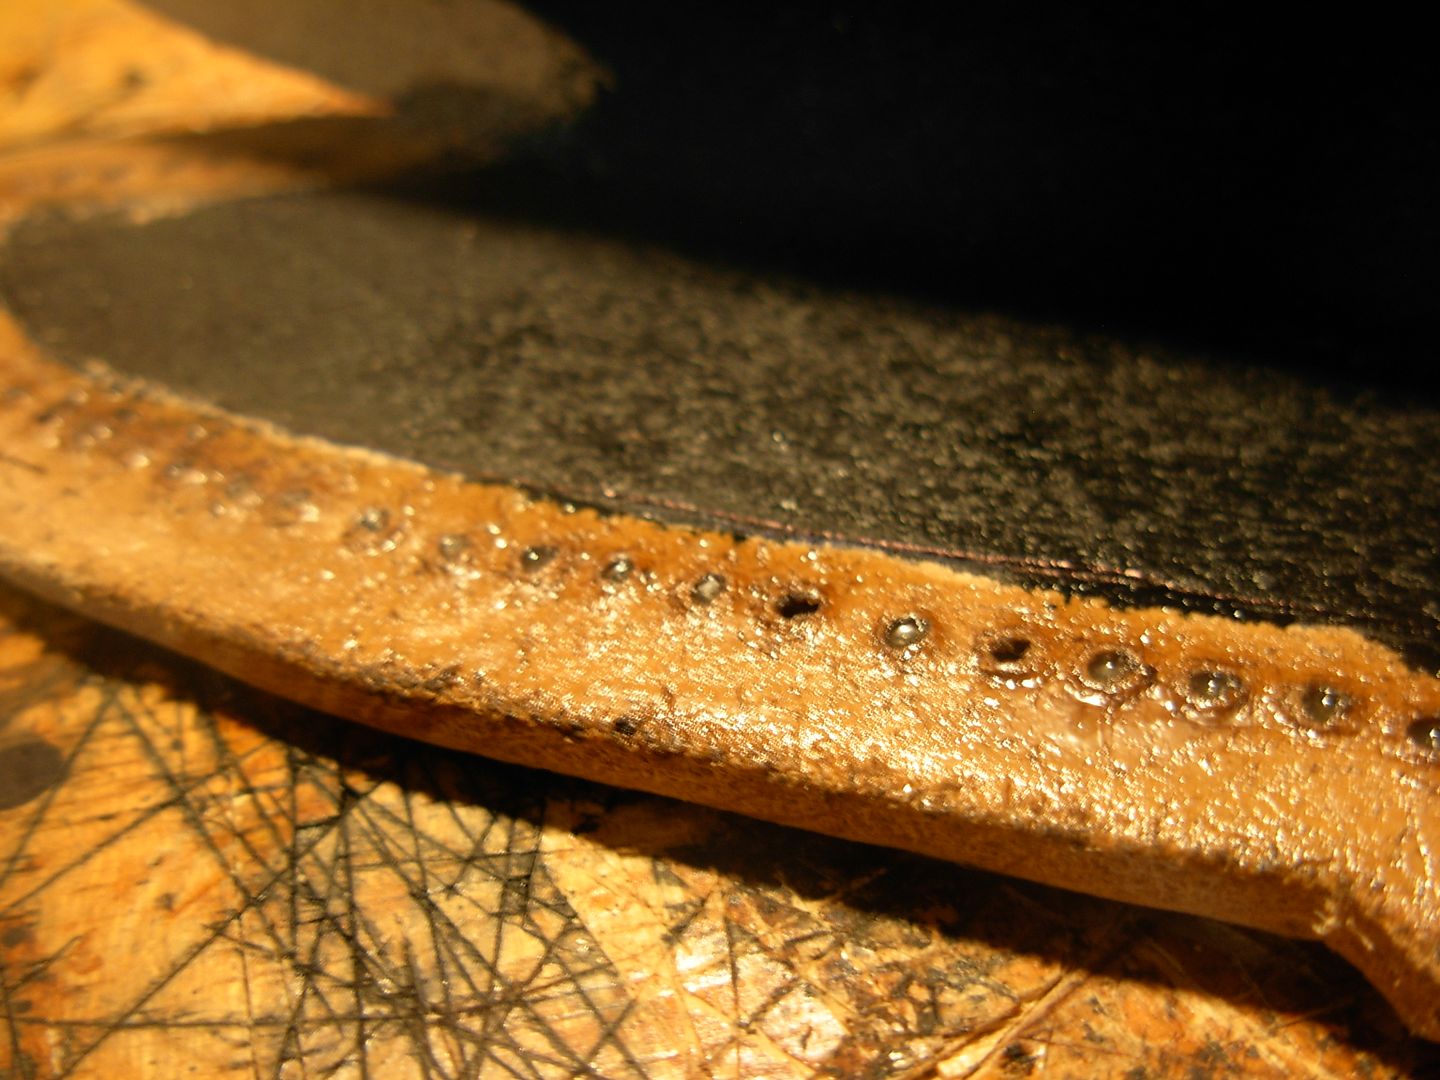
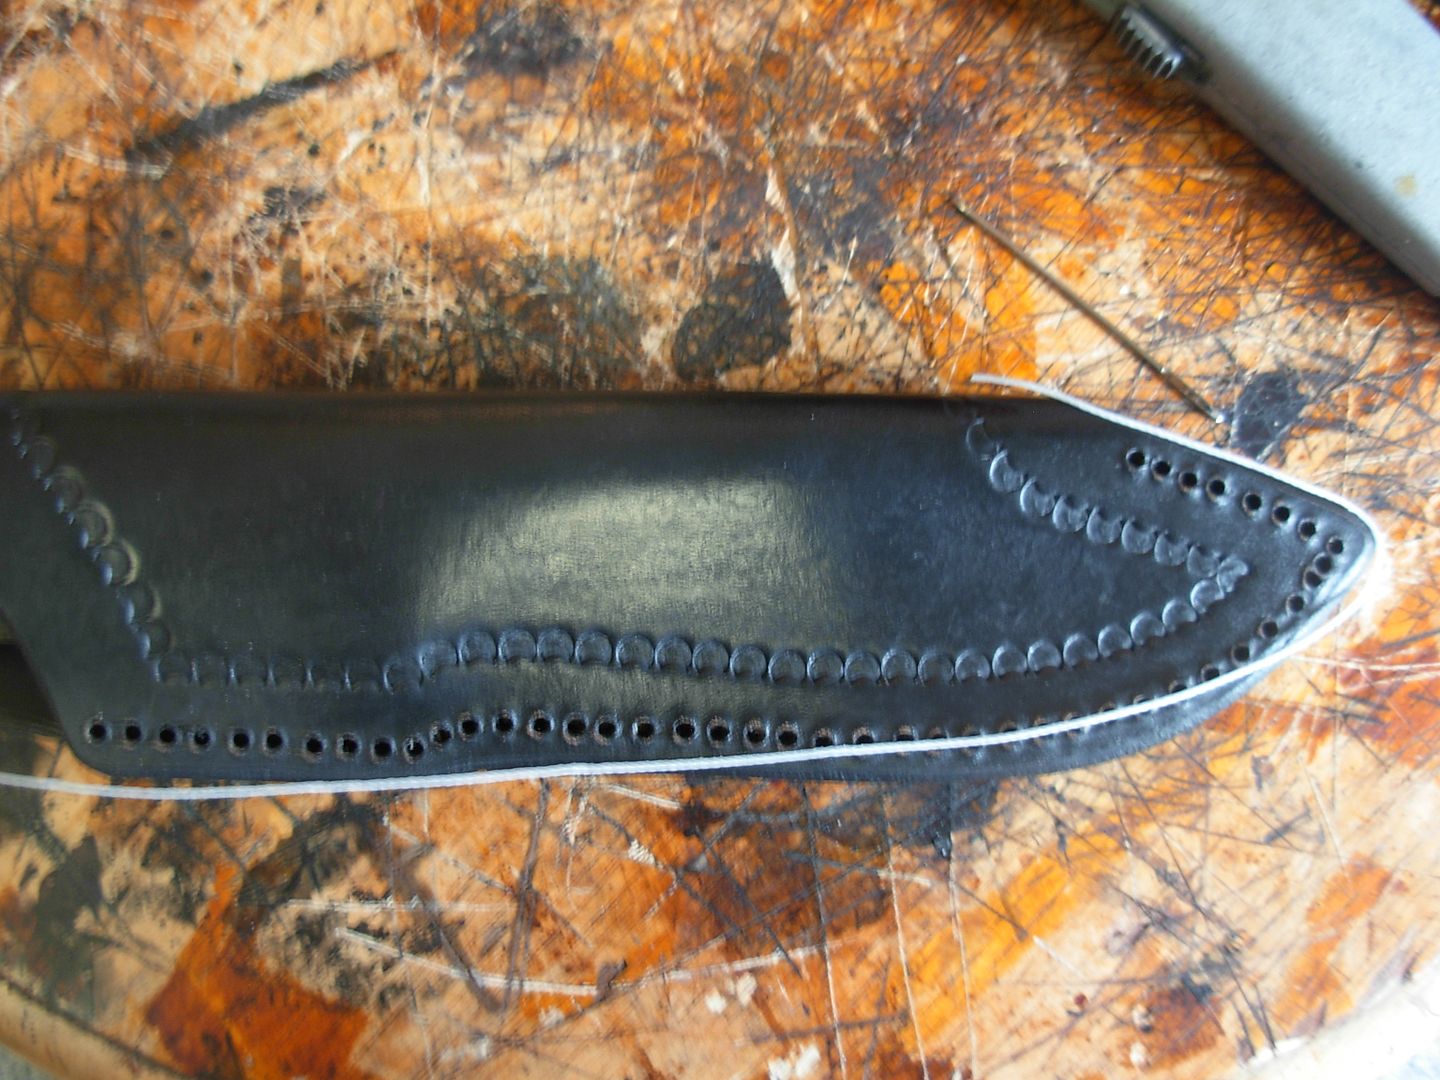
Let the dy job set up for a bit then drill the stitch holes through the welt and back side of the body. This takes a bit of effort with a hand drill but it's do-able

Here's the side that was against my 2x4 while drilling. A little tore up but nothing to worry about
With my holes drilled I want to trim my edge down and shape it so I free handed a line parallel to my holes.
This is now a pretty thick piece of leather so it'll take sevaral passes on the cut to get through. Cut my excess of square
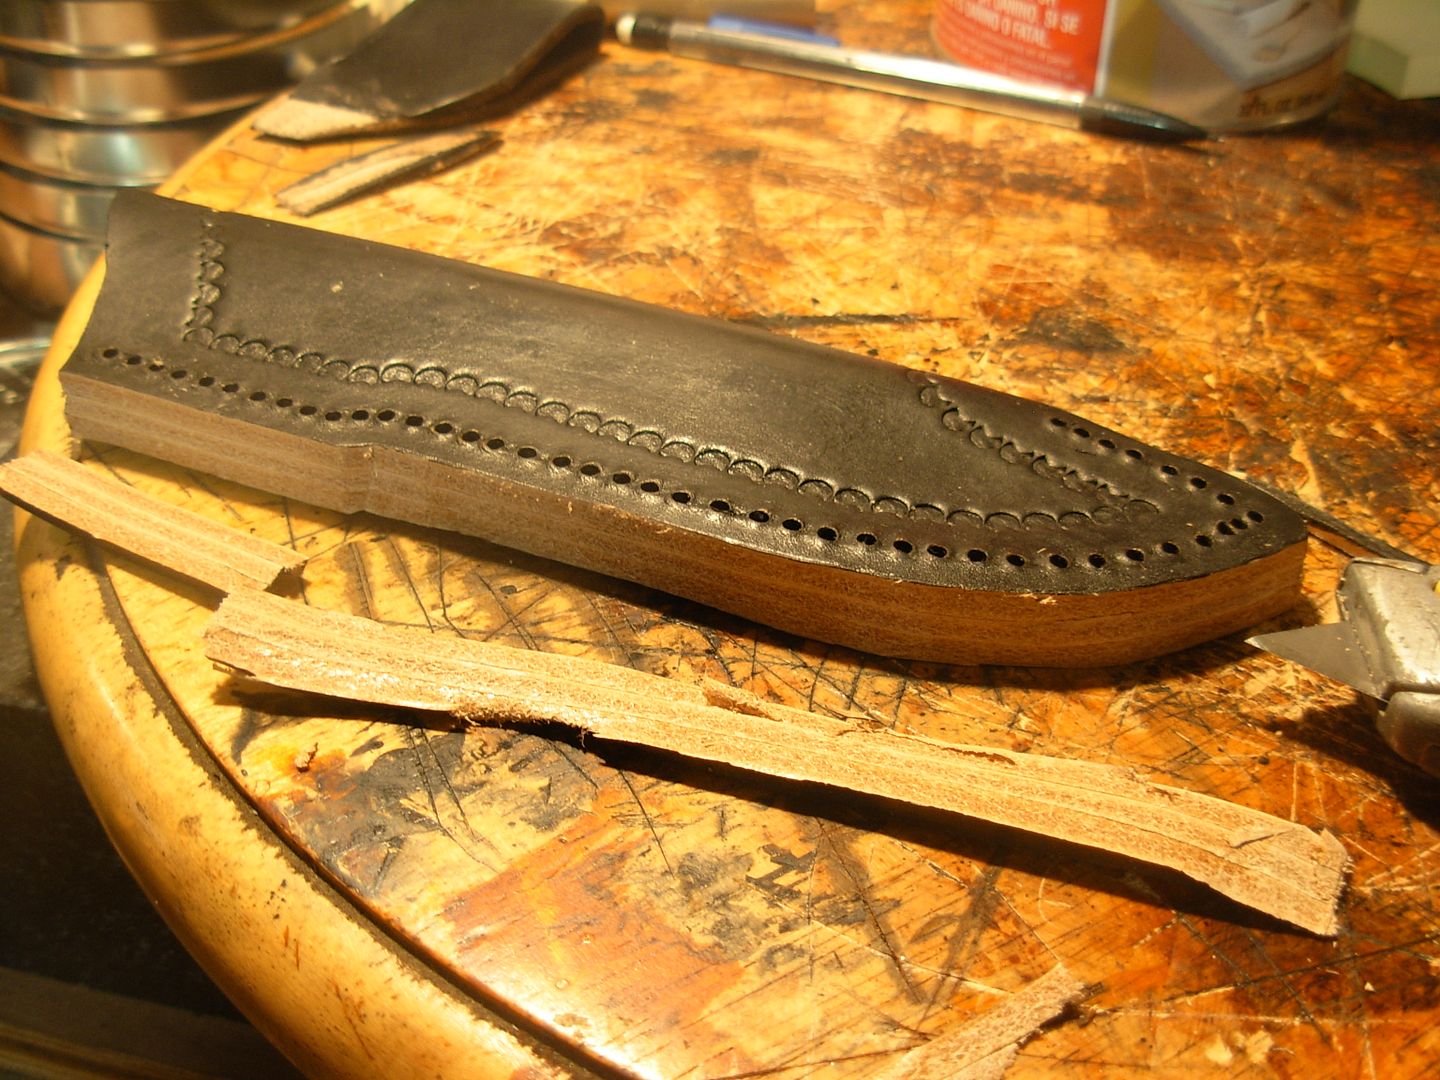
Cut a bevel on the edge all the way around both sides
Grab your sanding block and a piece of 120 grit paper and sand the edge smooth and round off the bevel cuts.
Cut the bevel around the mouth of the sheath also
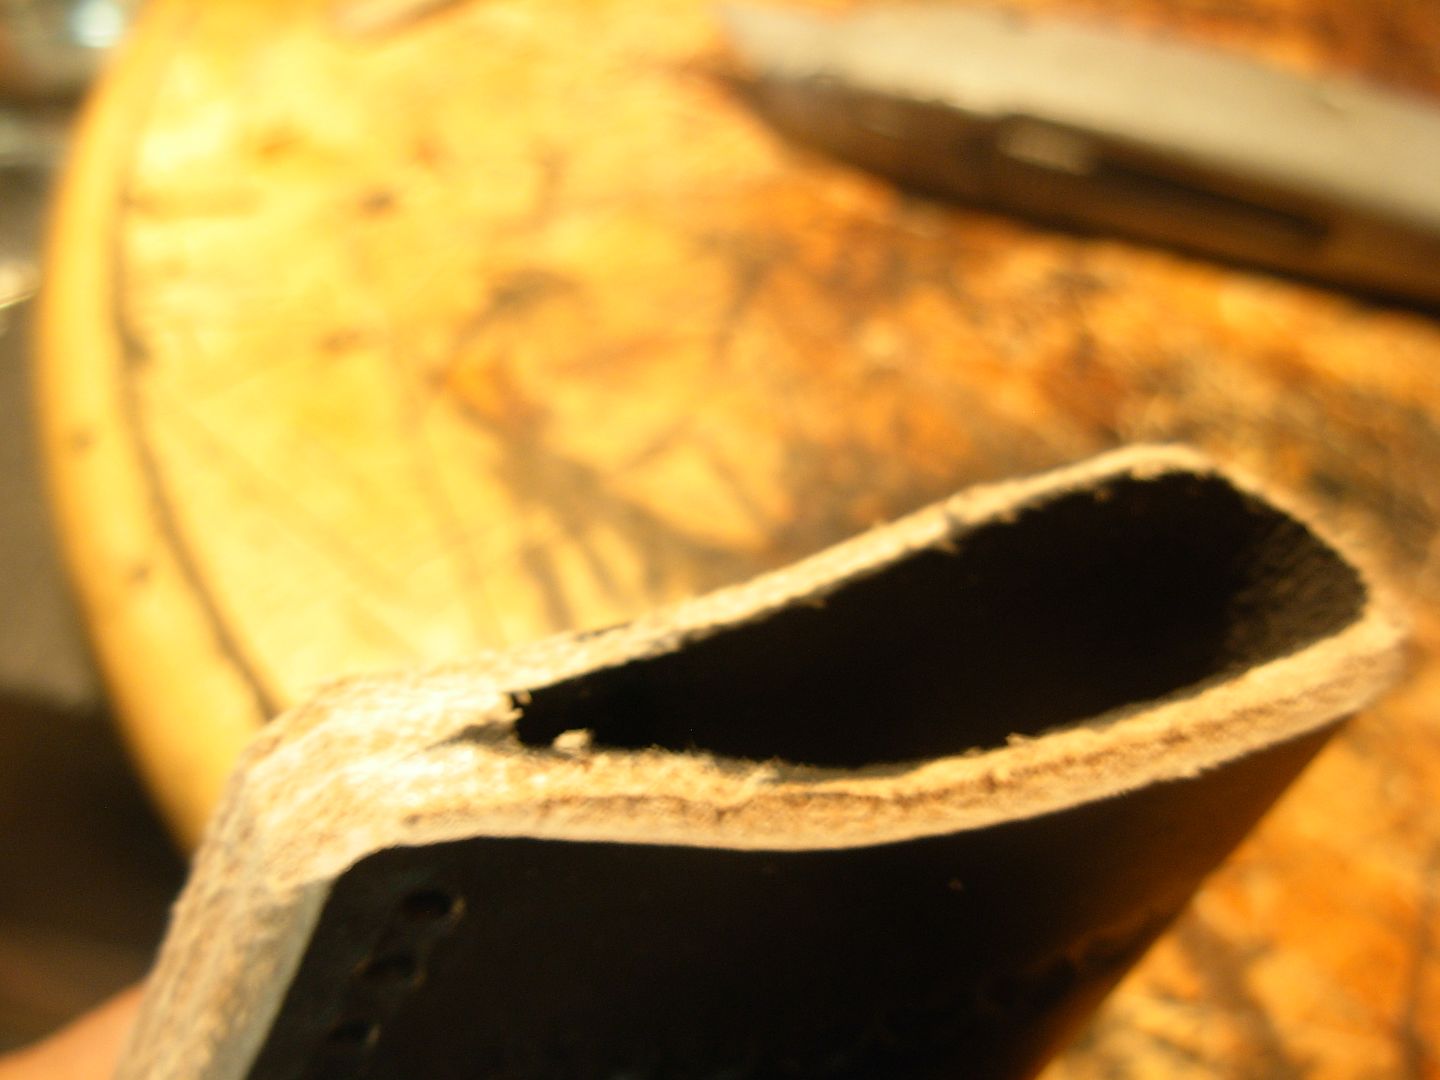
Now sand it all with some 220 grit
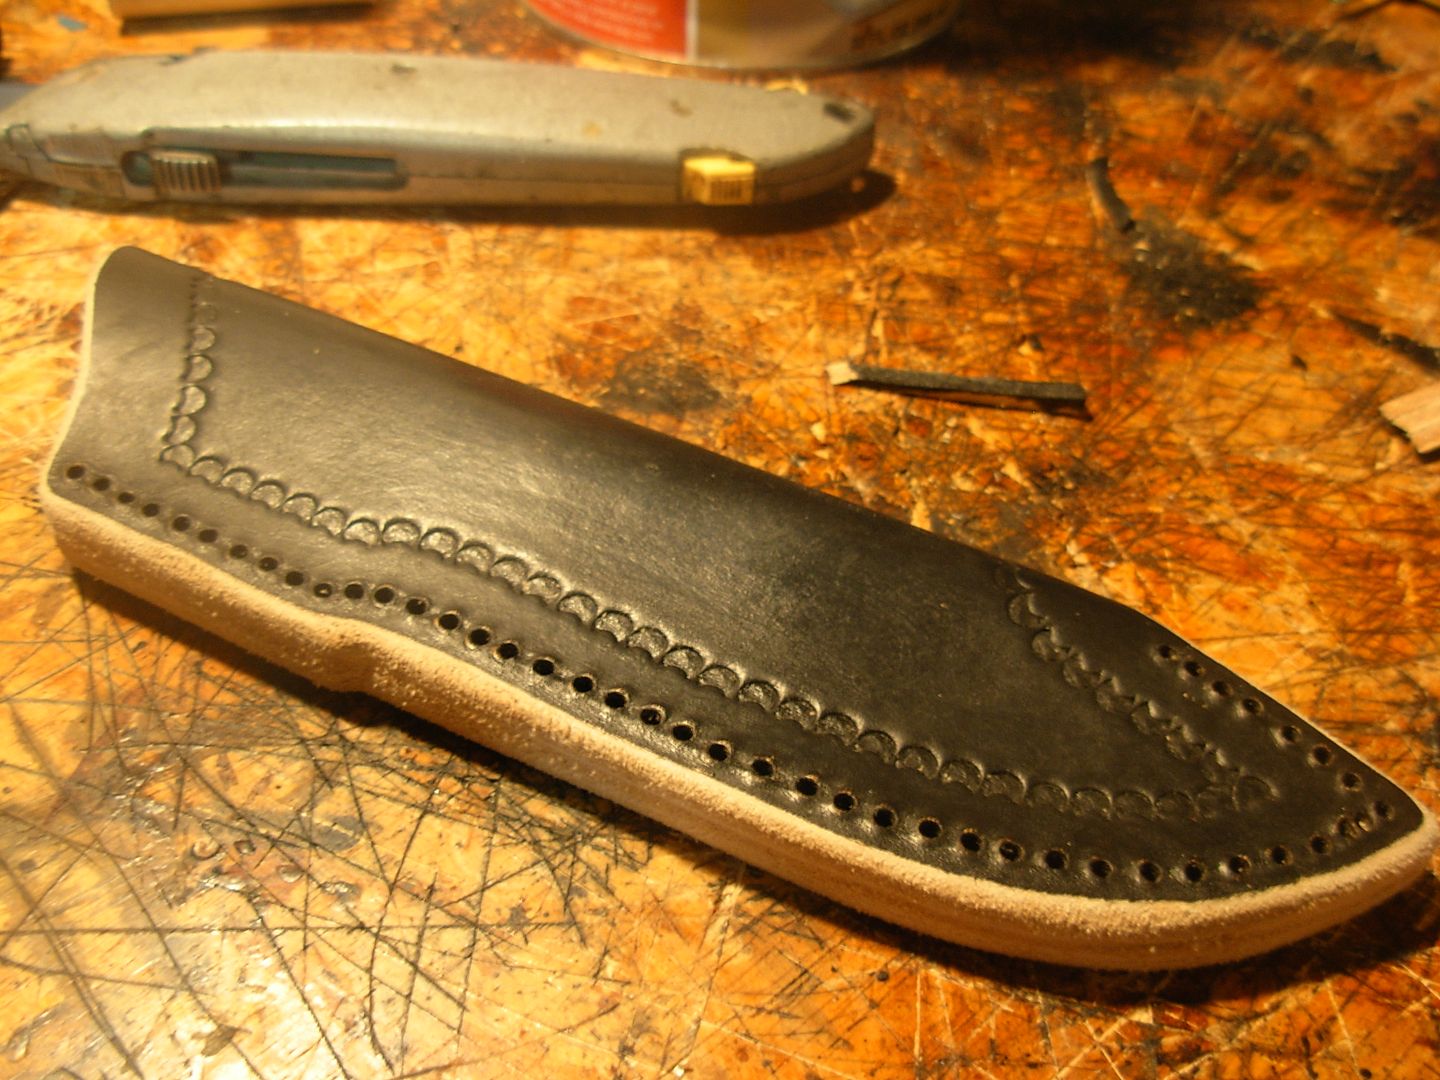
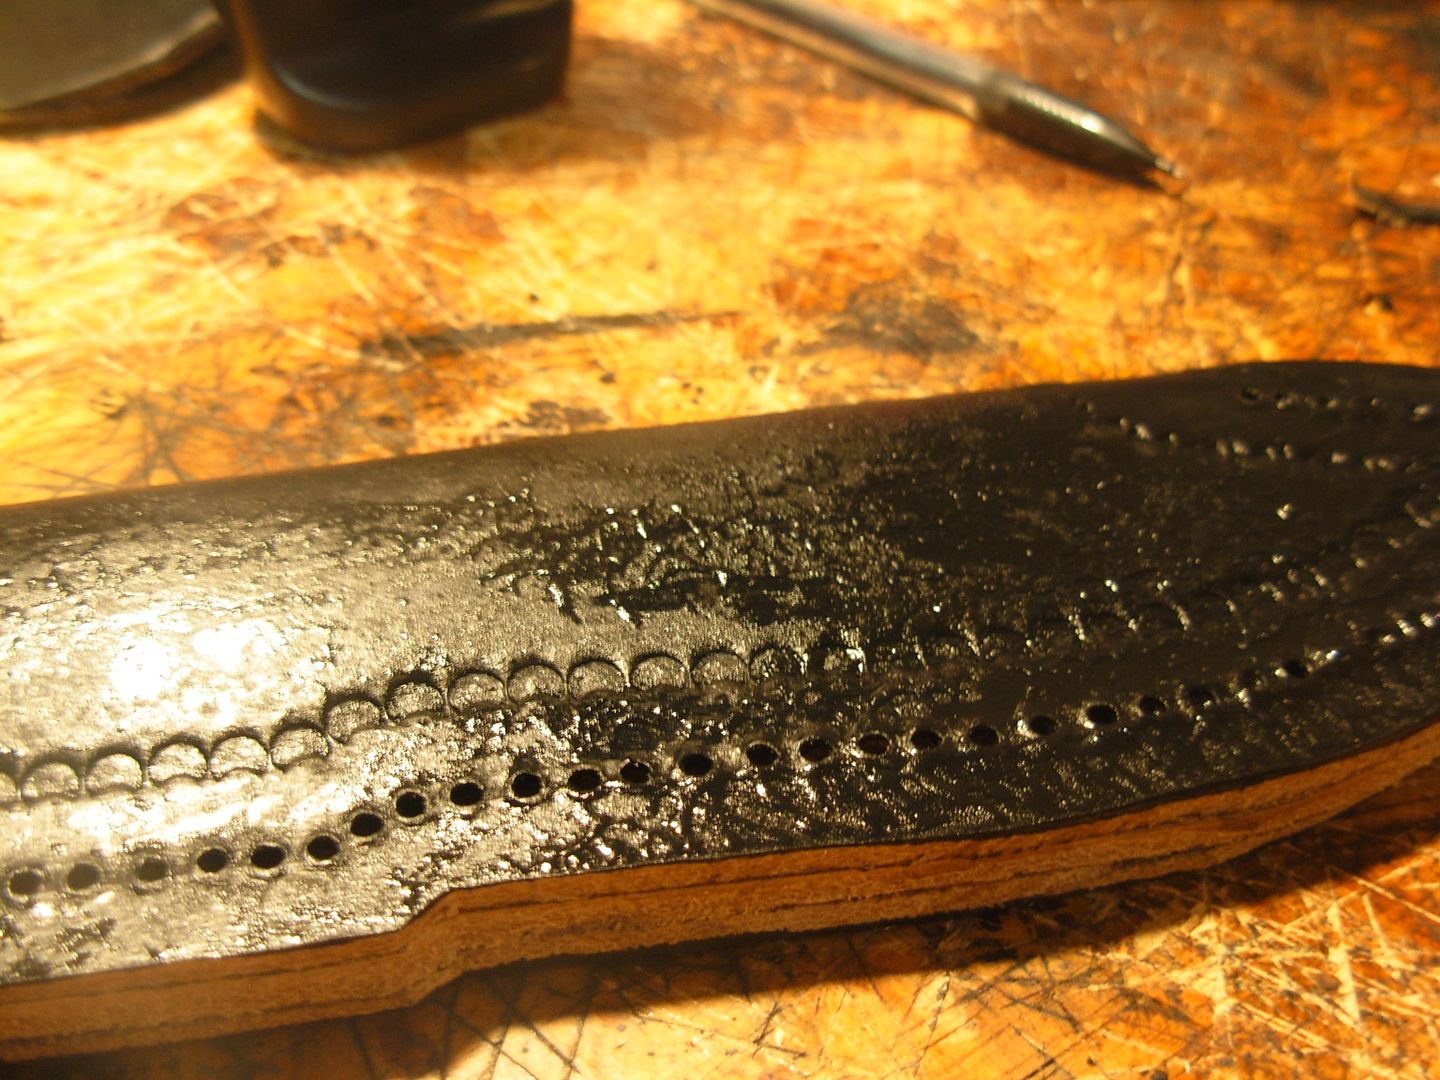
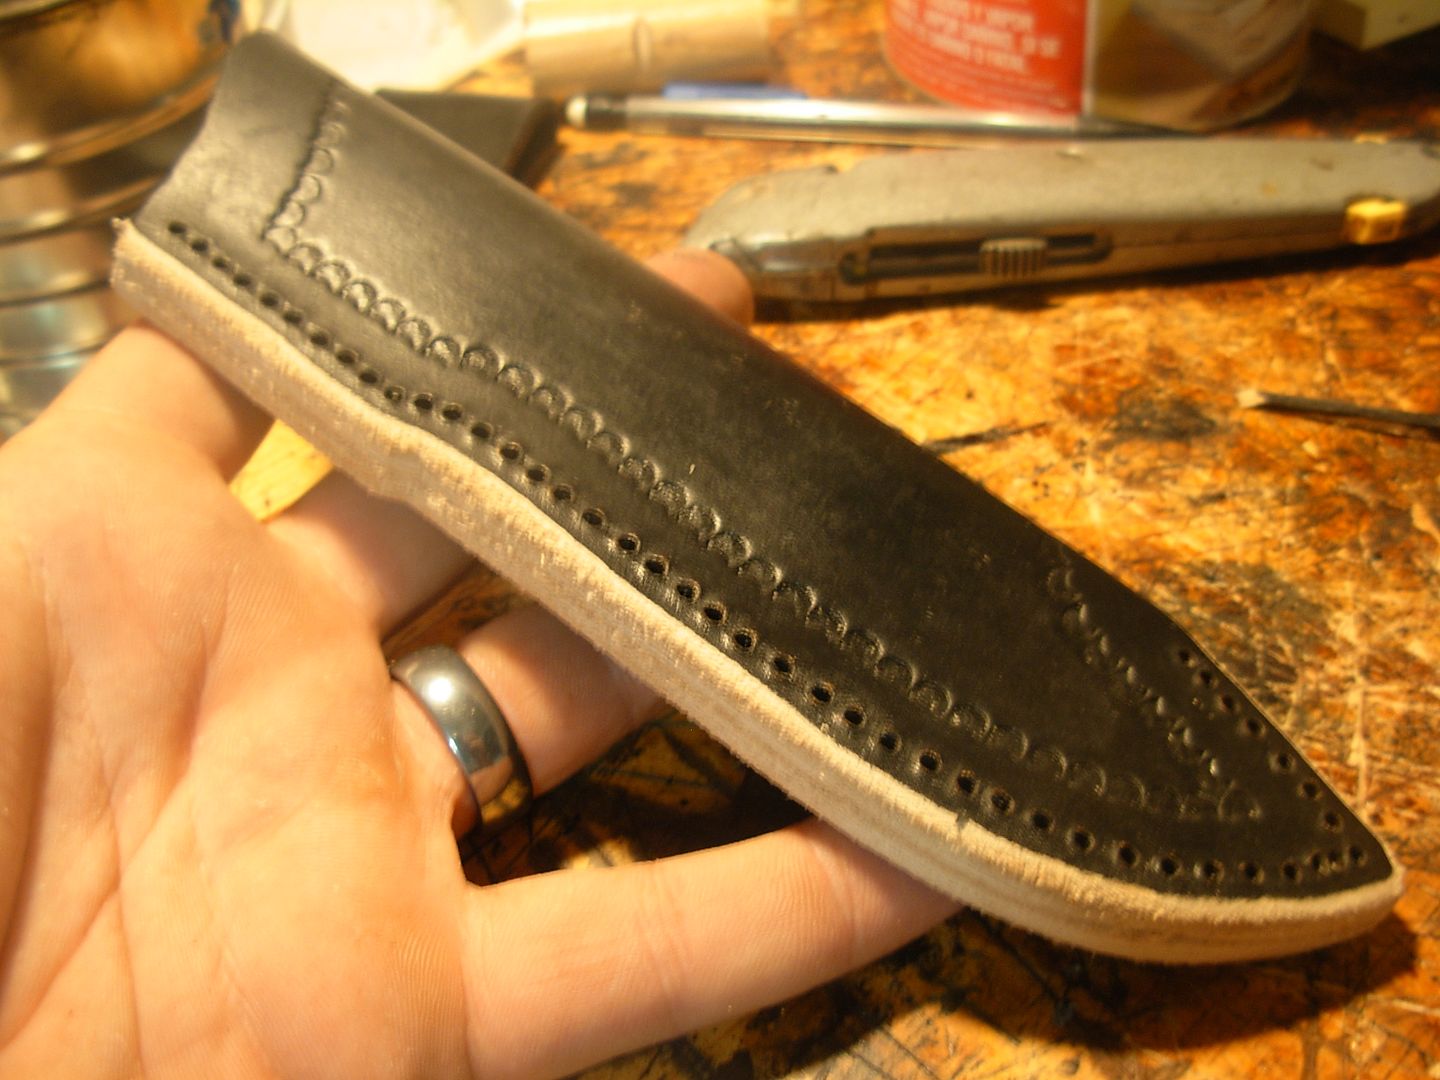
Now dye all the sanded edges and give a light coat over the rest of the body. Once the whole body is coated give it a wipe down with a paper towel to remove excess dye and level out the finish. The first coat of dy sealed the leather so this second coat will come out nice and smooth
I have not attatched my belt loop yet but this gives us a pretty good idea of what our finished sheath will look like
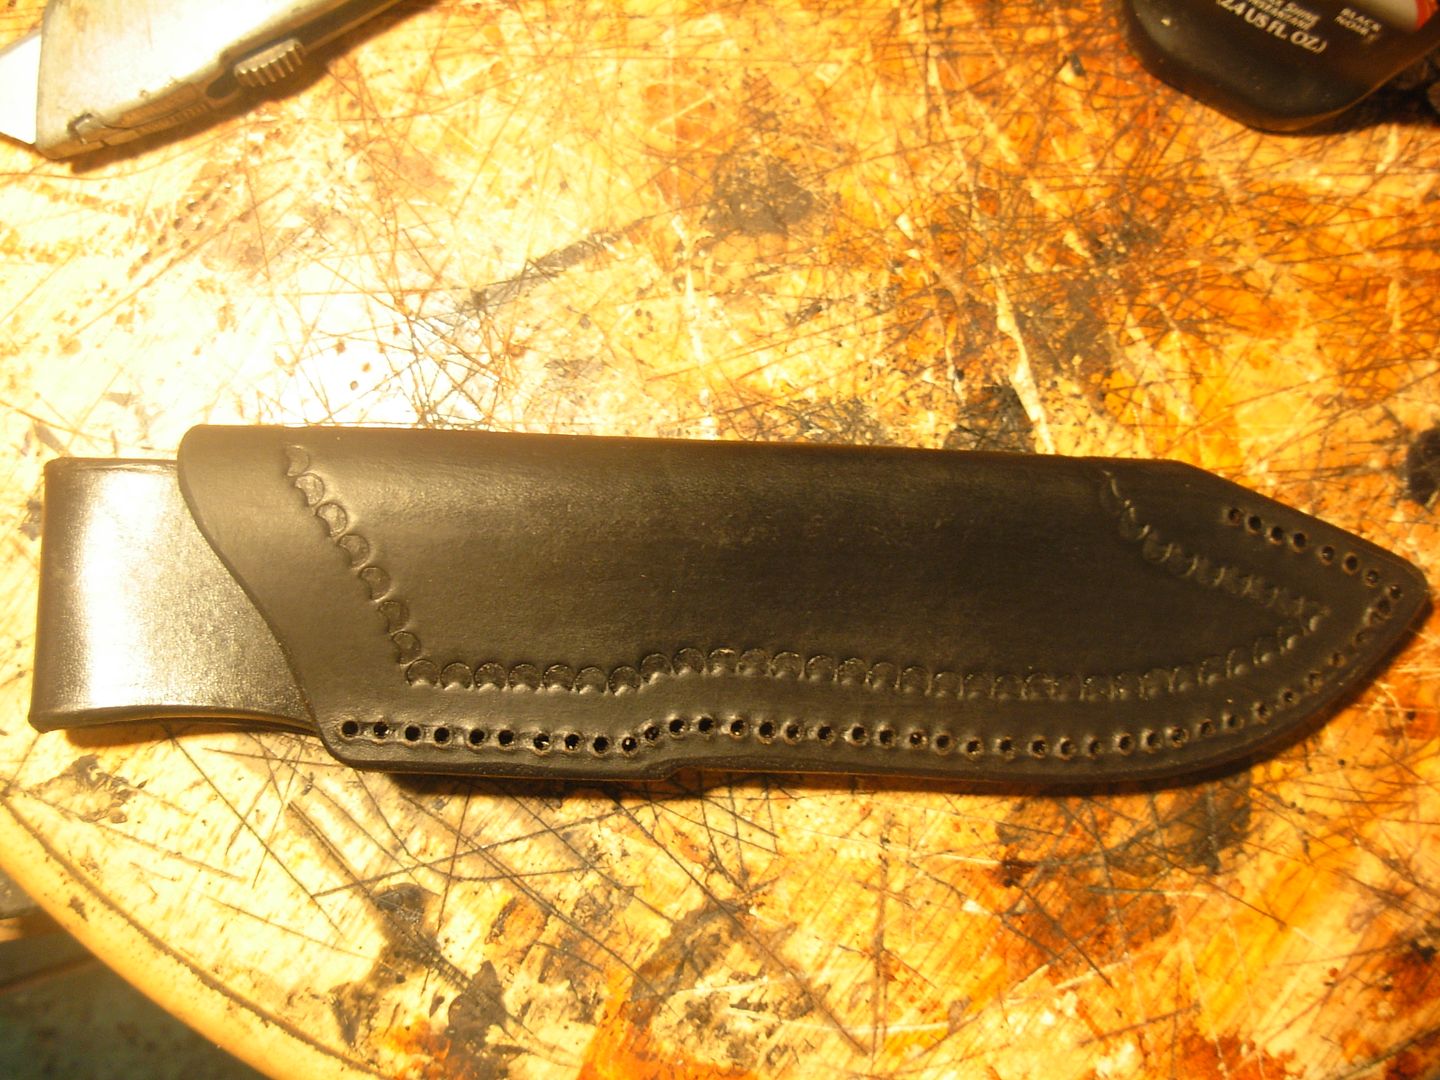
The tutorial is quickly comming to a close. Just need to cement the loop on and drill it then stitch it up and she'll be complete.
-Josh
Here you can see the end of my welt is in line with the center of my sheath body. To get a clean wrap around the welt and have the outside edges of my sheath work out at glue-up I need to trim this back just a bit.
Here it is trimmed back about an 1/8" an re bevelled. Had I not done this my welt would've been uneven with the welt sticking out from between the two body pieces. Should be good to go now.
Now I line my welt up and trace in pen so I know exactly where to put my contact cement on the body side
Ready for glue-up I cased out the body again to mold it to shape
Now we can slip our welt in there and hold things together to check out our fit
You can see my "guard" area is bumping flat into the top of my welt so some trimming is in order
Something about like this should do the trick
Now she'll drop right in like she should
IMHO this is THE product to get for gluing your leather. It's the least messy, sets the quickest, and is available from any hardware or big box store. This is EXACTLY what you want, The Original formula with the red label. Beside it on the shelf will be a Gel Formula with a green label which is NOT what we want. I use flux brushes for applicators and get them in 100 packs from Harbor Freight. Single use then pitch it and always have a nice clean brush instead of a buggered up one to work with.
Contact Cement is really easy to use. Get a nice coat on both pieces that are going to be glued together
Wait 4 or 5 minutes for the cement to tack-up and then stick your parts together. When first applied it'll look very wet. Once it tacks-up it'll have a more "glazed" appearance. Timing is not crucial either. If you stick it together wet it'll just take longer to set.
Glue the welt on the first side and we can have a look at how our knife is going to fit the sheath
All looks good so cement the other side
While I'm cementing I'll go ahead and cemnt my belt loop together like this
As soon as I stick the second side together I do an immediate test fit. If there's a problem I may be able to pull it back apart to fix it. After just a couple minutes this won't be possible and I'd have to cut the sheath apart.
Now I'm ready to dye the rest of the body. A big puddle of dye like this works well. Not enough dye and you'll get streaking
The dye itself will get a bit foamy. Nothing to worry about just let it sit and dry for a little bit
I dab the sponge a little to avoid streaking. The first coat isn't going to come out the prettiest so don't worry much if it looks splotchy
One it sets for a few minutes give it a light wipe down with a paper towel. Here I've missed a little spot
No problem just hit that spot again
Good to go
Let the dy job set up for a bit then drill the stitch holes through the welt and back side of the body. This takes a bit of effort with a hand drill but it's do-able
Here's the side that was against my 2x4 while drilling. A little tore up but nothing to worry about
With my holes drilled I want to trim my edge down and shape it so I free handed a line parallel to my holes.
This is now a pretty thick piece of leather so it'll take sevaral passes on the cut to get through. Cut my excess of square
Cut a bevel on the edge all the way around both sides
Grab your sanding block and a piece of 120 grit paper and sand the edge smooth and round off the bevel cuts.
Cut the bevel around the mouth of the sheath also
Now sand it all with some 220 grit
Now dye all the sanded edges and give a light coat over the rest of the body. Once the whole body is coated give it a wipe down with a paper towel to remove excess dye and level out the finish. The first coat of dy sealed the leather so this second coat will come out nice and smooth
I have not attatched my belt loop yet but this gives us a pretty good idea of what our finished sheath will look like
The tutorial is quickly comming to a close. Just need to cement the loop on and drill it then stitch it up and she'll be complete.
-Josh
Josh Dabney
Moderator
I left my sheath to dry overnight for a reason. Black dye and white stitching will not play well together if the dye is at all wet still so I wanted to be certain the dye down in my stitch holes is perfectly dry before stitching.
To assemble my belt loop and sheath body I lined the two up an pencil marked my area for contact cement.
Cement both parts
Stick the two together and hold for a few minutes. No need for clamps or anything.
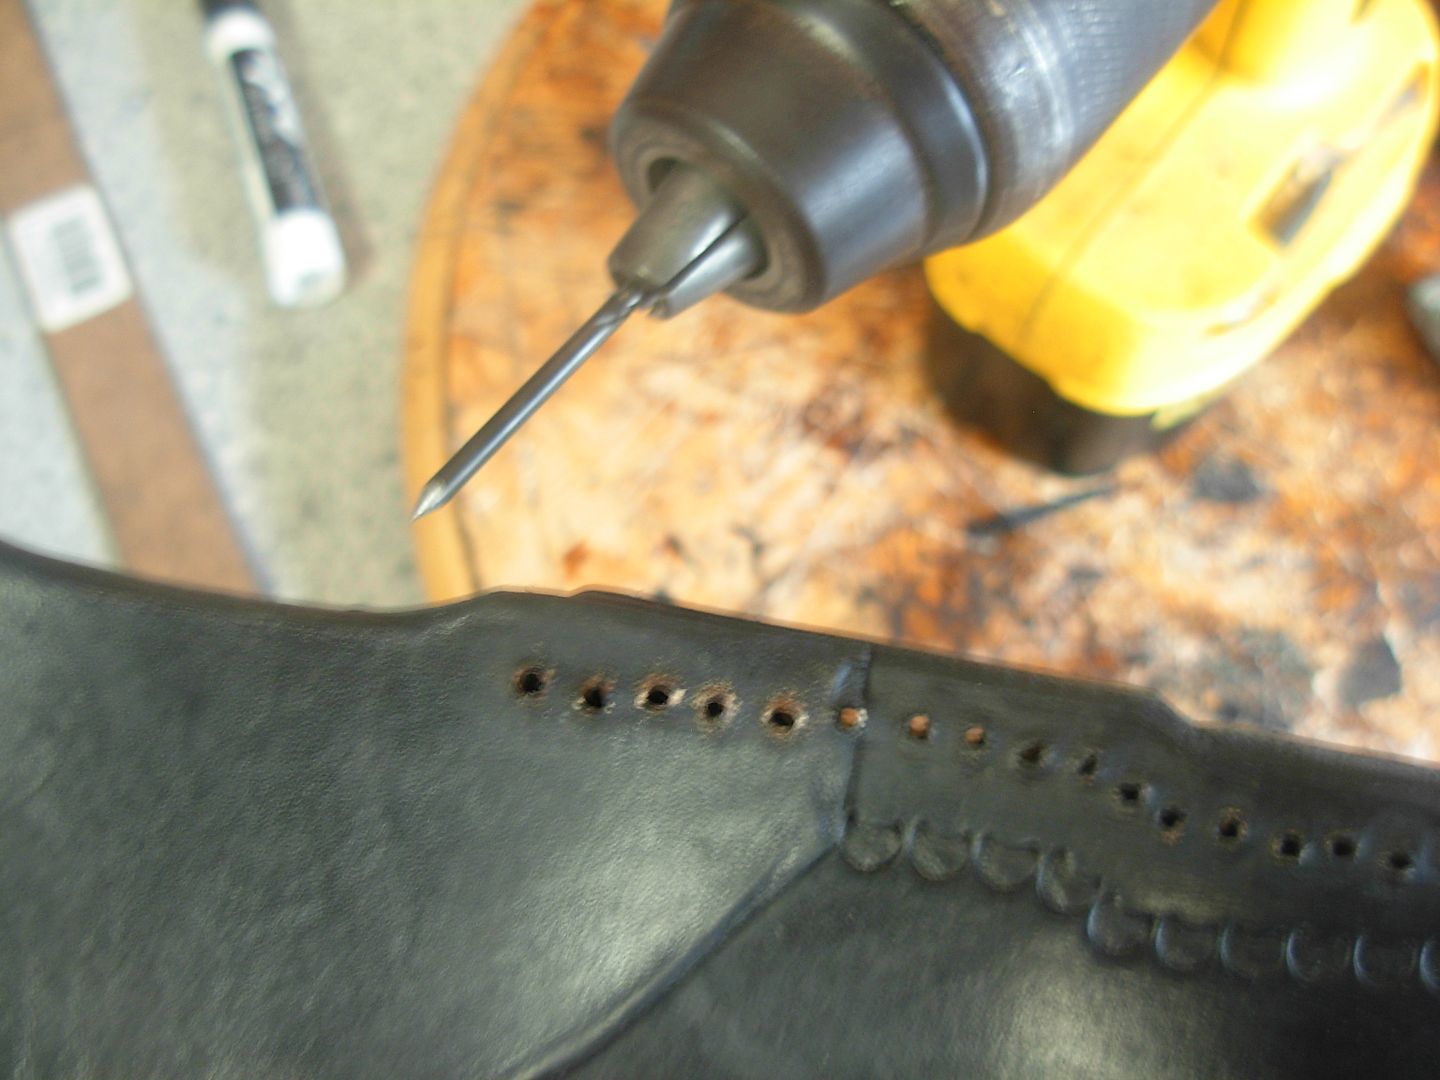
Let the cement set-up awhile befor drilling the stitch holes through the loop. The loop ends up at an awkward angle in relation to the sheath body so I set my loop on a wooden door shim for drilling. I find all kinds of uses for door shims around the shop and they come in a pack of a bunch and cost 99 cents - Here's what the shims look like but you can get them at hardware/big box stores-
http://www.bohleamerica.com/shop/product_info.php?products_id=970
Now drill the holes through the belt loop
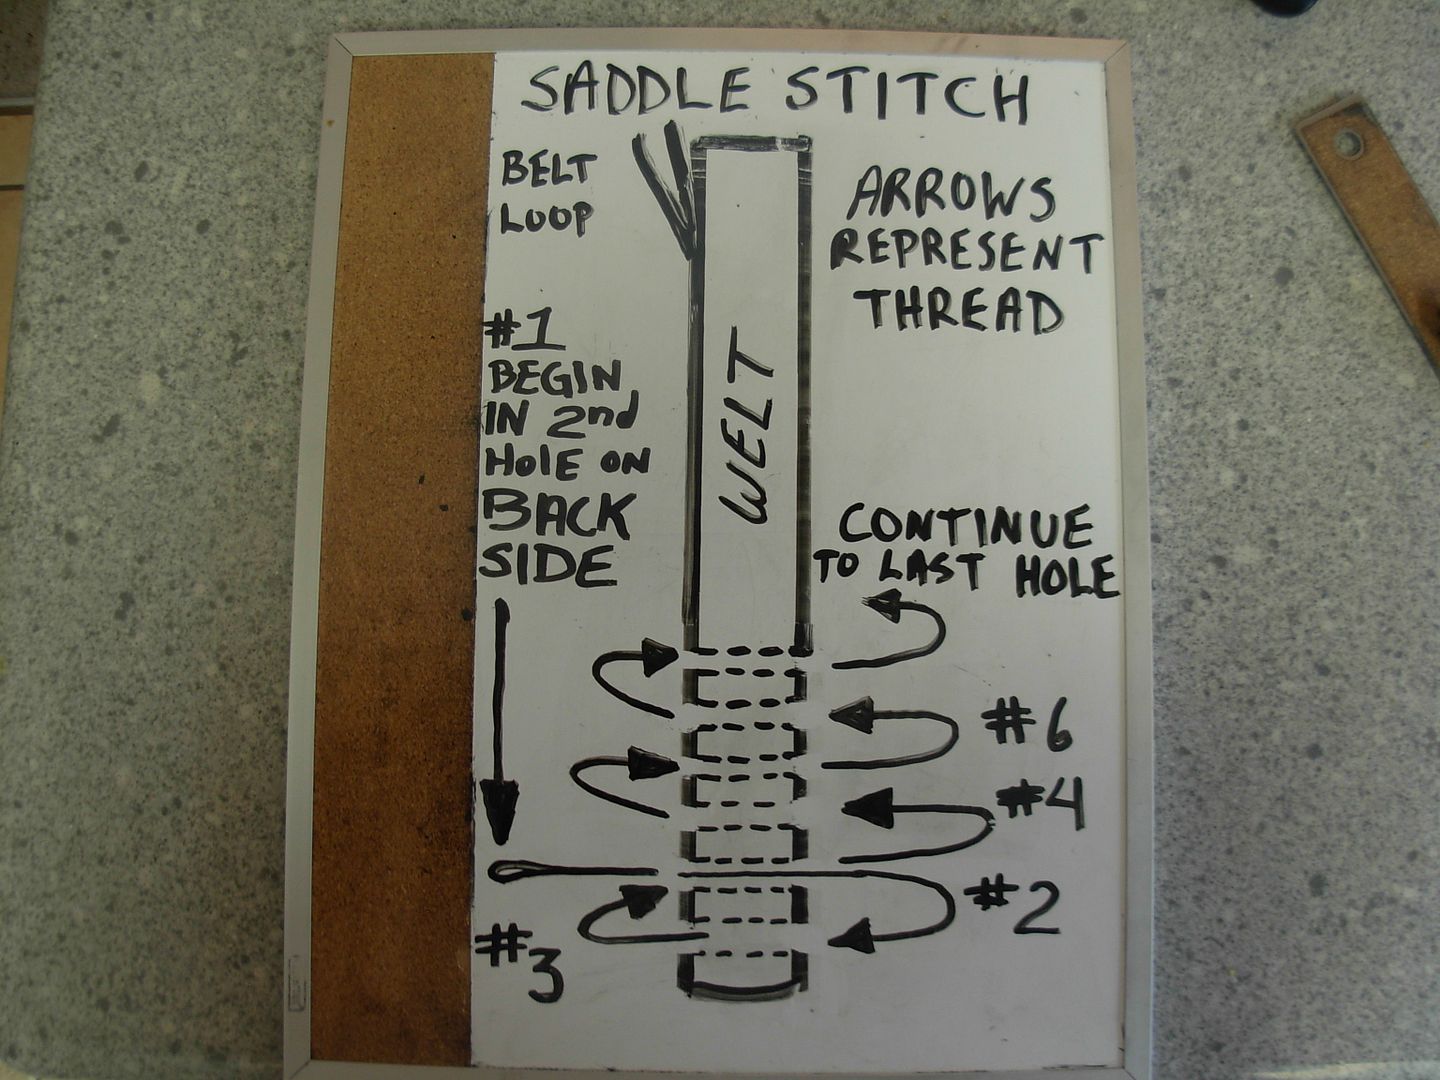
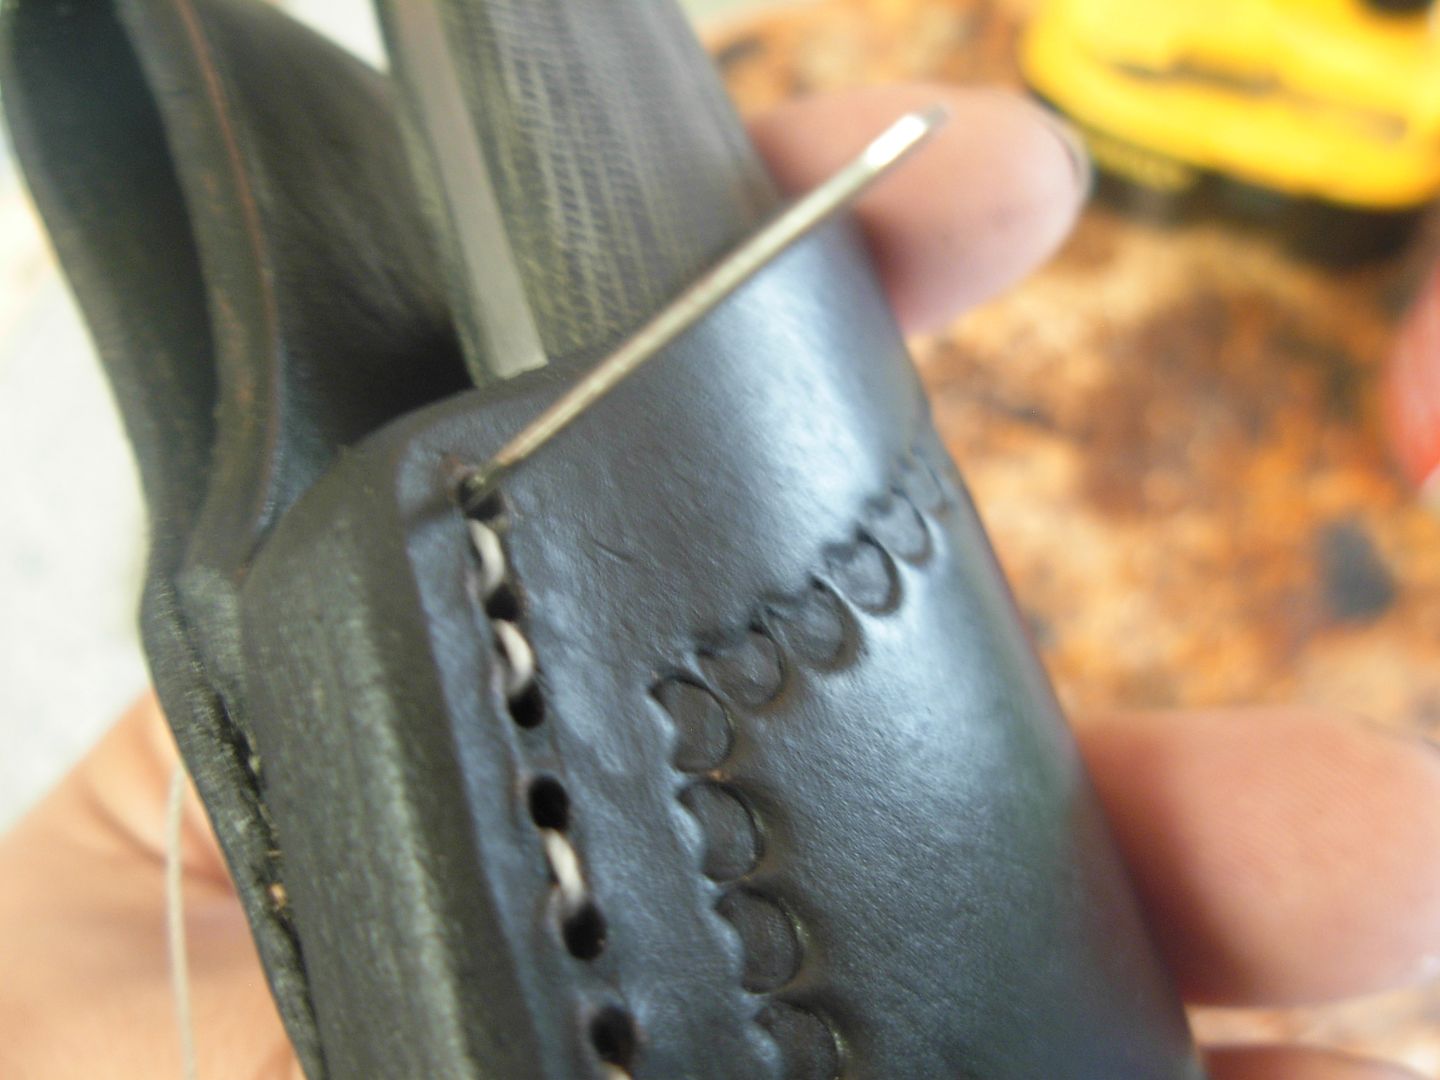
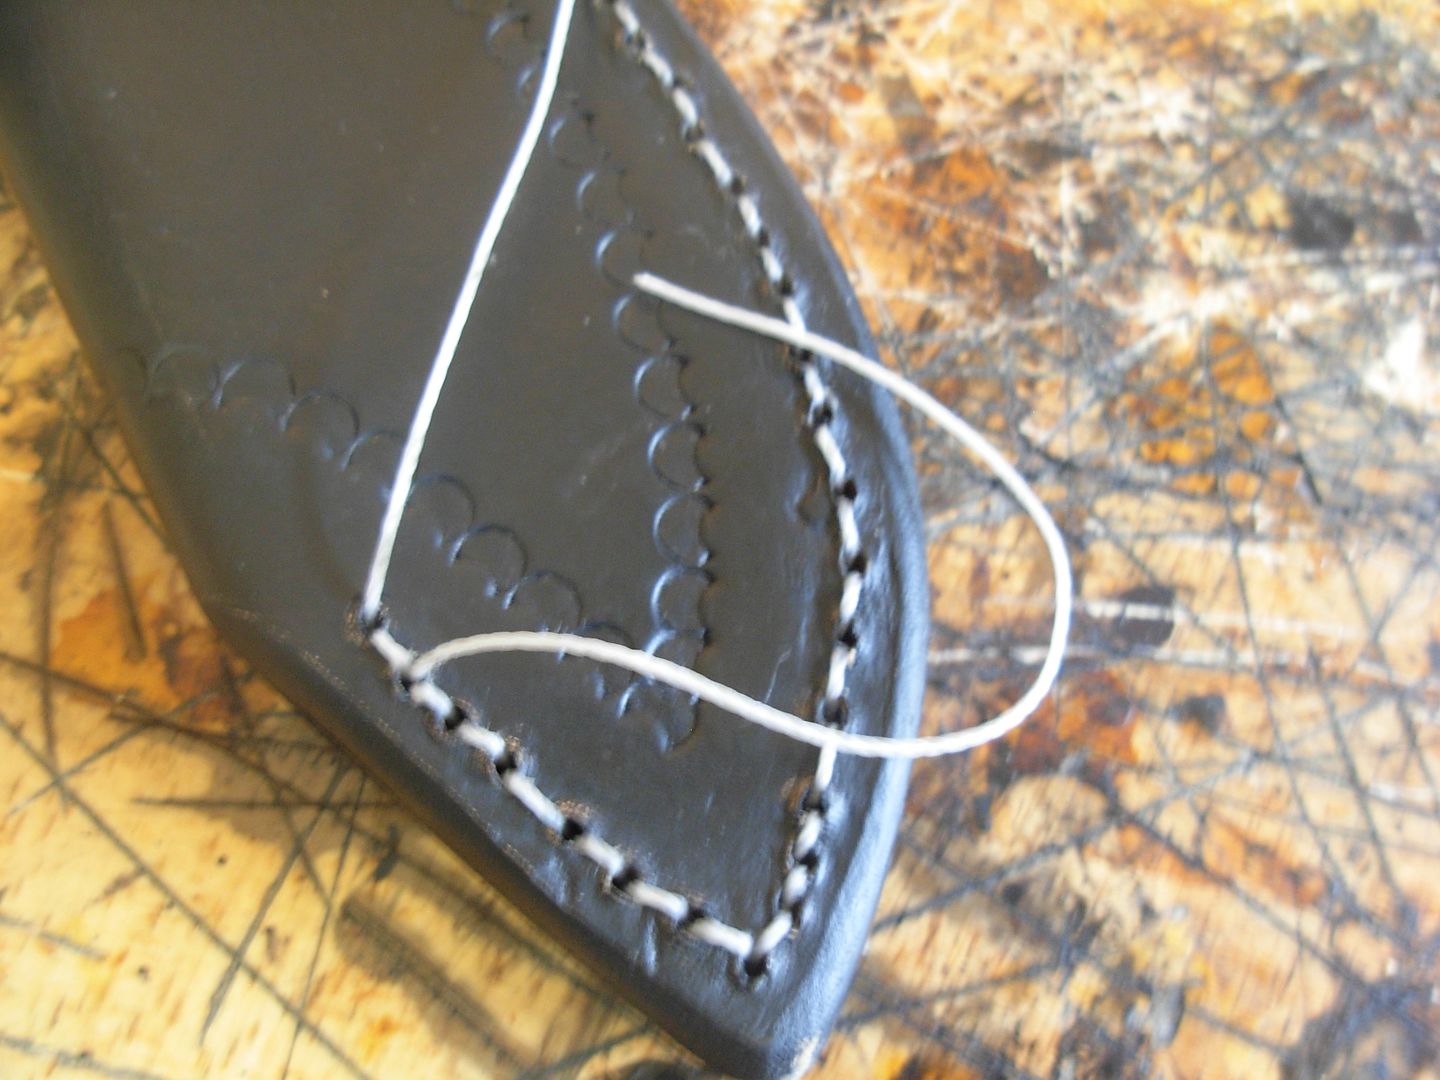
Now we're ready to stitch up our sheath. We'll use what's called a Saddle Stitch and we'll do it the easy way. Studying this pic you'll be able to figure it out but we'll get some pics along the way
The first step is to get a piece of thread cut. Begin by laying your thread out to the length of the stitch line
Now measure out 10 times the stitch line length. I'm going to have some wasted thread when I'm done but 10x the length will GUARANTEE that I will not run short or be trying to make my last couple stitches with a tiny 3" stub of thread.
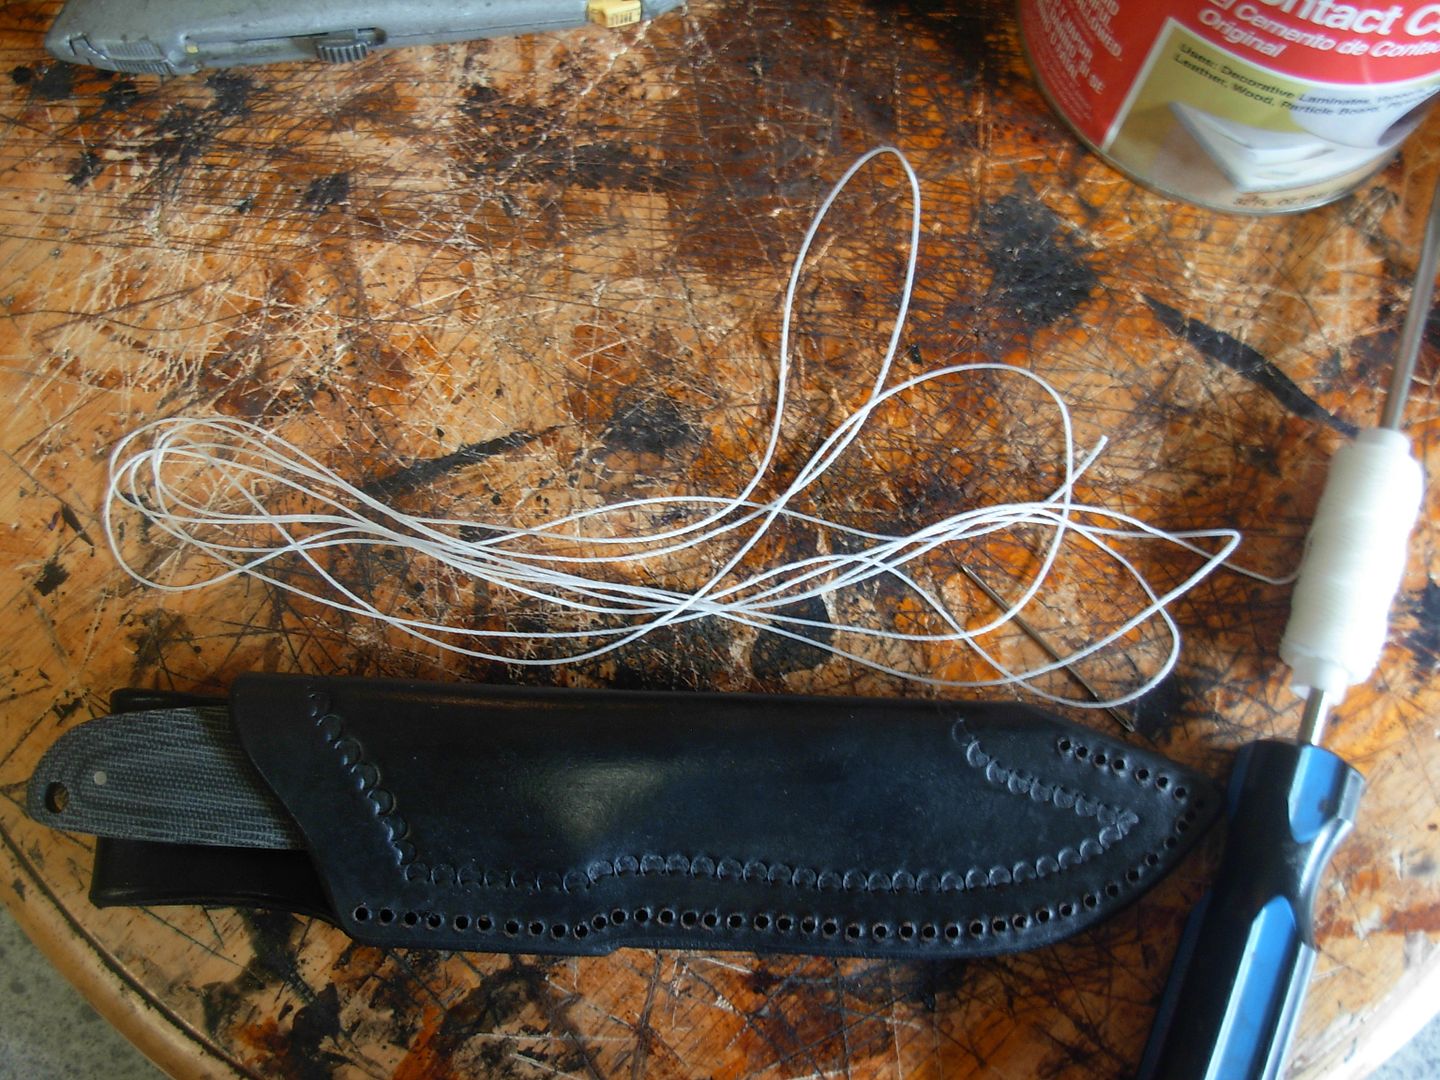
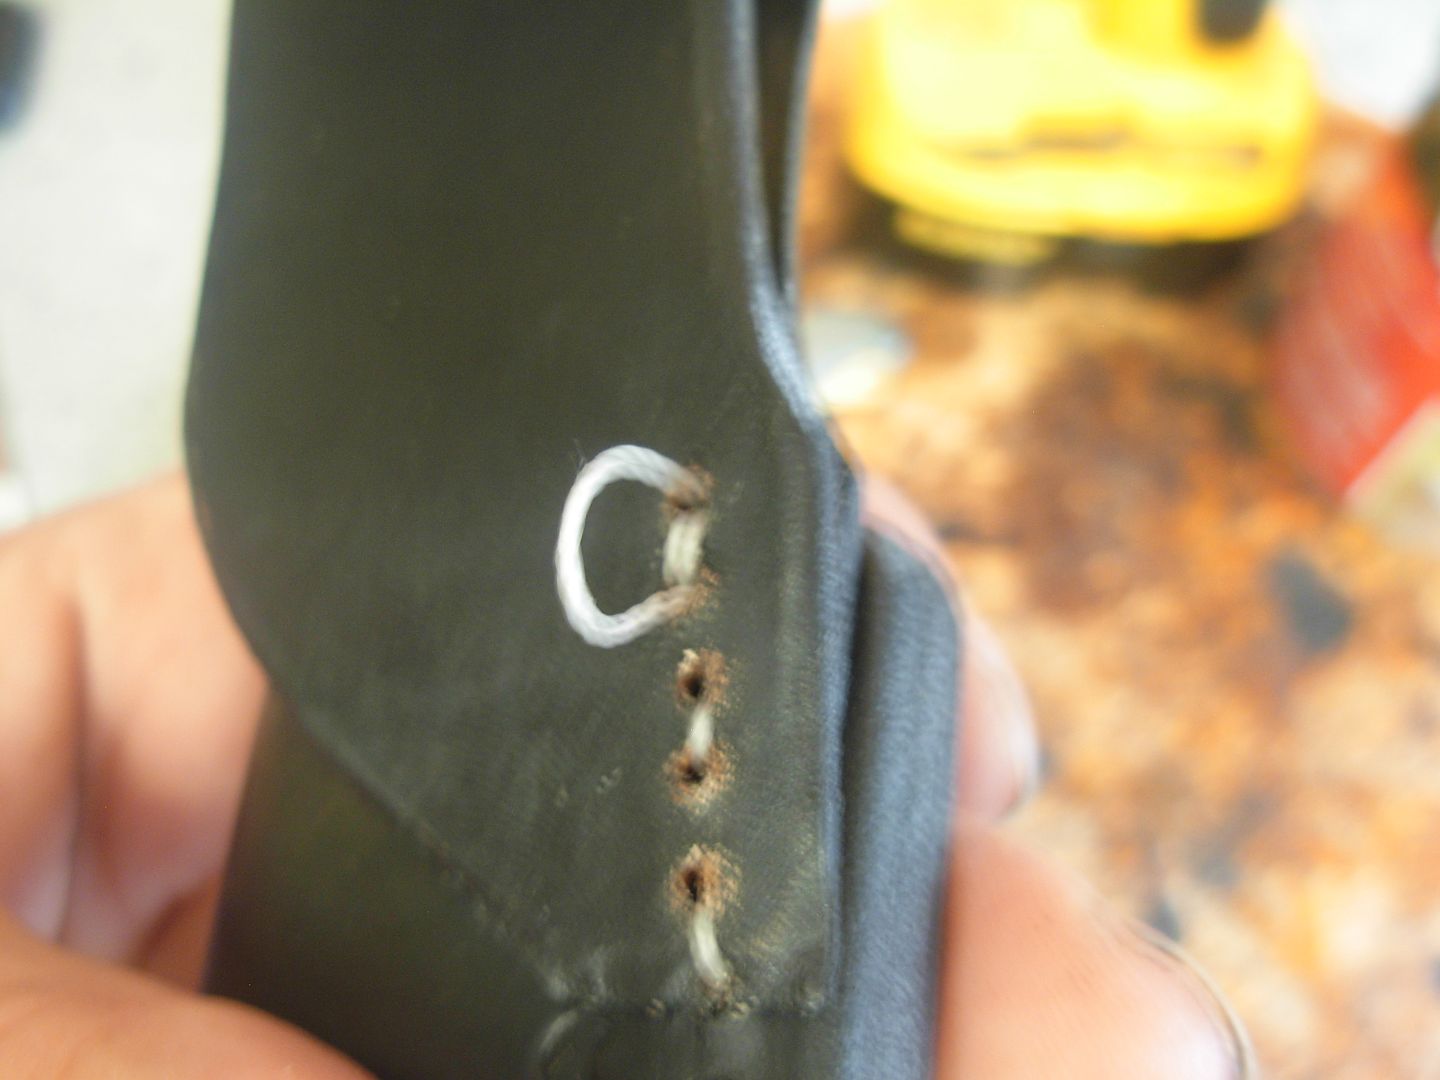
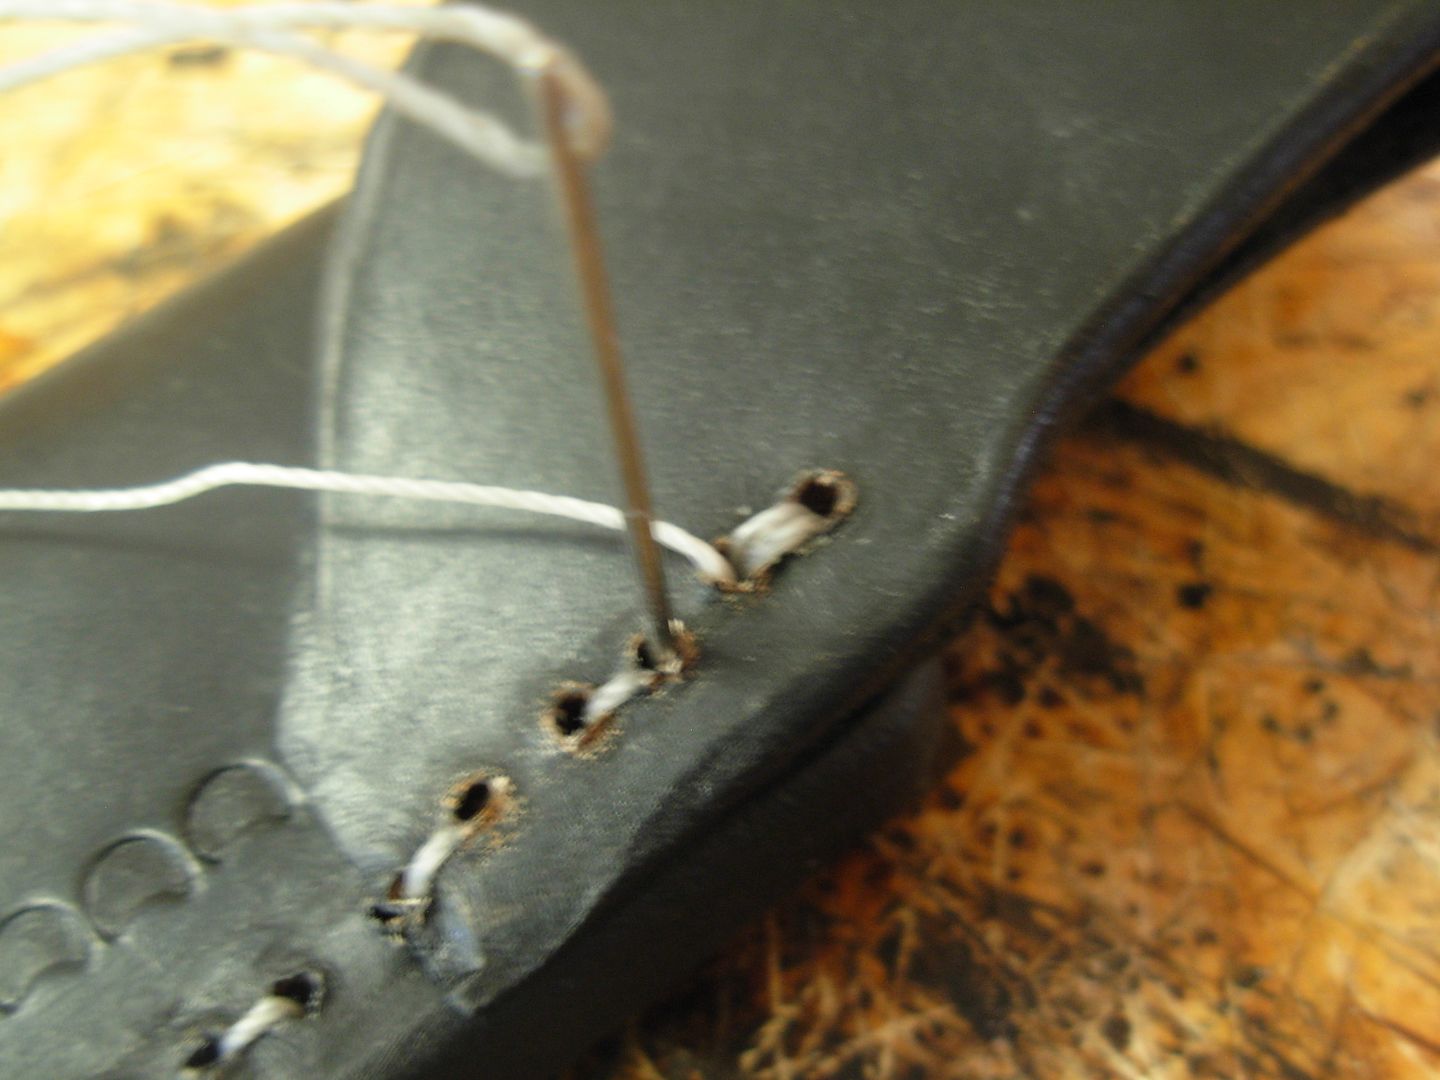
Now follow the directions from the previous pic. Start by threading your needle and going through the second hole from back to front. Pull your thread all the way through leaving a few inches of "tail" hanging out hole #2 on the back side. I'm beginning my stitching from the toe of the sheath because I'm stitching the belt loop right into the welt and the stress point in my stitch line is going to be the top hole where the belt loop will pull at my thread while in use.
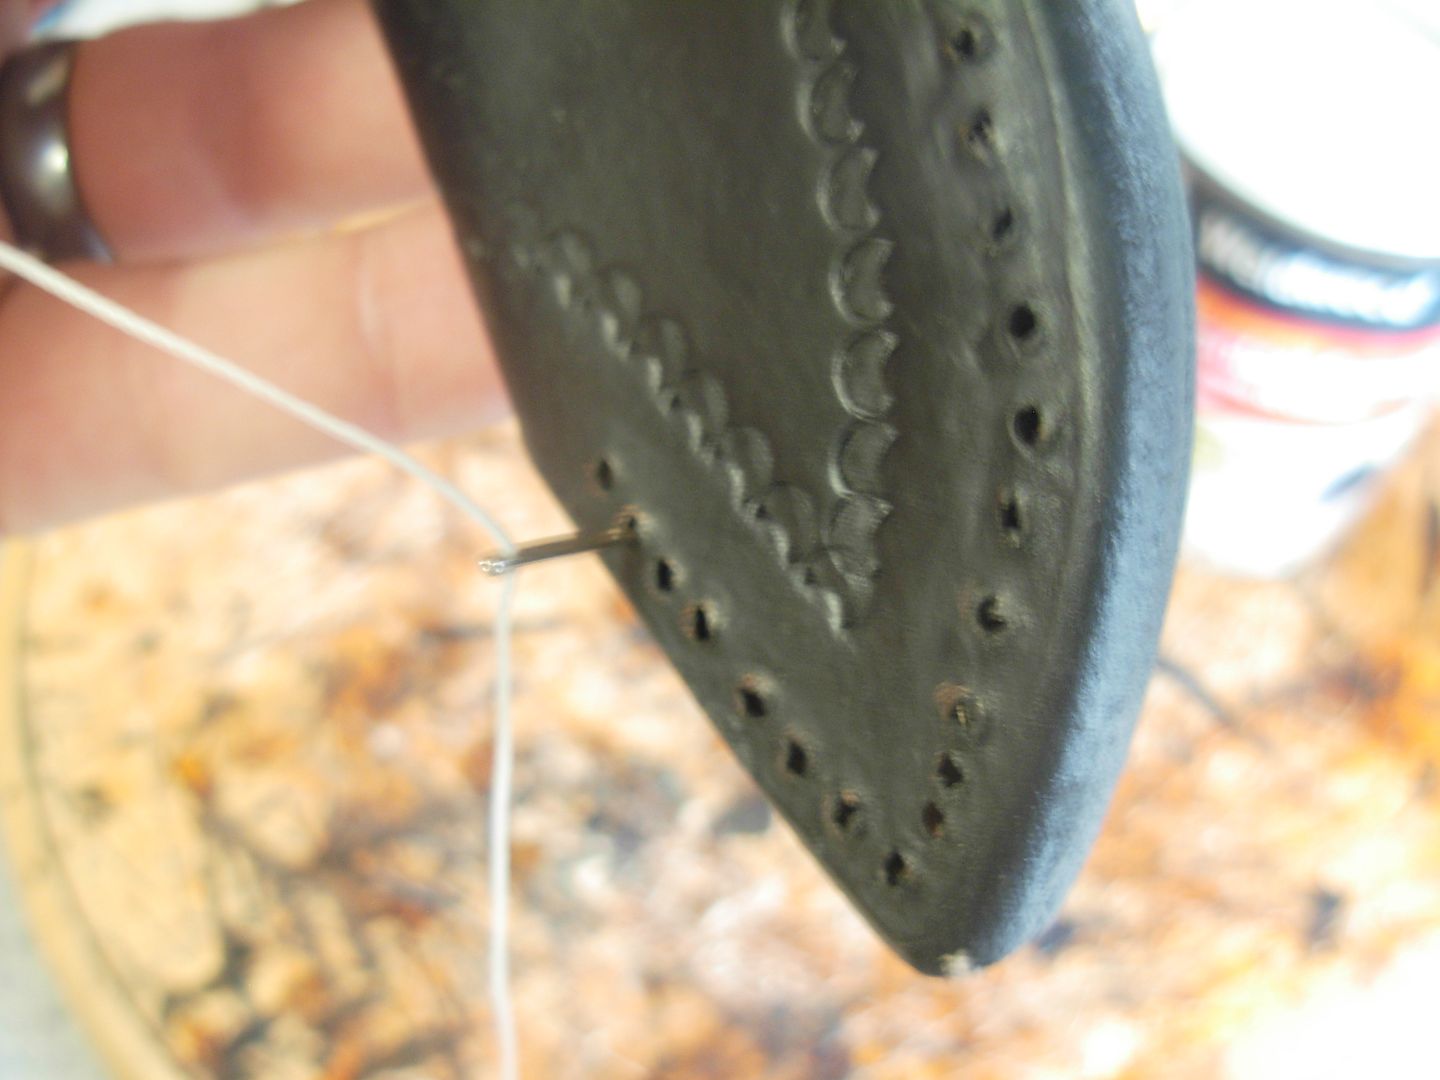
Then come from front to back through the first hole
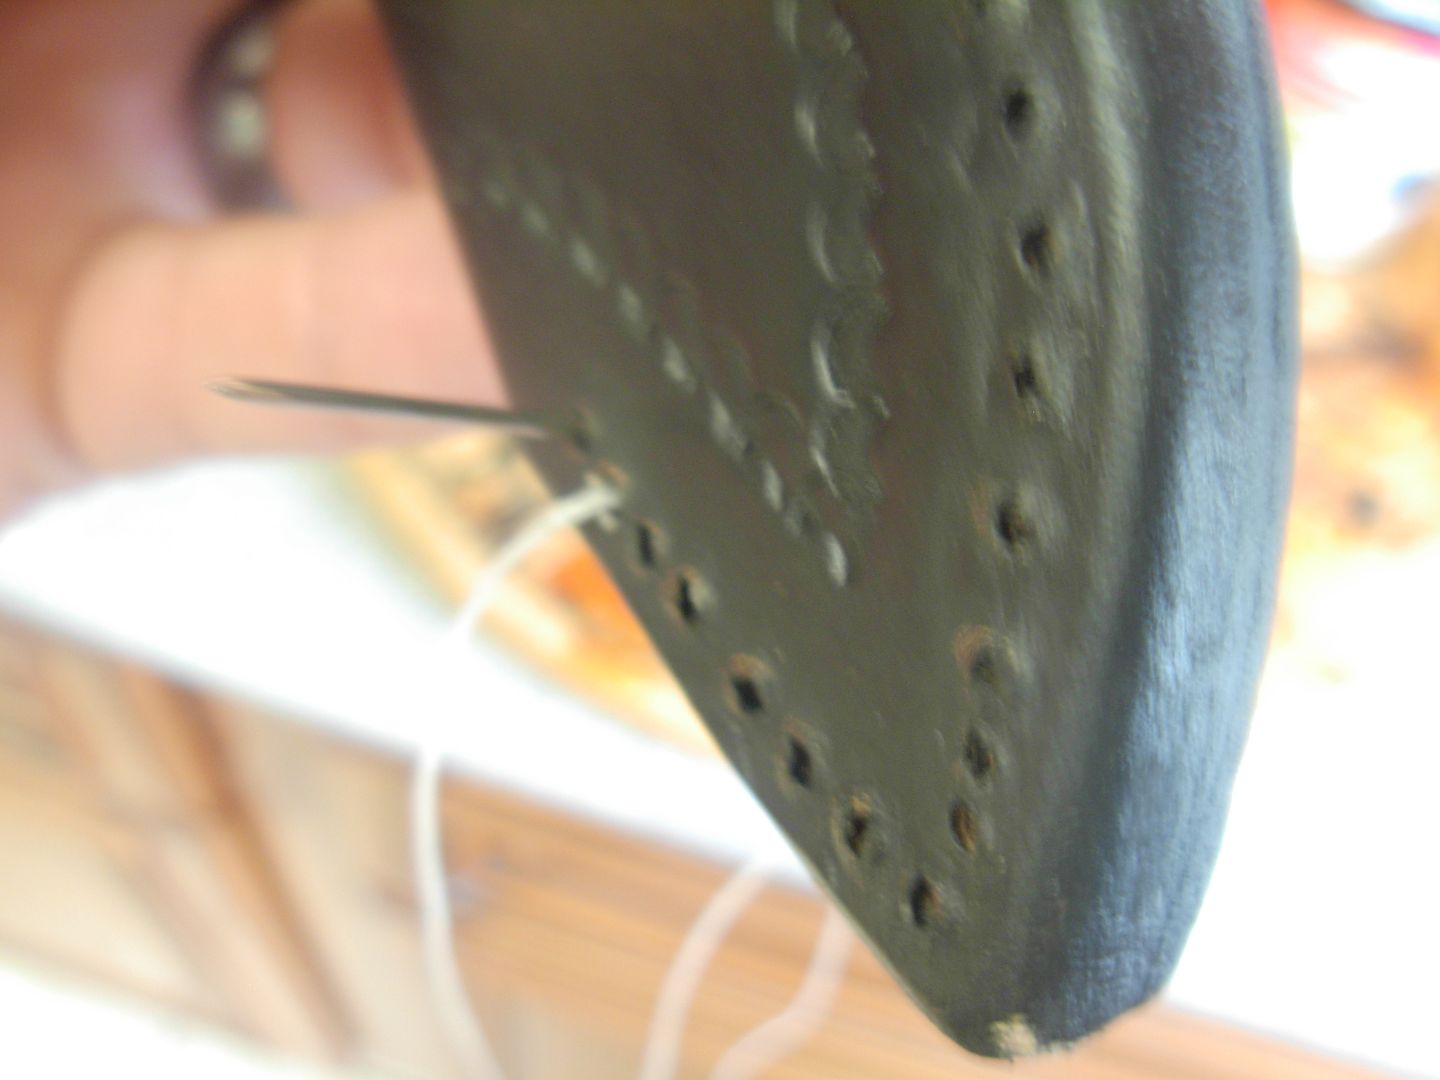
Now stitch like the drawing all the way to the top hole of the stitch line. On this first trip of stitching we'll get a "skip line" look with every other space having thread in it.
Because this top stitch is going to bare all the stress from the belt loop pulling against it I'm going to triple stitch this top stitch.
Here I have one stitch completed and I'm comming through the top hole for stitch #2
Two complete stitches and going through the top hole for #3. After this I'll come back through hole #2 from front to back and then continue back down to the toe side
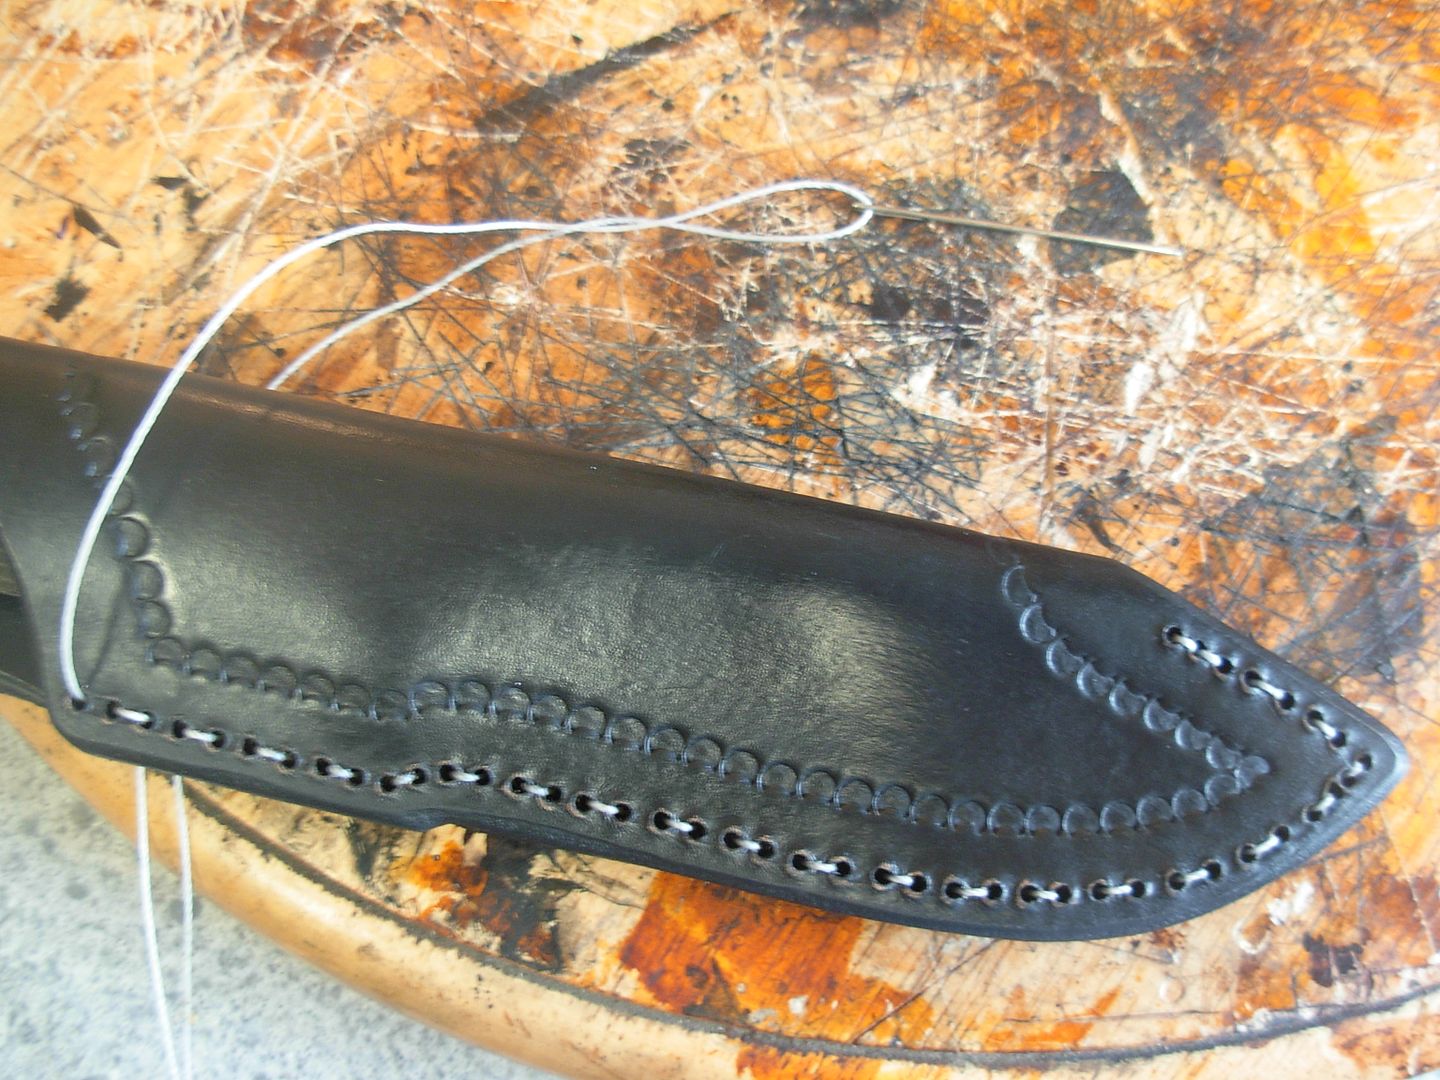
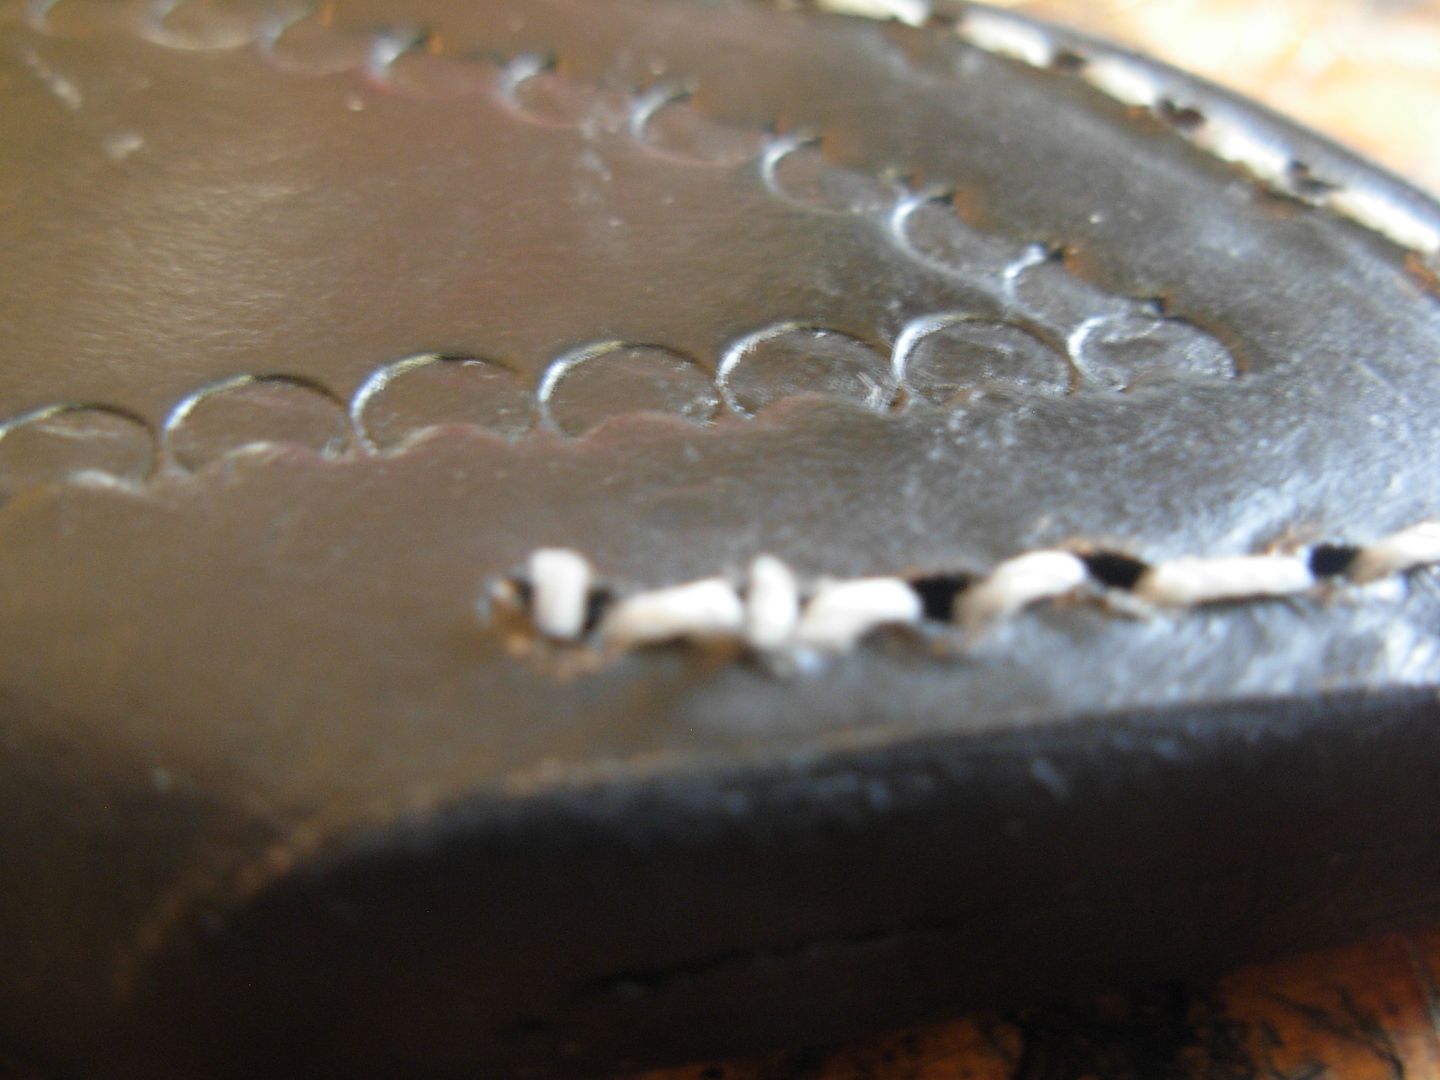
As we progress we are completing a stitch with each pull through and we go from the skip-line look to the stitched look
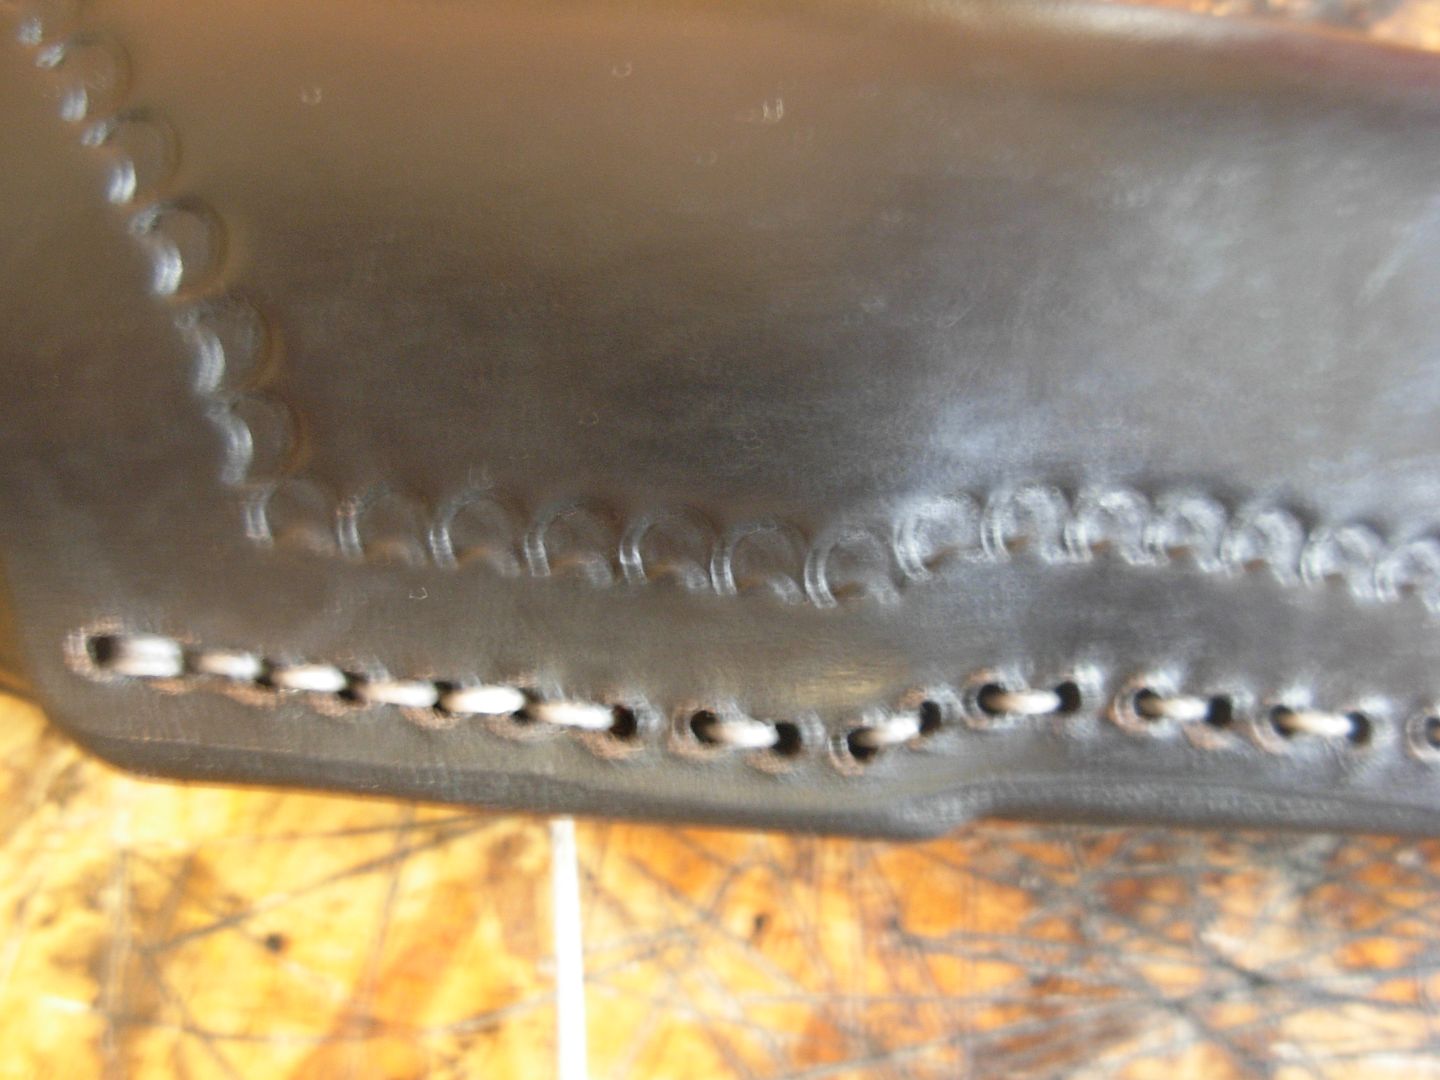
I began stitching with a completed first stitch so after stitching all the way back to the first hole I end up with a double stitch on the toe side and a triple stitch on the belt loop side and single stitches everywhere in between.
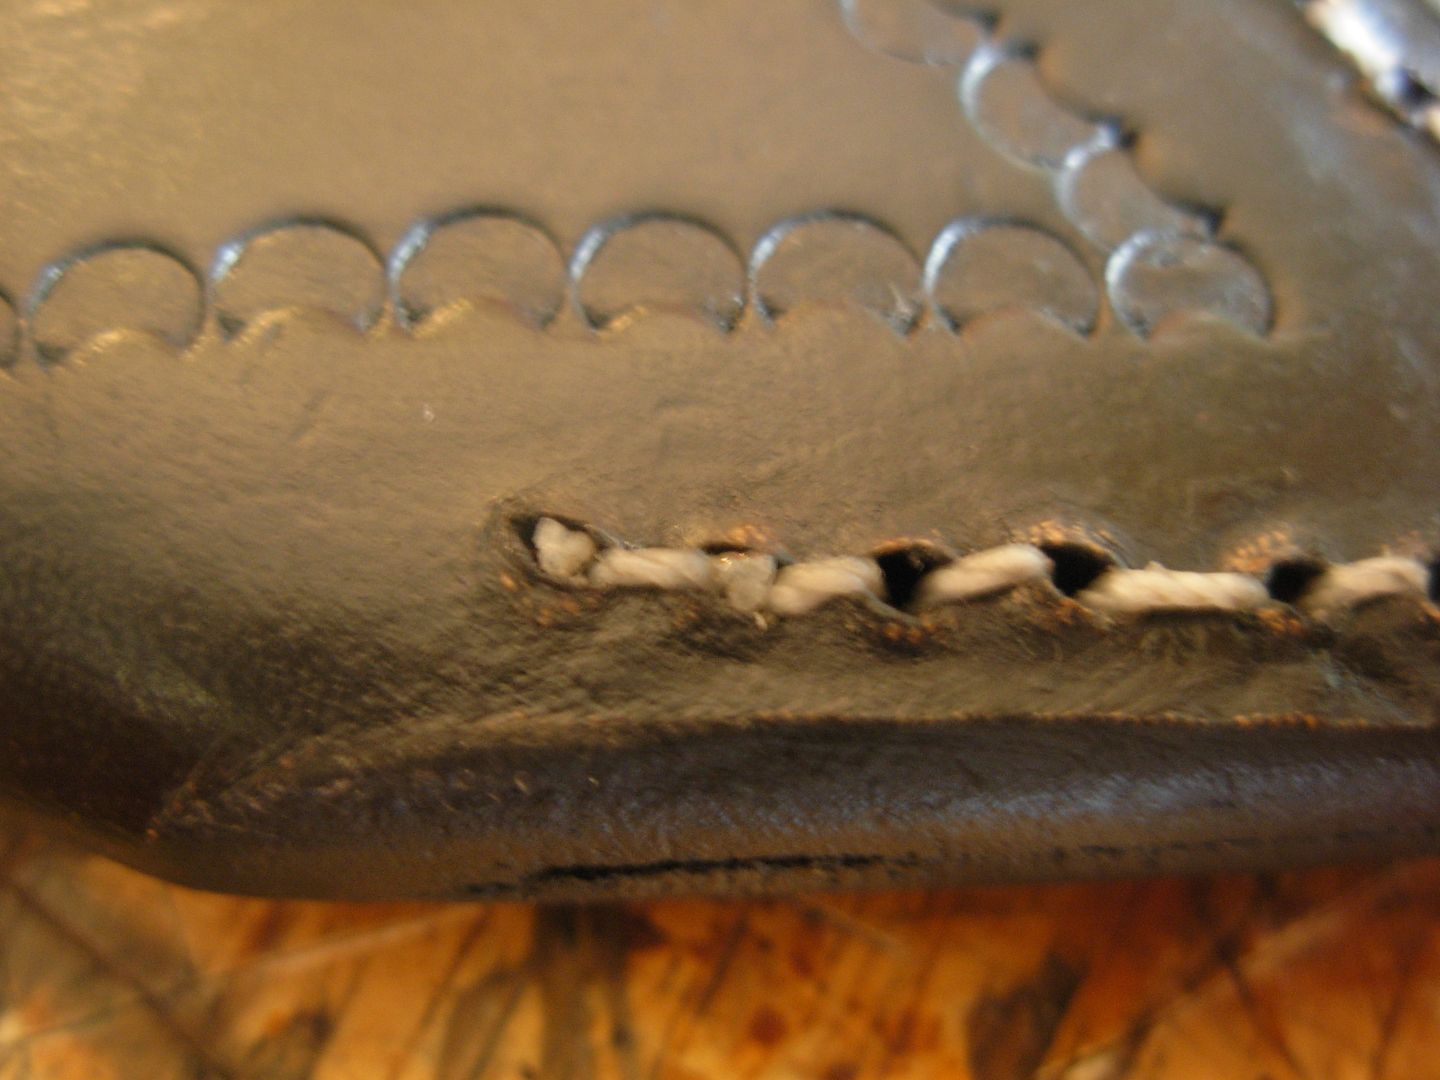
Now that I'm finished stitching I've got my thread with needle attached hanging out of hole #1 and my beginning "tail" hanging out of hole #2 BOTH on the back side of my sheath.
Now pull the thread and the tail taught and cut them off short leaving about an 1/8" sticking up.
Now get a lighter in your hand and some spit on your finger tip. Wave the flame over the 1/8" tails to melt them down flush to the stitching and then flatten the melty blobs of thread with you spitty finger. Now the tails are locked in place and our stitching is complete.
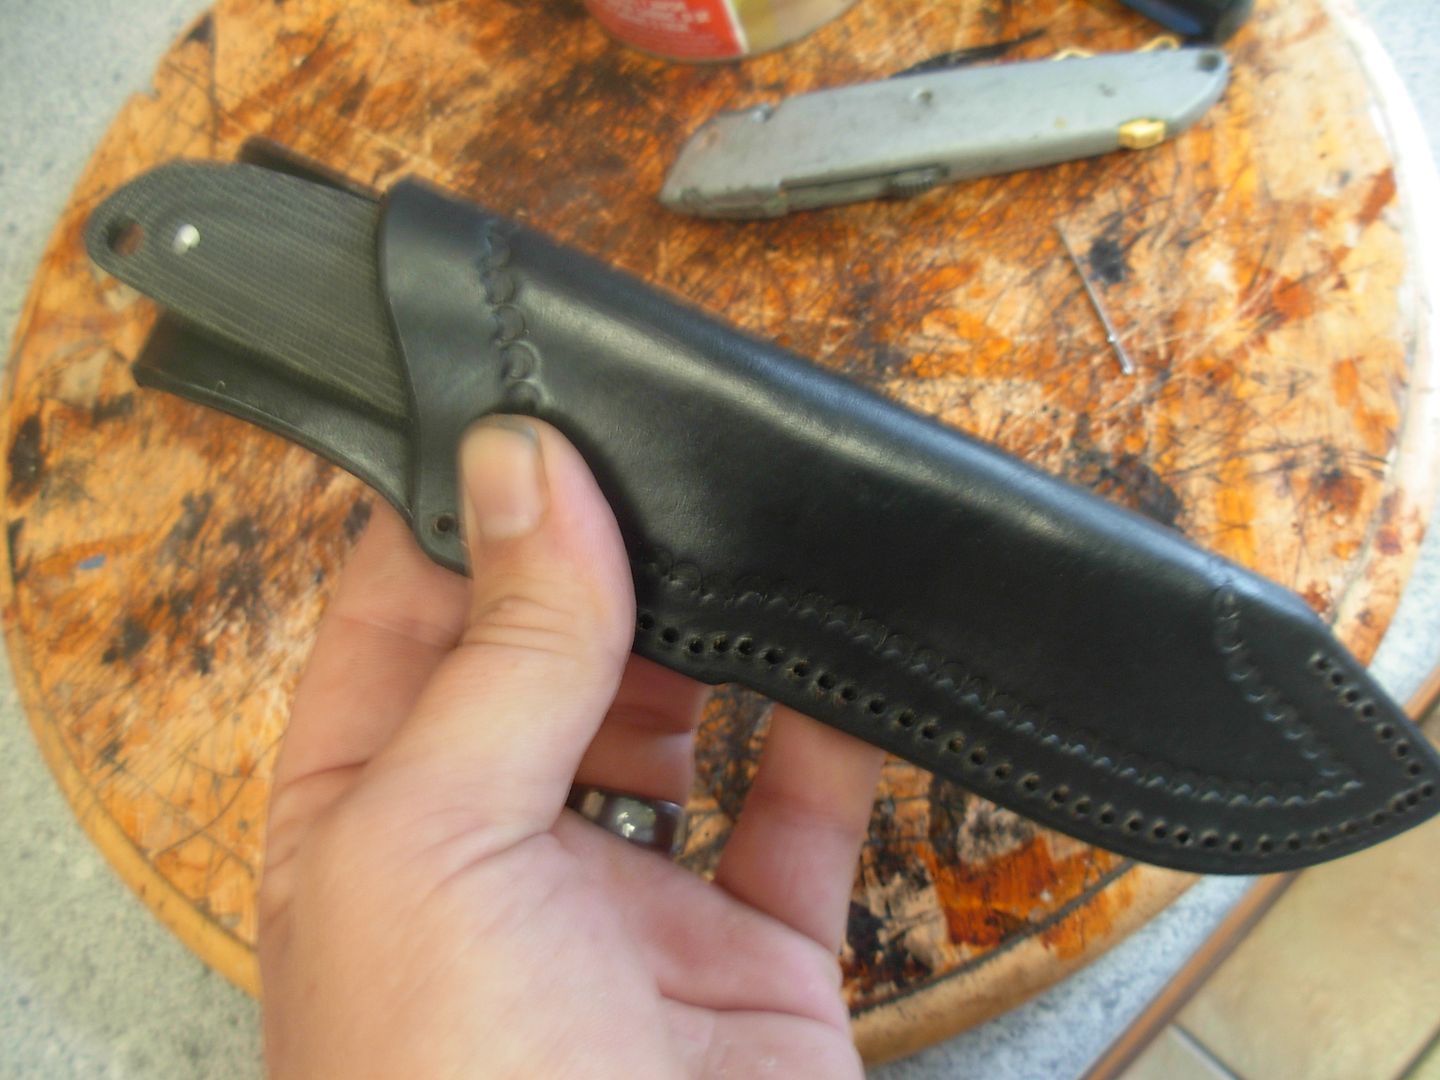
Here's a couple shots of my finished sheath.
Front side
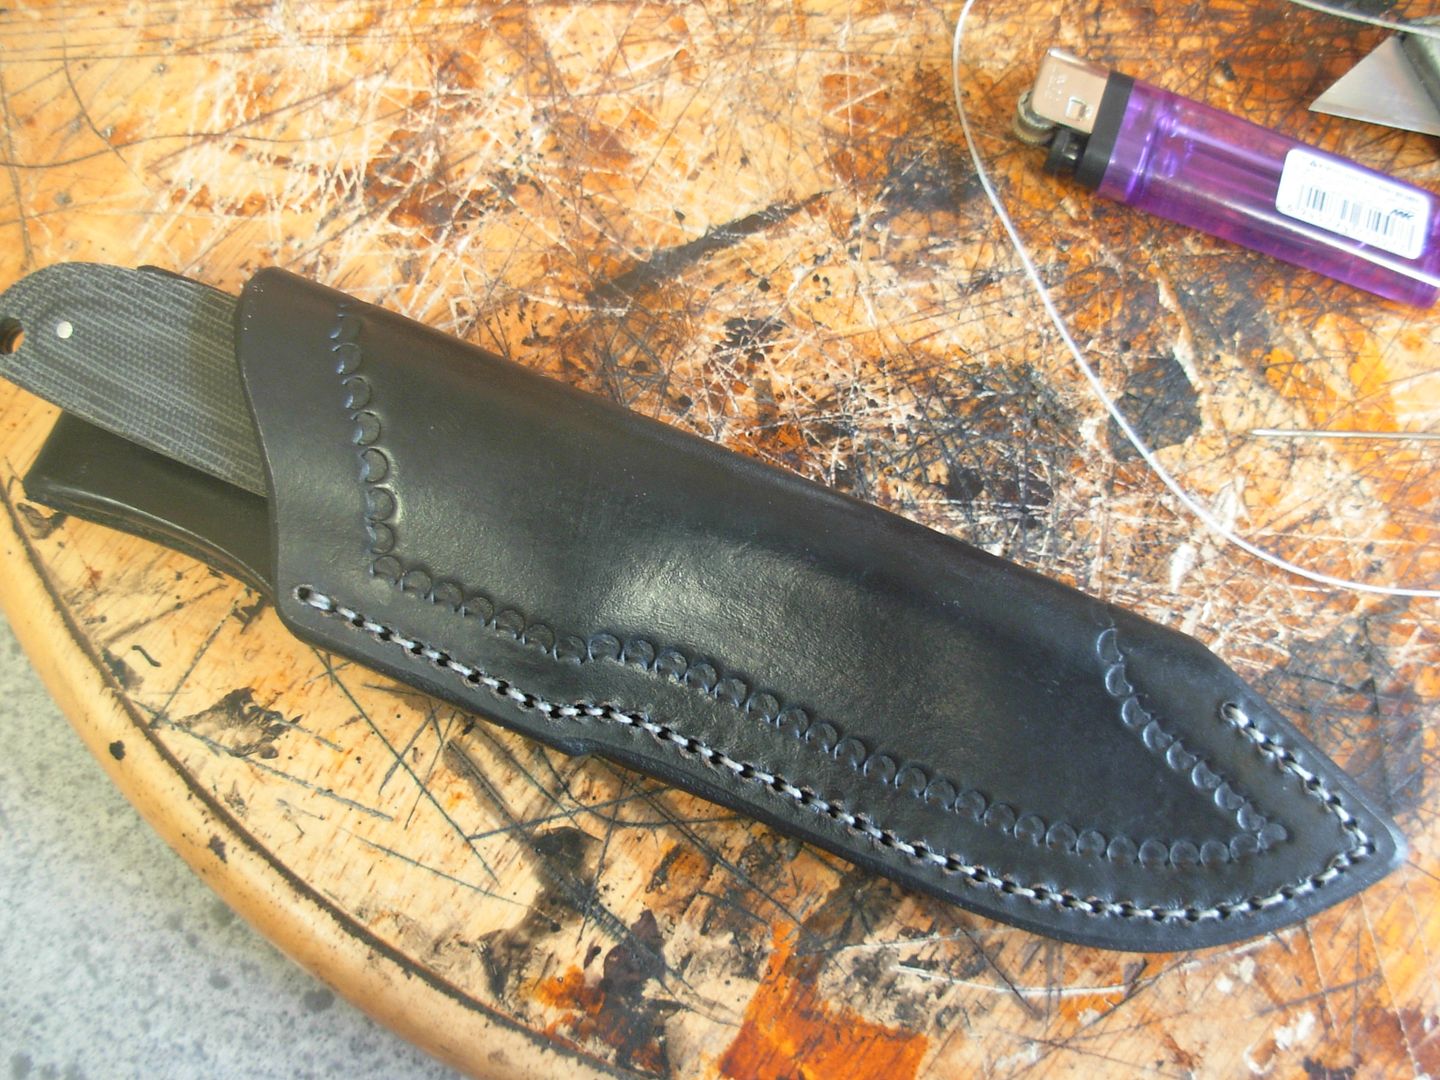
Back side
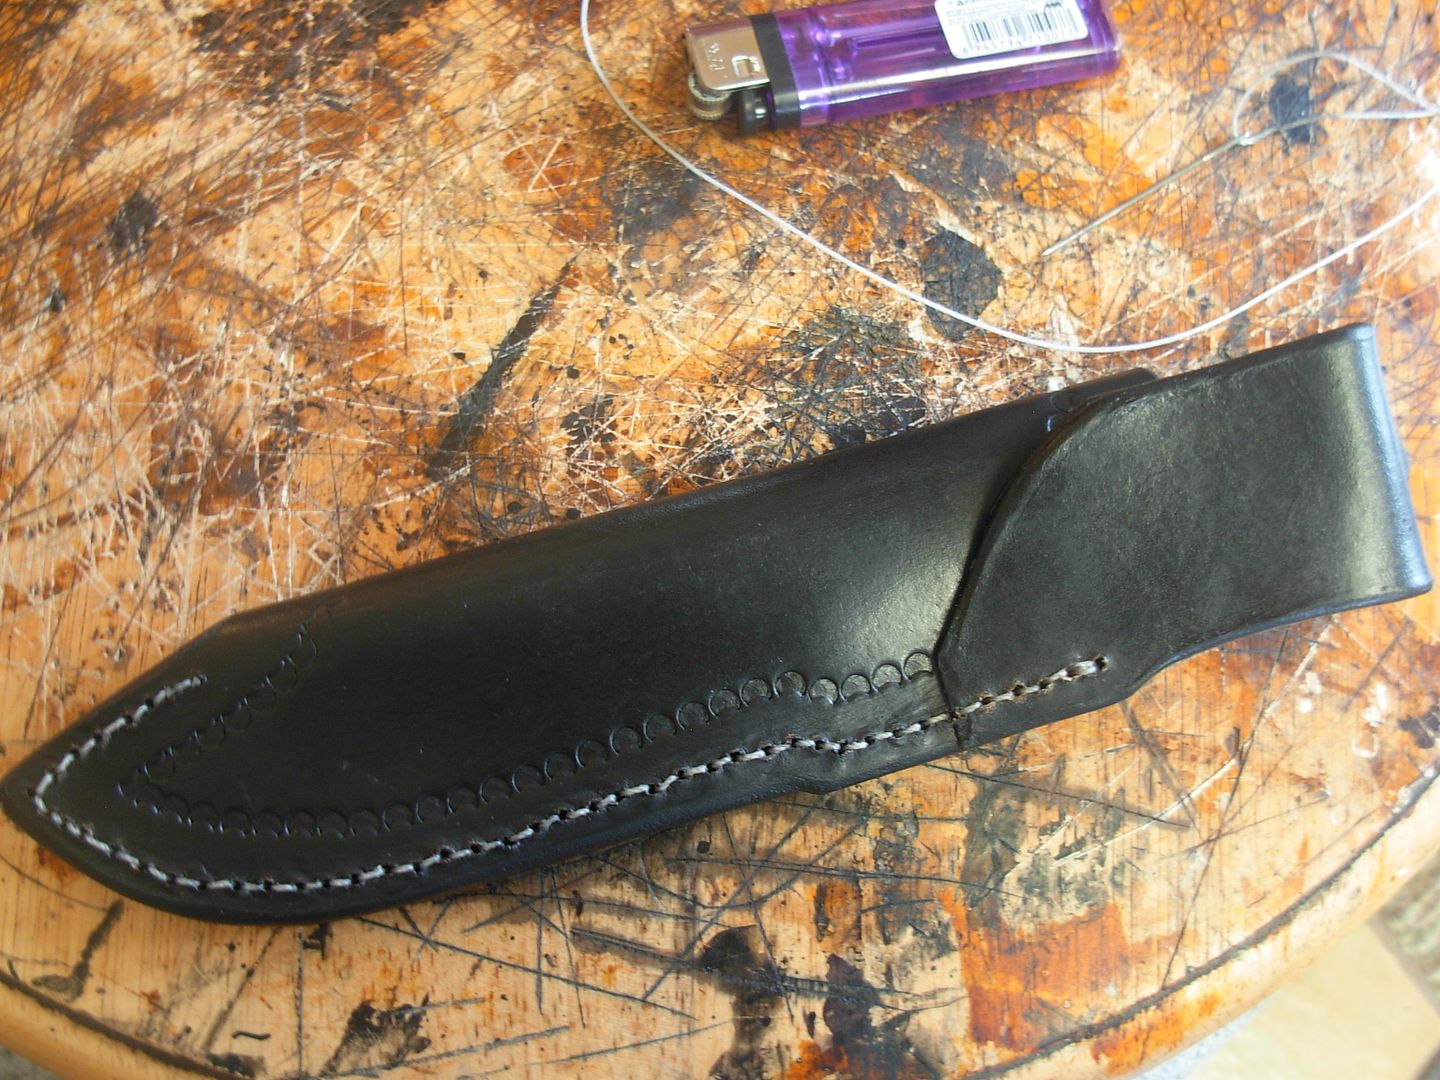
That's all there is to it !
Just need to sharpen up our knife to complete the Tutorial.
-Josh
To assemble my belt loop and sheath body I lined the two up an pencil marked my area for contact cement.
Cement both parts
Stick the two together and hold for a few minutes. No need for clamps or anything.
Let the cement set-up awhile befor drilling the stitch holes through the loop. The loop ends up at an awkward angle in relation to the sheath body so I set my loop on a wooden door shim for drilling. I find all kinds of uses for door shims around the shop and they come in a pack of a bunch and cost 99 cents - Here's what the shims look like but you can get them at hardware/big box stores-
http://www.bohleamerica.com/shop/product_info.php?products_id=970
Now drill the holes through the belt loop
Now we're ready to stitch up our sheath. We'll use what's called a Saddle Stitch and we'll do it the easy way. Studying this pic you'll be able to figure it out but we'll get some pics along the way
The first step is to get a piece of thread cut. Begin by laying your thread out to the length of the stitch line
Now measure out 10 times the stitch line length. I'm going to have some wasted thread when I'm done but 10x the length will GUARANTEE that I will not run short or be trying to make my last couple stitches with a tiny 3" stub of thread.
Now follow the directions from the previous pic. Start by threading your needle and going through the second hole from back to front. Pull your thread all the way through leaving a few inches of "tail" hanging out hole #2 on the back side. I'm beginning my stitching from the toe of the sheath because I'm stitching the belt loop right into the welt and the stress point in my stitch line is going to be the top hole where the belt loop will pull at my thread while in use.
Then come from front to back through the first hole
Now stitch like the drawing all the way to the top hole of the stitch line. On this first trip of stitching we'll get a "skip line" look with every other space having thread in it.
Because this top stitch is going to bare all the stress from the belt loop pulling against it I'm going to triple stitch this top stitch.
Here I have one stitch completed and I'm comming through the top hole for stitch #2
Two complete stitches and going through the top hole for #3. After this I'll come back through hole #2 from front to back and then continue back down to the toe side
As we progress we are completing a stitch with each pull through and we go from the skip-line look to the stitched look
I began stitching with a completed first stitch so after stitching all the way back to the first hole I end up with a double stitch on the toe side and a triple stitch on the belt loop side and single stitches everywhere in between.
Now that I'm finished stitching I've got my thread with needle attached hanging out of hole #1 and my beginning "tail" hanging out of hole #2 BOTH on the back side of my sheath.
Now pull the thread and the tail taught and cut them off short leaving about an 1/8" sticking up.
Now get a lighter in your hand and some spit on your finger tip. Wave the flame over the 1/8" tails to melt them down flush to the stitching and then flatten the melty blobs of thread with you spitty finger. Now the tails are locked in place and our stitching is complete.
Here's a couple shots of my finished sheath.
Front side
Back side
That's all there is to it !
Just need to sharpen up our knife to complete the Tutorial.
-Josh
Keith Willis
Well-Known Member
Great toturial Josh...
God bless
God bless
Josh Dabney
Moderator
Happy to contribute fellas !
Extremely busy with family for the weekend but I'll be covering sharpening our knife also so stay tuned for the finale !
-Josh
Extremely busy with family for the weekend but I'll be covering sharpening our knife also so stay tuned for the finale !
-Josh
Josh Dabney
Moderator
Alright, let's talk some knife sharpening.
It is true that many folks suffer from knife-sharpen-ophobia. Your avarage Joe off the street as well as many knifemakers also suffer this debilitating paranoia when it comes time to sharpen a knife.
Armed with a basic understanding of what's happening at the edge and a decent stone YOU can easily develop the sharpening skills to wow your friends and family with. The main component of learning is the willingness to practice practice practice.
There's about a gazillion jigs, fixtures, contraptions, and machines available to "help" us out with this task. Some work great while others are complete junk. I'd highly recommend to learn on stones without these handicaps for your own benefit so thats what I'm going to do here.
Let's talk a little about the stones themselves. I'm using Smith's brand Diamond stones in Coarse (325 grit) and Fine (725 grit) to sharpen my knife. For the person who's serious about learning to sharpen and can afford them they're a great investment. They are admittidly on the spendy side and pretty much all stones will work. These are the exact stones I'm using-
http://usaknifemaker.com/sharpening-supplies-c-52/11-5-x-2-5-coarse-diamond-bench-stone.html
http://usaknifemaker.com/sharpening-supplies-c-52/11-5-x-2-5-fine-diamond-bench-stone.html
For the more budget oriented shopper I can give a full recommendation to one of these Norton two sided stones. I used to have one just like this but gave it to my nephew awhile back. It'll take a bit more work than the diamond stones but you'll get there just the same with nothing other than one of these. I'd recommend going with the 8x2x1" version for $19.99. That's a good size and value for sharpening any size blade. Maybe we can get USAKnifemakers to stock a few of these but until that time I have ordered from these guys a couple time with no complaints at all-
http://www.sharpeningsupplies.com/Norton-Combination-India-Stone-P69C25.aspx
Let's define for our purposes what exactly "sharp" means.
Sharp- A knife blade that will dry shave your arm hair without effort. No pressure need be applied and no slicing motion will be used in attemting to shave arm hair. This is a fine way to CUT yourself and it's simply not necessary with a sharp knife. (trying to force it to scrape off a few hairs to call it shaving sharp is cheating)
There are alot of levels of sharp beyond shaving sharp but unless your a Barber or a Sushi chef you aren't going to need or benefit from a truely scarry sharp edge that'll scare the hair off a gnat from 10 feet away. Take my word that shaving sharp is enough and keep that as your goal.
Sharpening angle.
This is the angle the blade is raised off the stone for sharpening in relation to the imaginary centerline running from the edge to the center of the spine.
20 degrees for large knives like choppers, cleavers, bowies etc.
15 degrees for everything else
I'll go less than 15 on kitchen knives for my own use.
I'll be sharpening at 15 degrees here. As you're practicing you develop a muscle memory for the "feel" of 15 degrees which is ideal. A little more and your at 20 and a little less if you want will be easy targets if you become accustomed to sharpening in the middle ground.
To develop an accurate 15 degree habit it's a good idea to make yourself a little guide to ensure you're practicing the correct angle.
I used a protractor to layout this little guide on a standard Post-it-note so you can make one with just a ruler and piece of paper or cardboard.
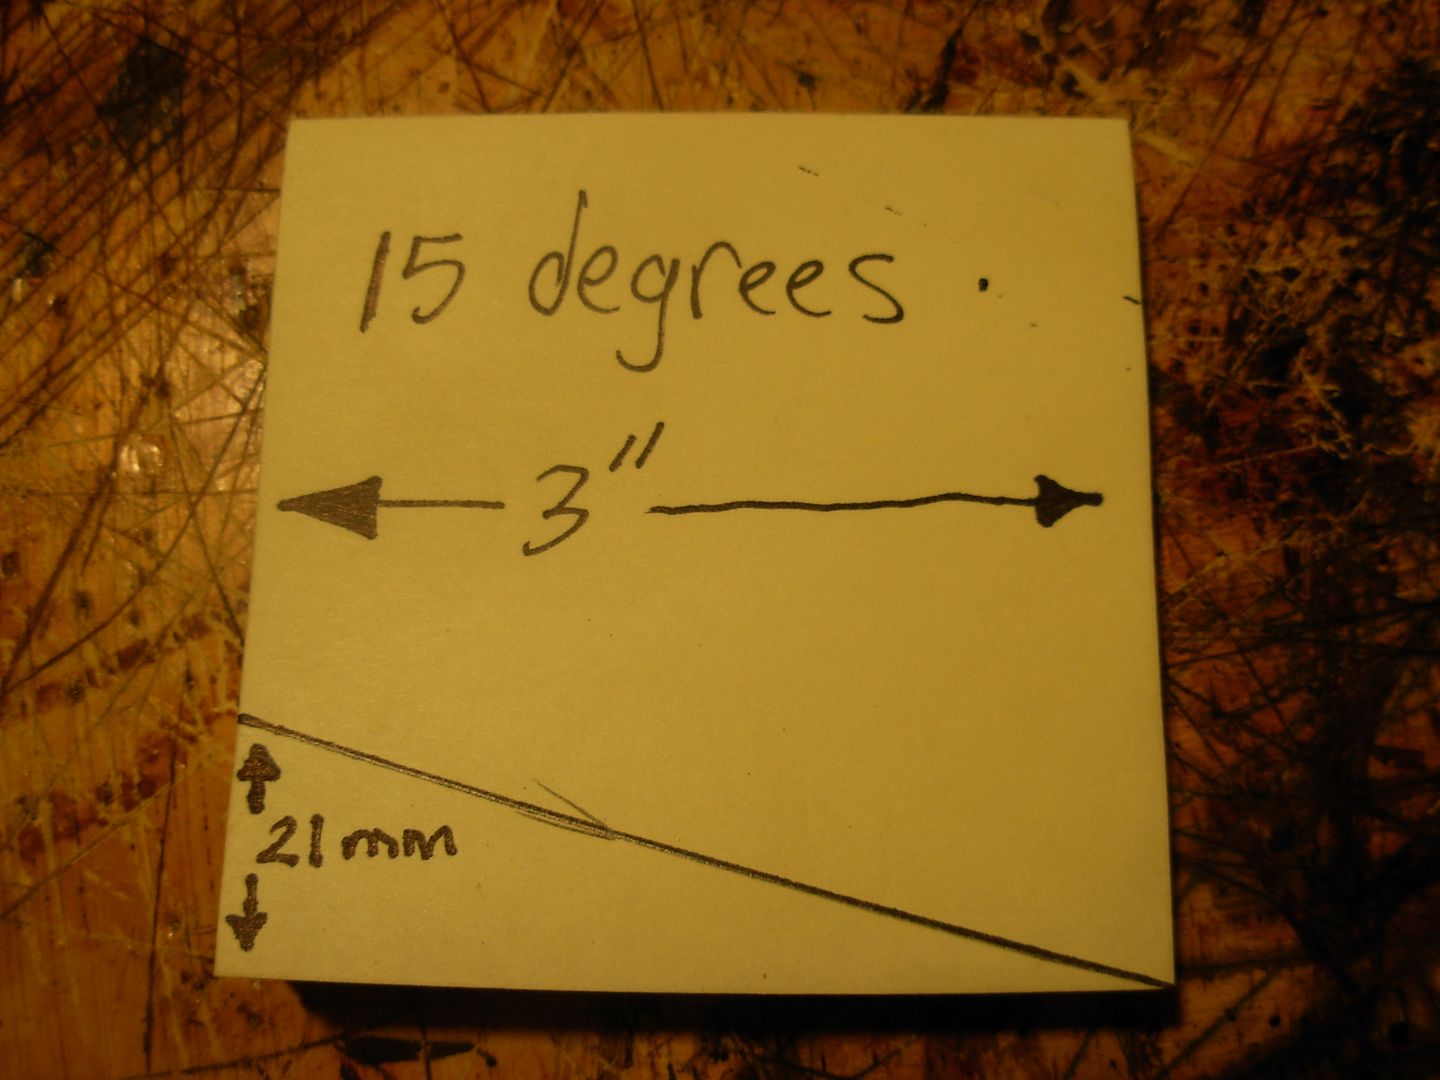
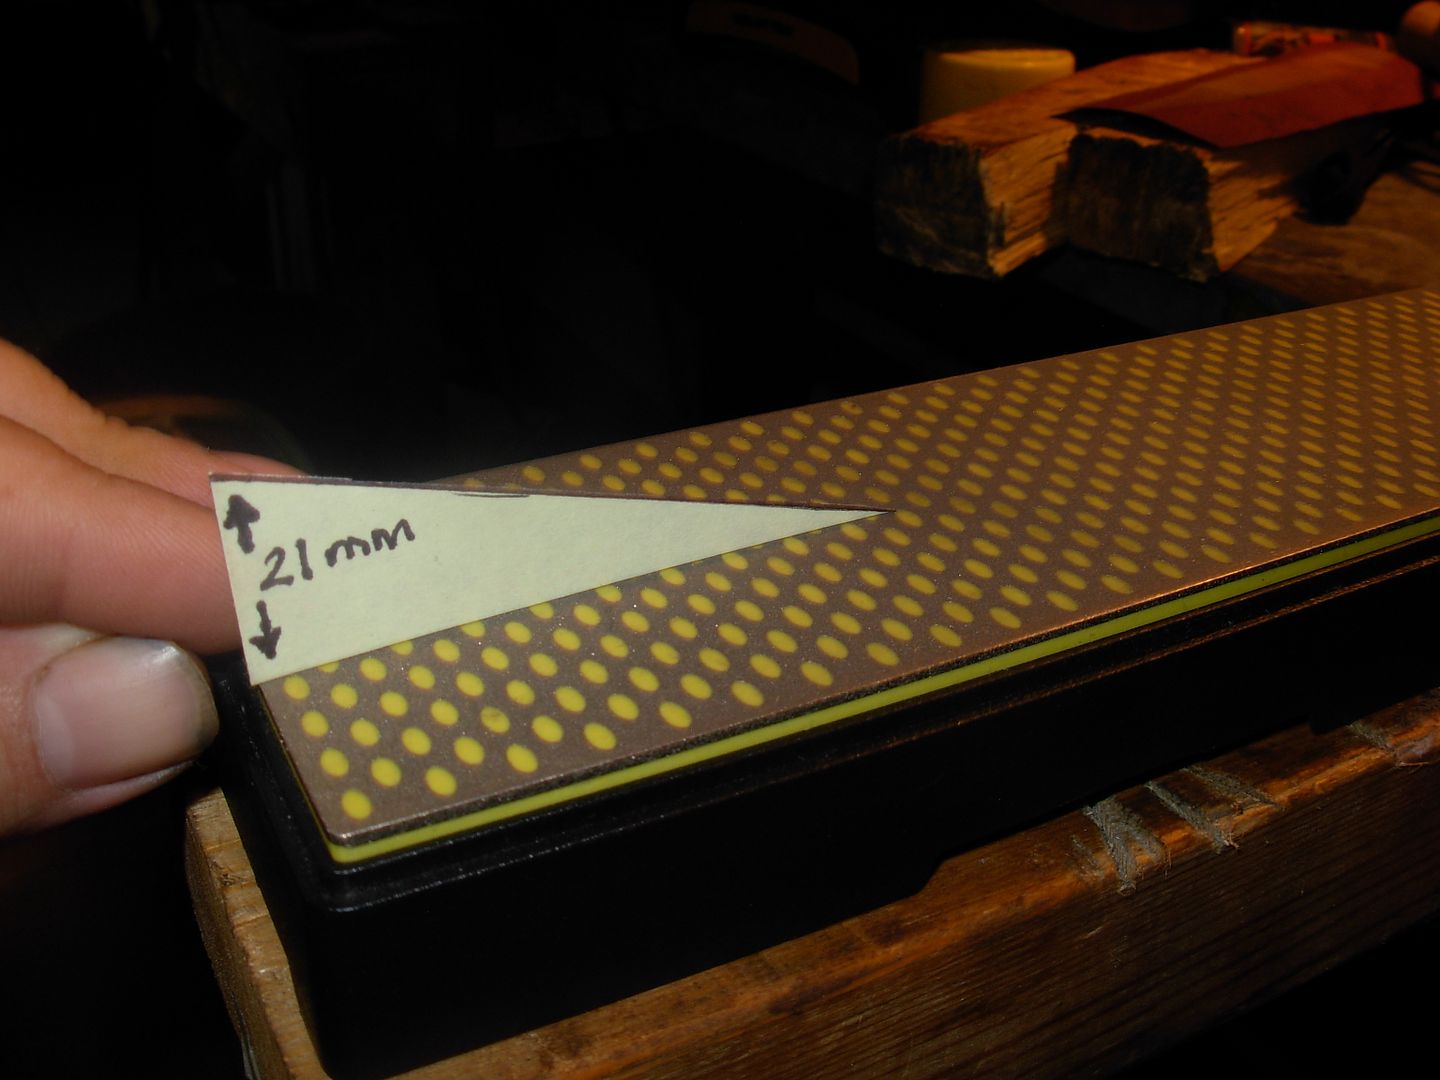
Your guide would be placed on the stone like this
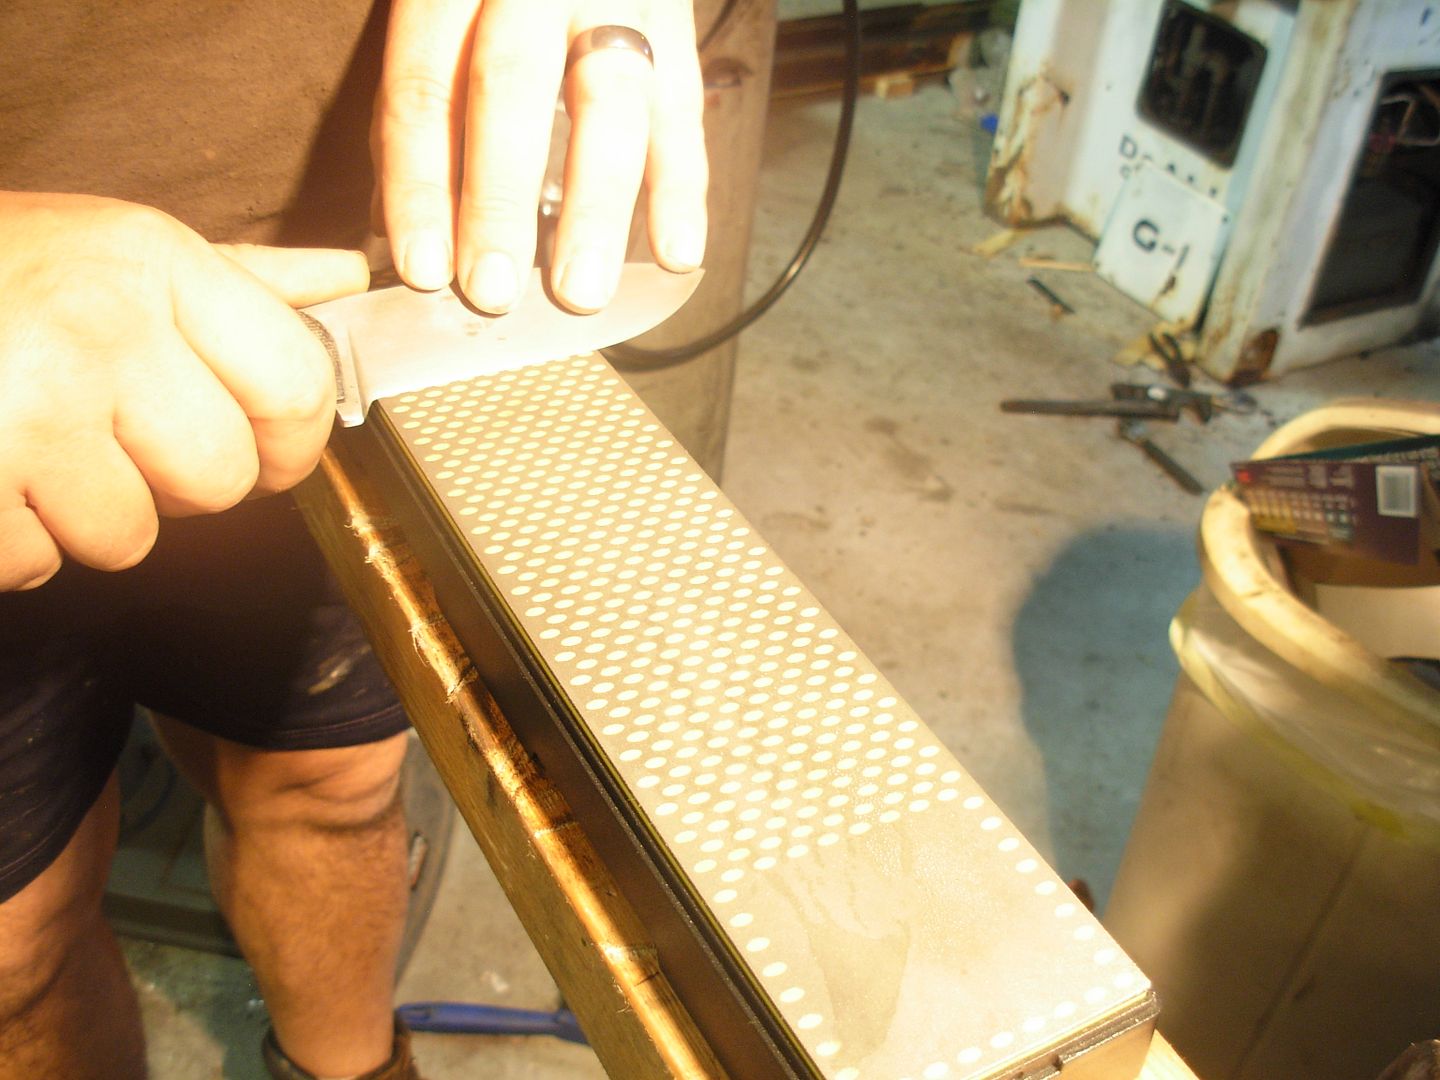
I learned many bad habits being self taught as a youngster. A good form is important to develop and will shorten your learning curve. Control the movement of your knife against the stone with your handle hand and control the amount of pressure applied against the stone and stabilize the blade with your off hand
More to come but Photobucket is giving me static :12:
-Josh
It is true that many folks suffer from knife-sharpen-ophobia. Your avarage Joe off the street as well as many knifemakers also suffer this debilitating paranoia when it comes time to sharpen a knife.
Armed with a basic understanding of what's happening at the edge and a decent stone YOU can easily develop the sharpening skills to wow your friends and family with. The main component of learning is the willingness to practice practice practice.
There's about a gazillion jigs, fixtures, contraptions, and machines available to "help" us out with this task. Some work great while others are complete junk. I'd highly recommend to learn on stones without these handicaps for your own benefit so thats what I'm going to do here.
Let's talk a little about the stones themselves. I'm using Smith's brand Diamond stones in Coarse (325 grit) and Fine (725 grit) to sharpen my knife. For the person who's serious about learning to sharpen and can afford them they're a great investment. They are admittidly on the spendy side and pretty much all stones will work. These are the exact stones I'm using-
http://usaknifemaker.com/sharpening-supplies-c-52/11-5-x-2-5-coarse-diamond-bench-stone.html
http://usaknifemaker.com/sharpening-supplies-c-52/11-5-x-2-5-fine-diamond-bench-stone.html
For the more budget oriented shopper I can give a full recommendation to one of these Norton two sided stones. I used to have one just like this but gave it to my nephew awhile back. It'll take a bit more work than the diamond stones but you'll get there just the same with nothing other than one of these. I'd recommend going with the 8x2x1" version for $19.99. That's a good size and value for sharpening any size blade. Maybe we can get USAKnifemakers to stock a few of these but until that time I have ordered from these guys a couple time with no complaints at all-
http://www.sharpeningsupplies.com/Norton-Combination-India-Stone-P69C25.aspx
Let's define for our purposes what exactly "sharp" means.
Sharp- A knife blade that will dry shave your arm hair without effort. No pressure need be applied and no slicing motion will be used in attemting to shave arm hair. This is a fine way to CUT yourself and it's simply not necessary with a sharp knife. (trying to force it to scrape off a few hairs to call it shaving sharp is cheating)
There are alot of levels of sharp beyond shaving sharp but unless your a Barber or a Sushi chef you aren't going to need or benefit from a truely scarry sharp edge that'll scare the hair off a gnat from 10 feet away. Take my word that shaving sharp is enough and keep that as your goal.
Sharpening angle.
This is the angle the blade is raised off the stone for sharpening in relation to the imaginary centerline running from the edge to the center of the spine.
20 degrees for large knives like choppers, cleavers, bowies etc.
15 degrees for everything else
I'll go less than 15 on kitchen knives for my own use.
I'll be sharpening at 15 degrees here. As you're practicing you develop a muscle memory for the "feel" of 15 degrees which is ideal. A little more and your at 20 and a little less if you want will be easy targets if you become accustomed to sharpening in the middle ground.
To develop an accurate 15 degree habit it's a good idea to make yourself a little guide to ensure you're practicing the correct angle.
I used a protractor to layout this little guide on a standard Post-it-note so you can make one with just a ruler and piece of paper or cardboard.
Your guide would be placed on the stone like this
I learned many bad habits being self taught as a youngster. A good form is important to develop and will shorten your learning curve. Control the movement of your knife against the stone with your handle hand and control the amount of pressure applied against the stone and stabilize the blade with your off hand
More to come but Photobucket is giving me static :12:
-Josh
Last edited:
Josh Dabney
Moderator
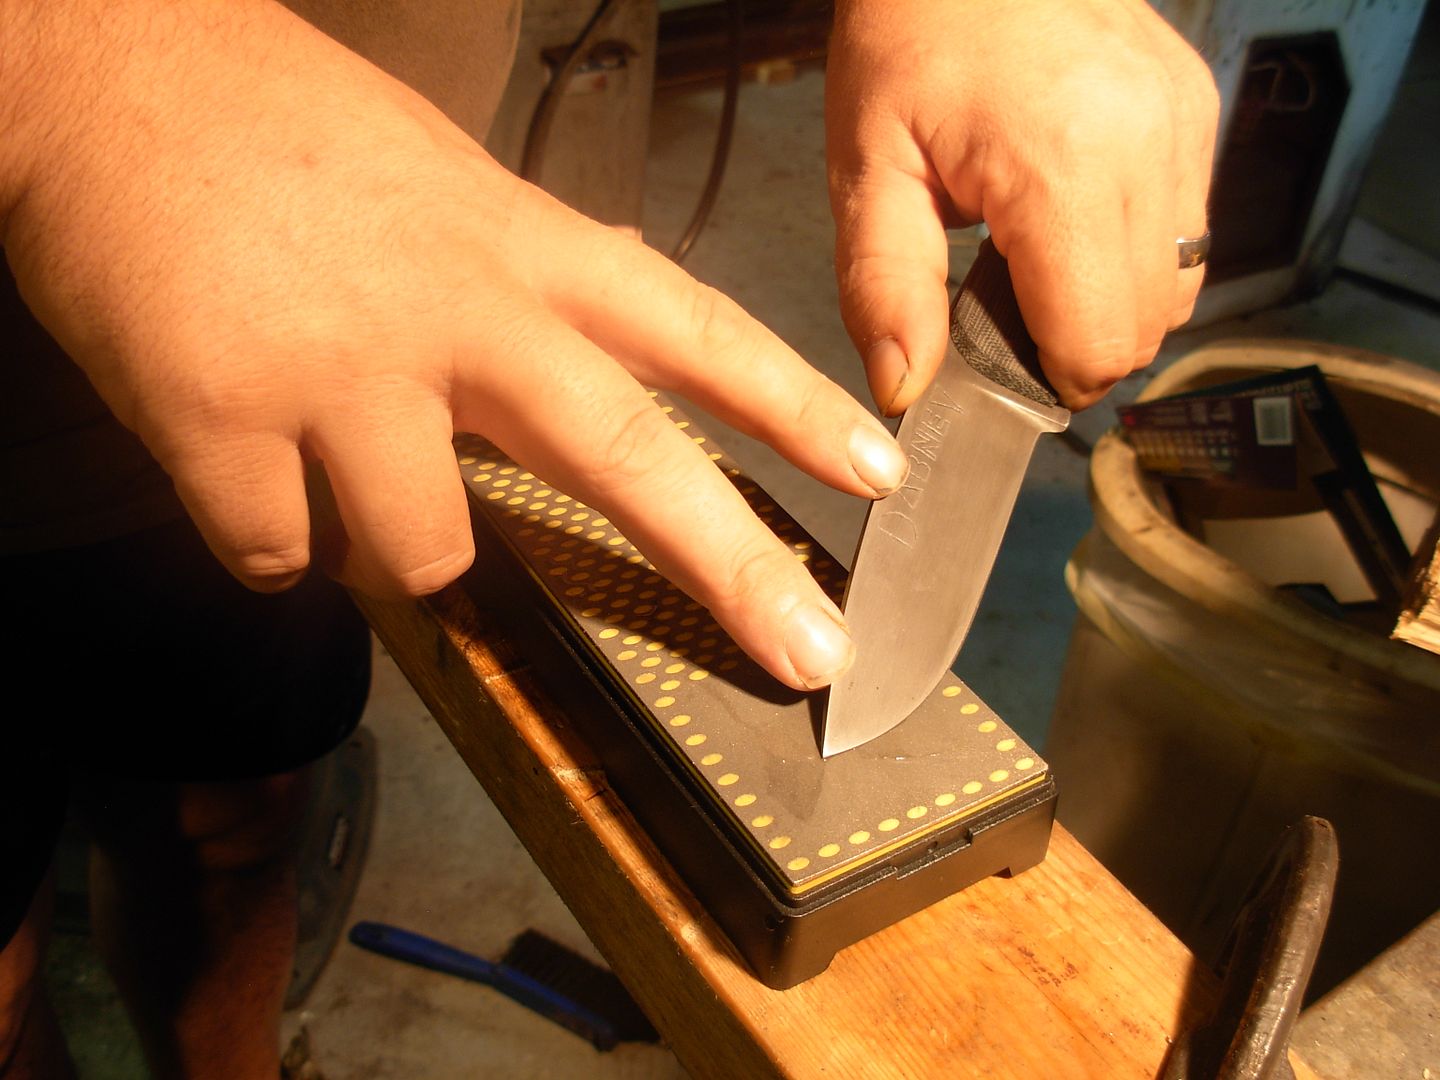
Use the same technique left handed to sharpen the other side of the blade still sharpening AWAY from yourself. Remember, whether sharpening a tent stake, hotdog stick, or sharpening... ALWAY cut towards the other guy
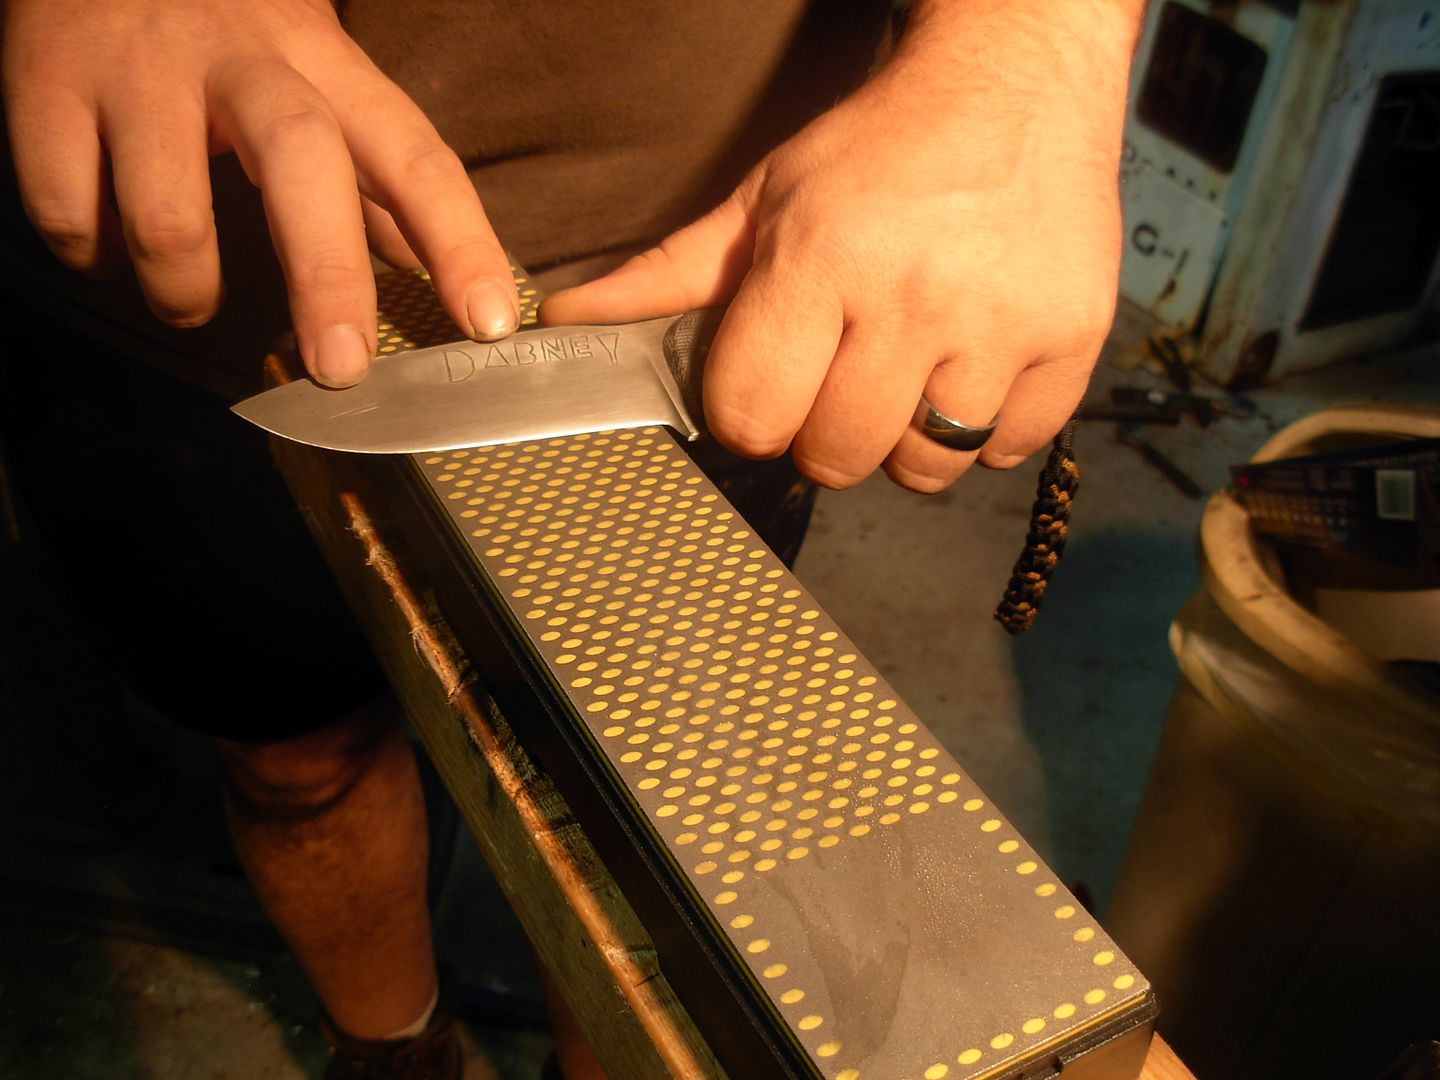
I thinks it's important to mention that these Smith's stones have the yellow spots on the surface which are little depressions in the surface supposedly to catch the swarf and keep the sharpening surface clean. (Surely they do it to use less diamond in creating the stone) These depressions can and will catch the tip of the blade while sharpening which is quite annoying. I avoid this 100% by ending my sharpening stroke on the small tool sharpening pad at the end of the stone like this. Problem completely eliminated and I do LOVE these stones ! They cut very agressively for the given grit which translates to less time at the stone getting your work done.
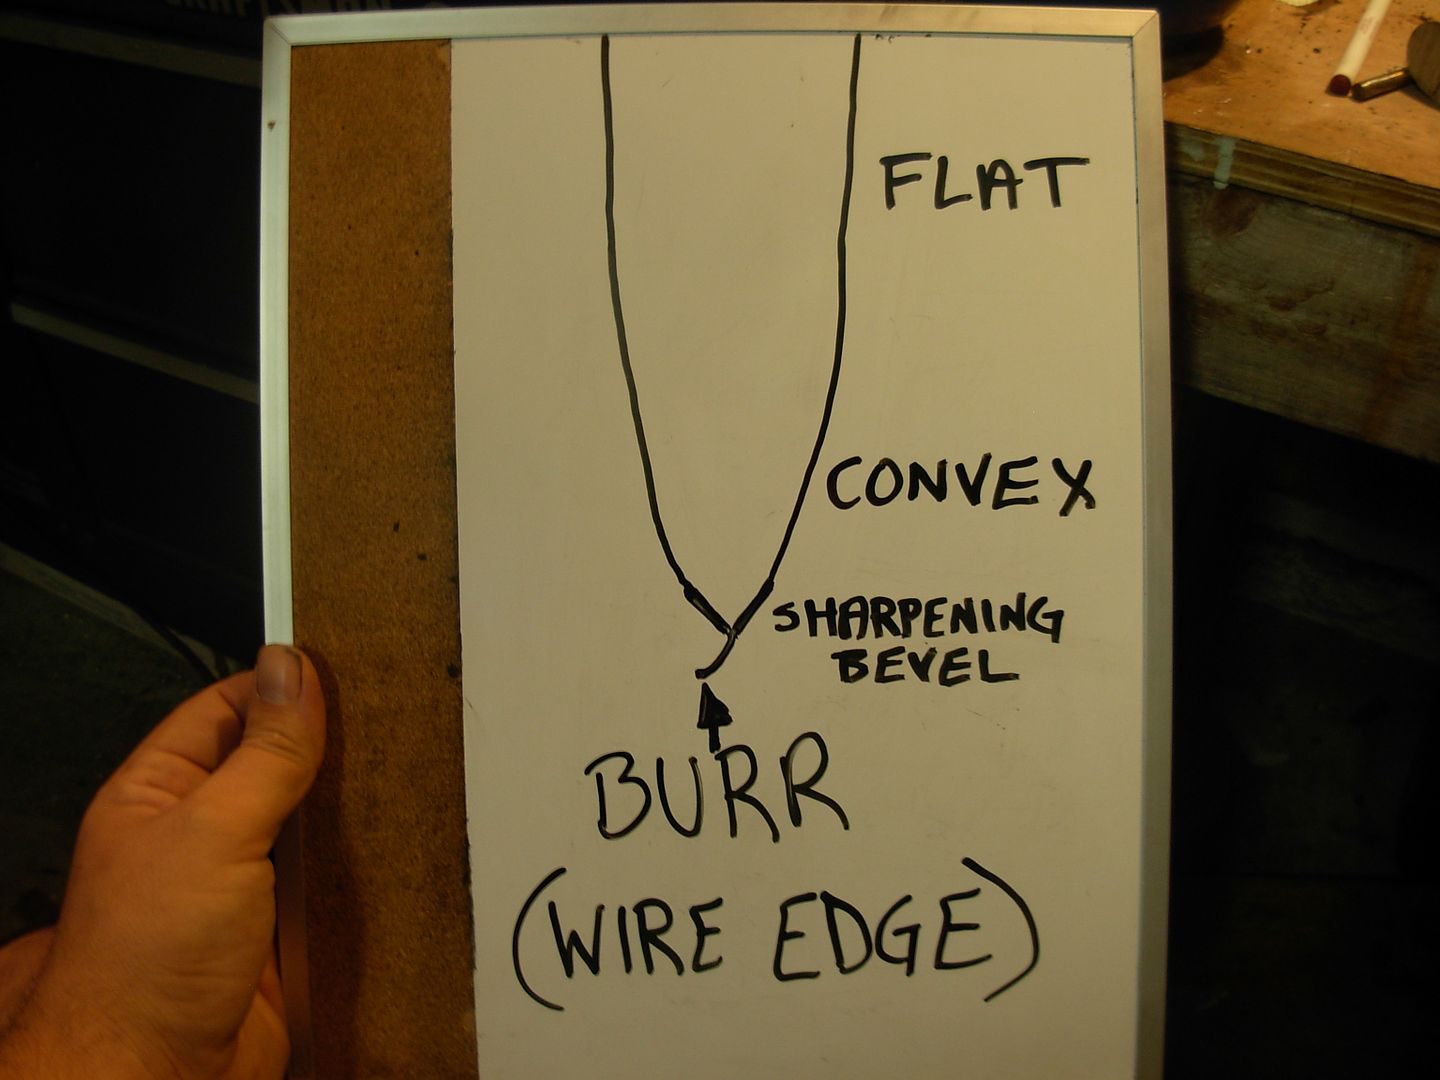
Let's take a super exploded look at what happens when we're sharpening.
We began with a flat grind and a convex edge. Now we are creating our sharpening bevel by removing steel on the stone. Once we achieve a zero edge on our stone we'll get a burr or wire edge. This burr will be angled to to the side opposite of the stone's surface. Our edge will not feel sharp as long as we have this burr on the edge.
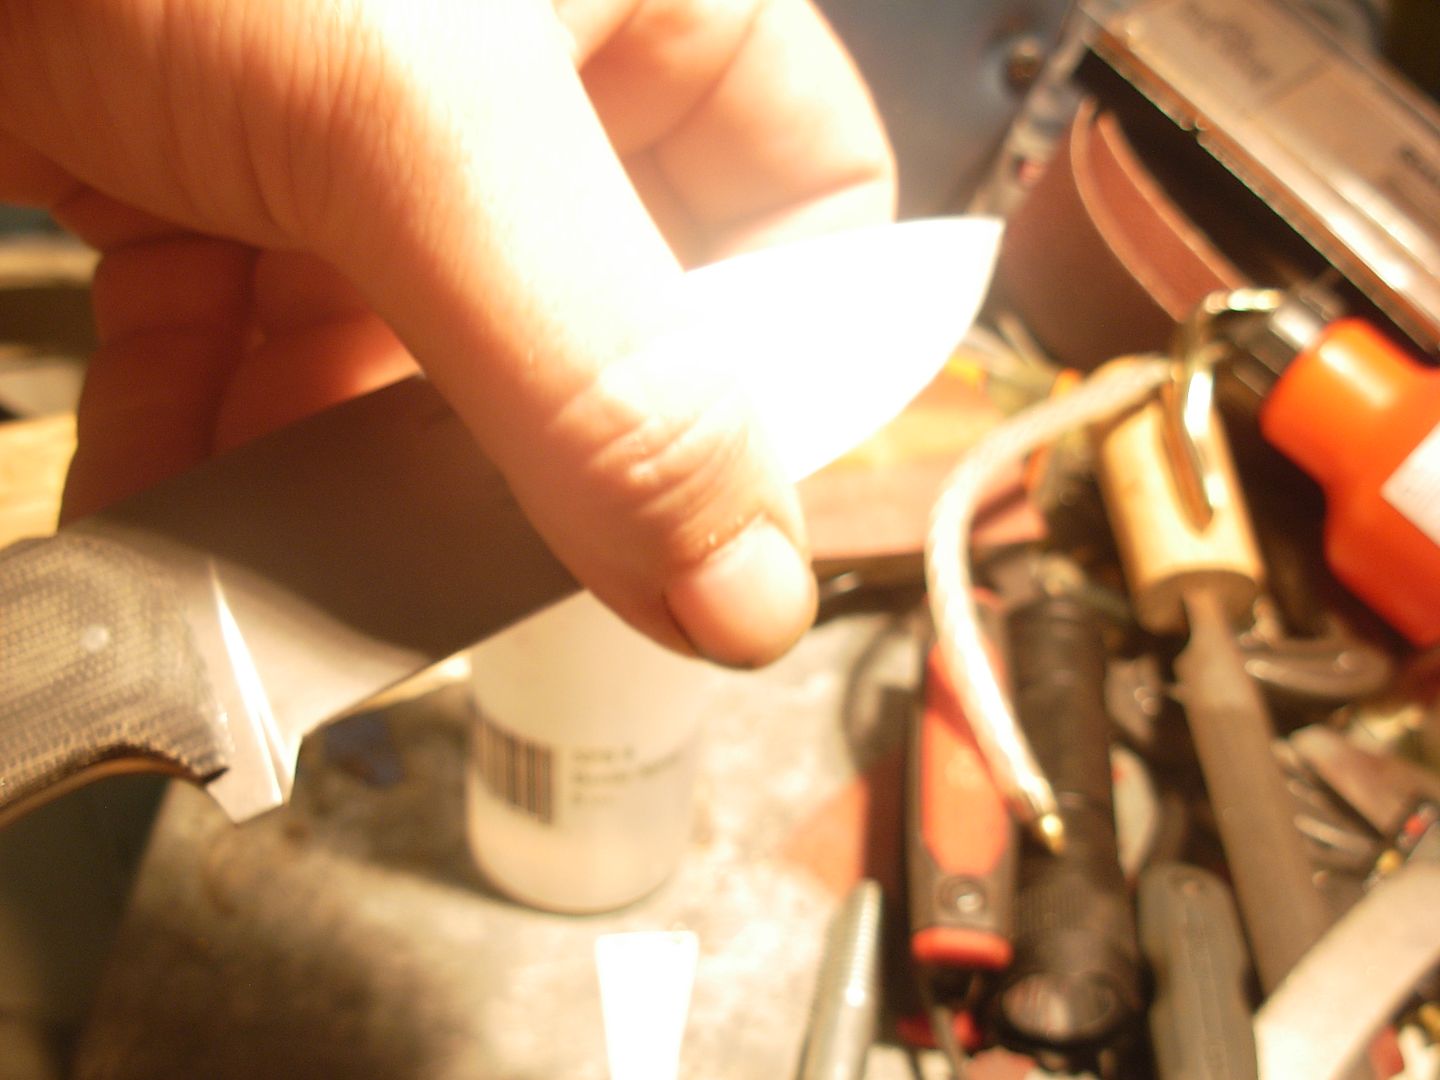
This burr we're pushing up at the edge can be teeny tiny or rather large and easily seen with the naked eye. It's absolutely ESSENTIAL that we learn to feel this burr. The burr will inform us if we have any flaws in our edge and let us know that we have achieved a sharpened edge at the grit level we're on. Here's how to feel for the burr. Place your thumb on the bevel and gently slide your thumb from the bevel across the edge. You only need to touch the blade. DO NOT apply any pressure with your thumb ! You'll be able to feel the burr being slightly scratchy againt your thumb. If it feels completely smooth without being scratchy then you've got no burr in the spot your checking.
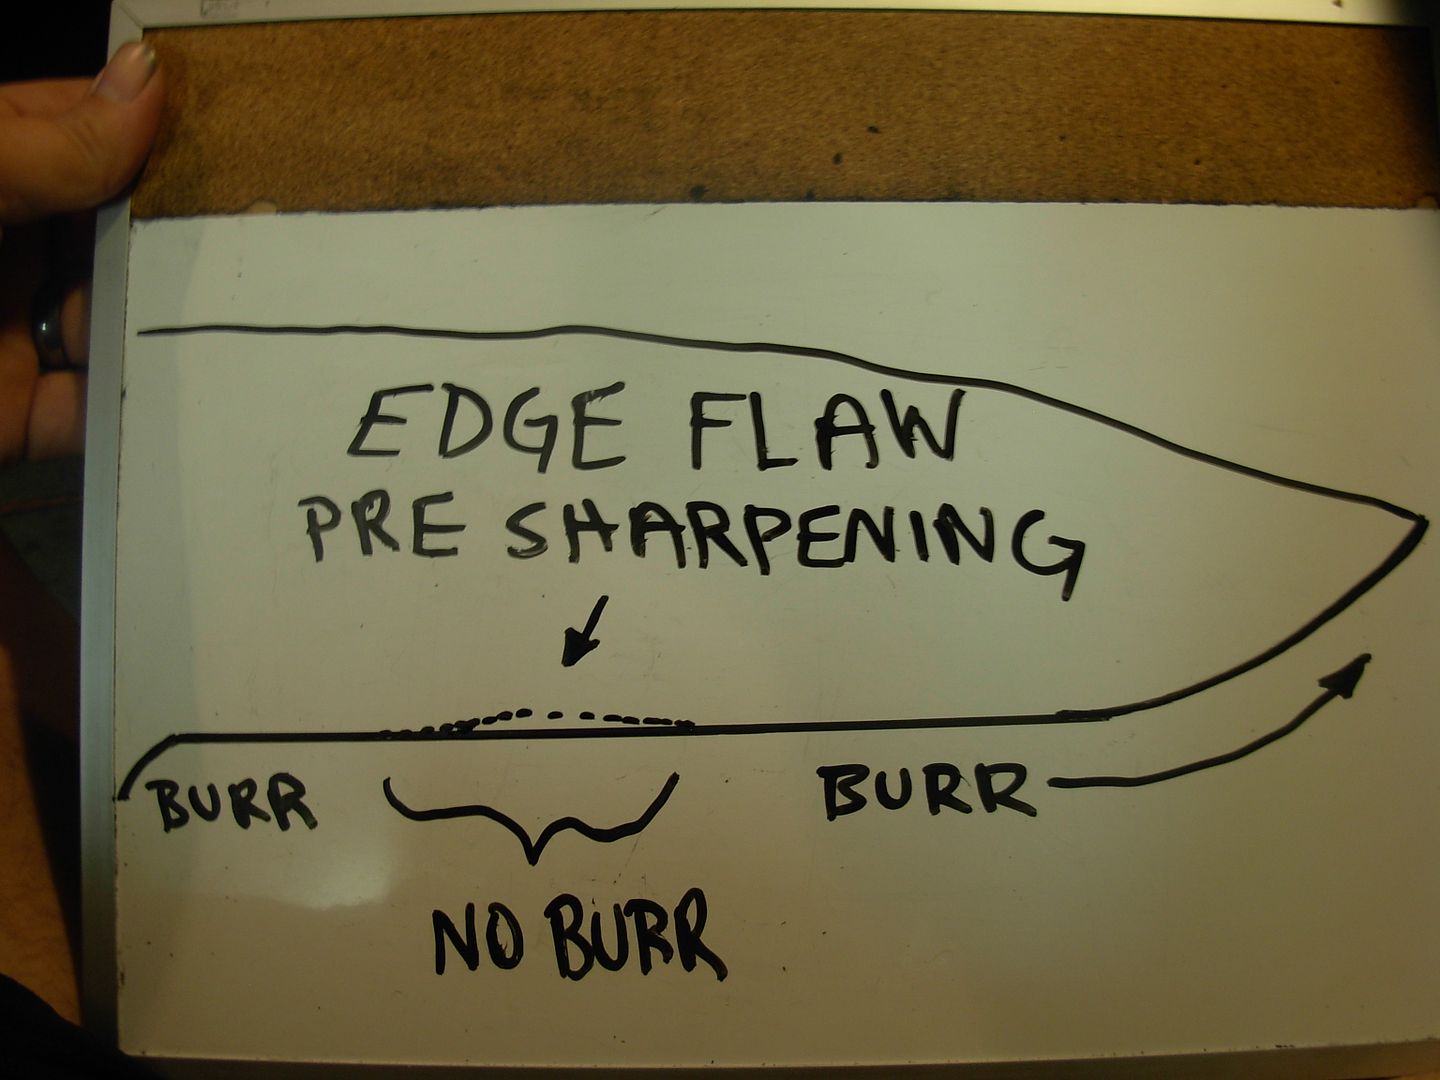
In a perfect world our edge is PERFECTLY straight from the plunge to the tip without any dips. If it is we'll have short work sharpening but lets face it, it's entirely possible that we have a dip of some level when we begin sharpening. A dip like this can be extremely difficult to see but the lack of raising a burr in that area will reveal the presence of a flaw.
If you run into this with your edge the only solution is to sharpen your edge down to the level of the flaw like this. In this case a little work on your coarse stone will take care of the problem. Same goes in the future for resharpening if youe get a chipped edge or some other type of edge damage.
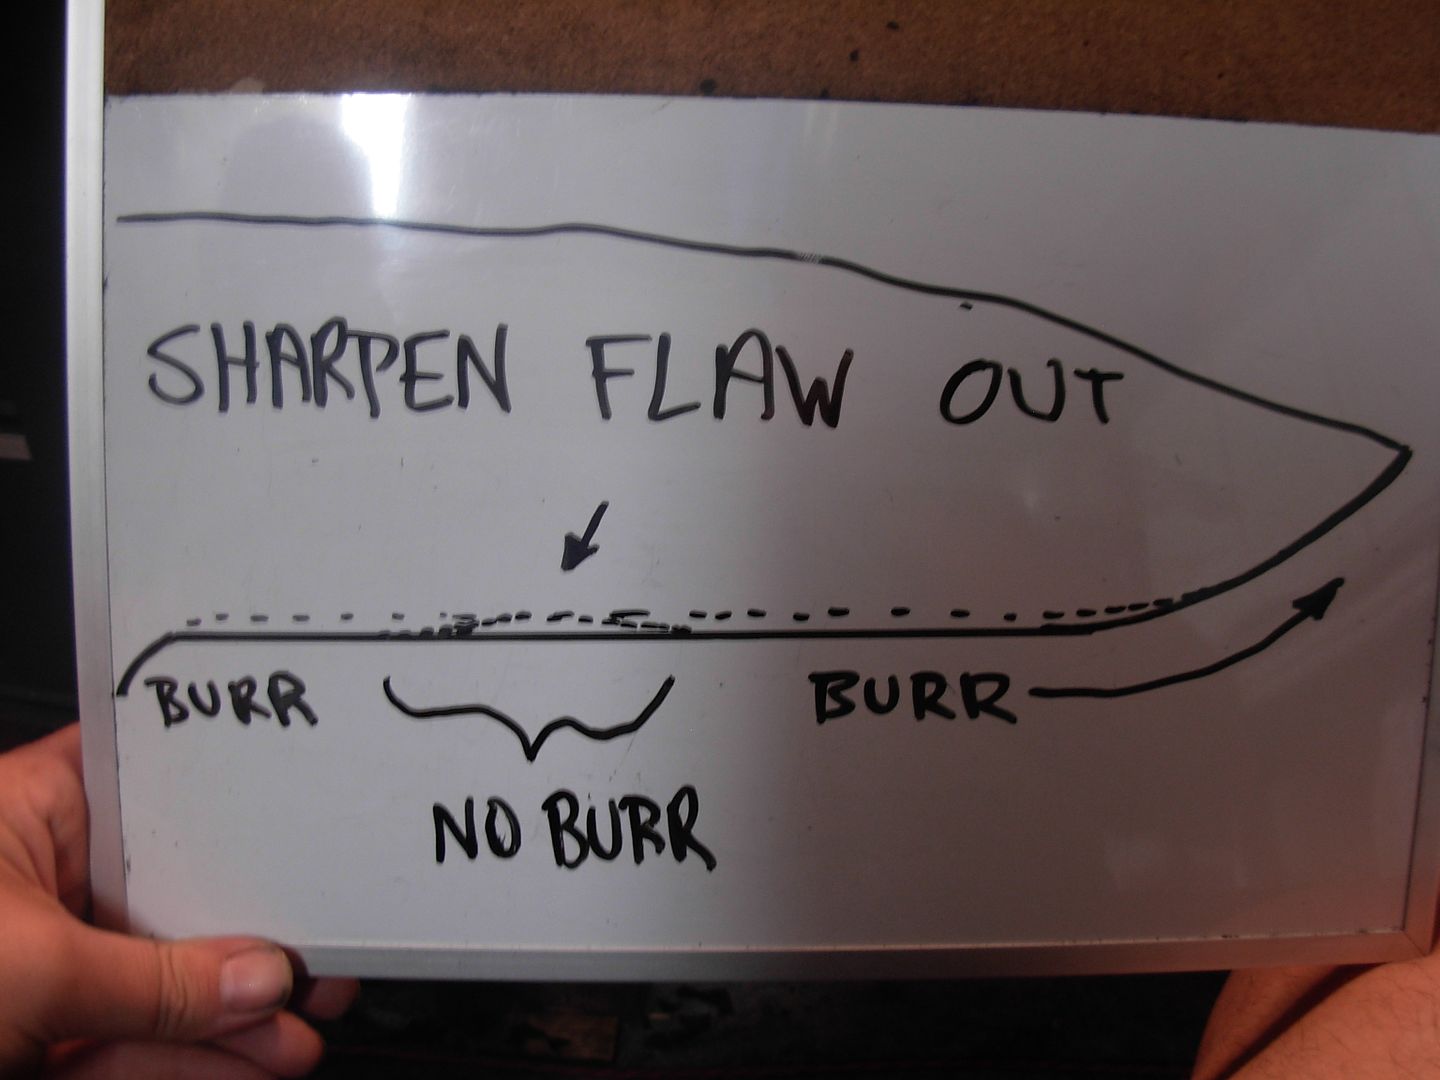
My edge didn't have any flaws pre-sharpening so it only took about 5 strokes on each side of the blade to raise a burr along the entire edge. Two minutes of sharpening tops. Having your blade set-up for sharpening with the zero convex makes this go very quickly. Once you've got a burr along the entire edge you're done with the coarse stone and can switch to the fine one.
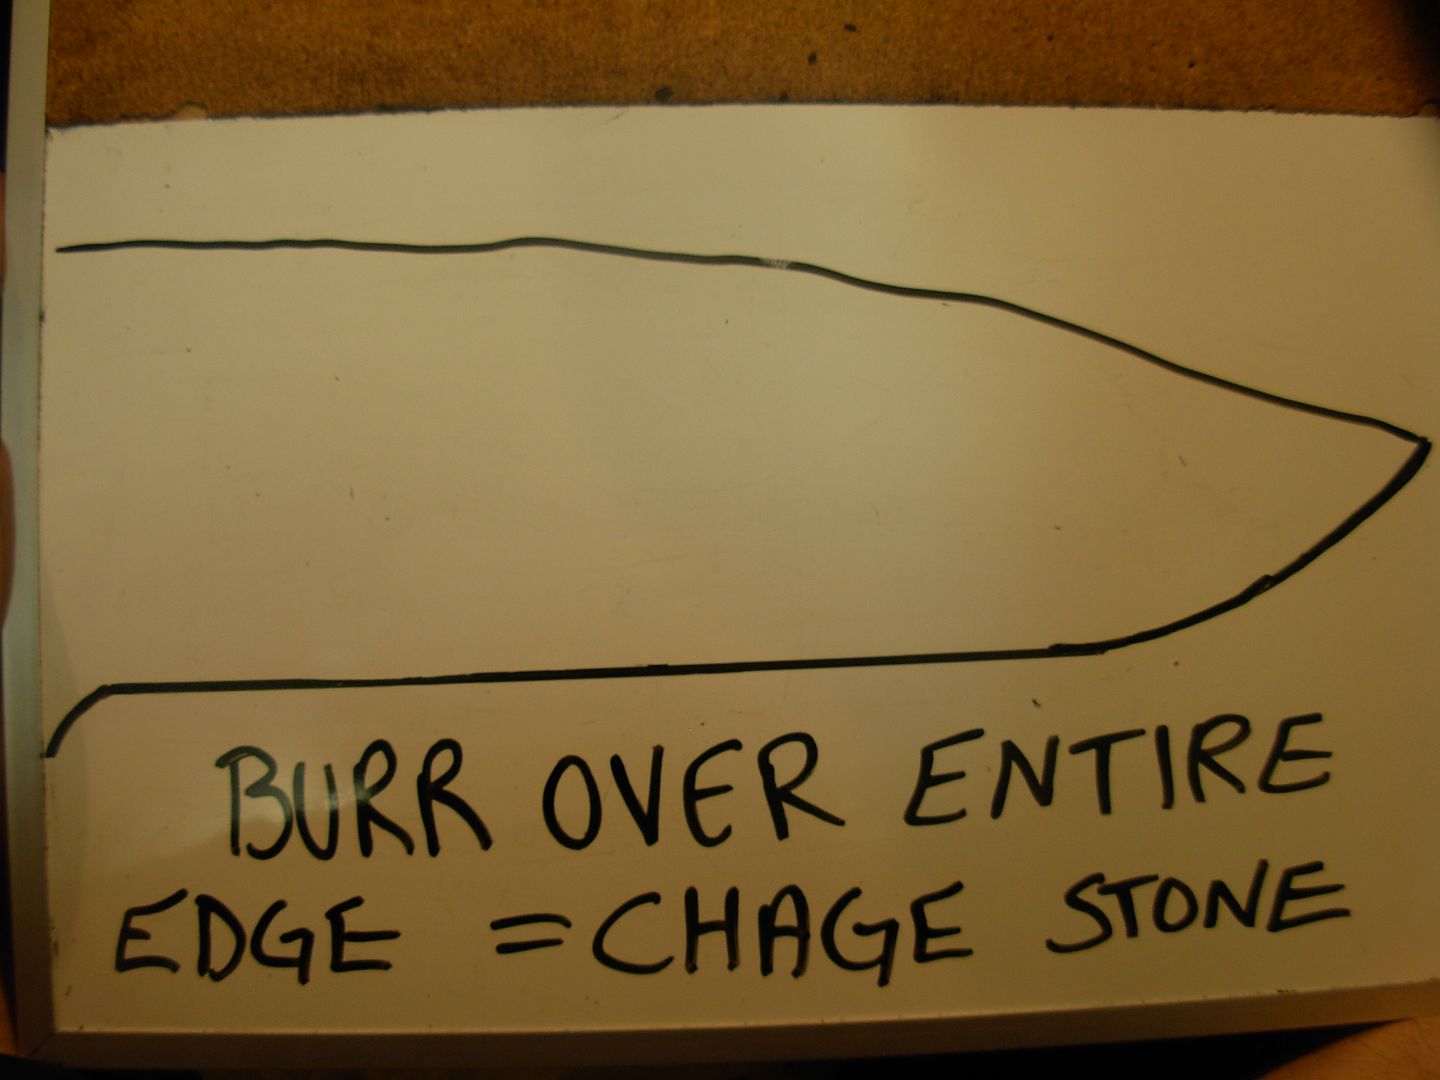
Important Note on the burr- When we switch from sharpening the left side of the blade to right and vice versa the burr will be pushed to the opposite side of the blade.
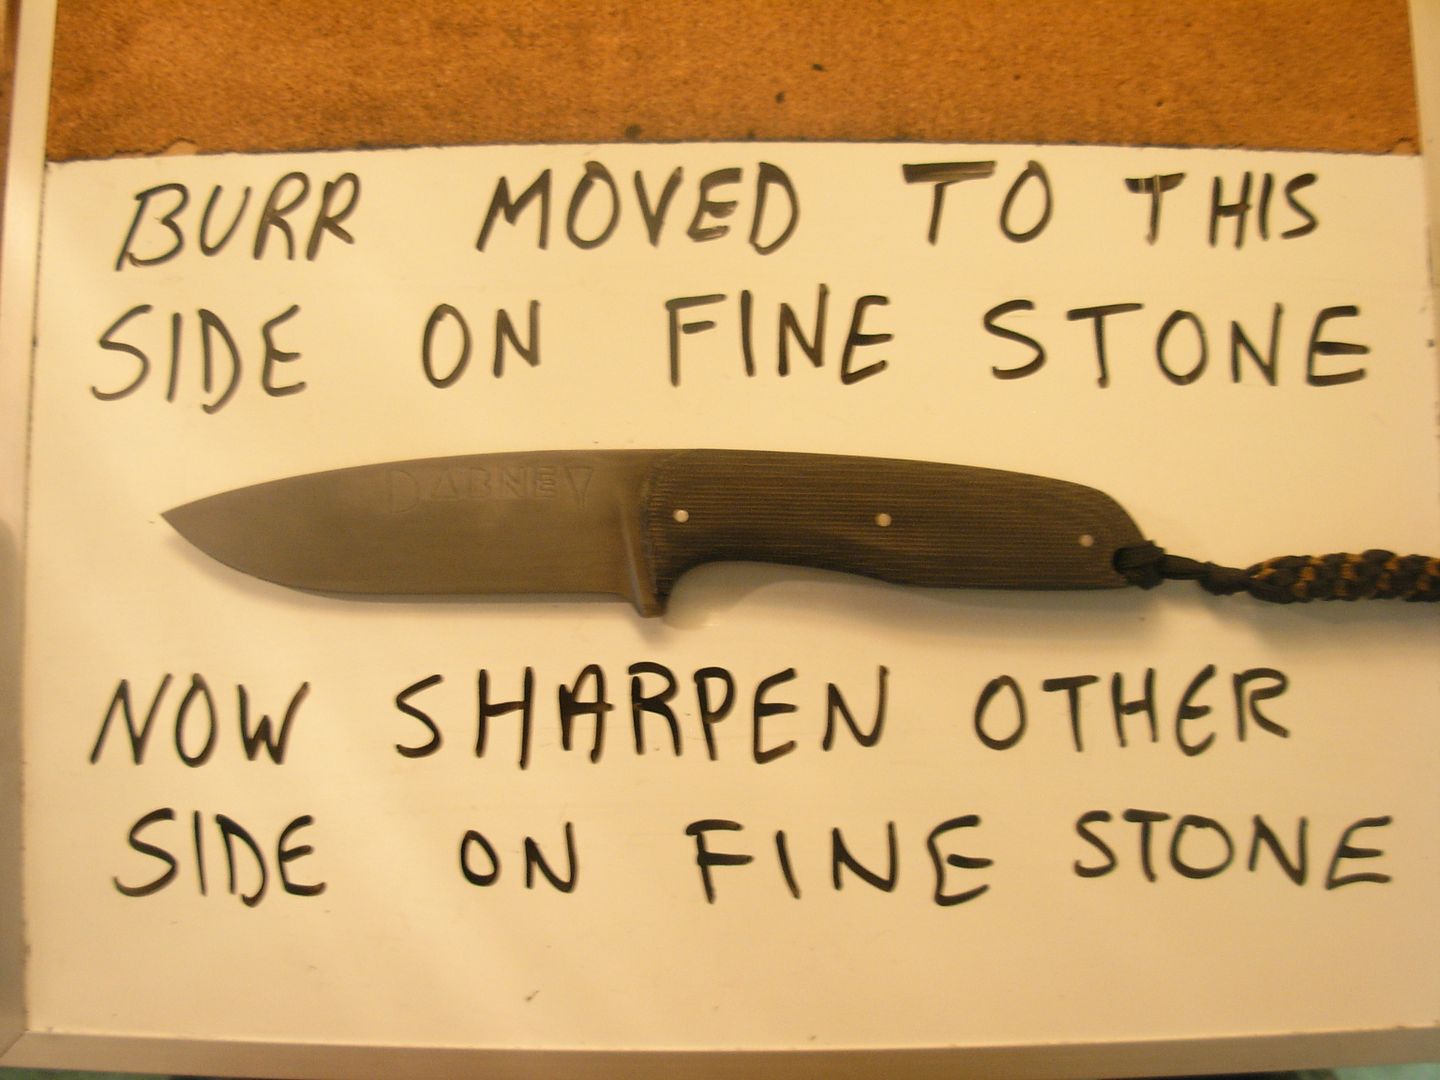
When we switch our stone grit we want to ensure that the finer grit stone has refined the coarser stones scratches on our sharpening bevel. We'll begin with the burr side of the blade against the finer stones surface.
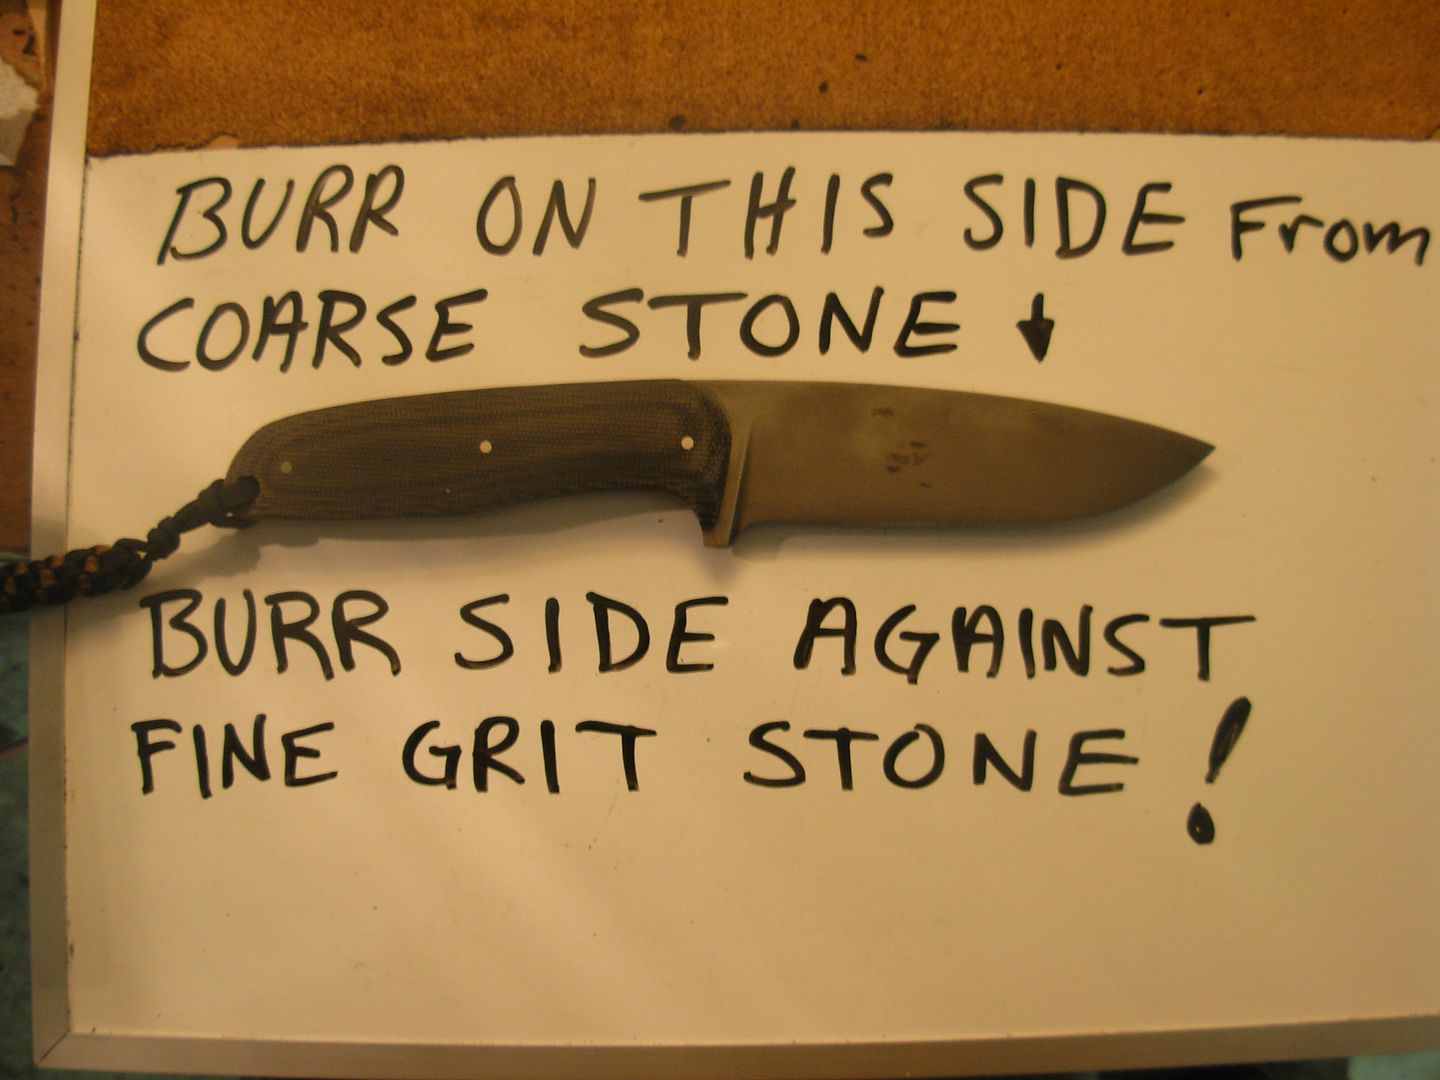
Once our burr is pushed to the opposite side over the ENTIRE edge our sharpening bevel is now at the finer grit on this side of the blade and we can proceed
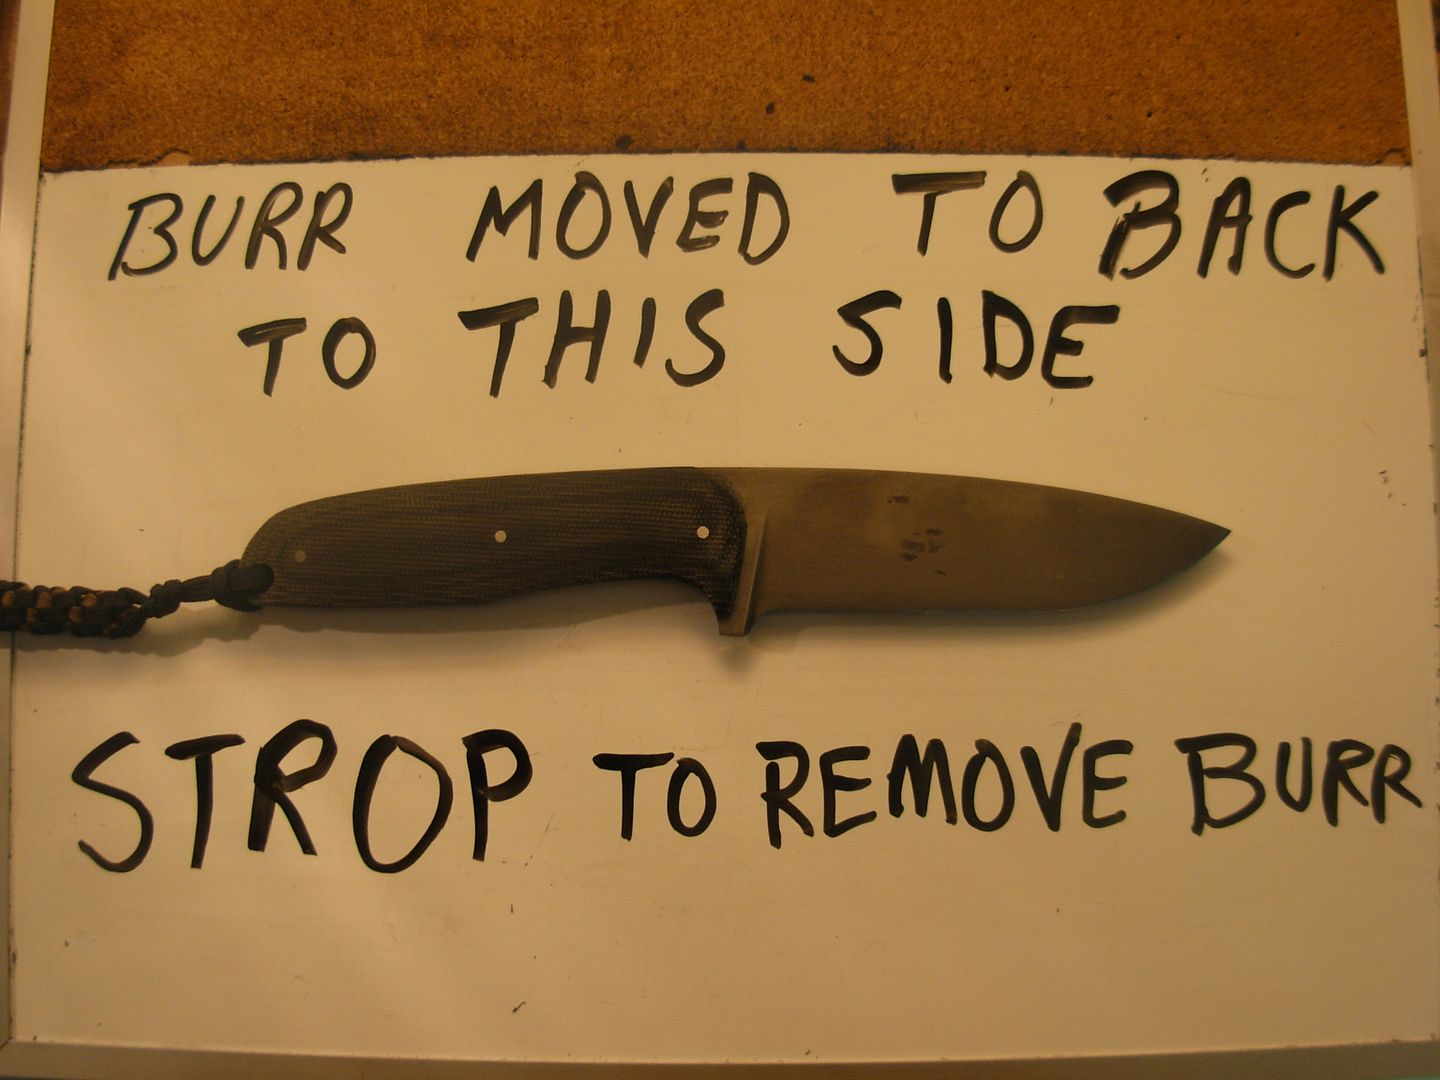
Now sharpen the second side at the finer grit until the burr is moved back the other way and our sharpening bevel is fully sharpened at our fine grit and is SHARP underneath the burr so we now just need to remove the burr with our strop
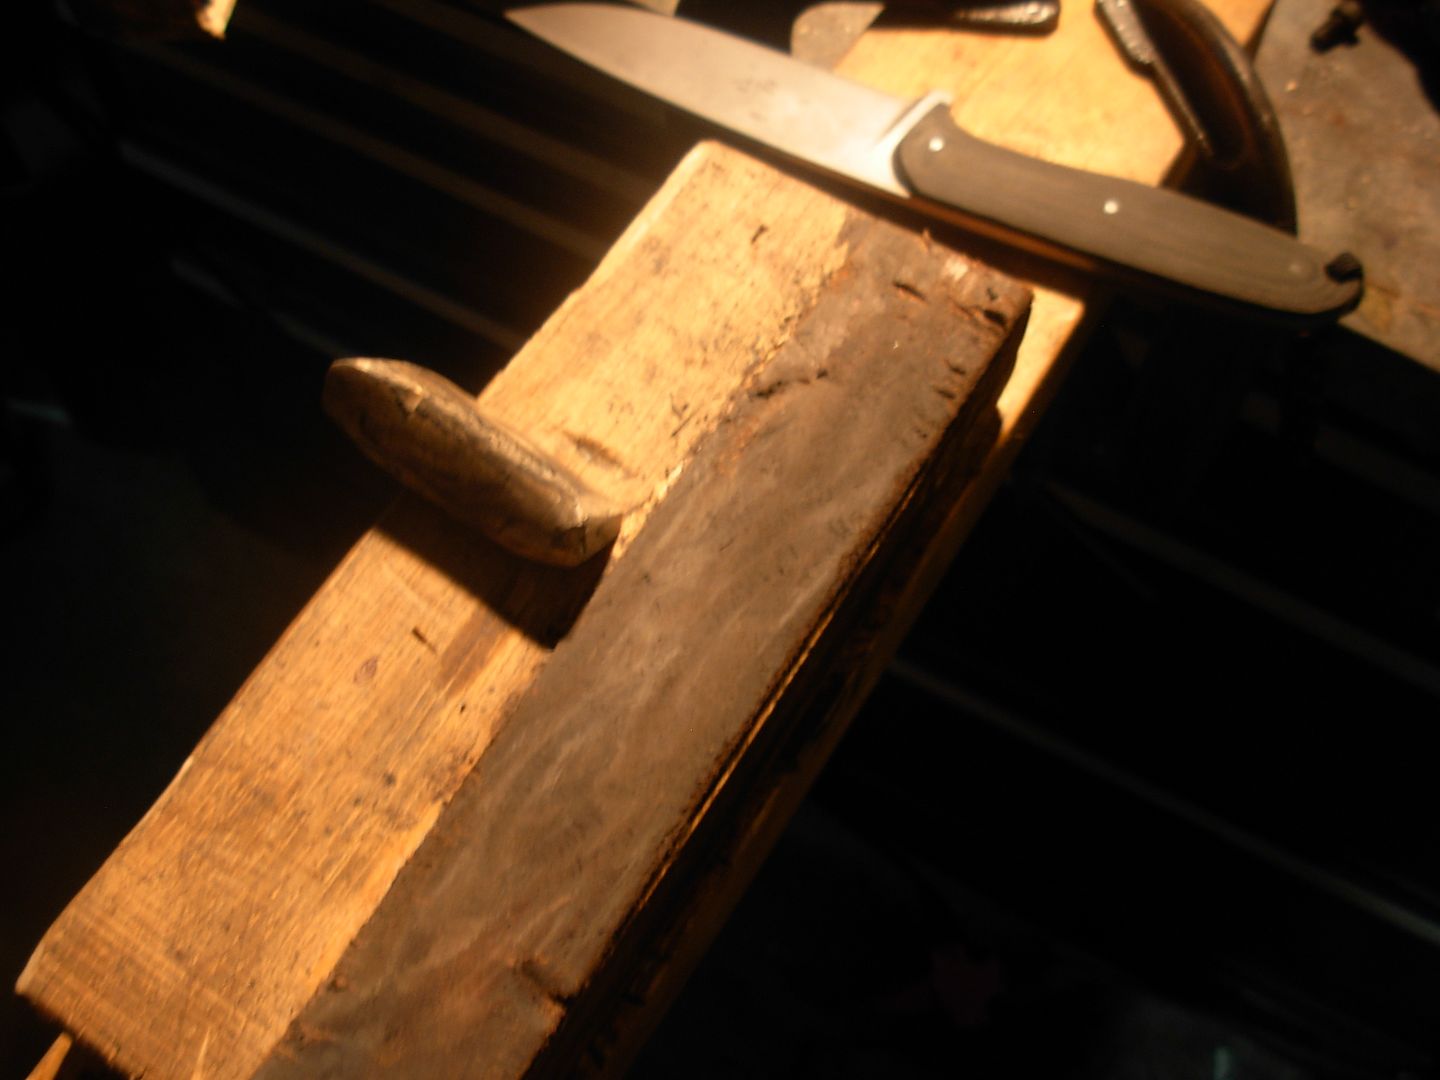
Here's my stropping set-up. Just a strip of leather contact cemented to a 2x4. I load my leather up with white jewelers rogue for a very slight polishing affect while stropping. I can't say with any certainty or scientific microscopic evidence that the rogue does anything at all but I do use it on my strop.
I hold my knife the same way I do for sharpening and draw the edge BACKWARDS while putting pressure against the leather. All we're really doing on the strop is pushing our burr from side to side until it comes off. Strop the burr side until you cant feel the burr then switch sides until you can no longer feel a burr anywhere. Once I've got my burr removed I'll finish up with strokes on each side of the blade with light pressure alternating sides on each storke for a total of 20 finishing strokes.
So let's just recap what we've done.
1. Sharpen to a burr on coarse stone.
2. Refined the scratches on our sharpening bevel with our fine stone.
3. Removed burr on strop.
How did we do ? Hair popping sharp ! Works every time
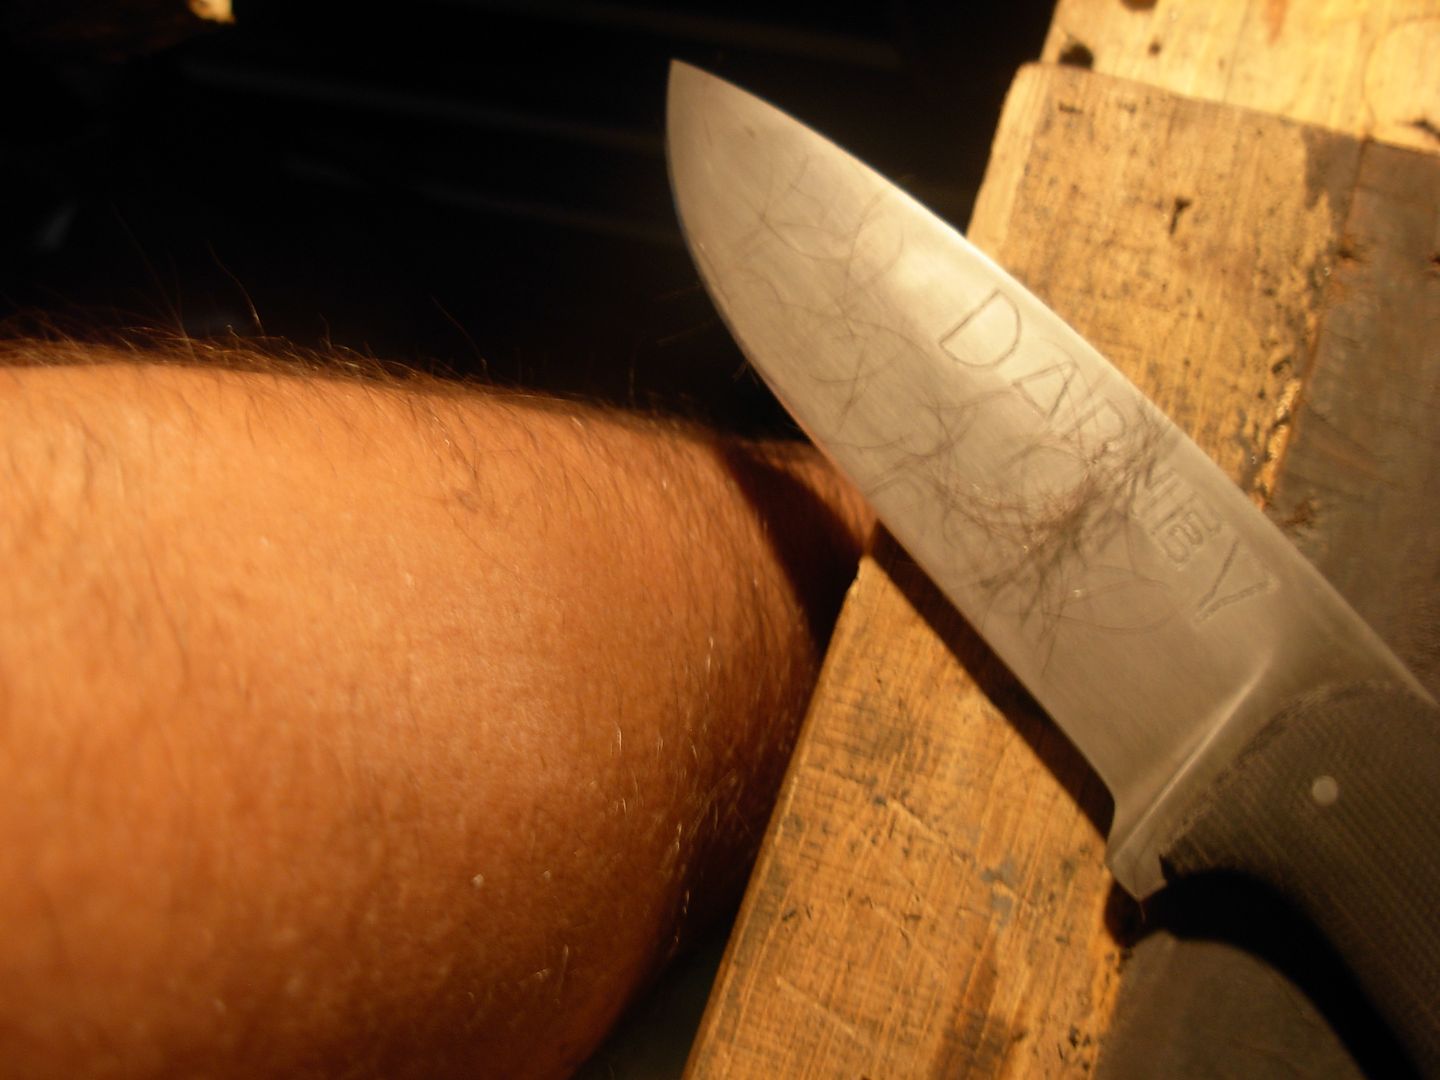
Shaving arm hair is a bad habit but I still always do it to check my edge out. As much or more can be learned about your edge by slicing paper though. A sharp knife will cut these curly cues without tearing or snagging anywhere. Tearing or snagging will be an indicatation of a chip in the edge, a flaw in the edge, or a piece of the burr that has not been fully removed after sharpening.
Our blade is now ready for action !
-Josh
I thinks it's important to mention that these Smith's stones have the yellow spots on the surface which are little depressions in the surface supposedly to catch the swarf and keep the sharpening surface clean. (Surely they do it to use less diamond in creating the stone) These depressions can and will catch the tip of the blade while sharpening which is quite annoying. I avoid this 100% by ending my sharpening stroke on the small tool sharpening pad at the end of the stone like this. Problem completely eliminated and I do LOVE these stones ! They cut very agressively for the given grit which translates to less time at the stone getting your work done.
Let's take a super exploded look at what happens when we're sharpening.
We began with a flat grind and a convex edge. Now we are creating our sharpening bevel by removing steel on the stone. Once we achieve a zero edge on our stone we'll get a burr or wire edge. This burr will be angled to to the side opposite of the stone's surface. Our edge will not feel sharp as long as we have this burr on the edge.
This burr we're pushing up at the edge can be teeny tiny or rather large and easily seen with the naked eye. It's absolutely ESSENTIAL that we learn to feel this burr. The burr will inform us if we have any flaws in our edge and let us know that we have achieved a sharpened edge at the grit level we're on. Here's how to feel for the burr. Place your thumb on the bevel and gently slide your thumb from the bevel across the edge. You only need to touch the blade. DO NOT apply any pressure with your thumb ! You'll be able to feel the burr being slightly scratchy againt your thumb. If it feels completely smooth without being scratchy then you've got no burr in the spot your checking.
In a perfect world our edge is PERFECTLY straight from the plunge to the tip without any dips. If it is we'll have short work sharpening but lets face it, it's entirely possible that we have a dip of some level when we begin sharpening. A dip like this can be extremely difficult to see but the lack of raising a burr in that area will reveal the presence of a flaw.
If you run into this with your edge the only solution is to sharpen your edge down to the level of the flaw like this. In this case a little work on your coarse stone will take care of the problem. Same goes in the future for resharpening if youe get a chipped edge or some other type of edge damage.
My edge didn't have any flaws pre-sharpening so it only took about 5 strokes on each side of the blade to raise a burr along the entire edge. Two minutes of sharpening tops. Having your blade set-up for sharpening with the zero convex makes this go very quickly. Once you've got a burr along the entire edge you're done with the coarse stone and can switch to the fine one.
Important Note on the burr- When we switch from sharpening the left side of the blade to right and vice versa the burr will be pushed to the opposite side of the blade.
When we switch our stone grit we want to ensure that the finer grit stone has refined the coarser stones scratches on our sharpening bevel. We'll begin with the burr side of the blade against the finer stones surface.
Once our burr is pushed to the opposite side over the ENTIRE edge our sharpening bevel is now at the finer grit on this side of the blade and we can proceed
Now sharpen the second side at the finer grit until the burr is moved back the other way and our sharpening bevel is fully sharpened at our fine grit and is SHARP underneath the burr so we now just need to remove the burr with our strop
Here's my stropping set-up. Just a strip of leather contact cemented to a 2x4. I load my leather up with white jewelers rogue for a very slight polishing affect while stropping. I can't say with any certainty or scientific microscopic evidence that the rogue does anything at all but I do use it on my strop.
I hold my knife the same way I do for sharpening and draw the edge BACKWARDS while putting pressure against the leather. All we're really doing on the strop is pushing our burr from side to side until it comes off. Strop the burr side until you cant feel the burr then switch sides until you can no longer feel a burr anywhere. Once I've got my burr removed I'll finish up with strokes on each side of the blade with light pressure alternating sides on each storke for a total of 20 finishing strokes.
So let's just recap what we've done.
1. Sharpen to a burr on coarse stone.
2. Refined the scratches on our sharpening bevel with our fine stone.
3. Removed burr on strop.
How did we do ? Hair popping sharp ! Works every time
Shaving arm hair is a bad habit but I still always do it to check my edge out. As much or more can be learned about your edge by slicing paper though. A sharp knife will cut these curly cues without tearing or snagging anywhere. Tearing or snagging will be an indicatation of a chip in the edge, a flaw in the edge, or a piece of the burr that has not been fully removed after sharpening.
Our blade is now ready for action !
-Josh
jonathan creason
Well-Known Member
Great job on the WIP, Josh. You only forgot 1 step, the last one showing how to box it up and mail it to me. :3:
Josh Dabney
Moderator
I've completed my knife and sheath with little more than what was provided in the KIT.
Now I've got some confessions to make-
-I've never profiled a knife blade using a drill bit and hacksaw before this.
-I've never used a bench grinder on a knife blade before this. I chose this because you'll likely have one or be able to borrow one for your project.
-I've never used files to file in a bevel on a knife blade before this.
-I've never heat treated a blade in a micro forge before this. I had to build myself a prototype to see if it would work and modify my original to better suite my needs.
-I've never attempted an improvised makers mark etch before this.
-I've never hand filed a convex edge before this.
-I've never etched a blade in Vinegar before this.
-I've never made a homemade leather tooling stamp before this.
So why is all this important ? Simply because I wasn't bringing any experience with these methods to the table so your experience should closely reseamble mine. Doing all our detail and finish work with files and sandpaper doesn't require any special skills.
The main tool requirement for completing your own KIT is the DETERMININATION to finish what you start. Follow through and you'll have a great little knife you can be extremely proud of.
-Josh
Last edited: