You are using an out of date browser. It may not display this or other websites correctly.
You should upgrade or use an alternative browser.
You should upgrade or use an alternative browser.
Rusty 1084 WIP-ish?
- Thread starter J. Doyle
- Start date
Kevin Zito
KNIFE MAKER
This is gonna be an awesome WIP! I know you are going to make that rust bucket dance! I can’t wait to see this!
J. Doyle
Dealer - Purveyor
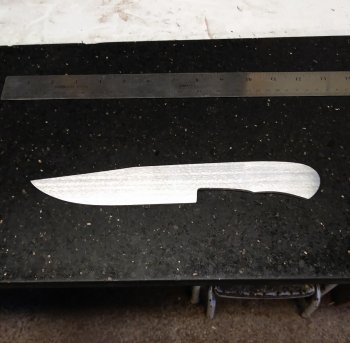
I knocked the rust off and cleaned the profile up to finished dimensions.

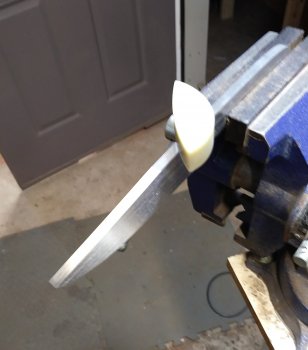
Next, I hand sanded the edge, and spine to 220 grit lengthwise.

Note the sanding block sitting on the spine. It has a couple different arcs on it to sand curved surfaces. I use it for the finger wells and the clip.
It may look straight in the pic, but the clip has a slight subtle curve to it. This is a design element that I usually incorporate on clipped blades. I think it gives the blade a lean and aggressive look. I believe almost everyone's eye can notice that detail in the finished knife, even if they can't put their finger on what they're seeing.

Next, I hand sanded the edge, and spine to 220 grit lengthwise.

Note the sanding block sitting on the spine. It has a couple different arcs on it to sand curved surfaces. I use it for the finger wells and the clip.
It may look straight in the pic, but the clip has a slight subtle curve to it. This is a design element that I usually incorporate on clipped blades. I think it gives the blade a lean and aggressive look. I believe almost everyone's eye can notice that detail in the finished knife, even if they can't put their finger on what they're seeing.
Justin Presson
Well-Known Member
Sweet John I have been wanting a WIP from you for years! I hope the fishing is terrible so you can finish this dude up...lol ok sorry I didn't really mean that 
J. Doyle
Dealer - Purveyor
Sweet John I have been wanting a WIP from you for years! I hope the fishing is terrible so you can finish this dude up...lol ok sorry I didn't really mean that
Hahaha....fortunately for you the fishing IS terrible right now. But I'm going to Montana soon and I have to work on a couple other things too so you guys might still have some waits here and there.
Kevin Zito
KNIFE MAKER
No big deal.... I’ll just check the website every 3 seconds for updates haha.Hahaha....fortunately for you the fishing IS terrible right now. But I'm going to Montana soon and I have to work on a couple other things too so you guys might still have some waits here and there.
Ty Adams
KNIFE MAKER
Don't John Doyle us now and take 10 years to do this WIP! No fishing, blowing up pumpkins and potatoes with fire works, or what ever shenanigans you are always up to. We want real time tips from you.Hahaha....fortunately for you the fishing IS terrible right now. But I'm going to Montana soon and I have to work on a couple other things too so you guys might still have some waits here and there.
C Craft
Well-Known Member
I knocked the rust off and cleaned the profile up to finished dimensions.
View attachment 64777
Next, I hand sanded the edge, and spine to 220 grit lengthwise.
View attachment 64778
Note the sanding block sitting on the spine. It has a couple different arcs on it to sand curved surfaces. I use it for the finger wells and the clip.
It may look straight in the pic, but the clip has a slight subtle curve to it. This is a design element that I usually incorporate on clipped blades. I think it gives the blade a lean and aggressive look. I believe almost everyone's eye can notice that detail in the finished knife, even if they can't put their finger on what they're seeing.
How about some more detailed of the sanding block!! What is it made of?? Wrap some paper on it and then tell me what the various edges are used for. You can't sit on an important piece of technology like this John!!! Seriously I would like to learn more. Sometimes it is these little tricks that can mean a lot!
J. Doyle
Dealer - Purveyor
Don't John Doyle us now and take 10 years to do this WIP! No fishing, blowing up pumpkins and potatoes with fire works, or what ever shenanigans you are always up to. We want real time tips from you.
No shenanigans??.........whaaaaaaaaaat?
It may look straight in the pic, but the clip has a slight subtle curve to it. This is a design element that I usually incorporate on clipped blades. I think it gives the blade a lean and aggressive look. I believe almost everyone's eye can notice that detail in the finished knife, even if they can't put their finger on what they're seeing.
Hi John, I'm still learning blade design and I hope you don't mind me saying that's a really good idea. I'm not a major hunter, but for gutting, it looks like it would ride comfortably on my fingers, allow more upward pressure, and still not want to poke the stomach. It actually looks like a user would gain more control when gutting an animal than conventional clip or drop point.
Chris Railey
Well-Known Member
How about some more detailed of the sanding block!! What is it made of?? Wrap some paper on it and then tell me what the various edges are used for. You can't sit on an important piece of technology like this John!!! Seriously I would like to learn more. Sometimes it is these little tricks that can mean a lot!
Yeah, what C Craft said please. I have never radiused or altered the spine on any knife I have made until I came here so I do not even know what else I do not know.
Don Robinson
Well-Known Member
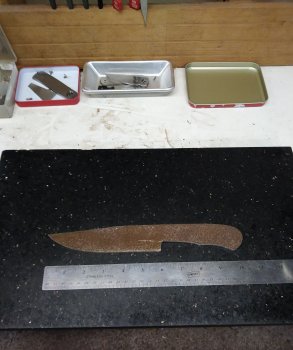
How come all that stuff in the first picture is all lined up, straight and clean?????
Dennis Morland
KNIFE MAKER
I am looking forward to the shenanigans!
J. Doyle
Dealer - Purveyor
How come all that stuff in the first picture is all lined up, straight and clean?????
Because our power was out for several days and the rivers were too flooded to fish. So with nothing else to do I was forced to resorting to cleaning the shop.
Smallshop
KNIFE MAKER
I think that's true of almost any aspect of knife/sheath making! Even if an eye is "untrained" it notices things...just not as specifically as someone making them...I believe almost everyone's eye can notice that detail in the finished knife, even if they can't put their finger on what they're seeing.
J. Doyle
Dealer - Purveyor
On a serious note....I try to keep my shop time to M-F. I try not to work evenings and weekends if I don't have to. So that's why there's fewer posts and more goofing off on weekends. I don't mind answering questions and keeping up with the forums on evenings and weekends though.
Dennis Morland
KNIFE MAKER
Is that how squash got its name??


