You are using an out of date browser. It may not display this or other websites correctly.
You should upgrade or use an alternative browser.
You should upgrade or use an alternative browser.
Matchlock Axe/Pistol
- Thread starter Bruce Bump
- Start date
Bruce Bump
Forum Owner-Moderator
Yep, I'm tickled that it will fire but I need to solve the slow ignition problem. That match looks plenty hot but doesnt want to light off the powder. Its even slower on ffff black powder. A lit paper match easily lights off all the gun powders I've tried so it must be the cotton cord doesnt seem hot enough. I'm banking on the new cotton slow match from Dixie Gun Works. They claim it is treated with potassium nitrate.
Not better then to hear a grown man giggle.
ddavelarsen
Well-Known Member
Good luck with the new slow match! That video had me on pins and needles, especially when it didn't fire right off. And then when it did, the huge flame from the primer box flipped me out... Whoever shoots that bad boy is going to need nerves of steel and a steady aim! I'm sure digging the project and I have to say you have some fine nipples. ")
So would you educate me? Is it the volume inside the nipple that measures the powder? What keeps the powder from falling out when you open the flask gate to fill it? You can tell I've never shot black powder, so I know I'm asking dumb questions that are just eating up your valuable time. But I don't know who else to ask. You're kind of my authority on these things.
So would you educate me? Is it the volume inside the nipple that measures the powder? What keeps the powder from falling out when you open the flask gate to fill it? You can tell I've never shot black powder, so I know I'm asking dumb questions that are just eating up your valuable time. But I don't know who else to ask.
You're kind of my authority on these things.BRad704
Well-Known Member
Bruce.... I didn't get to watch the video with sound because I'm on a conference call, but DANG! I just about jumped outta my chair when it finally went off!
Dave, I was wondering the same thing. My only idea is that you invert the flask, put your finger over the tip of the nipple and then slide the gate Open-Closed. Turn back upright and you are ready to rock.
Dave, I was wondering the same thing. My only idea is that you invert the flask, put your finger over the tip of the nipple and then slide the gate Open-Closed. Turn back upright and you are ready to rock.
Brad Lilly
Moderator and Awards Boss
That was awesome!!! I love the video.
Bruce Bump
Forum Owner-Moderator
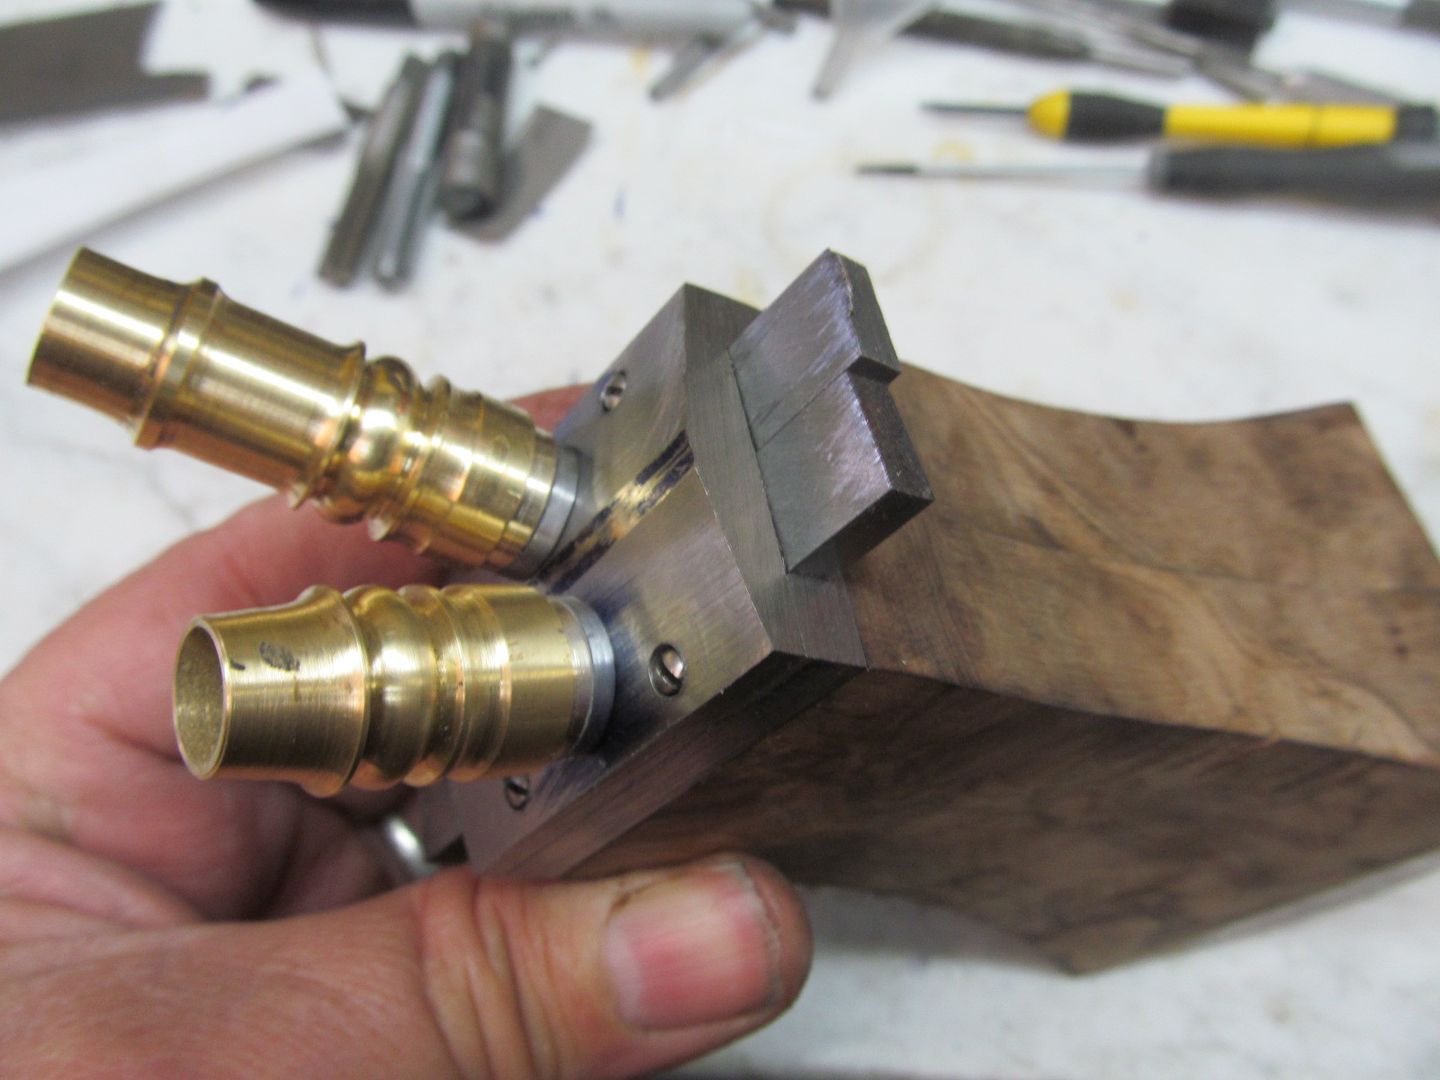
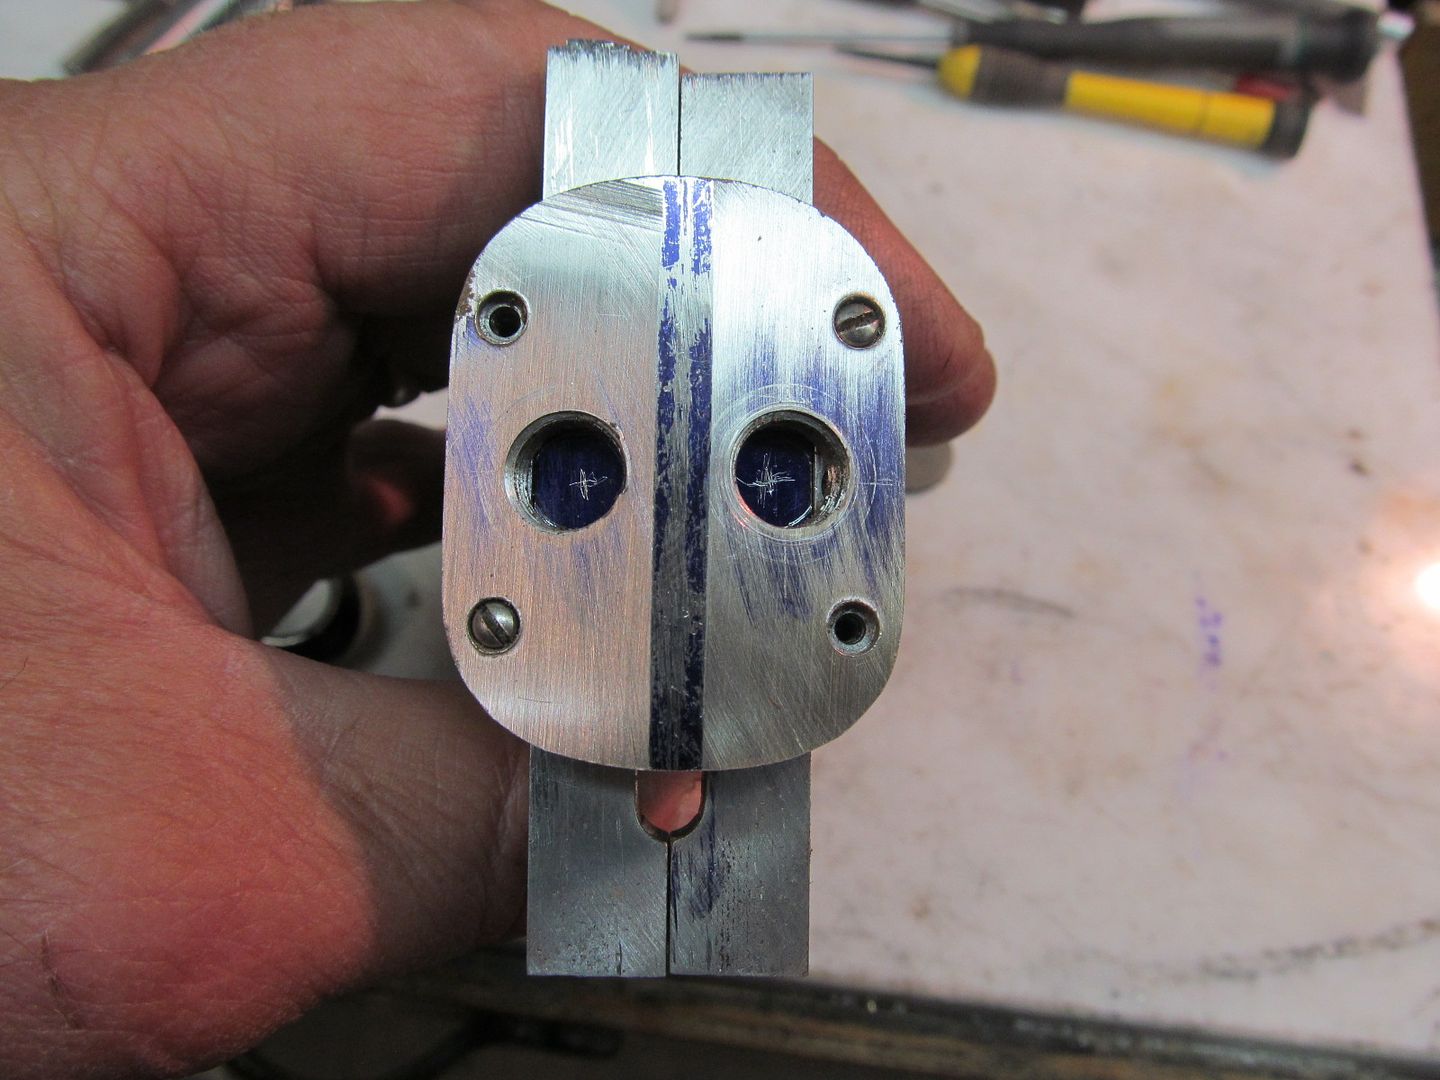
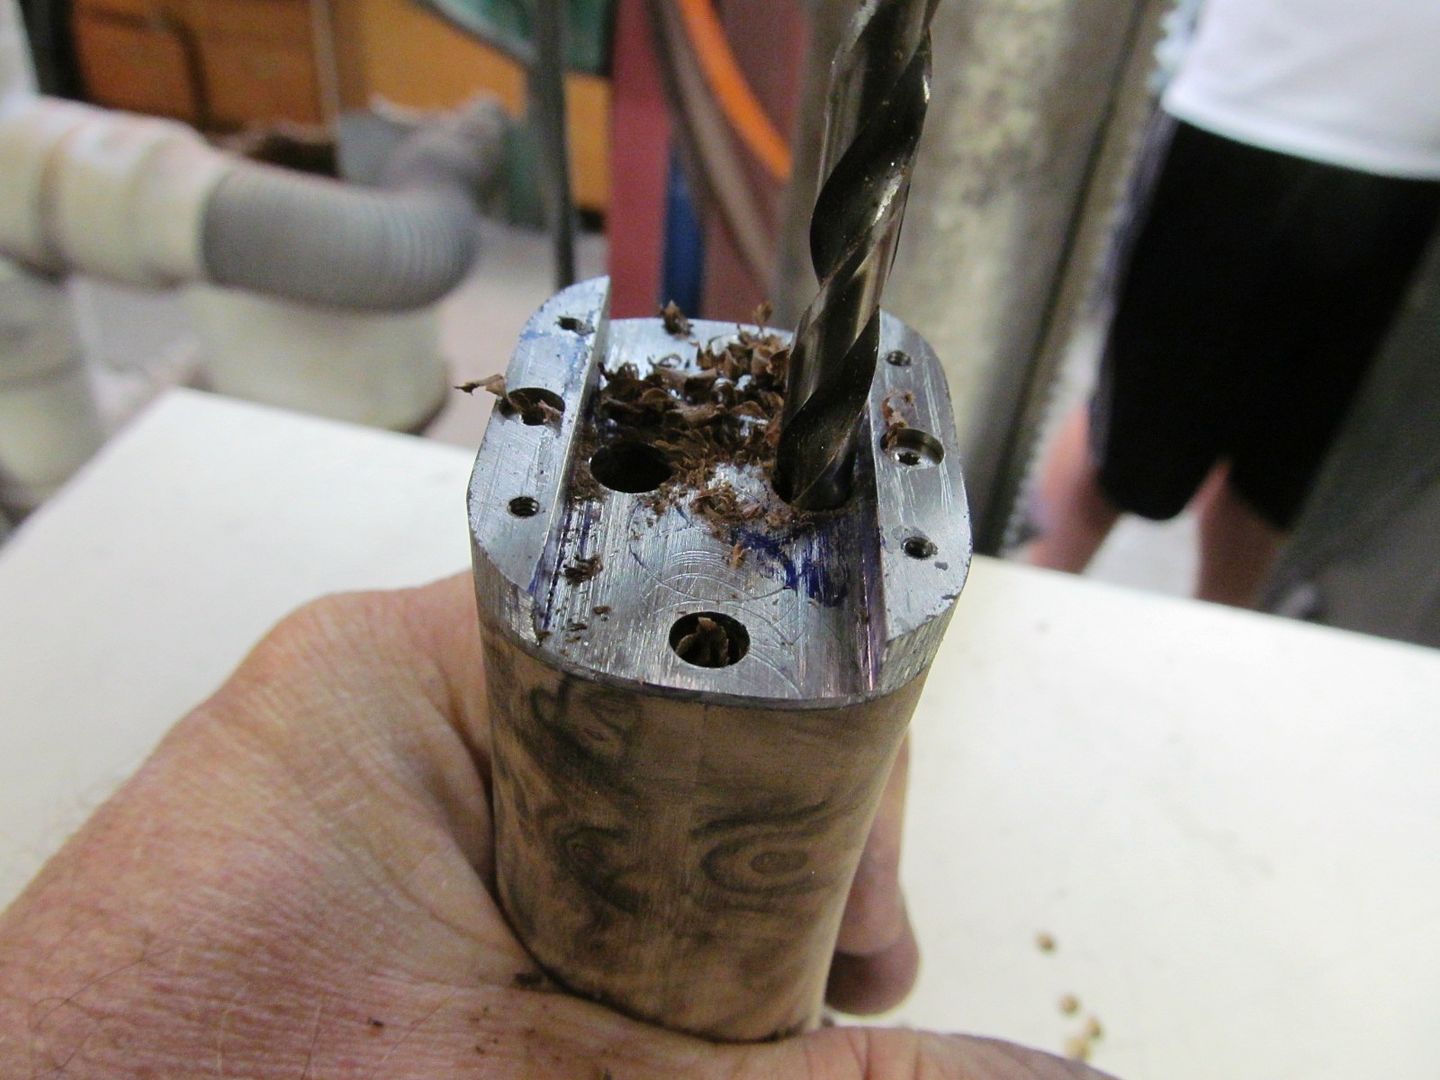
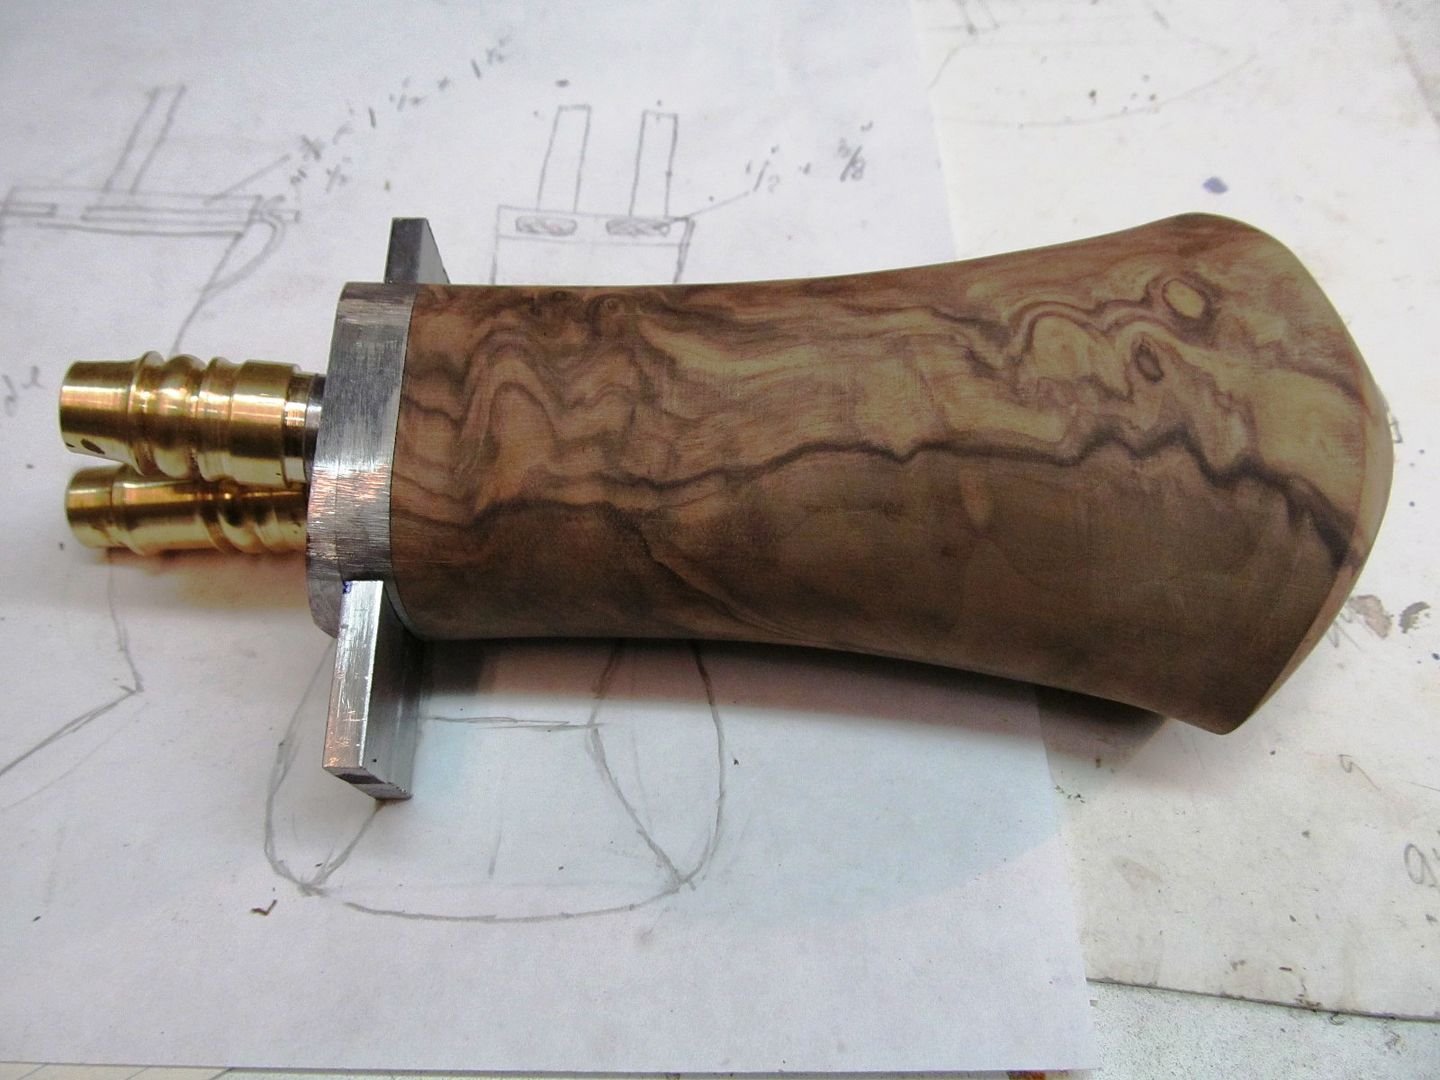
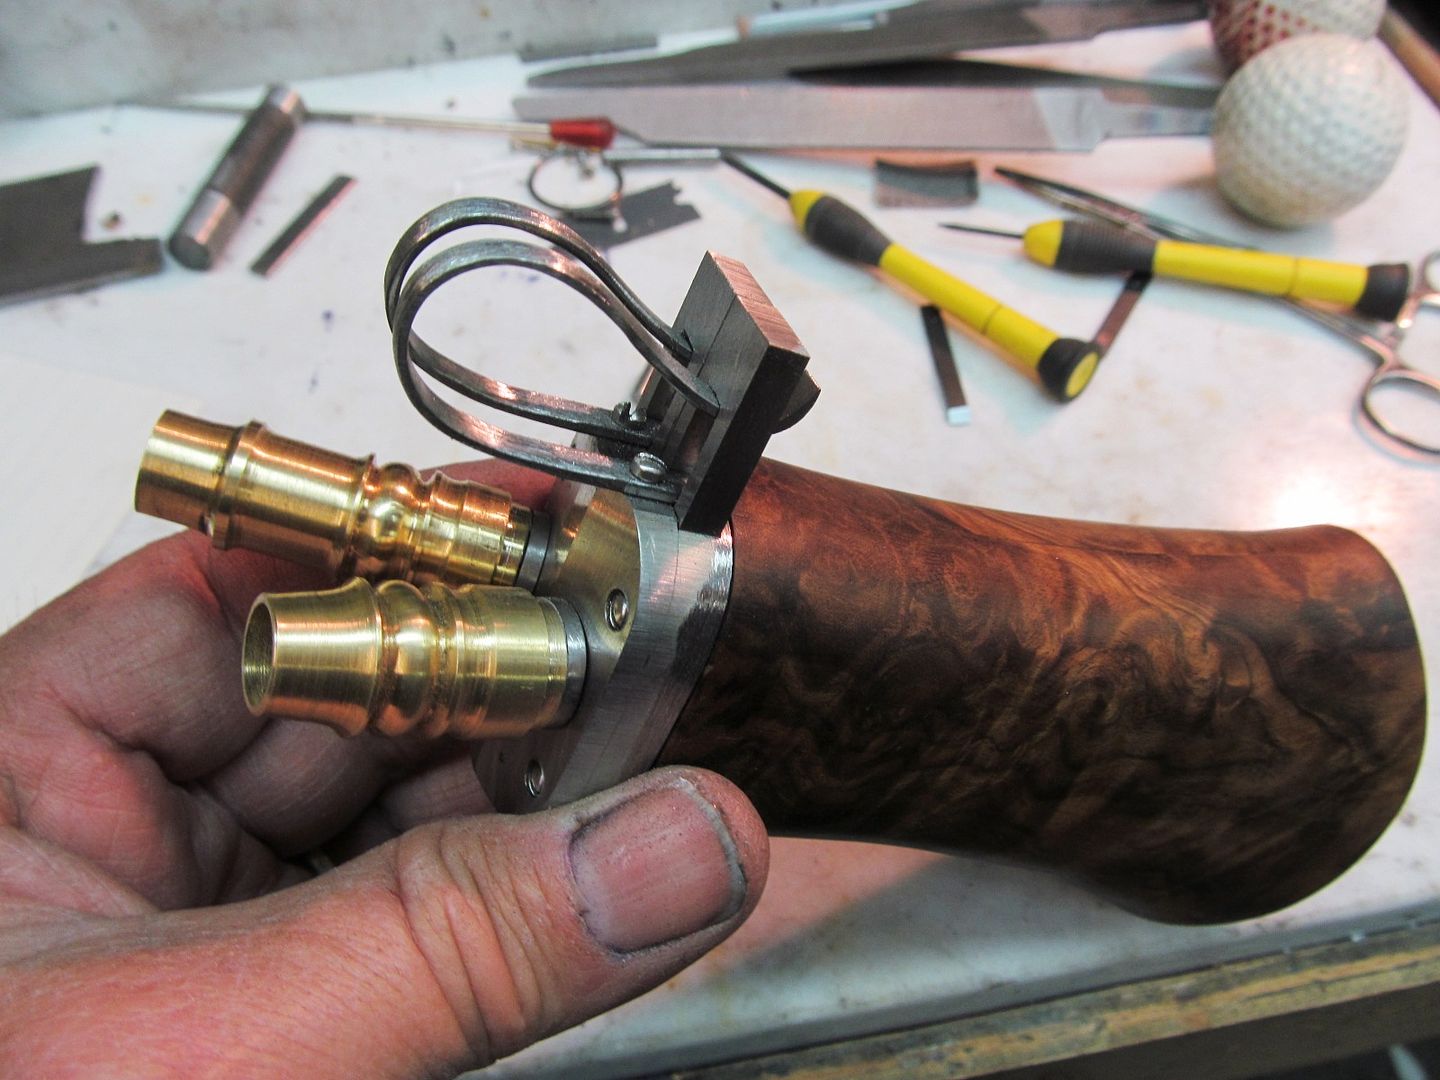
The powder flask does indeed give a consistent measure of powder by putting your finger over the spout, pushing the gate open with another finger, inverting the flask so powder can fill the nipple and releasing the gate to close it. I still need to make a spring for each gate so they will close. The powder in the nipple is the correct weight (grains) for loading. There are two nipples, the large one is 35 grains for the main charge and the smaller one is 15 grains used for the primer (flash pan). The primer weight may very well be too much. After I get a better match I can experiment with the size, hopefully reducing it to give a faster ignition and lower flash height.
12345678910
Well-Known Member
I haven't read all 38 pages of the text, so If I missed this just point me to a page.
When it went off the match hammer was back and it was because the match really flared up, maybe some powder was stuck to the match
It seems that if the pan was open that could happen any time.
Will the pan cover be normally closed and open when the hammer is tripped ?
When it went off the match hammer was back and it was because the match really flared up, maybe some powder was stuck to the match
It seems that if the pan was open that could happen any time.
Will the pan cover be normally closed and open when the hammer is tripped ?
ddavelarsen
Well-Known Member
Dave, I was wondering the same thing. My only idea is that you invert the flask, put your finger over the tip of the nipple and then slide the gate Open-Closed. Turn back upright and you are ready to rock.
You nailed it indeed Brad! Bruce, thanks for the explanation. I'm looking forward to how you install the springs for the gates, and what kind of springs they are. This is all a mystery to me.
Dwane Oliver
Well-Known Member
I LOL at " Ehh it could go off any minute "
Looking great Bruce.
Looking great Bruce.
Bruce Bump
Forum Owner-Moderator
Hi Count,
The serpentine (hammer) is back at all times until the trigger is slowly pulled. The powder box lid remains closed until the shooter is ready to fire the gun. At that time the shooter lights the slow match (cotton cord) and opens the lid to expose the powder. When the trigger is pulled the serpentine touches the burning "slow match" to the powder. The trouble I had is the slow match didnt want to ignite the powder. I'm working to remedy that problem buy ordering a new slow match. If that doesnt solve the problem I have to find better pyrodex powder.
The serpentine (hammer) is back at all times until the trigger is slowly pulled. The powder box lid remains closed until the shooter is ready to fire the gun. At that time the shooter lights the slow match (cotton cord) and opens the lid to expose the powder. When the trigger is pulled the serpentine touches the burning "slow match" to the powder. The trouble I had is the slow match didnt want to ignite the powder. I'm working to remedy that problem buy ordering a new slow match. If that doesnt solve the problem I have to find better pyrodex powder.
I haven't read all 38 pages of the text, so If I missed this just point me to a page.
When it went off the match hammer was back and it was because the match really flared up, maybe some powder was stuck to the match
It seems that if the pan was open that could happen any time.
Will the pan cover be normally closed and open when the hammer is tripped ?
Last edited:
Bruce Bump
Forum Owner-Moderator
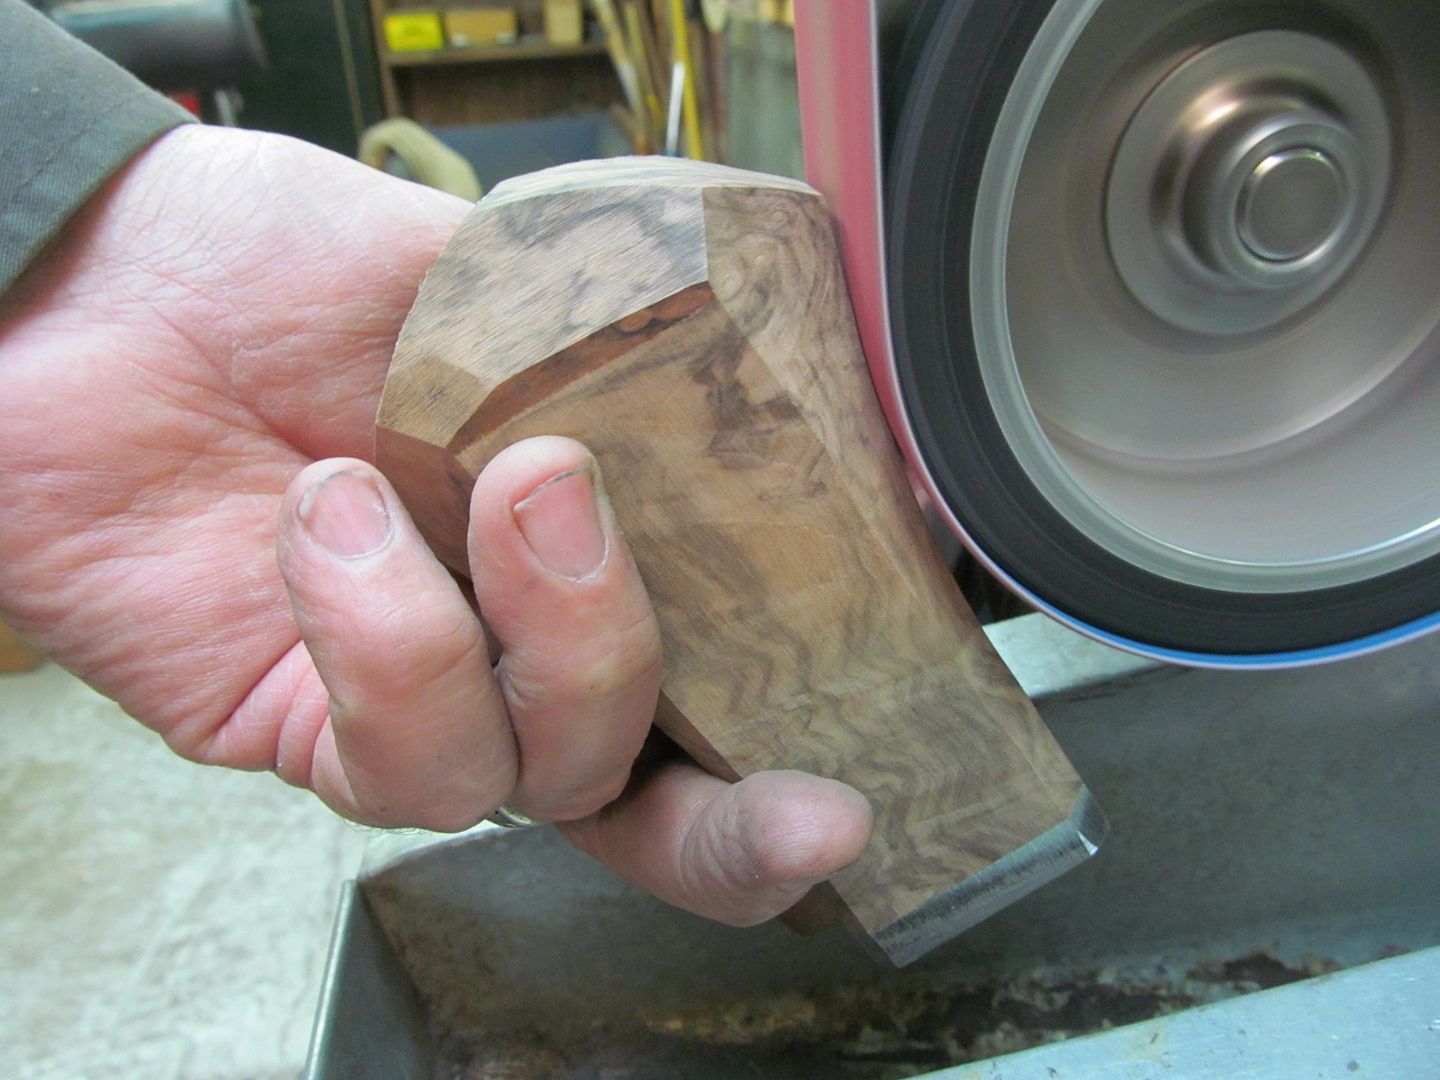
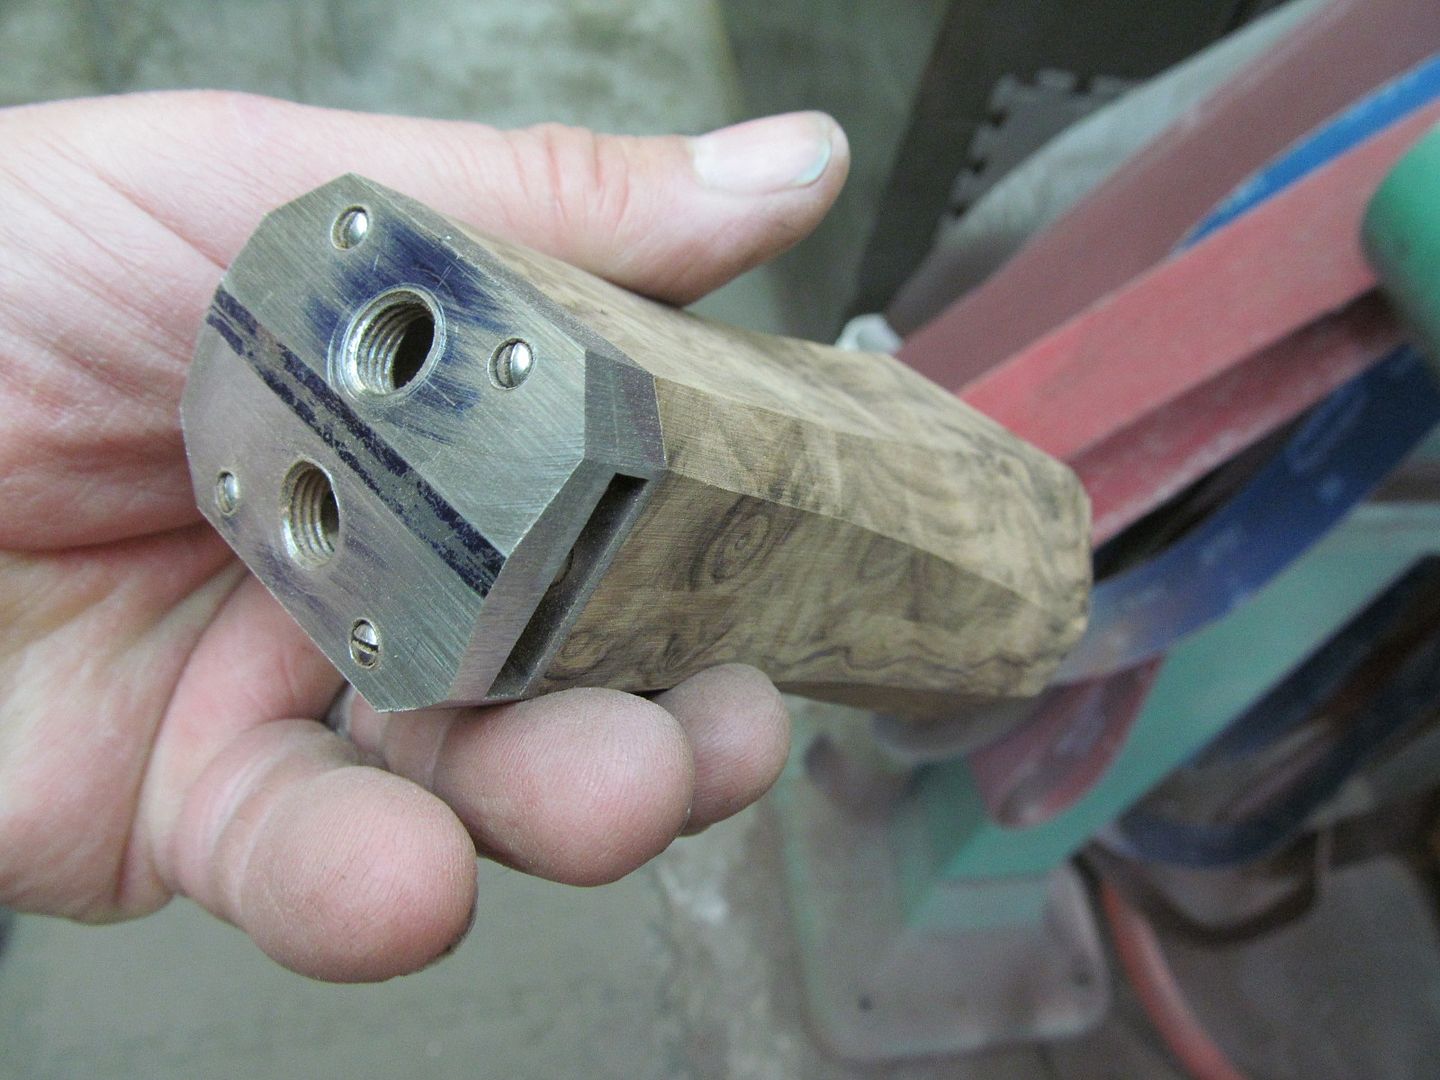
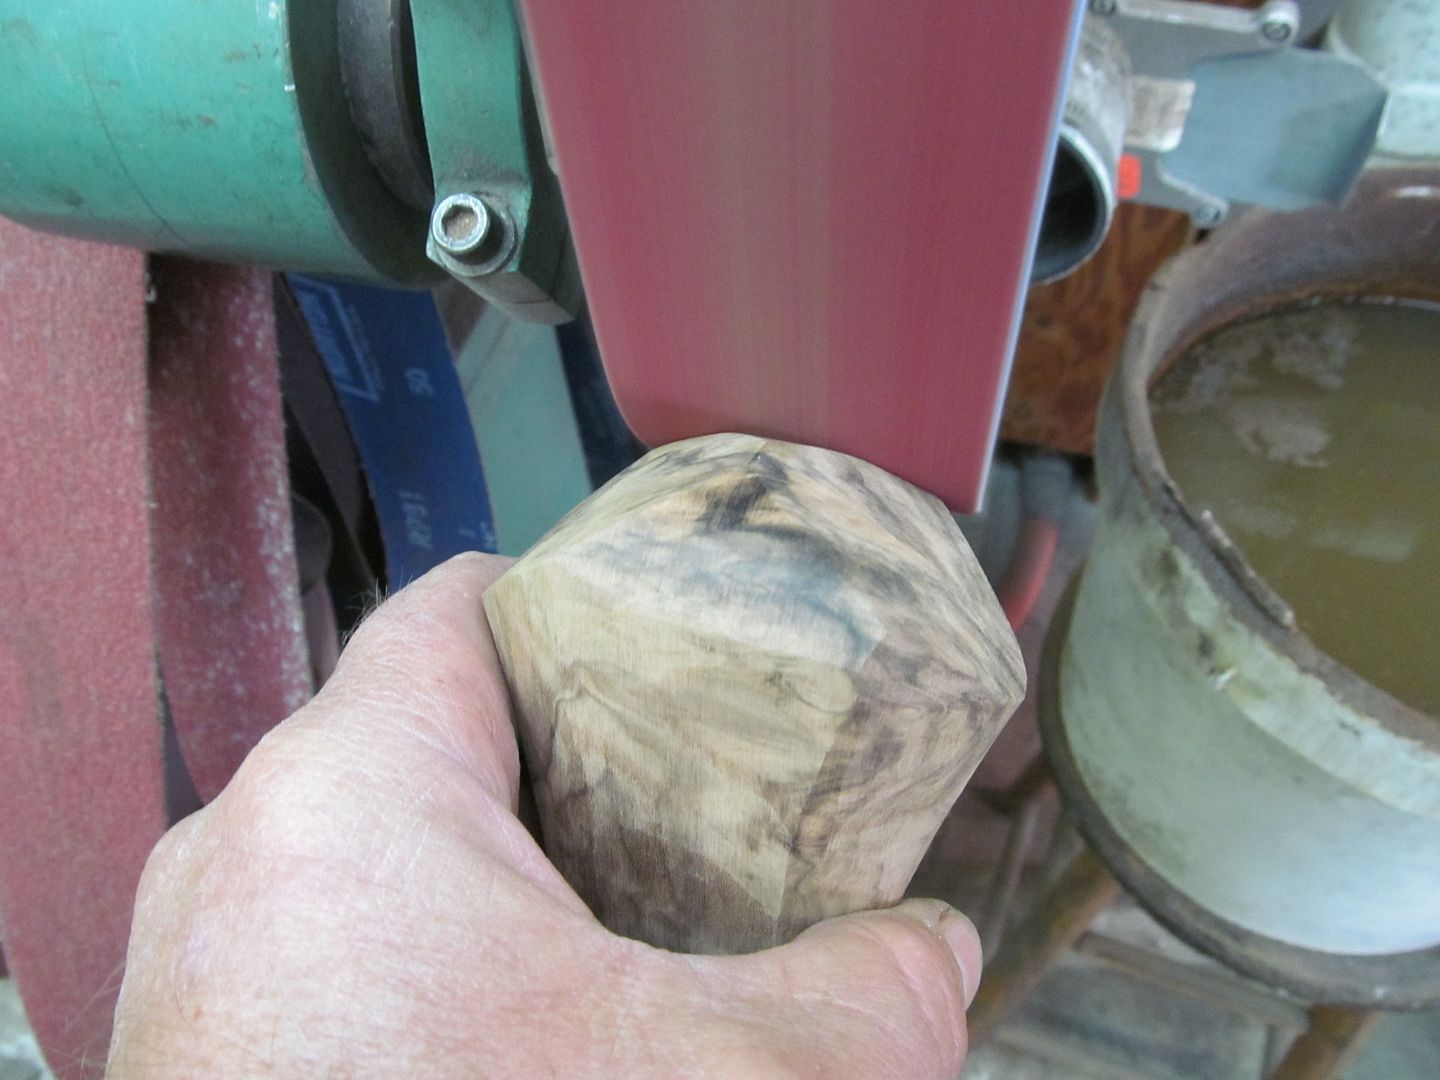
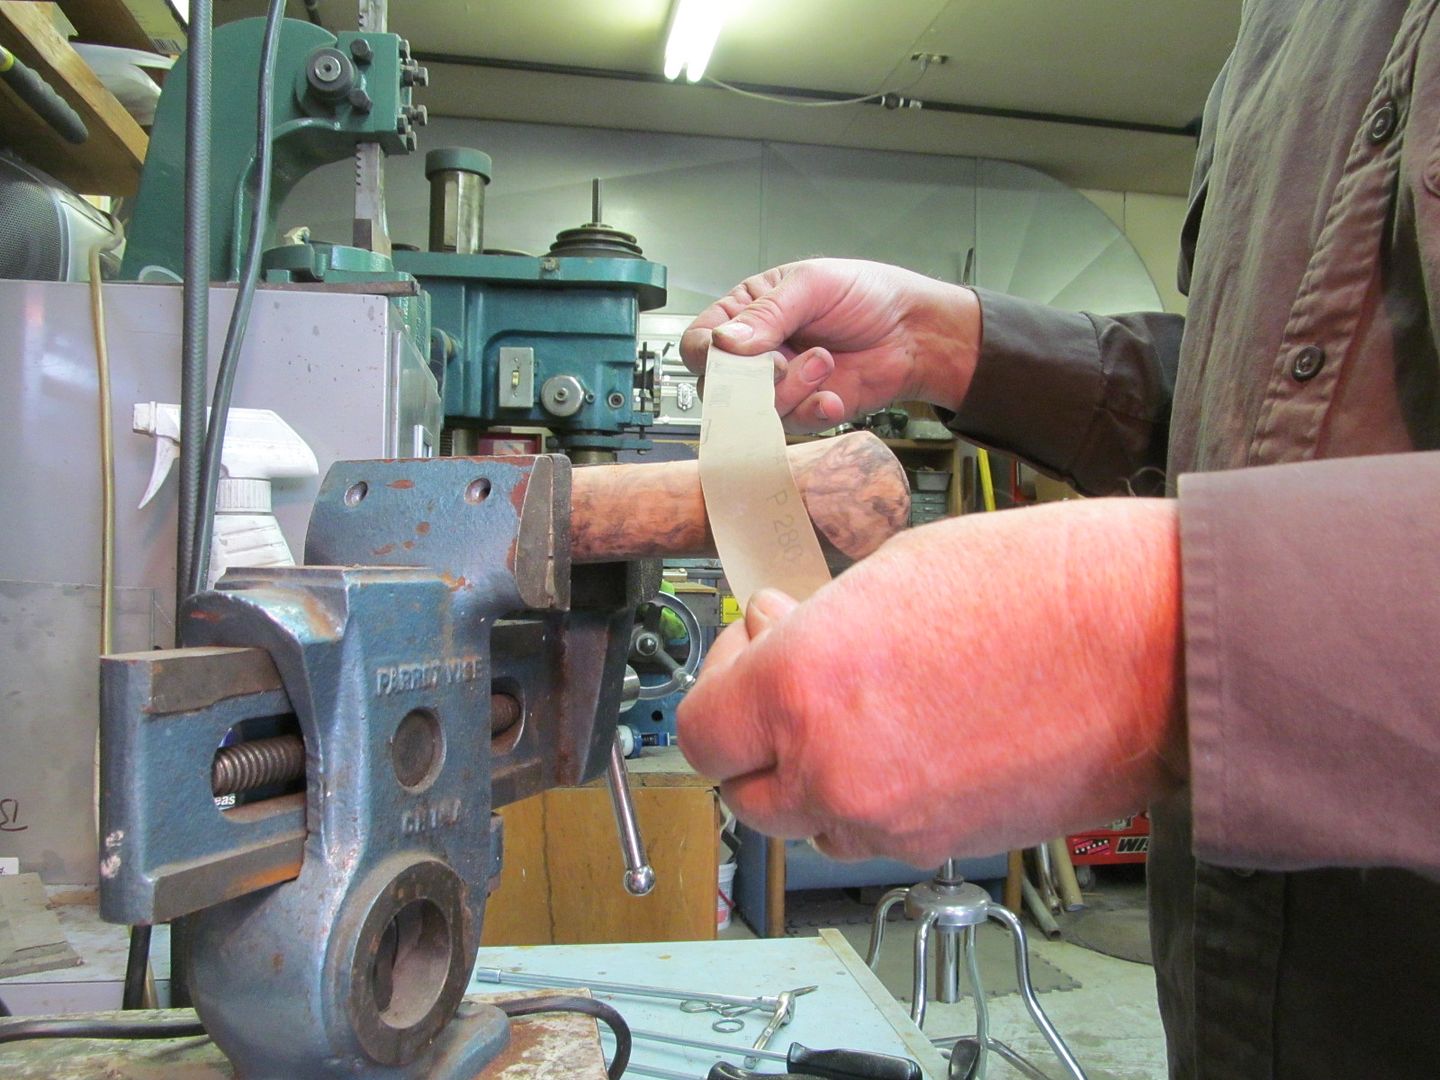
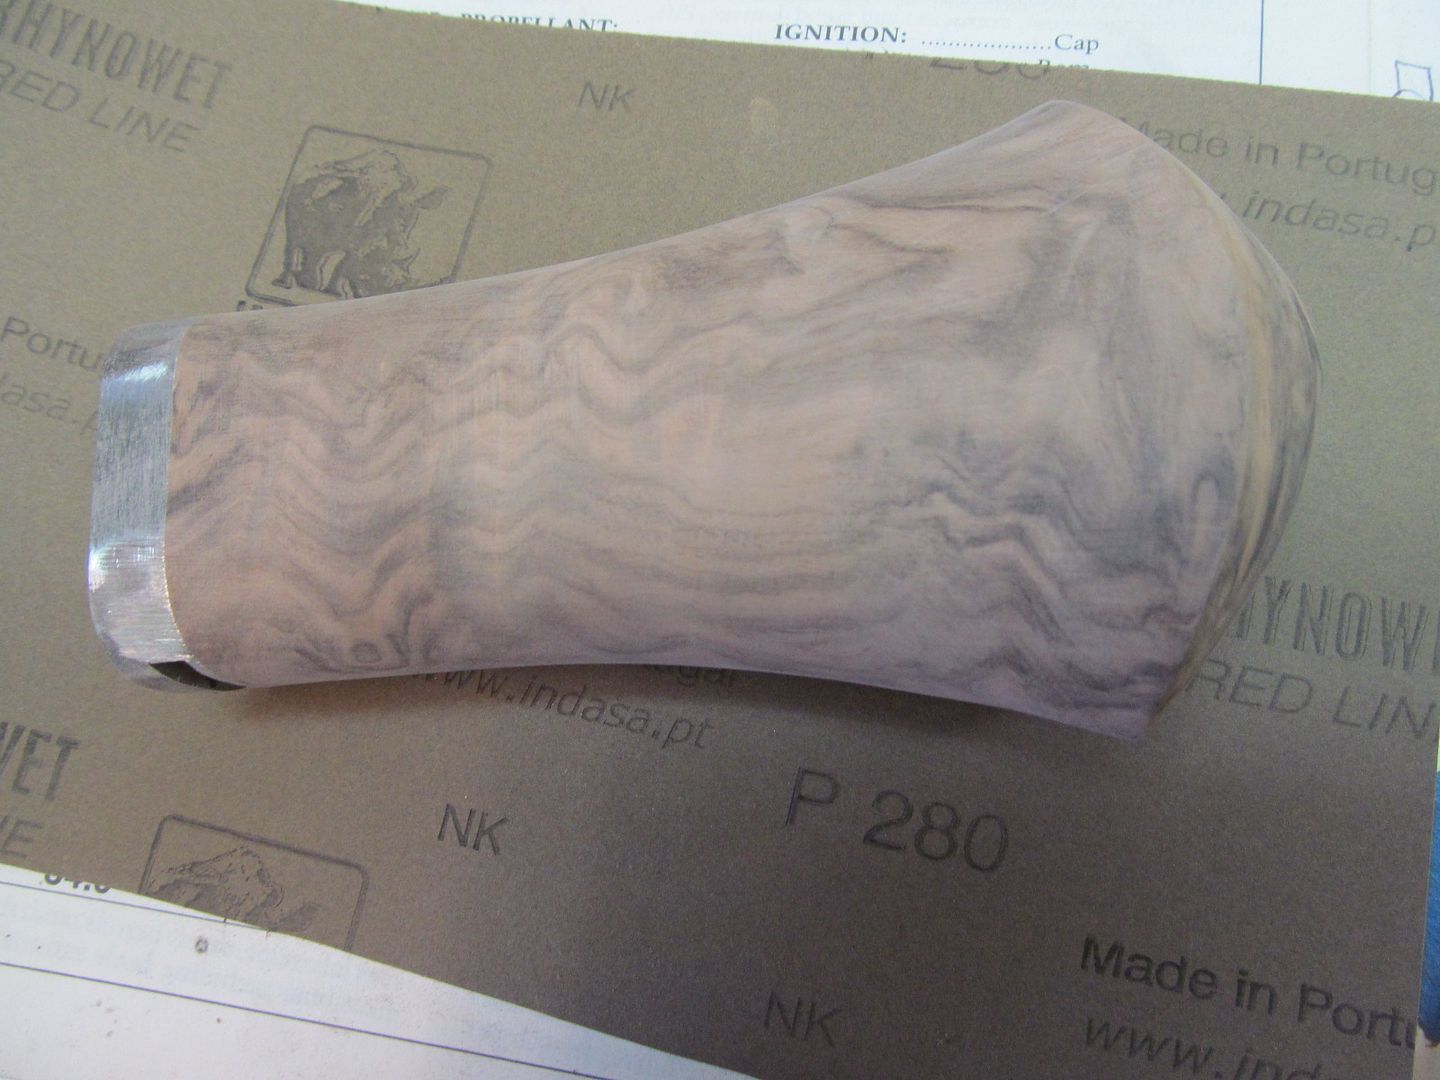
More work on the flask today.
Bruce Bump
Forum Owner-Moderator
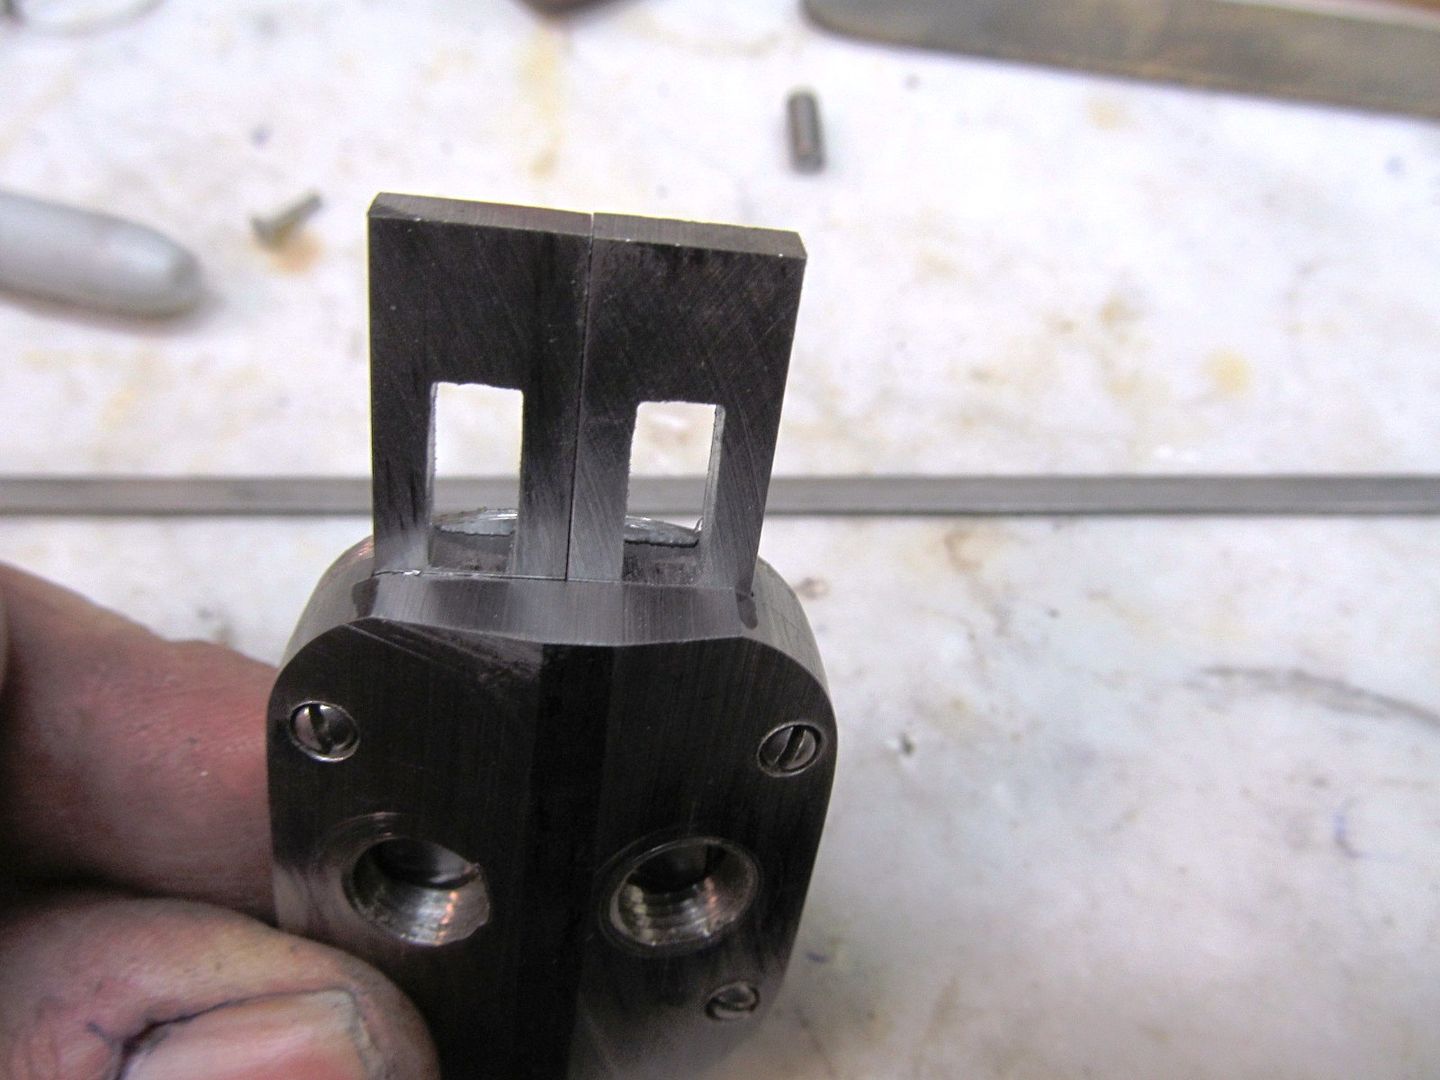
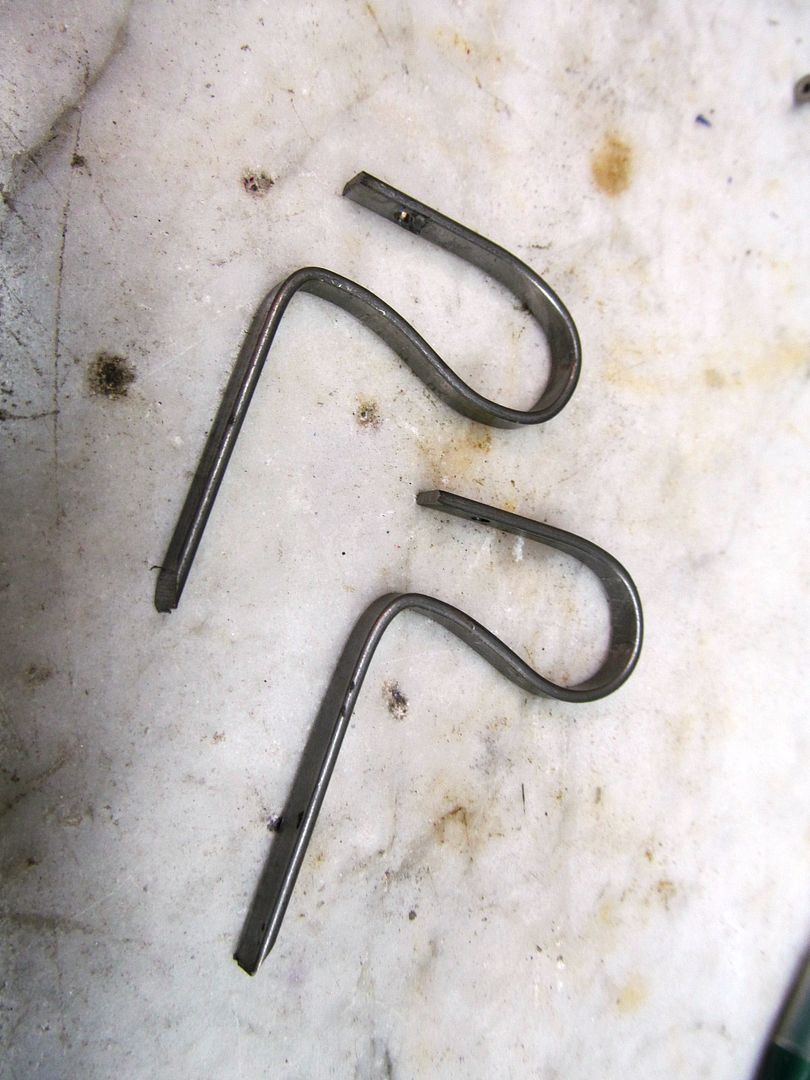
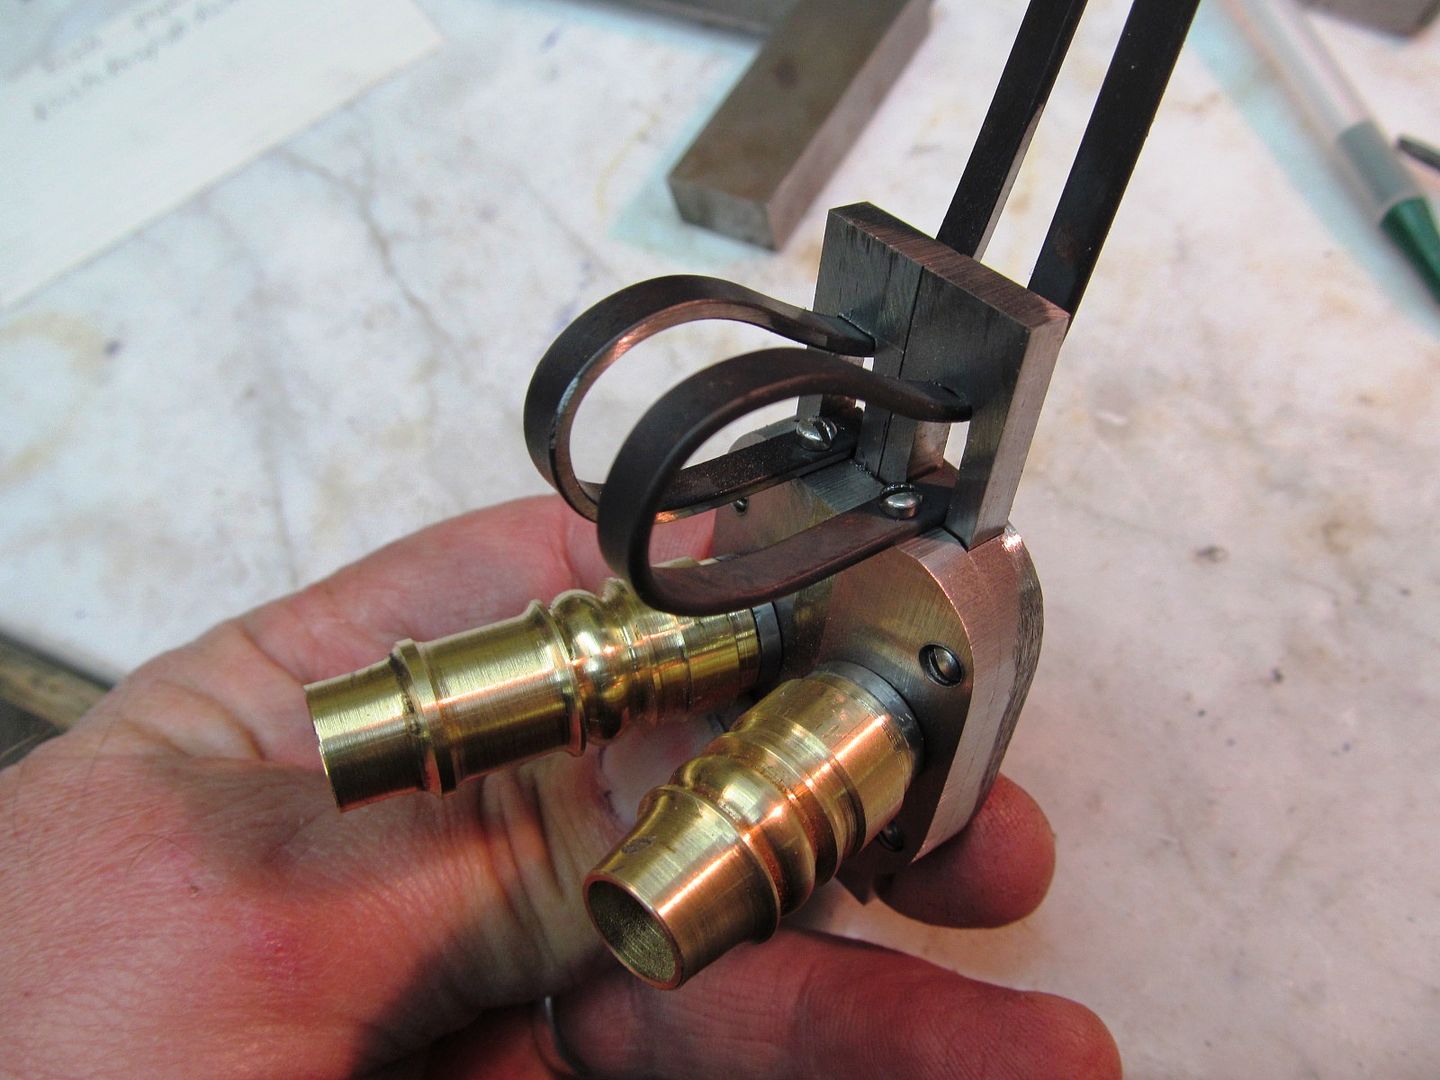
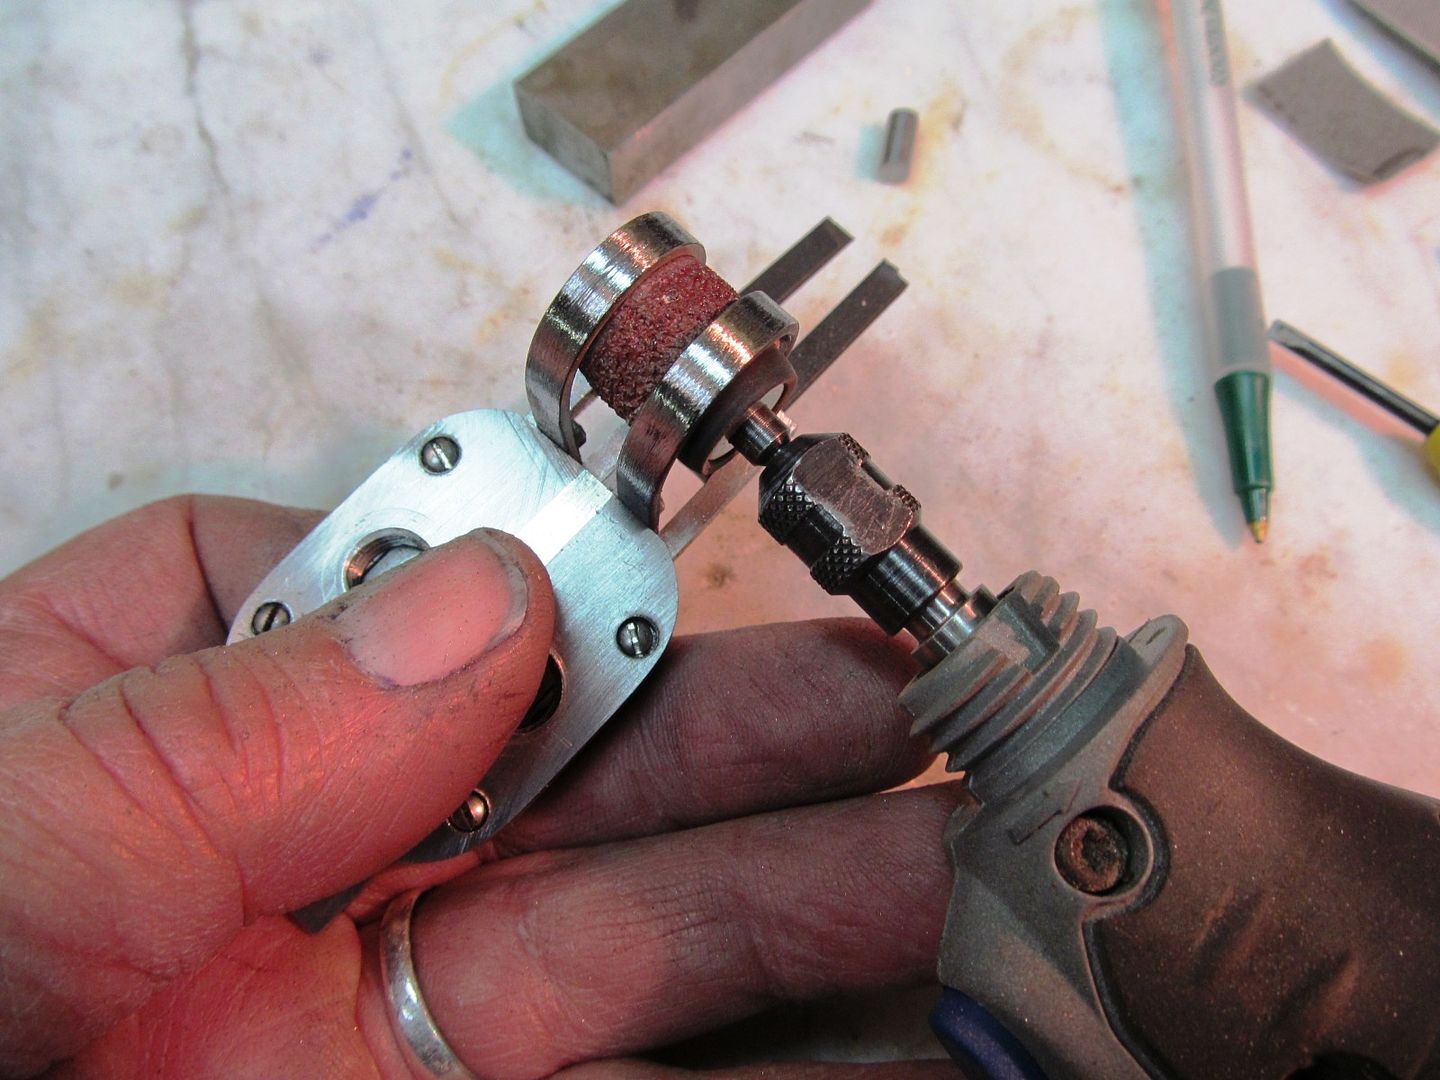
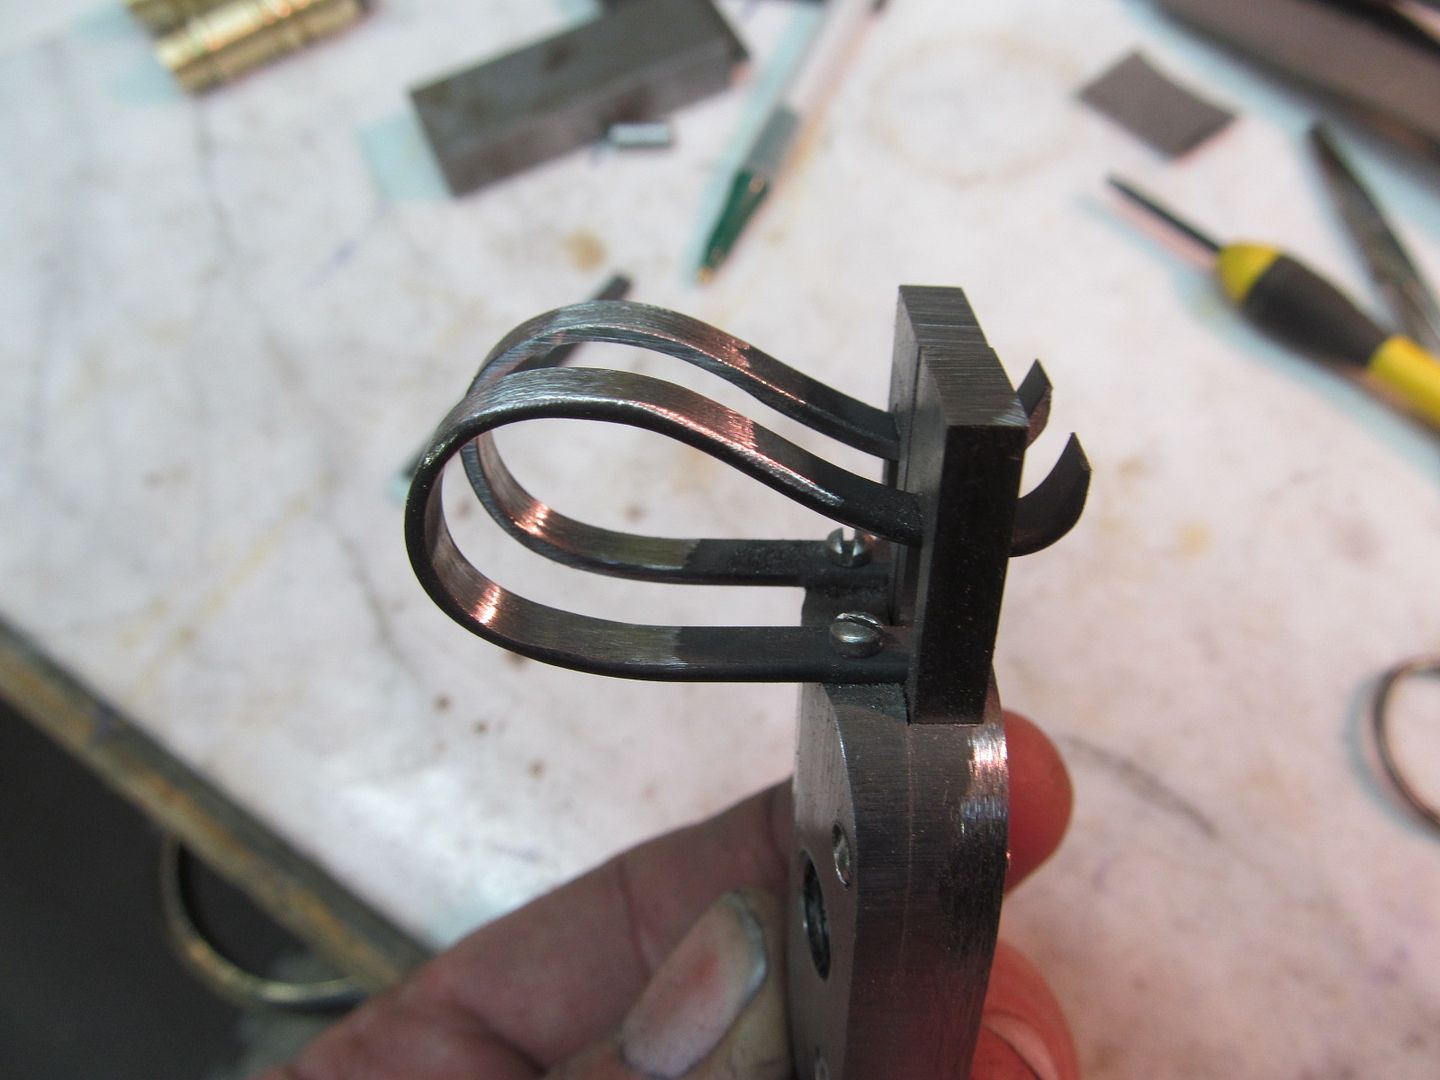
Well I've finally figured out the springs for the flask gates. It is a simple flat 1075 steel bent in a long "C" shape. I had to mill and file out a rectangle window in each gate for the spring to go through and come back and hook into. One end is screwed down so it will remain in place. I'm heat treating them now.
ddavelarsen
Well-Known Member
I think I see where that's going. How long will the "throw" for each gate be? Just enough to open the 'window' to the flask? Will the ends of the gates be exposed? If so, you're going to embellish them somehow and I'm looking forward to what that is. This is one of the most interesting parts of the project for me, for some reason. I guess because I don't remember you having shown this on any of the previous ones. Good stuff! Thanks again Bruce, for all the time you spend sharing your work with us.
Bruce Bump
Forum Owner-Moderator
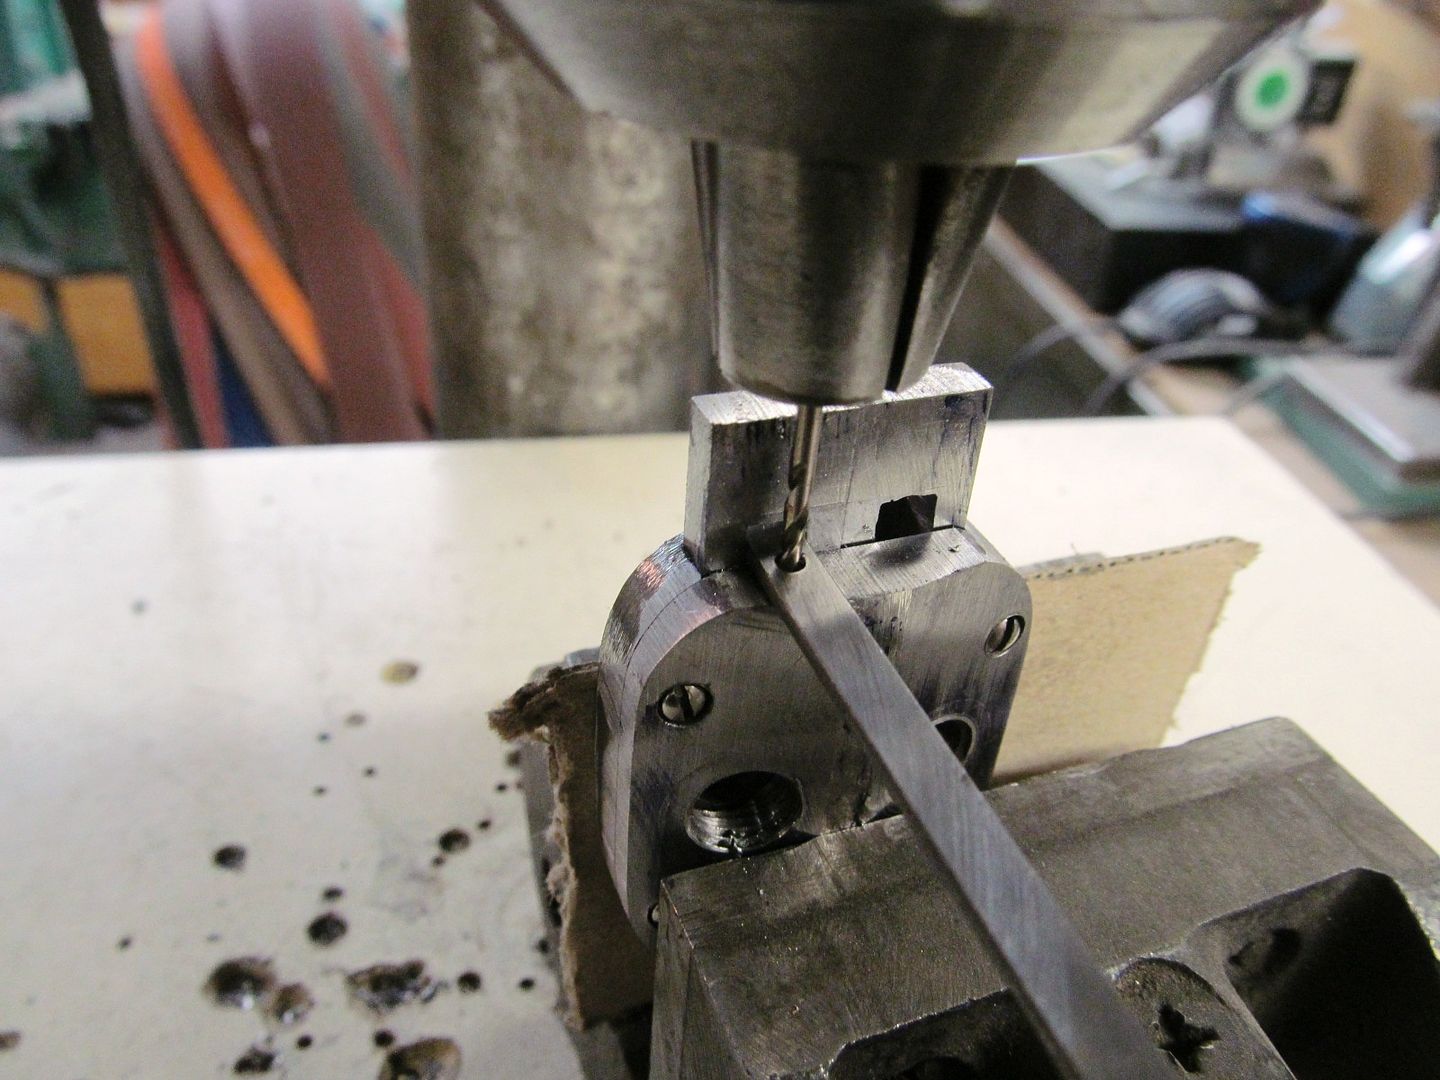
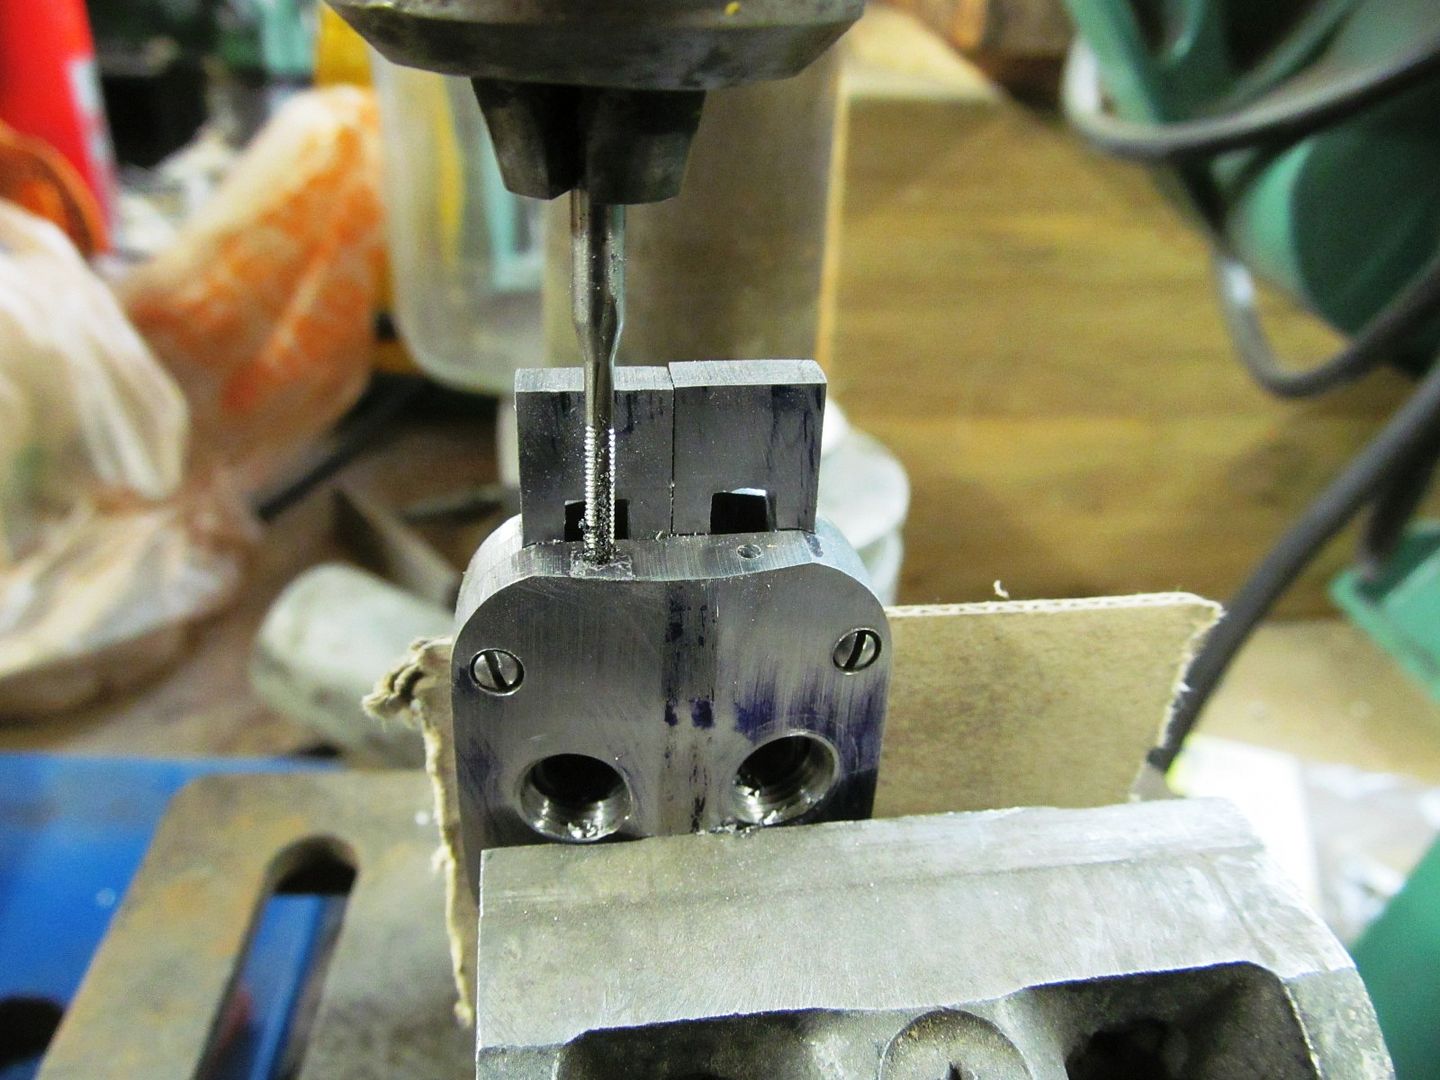
Dave the travel needs to be barely far enough to cover the holes. Right now they are drilled at 1/4" and the travel is almost the same, I'll need to file the stops a little more I think other wise powder can trickle past the gates or the gates wont open all the way to fill the nipples.
The gates will be flush on one end with the housing but the spring end will get a thumb pad welded on.
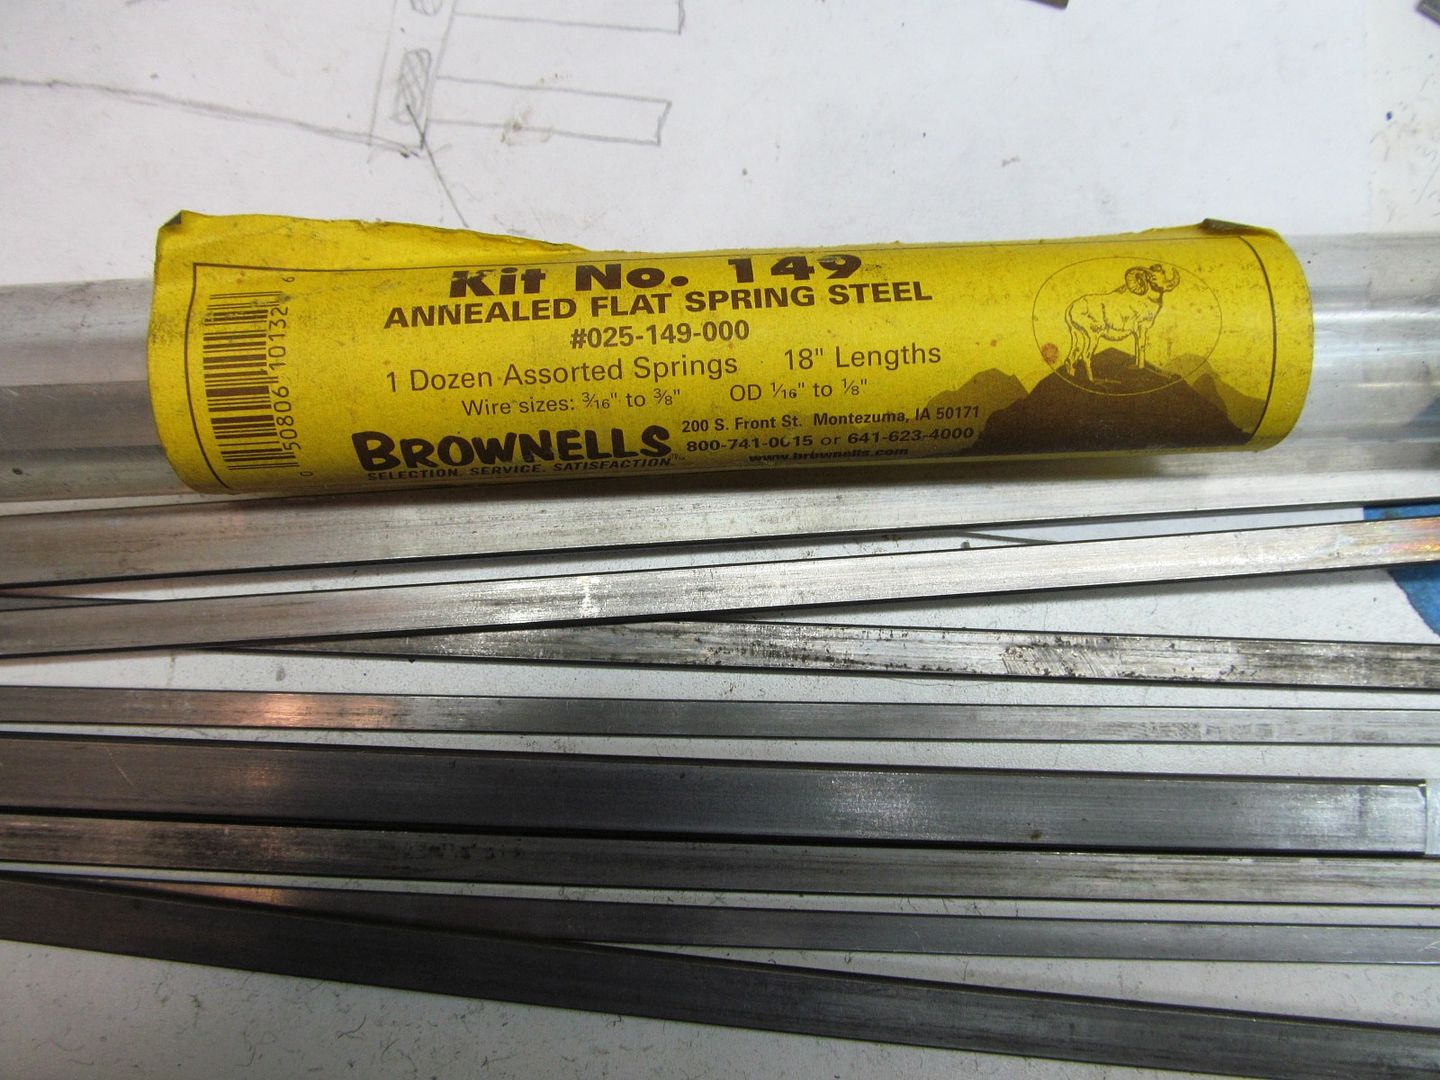
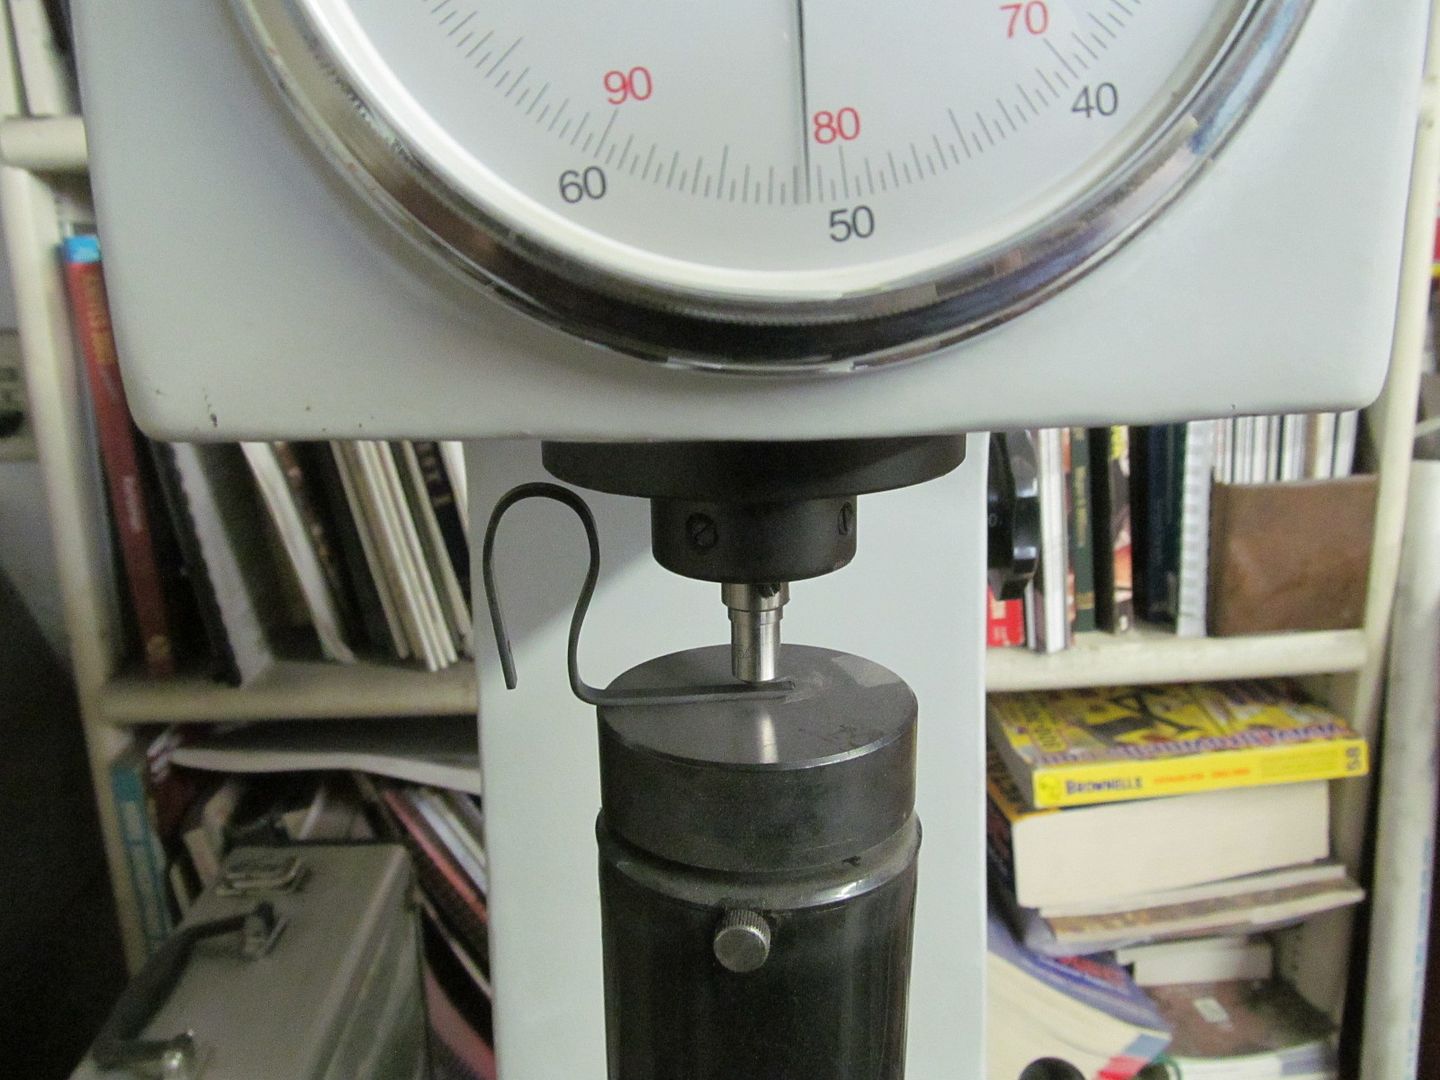
Here is a shot of the spring material I use on many of my guns. I'm sure this is 1075 but I'm not sure. I called Brownells and they werent sure either. It heat treats really nice and consistant. hold at 1500 F for 5 minutes and quench in Brownells "Tough Quench" and they are always at 63 rockwell hardness. Temper for one hour at 725 F will give a spring temper of 50-51 rc.
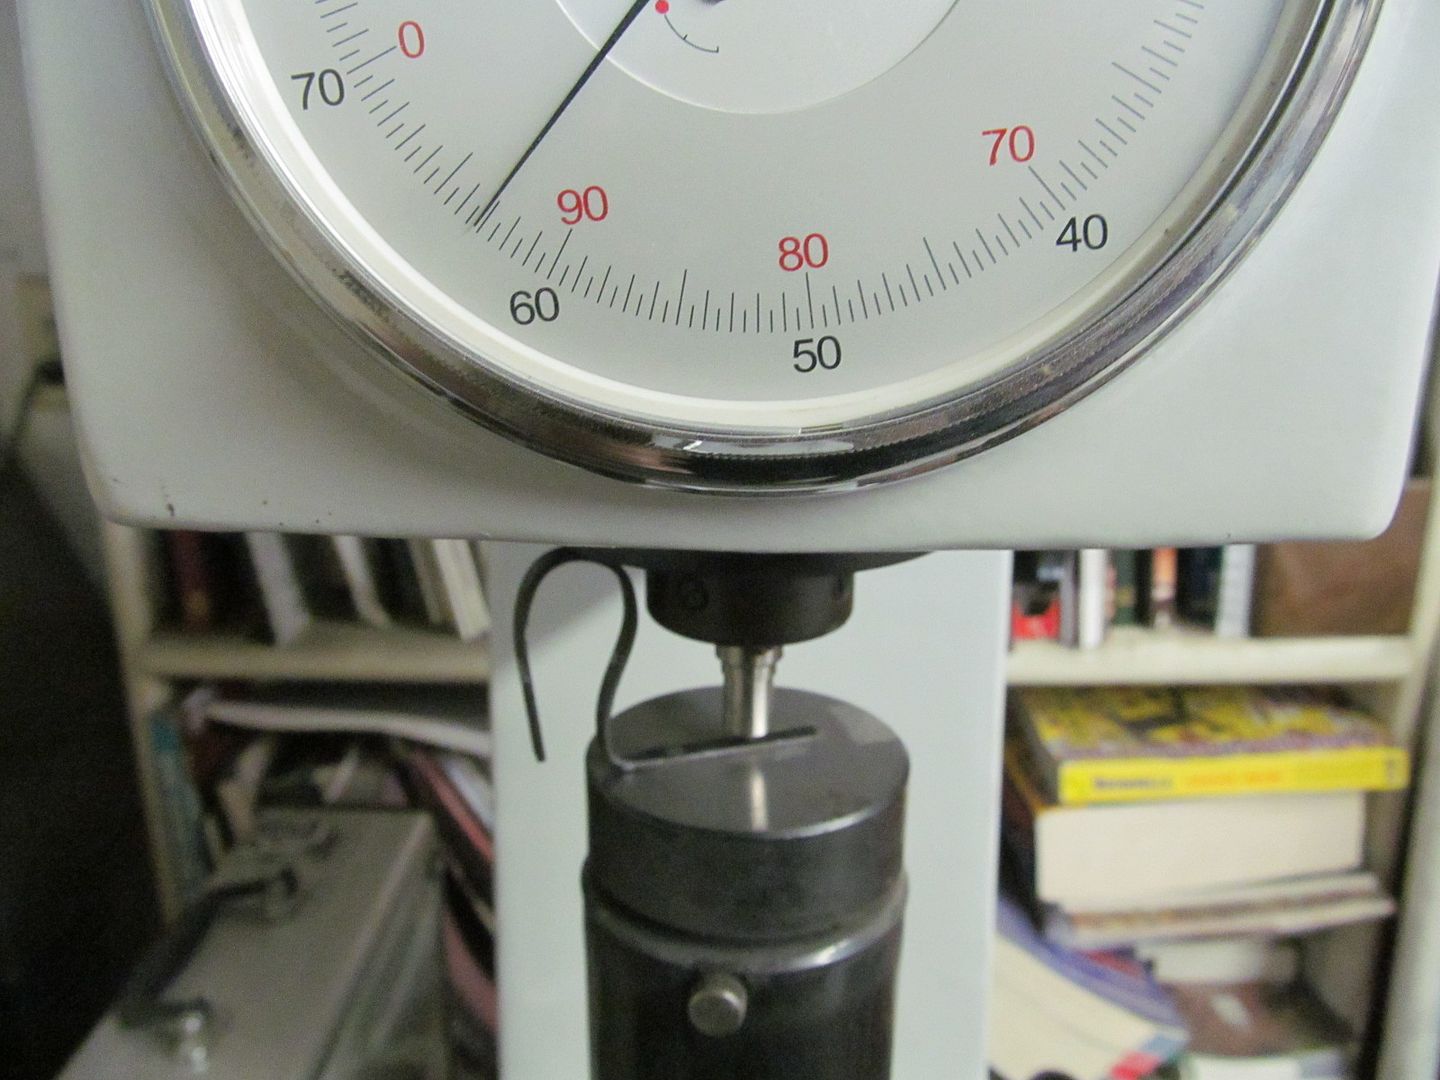
I left a tail on these springs so I can test the hardness, they will be ground off later.
I use Brownells PBC for a anti-scale and never have trouble with scale. The scales just washes right off in hot water and Kayes new tooth brush.
The gates will be flush on one end with the housing but the spring end will get a thumb pad welded on.
Here is a shot of the spring material I use on many of my guns. I'm sure this is 1075 but I'm not sure. I called Brownells and they werent sure either. It heat treats really nice and consistant. hold at 1500 F for 5 minutes and quench in Brownells "Tough Quench" and they are always at 63 rockwell hardness. Temper for one hour at 725 F will give a spring temper of 50-51 rc.
I left a tail on these springs so I can test the hardness, they will be ground off later.
I use Brownells PBC for a anti-scale and never have trouble with scale. The scales just washes right off in hot water and Kayes new tooth brush.
Last edited:
ddavelarsen
Well-Known Member
Yep, this is what I had imagined, roughly. Nice to know I'm getting in on your wavelength a little once in a while. I use PBC too, when I HT knives, and it's wonderful stuff. Don't know how I ever lived without it before.
I use PBC too, when I HT knives, and it's wonderful stuff. Don't know how I ever lived without it before.Bruce Bump
Forum Owner-Moderator
Dave, You will soon be working on a powder flask for 6 days too. Why dont we just go buy one of these, they only cost $29 at Cabelas.
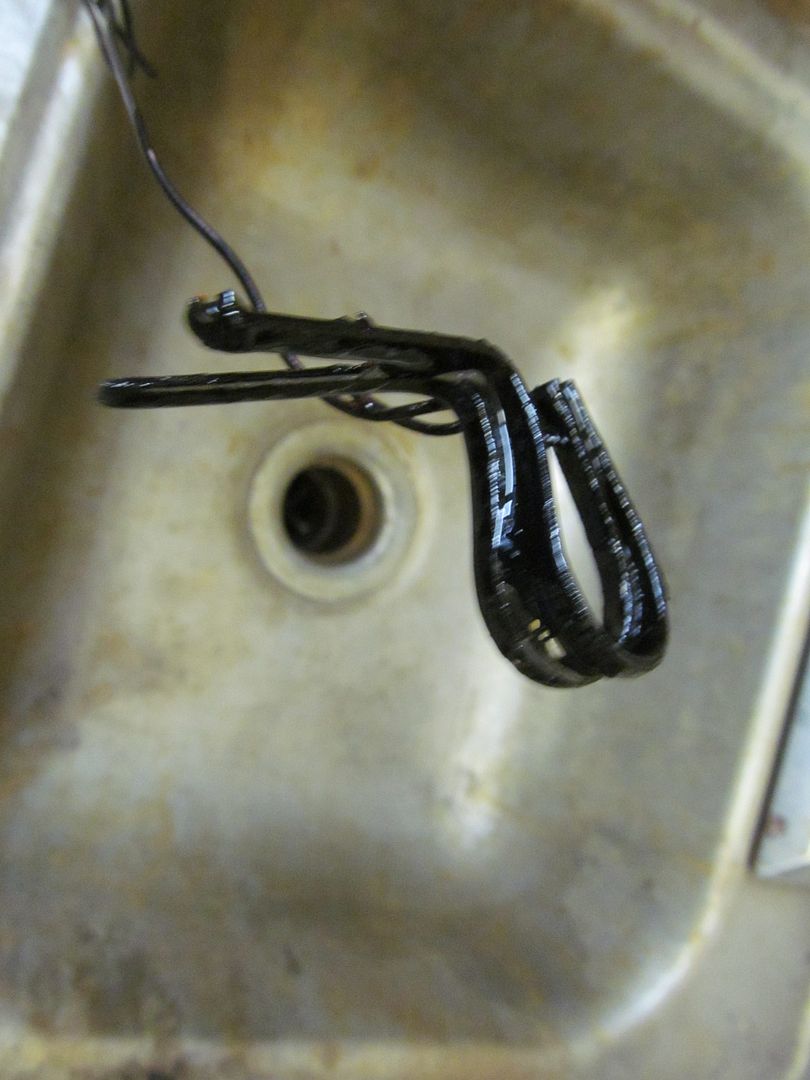
After tempering the hardness did indeed drop to a tad over 51, a nice snappy "spring temper". I could hardly push the gates open so they required thinning and shaping with the grinder and dremel until they could be opened comfortably with the thumb. Next the gares will get a "thumb rest" welded onto each one. The other end will be cut off and ground flush.
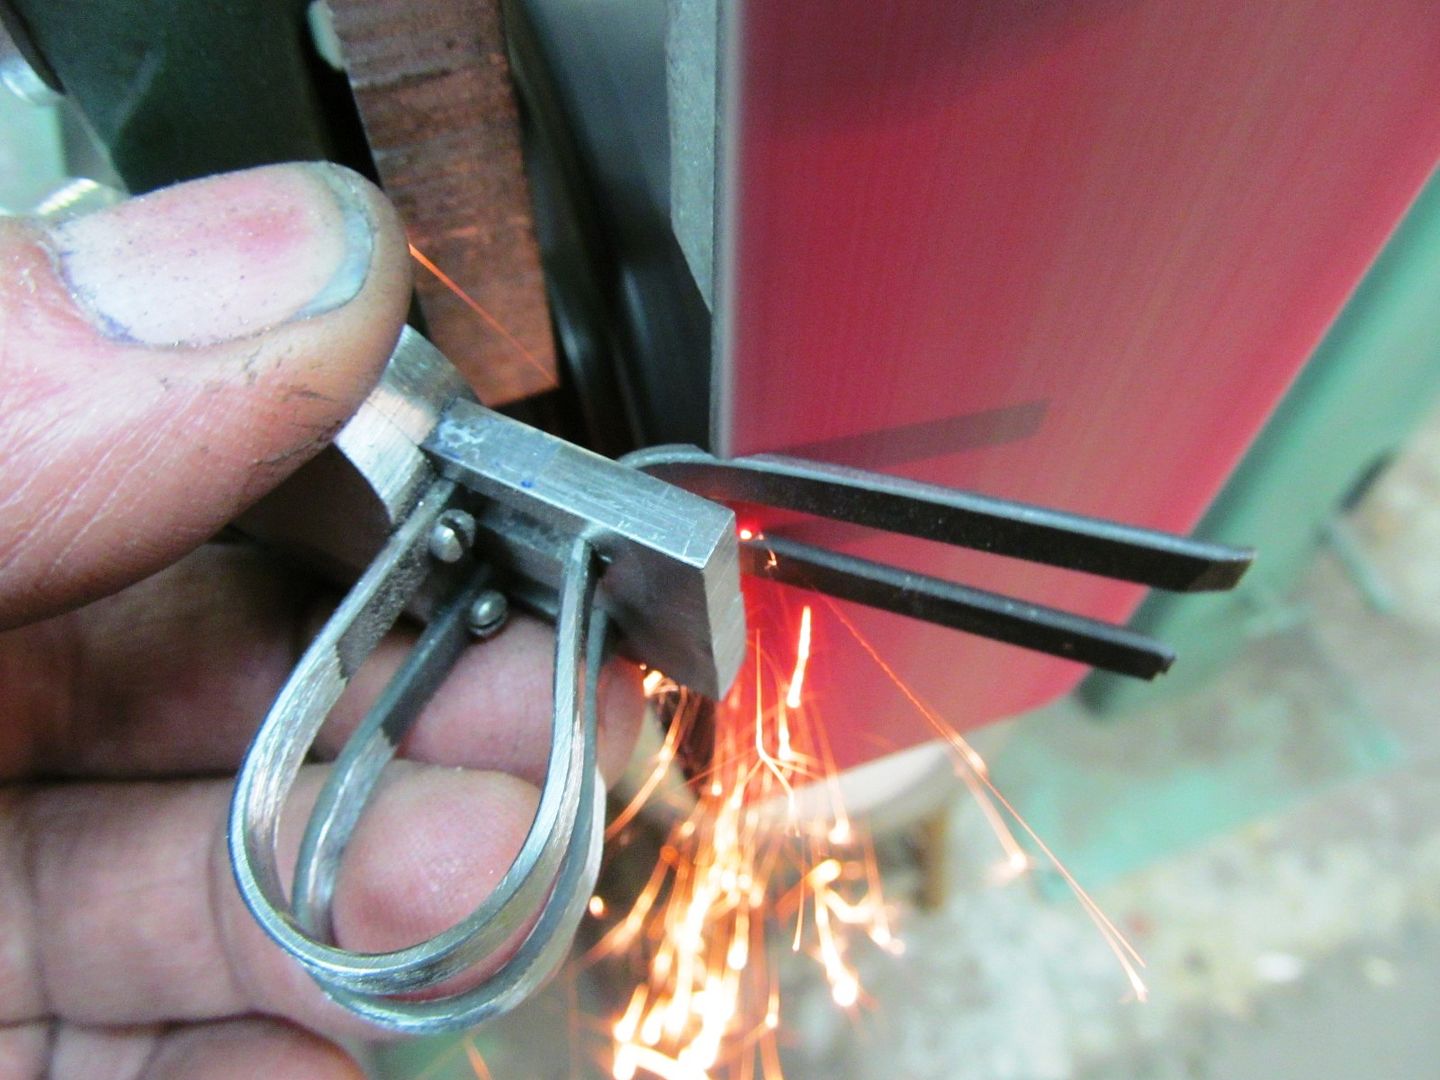
After tempering the hardness did indeed drop to a tad over 51, a nice snappy "spring temper". I could hardly push the gates open so they required thinning and shaping with the grinder and dremel until they could be opened comfortably with the thumb. Next the gares will get a "thumb rest" welded onto each one. The other end will be cut off and ground flush.
Last edited:
cnccutter
Well-Known Member
Bruce, you are a true artisan. watching you work only gives me hope i might get a fraction of your talent into one of my knives.
when you start a project, how far out do you have it designed / planed? do you just have a mental concept with a few sketches and work through it as you go, or have it all drawn and set?
Erik
when you start a project, how far out do you have it designed / planed? do you just have a mental concept with a few sketches and work through it as you go, or have it all drawn and set?
Erik
Bruce Bump
Forum Owner-Moderator
Erik, Thanks for the compliments
I do start with with a drawing so I can at least show my idea to my collector but more often than not the final project isn't just like it. I figure things out as I go as I,m not a CNC guy. I can usually hold my own with a pencil but if I knew CAD some of the mechanisms would be easier to make. Sometimes I work a couple days on a part and give up and head a different direction. Its not shown in these pictures but this is the second top plate on the flask. I drilled the first one way off center. It's all good experience and has taught me what not to do on the next gunknife.
I do start with with a drawing so I can at least show my idea to my collector but more often than not the final project isn't just like it. I figure things out as I go as I,m not a CNC guy. I can usually hold my own with a pencil but if I knew CAD some of the mechanisms would be easier to make. Sometimes I work a couple days on a part and give up and head a different direction. Its not shown in these pictures but this is the second top plate on the flask. I drilled the first one way off center. It's all good experience and has taught me what not to do on the next gunknife.
Last edited:
rhinoknives
Well-Known Member
Bruce,
Great looking nipples! Even if one of your nipples is bigger than the other! :biggrin:
Turning those really kept the class level all out here instead of store bought ones
I cast a vote for some file work and jewelling on those two gates! Do you have a pattern for some Dragons teeth or something else that is Dragoonish?
I know, you will be working on this flask for about a month at this rate. It's worth every minute.
Some collector will just have to have this fine work of art!
Laurence
www.rhinoknives.com
cnccutter
Well-Known Member
thanks Bruce. i know we all solve and work problems from different directions.
i don't think cad is a solve all solution. I use it for some things but when working on an idea i do better with a pencil and paper that i can quickly expand on or discard solutions to an idea. i also find the quicker pace can send you in directions you might not have imagined with cad.
Erik
i don't think cad is a solve all solution. I use it for some things but when working on an idea i do better with a pencil and paper that i can quickly expand on or discard solutions to an idea. i also find the quicker pace can send you in directions you might not have imagined with cad.
Erik