First Framelock WIP

Justin Presson

Well-Known Member
I was going to wait until I finished before I tried to do a WIP but I got to thinking I might need help along the way and some more experienced makers might be able to stop me from making mistakes and give me tips to help out in my build or anyone else that might read this....or just sit back and watch the train wreck
I in know way know what I am doing so I likely will do things wrong, out of order or anything in between. I have looked over a bunch of tutorials, wip and read Bob Terzuola's tactical folder for the most part as well as got alot of good advice on here.
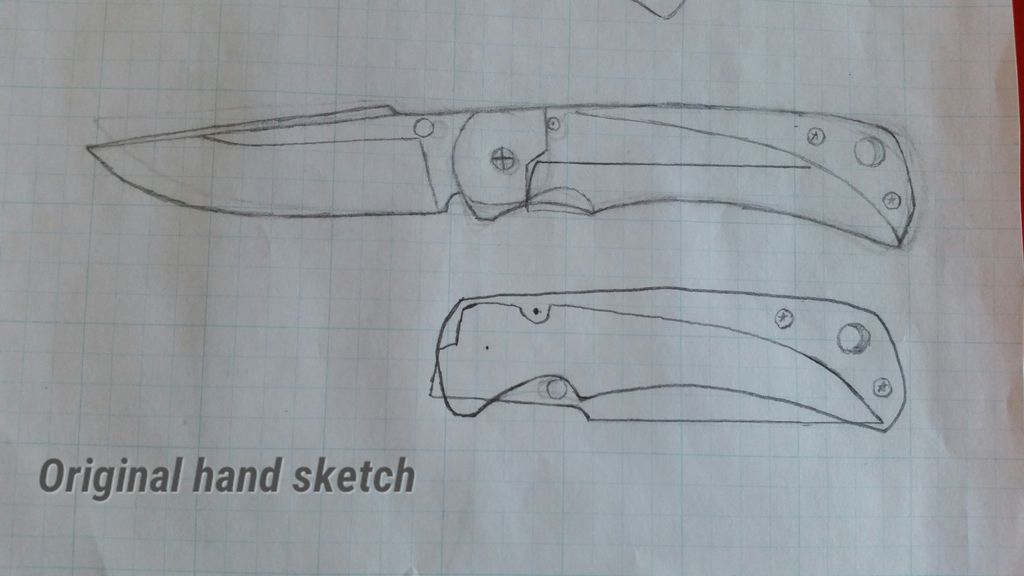
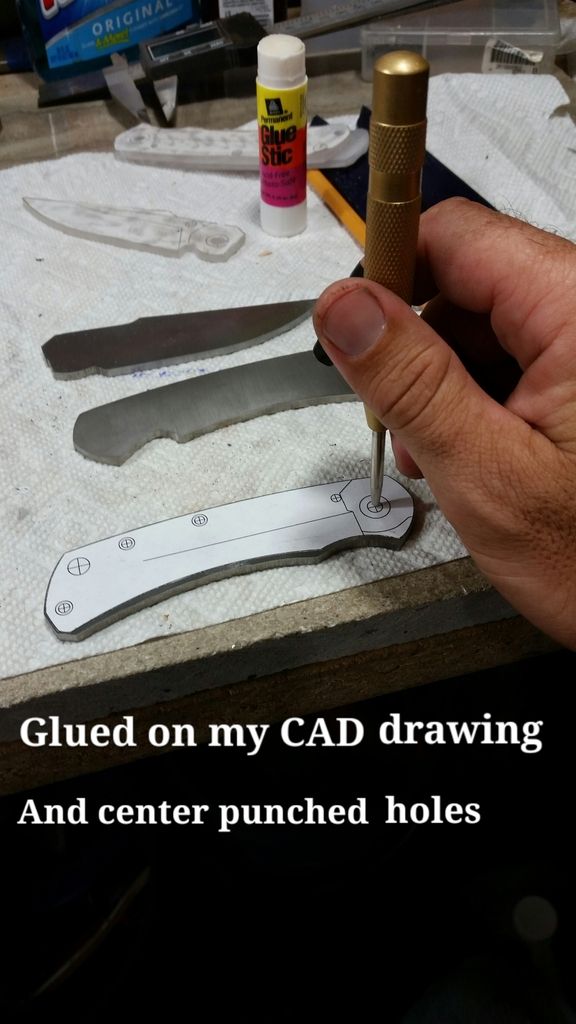
I started off with a hand sketch then transfered it over into auto cad and tweaked it until it all seemed to work.

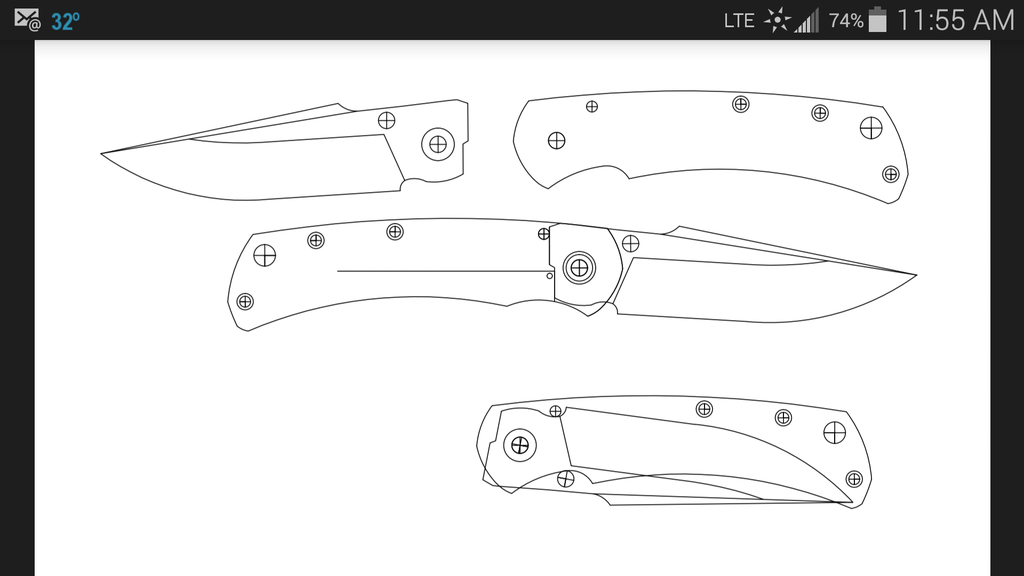
This is it mocked up in auto cad but I made changes and I can't find that file on my phone at the moment but you get the idea.

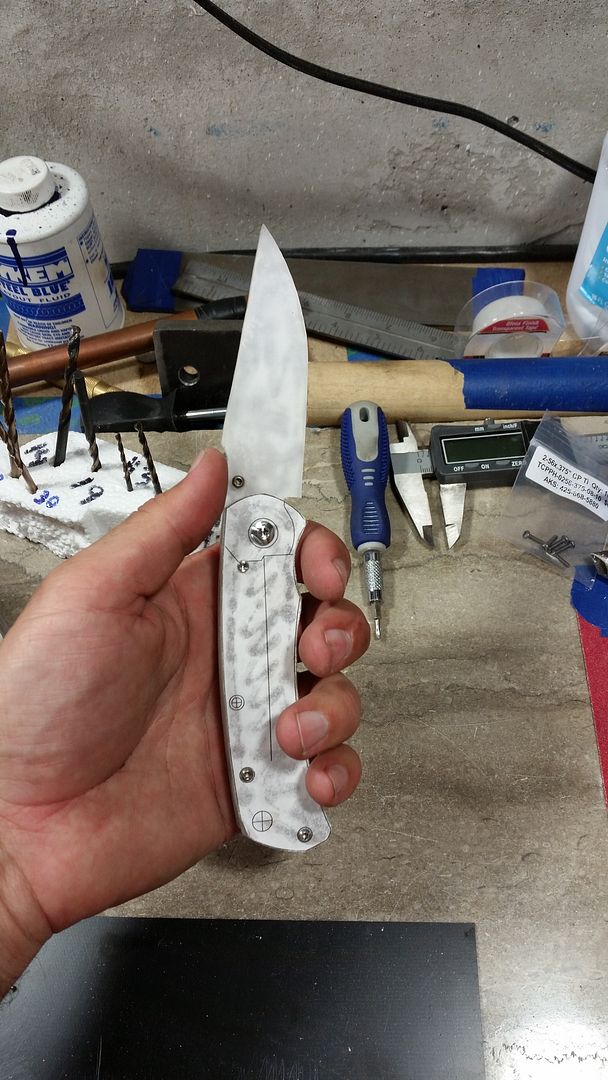
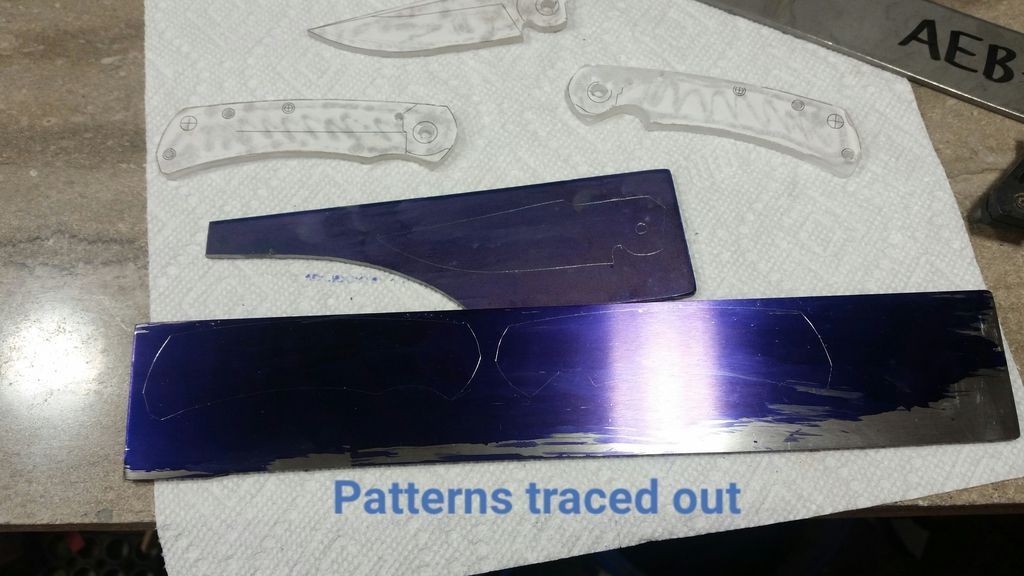
I transferred it to plexiglass to make a working template.
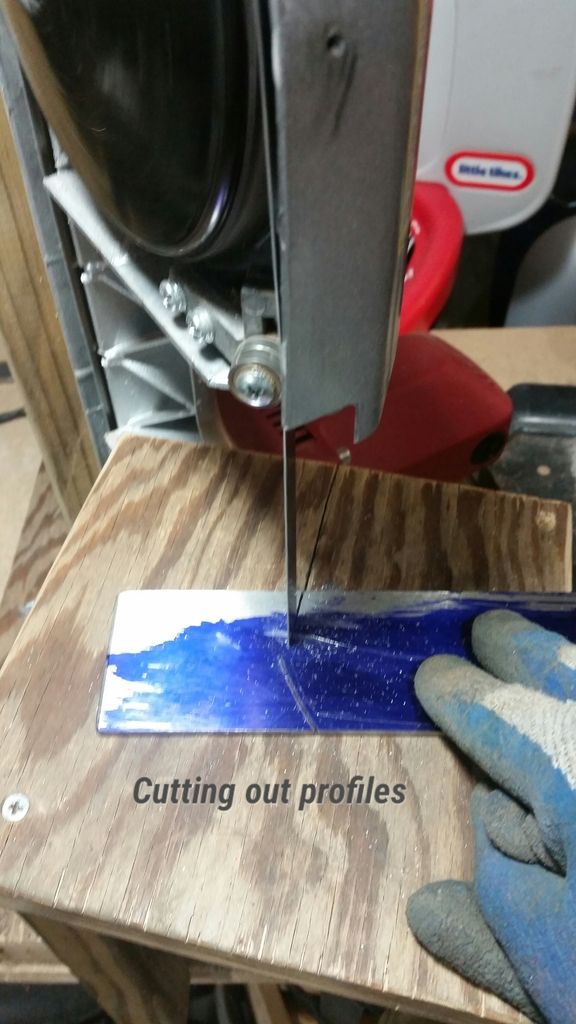
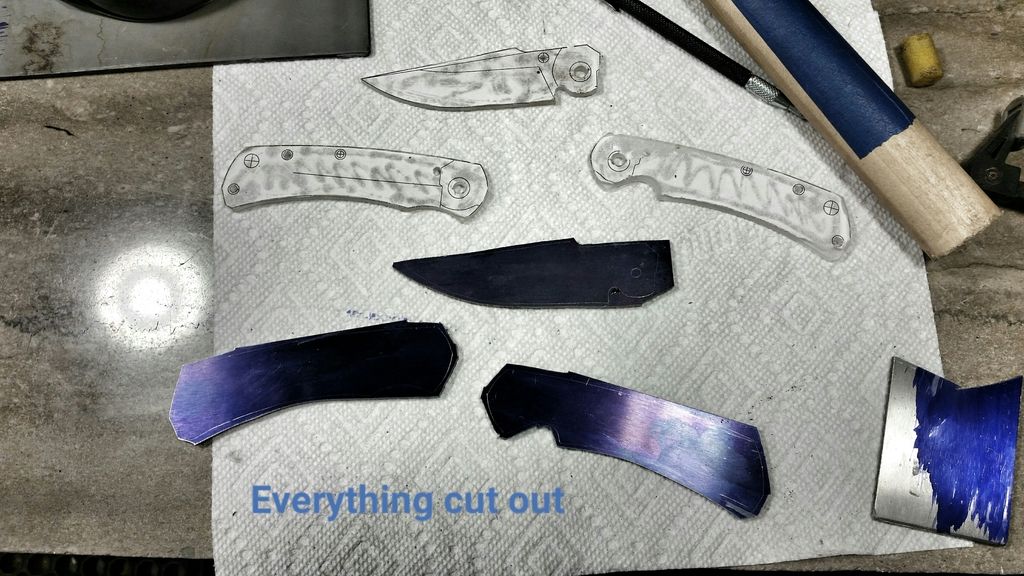
Then cut it out and proceeded to do all the steps to make a real one to get an idea of how it would look and feel.

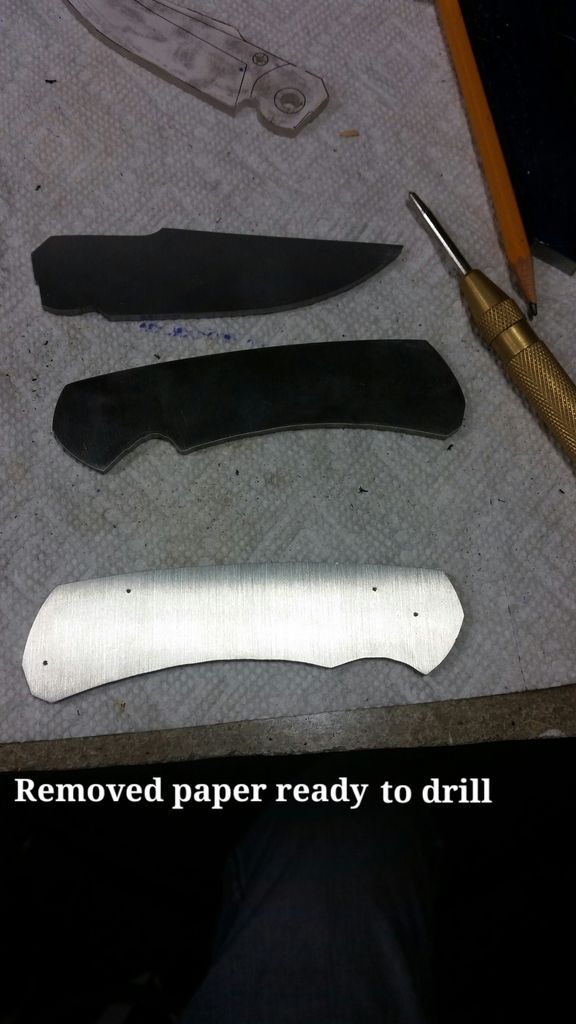
I started making notes on the photos as I took them to try and keep everything straight plus I knew it would makes me slow down I don't want to rush.

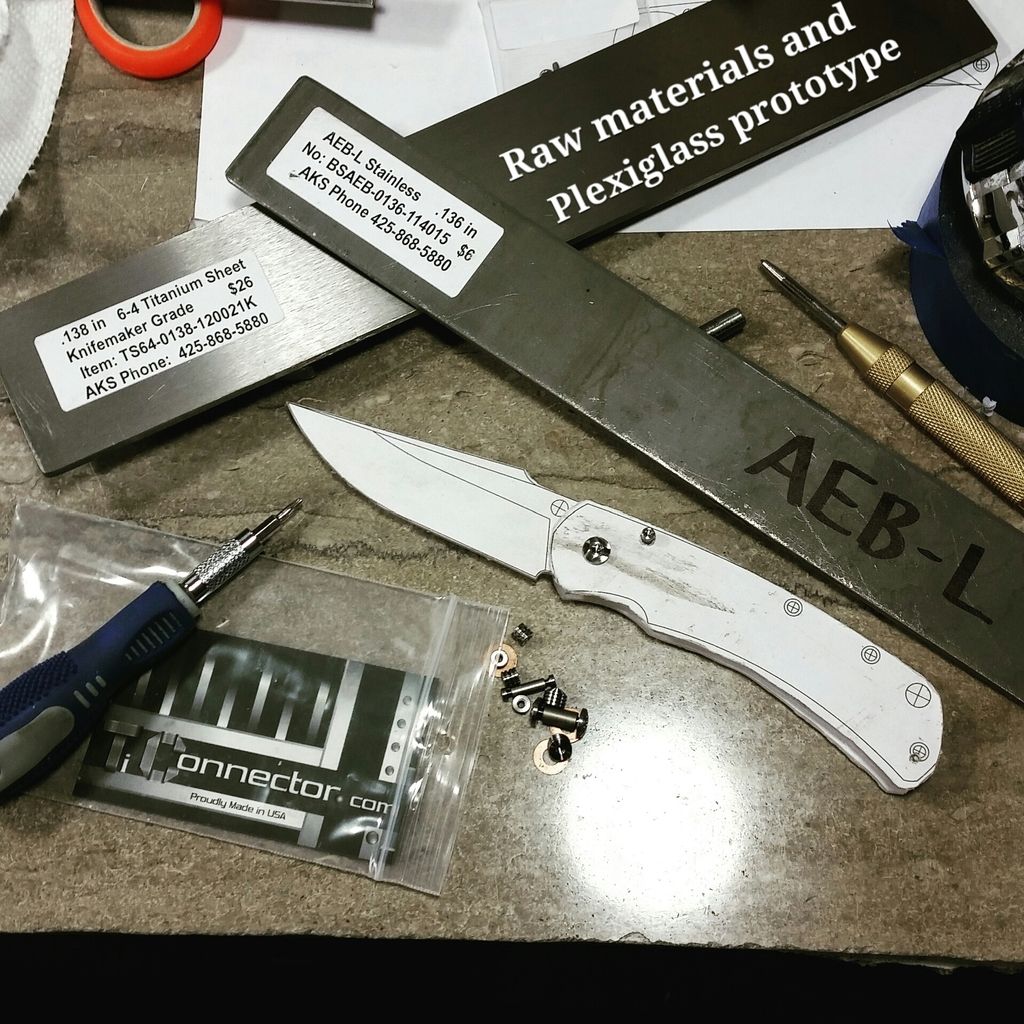
I tried to do what Ed said in a post I read and build the design and specs around my hardware to help minimize me having to modify the hardware and such.


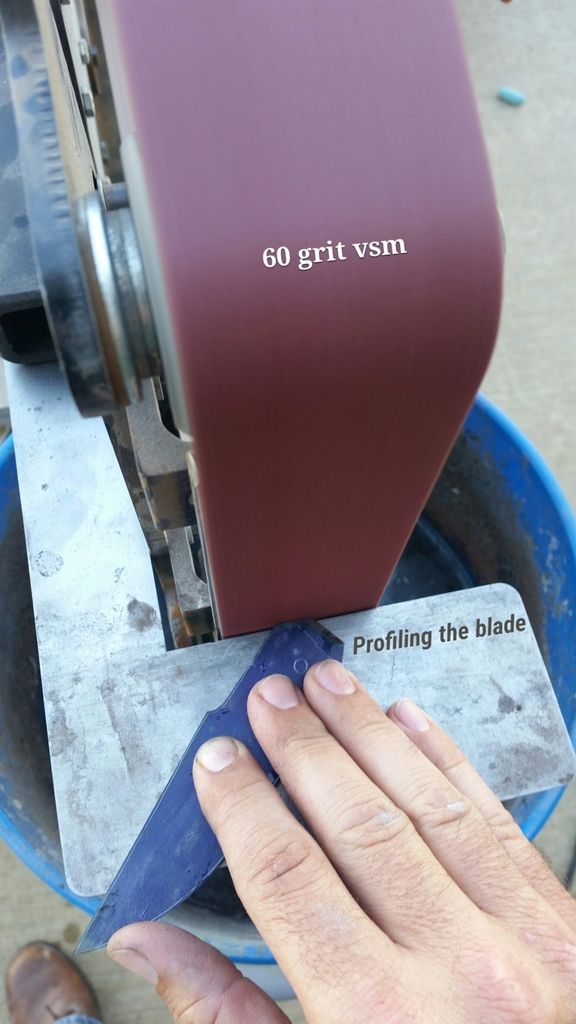
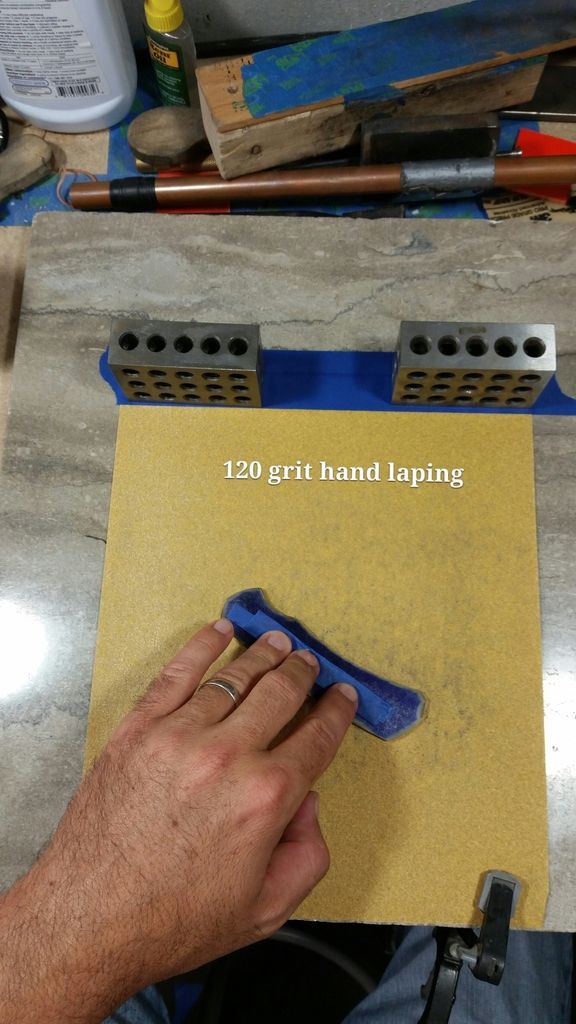
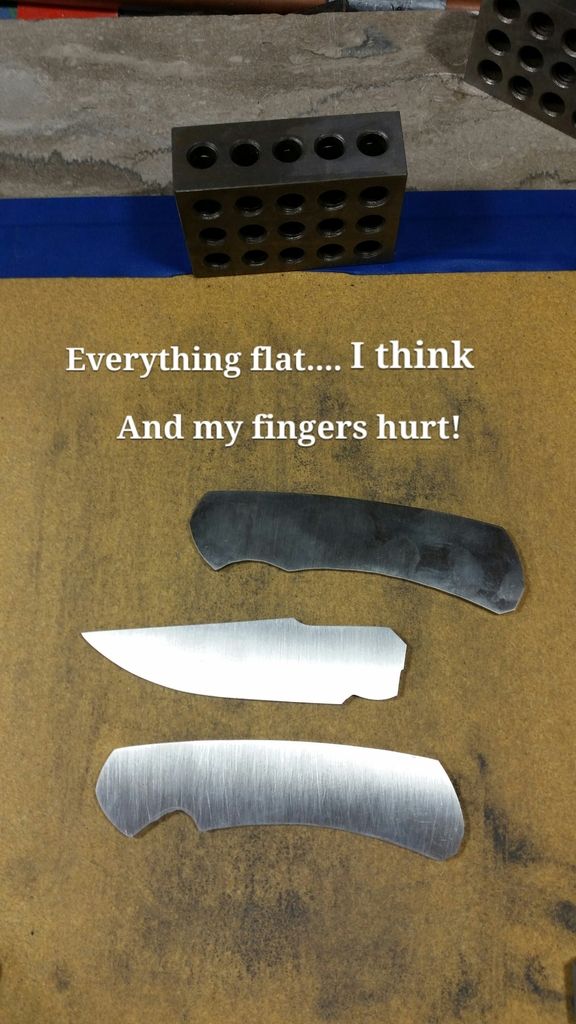
I went to 120 grit next and cleaned up the blade and titanium scales but left my self a little extra on the tang of the blade but not enough as you will find out...doh!
It was time to make it all flat.


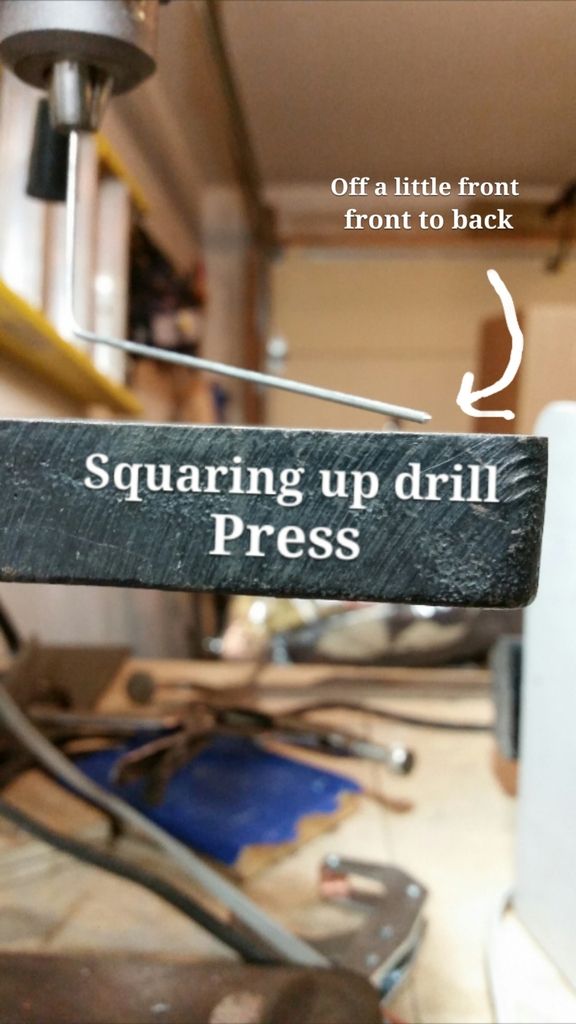
I don't have a mill or anything so I attempted to square up my drill press the best I could.


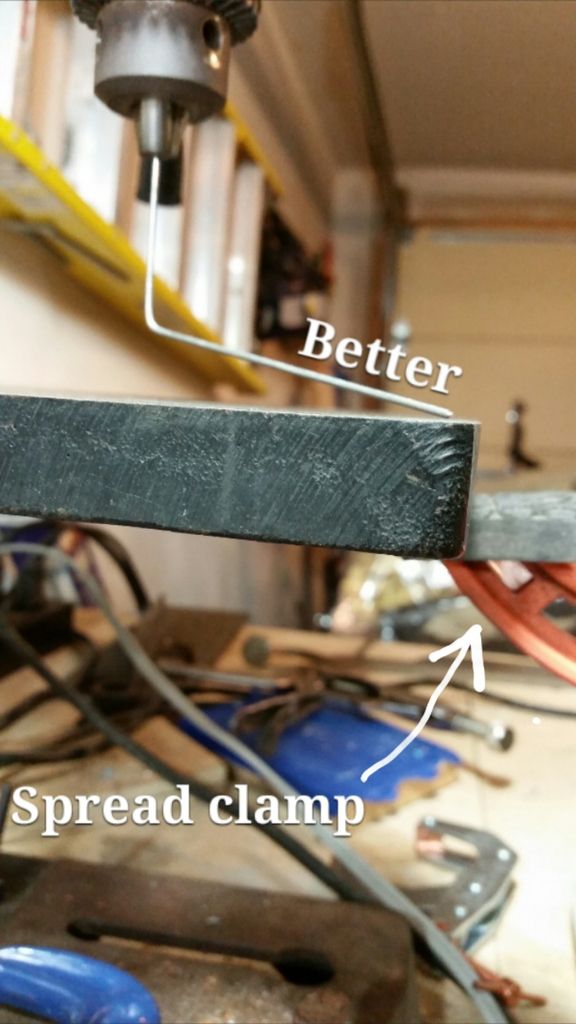
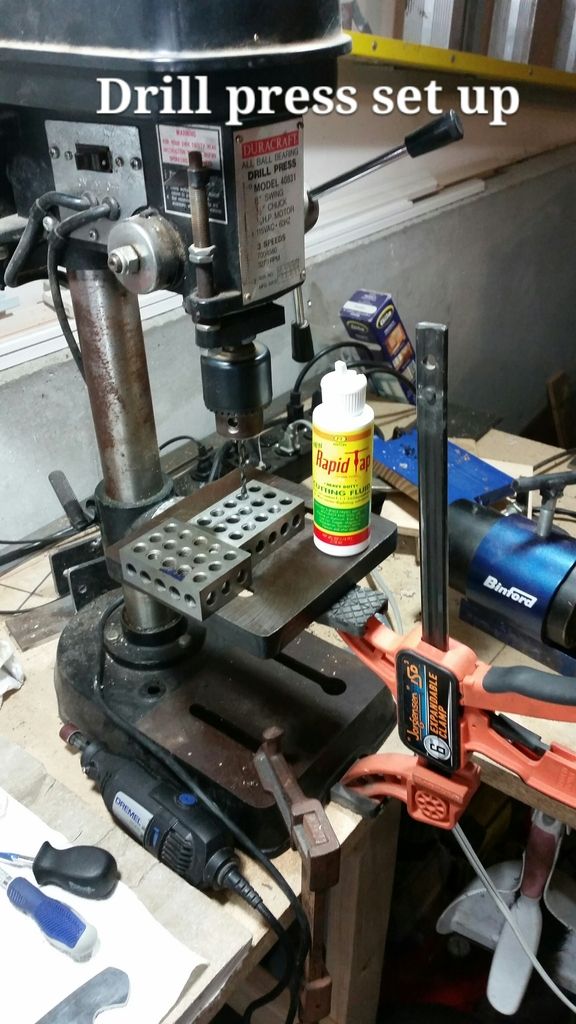
As you can see I had to use that spread clamp to make it true front to back not sure how else to adjust it. It seemed to work ok.


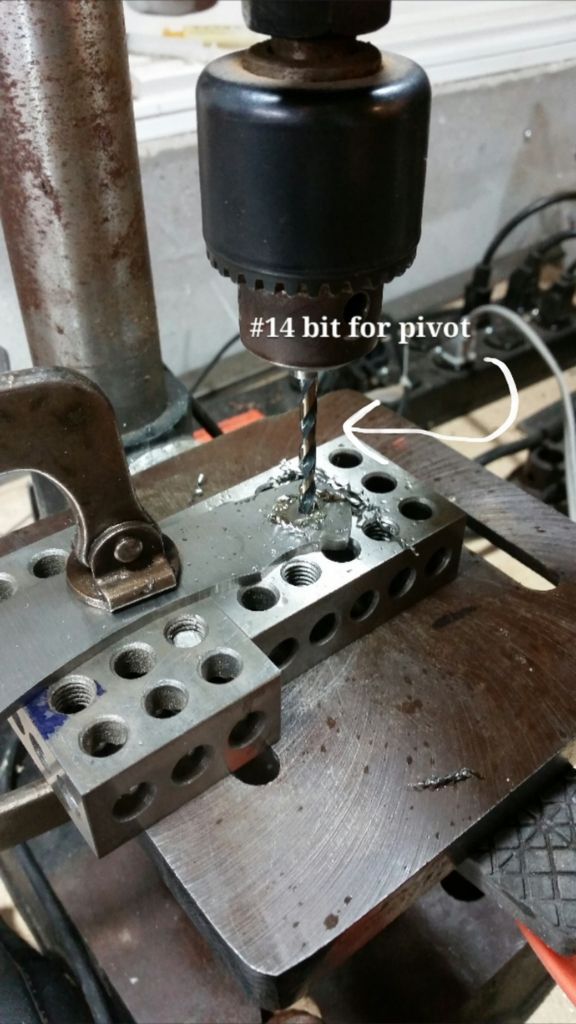
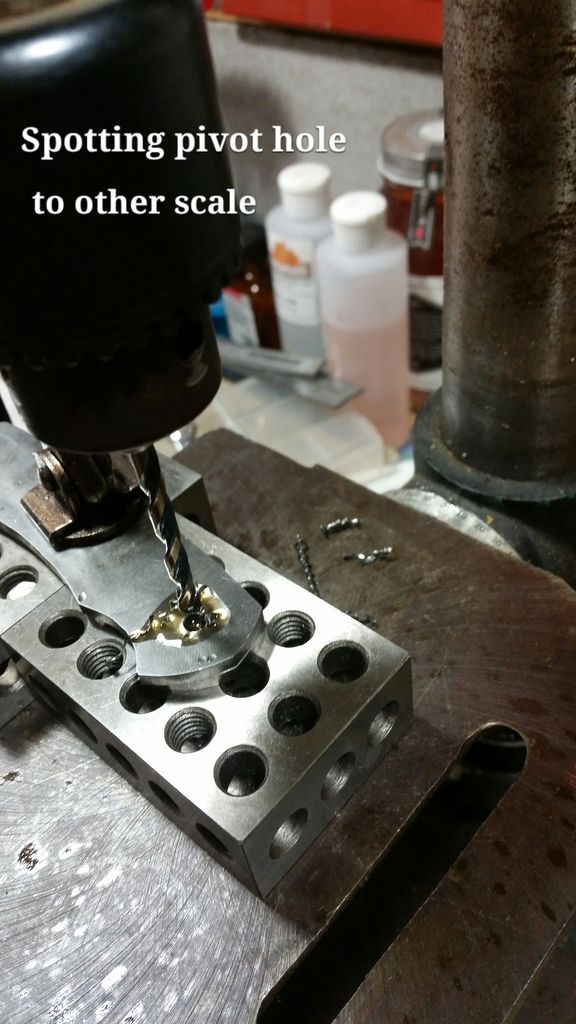
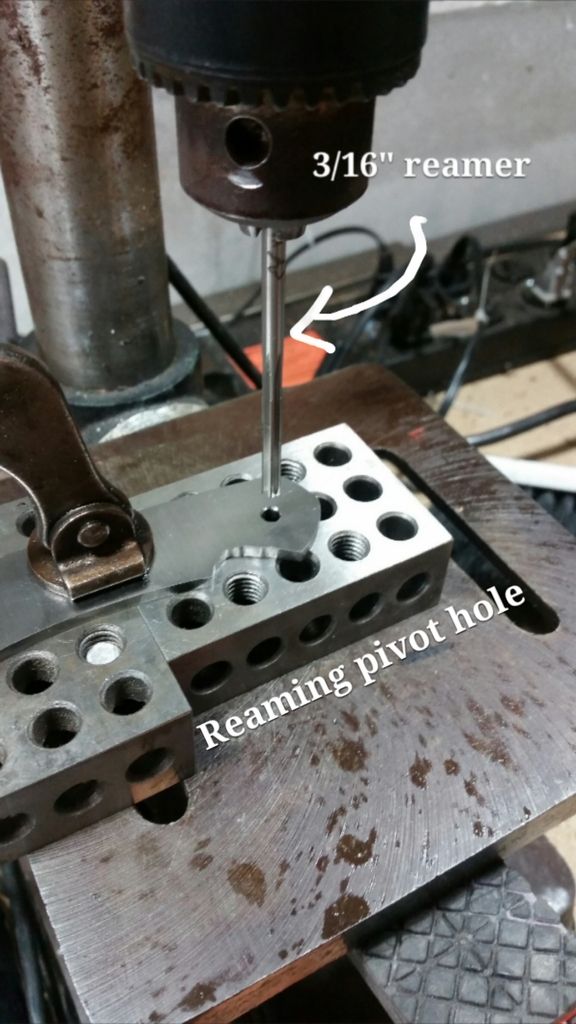
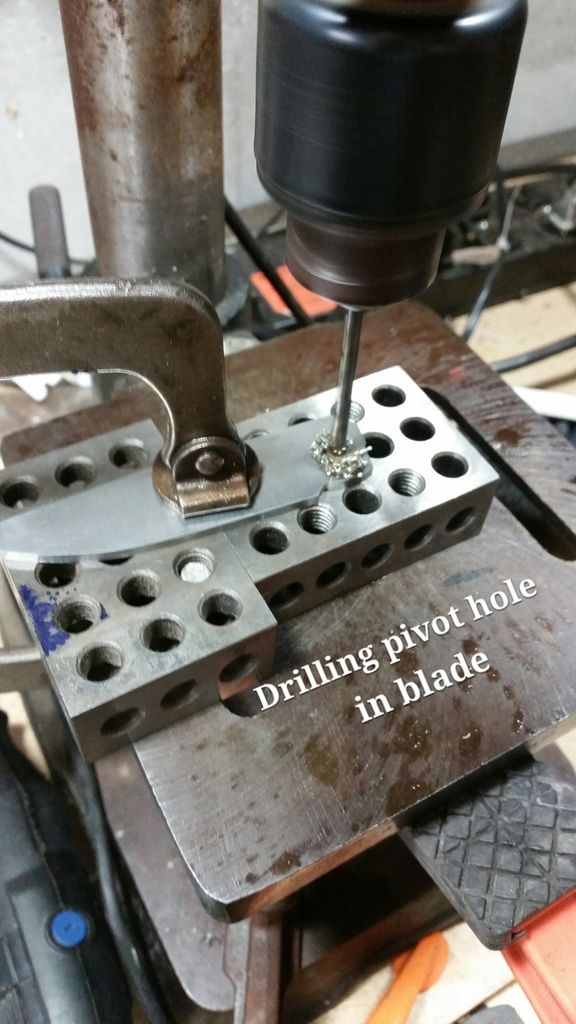
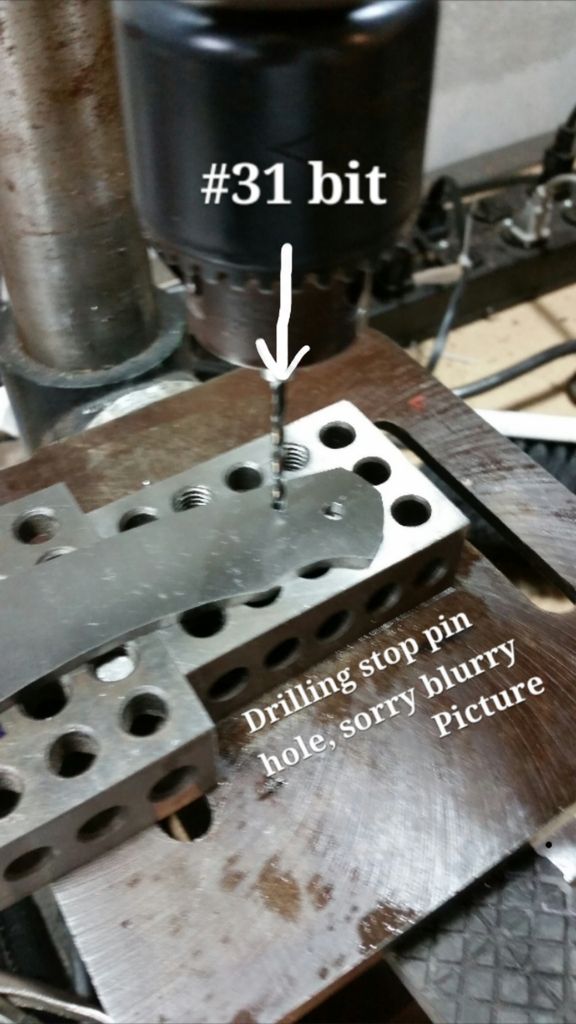
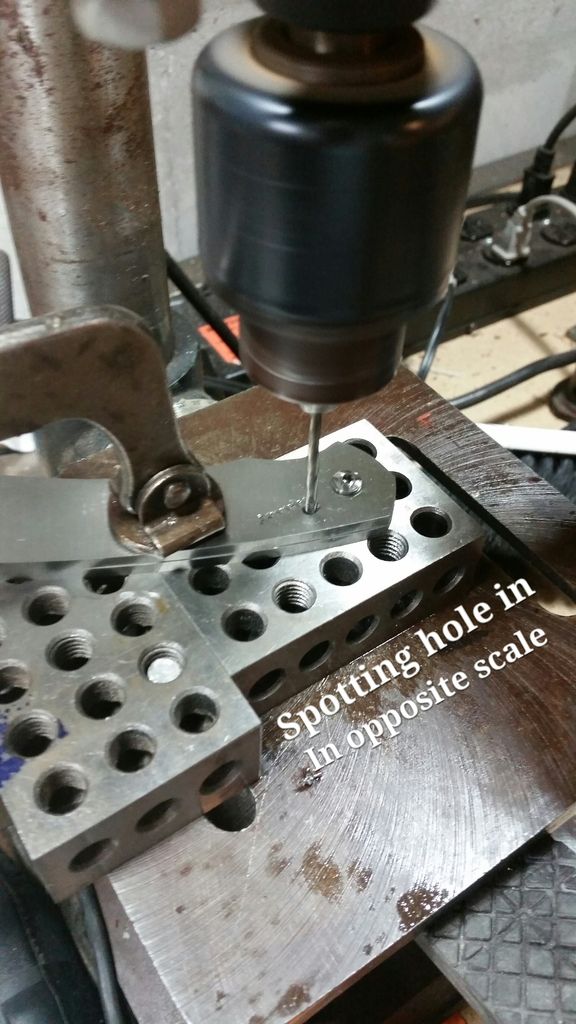
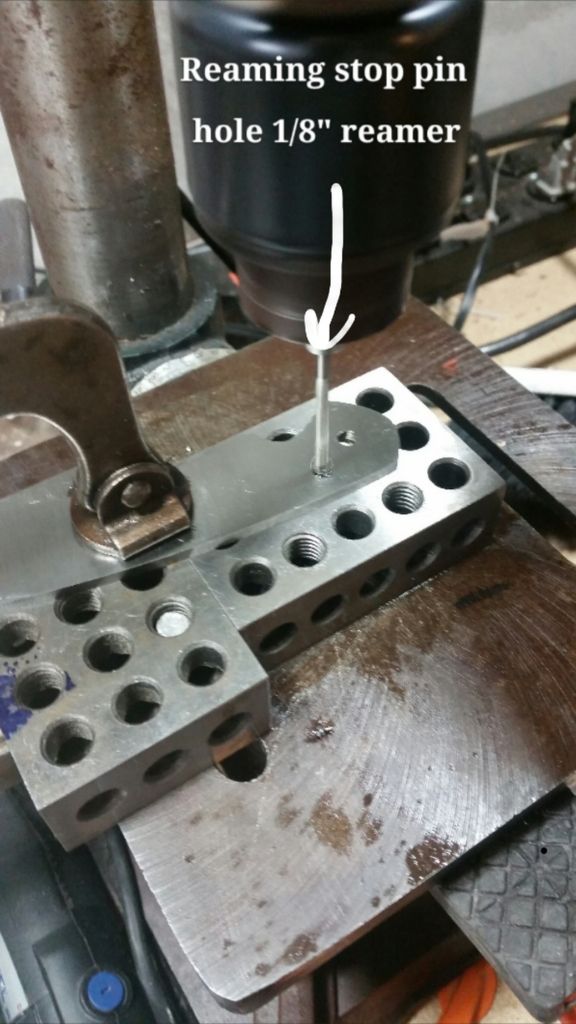
I drilled out the other scale picot hole and then reamed both.


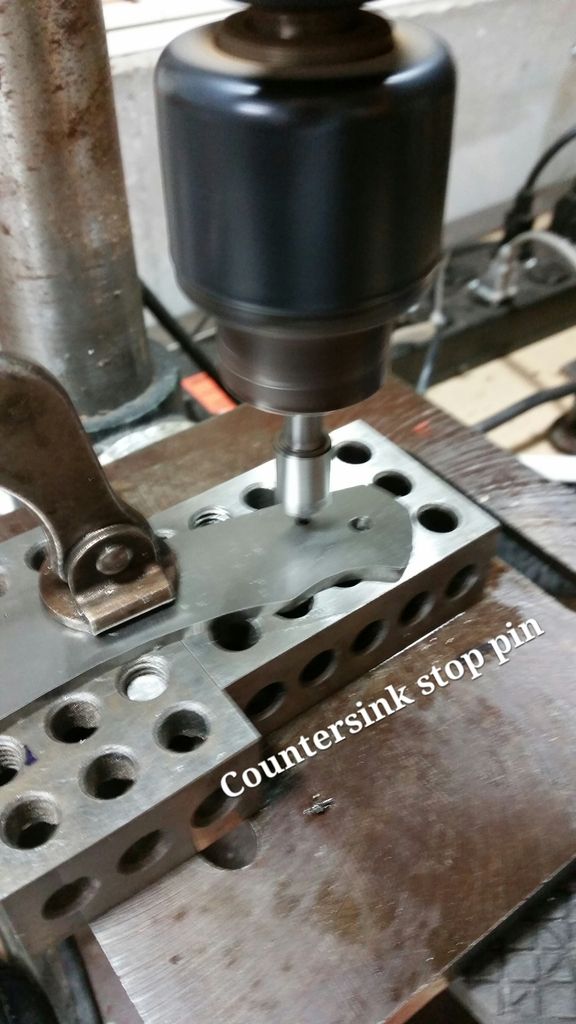
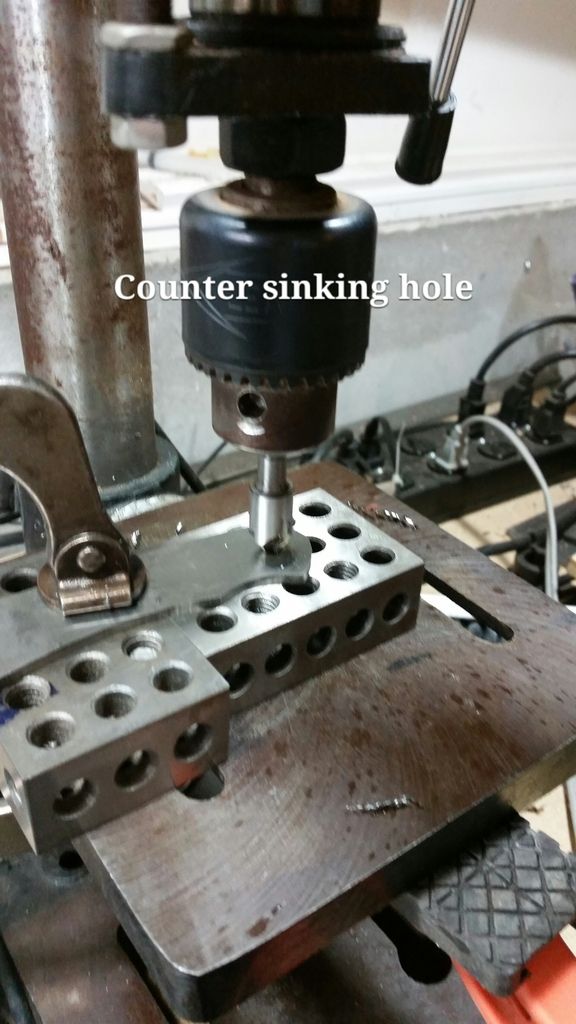
I just countersunk all the holes just enough to remove the burrs.


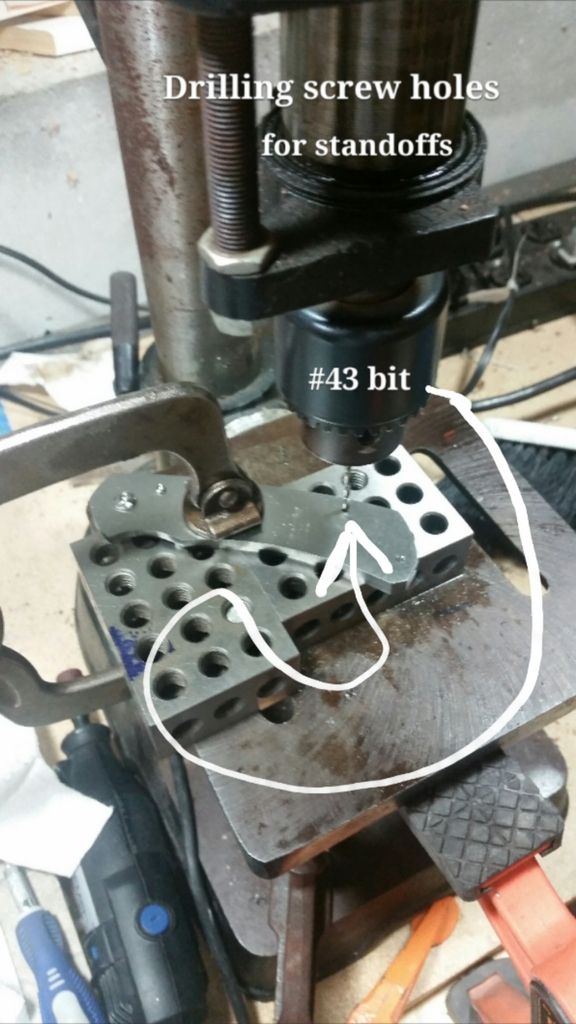
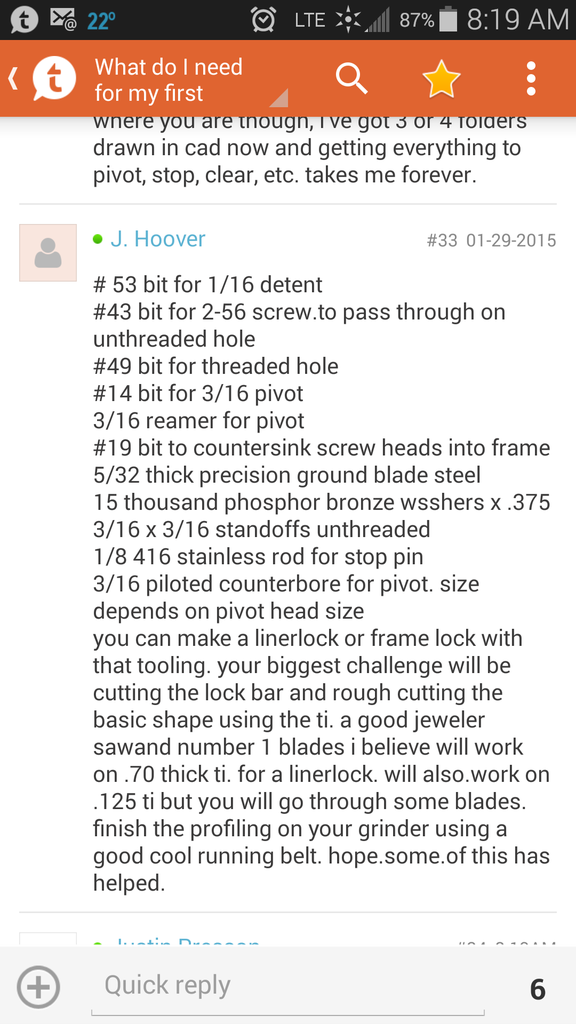
This would be a good time to thank J. Hoover for replying to a thread I made about what all bits I needed and sizes to drill and ream this stuff.
I took a screen shot on my phone to reference now and again.
 
After all the holes where drilled the big moment came to put it together and see if everything lines up. Wohoo it did!!

Next I needed to cut into my blade the slot for the stop pin to it so the blade would close.

I was going back and forth between the file and lightly cleaning up on grinder.


Once I got it to close I realized I took off a little to much of the scale on one side. I thought I left enough on both so I could screw the to together after I drilled all the holes to finish matching my profile up.

But that's ok if that shows a little I can live with it. It's my prototype.
That's as far as I got so far. I will try to update this as I work on it.

Thanks for looking and please feel free to chime in and tell me if I'm going about something wrong, could be doing better or anything that might help me or someone else in the future.
 
Last edited:
Oh oh, Justin! You're heading down a dangerous road making folders you know. I'm afraid that you're about to hit the point of no return where the addiction begins to set in. Joking aside, it looks like you're well on your way to a great piece. Your design looks solid, just keep thinking things through as you go. It's really easy to put the cart before the horse, so to speak, and not get everything done in proper sequence. Keep taking thing slow like you already mentioned and you'll do just fine. I'll be watching your progress with great interest.
 
Oh oh, Justin! You're heading down a dangerous road making folders you know. I'm afraid that you're about to hit the point of no return where the addiction begins to set in. Joking aside, it looks like you're well on your way to a great piece. Your design looks solid, just keep thinking things through as you go. It's really easy to put the cart before the horse, so to speak, and not get everything done in proper sequence. Keep taking thing slow like you already mentioned and you'll do just fine. I'll be watching your progress with great interest.
Thanks man, I know it's probably either going to be I love them or hate them or both..lol :)
 
I have a question for guys who have made framelocks before. Do you grind in the lock angle on the blade tang before or after heat treat? Seems I have seen it done both ways but not sure what is prefered.
I plan to work on if after I get off work today so hopefully more pics tonight.
 
I grind the lock face on the tang after heat treat. You're not taking off very much material and you can polish it up nicely before setting the lock bar. Just a quick word of advice, cut your lock bar a little on the long side. It's much easier to take a little bit off when fitting the lock to the blade tang than it is to add it on. Don't ask me how I know or how many times I've had this problem :p. Good luck with the build.
 
Well I didn't get much done after work but here it is.
This is the counterbore and pilot I used to recess the pivot screw heads.
When I called and got the hardware from Steven Kelly he gave me all the info I needed on counterbores which was awesome and gave me advice on working the Ti, nice guy.
He said to run you're mill around 350 rpms if I remember right when counterboreing ti since I just have the ol Craftsman drill press I put it on the lowest it would go which is like 560 rpm and used a tapping type feed and lubed the crap out of it with taping fluid!


Thanks for those last pics Justin, I've been kind of stumped on what's the best way to make that pivot pocket. A few days ago, John was talking about counterbore and pilots and such, but I wasn't sure what he was talking about. I see you know all about it now. Did you order a pivot that had a 1/4" O.D. or did you have to tweak it to fit? I was looking at Enco's selection and they don't have a whole lot of options on counterbore sizes. Some pivots come in strange sizes, just wondering.
 
Last edited:
The pivots I got have a head diameter of .307" and like on Steven Kelly's website it says they fit nicely inside a 5/16" (.312) counter bore, which is what I used. The barrels are 3/16" so I got the 3/16" pilot that fits inside the 5/16" counter bore and those little boogers are expensive but it did a good job.
 
Again just a short update. Sometimes I can only work in short spurts.

Trying to get the ti handles all down to size and even.


Didn't get the stud drilled, still need to counter sink my stop pin heads and my standoff screws...which can any one tell me if I can just use a larger drill bit to make my counterbore hole for them or do they need a flat bottom hole like I did for my pivot?
 
Since you're working with minimal tools....
I'd zero the hole with the last drill bit used, then switch out to an endmill for whatever size bore you need. Endmills are cheeper than counterbores. Use your depth stop on the drill press too. Looking good so far.


Rudy
 
Justin, you've motivated me. I ordered a couple counterbores today from Enco. I ordered a 5/16" and a 3/8" with 2 size pilots too. Actually, they ran a one day special today, 20% off and free shipping, no minimums in case you need anything. Offer codes "cyber" and "Monday" good til midnight tonight.
 
Since you're working with minimal tools....
I'd zero the hole with the last drill bit used, then switch out to an endmill for whatever size bore you need. Endmills are cheeper than counterbores. Use your depth stop on the drill press too. Looking good so far.


Rudy
Thanks for the tip Rudy!
 
Justin, you've motivated me. I ordered a couple counterbores today from Enco. I ordered a 5/16" and a 3/8" with 2 size pilots too. Actually, they ran a one day special today, 20% off and free shipping, no minimums in case you need anything. Offer codes "cyber" and "Monday" good til midnight tonight.
Good deal, dang it I wish I would have read this last night!
 
Back
Top