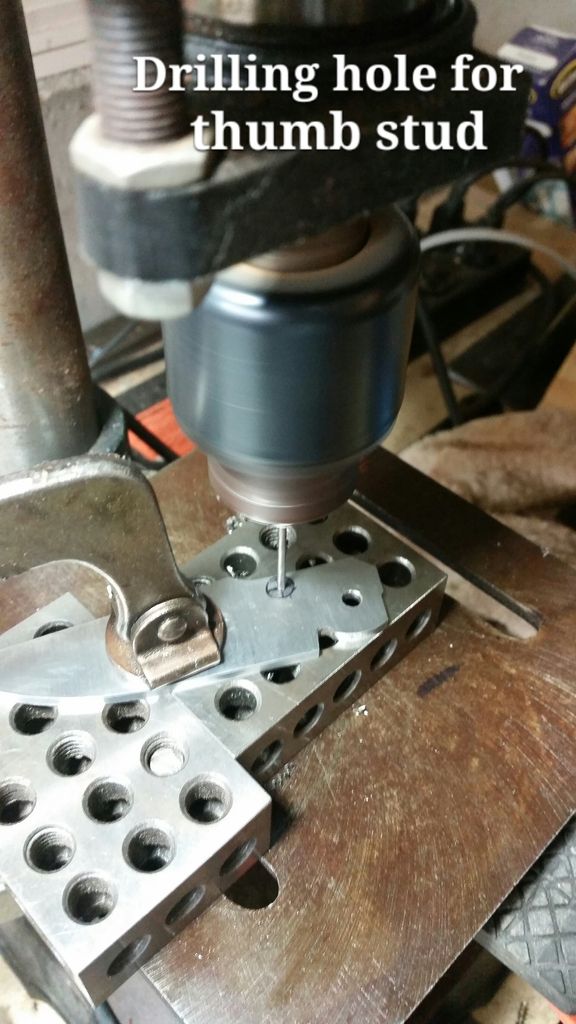
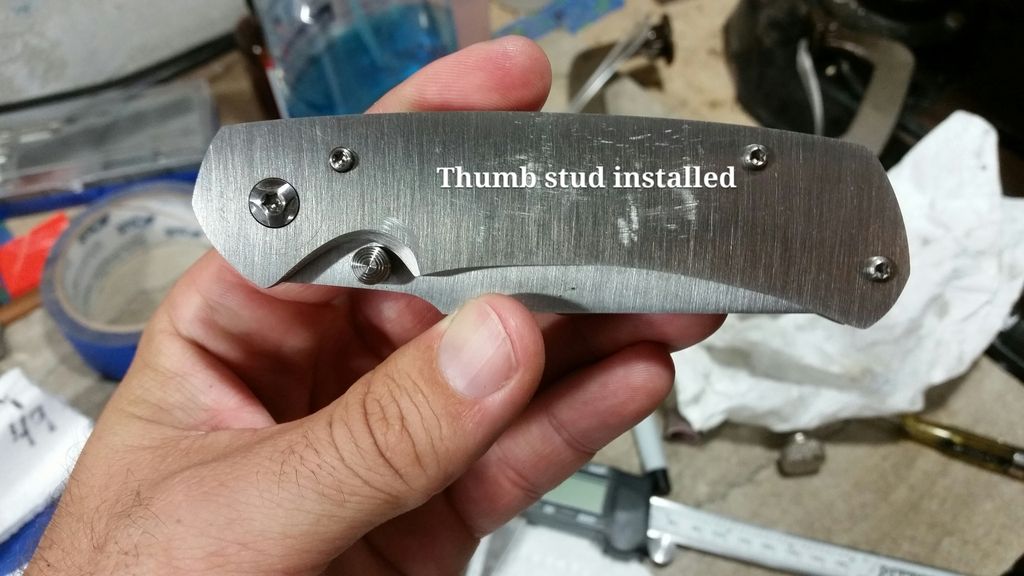
First Framelock WIP


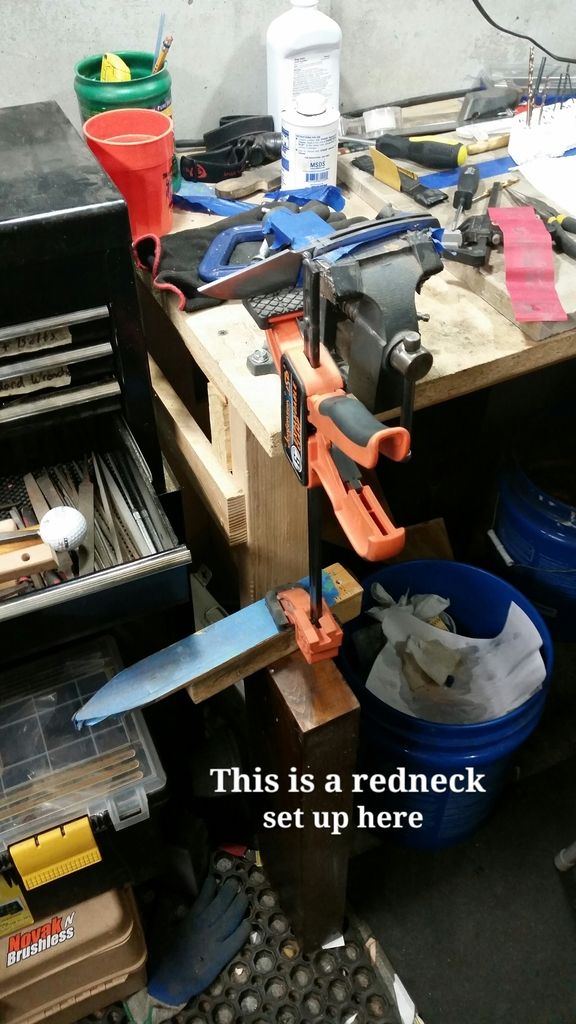
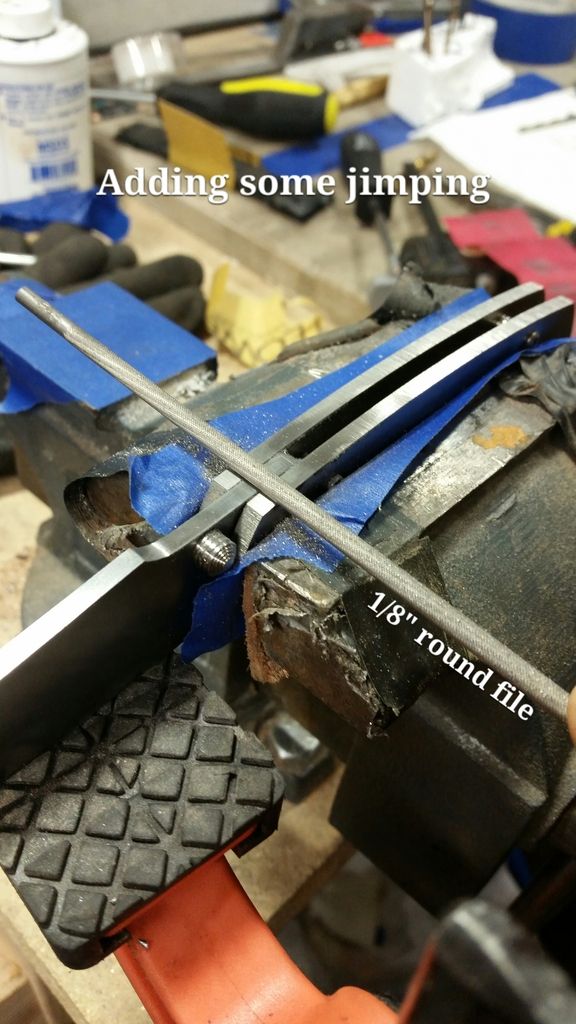
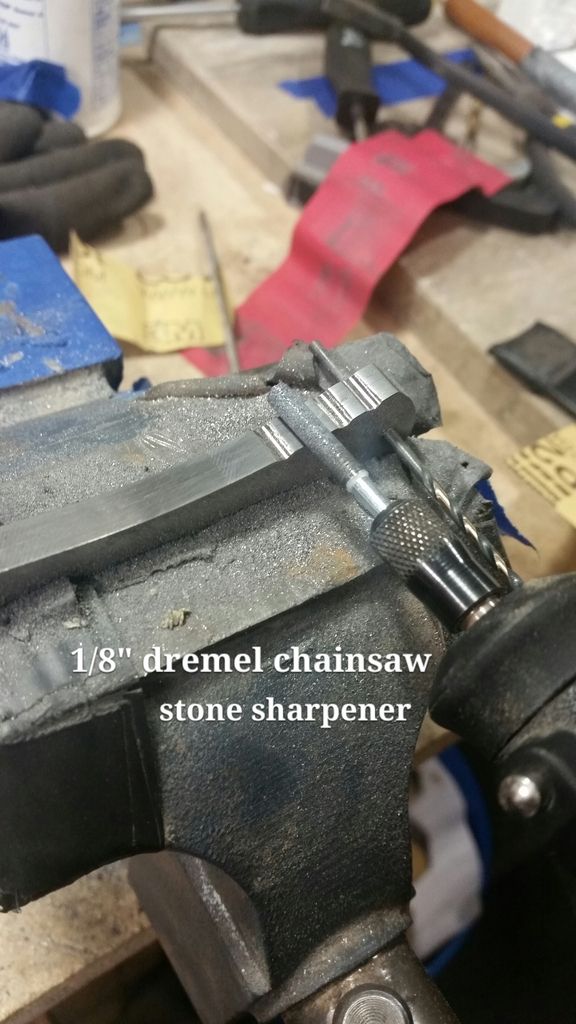
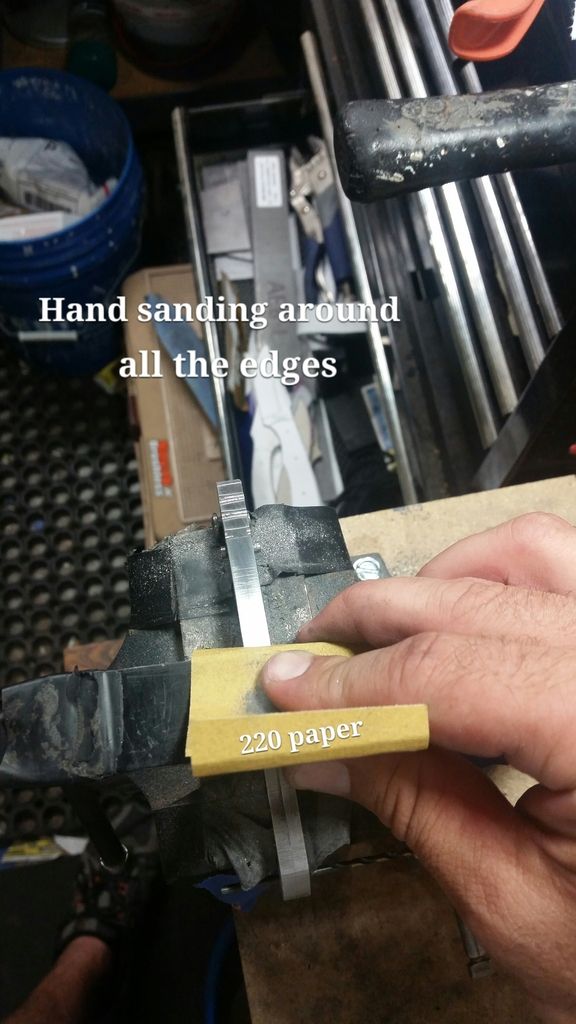
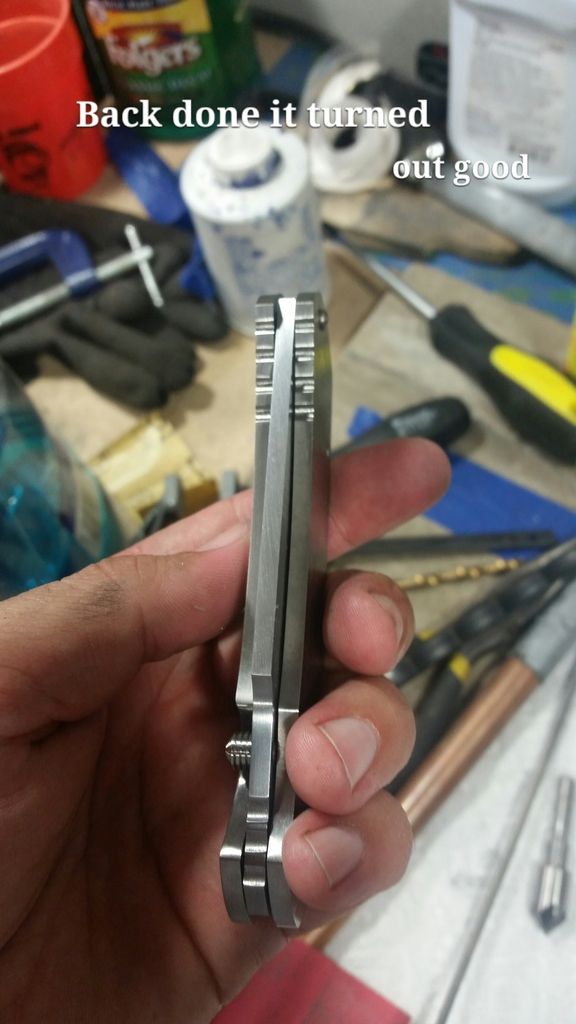
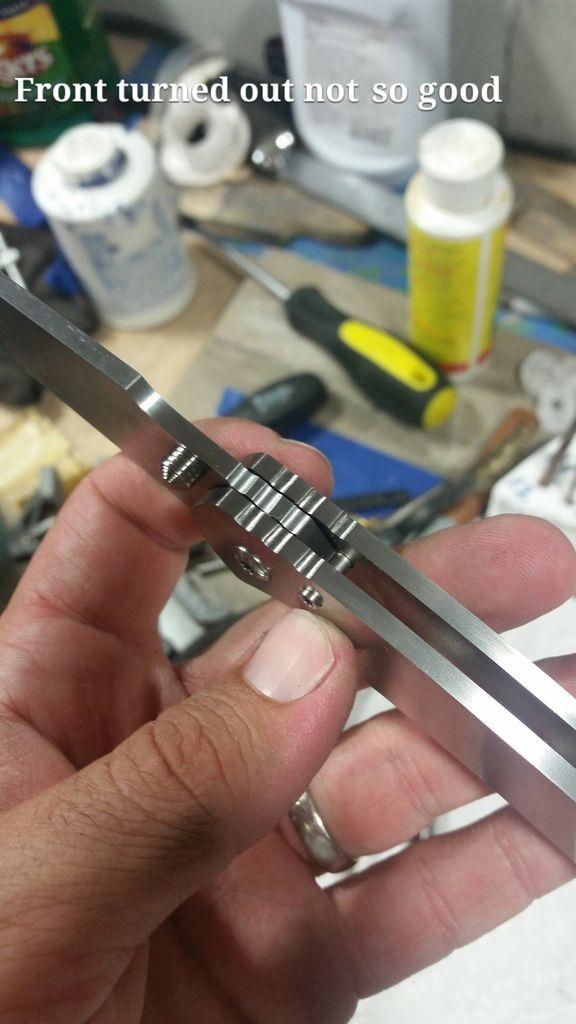
Was not sure how to hold the blade open while I filed in some jimping or whatever ya call it. I wanted to do the blade and handle at the same time so it matched....as you will see it didn't turn out as good as I had wanted.


Used the dremel to smooth out the file marks.


Not as happy with the front the alignment is off...that's all for now. I need to get my counterbores for sinking the screw heads, shorten pivot and stop pin barrels a tad, cut the lock bar, pocket clip and figure out what finish I'm gonna do on the Ti. Alot left to do. The blade is pretty much finished now and ready for heat treat...I will probably hand sand it a bit on the flats but that's it. Oh wait I still have to do the detent ball.
 
Justin, I'm subscribing, but I picked up a little tip a few years
ago when doing any kind of thumb jimping, it works INCREDIBLY
BETTER, if you use a set of those magnifying visors, you will see so
much more detail in the work thats happening as its happening.
I was using it to do some fine file work, for thumb traction, it was ONLY
a little bit, but what I learned on that one knife, is the visor, and MEASURE
THE SPACING! The only thing I can think that weny wrong on the blade jimping
would be the angle you held the file and dremel, again seeing it up close makes it
so much easier, it looks so big, and when you take them off and see your work,
it really is amazing!
You're doing a great job, not having a mill or any other highly desirable equipment,
makes it a bit more of a challenge and that should make you appreciate this beautiful
knife all the more! I know I would! Keep it up, and keep the pics coming, I'm looking
forward to MORE!
Rex
 
Justin,
I have a quick question, what have you learned so far about raw materials and the best place to buy them? I don't just me the cheapest, I mean best quality for the money. I've always been curious about the right sized Ti for handles, and that looks like .138" thick? Is that correct? They look pretty thick to be liners! To me anyway, correct me on anything I'm wrong about, please and THANK YOU FOR THIS W.I.P.!!!!!!
Rex
 
Justin,
I have a quick question, what have you learned so far about raw materials and the best place to buy them? I don't just me the cheapest, I mean best quality for the money. I've always been curious about the right sized Ti for handles, and that looks like .138" thick? Is that correct? They look pretty thick to be liners! To me anyway, correct me on anything I'm wrong about, please and THANK YOU FOR THIS W.I.P.!!!!!!
Rex
I researched a lot , until I was sick of it. The titanium is .138 thick I got from alpha knife supply. Its going to be a frame lock so I wanted thick ti. They seem to have the quality ti in sizes and prices that worked good for me. The hardware was one thing I didn't know for sure what to get. I ended up getting some pivots from Steven Kelly of ticonnector.com they are not cheap close to $11 each, but they are nice and titanium, also got thumb studs, standoffs and stop pins. The blade steel I also got from alpha.
 
Man between work and the kids I have not had much time to give to this, sorry for the delays.

I set out to get my screw heads counter sunk today after work. I wanted to get it done so I can shorten my hardware.


c8c61d03715ea2bb58389db3ffee5038.jpg

c77e71a9a3d038c0813346aab731d032.jpg

I just used a number 14 bit as my counter sink, I know this is not ideal but I have not ordered the proper ones. I just went a little at a time and test fitted to get the depth I wanted.
8415e4356106309f5dafe9c7c3296061.jpg

4ba060fd3fd85f9969ee12ee83335aa9.jpg


I hope to go down into the sauna that is my garage tonight and get more done.
I also checked my washer and blade thickness as I knew it was close but needed to check. My stand offs measured .162
ff5c02e83f0067601885912db27e54c3.jpg

Notice the tape on my caliper that just screams accuracy
Not sure if I have to be dead nuts on this but I still need to take the blade to 400 grit before heat treat so seems good to me.
 
Today I tackled shortening all the hardware, pivot and stop pin.
I have no idea how you are supposed to go about doing this or if there is a proper way....if so please let me know.
Anyway here is how I did it, none of the wip or tutorials I have read ever seem to cover this.
So I wanted to make sure everything was square and true as I could.
I started with a scrap of O1 and drilled and reamed all my holes to match my hardware and pivot.
14cb249921f5d72d70d438dc25561417.jpg

Then I clamped it to a 123 block. Then I clamped a piece of angle iron to my work rest along with another 123 block checking to make sure everything was square to one another.
211e69eb09a38466938b23621929e27b.jpg

d6da9ba7f7ea19876b6eb0452cbc9dad.jpg

I just barely touched it against a 120 grit belt and kept checking fit.
3f314b755db2481a2b663416f7435e19.jpg
 
Next thing I decided to do was contour the titanium handles scales. So I put a couple drops of super glue on them and stuck them together.
I'm sure there is a better way to do this but I just free handed it on the grinder with a 120 grit belt. I had one booboo. One of the sides got away from me on the front of the handle so I had to take the other down to match it, but I think it still came out OK.
4ed0ed7245e28b7b9a9e76fc27481a7b.jpg

ea153b8df5016a0ff69c2b54ae143acd.jpg

After that I went to hand sanding the bevels I just made to clean them up and even them out.
2912d954c843f69c84aa02646cd26409.jpg

Everything cleaned up good except the inside curve I kind of jacked up and I needed to either go back to the grinder or use my dremmel with sanding drum...but it was late at night and everyone was asleep upstairs so no power tools...never wake a sleeping baby moma gets mad..lol
So here is it together.
aed0bf3972b28785a6e506520a440b8e.jpg

7e2a3d4d404976fae035258732fc0cb3.jpg

Next step will be to clean that inside curve and then I'm going to cut the lock bar, but I want that inside curve done first before I cut it so I don't have flex in the lock bar.
 
7755bc0b2f8807b58fb51a209360c68f.jpg

OK back at it for a little bit after work today. I laid out where I wanted the lock bar to be. Then I drilled some holes at the end to make a clean stop and corner.
e8accd9be8972af560b77c961ce6ef88.jpg

I used the drill press at work since it has a larger rest and to the drill press vise and clamped the frame in it. I made sure to check alignment at both ends where the dremmel cutting disk would hit. I ran the drill press at 2000 rpms. Not sure what I needed so went with that.
296eb9716e53a6ff446bac560c41fa8c.jpg

This took forever probably 30 minutes plus. I went really slow and fed it into the disk slow being sure not to flex the disk. I wanted to make sire not to rush it at this point since I have so much work into it. It left a nice clean cut and only switched disk at the very end to take out the last 1/16th of an inch I couldn't reach with the worn disk.
Here is a pic of the worn one on top of a new one.
6ea13141074e5221150607ead13b4a20.jpg


Success!!!
ea61d0951d6db977e647a92a8438e0e3.jpg

c7752ffc69f96d0104fc88d457cb9d4f.jpg


I only got the long cut done before having to go pick up the kids. Going to do the short one after work tomorrow.
 
That's really looking great Justin. I bet that 30 minutes seemed like 3 hours! I'm really enjoying following your progress. Keep up the great work.
 
Oh yeah got the lock cut today after work, cheeks were clinched ...lol
3401f22784e8a7670ee78064ae5cb48b.jpg

I ramped up the rpms to 2800 and seem to cut faster but also might just be the short cut is straight on and not across like the long cut.
04b7688ae7a089a2e502824b3d87a9e4.jpg

Here you can see how the tang sticks past the lock, that's where I will leave it for heat treat. Going to grind it post HT.
0a888961ef0930992d014dcbb3a1500b.jpg


I also milled out the lock relief (sorry work drill press) I don't think it put to much strain on the bearings but probably still not good on it. I used a tungsten carbide cutter from dremel. Here is a pic of it. This thing cut surprisingly fast and good.
d0c23e3a450aaec03e9f65d7aa50f4f8.jpg


It wanted to chatter some but not terrible. It jumped out of my grove once and gouged the lock bar but I think it will sand out. I just fed it slow and easy by hand sliding the drill vise back and forth and like I said went way better than I expected.
a5e39994c4a50b875542e3e361cb6f52.jpg

6f10f8087d5cc4ccd1f97ac89be44ca6.jpg

451b0c229391606e36b23210043607e0.jpg

I left it about .07 thick in the cut not sure if that is good know and of guessed a bit and from other tutorials. Made it a 1/2" wide so if any experienced guys read this chime in if I need to go deeper and wider.
 
Last edited:
First time in here on your WIP.
Sure looks like a very nice knife is being made !!
I'm sure it will be most satisfying to have made!!
Frank
 
Last edited:
I want to apologize for not being with you sooner on this WIP. I feel I certainly may have been able to make some suggestions you may have wanted to use to make your progress a little easier.In fact, I feel badly about missing this opportunity to possibly being able to help out a forum member.Perhaps this may still be a chance to help out.
That relief on the leaf spring is not deep enough. Go down to about .060 and use a curve, avoiding any sharp corners on the bottom. As it is now it will be too stiff to push out of lock up.
Frank
"It's not how it's made or what it's made of, but how good it is when finished."
 
Back
Top