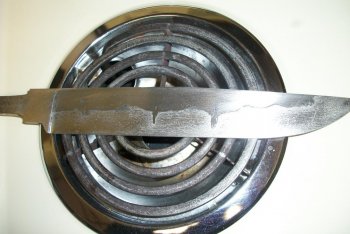
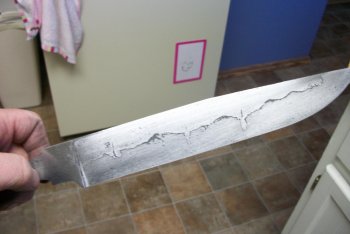
dt-48 = nice hamon

franklin

Well-Known Member
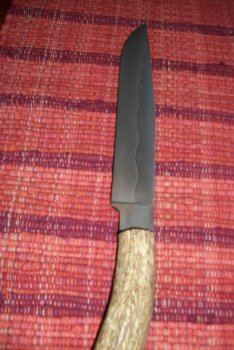
Was pretty pleased when this came out, first try on a 7 1/2 inch 1095 blade using the dt-48 i got from boss.
I used furnace cament 1/16 inch thick on both sides, spine. heated blade to 1475 for 15 min (blade 3/16 thick at spine) oil was at 95 dagrees.
I really like how this came out may leave as is and finish with antler for the handle , what do you guys think?
 

Attachments

  • 100_3302.jpg
    100_3302.jpg
    95.7 KB · Views: 58
  • 100_3306.jpg
    100_3306.jpg
    88 KB · Views: 88
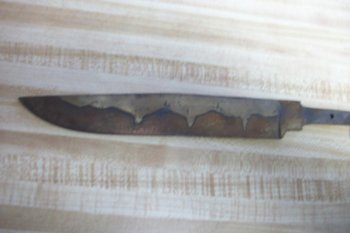
just got out of tempering, cant wait to show a pic it looks really cool right out of oven, when it cools ill post up a pic.
Thanks for the kind words guys.
 
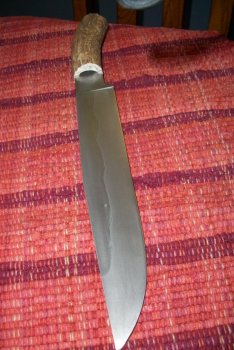
Well here she is. Should i leave it or sand down and etch?
 

Attachments

  • 100_3308.jpg
    100_3308.jpg
    84.3 KB · Views: 47
  • 100_3311.jpg
    100_3311.jpg
    97.1 KB · Views: 38
Very nice, I think sand and etch,
Franklin how close did the hamon follow your clay line.
I'm using Dt48 but have not tried a hamon yet.
 
I think that it also came out good but I don't think that what you see is what you are going to get. I think that what you see is the scale from where you applied the cement. I think that once you start polishing you will see something different. But who knows, I could be wrong?
 
Well here she is. Should i leave it or sand down and etch?

Larry,
With it sanded down and etched it will reveal even more details you can't see just yet, the way I do it is so simple, after sanding to the grit I want, usually around 1000 give or take a few hundred grit, then finish it back with 400, for a more durable finish, I will generally check the hamon at 400, that way you can easily see any scratches you couldn't see before and the hamon. Then take it on up, re-etch to see how it looks and then back to 400. OK, after you get to your target grit, I etch with Radio Shack PCB ( I think that's what it's called) Etchant, neutralize with Windex (value brand is fine) then, here is the best part, a squirt of WD-40, then I scrape some red rouge off a stick as finely as possible, making a slurry out of it with the WD-40 use your bare finger and pick out any hard pieces that didn't dissolve and polish your pants off! I take extra time with a little pressure, I put a little more work into the bottom 2/3 than the top 1/3, I like the patina'd look of the gray, it contrasts well. If I like the results I'll finish up the bottom 2/3 with Flitz, using the last little bit on the top side, I usually end up doing this numerous times, starting with 180 grit, all the way back up the grits again, until I'm happy with it, if it really doesn't satisfy me, I will re-HT it over again. Yeah, I've got a Hamon sickness, and it's all Don Hanson's fault!!!!
Rex

Btw the way I am loving my DT-48!!! It is awesome for hamon, so far I've used it on 1084 and W-2.
 
Last edited:
John the line is at the same as the cement was, chuck in the first pic it was lightly sanded down with 220 gritso there should be no scale ,but after what you said i might sand down just to see the difference. ( thanks chuck for sharing something i did not know, its cool to learn new things.)

Rex i now there should be a little clouding around edges i cant see and they would look cool but its just the way it turned colars in the temper that looks so good to me.
Idont think my pics doing it justice its got shades in it that are really cool. At any rate think im going to sand her down see what she gives up ........... lol
 
.... sand her down see what she gives up ........... lol

Larry,
That is the beauty of pulling a hamon out on a blade, its finding out what kind of activity you get, like Christmas day!!!! Take it slow and enjoy the process, besides those pretty colors are temporary. And a Hamon is FOREVER!!!! Can't wait to see it when you get it done, it's gonna be a beauty!
 
Larry I was going thru the exact same thing yesterday with some 1/8" 1095. My blade cracked. The wonderful thing was...I wasnt upset. I realized now immediately that I overheated the blade for the thickness. I'm starting over today.
Since you dont know which way to go...just send it to me and I will take care of it. No need to trouble yourself with all of that troublesome sanding.

Eric
...cant wait to see it finished. Post lots of pictures!
 
Been sanding all morning maybe there will be a pic later. lagrange (thats there is funny!!!!!!!) NOT.
Rex so far it looks just like the first pic without the dips but all in all looks the same. want to try a new etchant today ,anyone try 1 part muriatic acid 2 parts hydroperoxide.
 
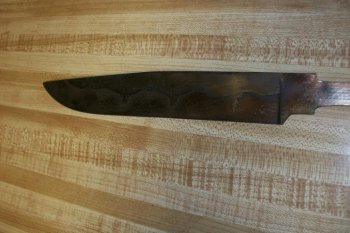
Well guys went in a little bit different way with this one. The normall polish just didnt fit well with me on this, so i did a long etch 5 min in the new etchant im using at 2500 grit.
then i went back down to 800, 1500,2500 then rubed the heck out of it with never dull what do you guys think, all comments are welcome.
 

Attachments

  • 100_3314.jpg
    100_3314.jpg
    94.8 KB · Views: 27
  • 100_3315.jpg
    100_3315.jpg
    97.8 KB · Views: 29
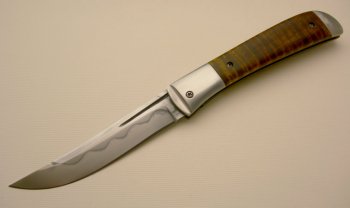
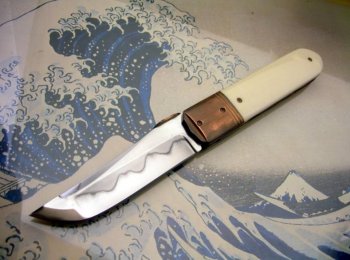
I think that it looks good. The way to get those dips and keep them is to practice. It has taken me a while to figure out how to get more activity rather than a slightly wavy line.

Here are a couple that I recently did.
 

Attachments

  • Japanese Inspired folder.jpg
    Japanese Inspired folder.jpg
    69.5 KB · Views: 15
  • Ivory Yakuza on waves.jpg
    Ivory Yakuza on waves.jpg
    63.6 KB · Views: 17
Those look awsome chuck! You actually can still see the dips when it was finished shiny but after the long etch there barely visible, but i wanted that gun metal gray look to this blade. thanks for the compliment. I will deffenetly keep trying knew things to see how they look.
 
Back
Top