You are using an out of date browser. It may not display this or other websites correctly.
You should upgrade or use an alternative browser.
You should upgrade or use an alternative browser.
What's going on in your shop?
- Thread starter Justin Presson
- Start date
Sean Jones
Well-Known Member
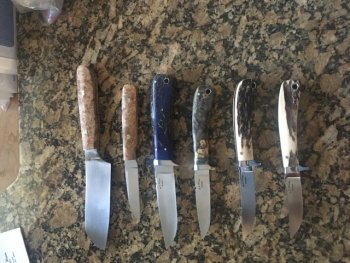
Two glued up and ready for the next stage.


Nick Riggi
Well-Known Member
Thanks Ed- I think I figured out the issues- Firstly, the back jaws on the Tapmatic were not "centered" I had to loosen the 2 tiny set screws and then insert my tap- then tighten each equally. This was a big part of it. Secondly, I decreased the distance of where the stop arm was contacting the brace I made and installed on the press table. This has all but eliminated the "clanking" Tapmatic is working perfectly now. What an awesome tool!The tapping heads are designed for that arm to be "contained" to limit rotational movement but still allow free up/down travel...... here's how mine is setup......
View attachment 73647
Now I just need to make some tooling fixtures to hold down my cut work pieces to really get the most efficient use of this set up!
Randy Lucius
Well-Known Member
Hi Craig,
How thick is that liner stock you start with?
How thick is that liner stock you start with?
lol.
OK that makes sense now.
OK that makes sense now.
Tracy it's 1/4 inch bead blasted 416. I got a good deal on some and when I run out I will go back to 3/16 stock. It will end up something like this.
View attachment 73655
Jon Buescher
Well-Known Member
Nothing, not a dang thing I haven’t played in almost a month!
Daniel Macina
Well-Known Member
mike miller
KNIFE MAKER
EdCaffreyMS
"The Montana Bladesmith"
Lotsa good stuff there Mike!!
As for me........ It won't be long now! I am feeling decent today, so took a shot at finish grinding the initial batch of the latest in my EBK series....... hope to introduce them within a couple of weeks if all goes well. Not only testing out the new design, but going to test some new handle materials too......called Richlite.....from Masecraft. More to come on that too.
UPDATE: FORGET THE RITCHLITE! I cut out and prepped a set of handle scales....what a PAIN! The material is a laminated paper product, which I assumed would be a lot like paper micarta....NOT! It's relatively soft, and even with sharp, new belts, slow speeds, and very light pressure, it scorches and/or burns badly. The stuff I purchased is Red/Black layered, but the red layers scorch so badly it comes out a Brown/Black. I was able to make it sorta work, but it takes 3-4X the amount of time, and easily 3X the number of belts. It's inexpensive, so at least I'm not out a lot of money, but will be ordering G10 and leave this stuff alone.

As for me........ It won't be long now! I am feeling decent today, so took a shot at finish grinding the initial batch of the latest in my EBK series....... hope to introduce them within a couple of weeks if all goes well.
UPDATE: FORGET THE RITCHLITE! I cut out and prepped a set of handle scales....what a PAIN! The material is a laminated paper product, which I assumed would be a lot like paper micarta....NOT! It's relatively soft, and even with sharp, new belts, slow speeds, and very light pressure, it scorches and/or burns badly. The stuff I purchased is Red/Black layered, but the red layers scorch so badly it comes out a Brown/Black. I was able to make it sorta work, but it takes 3-4X the amount of time, and easily 3X the number of belts. It's inexpensive, so at least I'm not out a lot of money, but will be ordering G10 and leave this stuff alone.

Last edited:
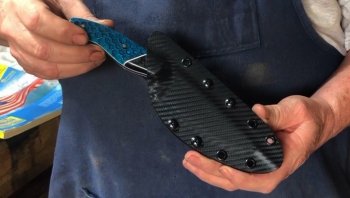
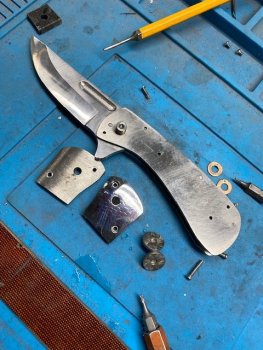
I made a jig stick to screw on bolsters so I could round them over. The pivot heads are engraved and some I had sitting on my bench for something like this.
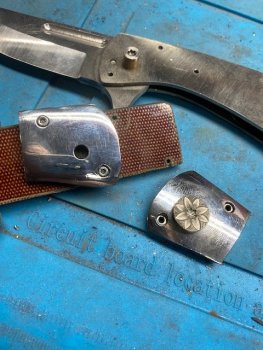
I also use it to drill a counterbore for the pivot head. The bolster material is some bubble canister I made awhile ago. You can see it in the bottom one and it should pop when I dunk it in the salts.
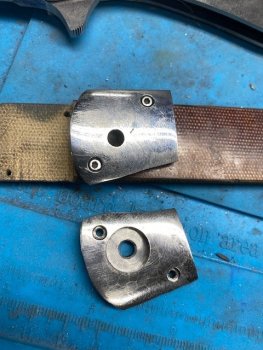
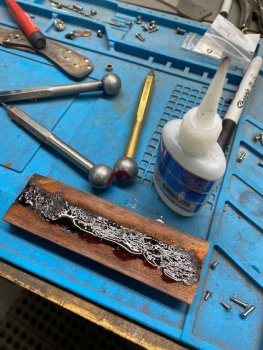
I found some amber dyed stag scales in my stash. The pith was soft and crumbly so I soaked it in this CA and sanded it to fill it all in.
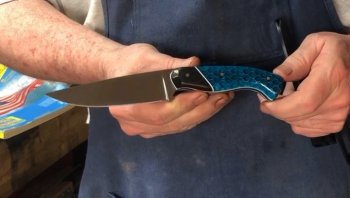
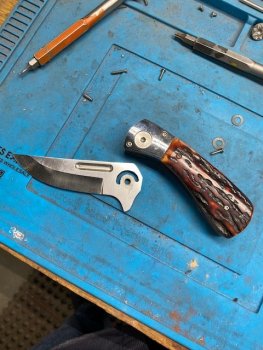
Bolster and scales are fitted. I need to make a new back spacer and start fine sanding and detailing now. The blade is twist damascus.

I also use it to drill a counterbore for the pivot head. The bolster material is some bubble canister I made awhile ago. You can see it in the bottom one and it should pop when I dunk it in the salts.

I found some amber dyed stag scales in my stash. The pith was soft and crumbly so I soaked it in this CA and sanded it to fill it all in.

Bolster and scales are fitted. I need to make a new back spacer and start fine sanding and detailing now. The blade is twist damascus.

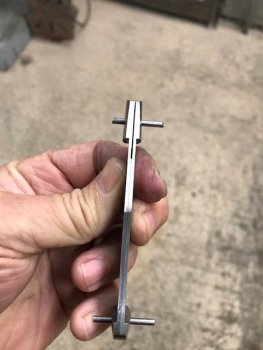
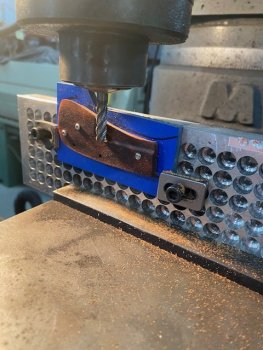
I had to mill some relief for the lock bar into the lock side bolster. Here is my bolster screwed to a jig stick. I can get it kinda level by adjusting the screw tension since the other side is convex. Very light passes to .040". The stick is clamped down to my fixture plate and held in the vise.
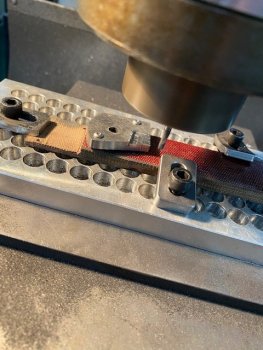
I made a new jig stick to relive the lock side scale.
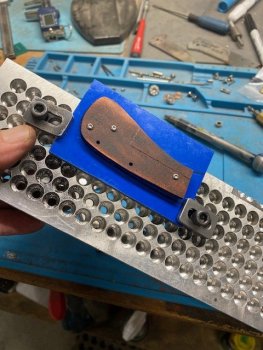
1/4" ball end mill does the job.
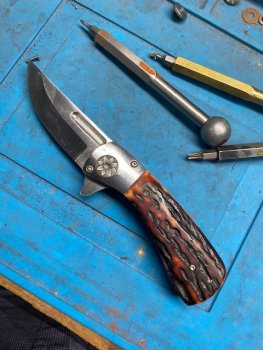
Mostly done. Now for detailing, heat treating the blade and some color.

I made a new jig stick to relive the lock side scale.

1/4" ball end mill does the job.

Mostly done. Now for detailing, heat treating the blade and some color.

Nick Riggi
Well-Known Member
Put together a quick "down and dirty" fixture this weekend to secure my Bevel Jig bodies when drilling and tapping. Should have down it long ago. Much safer and I can already see this improving the process as well as speeding it up.
1/2 thick Aluminum bottom plate with the 90 degree fixed- and the bottom and side holders move and lock to securely hold the piece. .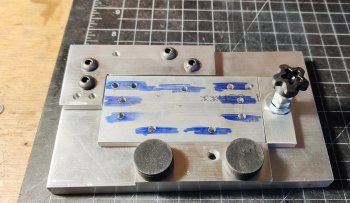
Bottom plate is drilled to match the jig body holes.
1/2 thick Aluminum bottom plate with the 90 degree fixed- and the bottom and side holders move and lock to securely hold the piece. .

Bottom plate is drilled to match the jig body holes.
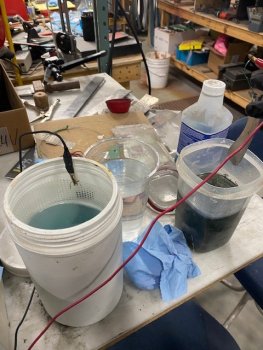
anodizing day.
First a dunk into clear water to wet it down, then a quick soak in warm Multi-etch (from reactive metals). It's important to wipe all the oils off and wear plastic gloves. Finger prints will show up otherwise.
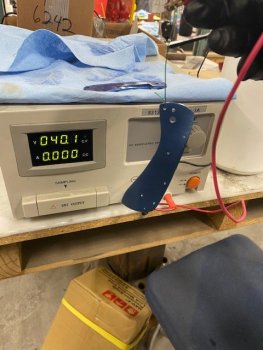
Then into the tank at 40v for this color of blue.
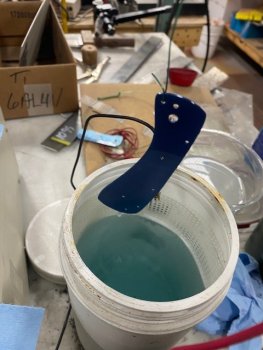
Multi-etch on the right, center back is just a cup of water and the "tank" on the left.
I use liquid TSP for the solution. No measuring as the amount doesn't seem to matter much other than a weak solution will take a few more seconds.
This variable DC power supply is also from reactive metals. It's 3 amps but a 1 amp will work also but just a bit slower.
The wire holding it niobium. a piece of Ti wire will also work.
First a dunk into clear water to wet it down, then a quick soak in warm Multi-etch (from reactive metals). It's important to wipe all the oils off and wear plastic gloves. Finger prints will show up otherwise.
Then into the tank at 40v for this color of blue.

Multi-etch on the right, center back is just a cup of water and the "tank" on the left.
I use liquid TSP for the solution. No measuring as the amount doesn't seem to matter much other than a weak solution will take a few more seconds.

This variable DC power supply is also from reactive metals. It's 3 amps but a 1 amp will work also but just a bit slower.
The wire holding it niobium. a piece of Ti wire will also work.

Sean Jones
Well-Known Member
A kitchen knife for my wife. The blade and the English walnut are from John Wilson via the Christmas Kith. Finally got this done. Beautiful wood
AEB-L at 61 RC
English Walnut
Burgundy G-10 Liners
OAL 11"
AEB-L at 61 RC
English Walnut
Burgundy G-10 Liners
OAL 11"
Sean Jones
Well-Known Member
Just started shaping the handle on this one. Cocobollo from John Wilson. I was surprised at how much orange there was in the wood. I picked the orange liners on a whim and ended up with a very good match!
John Wilson
Well-Known Member
That is a nice piece of cocobolo. I'm glad you found a good use for it. I personally can't work with it anymore. Cocobolo and I don't get along. Please be careful and wear a respirator around that stuff when sanding it.

