You are using an out of date browser. It may not display this or other websites correctly.
You should upgrade or use an alternative browser.
You should upgrade or use an alternative browser.
The Strauss Pirate 36 caliber
- Thread starter Bruce Bump
- Start date
Bruce Bump
Forum Owner-Moderator
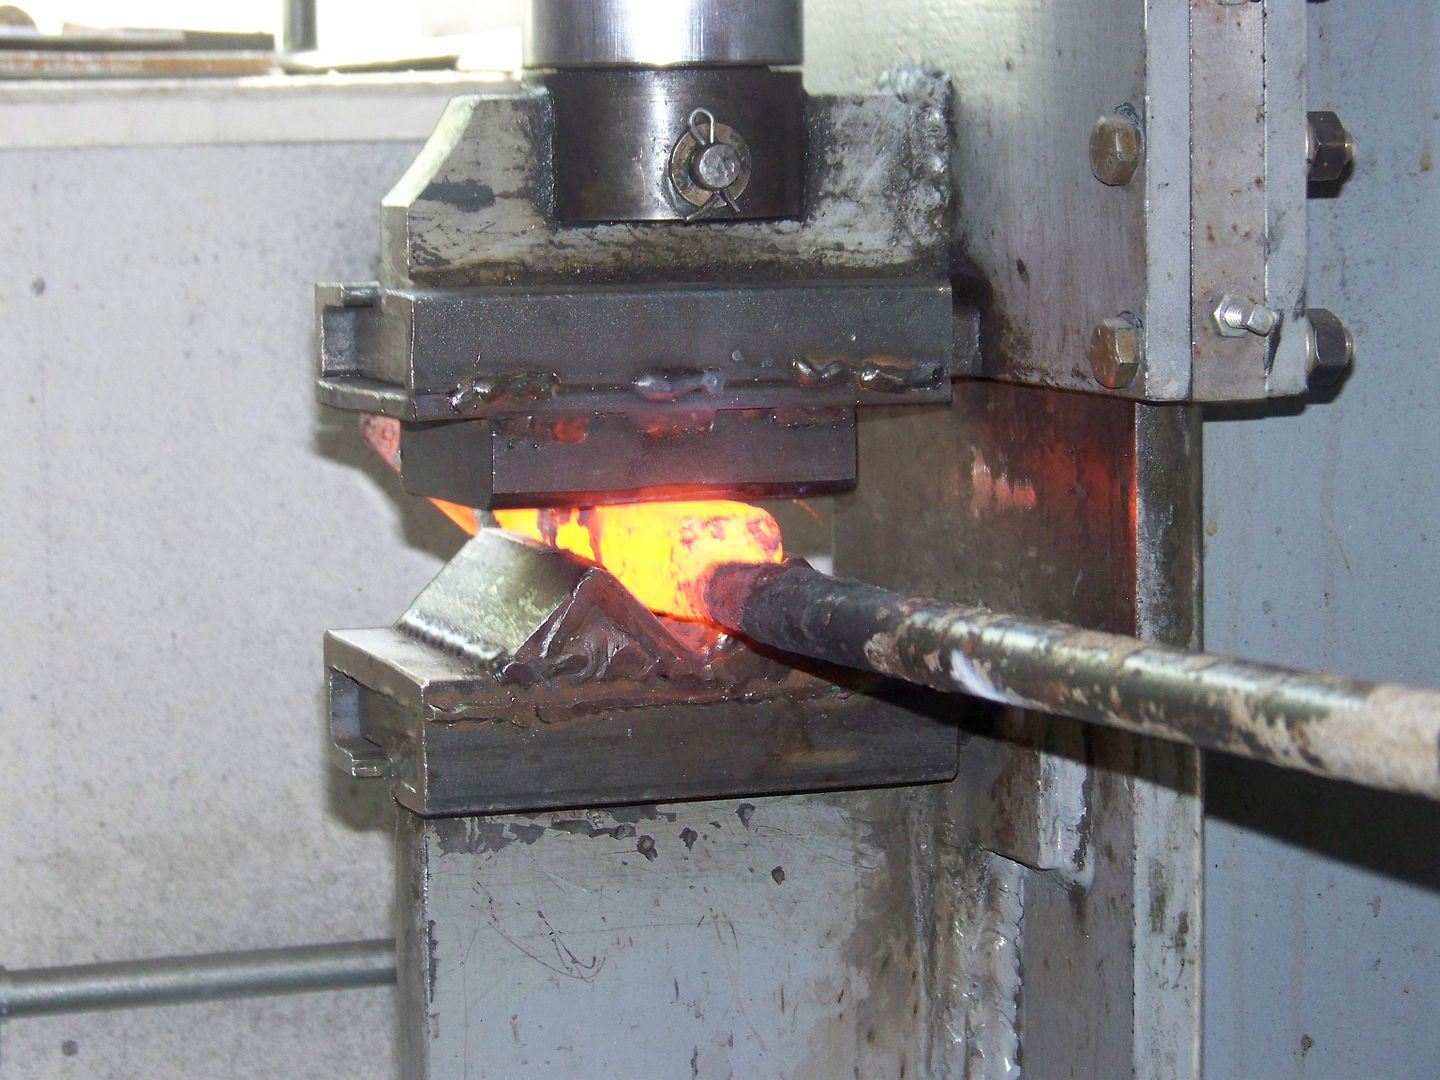
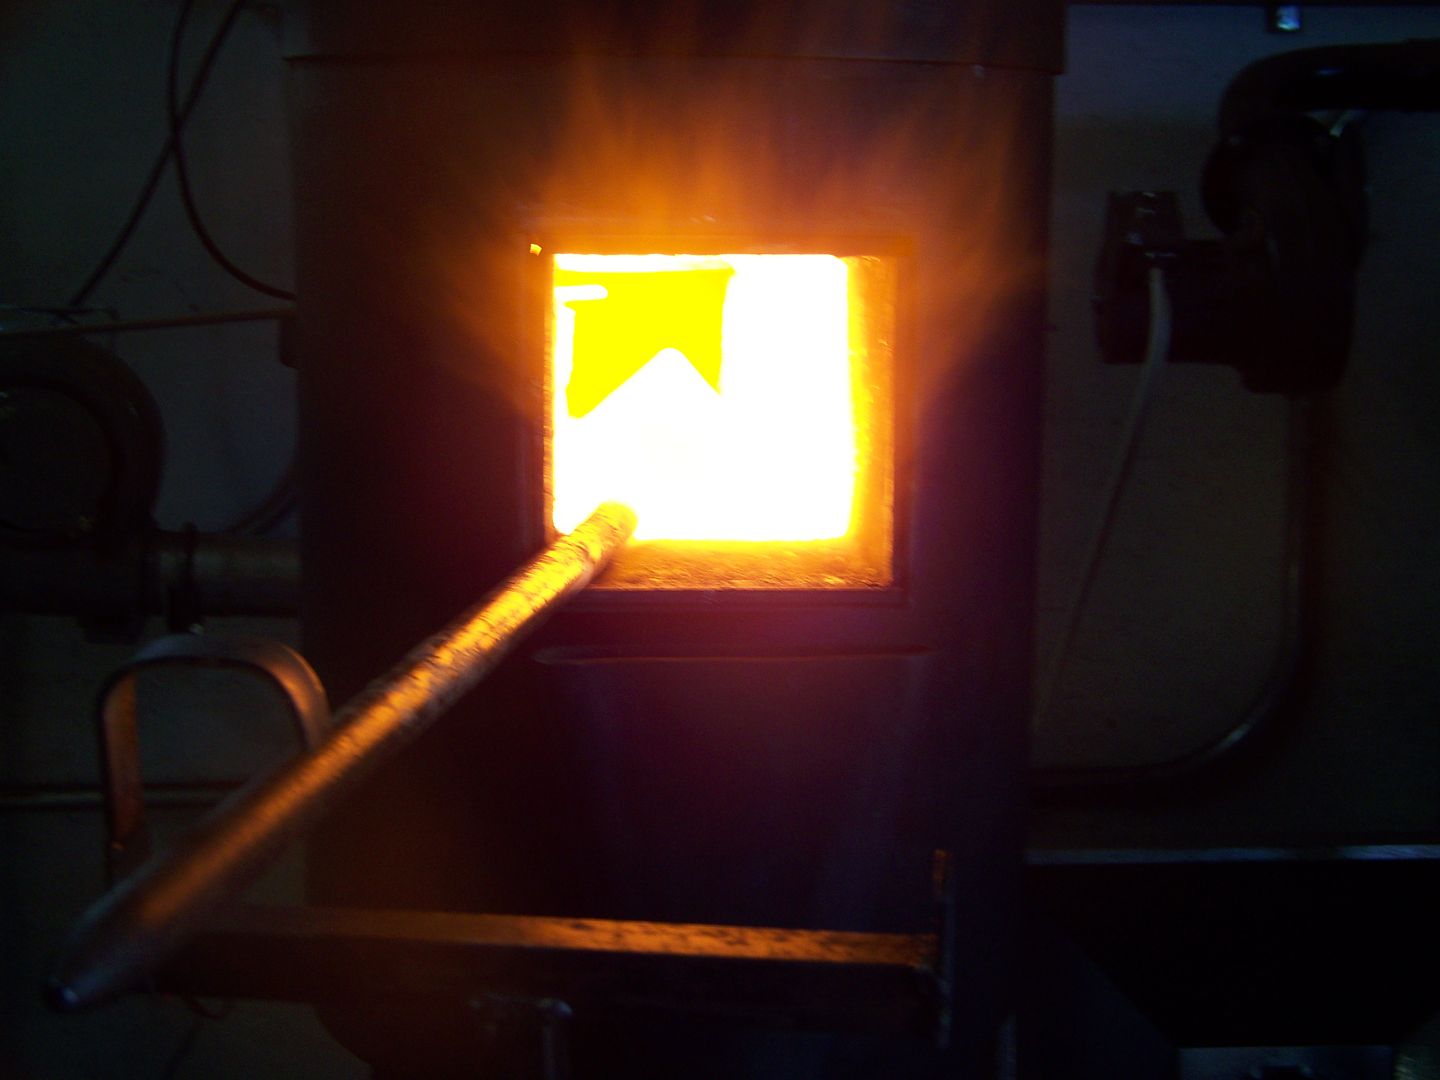
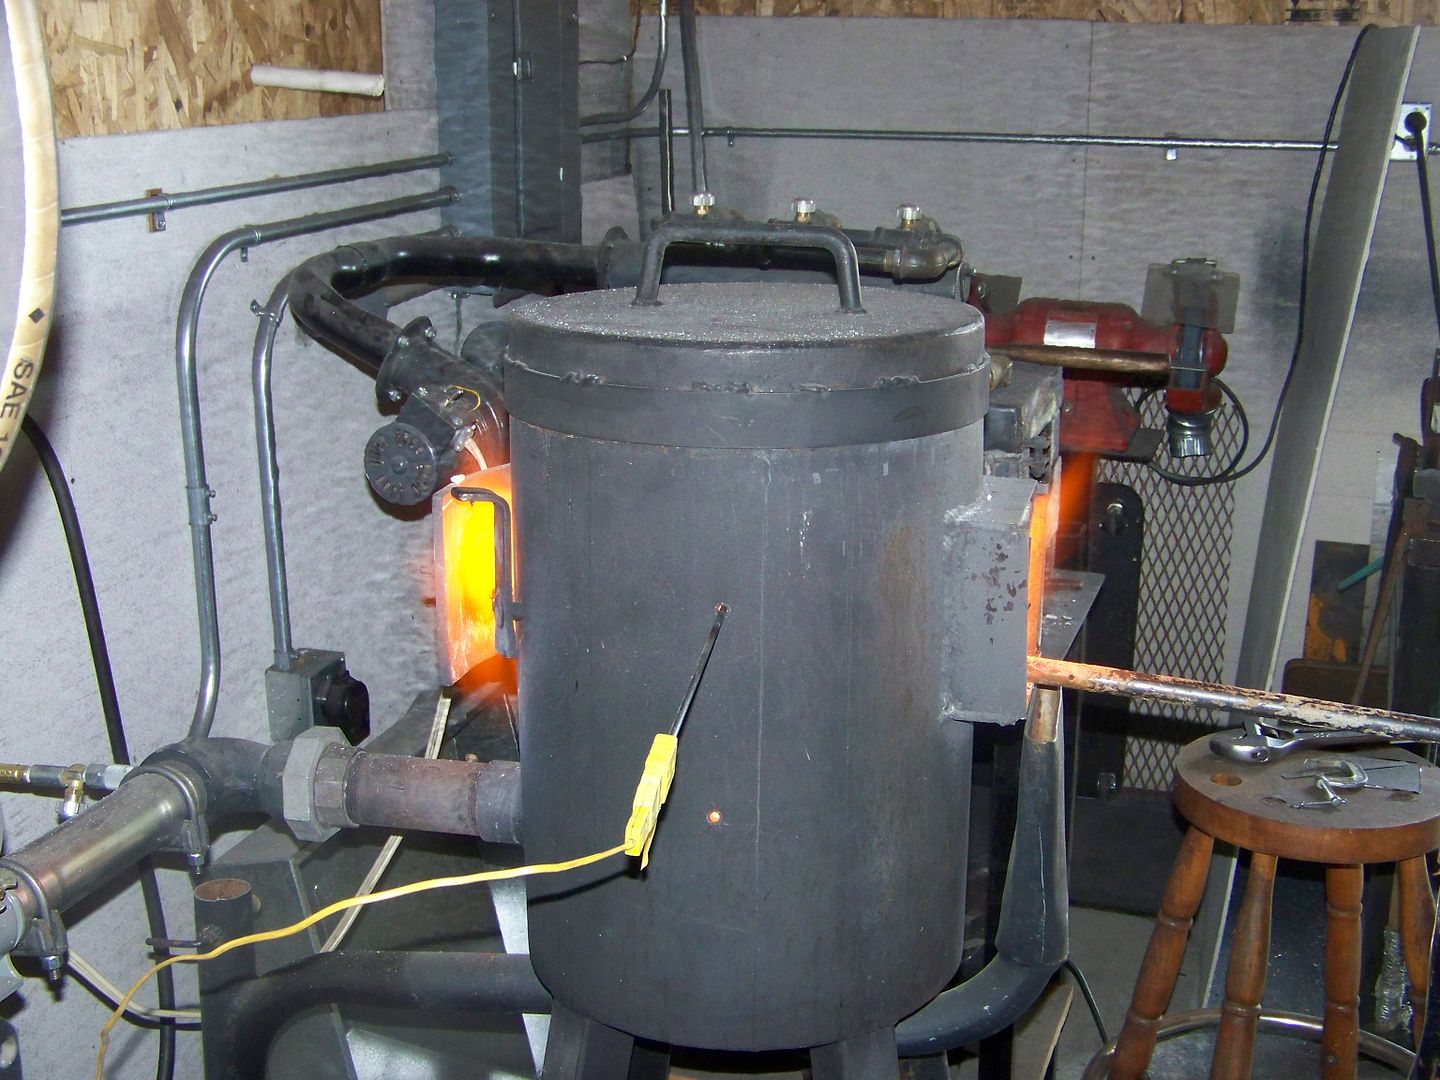
I fired up the forge again today. You must have noticed I'm running two billets at once. One is a finer patterned "W" and the other is a very coarse thick layers "W" pattern. Without more folding the w's dont get a chance to form that familiar "C" shape you're used to seeing. With the steel this thick it wants to just squish but thats OK because I'm not going for "W"s or feather with this damascus. This one will be a fairly simple mosaic actually but will be twisted to show the pattern as opposed to accordian cutting or tileing. I feel the performance is superior in a twisted mosaic and still gives an interesting pattern, not as dramatic as tileing but much stronger. Of coarse we all know this gun knife will get used hard and put away wet and dirty so performance is of upmost importance. Right?
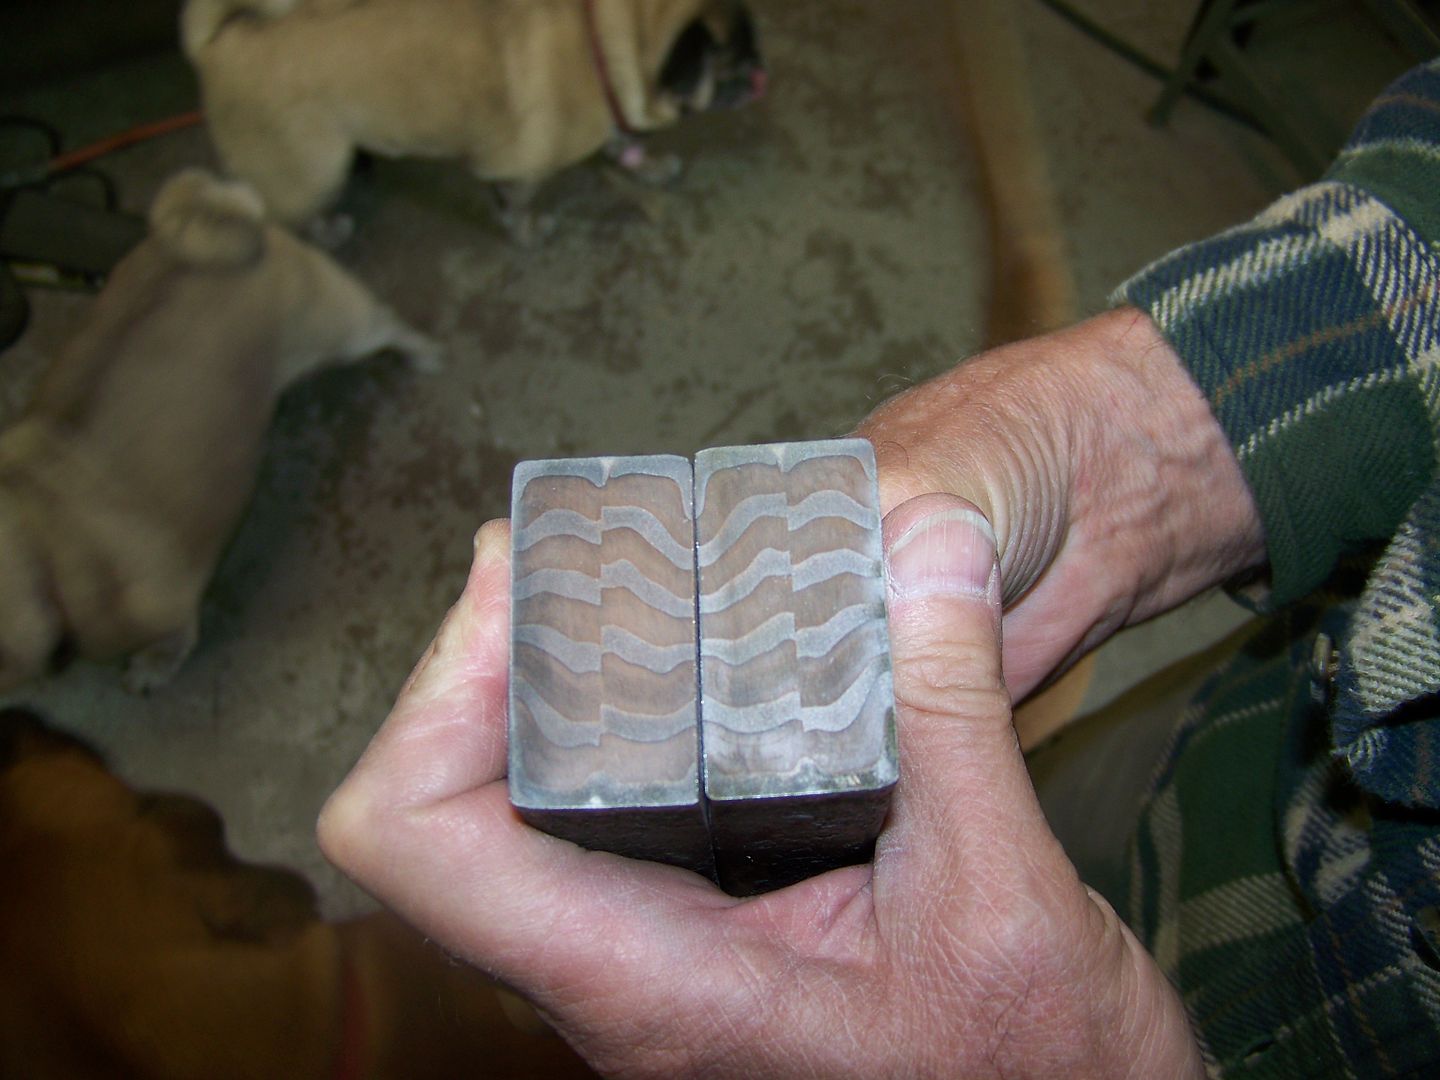
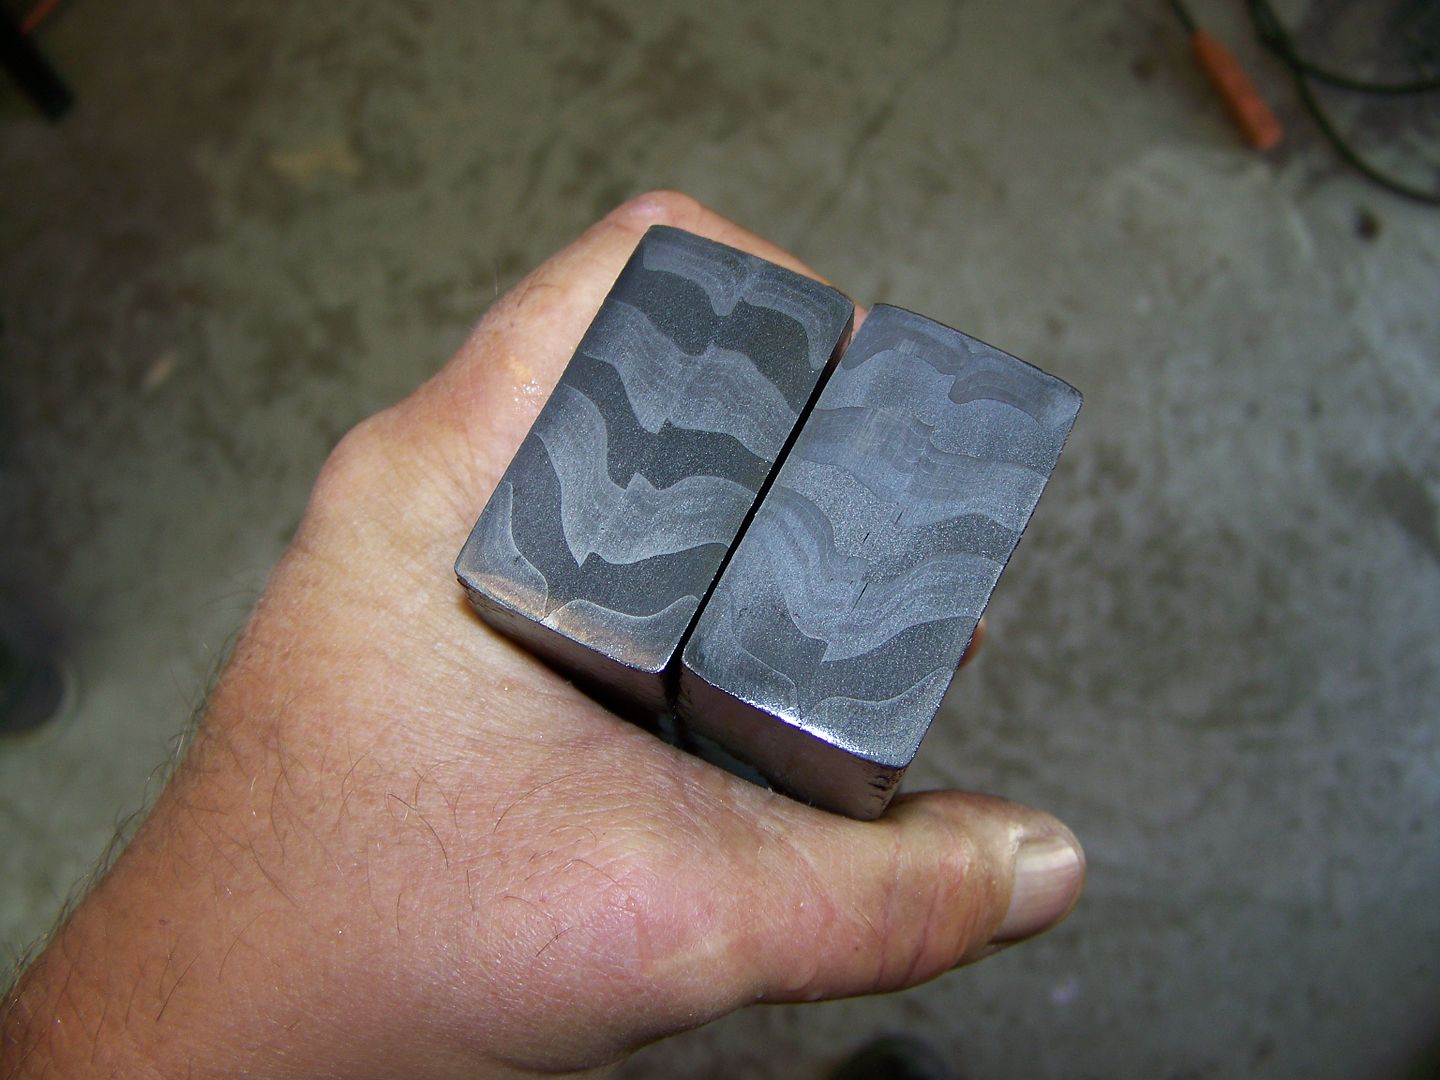
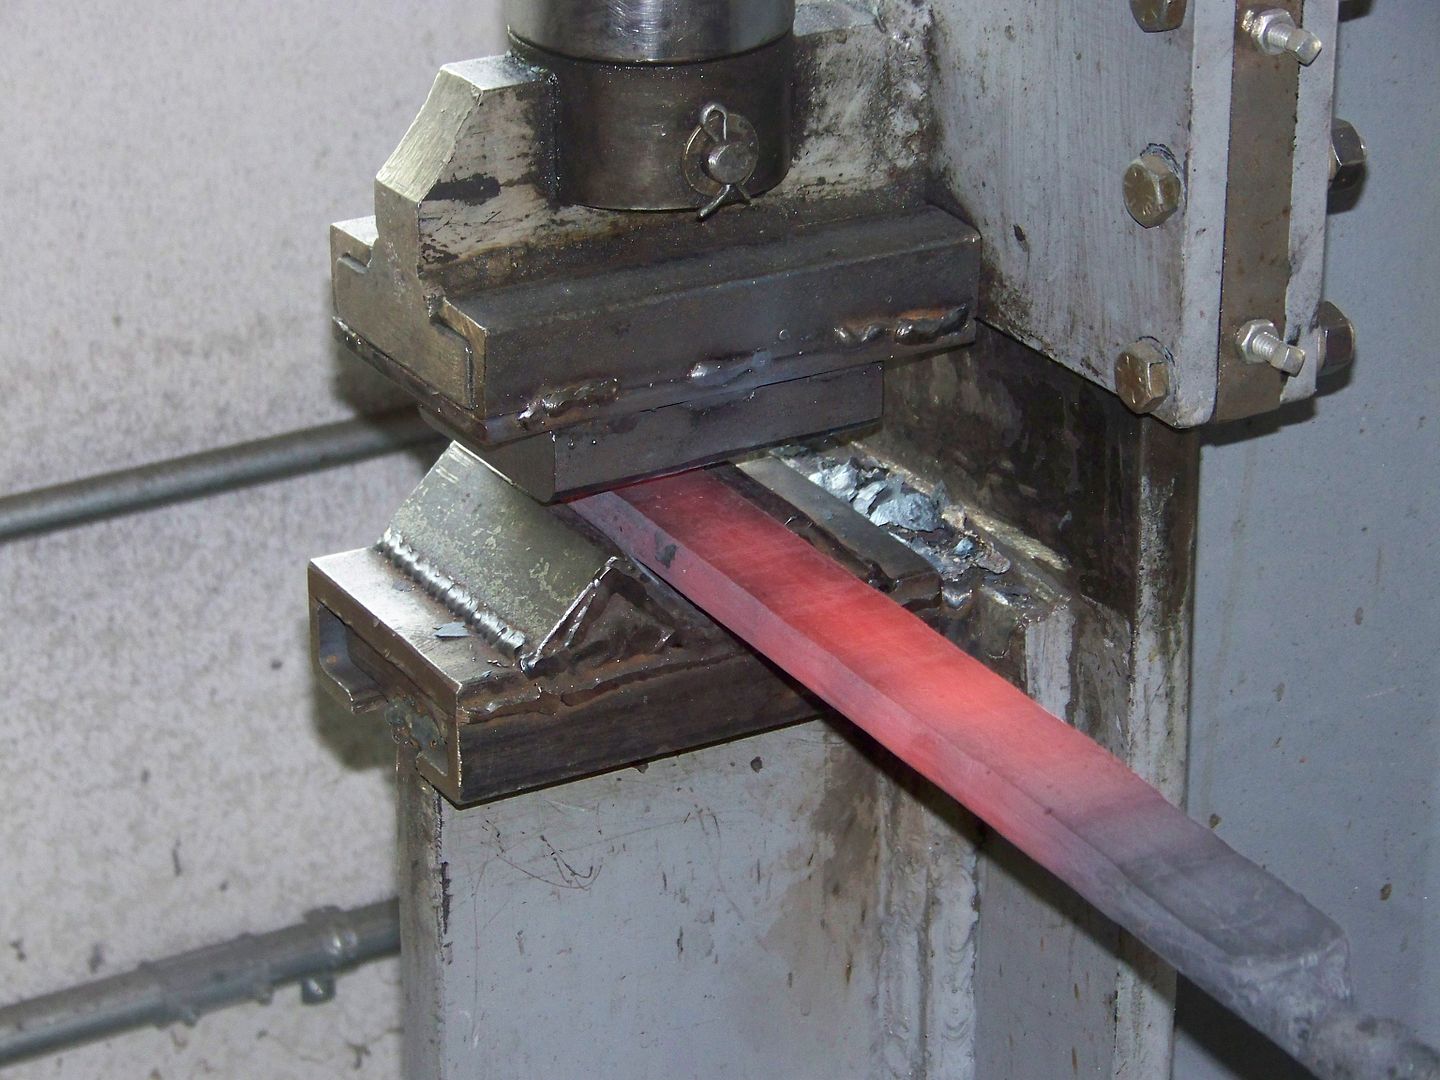
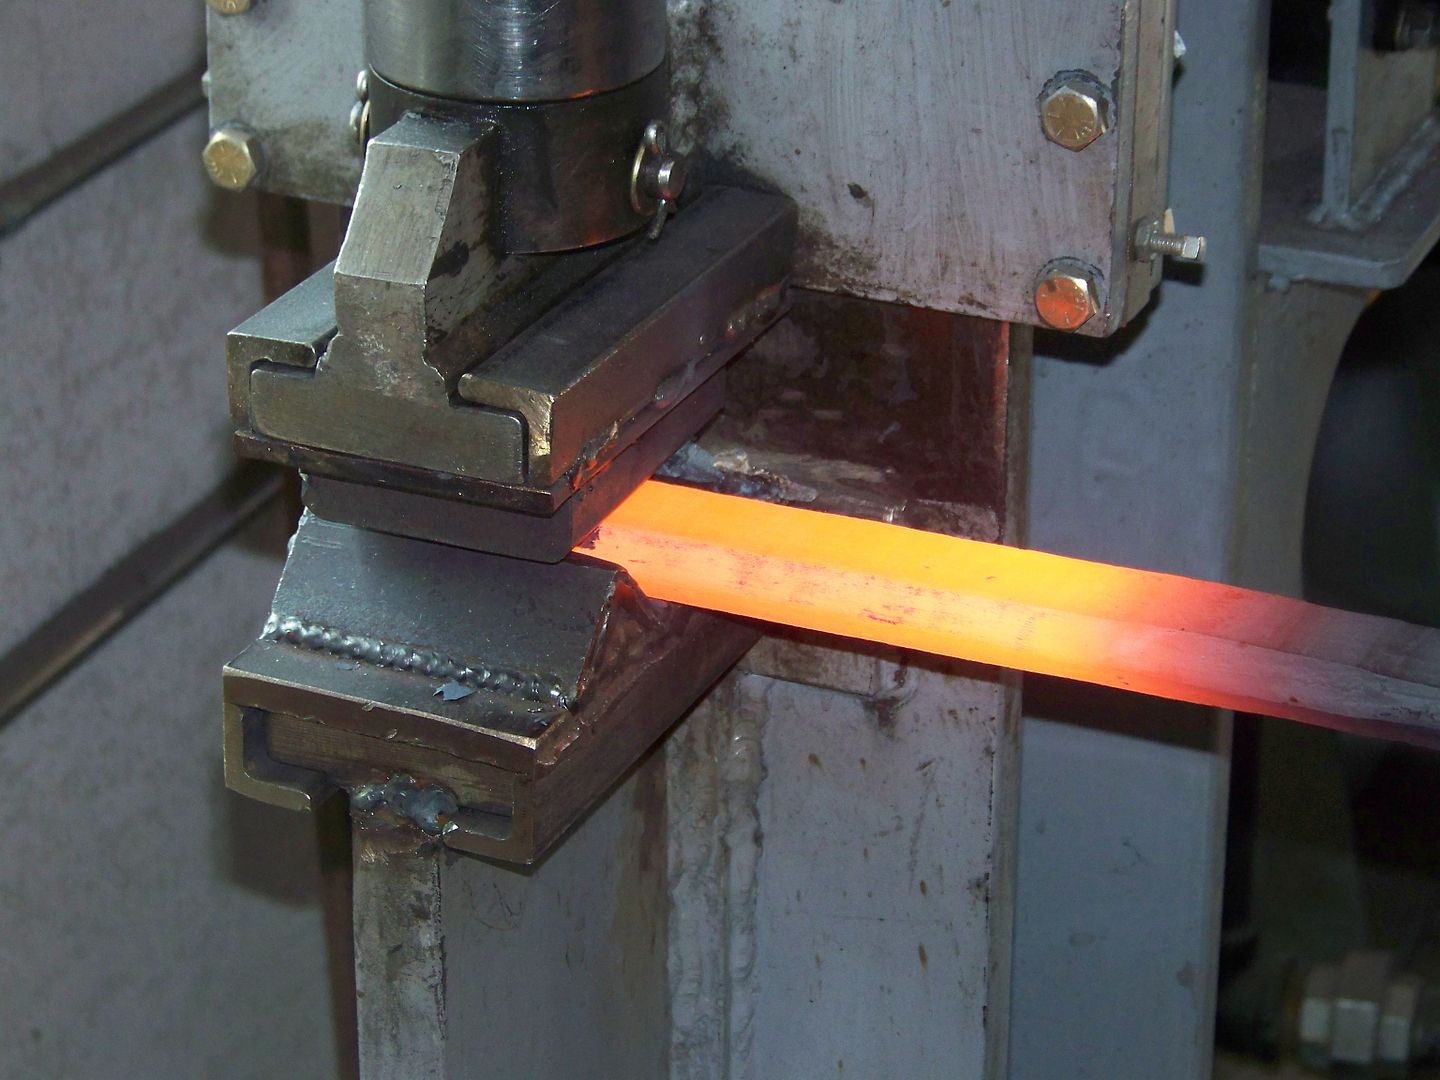
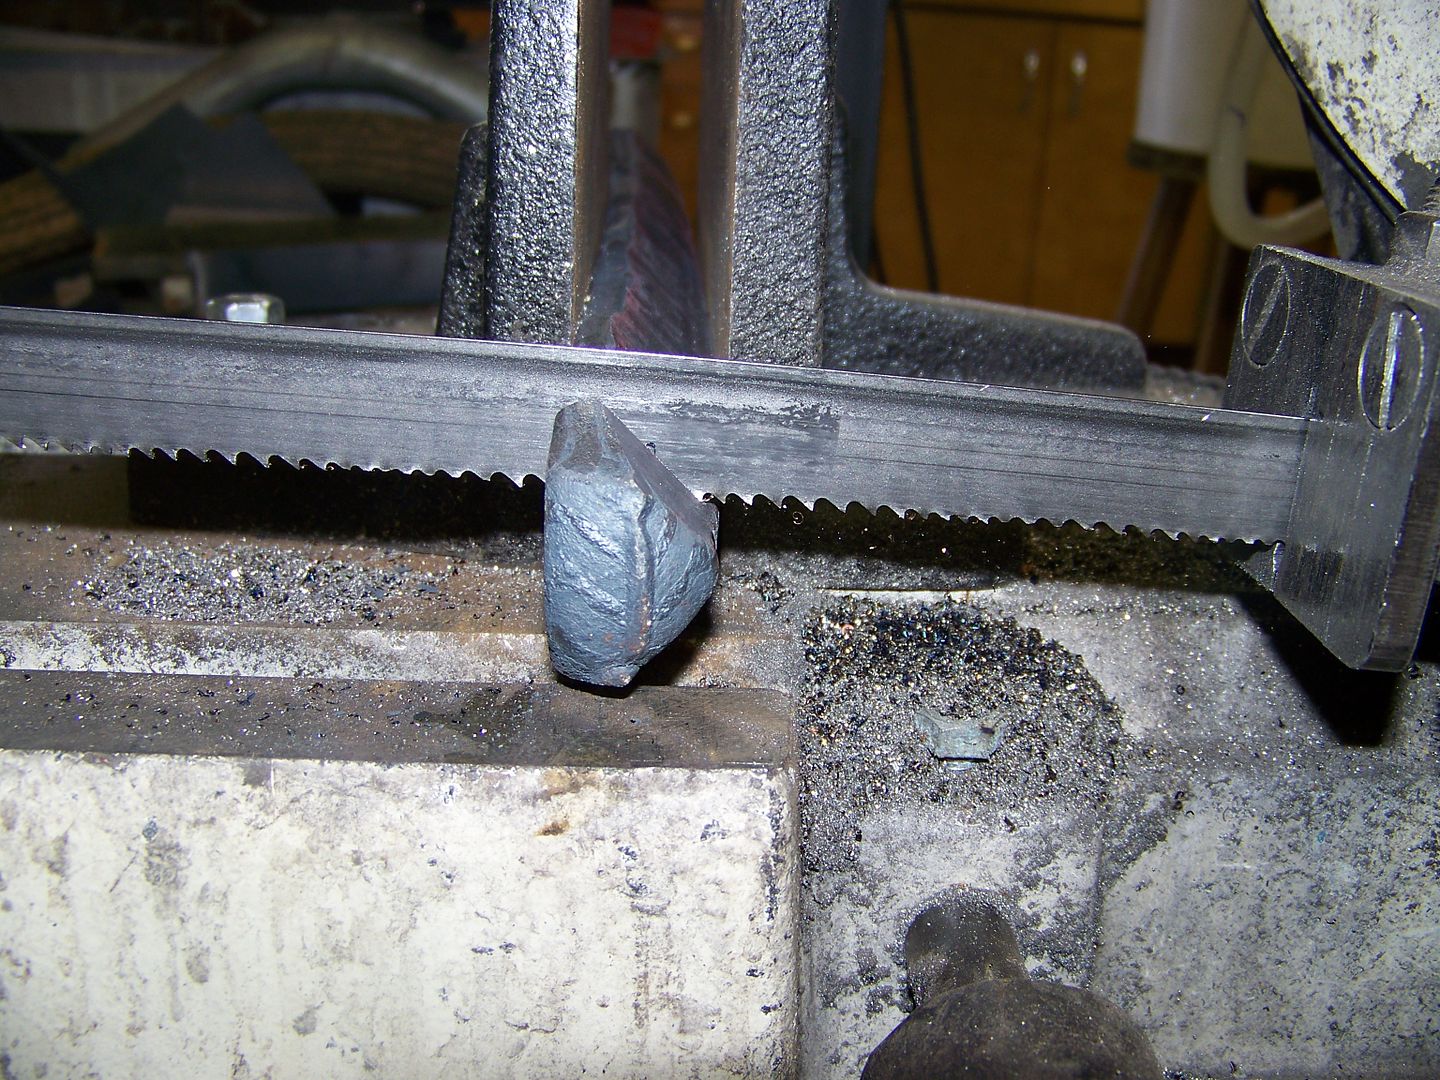
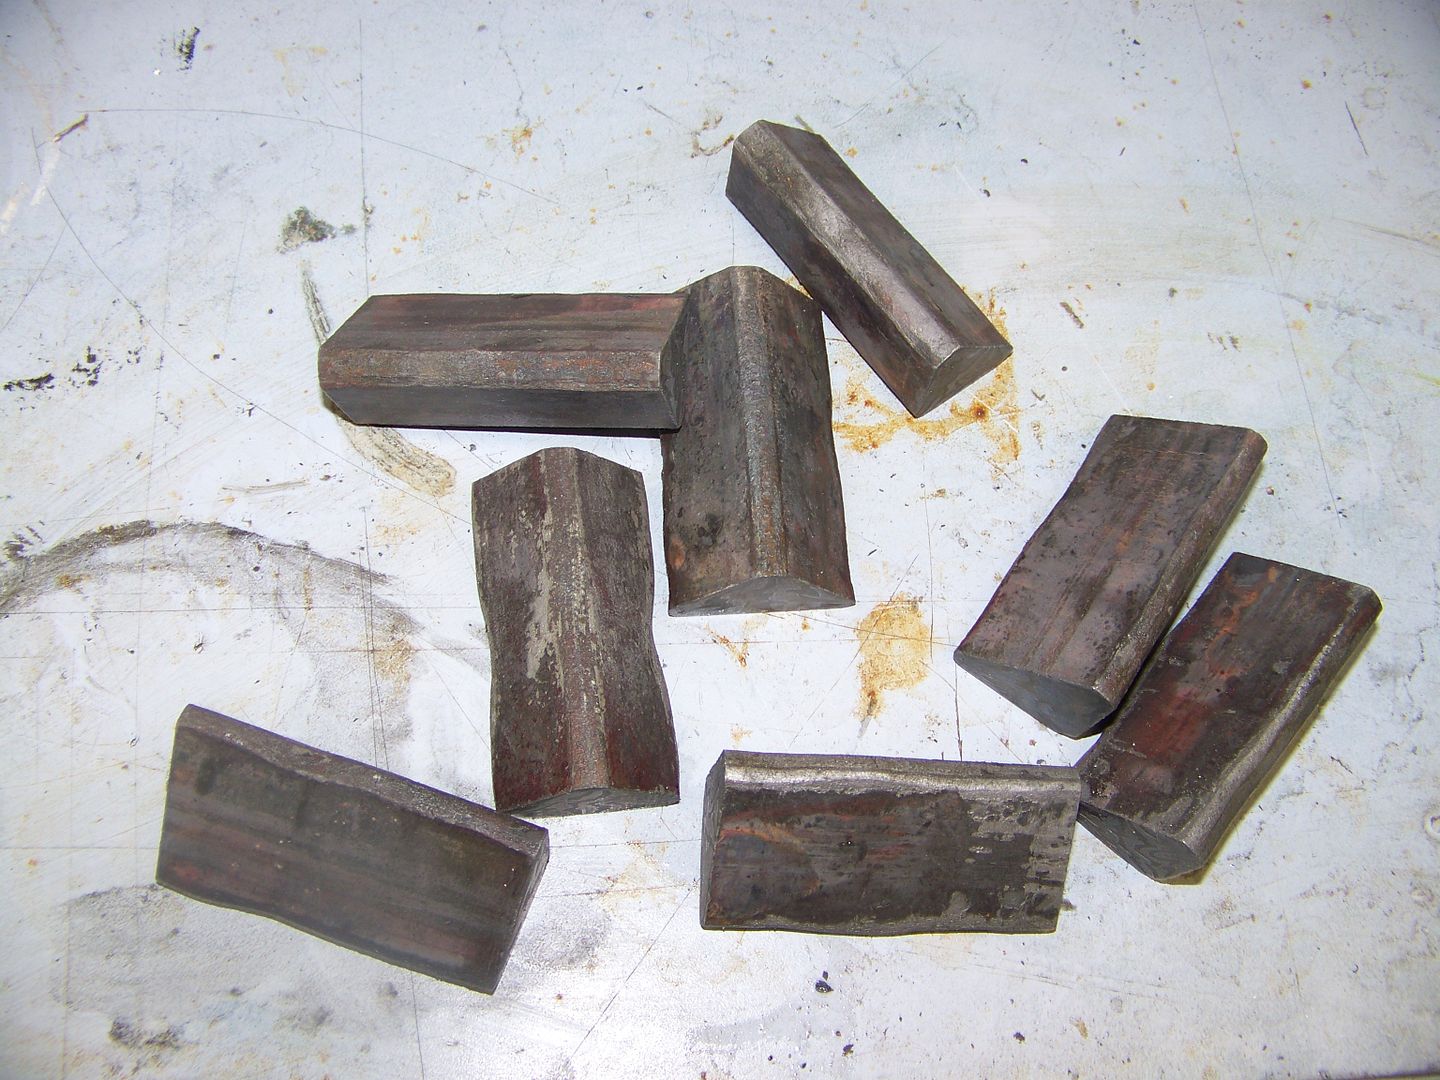
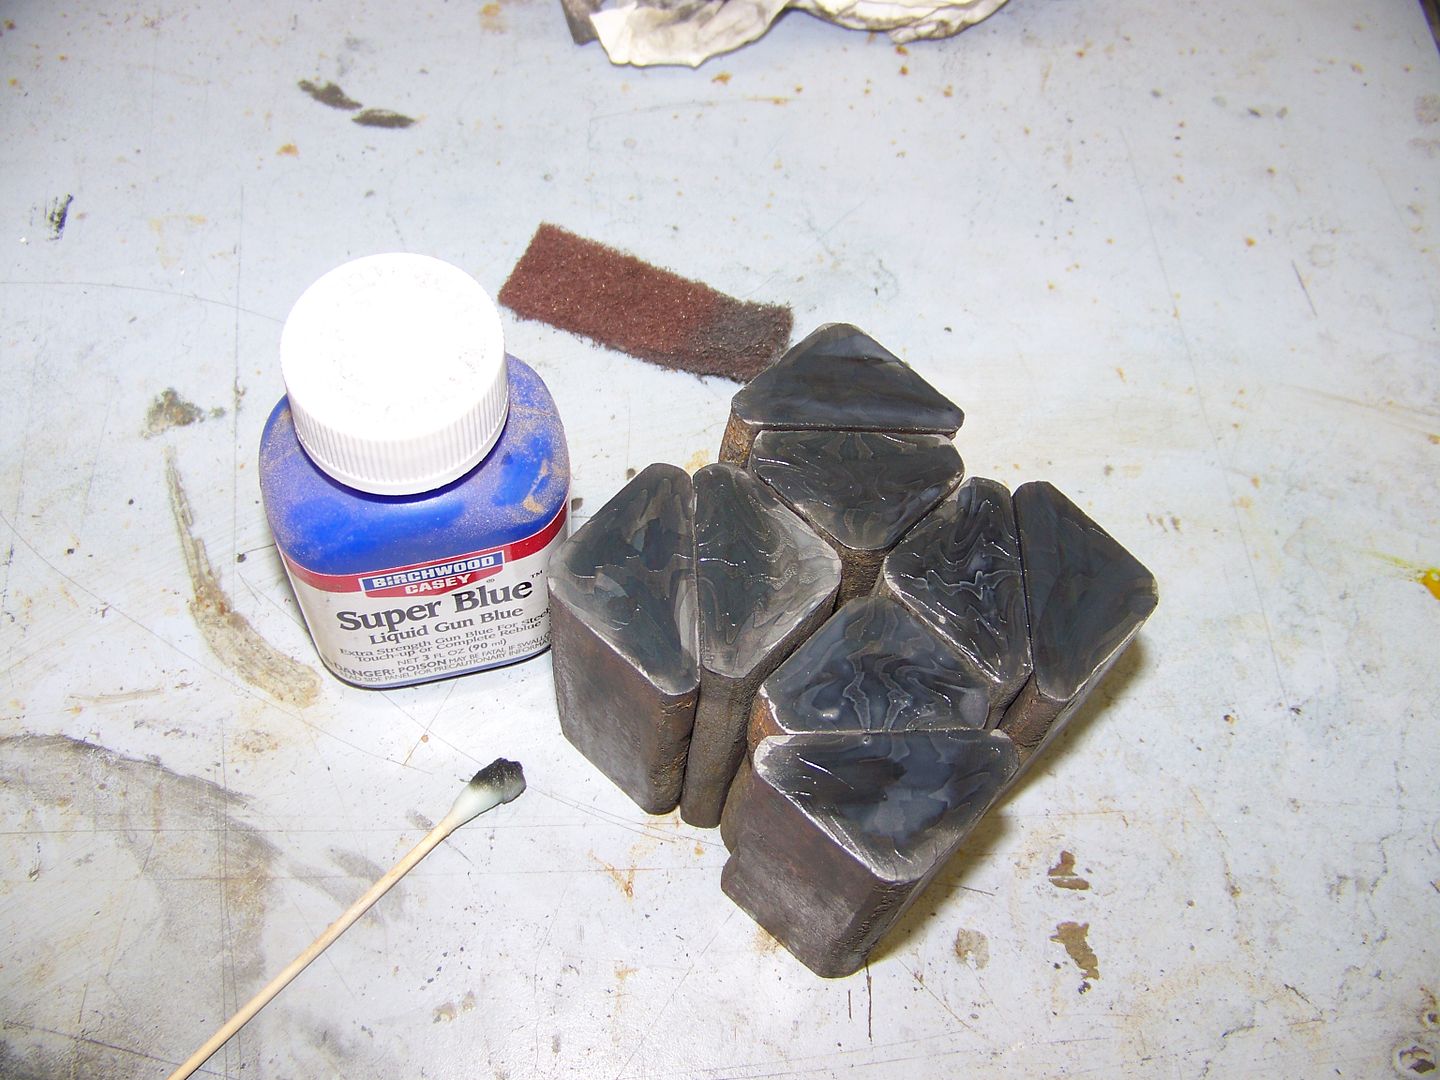
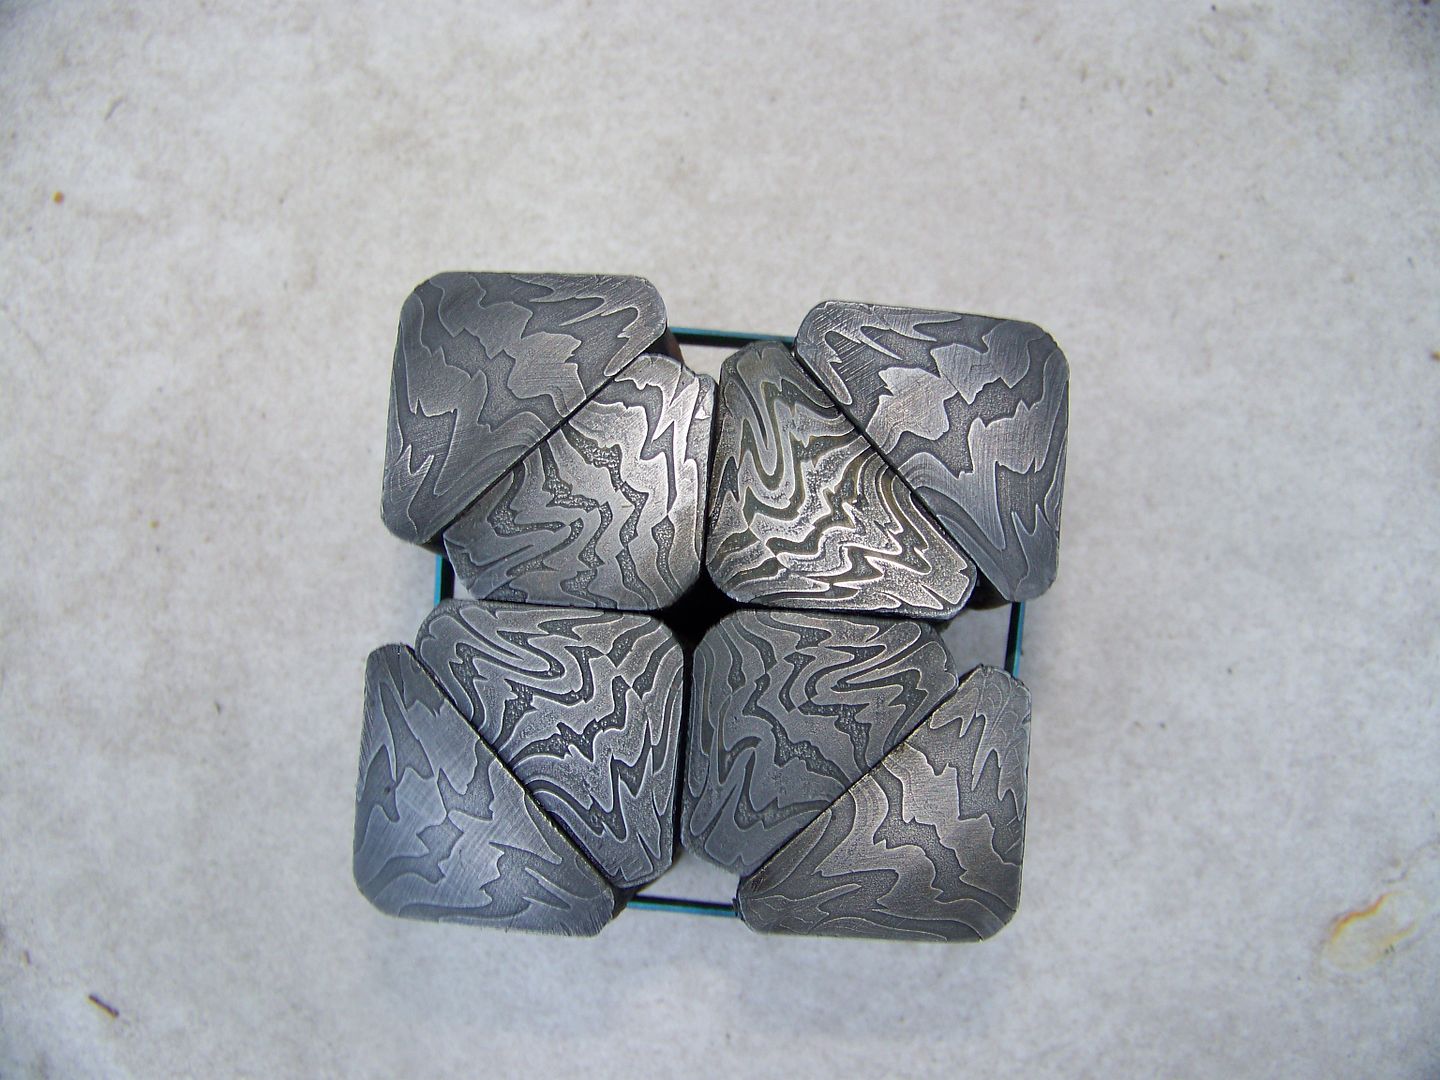
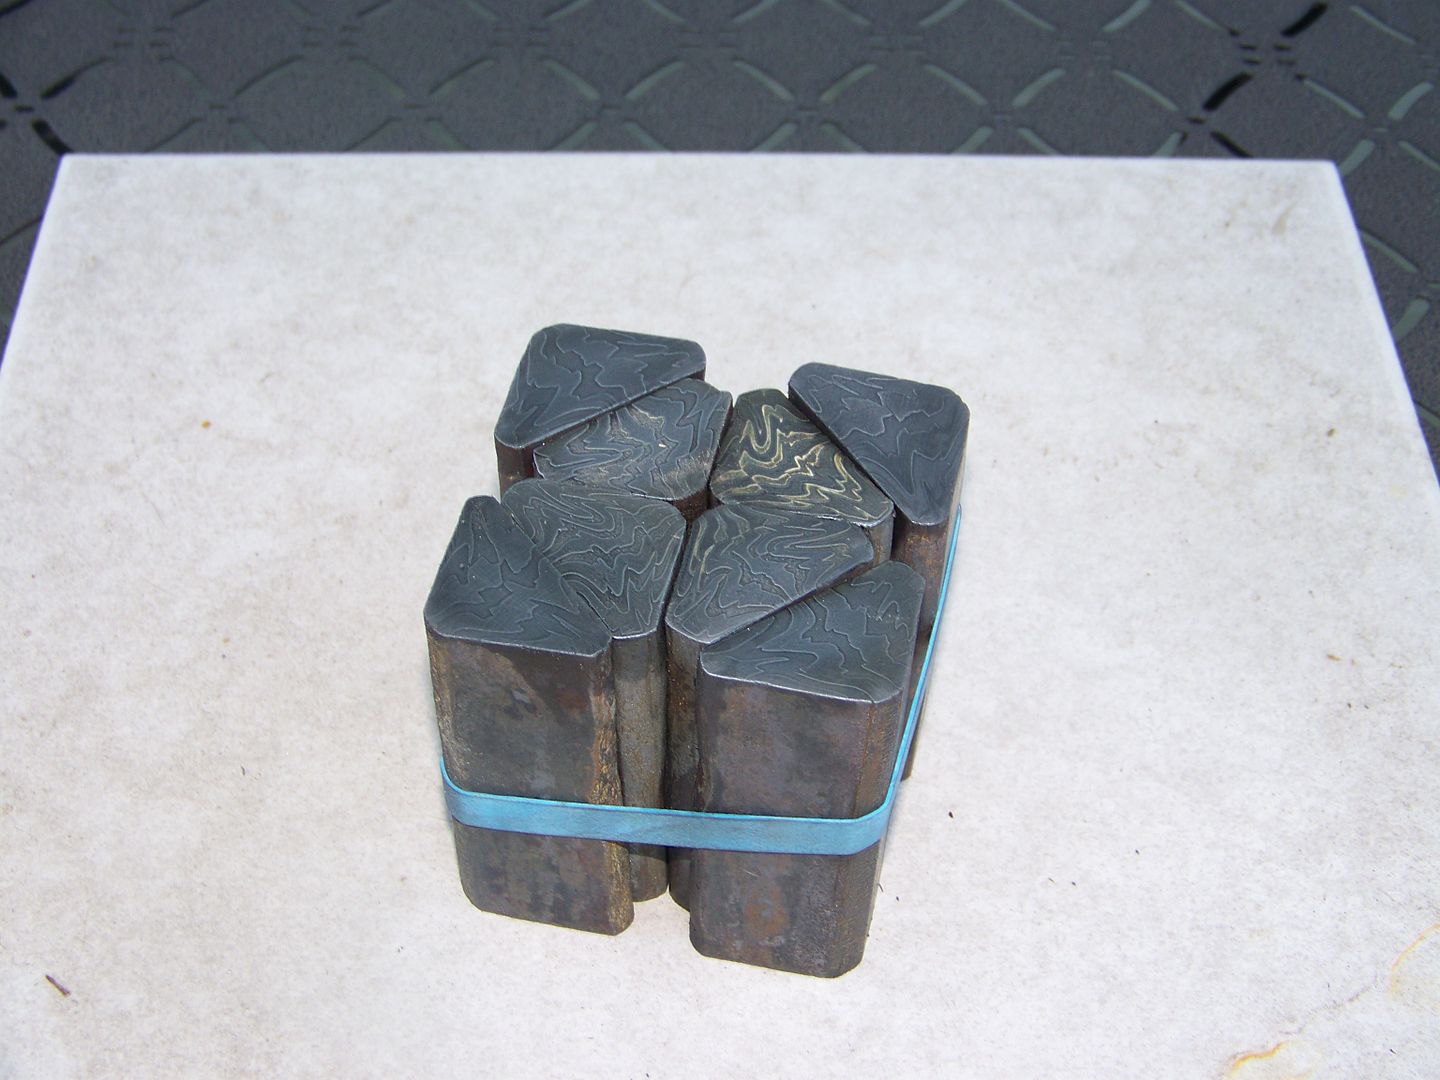
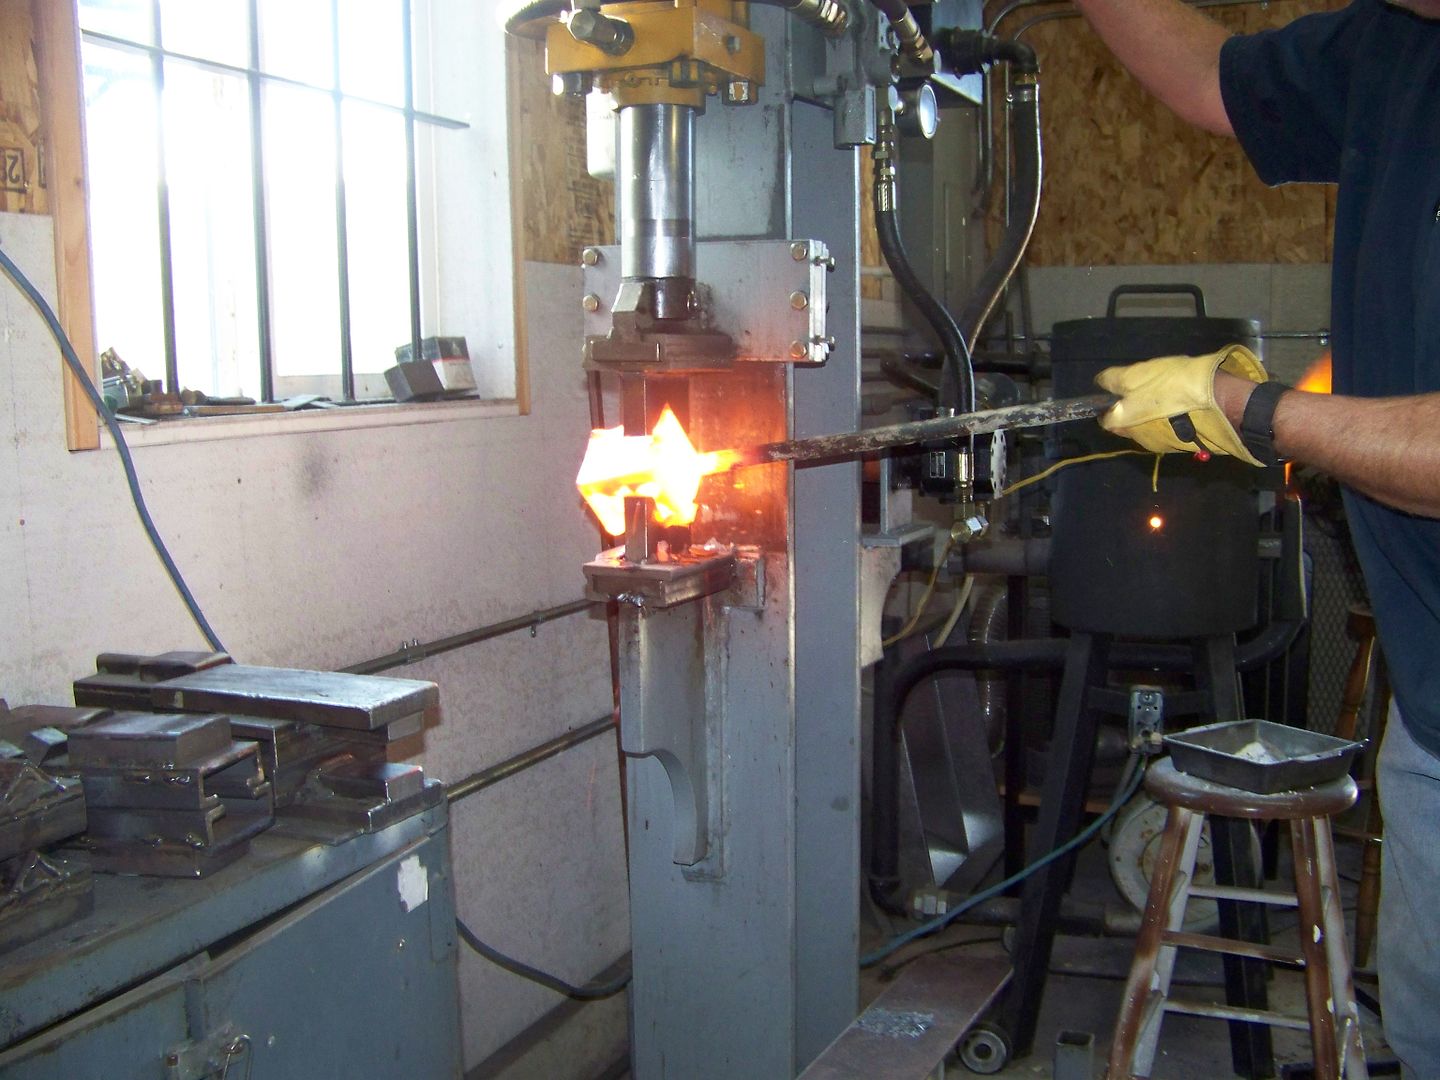
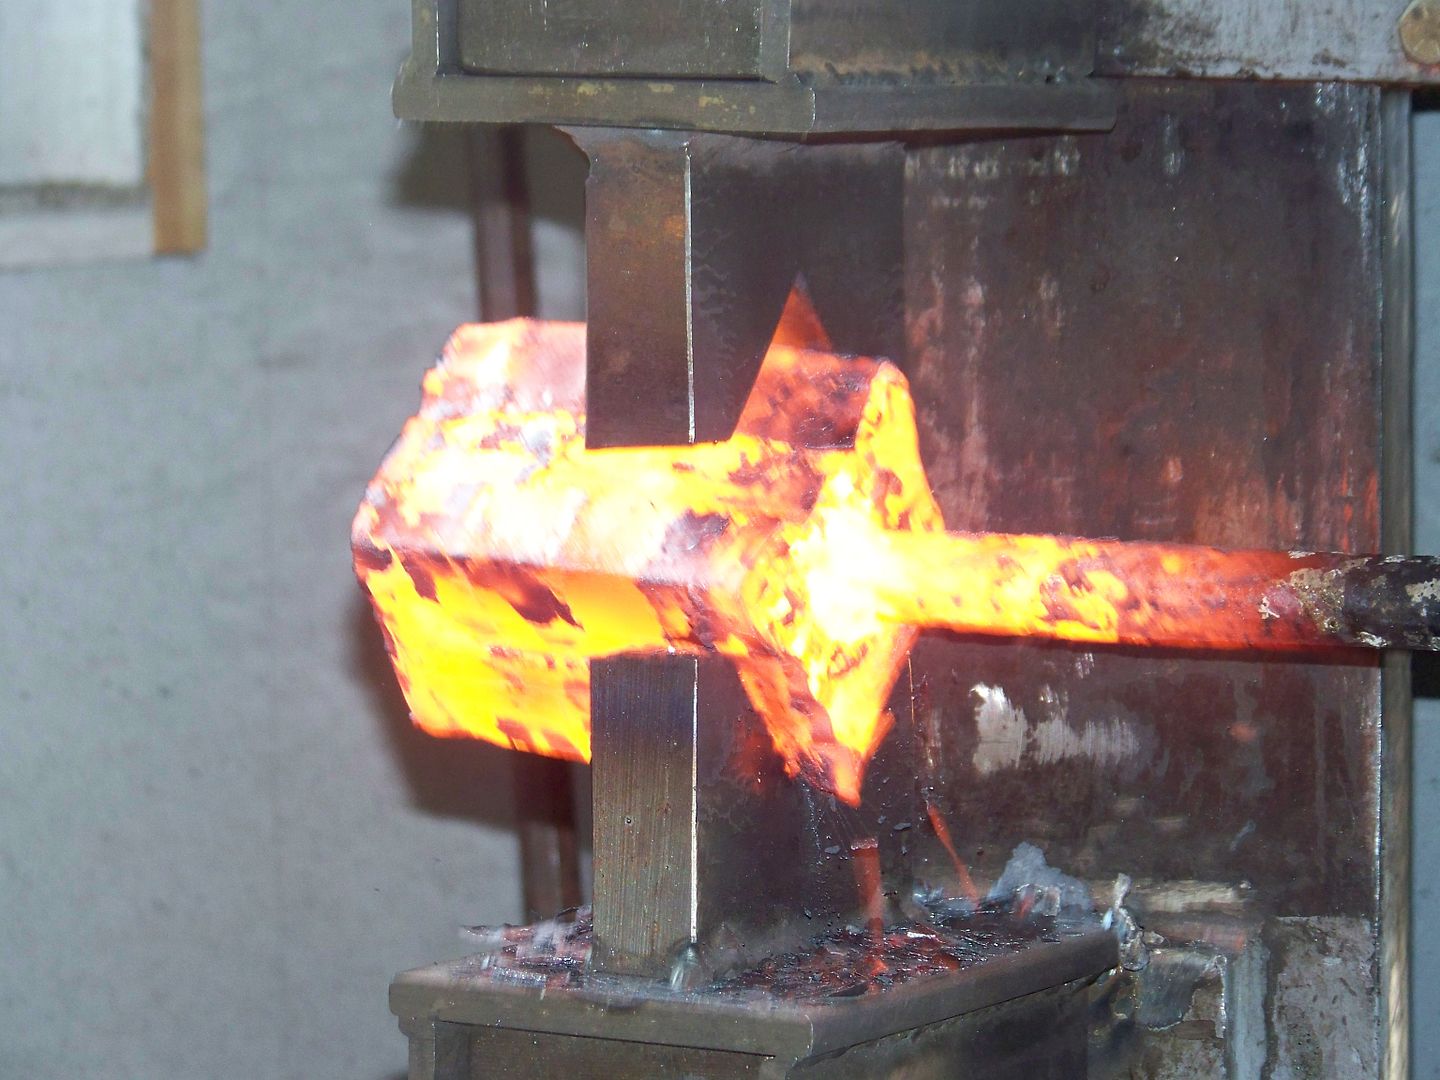
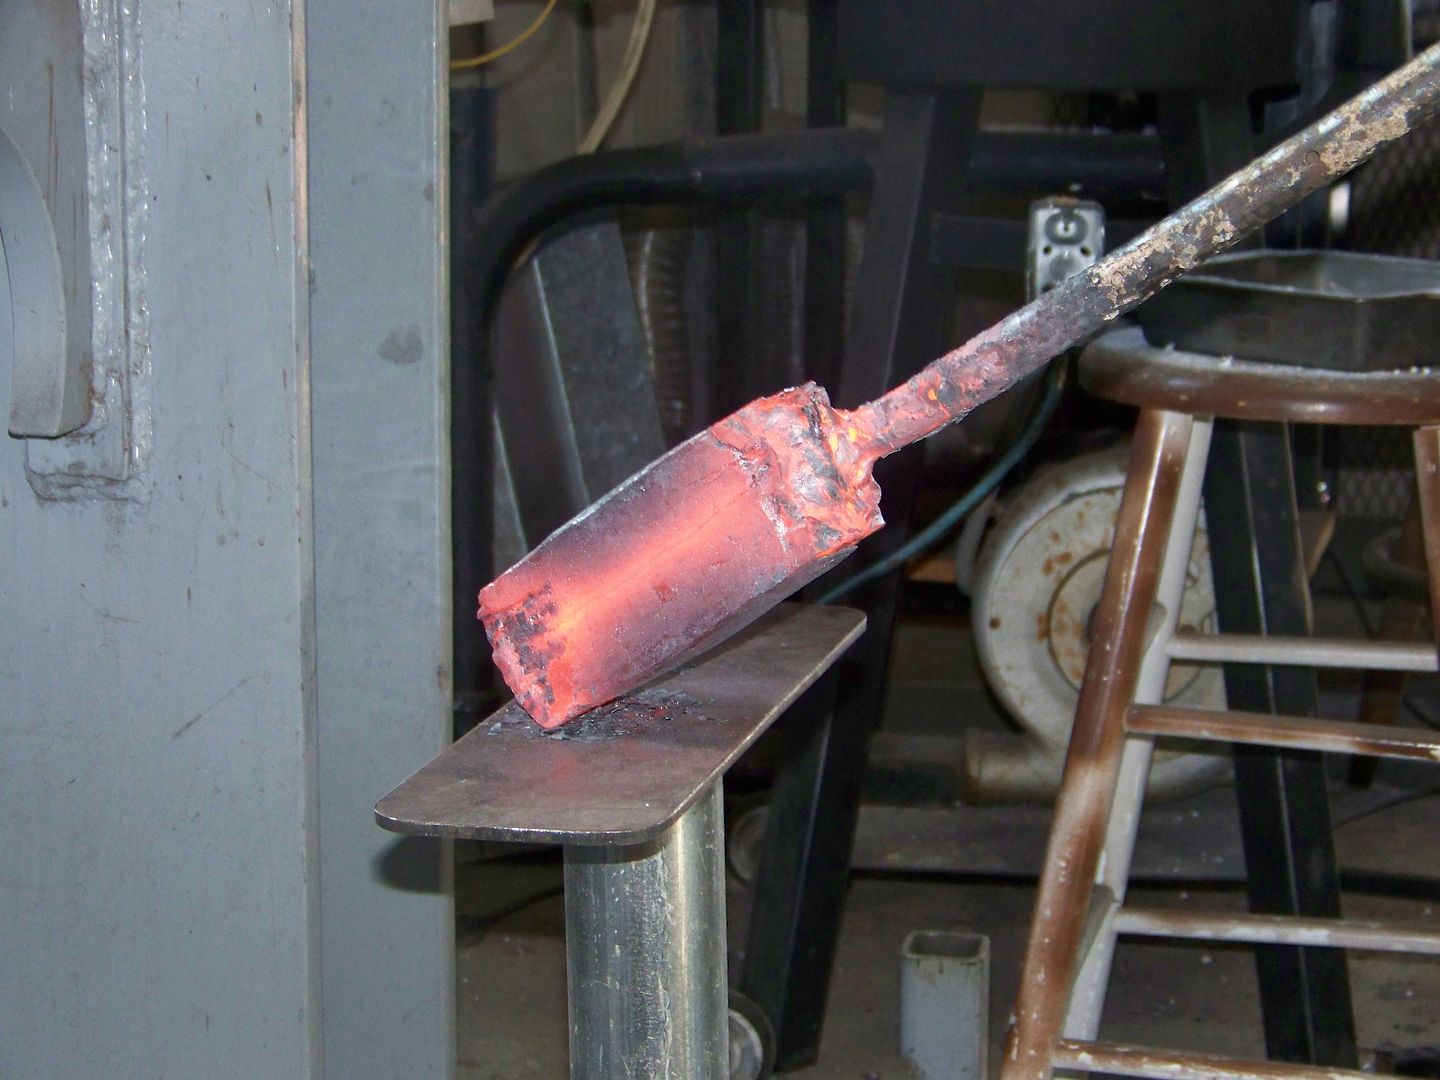
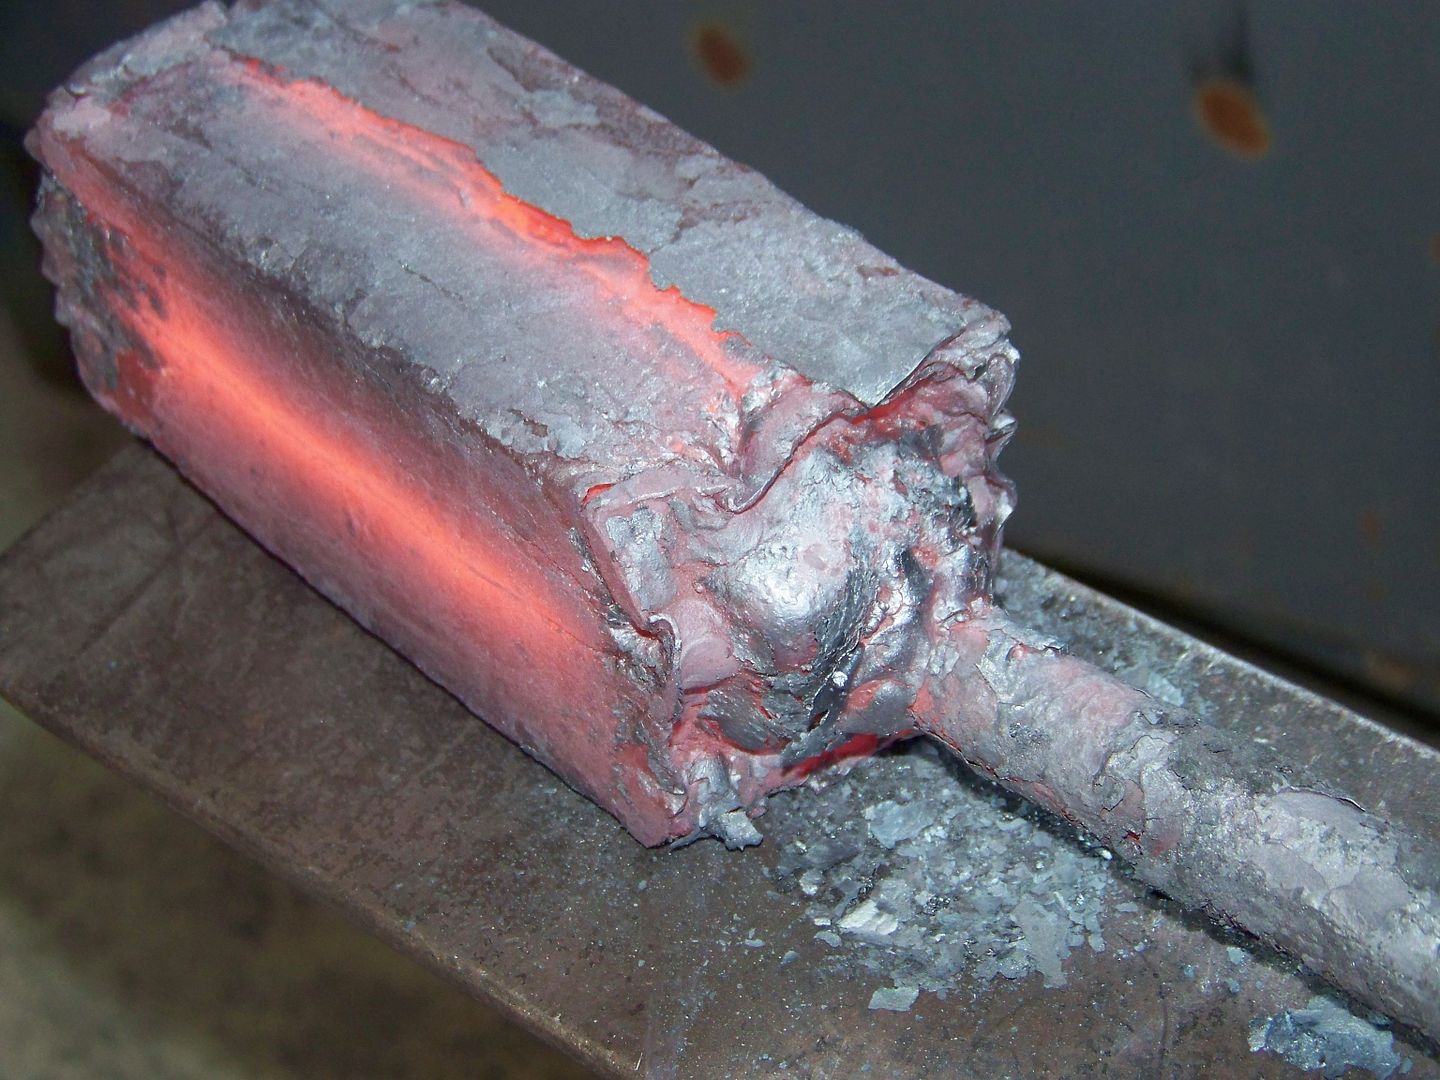
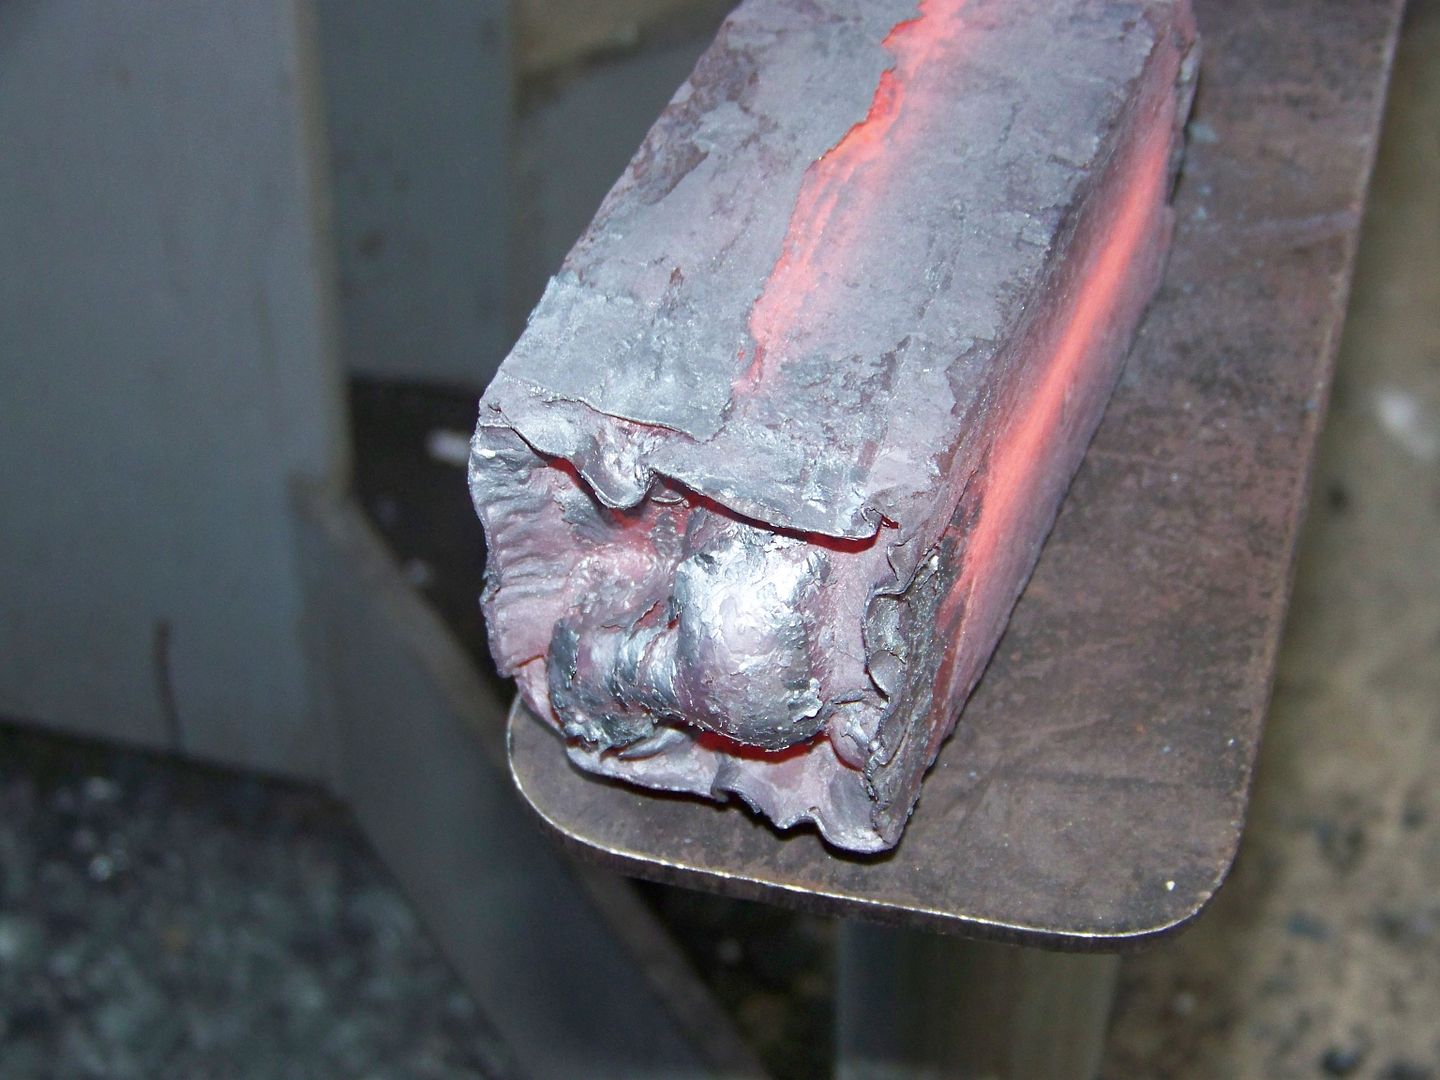
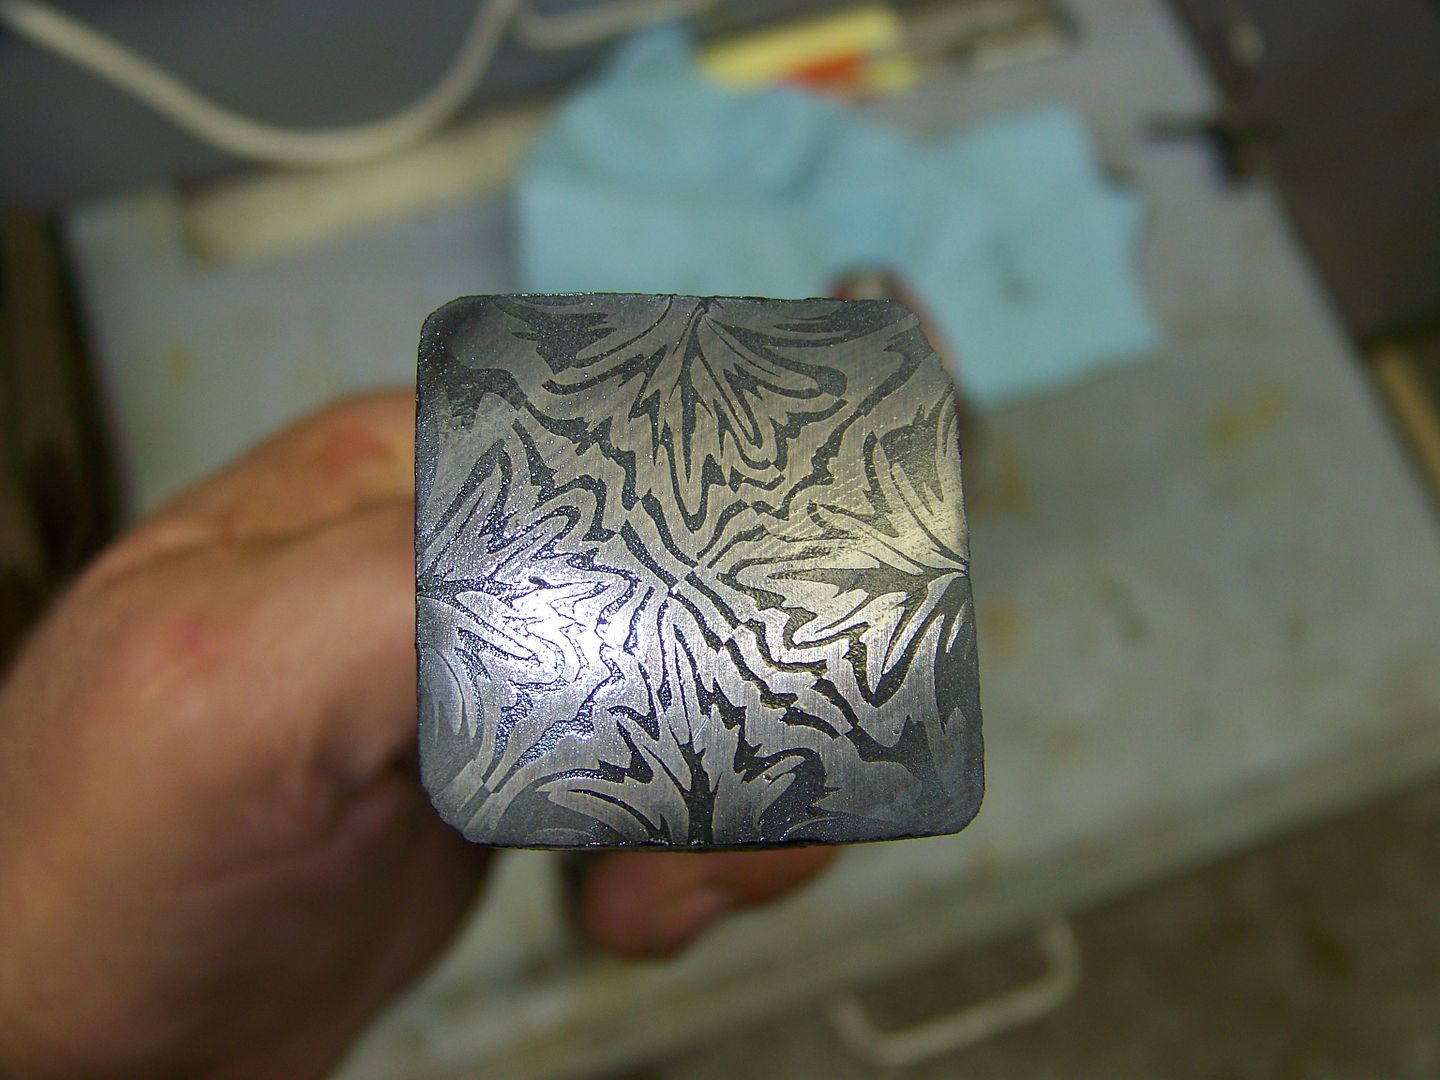
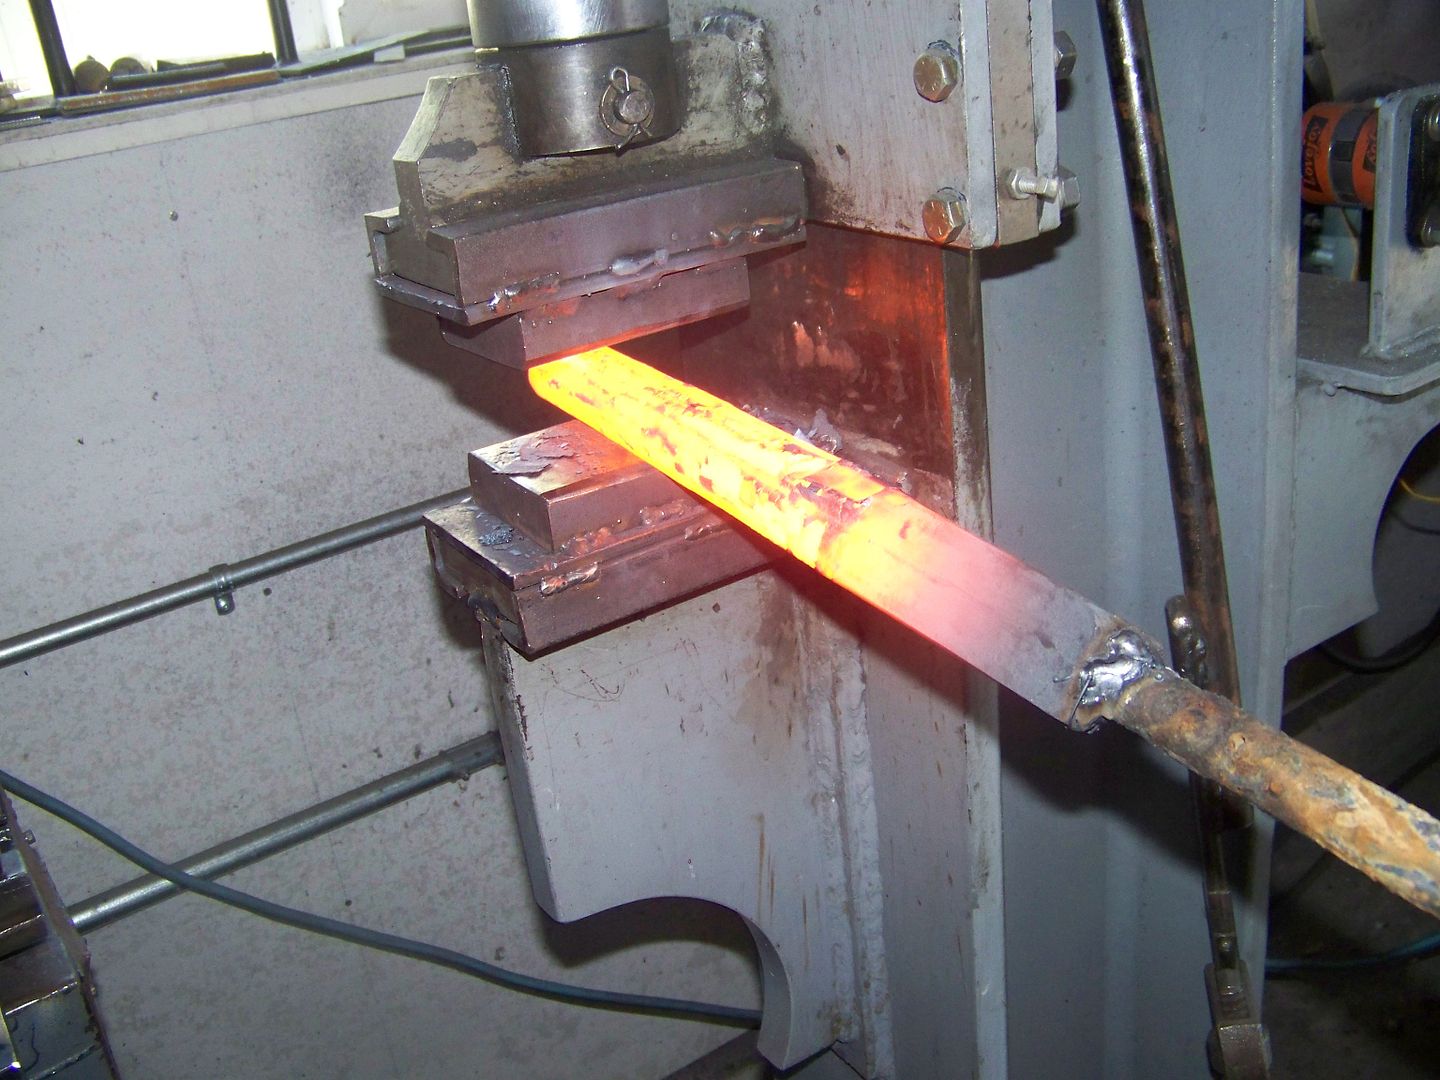
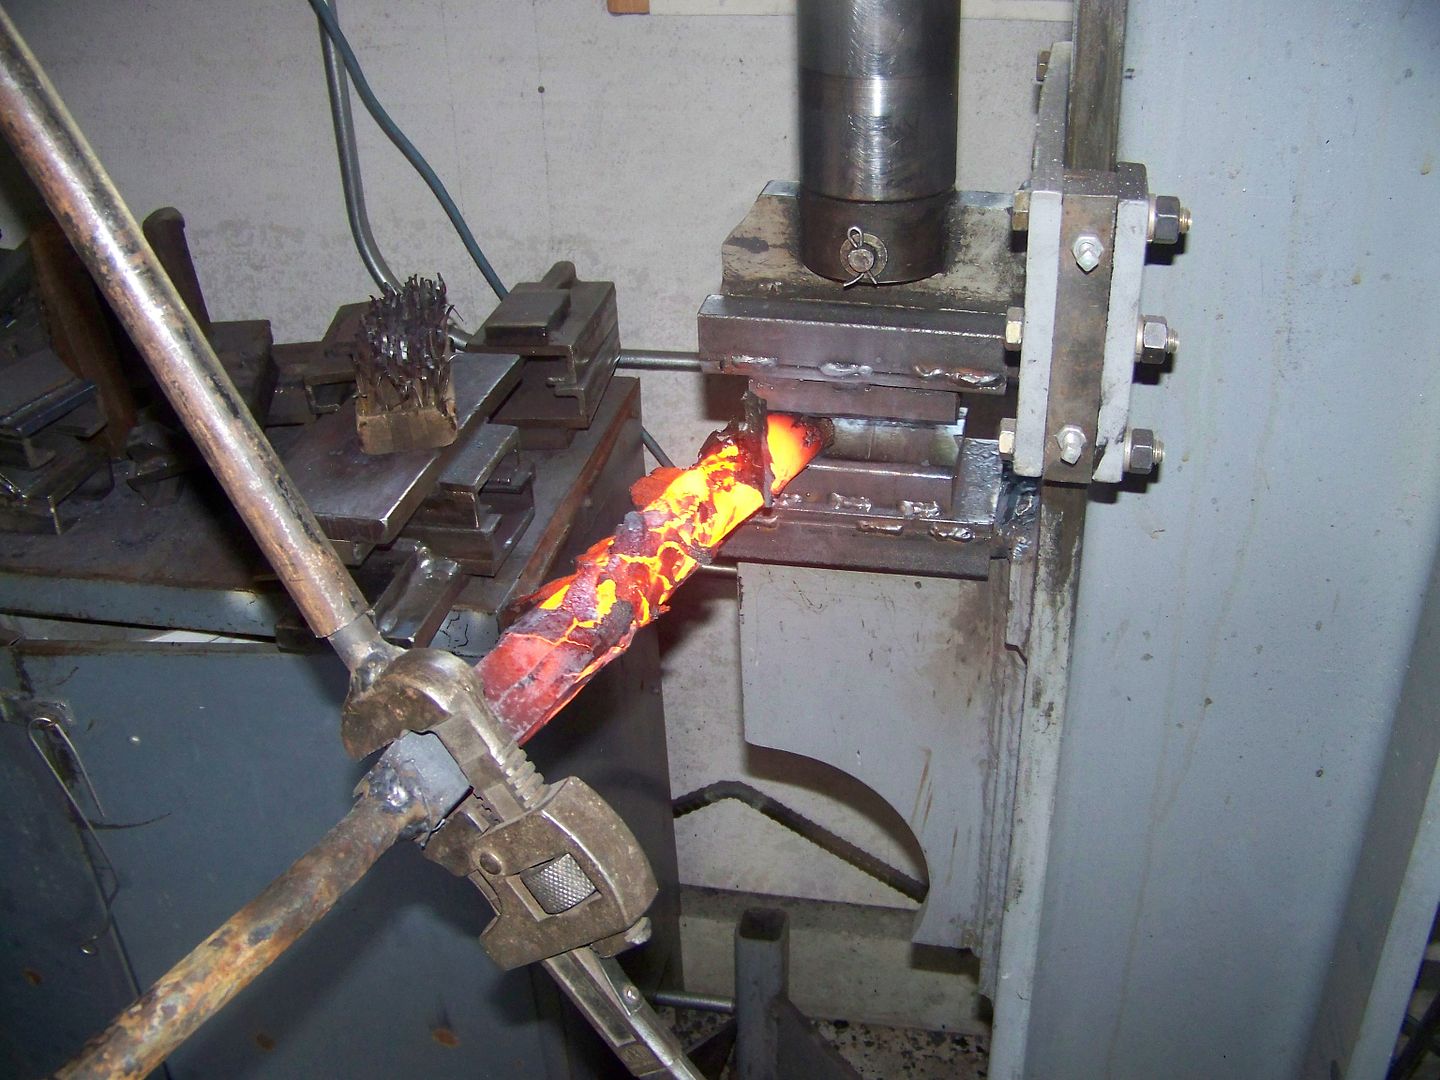
I only drew and folded these two billets twice and reformed them both in a flat and V shaped set of press dies to make them triangle shaped. I then cut the bad ends off and cut both billets into 4 pieces 3" long each. Cleaning both ends to 400 grit and etching them shows me the pattern. I put the 4 finer patterned ones together for the center and the 4 coarse patterned around them to get a square once again.
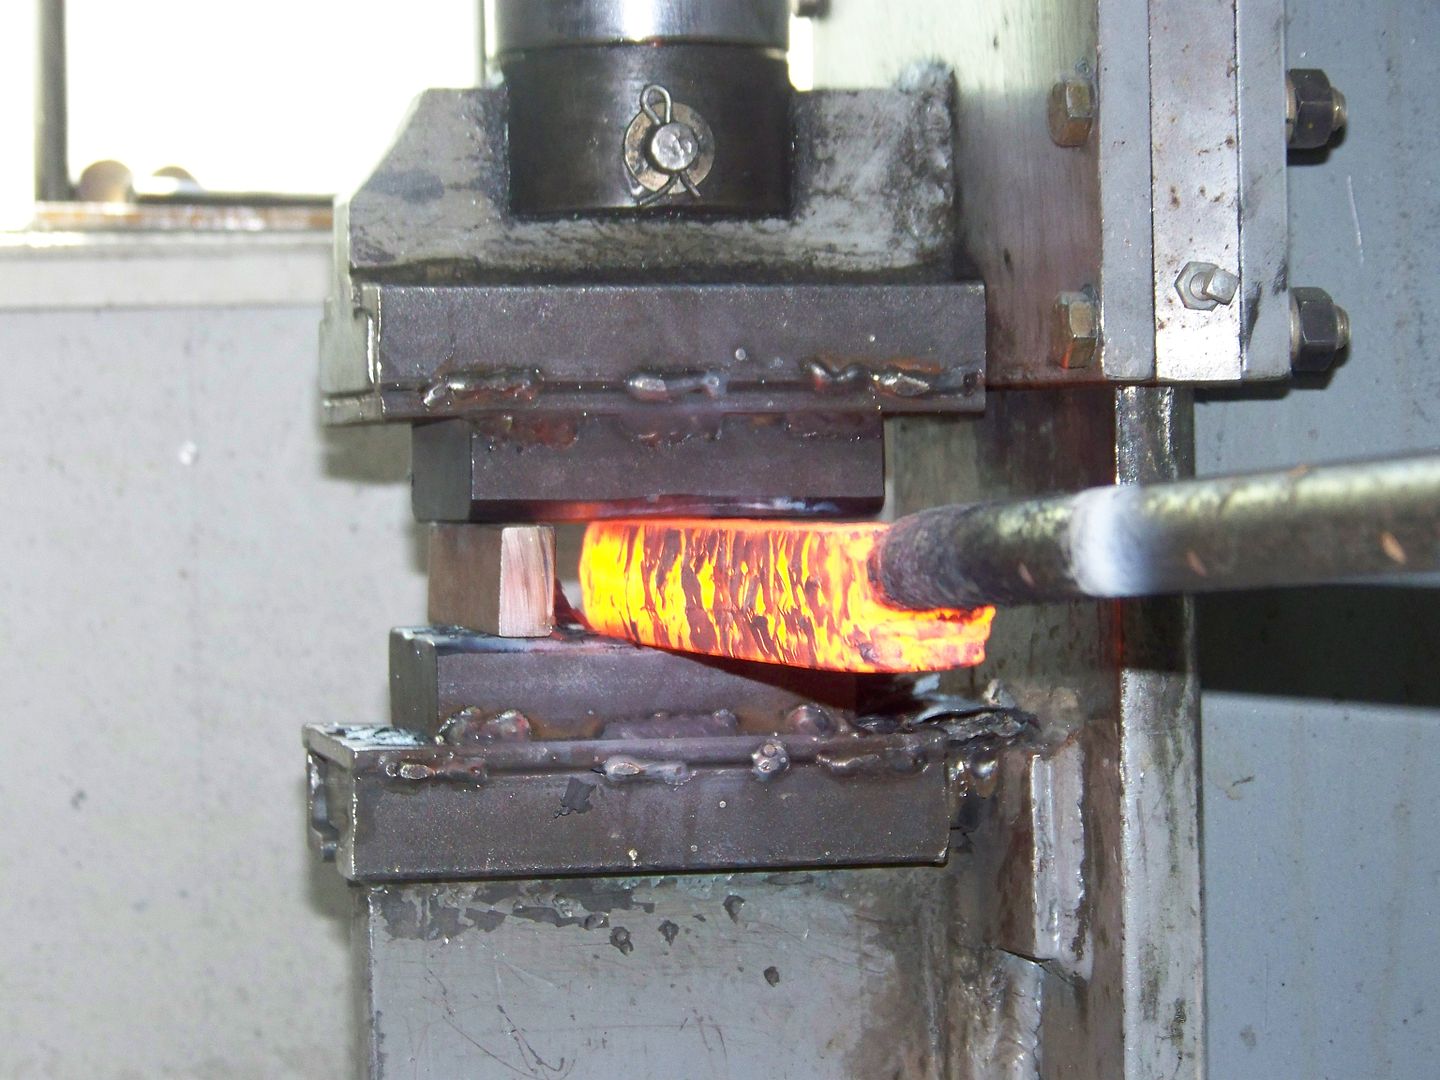
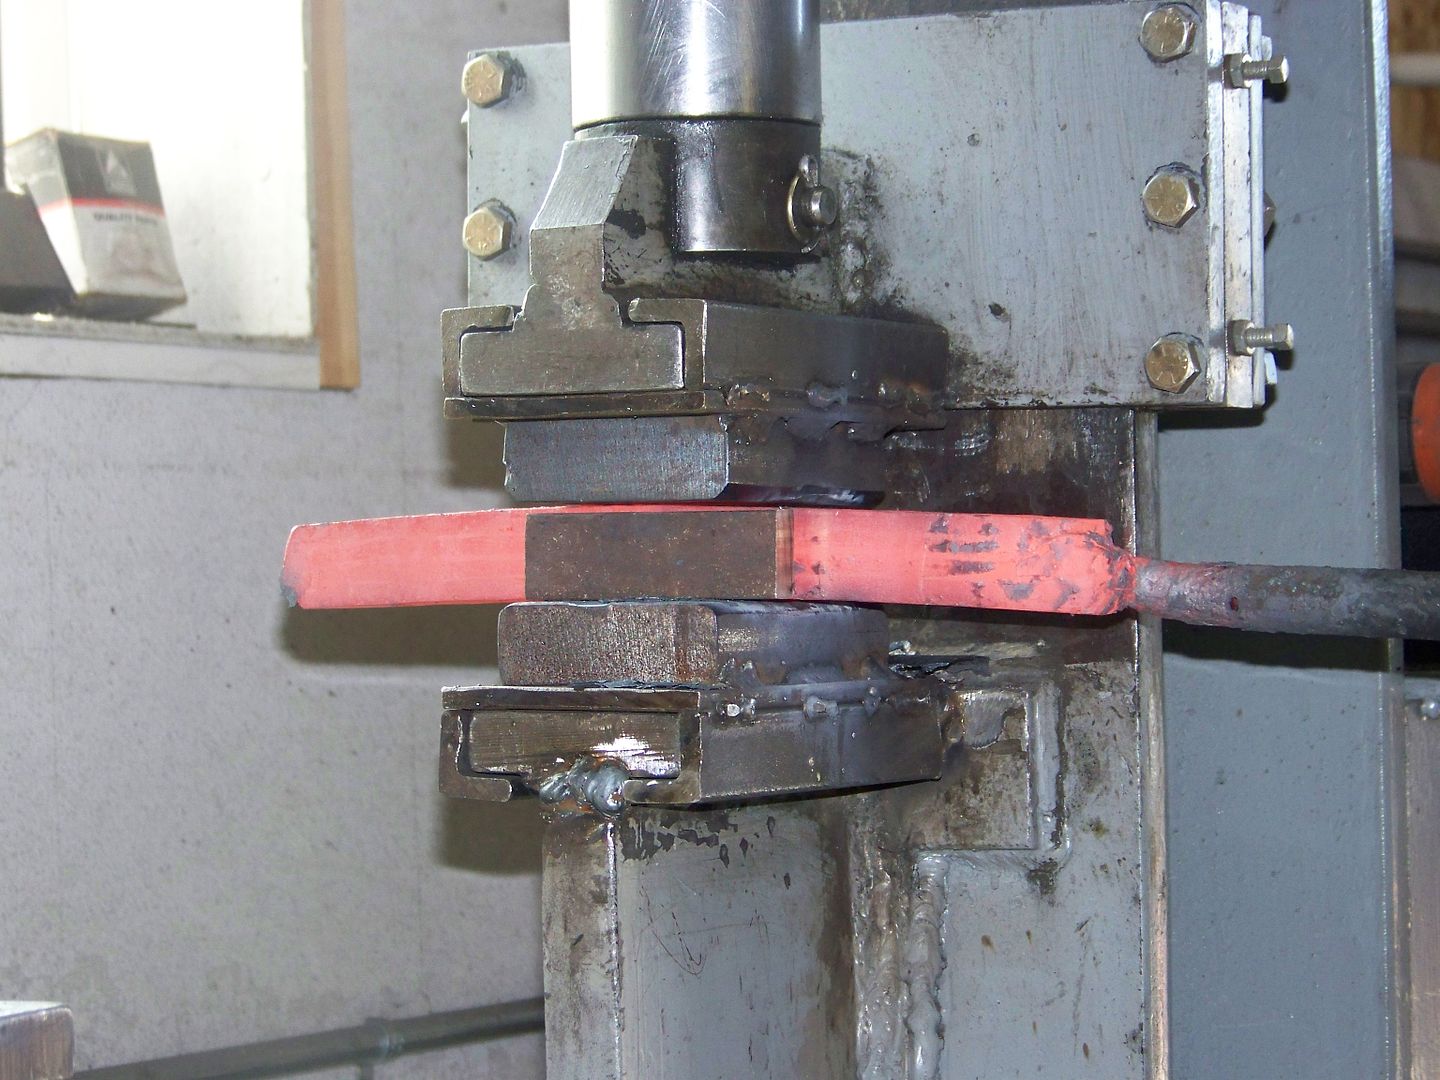
Next will be a steel canister with used stainless foil lining and forge welded in squaring dies, removed from the canister, drawn out, rounded, twisted, flattened and surfaced into a bar. Come back soon, the fun is just getting started.
I only drew and folded these two billets twice and reformed them both in a flat and V shaped set of press dies to make them triangle shaped. I then cut the bad ends off and cut both billets into 4 pieces 3" long each. Cleaning both ends to 400 grit and etching them shows me the pattern. I put the 4 finer patterned ones together for the center and the 4 coarse patterned around them to get a square once again.
Next will be a steel canister with used stainless foil lining and forge welded in squaring dies, removed from the canister, drawn out, rounded, twisted, flattened and surfaced into a bar. Come back soon, the fun is just getting started.
Last edited:
Mike Martinez
Well-Known Member
Mr. B, you sure are an inspiring artisan! Thank you for sharing your work, much like everyone else, I'm glued to this thread.
Regards,
Mike
Regards,
Mike
BRad704
Well-Known Member
Next will be a steel canister with used stainless foil lining and forge welded in squaring dies, removed from the canister, drawn out, rounded, twisted, flattened and surfaced into a bar. Come back soon, the fun is just getting started.
Is that all?
")
Bruce Bump
Forum Owner-Moderator
Nope, then comes normalizing, annealing, profiling, drilling, filing, grinding the bevels, stress relieveing, austinizing, quenching and tempering. Not to mention hardness testing, regrinding, fitting and hand rubbing. Oh I forgot etching and polishing. hehe
Is that all?
mike miller
KNIFE MAKER
All I can say is WOW.
Bruce Bump
Forum Owner-Moderator
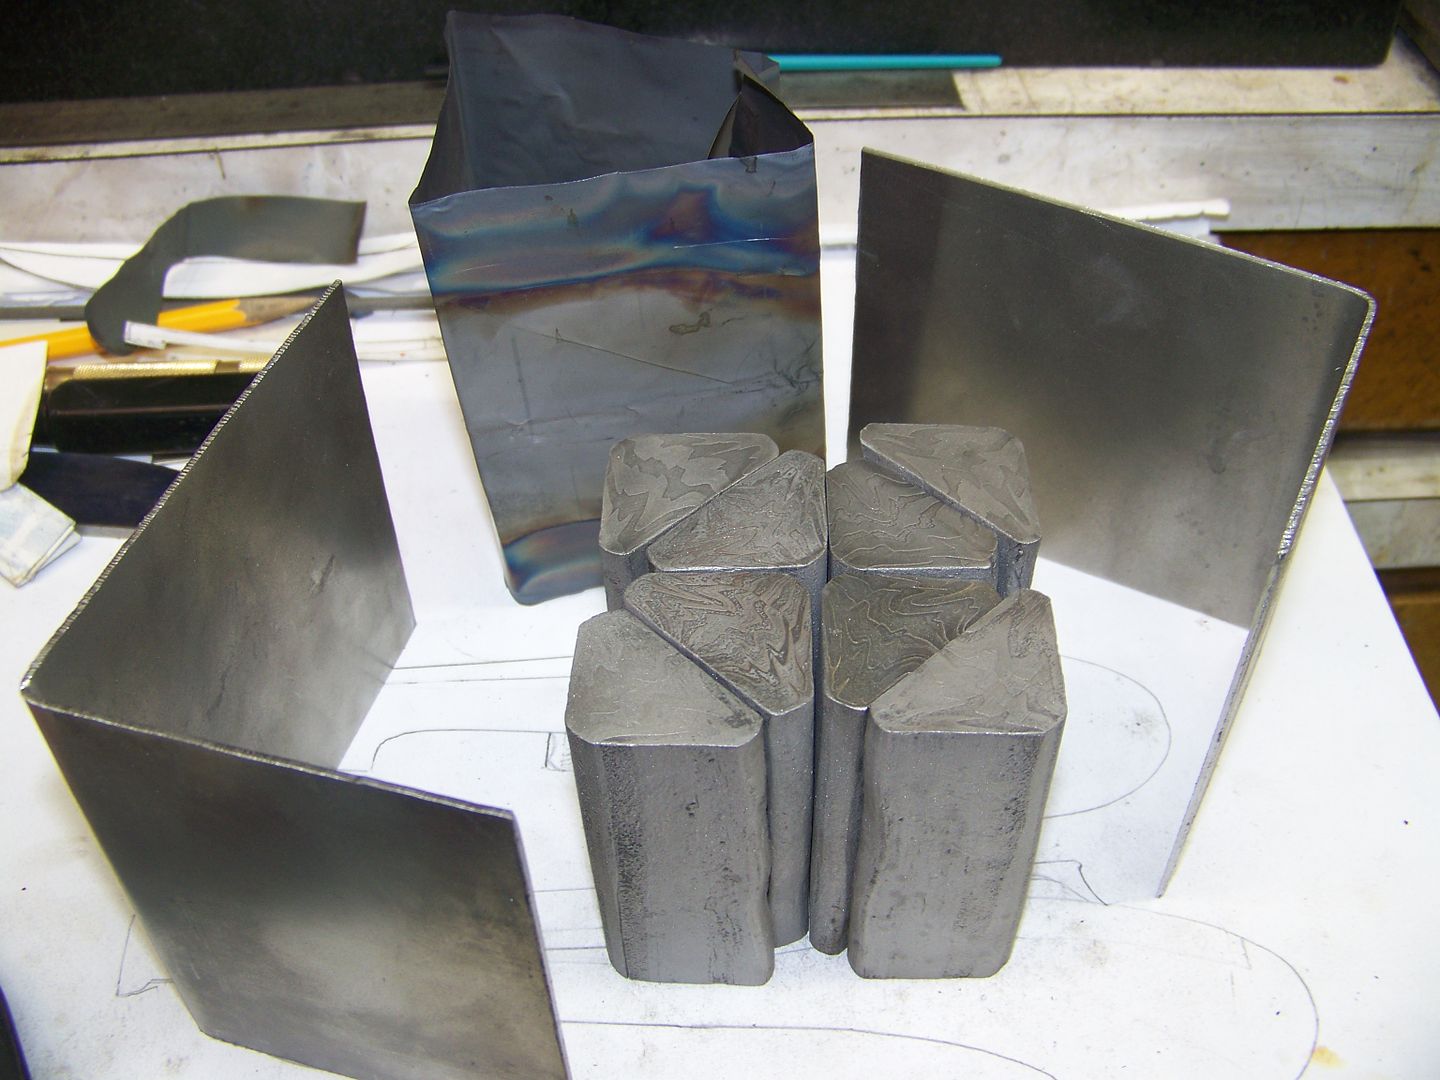
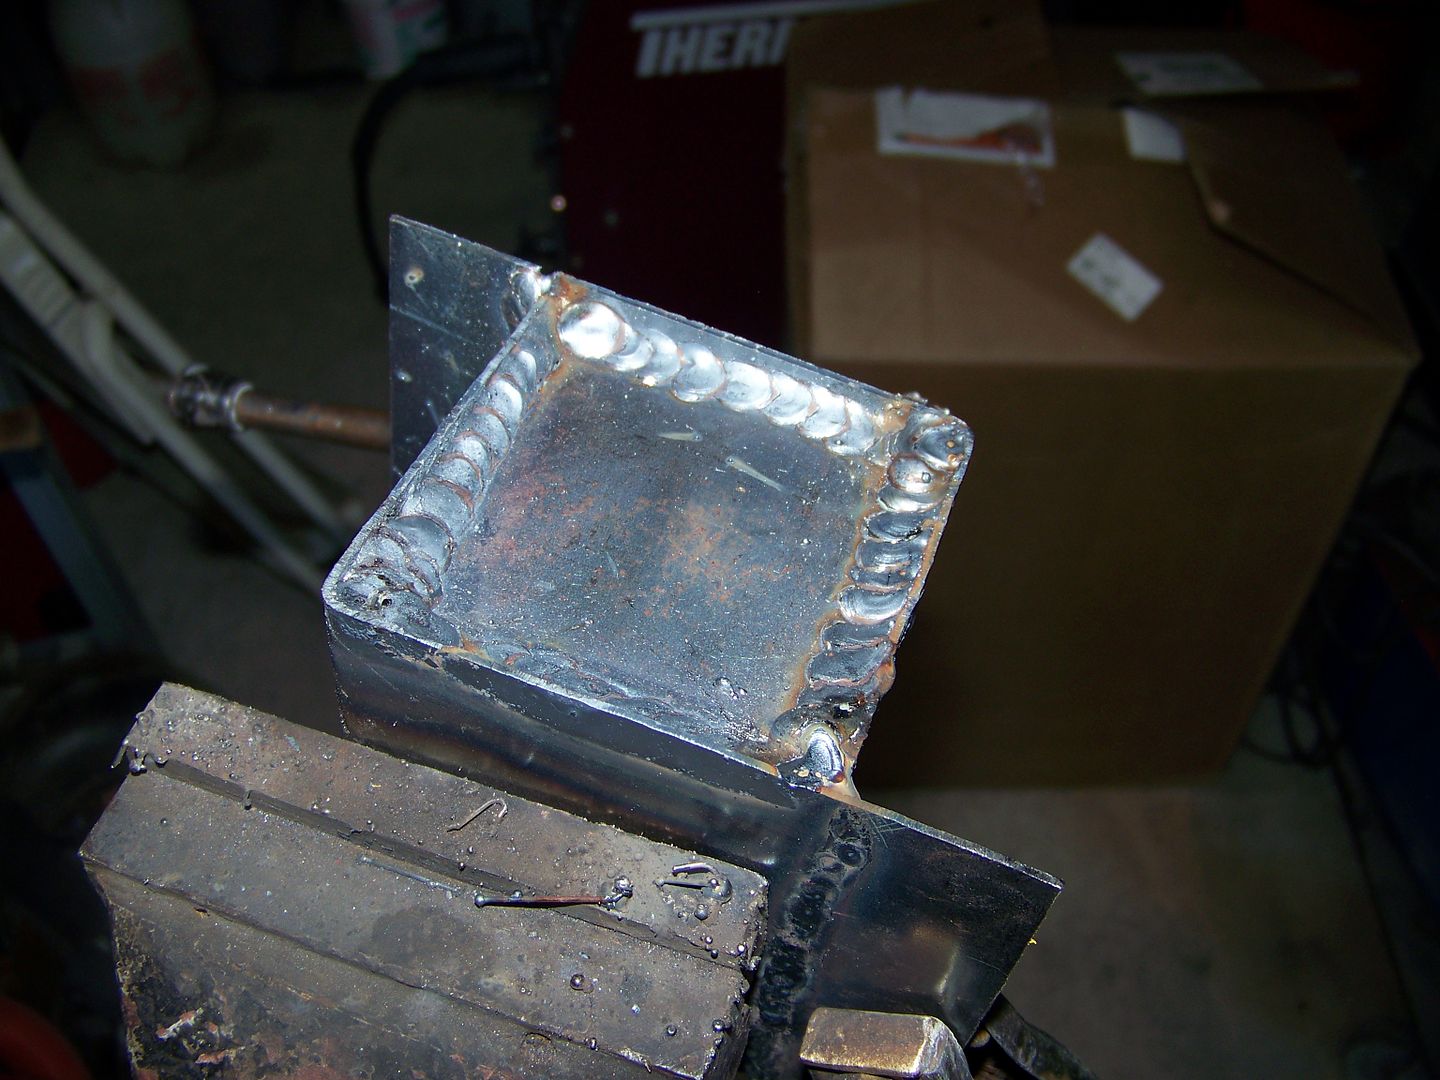
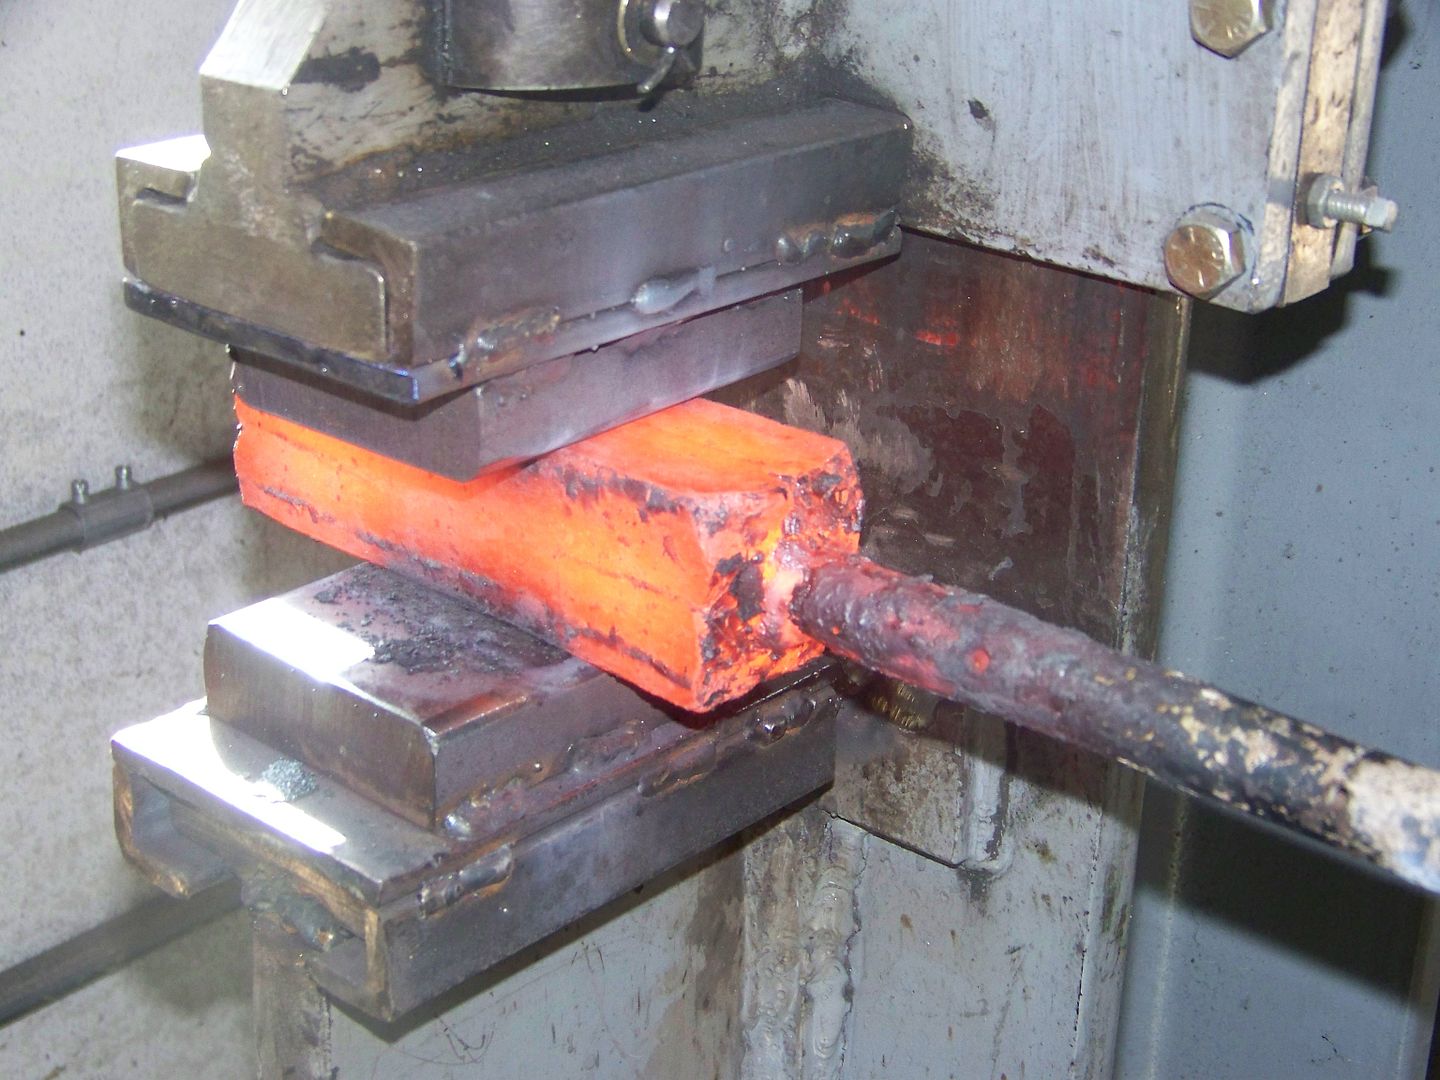
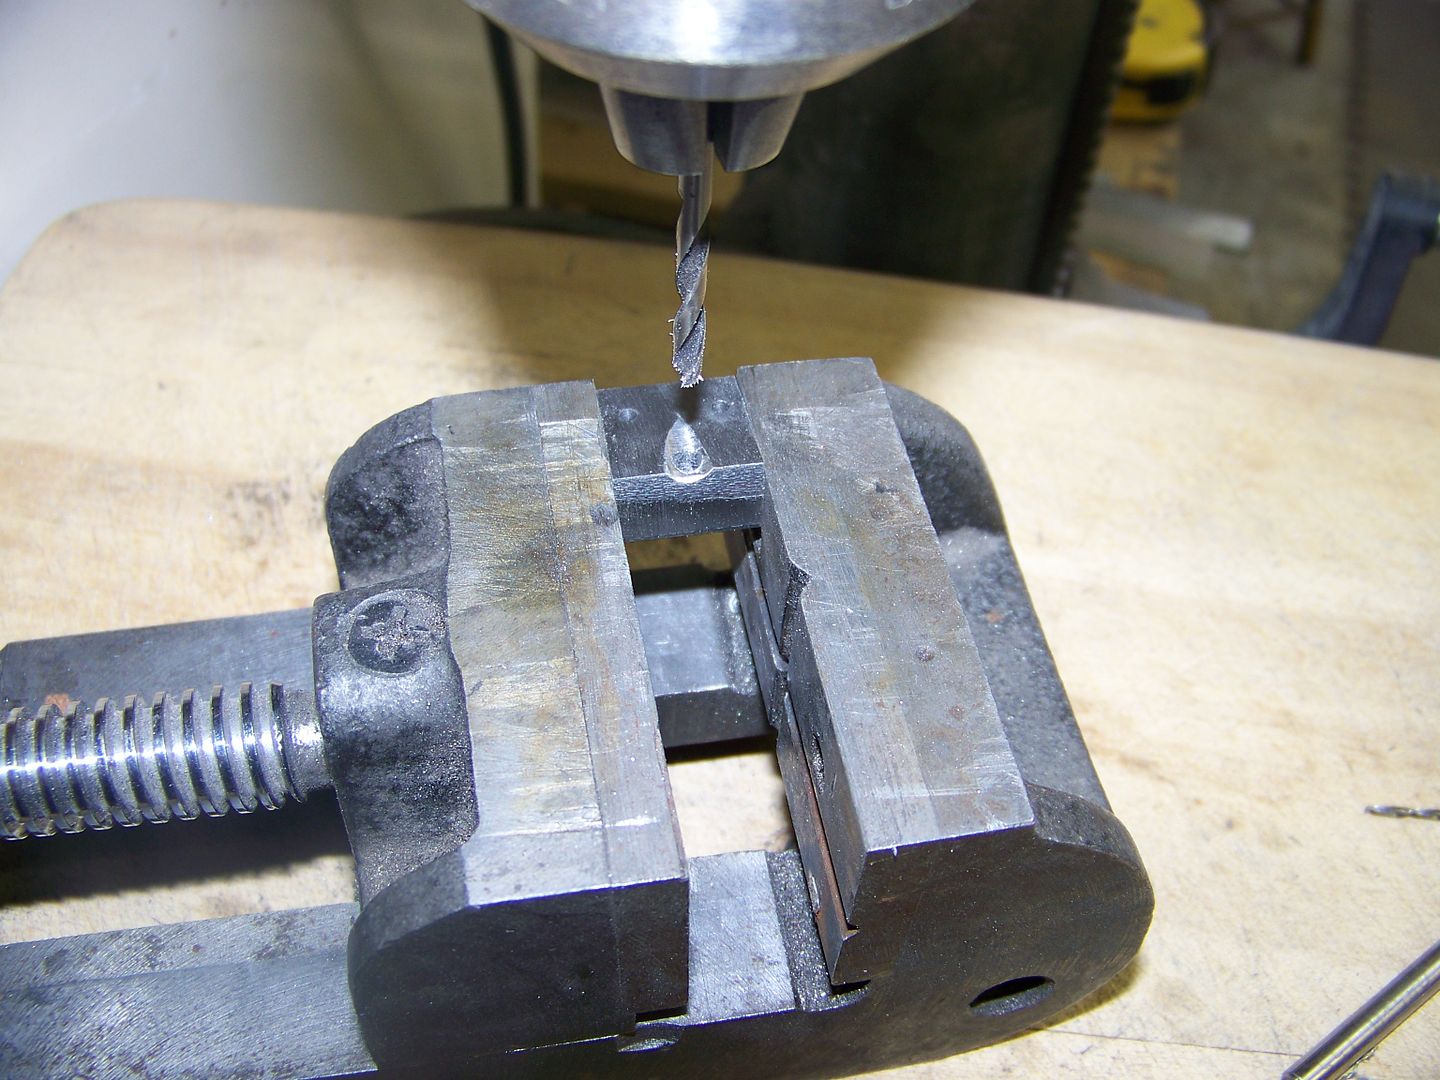
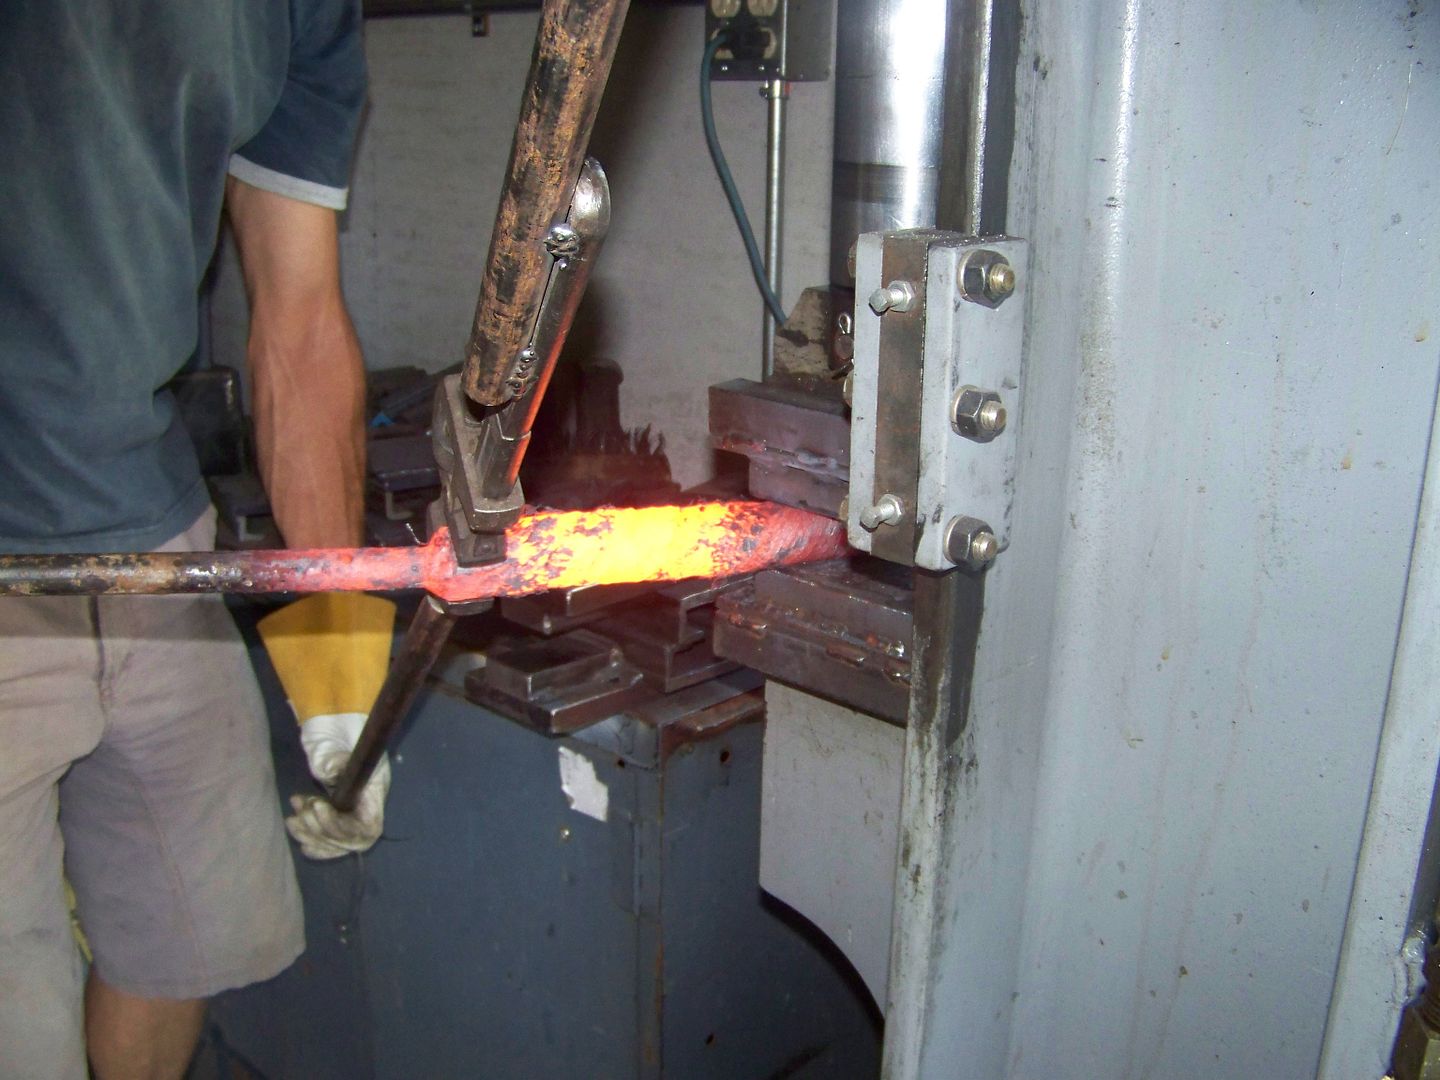
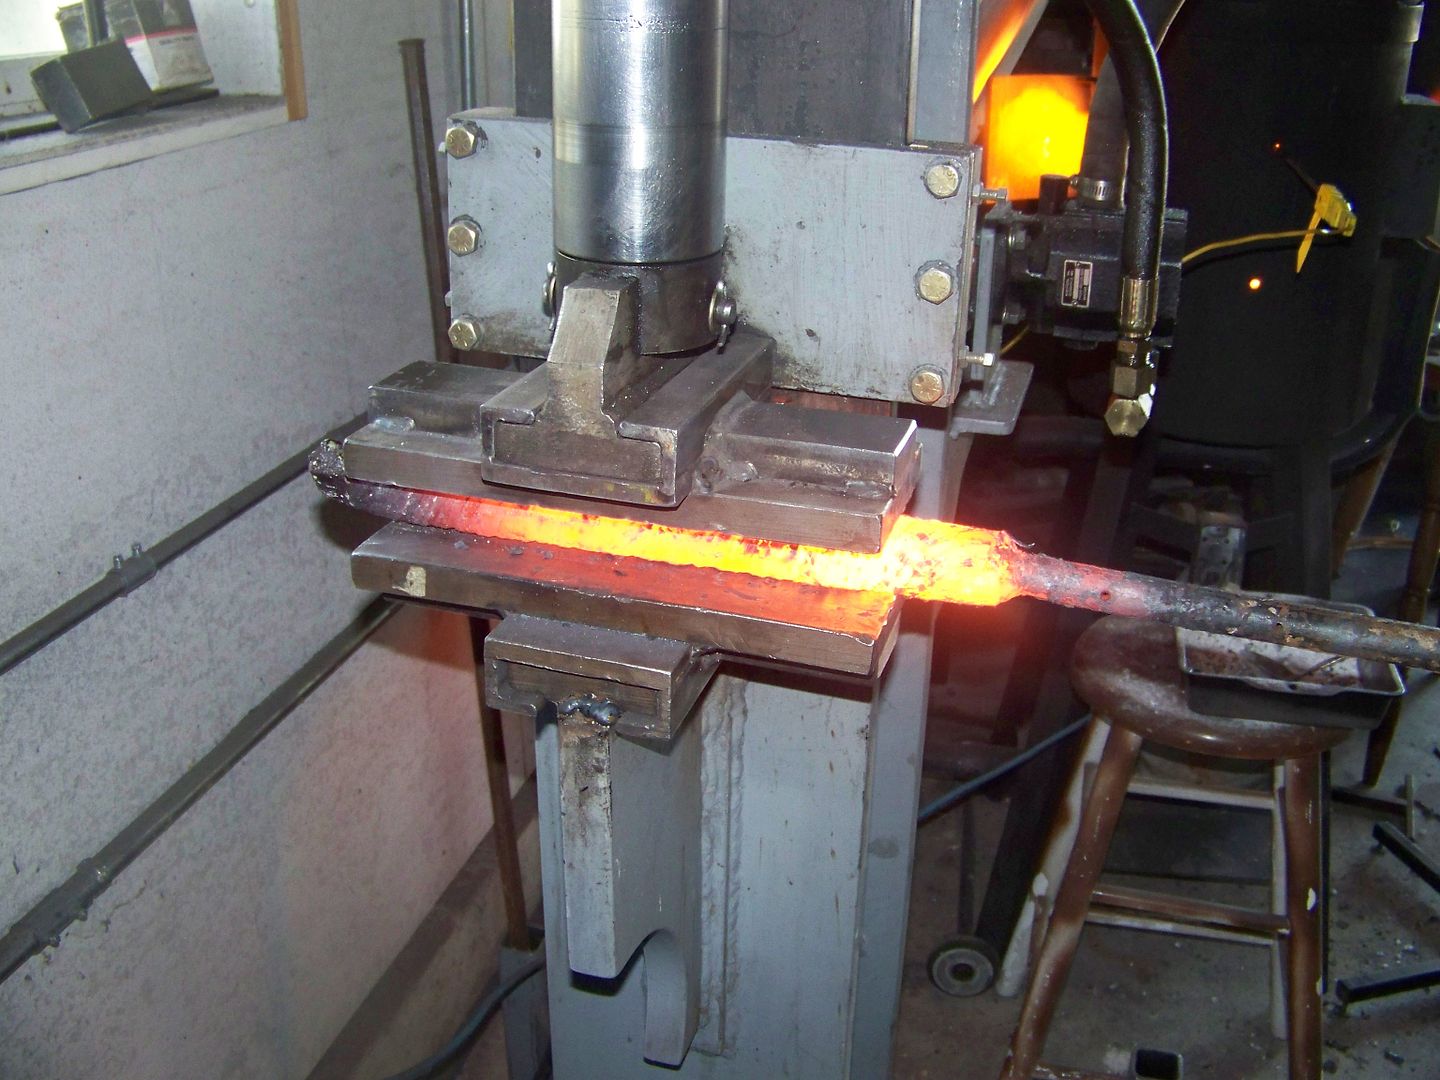
Here is the parts for the canister. Basically just thin wall mild steel works fine. The foil is used foil because the oxyidation formed on the surface helps prevent it from forge welding to the high carbon steel parts inside. I just wrap the foil around the parts and weld the mild steel box around it. The end caps need to be heavier gauge though to help hold the box together when the welding begins. I used 1/8" plate and just cut them out to fit inside the 4 walls. Inside is important too to help hold the box together.
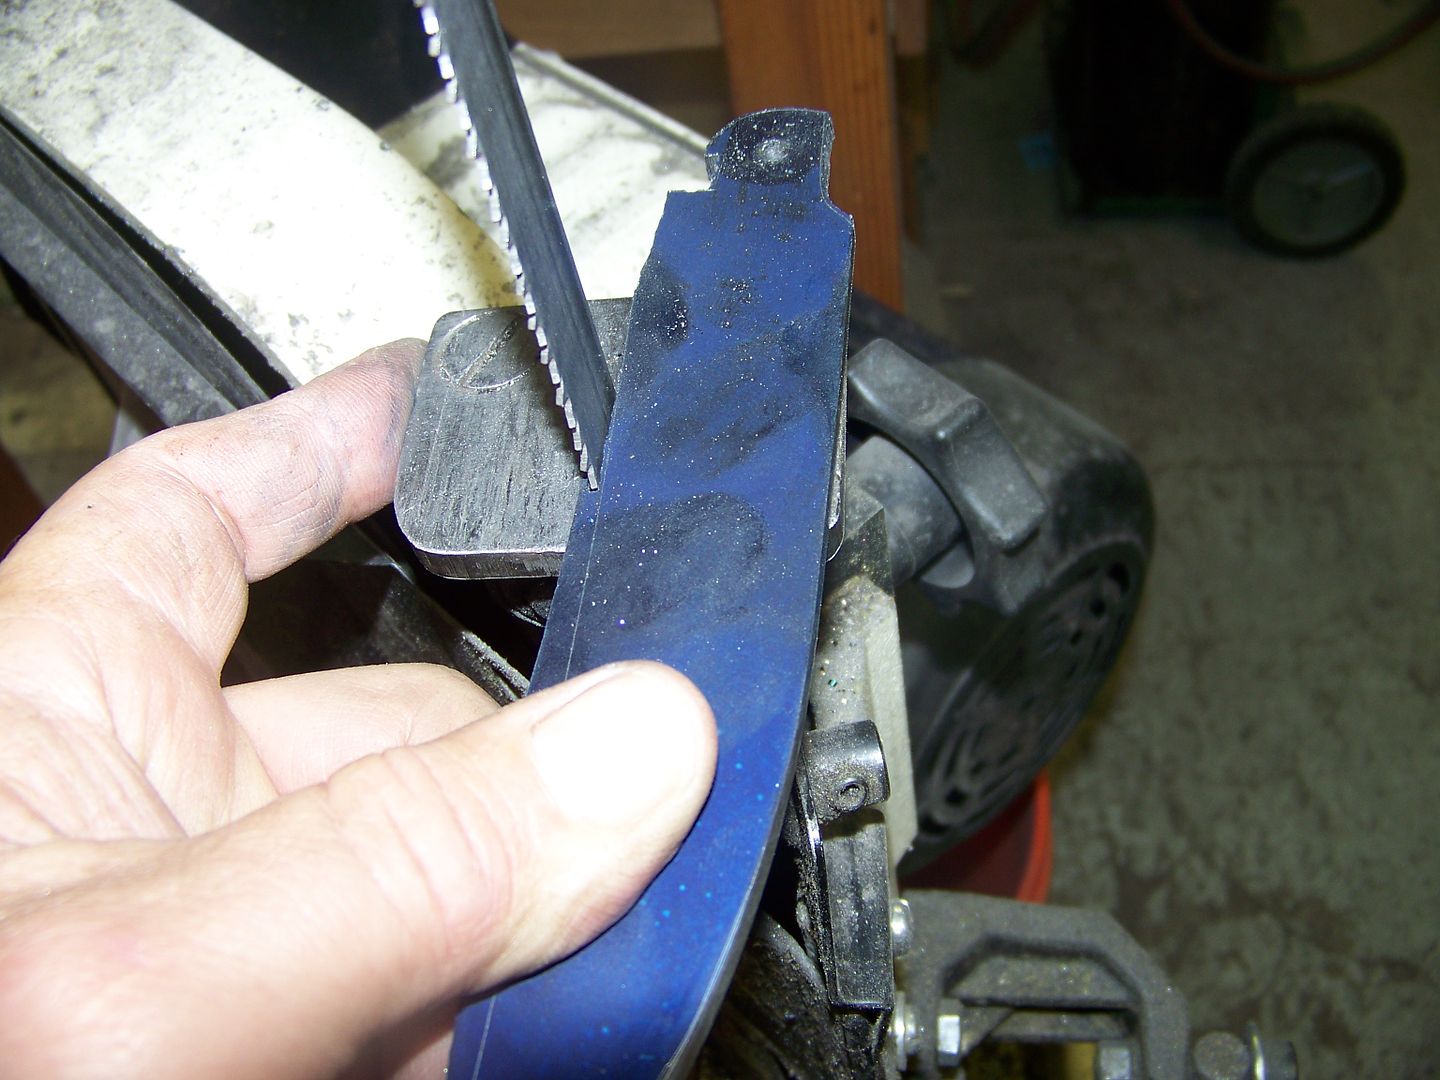
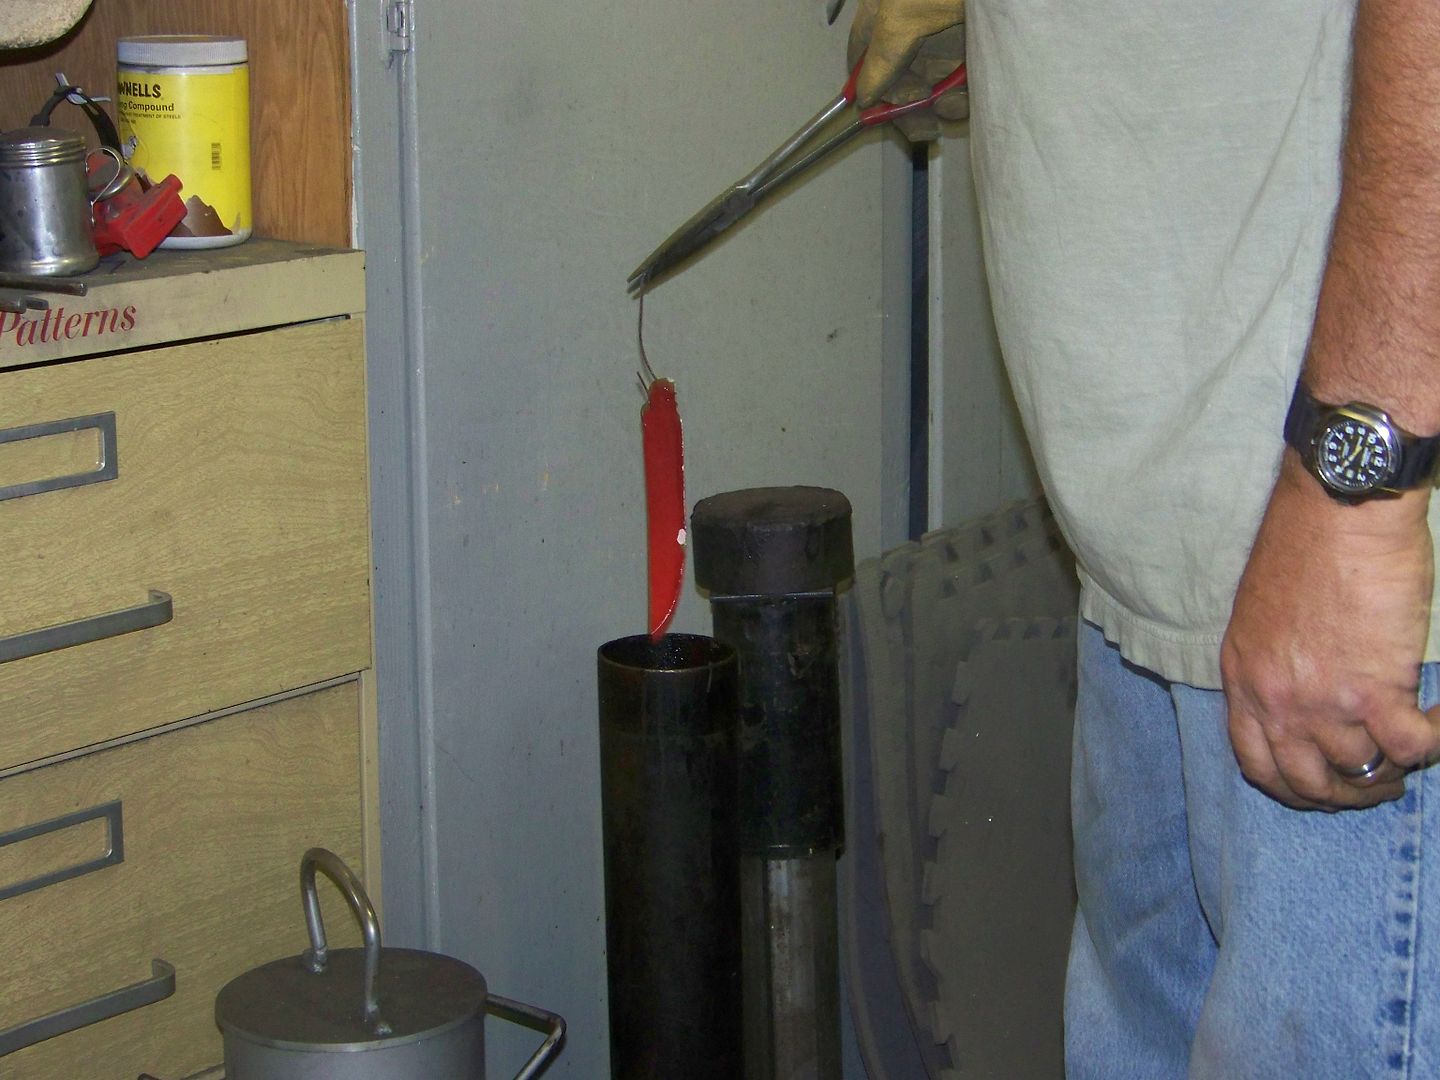
Oh, I forgot to tell ya I bead blasted the scale off the triangled parts. I like the pattern best if the grinder isnt used for removing scale. The mating lines will not be visible which makes for a better pattern.

Oh, I forgot to tell ya I bead blasted the scale off the triangled parts. I like the pattern best if the grinder isnt used for removing scale. The mating lines will not be visible which makes for a better pattern.
Last edited:
Bruce Bump
Forum Owner-Moderator
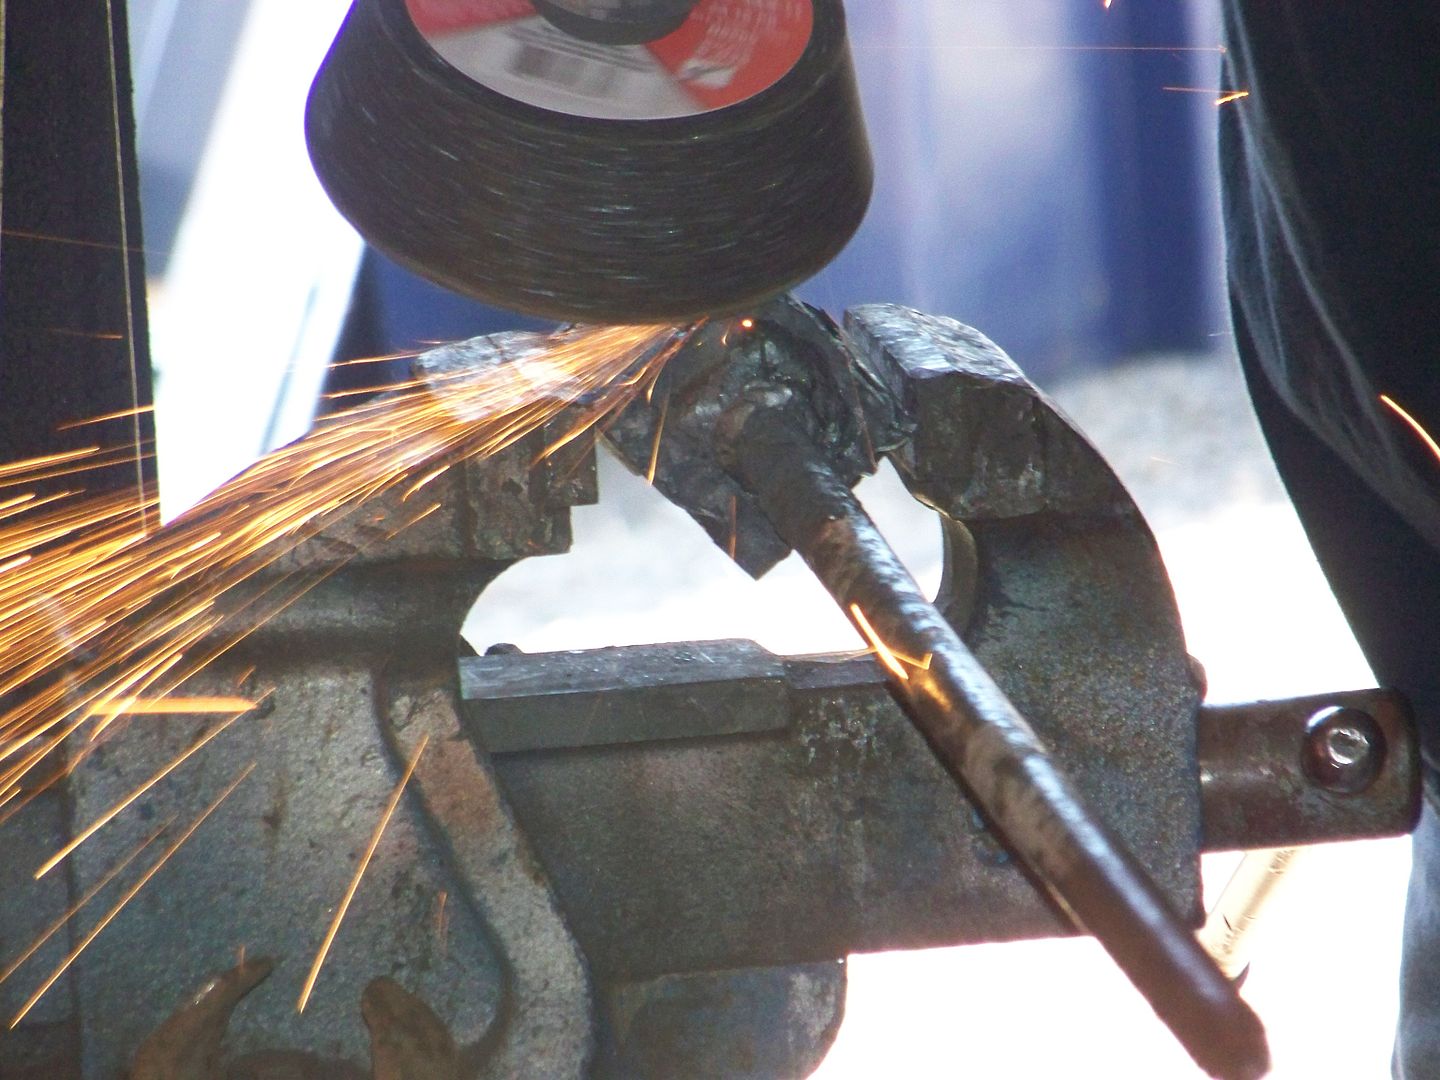
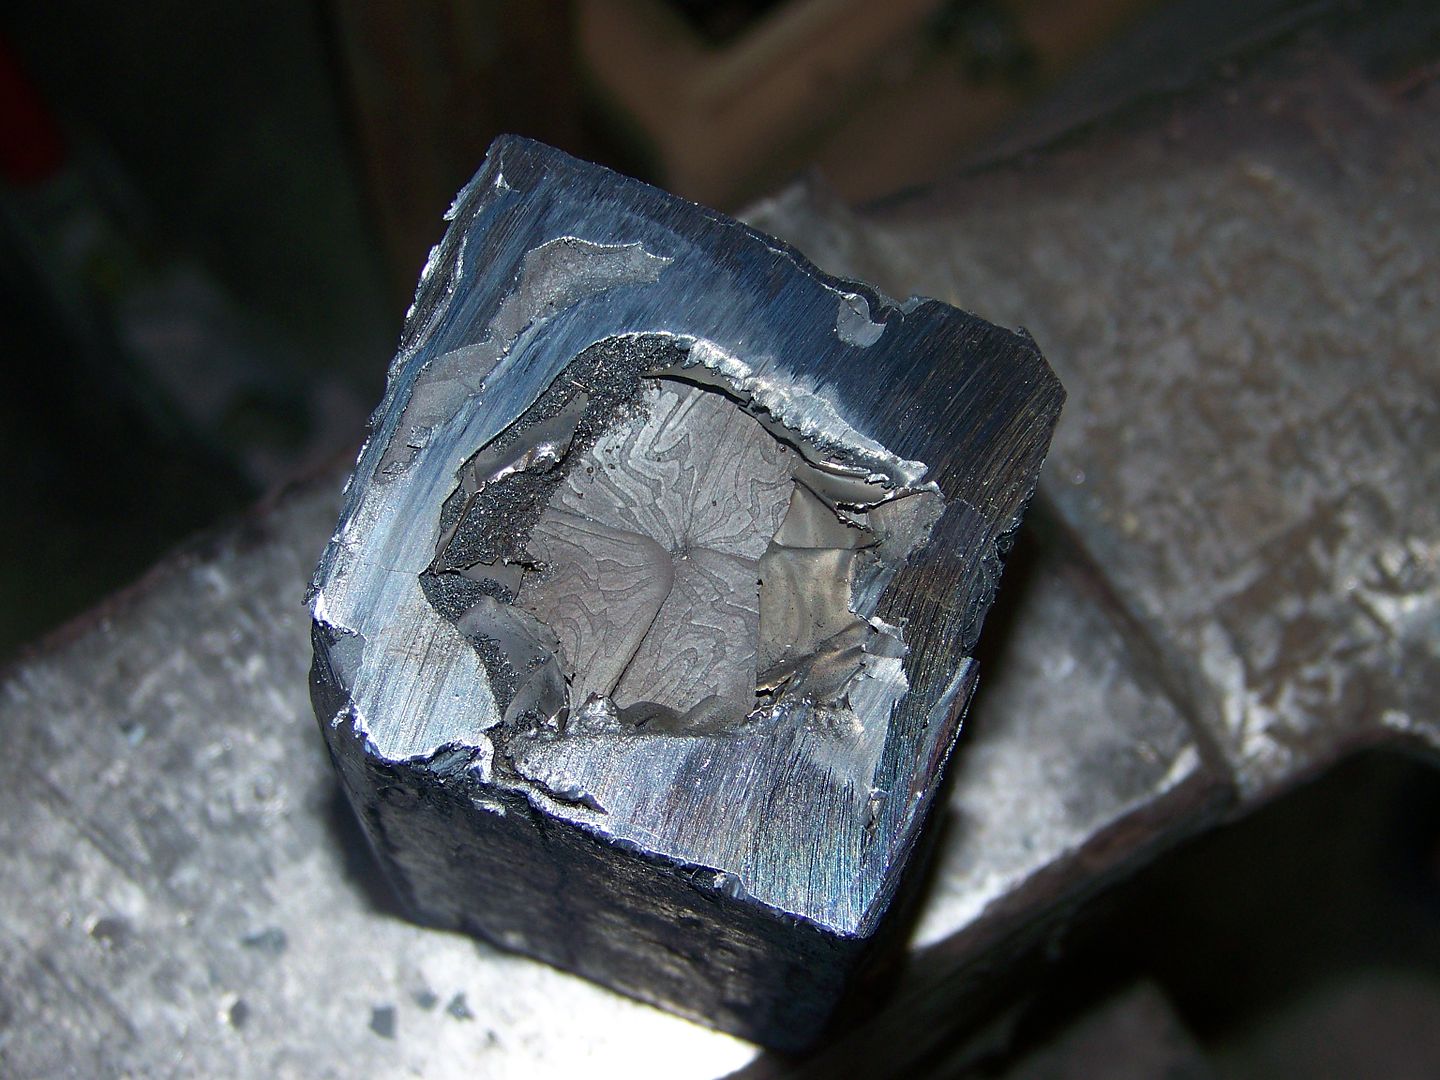
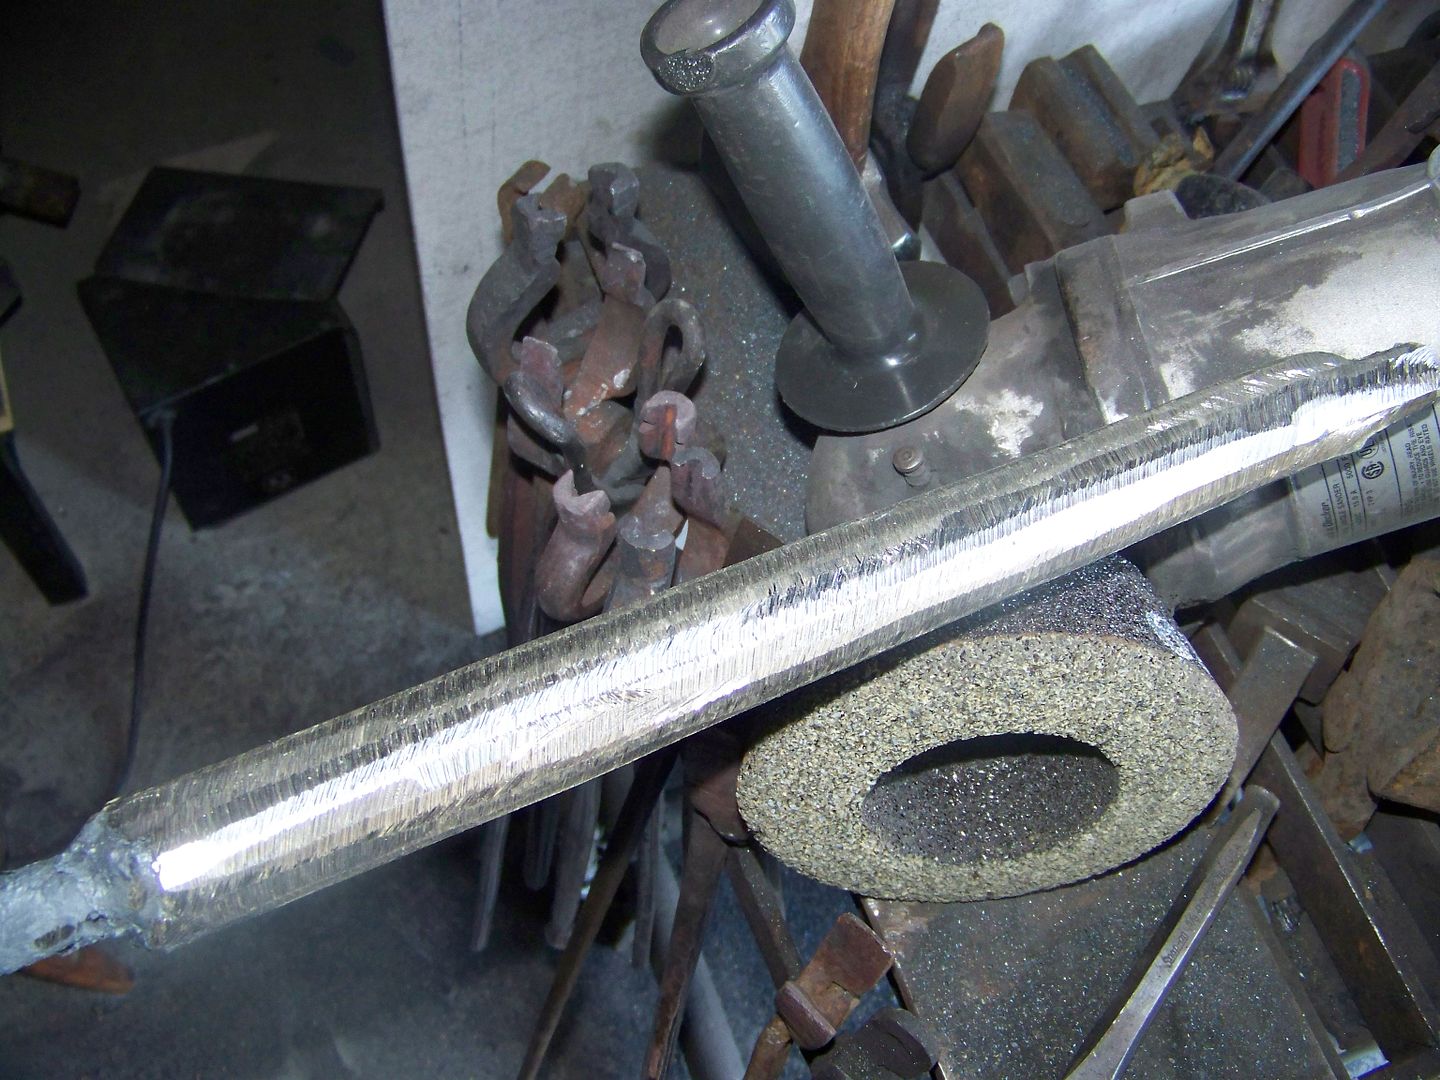
Now that the parts are forge welded inside and drawn out a few inches I need to remove the canister. I ground off two corners and cut both ends off and peeled off the can. The only problem I had was the canister got sqeezed into a couple of the gaps between the triangles and get trapped. It did come off but not as clean and easy as expected. I plan to surface all 4 sides and etch the billet to see if there is any remaining mild steel in this billet. Mild steel shows up as grey color from the etch.
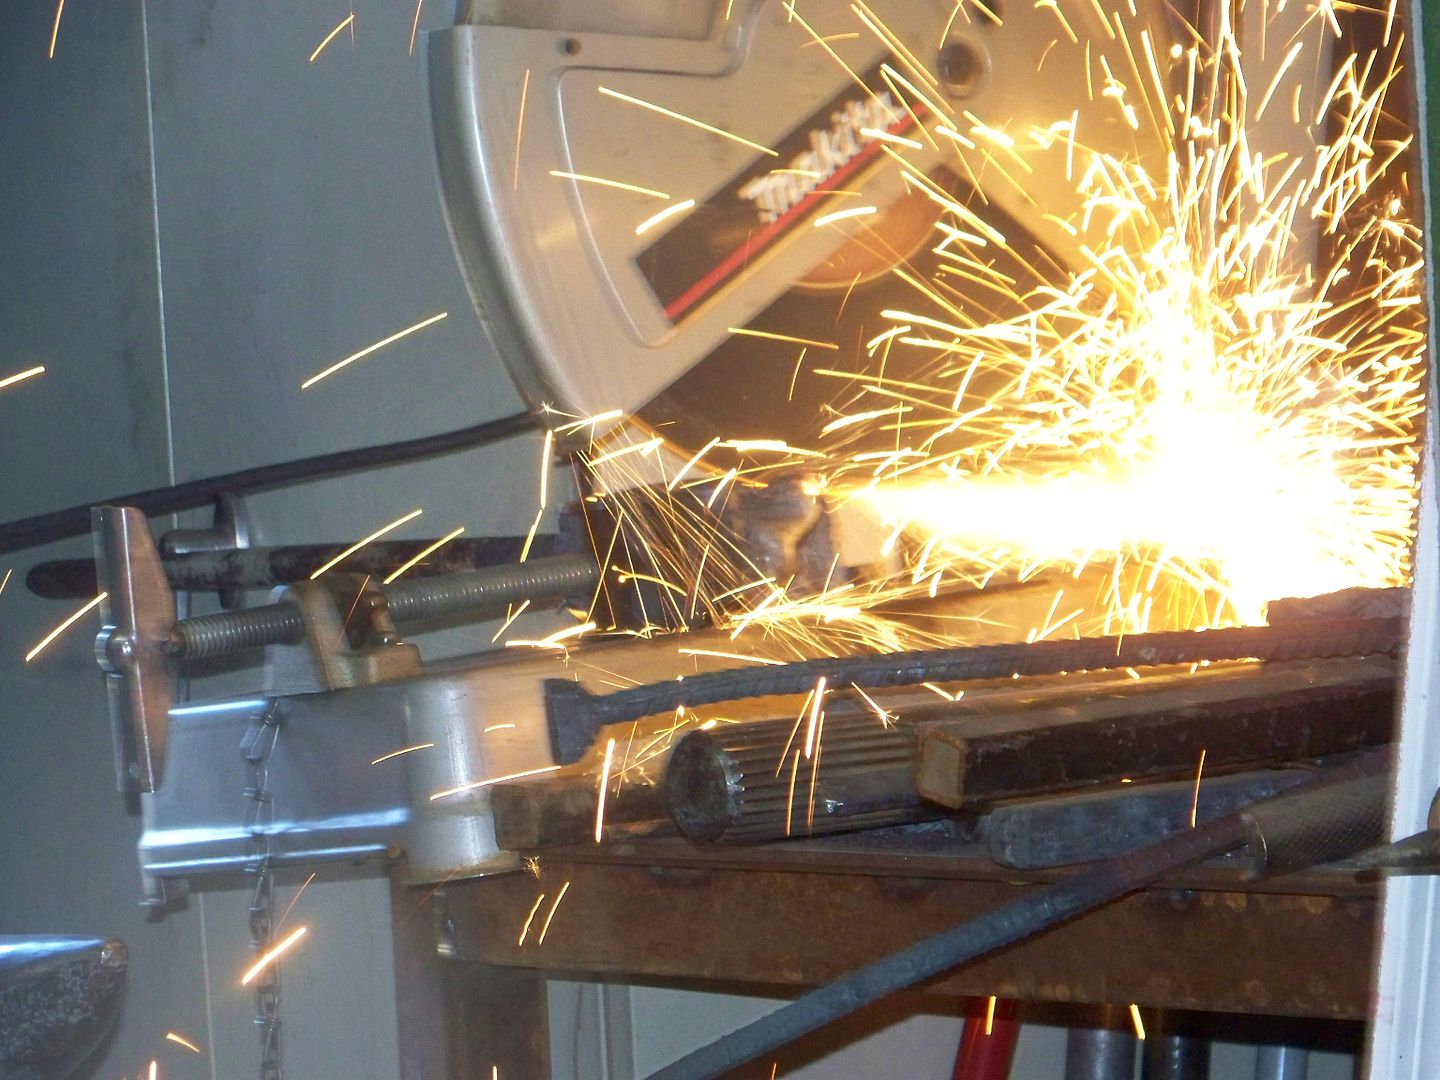
Notice the ends? They bulge out really nice and are easy to chop saw off. See the damascus parts are closed up and showing the pattern.
BTW, Our 8 year old grandson, Ashton took these last batch of pictures. Good quality grandpa/grandson time today.
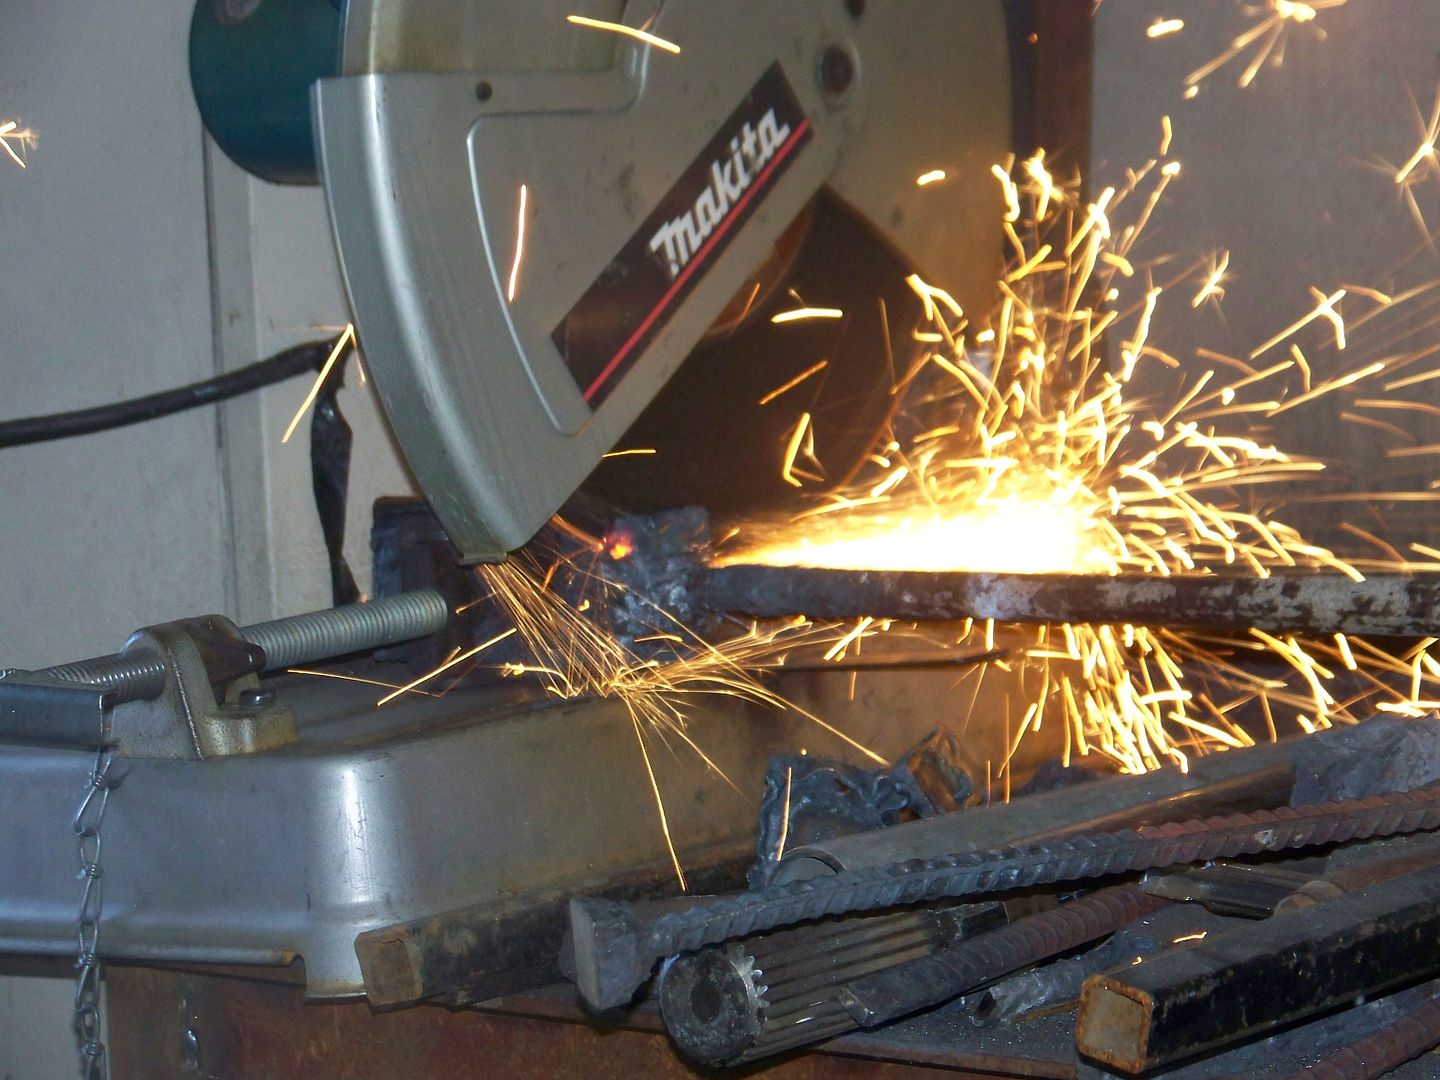
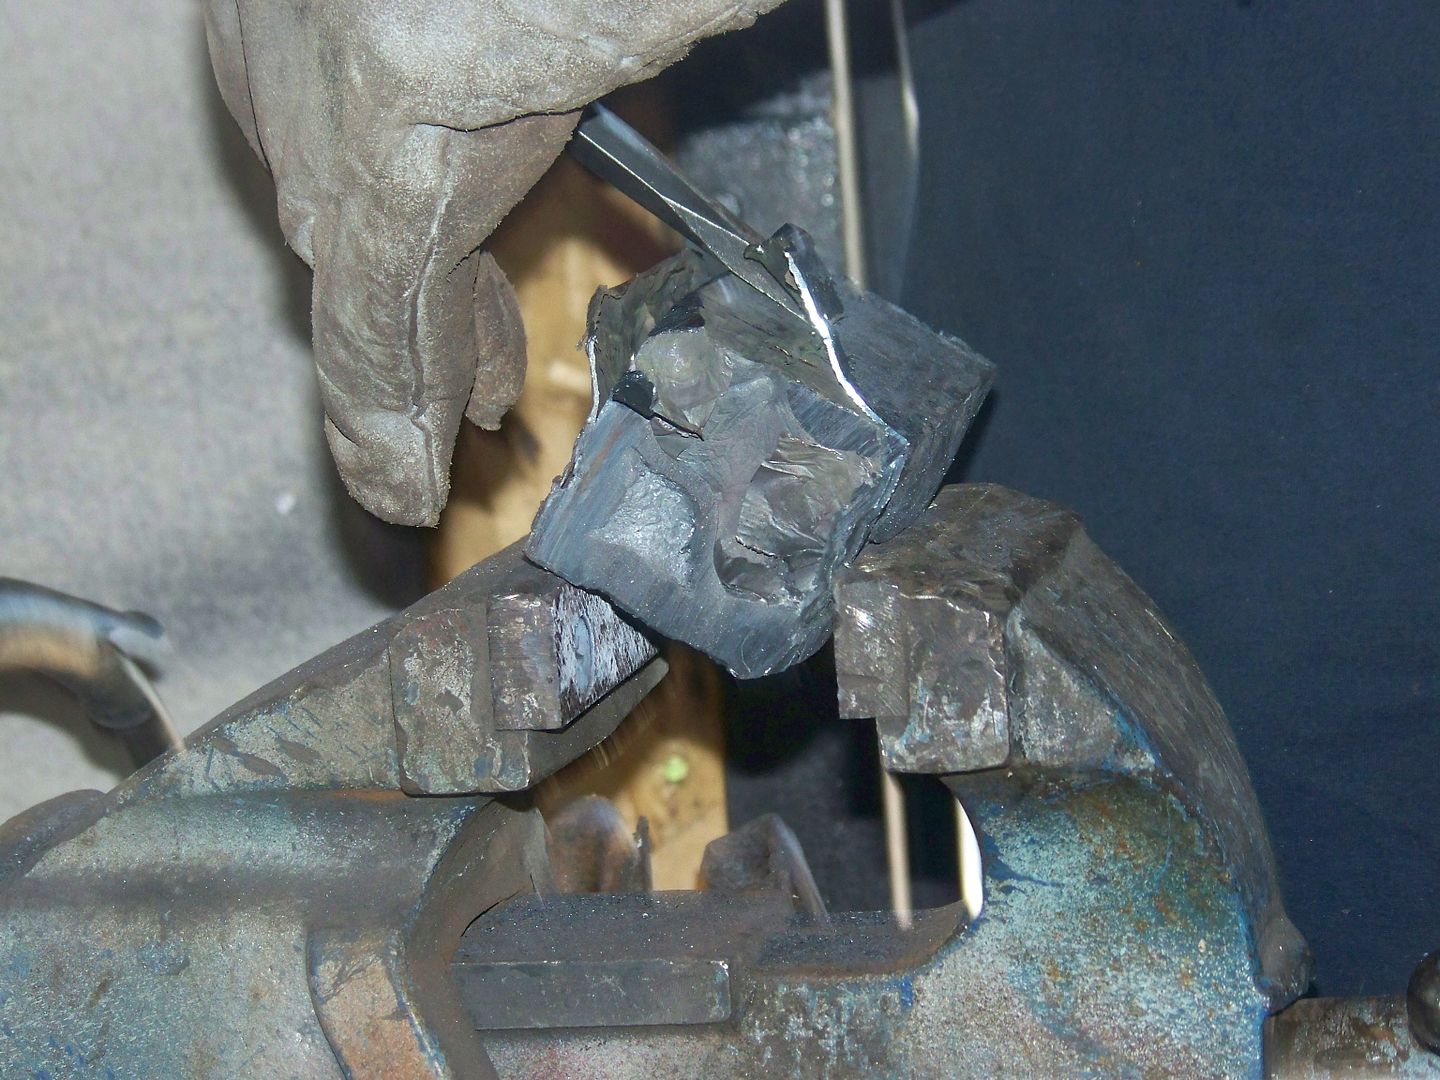
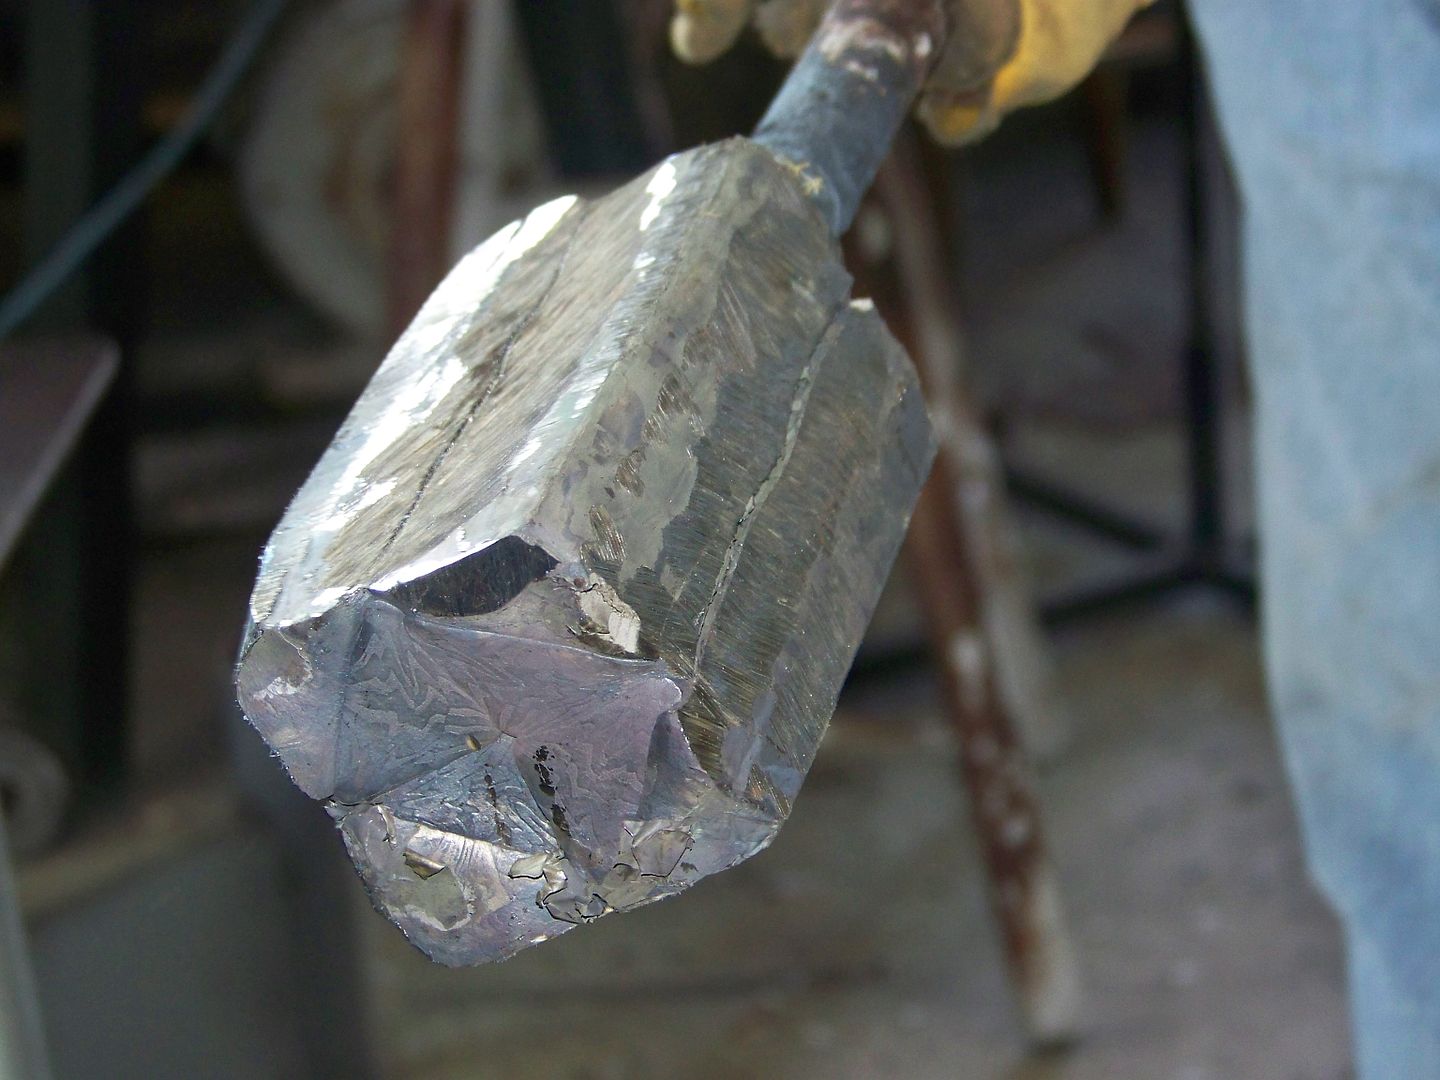
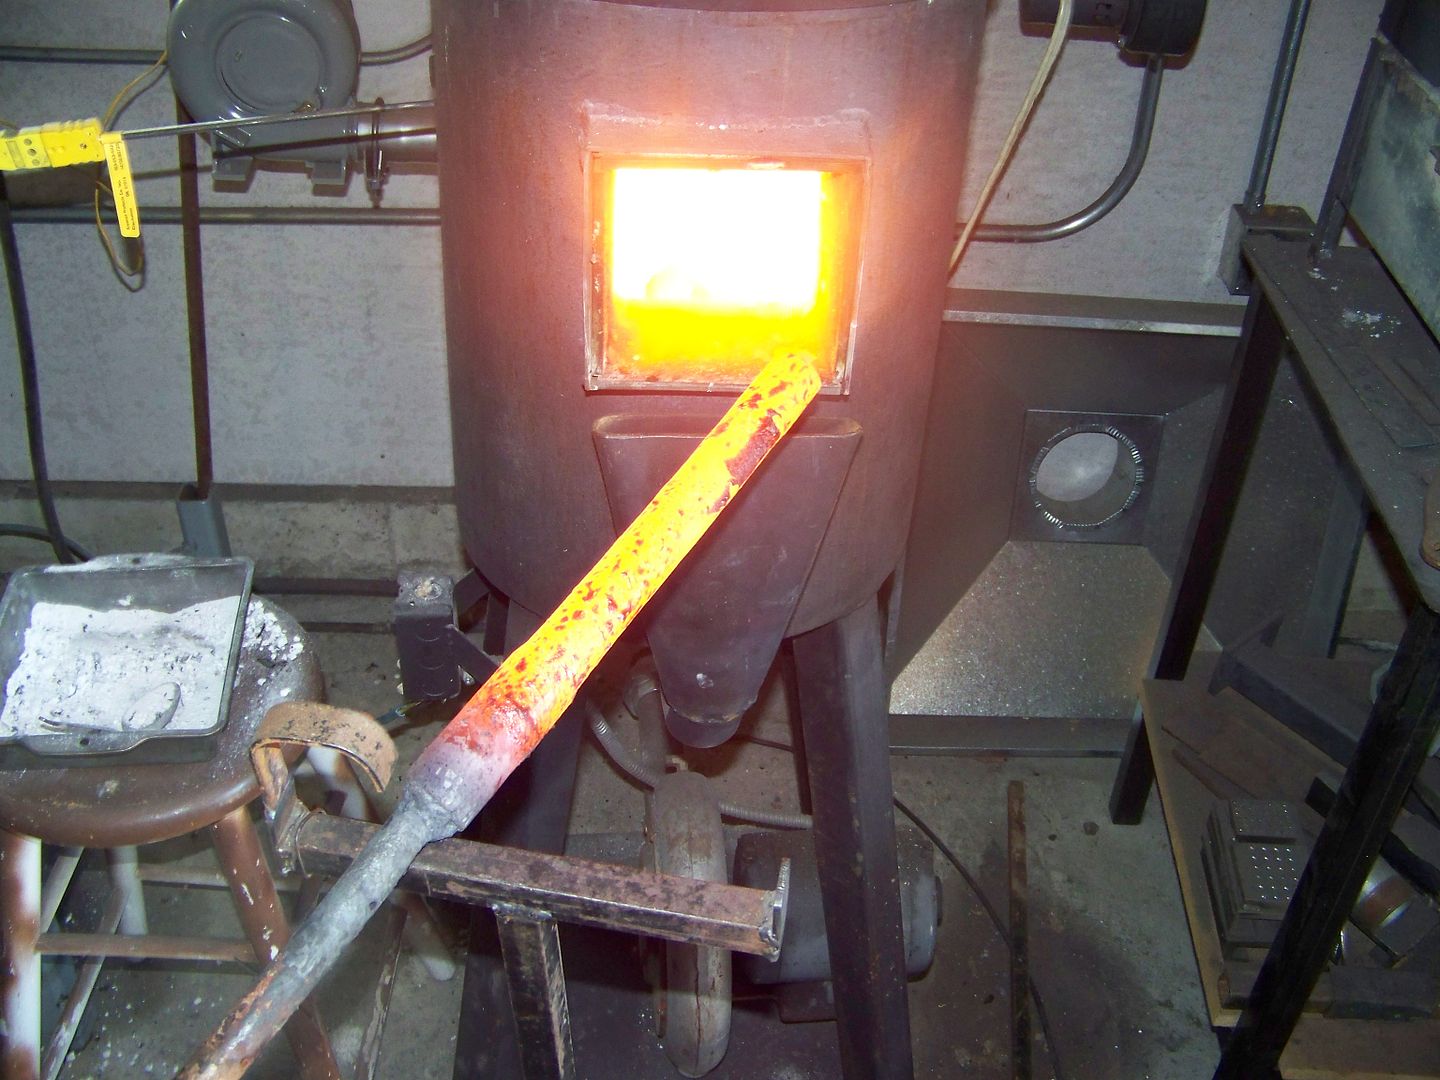
Weld the handle back on and back in the forge to draw it out to about 12" long. See where the canister could be trapped? That needs to be ground out.
Notice the ends? They bulge out really nice and are easy to chop saw off. See the damascus parts are closed up and showing the pattern.
BTW, Our 8 year old grandson, Ashton took these last batch of pictures. Good quality grandpa/grandson time today.
Weld the handle back on and back in the forge to draw it out to about 12" long. See where the canister could be trapped? That needs to be ground out.
Last edited:
Bruce Bump
Forum Owner-Moderator
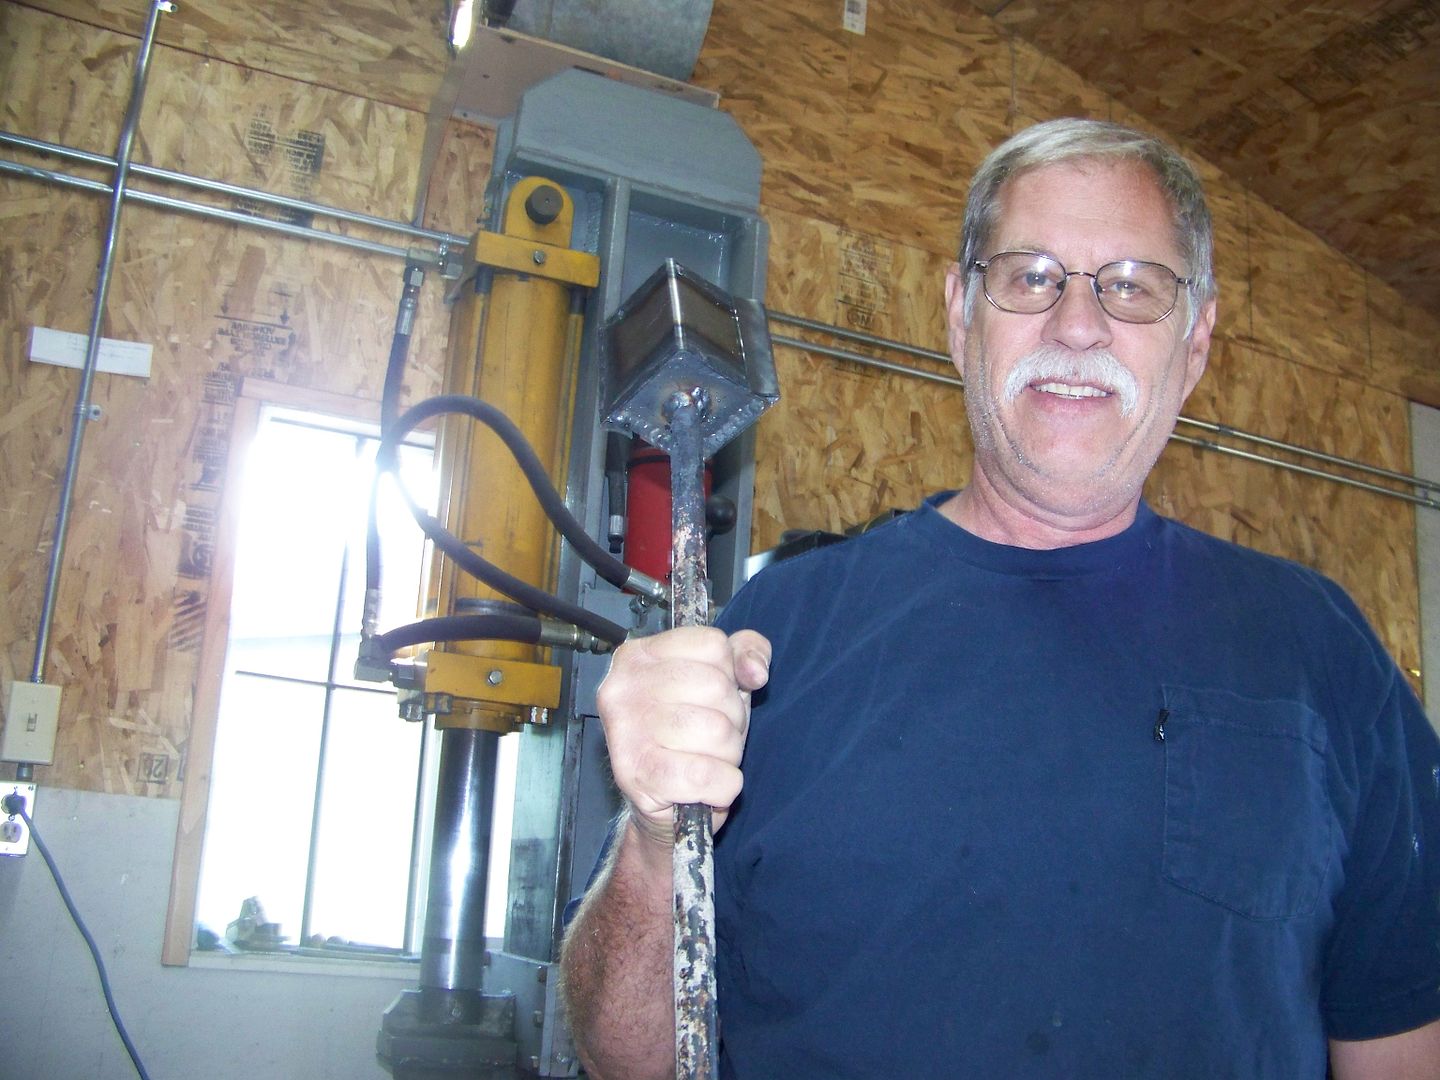
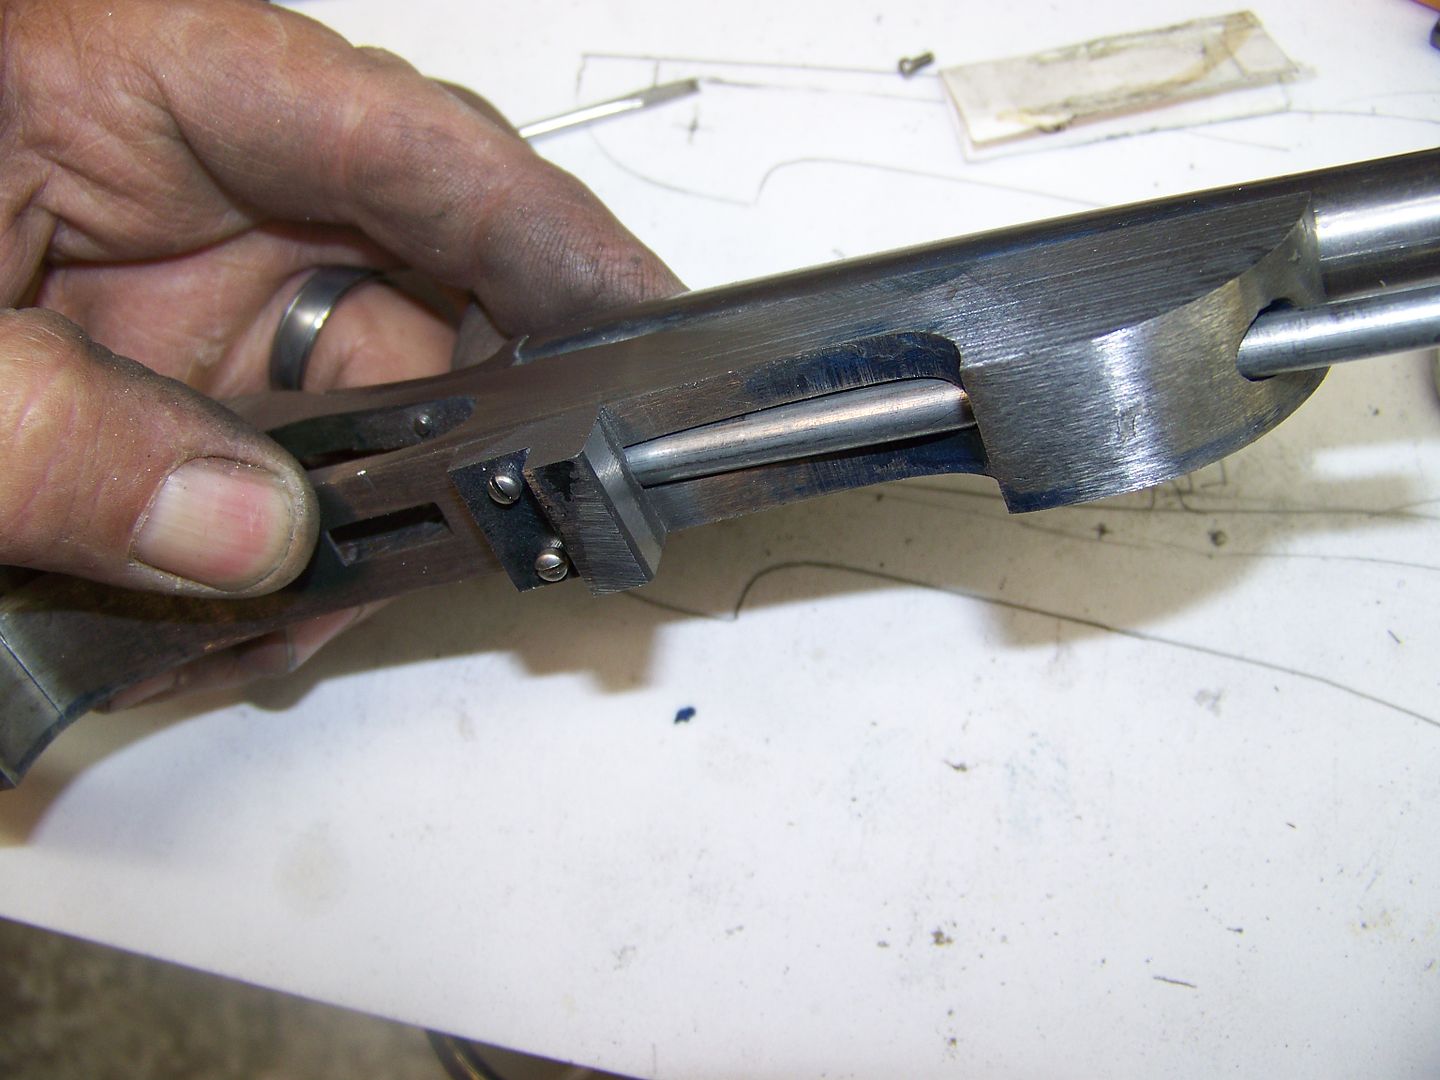
While cooling off from forging I added the ram rod cover to the underside of the frame. Its milled from 1018 and drilled for 2-56 screws. The underside is drilled with a number 30 drill to accept a spring and ball detent to hold the ram rod in. This is a dummy ram rod pictured, the real one will be turned on the lathe and have a knob on it.
My thread tapping machine is an elcheapo disabled drill press. I stripped it down to the bare neccesities and turn the pulley back and forth by hand. Still waiting for Santa to bring me a new Tap-Matic but meanwhile this works fine.
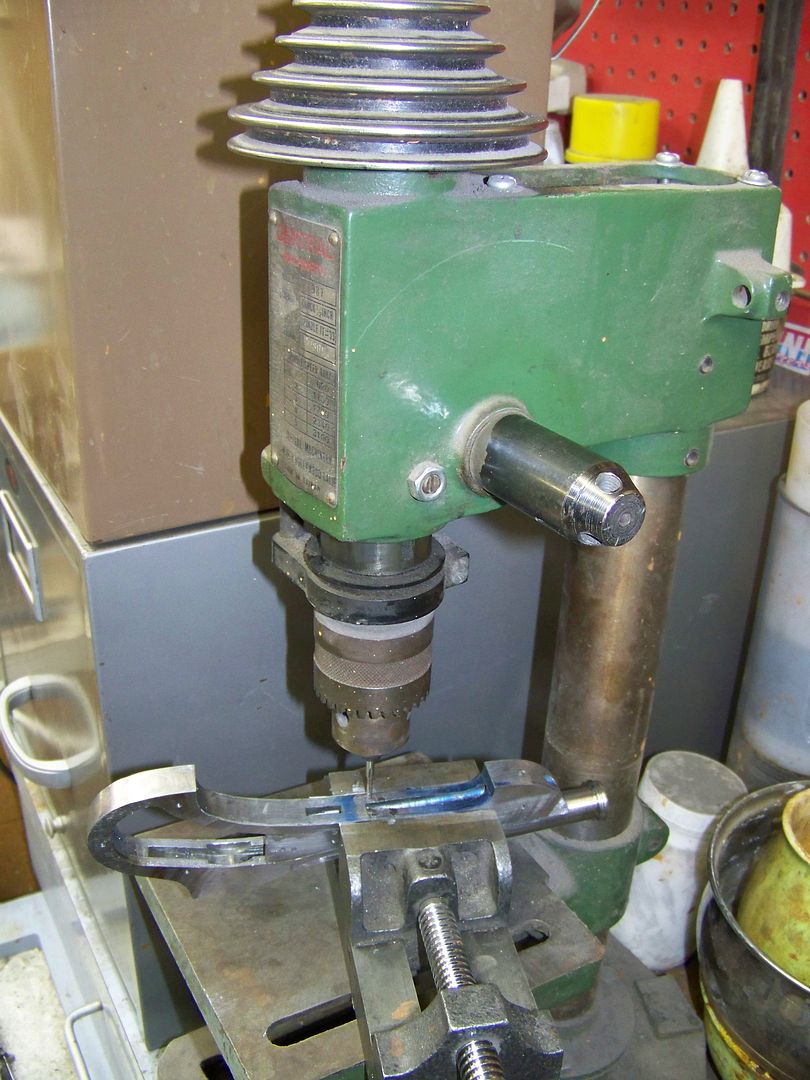
My thread tapping machine is an elcheapo disabled drill press. I stripped it down to the bare neccesities and turn the pulley back and forth by hand. Still waiting for Santa to bring me a new Tap-Matic but meanwhile this works fine.
Bruce Bump
Forum Owner-Moderator
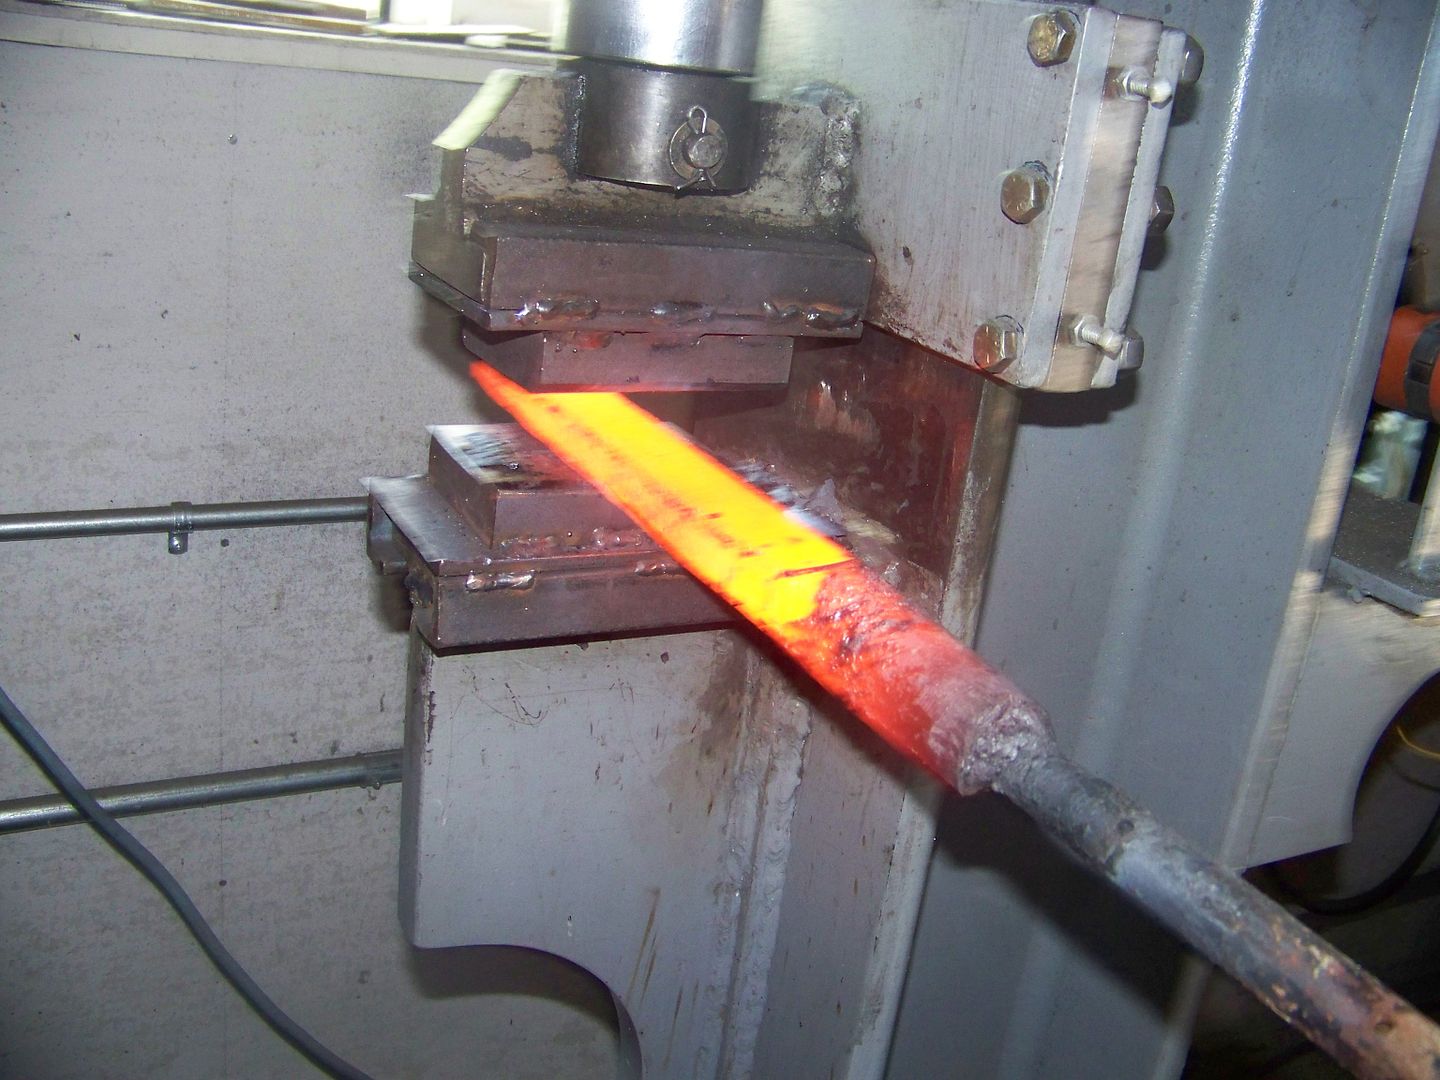
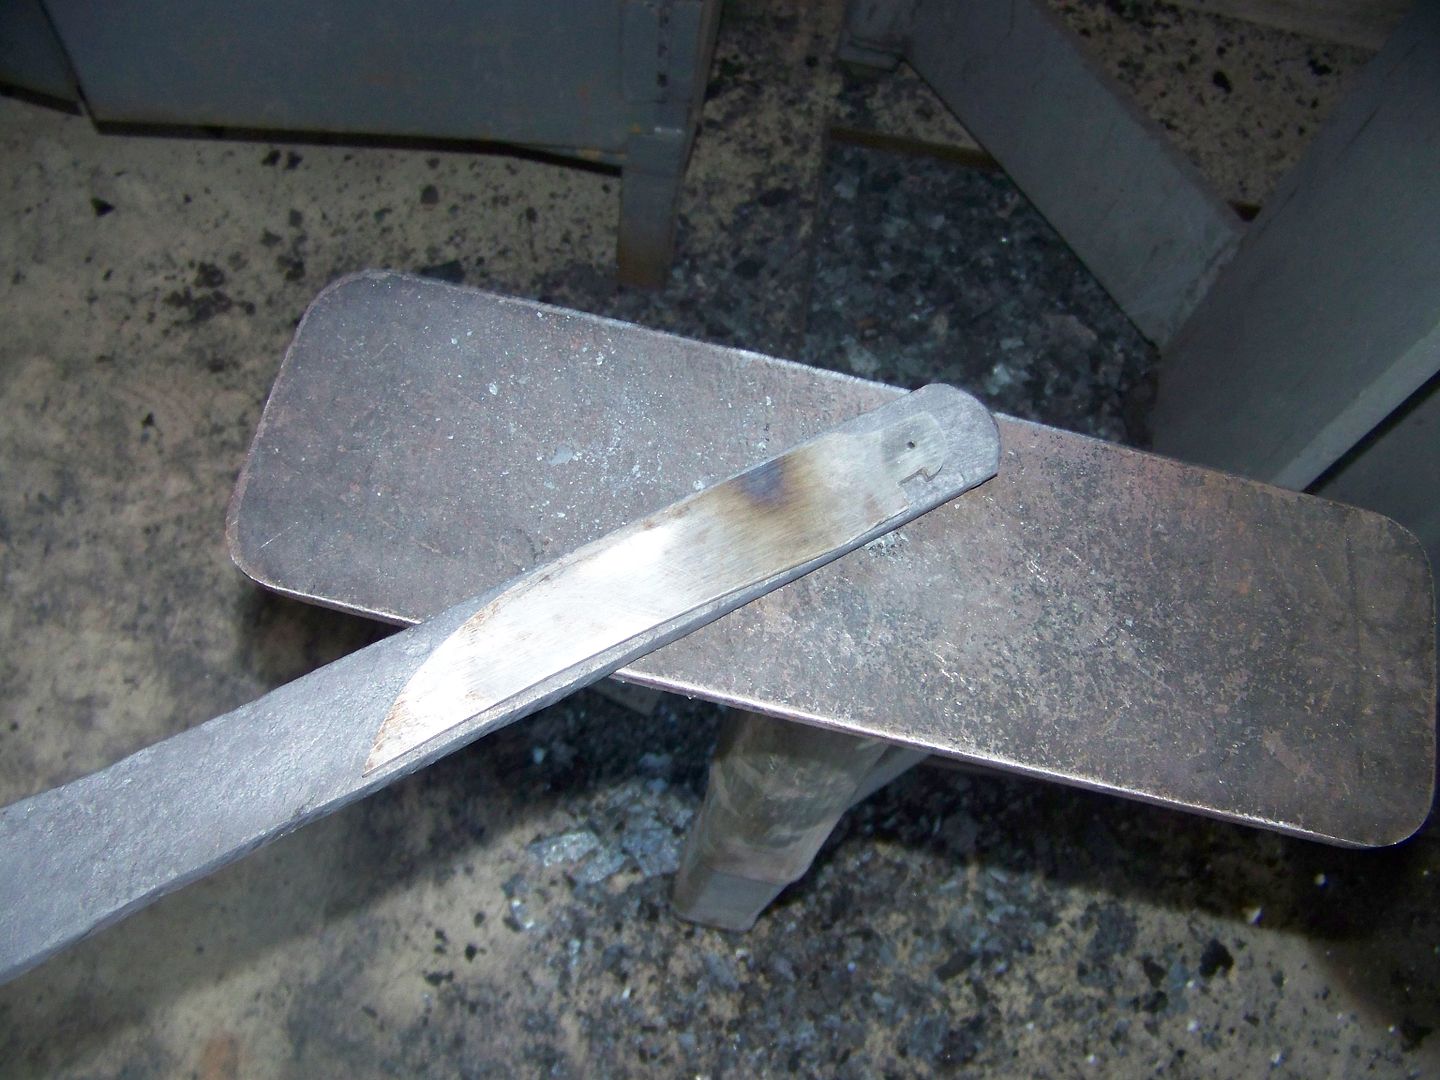
I drew the billet out to about 1 1/4" square and cut one end off to see my pattern. I like allot.
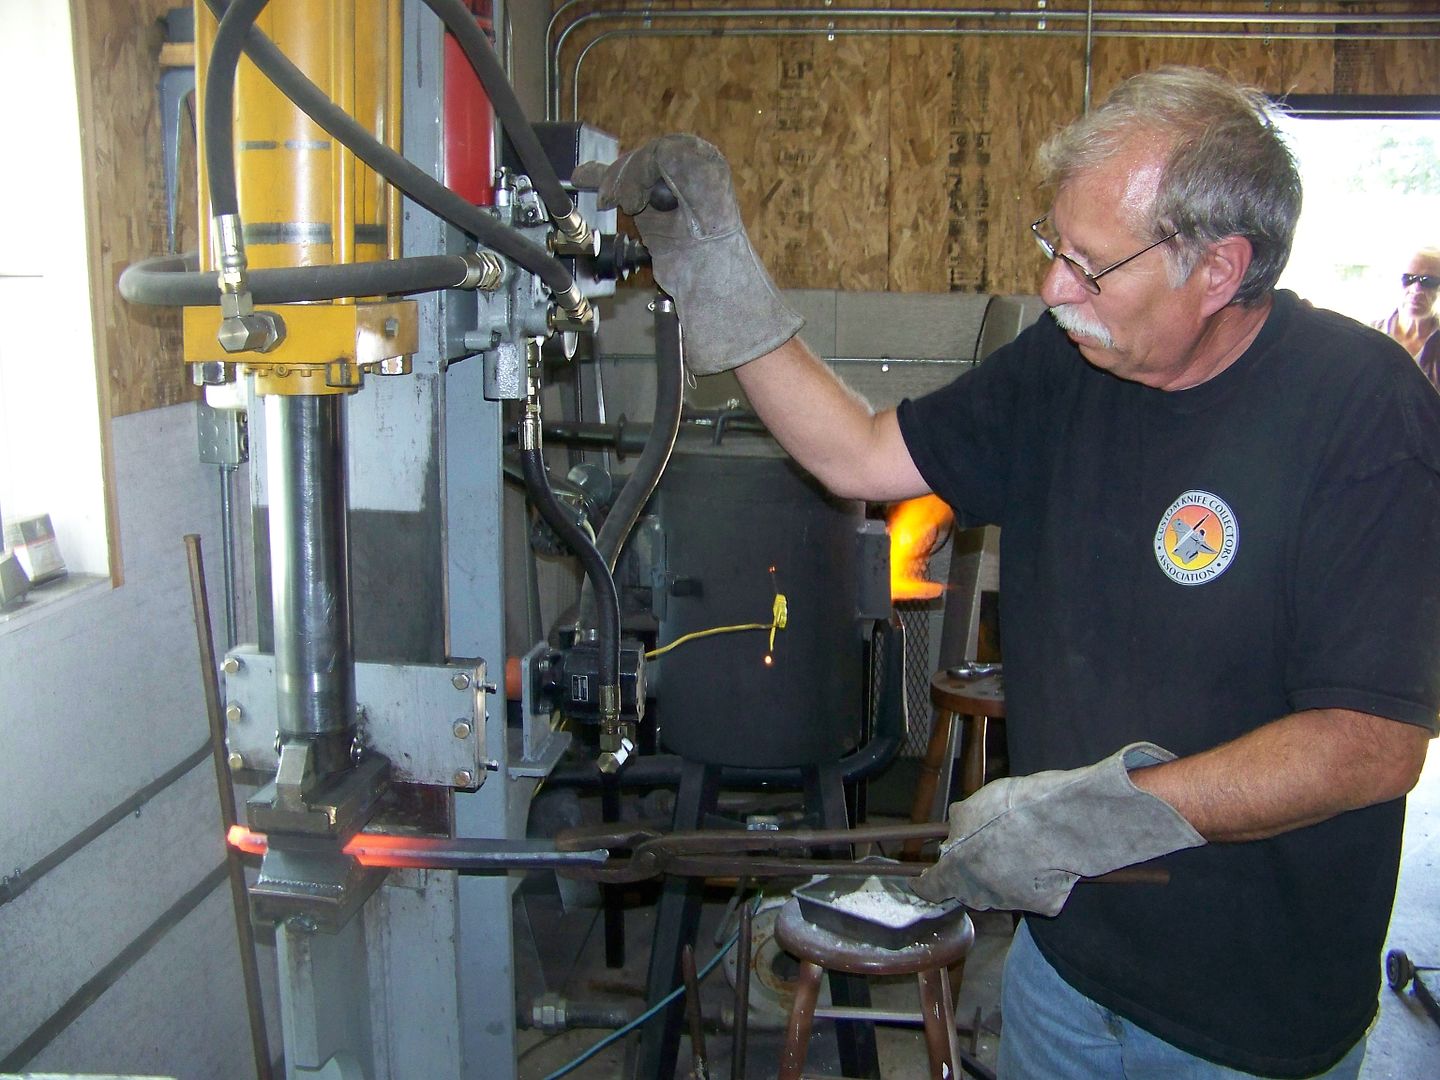
Next I used the short flat dies to octogon and make it semi round so it will twist smoother. My buddy Ben came over just in time to help me twist it. Two people take all the hard work out of it.
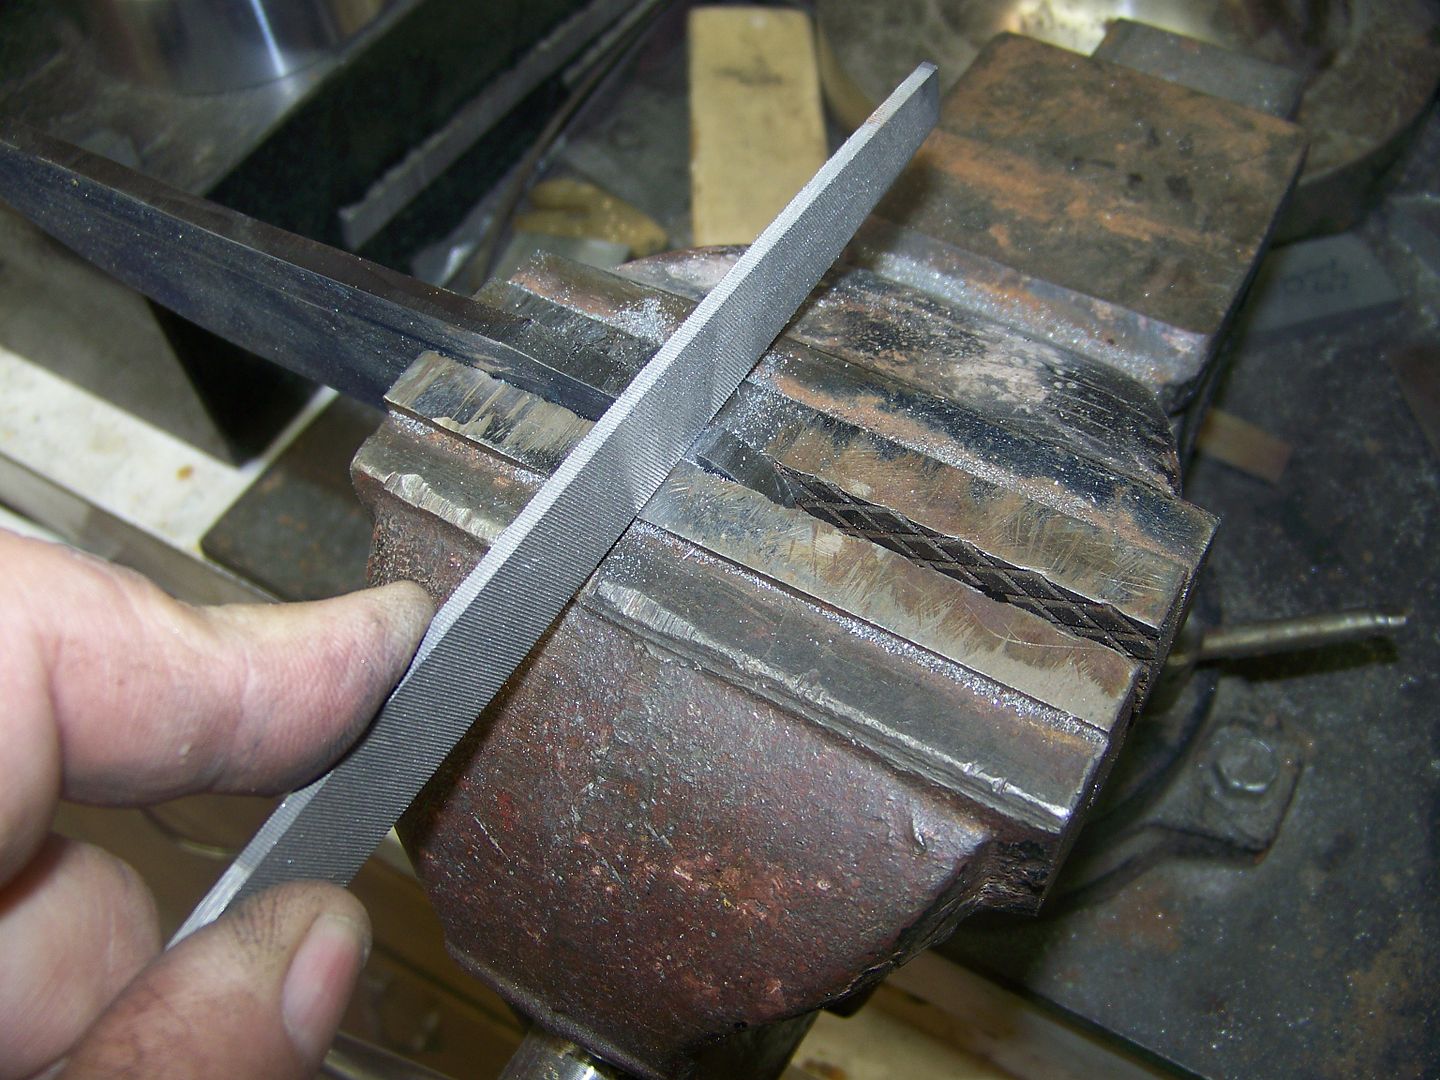
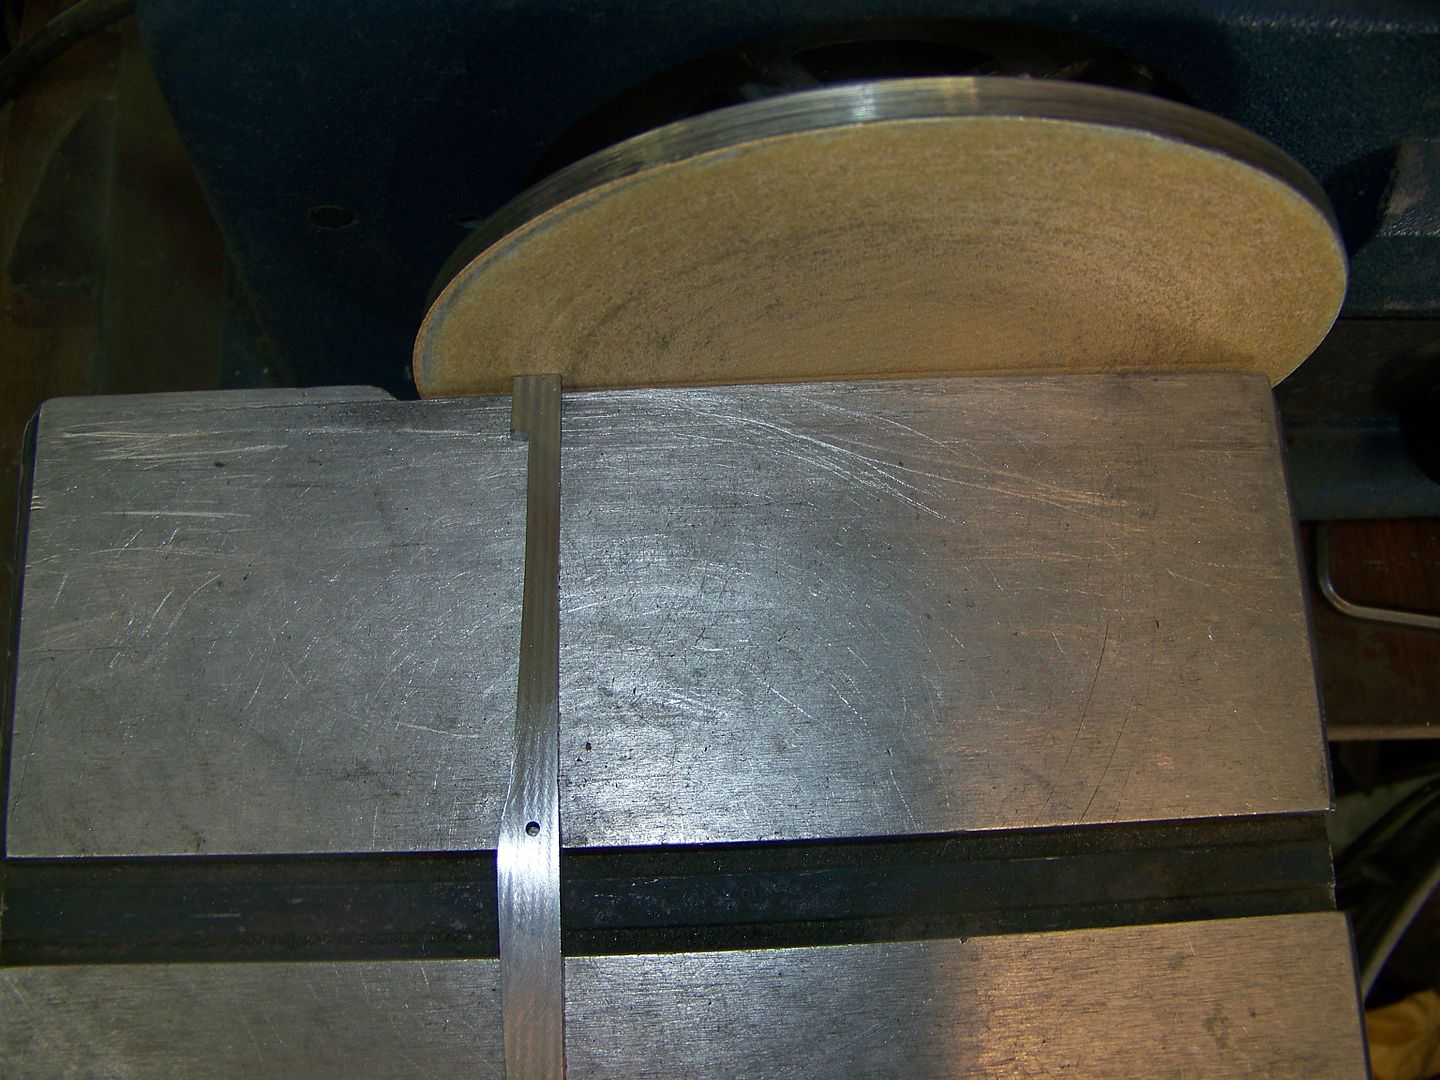
Next I straightened it in the long dies and ground off the outside down to clean smooth steel.
Tomorrow I should be able to smash it flat and surface it for the blade and back spring.

Next I used the short flat dies to octogon and make it semi round so it will twist smoother. My buddy Ben came over just in time to help me twist it. Two people take all the hard work out of it.
Next I straightened it in the long dies and ground off the outside down to clean smooth steel.
Tomorrow I should be able to smash it flat and surface it for the blade and back spring.
Bruce Bump
Forum Owner-Moderator
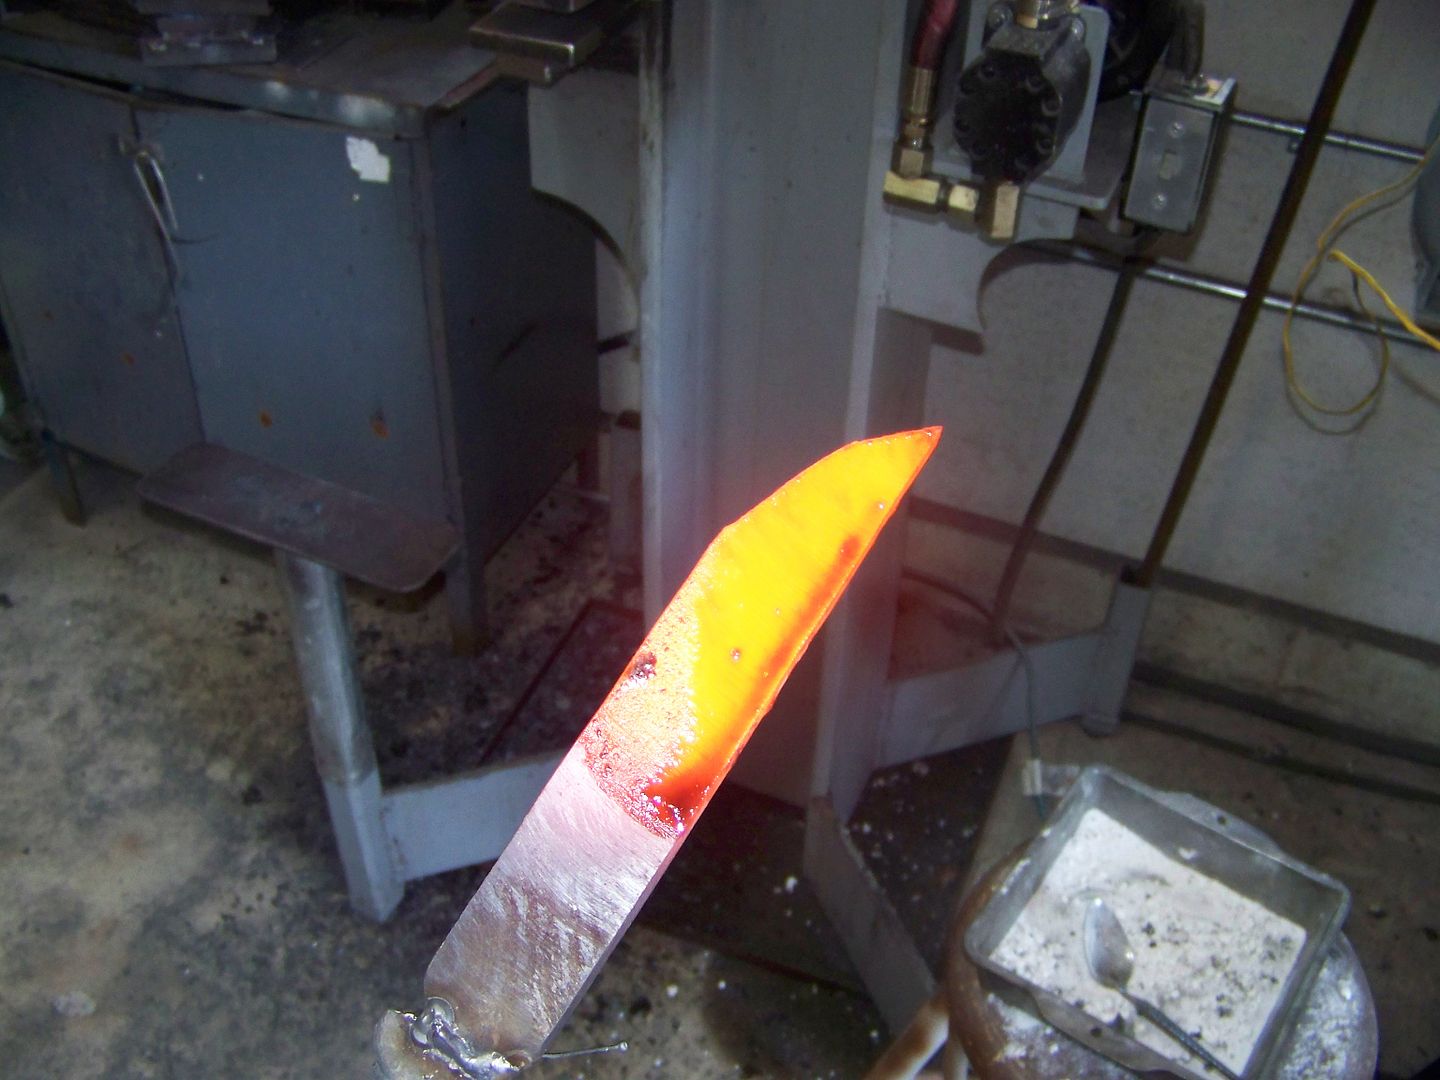
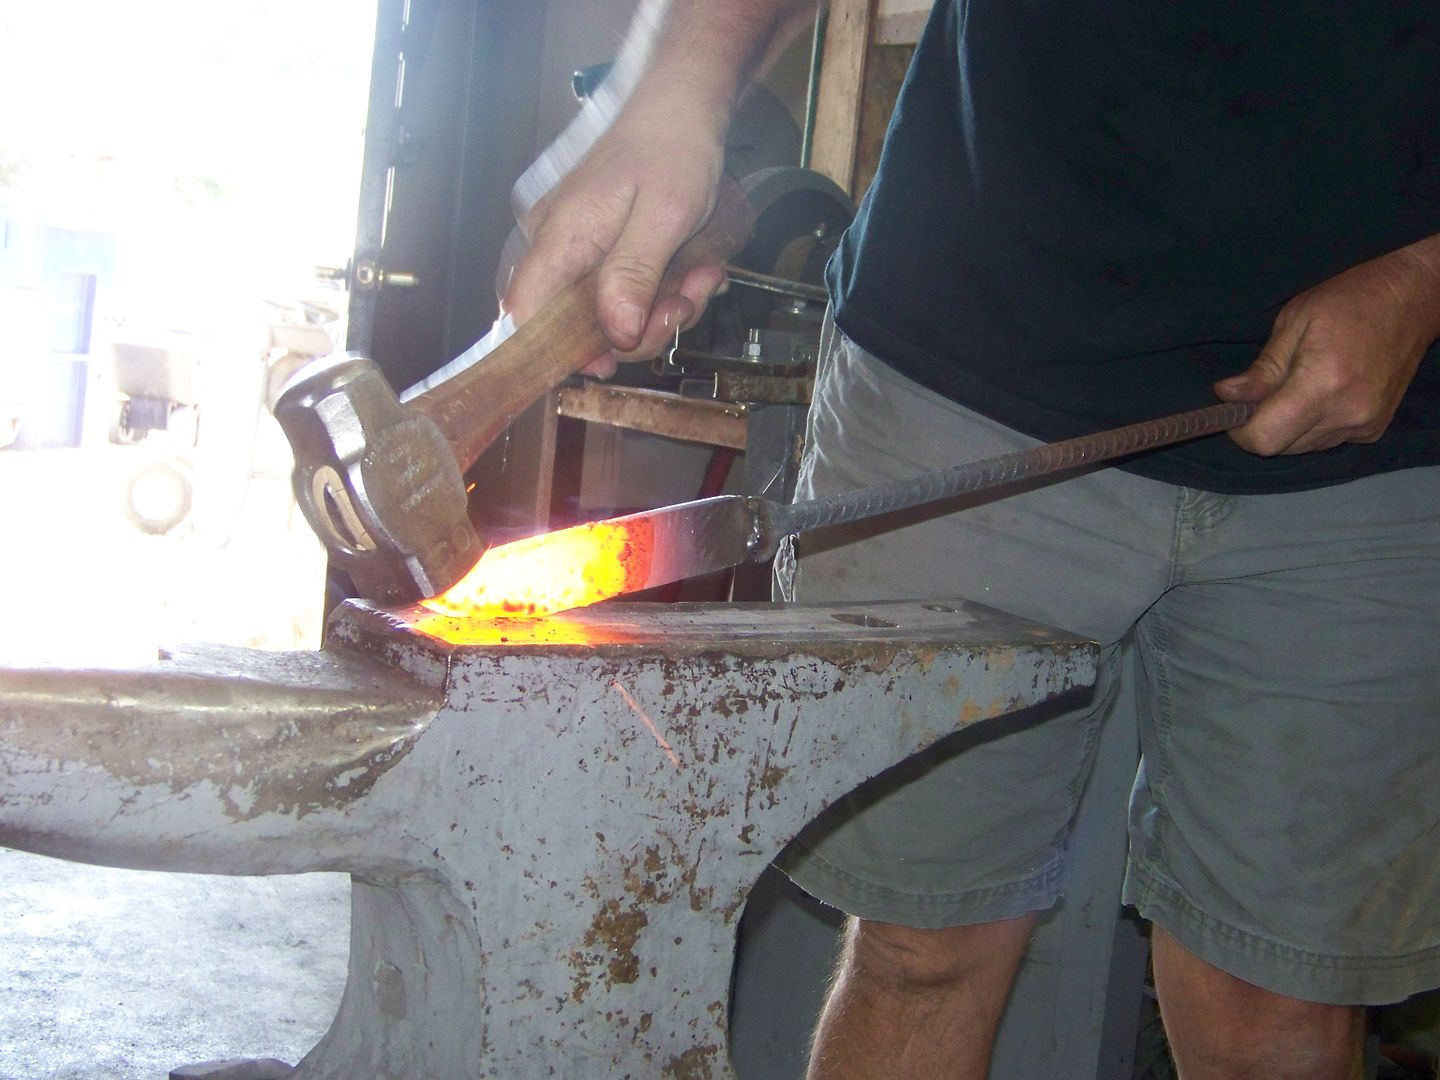
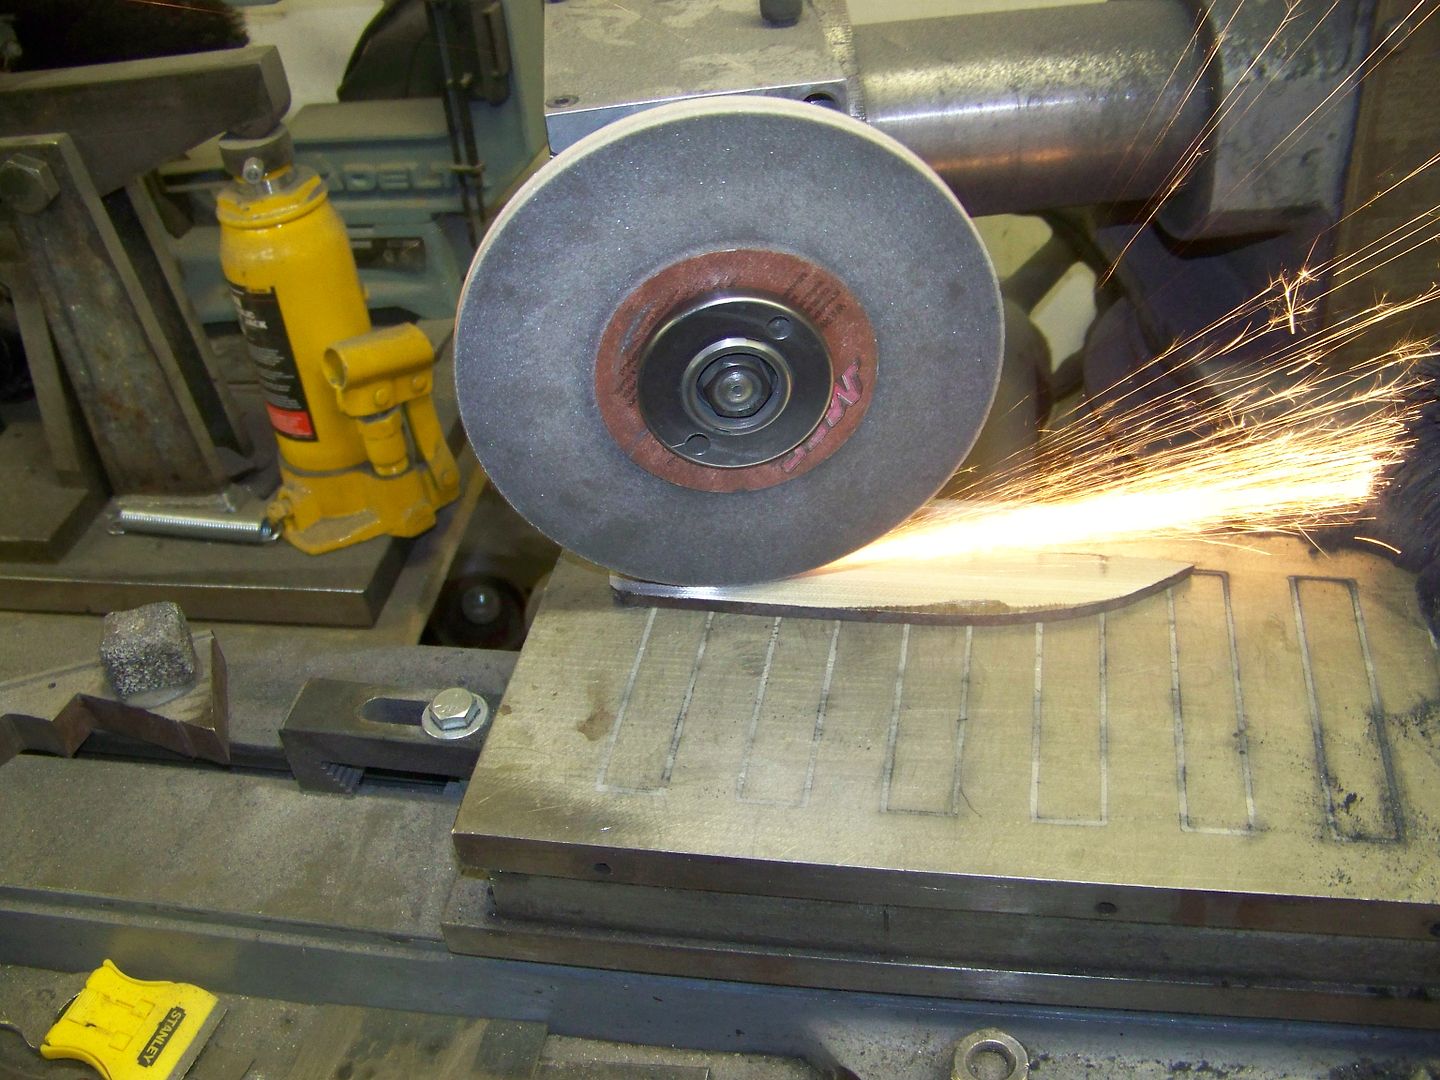
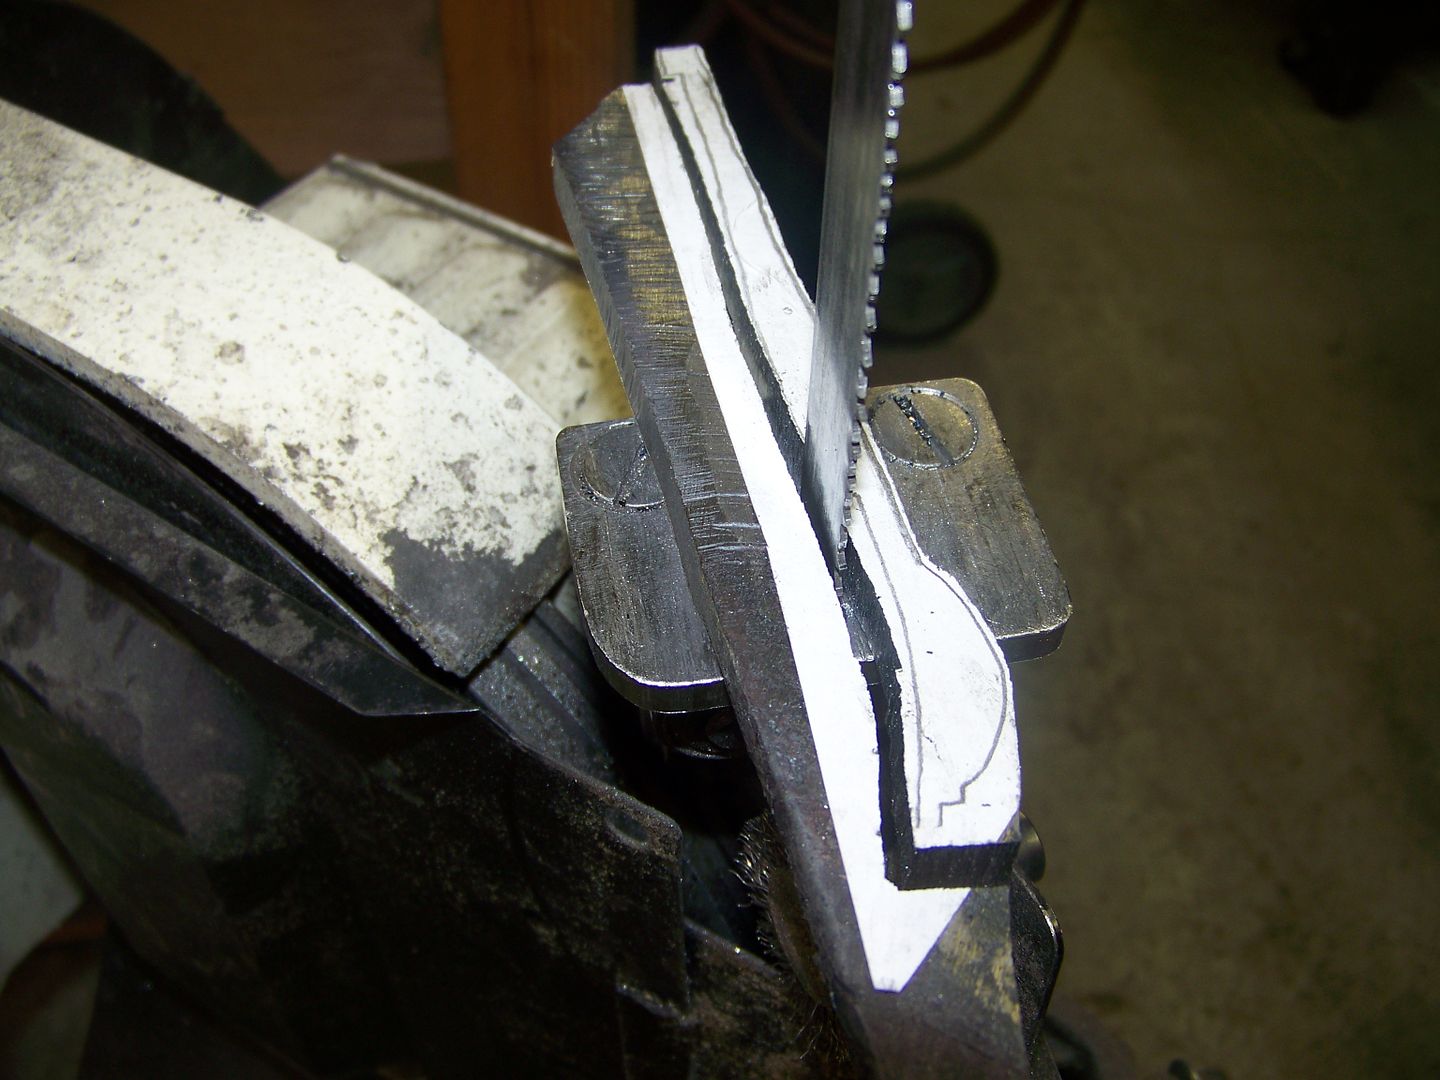
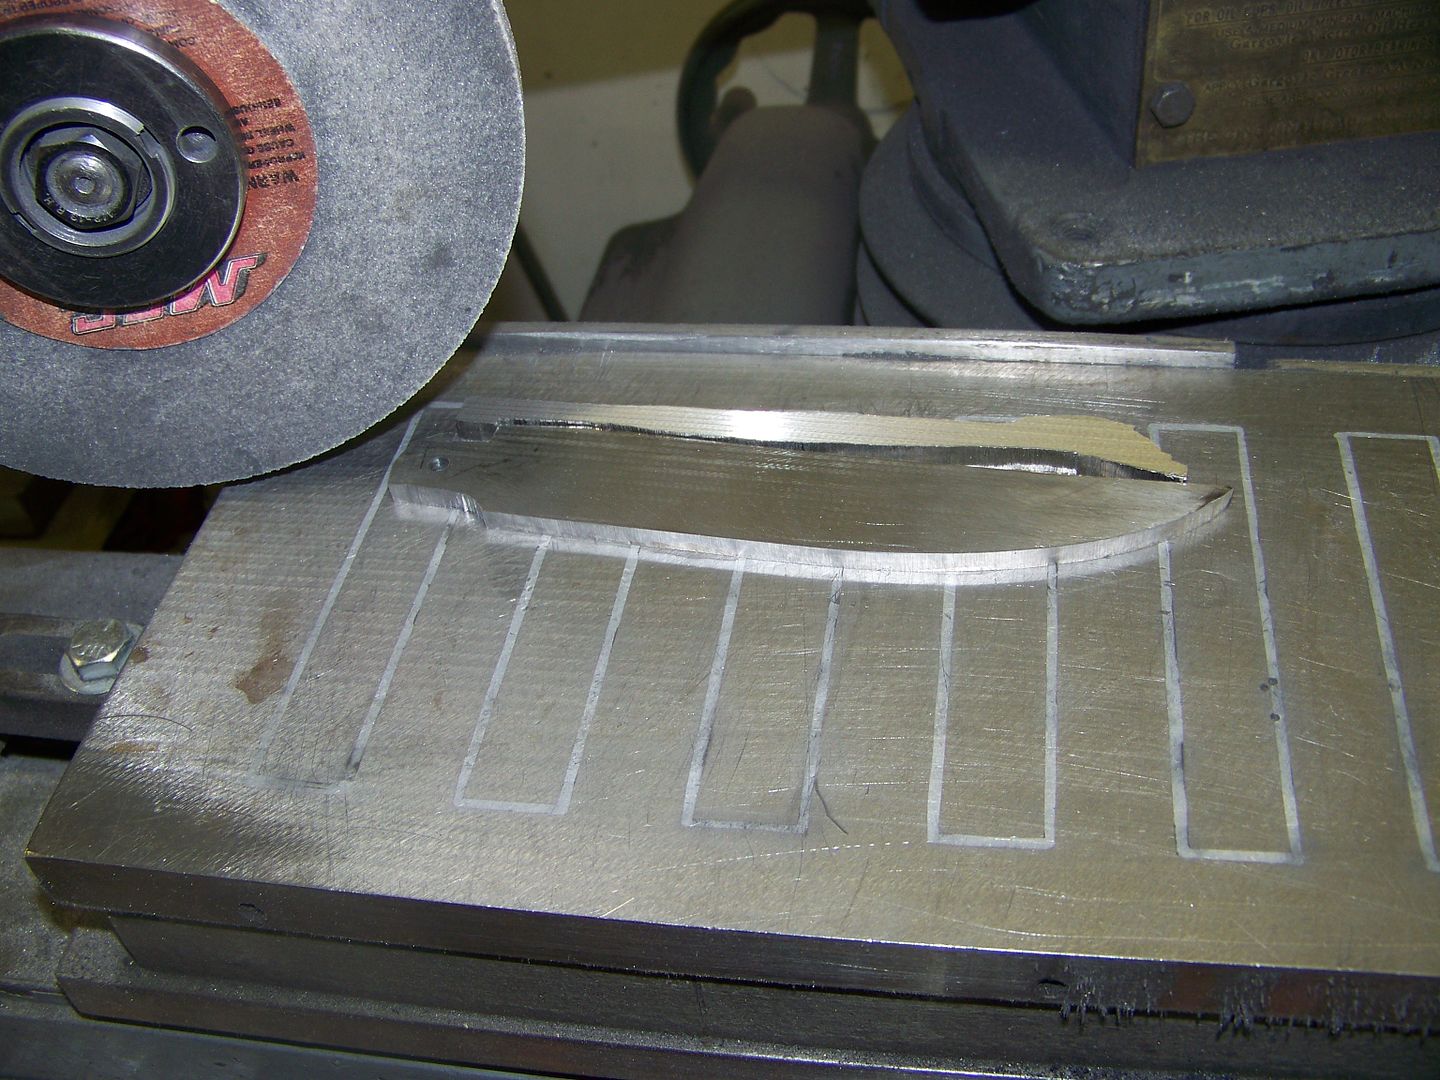
Back on the job today. I heated and flattened the bar to around 1/4" thick and cut a piece off big enough for the blade. I like the pattern along the edge of the bar and wanted that same pattern to follow along the edge of the blade so I heated it back up and reshaped it by forging it to shape. Now that flame looking pattern should follow the edge as opposed to looking like it was simply cut out of the middle of a damascus bar.
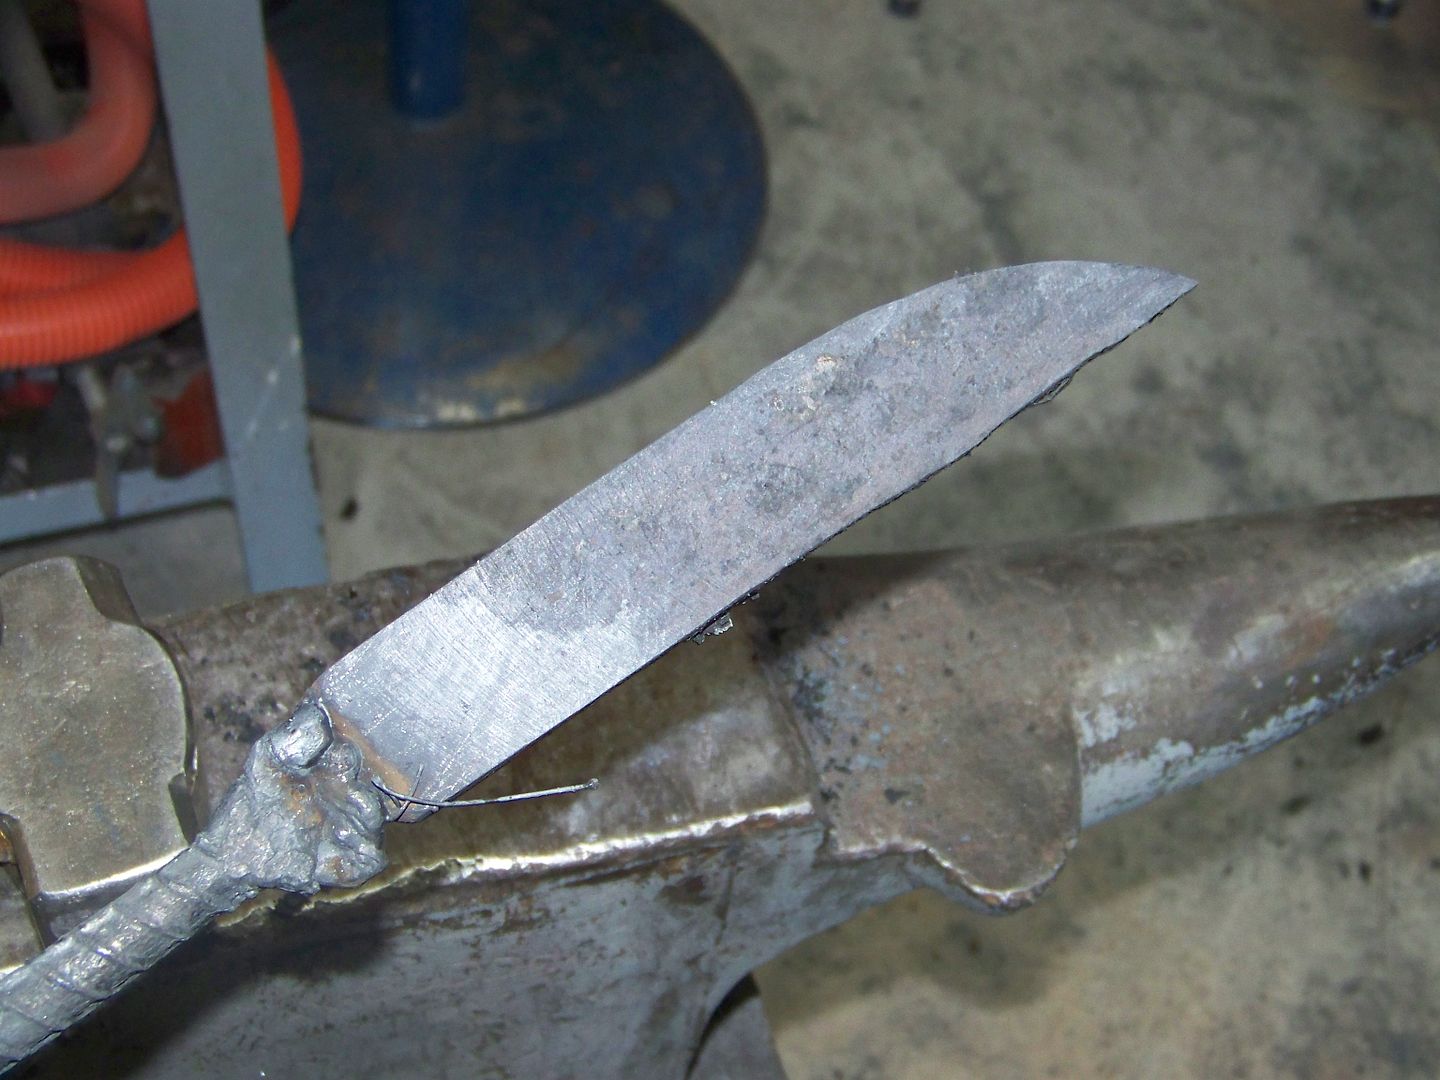
After some surface grinding I can see my pattern but with twist damascus the pattern looks reletively plain until the bevels are ground into so the inside of the bar is then revealed.
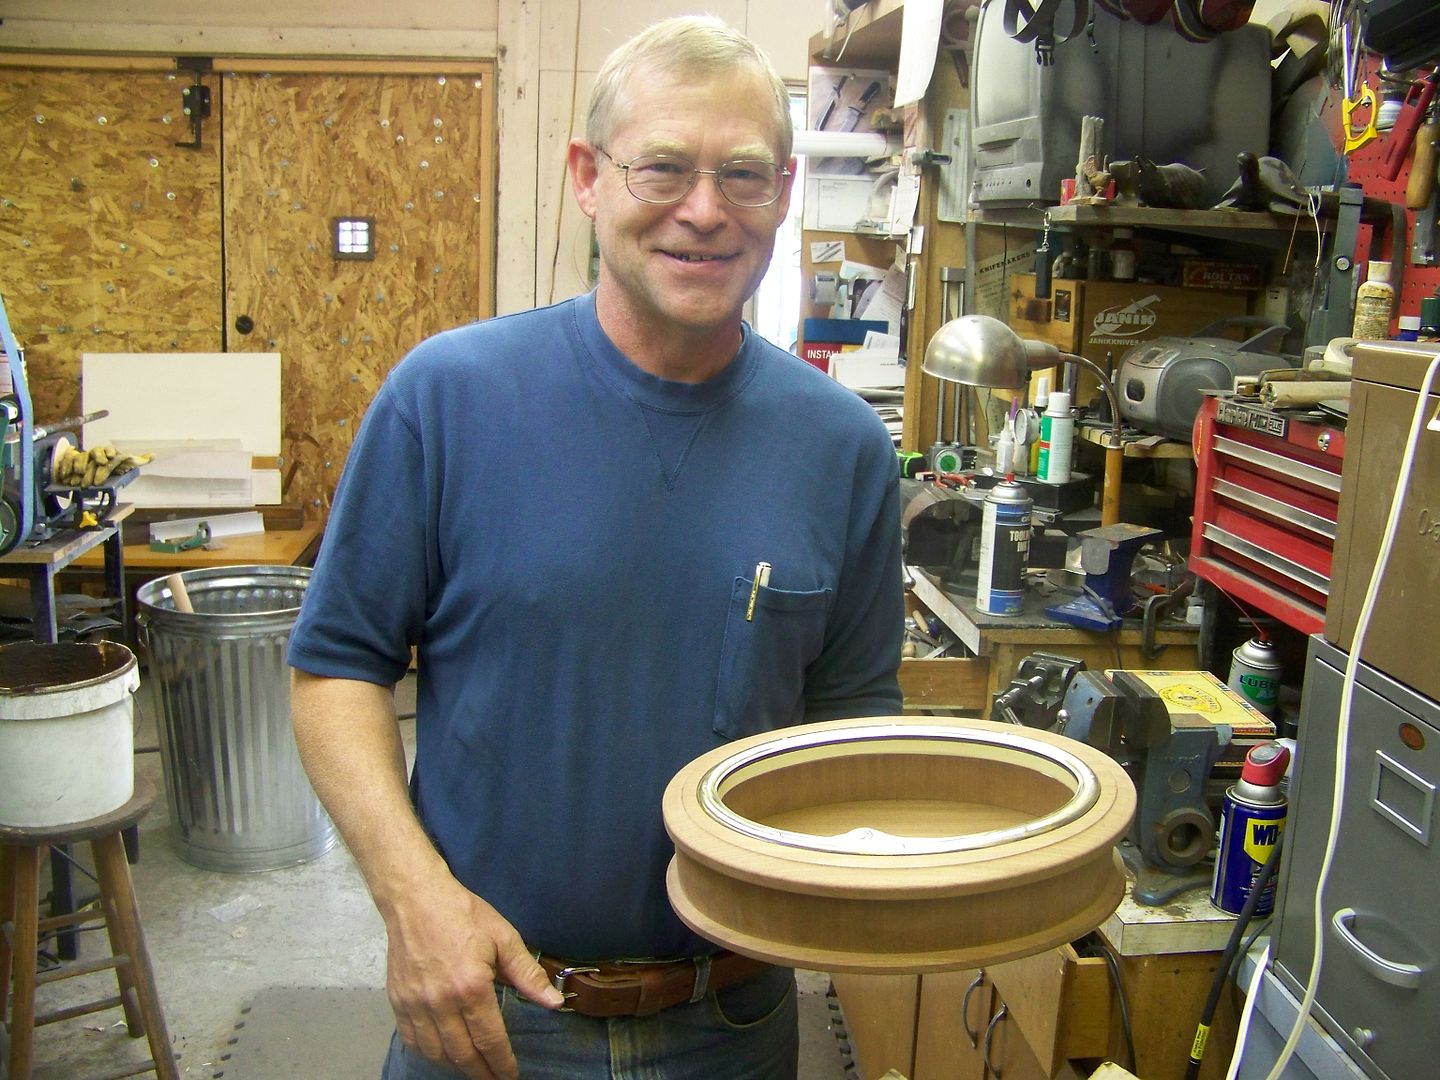
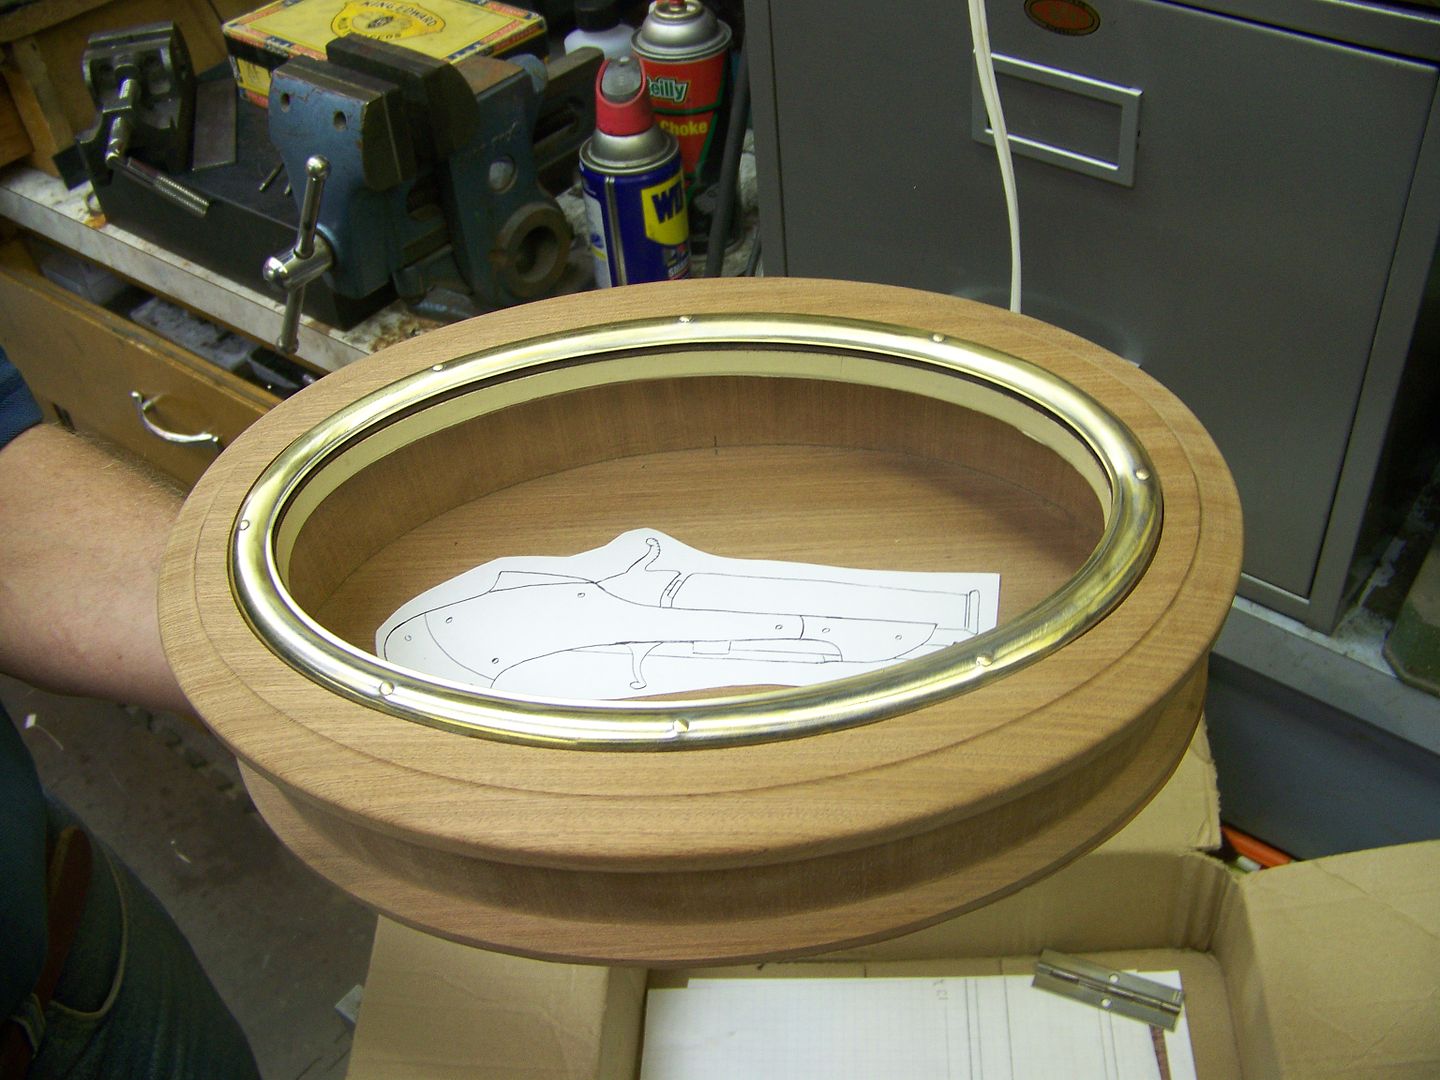
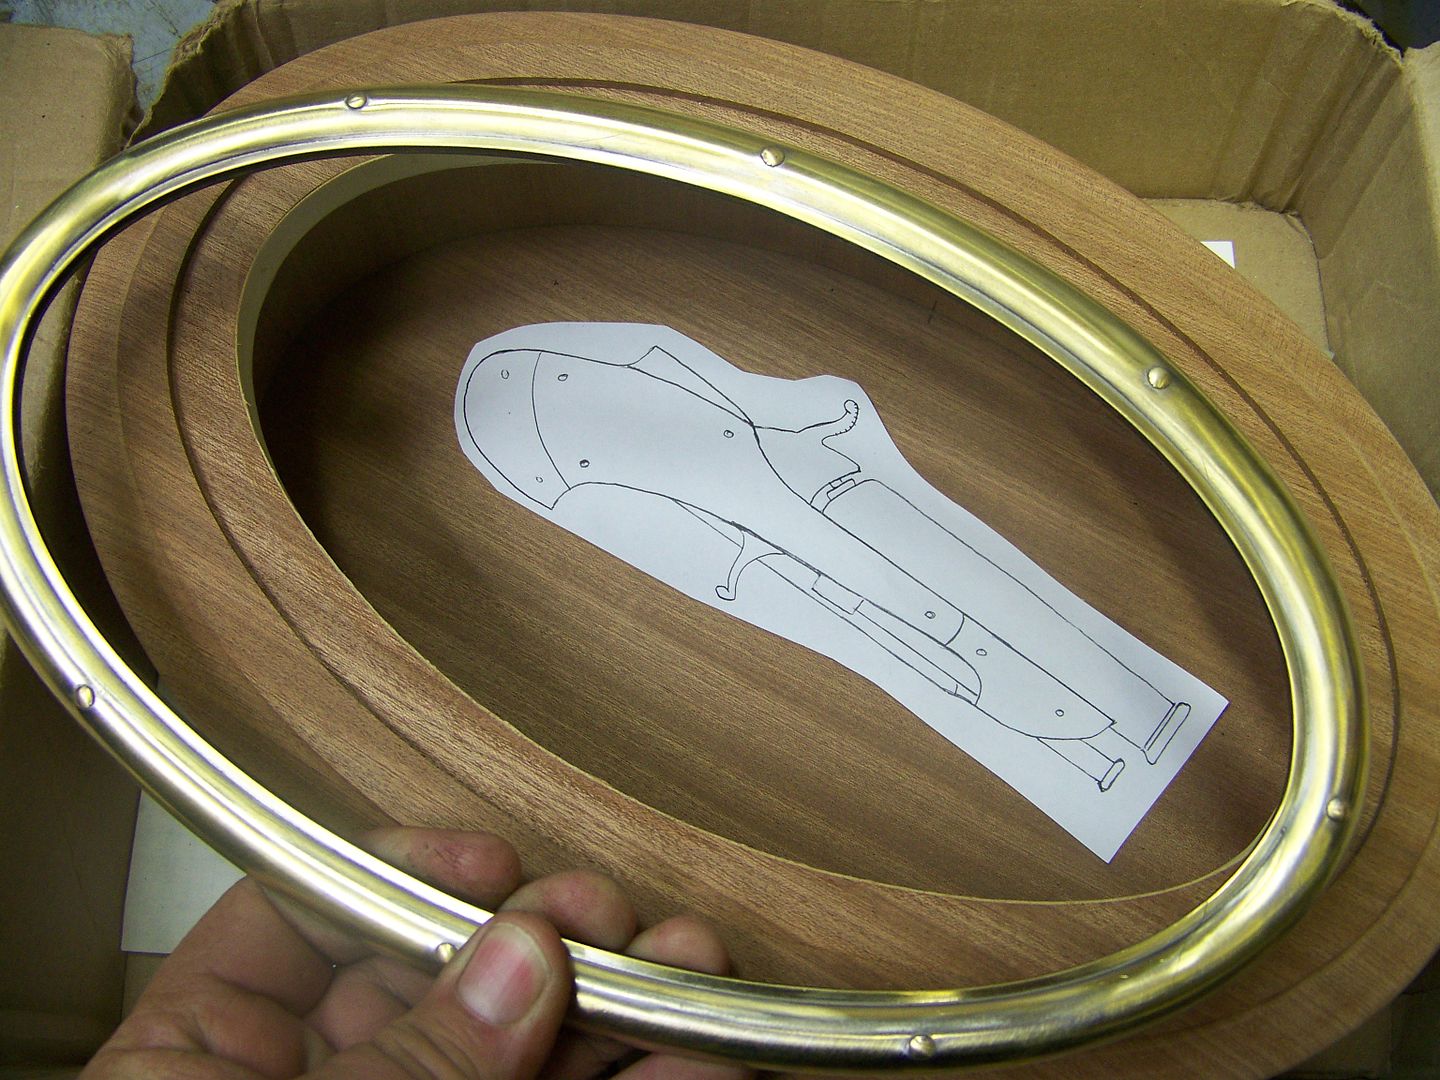
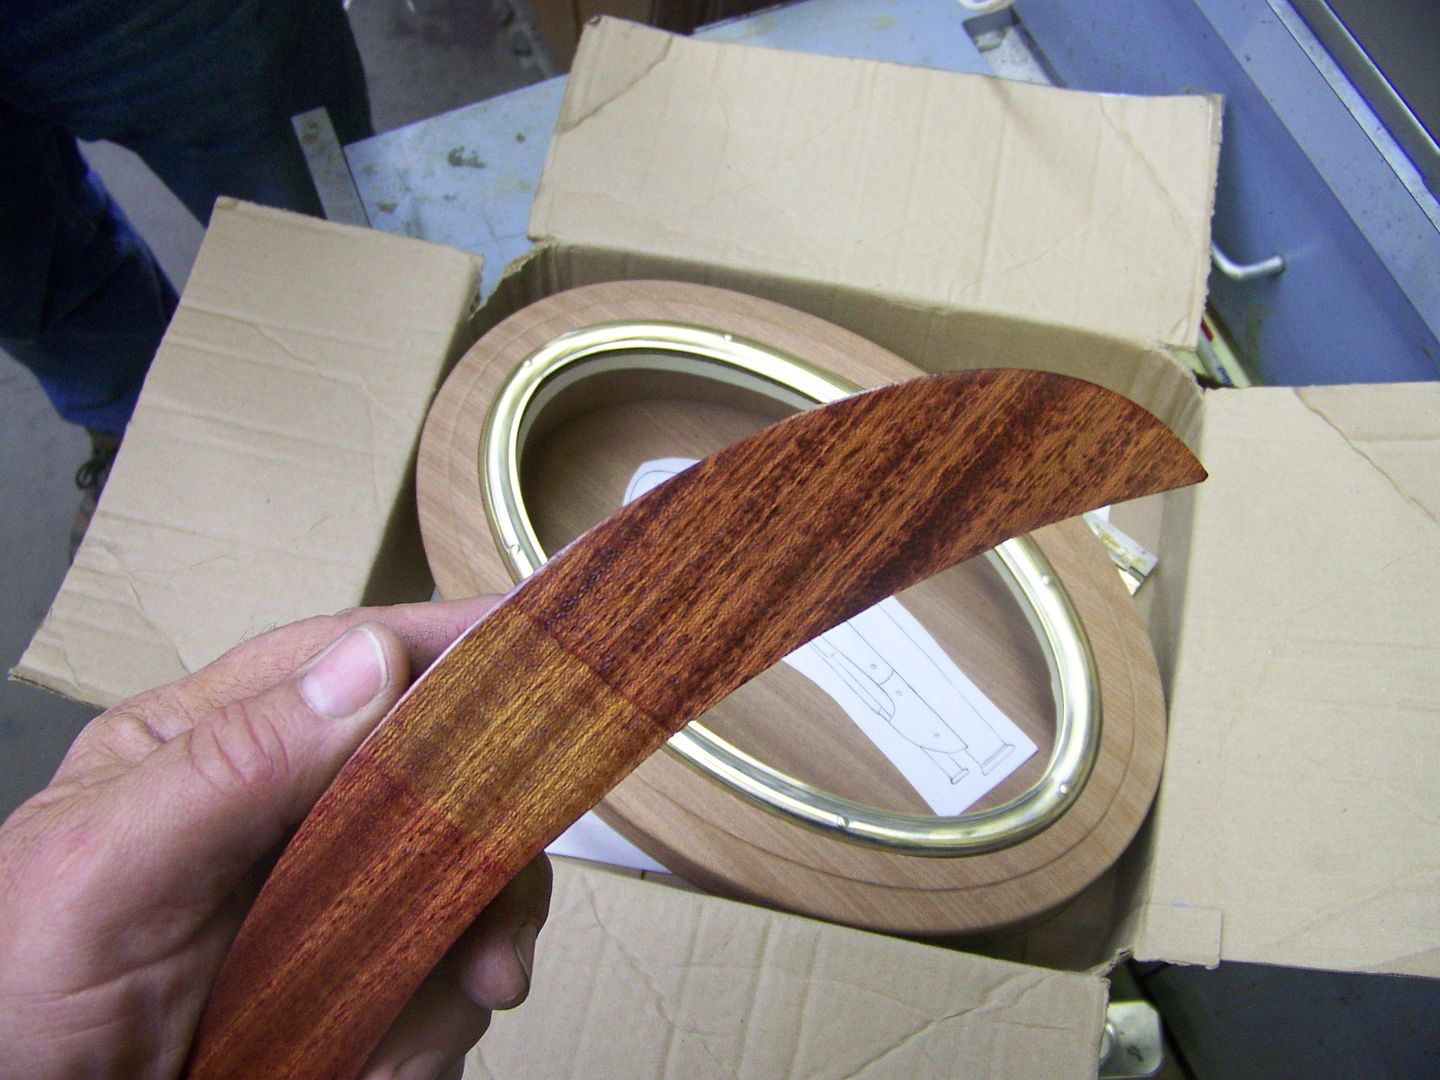
Also Roger came by to touch bases on my box for this gunknife. I made the box but he is doing the hinges, latch and finish work. Its made from red mahogany. The oval has beveled glass that was scratched so I sent it off as a pattern for a new piece. The bezel is brass and will get lightly engraved and nickel plated as will the antique piano hinge. We both decided the stain should be "red mahogany" as shown in the sample.

After some surface grinding I can see my pattern but with twist damascus the pattern looks reletively plain until the bevels are ground into so the inside of the bar is then revealed.
Also Roger came by to touch bases on my box for this gunknife. I made the box but he is doing the hinges, latch and finish work. Its made from red mahogany. The oval has beveled glass that was scratched so I sent it off as a pattern for a new piece. The bezel is brass and will get lightly engraved and nickel plated as will the antique piano hinge. We both decided the stain should be "red mahogany" as shown in the sample.
Denny Eller
Well-Known Member
Bruce, this is another stellar WIP as all of yours always are. I'm wanting to see the end product badly yet I don't want the WIP to end. Like all great novels, I race to the ending but then wish the story would go on and on.
Bruce Bump
Forum Owner-Moderator
Hi Denny,
Thanks much for watching and the nice comment. This one is taking shape but theres still lots more action to come. You've got time for a tinkle break and more popcorn.
Thanks much for watching and the nice comment. This one is taking shape but theres still lots more action to come. You've got time for a tinkle break and more popcorn.
Bruce, this is another stellar WIP as all of yours always are. I'm wanting to see the end product badly yet I don't want the WIP to end. Like all great novels, I race to the ending but then wish the story would go on and on.
Bruce Bump
Forum Owner-Moderator
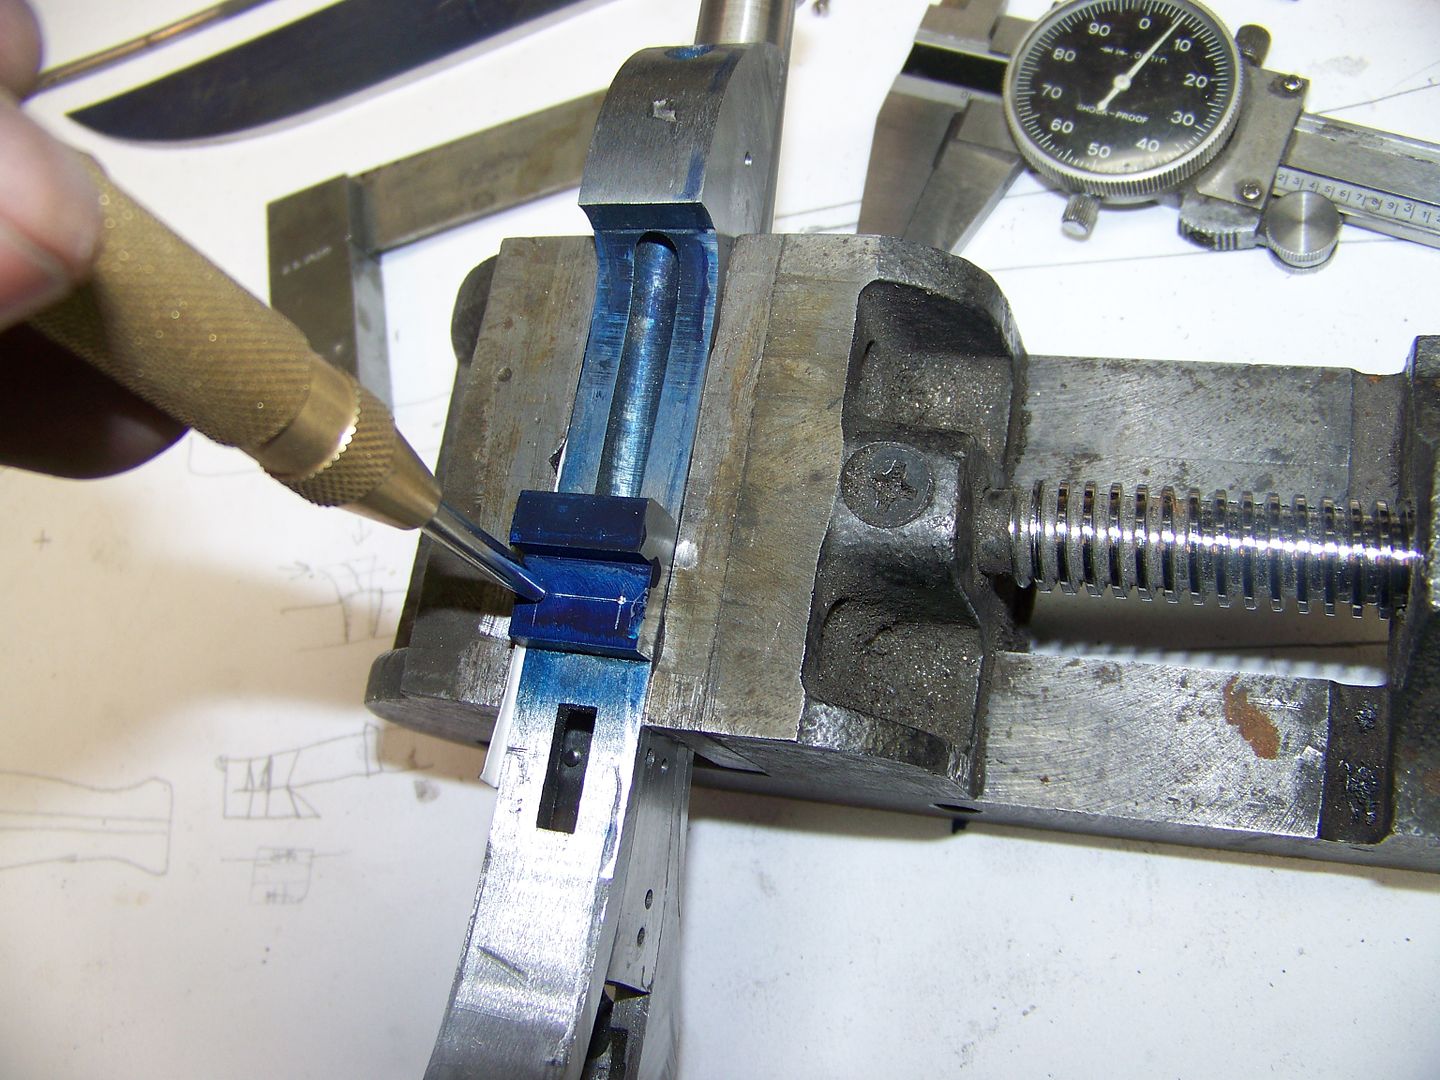
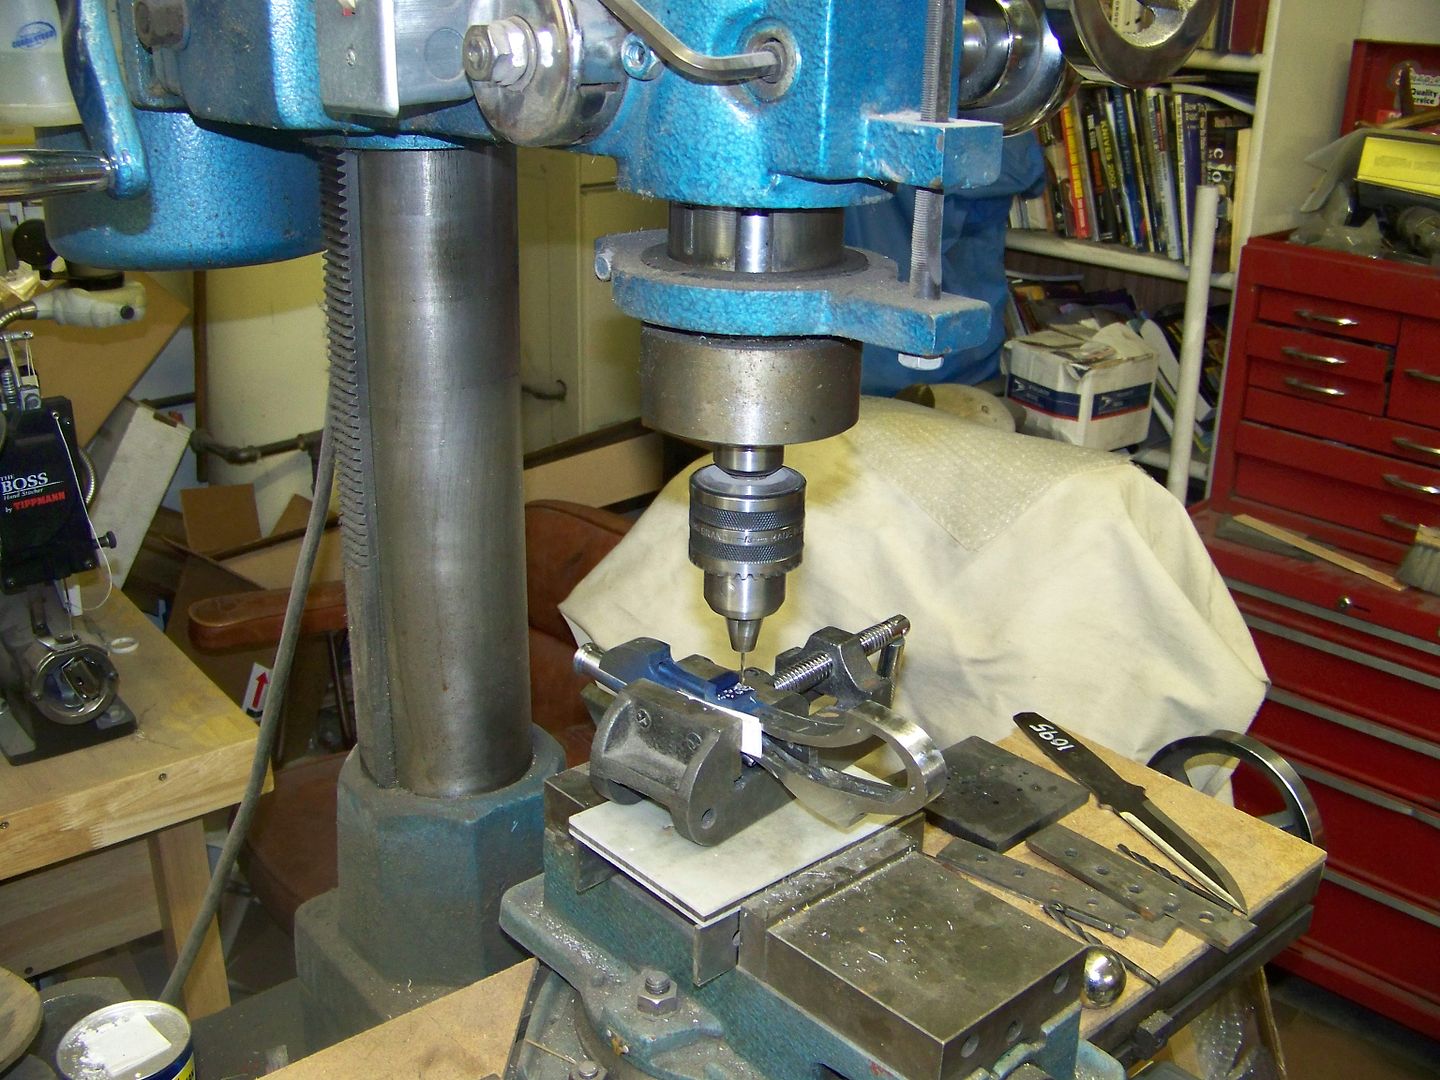
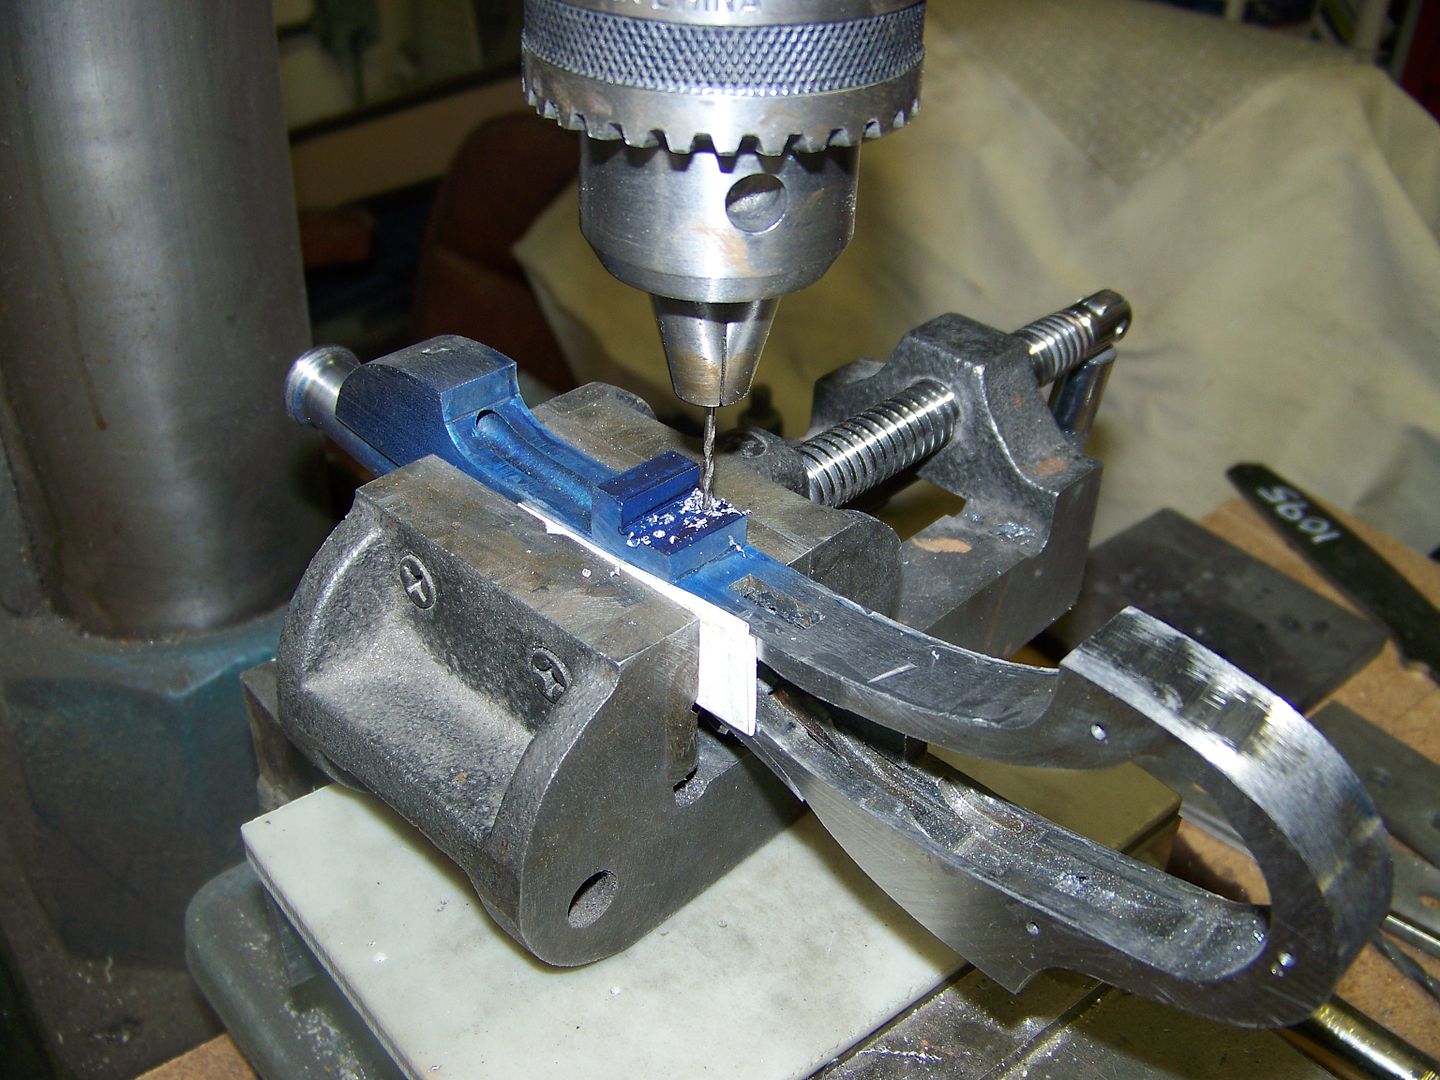
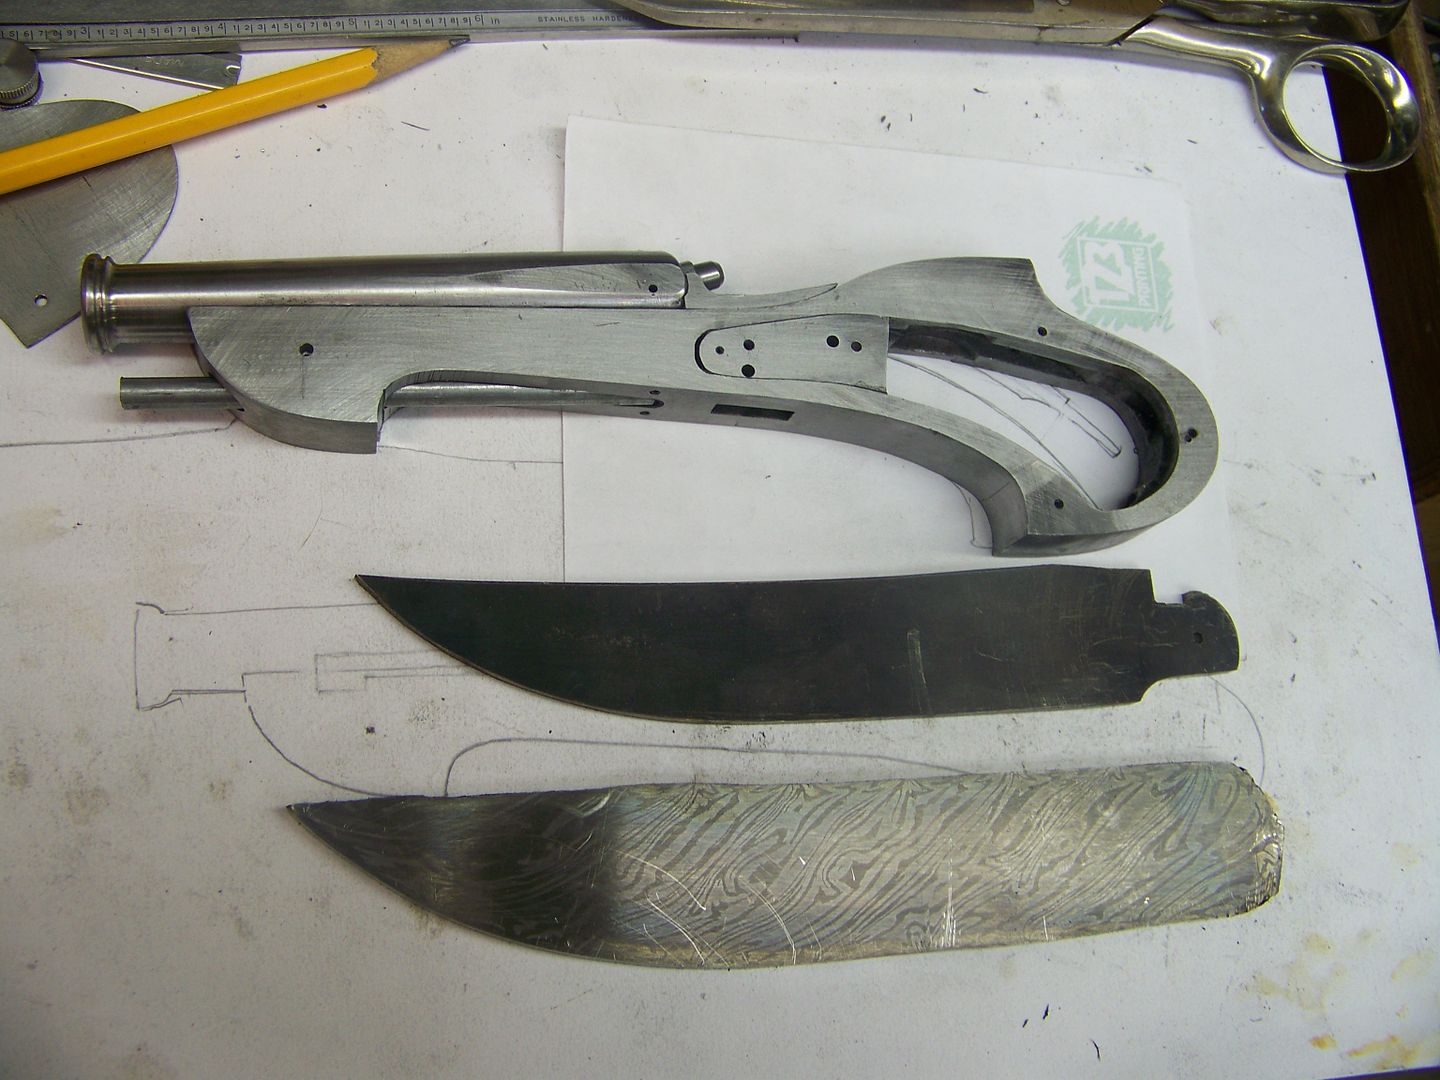
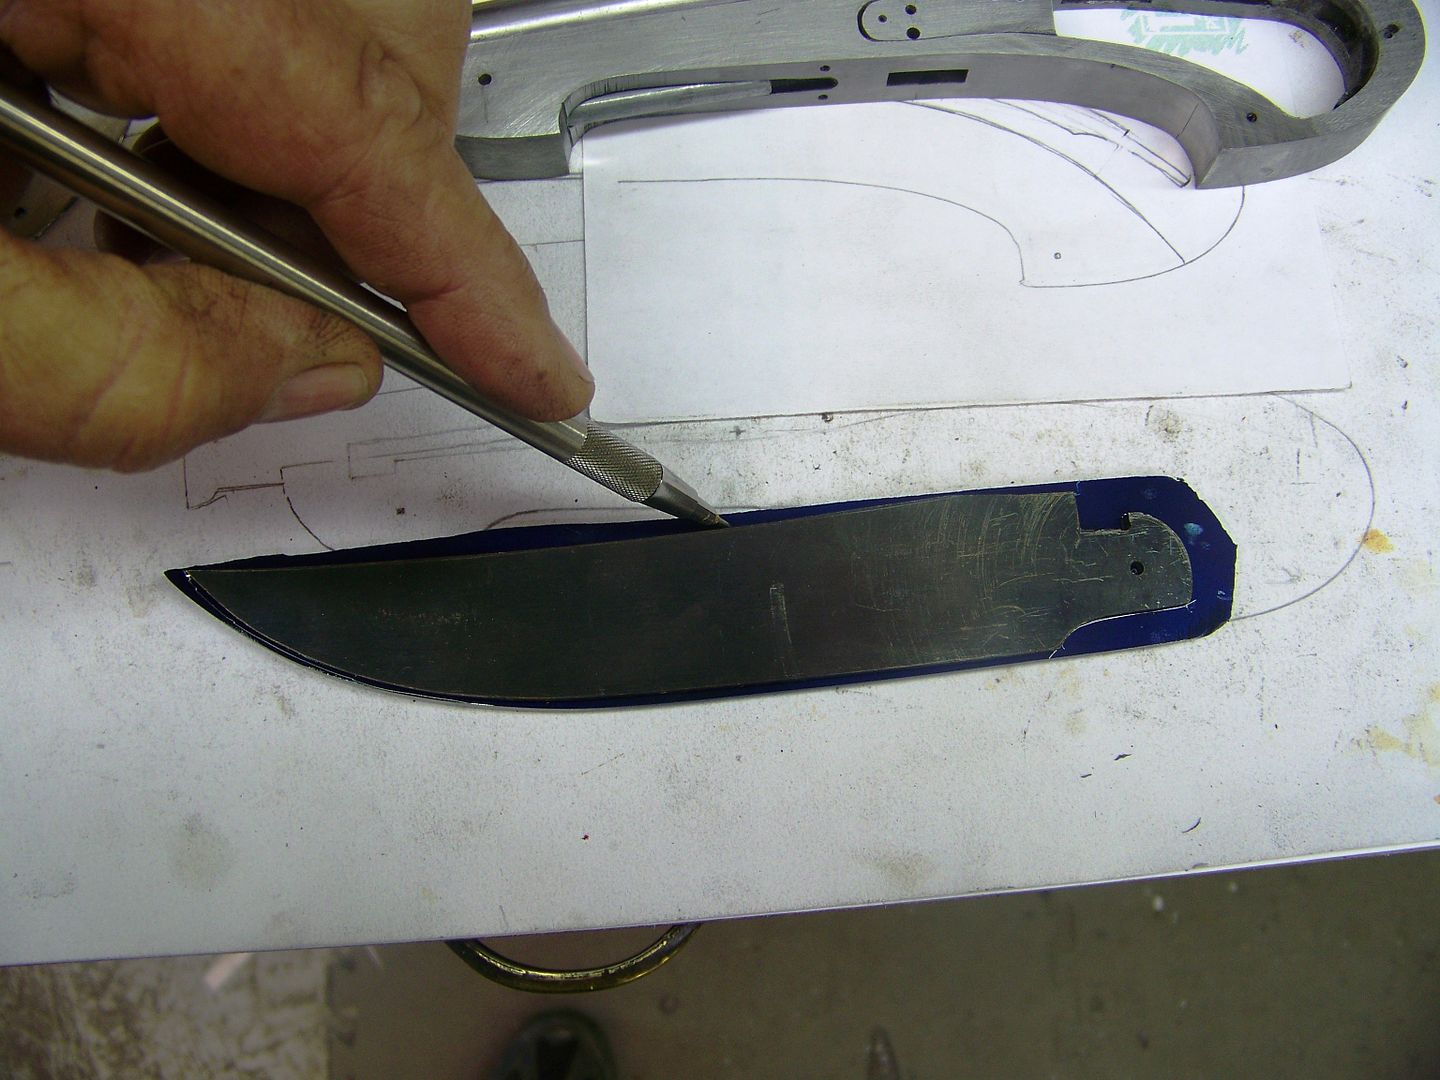
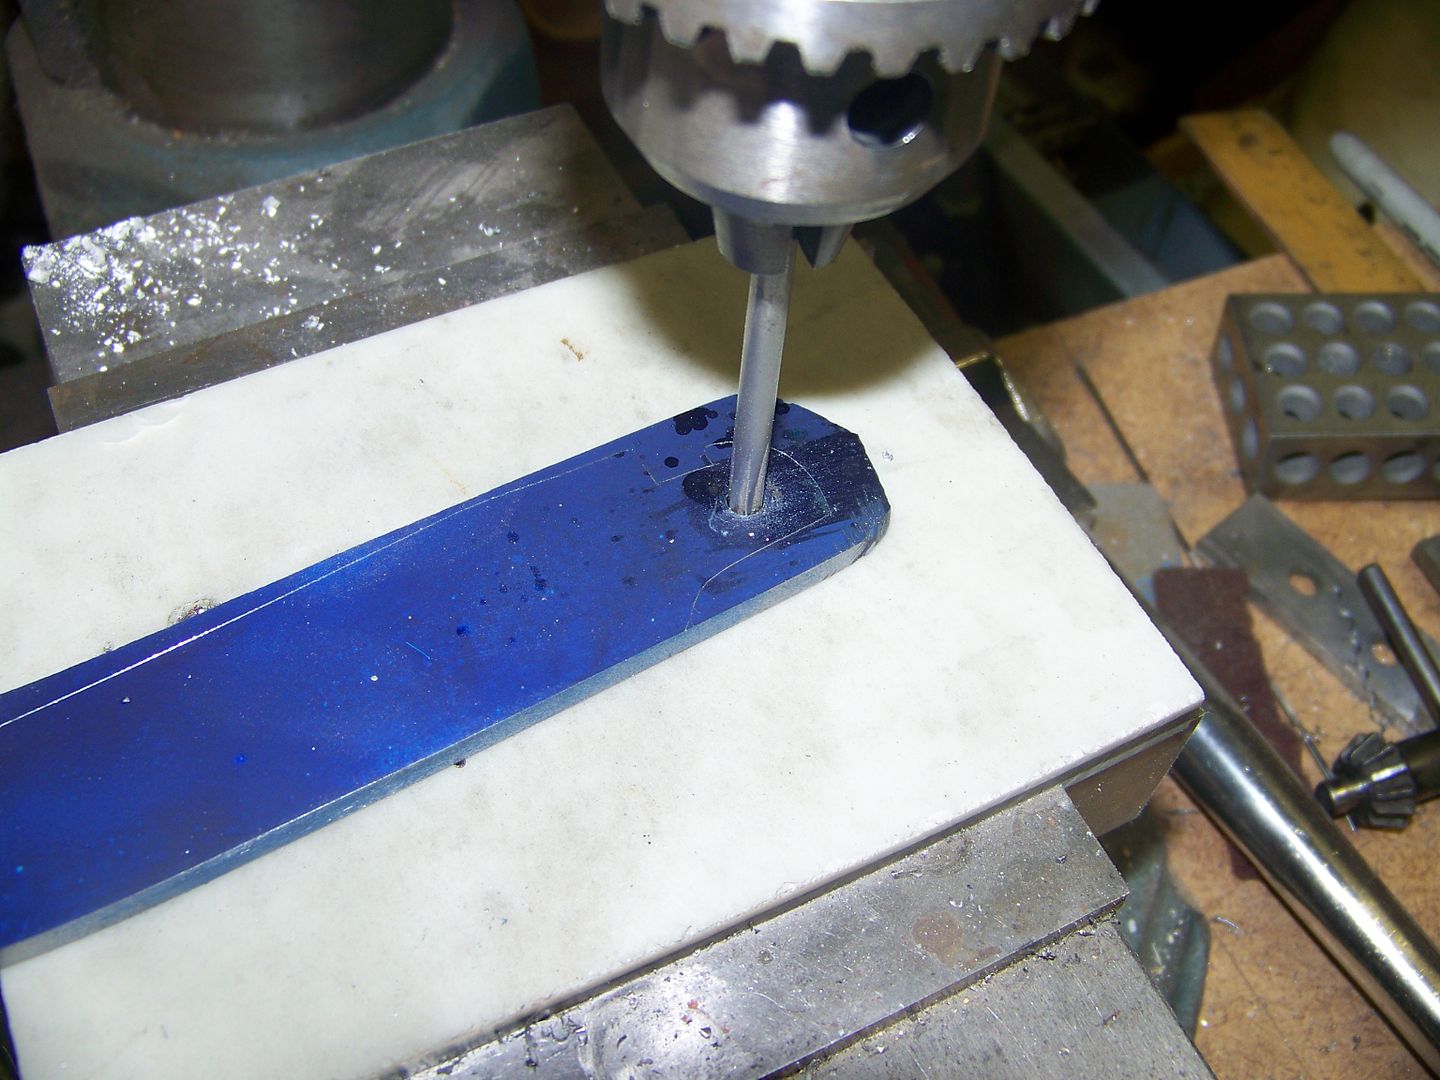
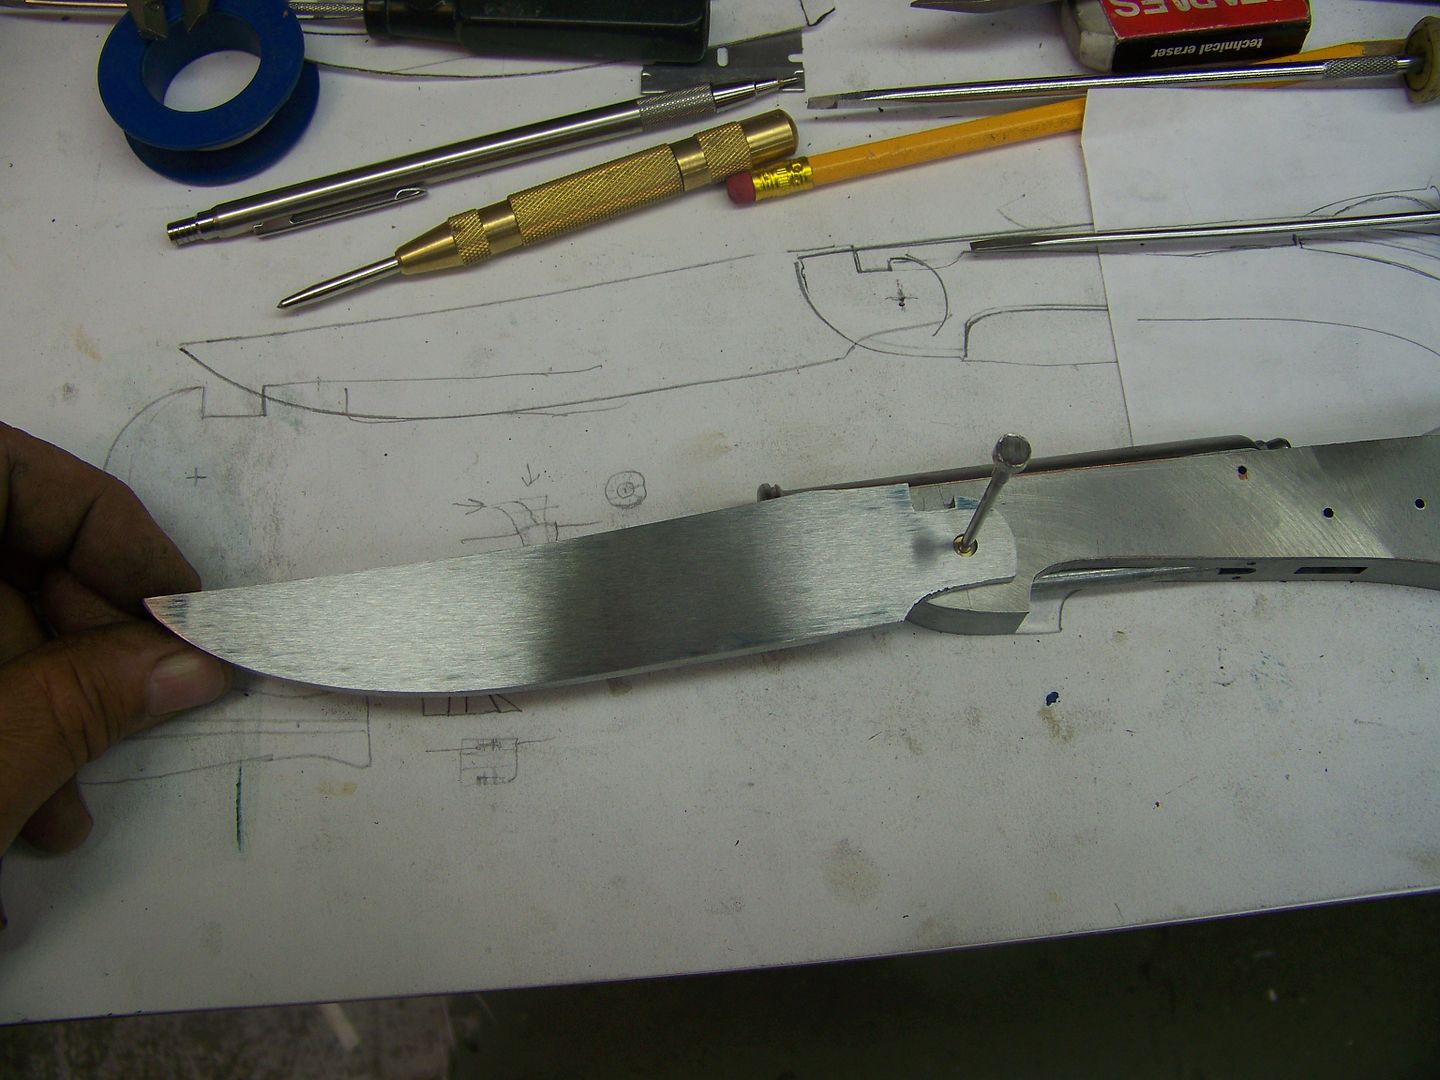
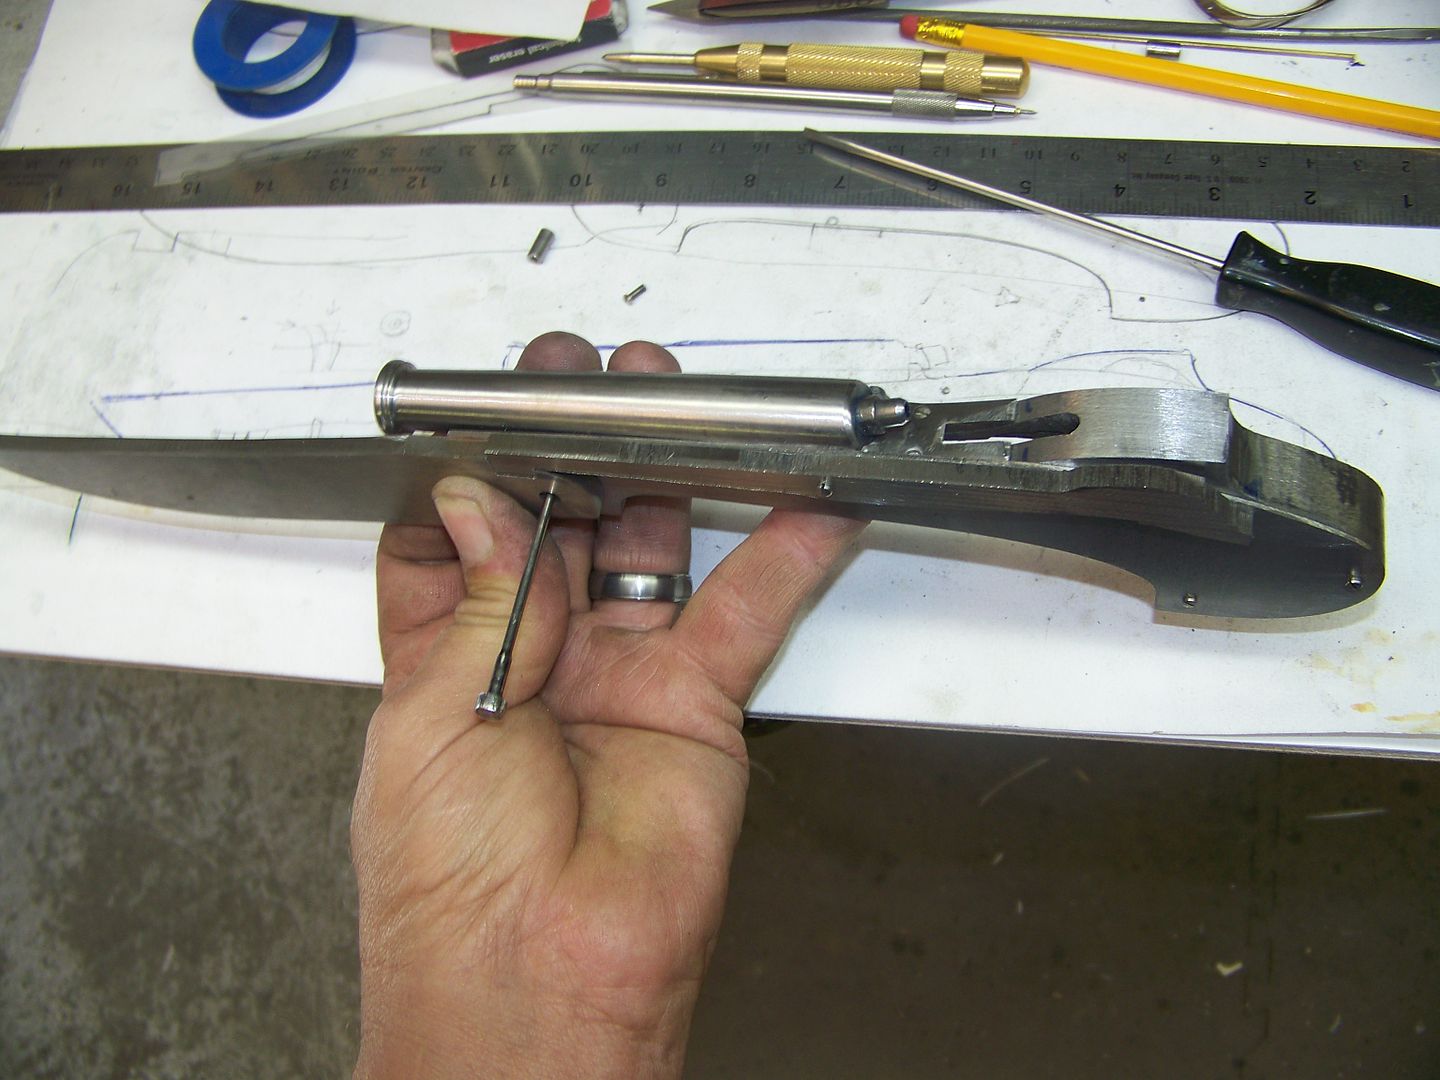
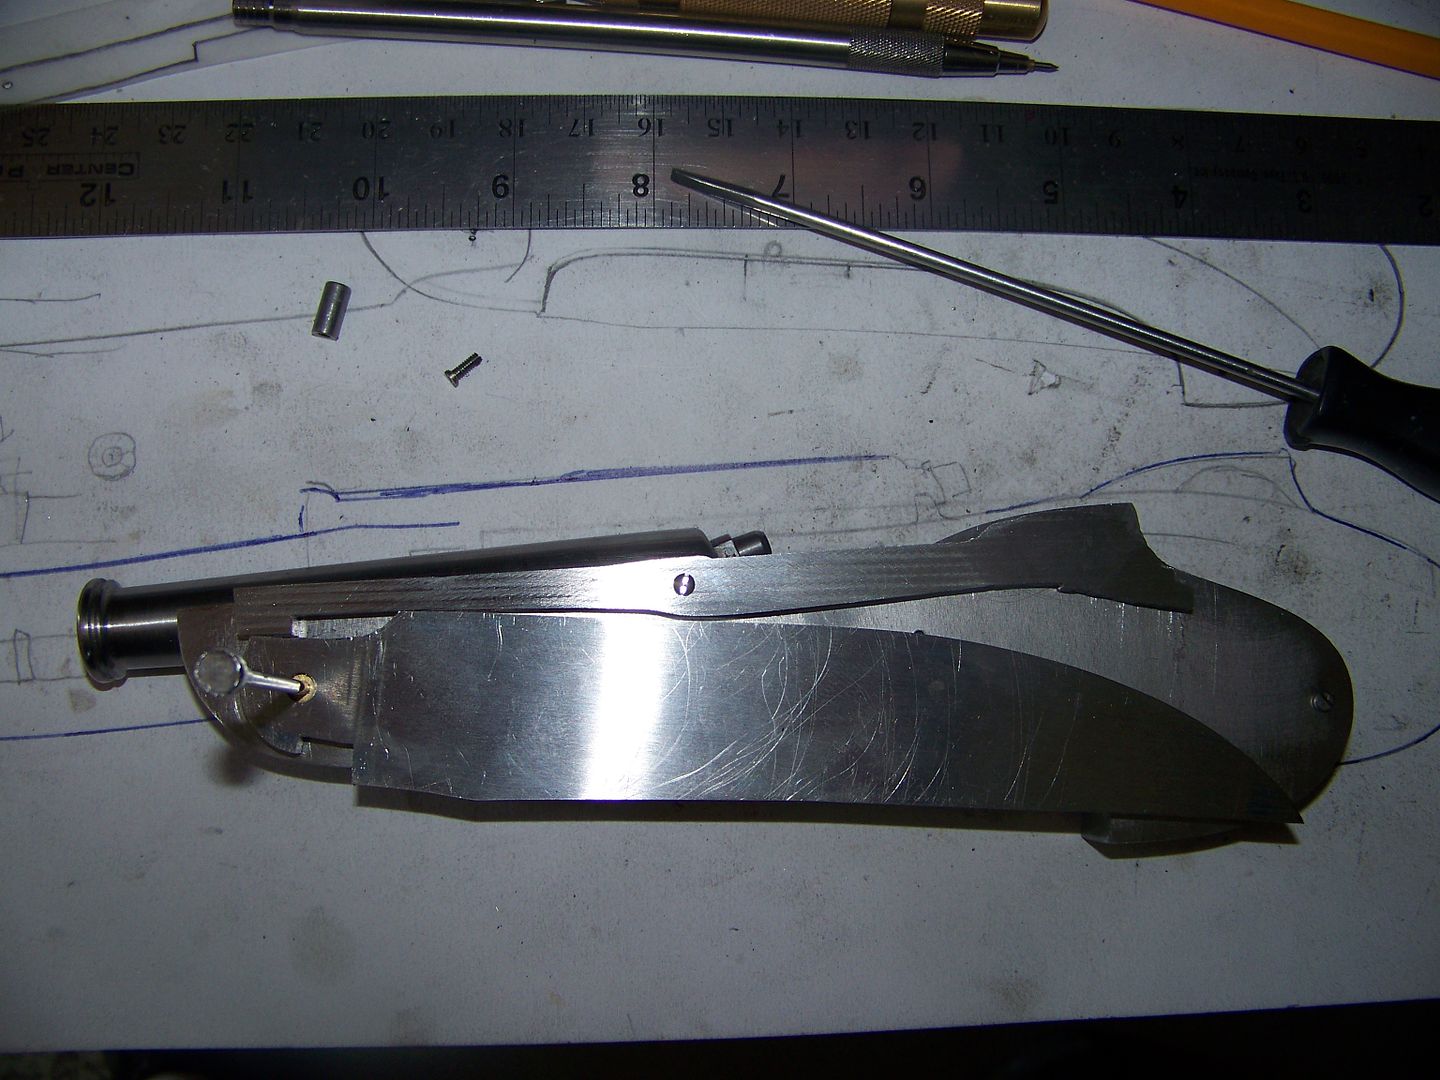
More work on the folding blade today. The mild steel blade as a template is handy. I simply traced around it onto the damascus steel bar and cut it out on the bandsaw. Oh first I drilled and reamed the pivot hole to .187" (3/16") so I can use a standard bronze bushing. The lock bar is cut from damascus too and rough ground and finally surface ground to the blade thickness. Both will get re-ground after they are heat treated.
Mylar is used to draw the shape of the lock bar and photocopied onto paper and glued to the damascus. I bandsawed it out and drilled it to .187" also at the pivot. It wont get a bronze bushing but instead a hardened drilled dowell.
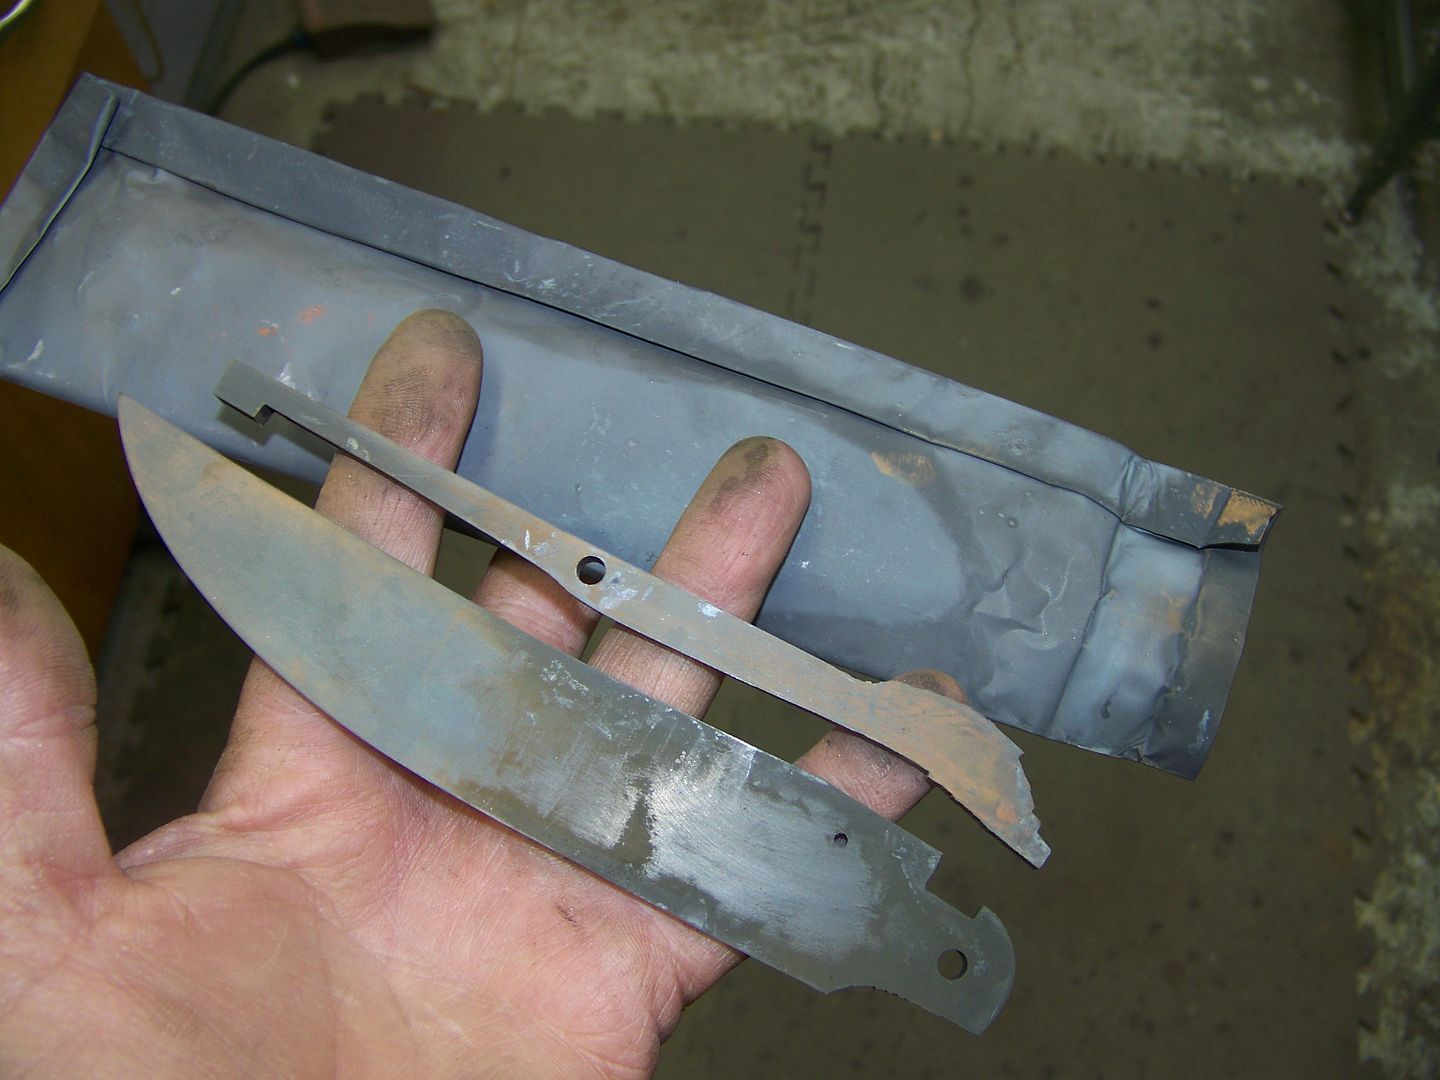
Blade and lock bar get painted with blue layout fluid and closed up on a stainless envelope and go into my oven for normalizing twice, annealing and stress relieving thermal cycles. The blue layout fluid eats any oxygen in the envelope to prevent scale. When I austinize to quench I'm going to use PBC Anti-scale from Brownells.
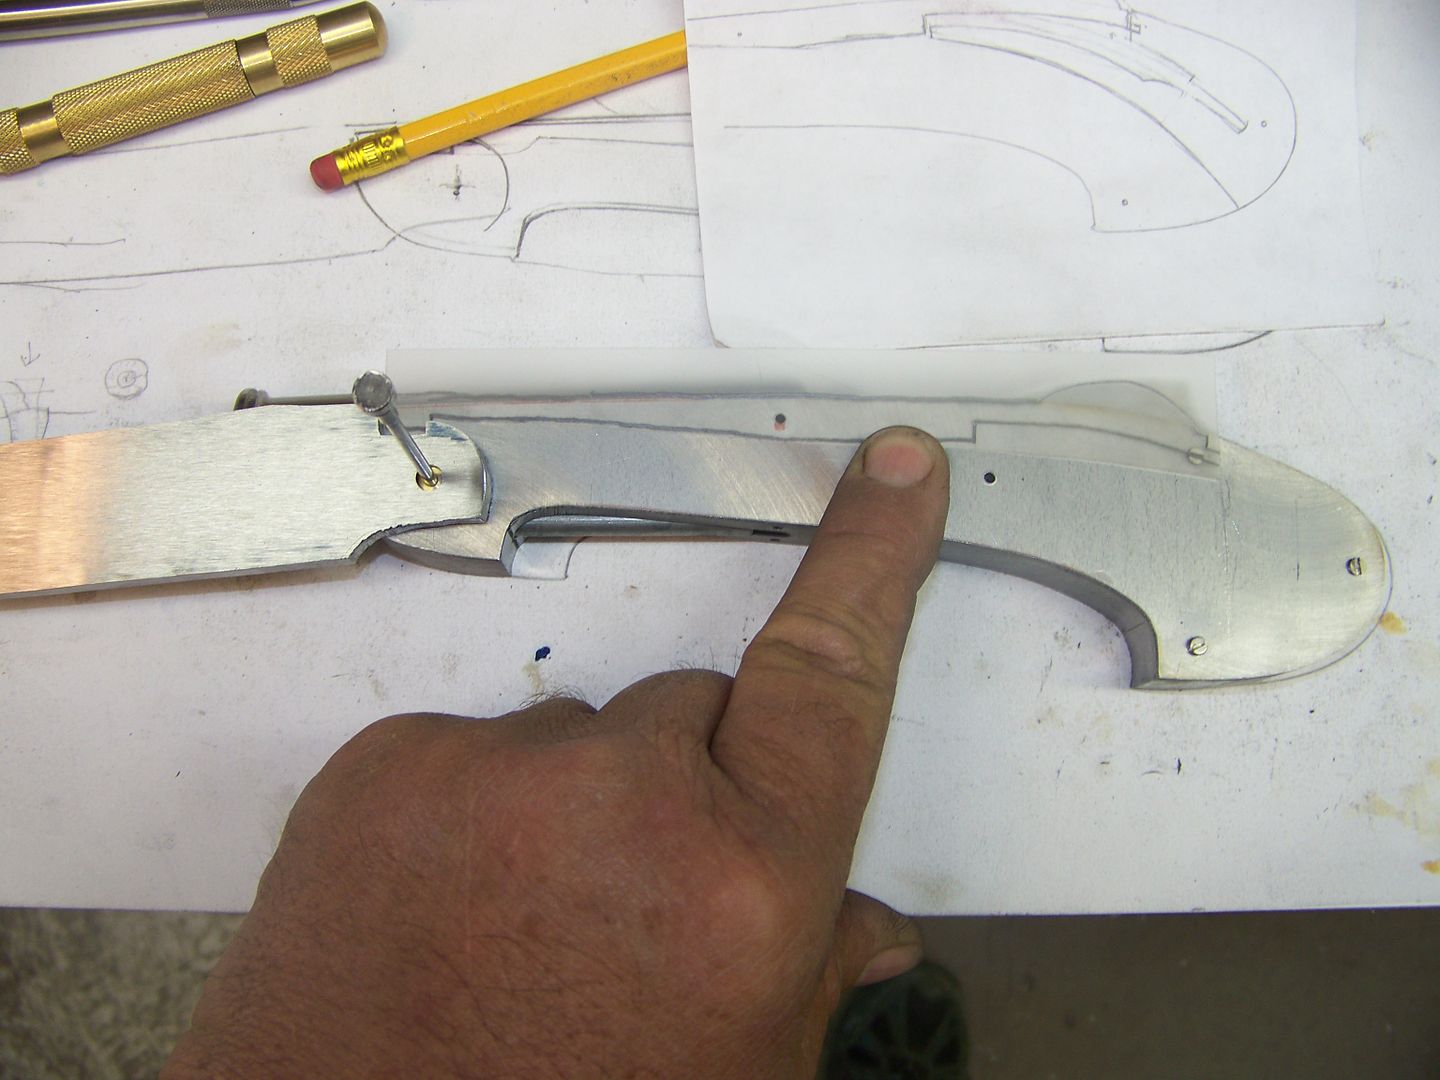
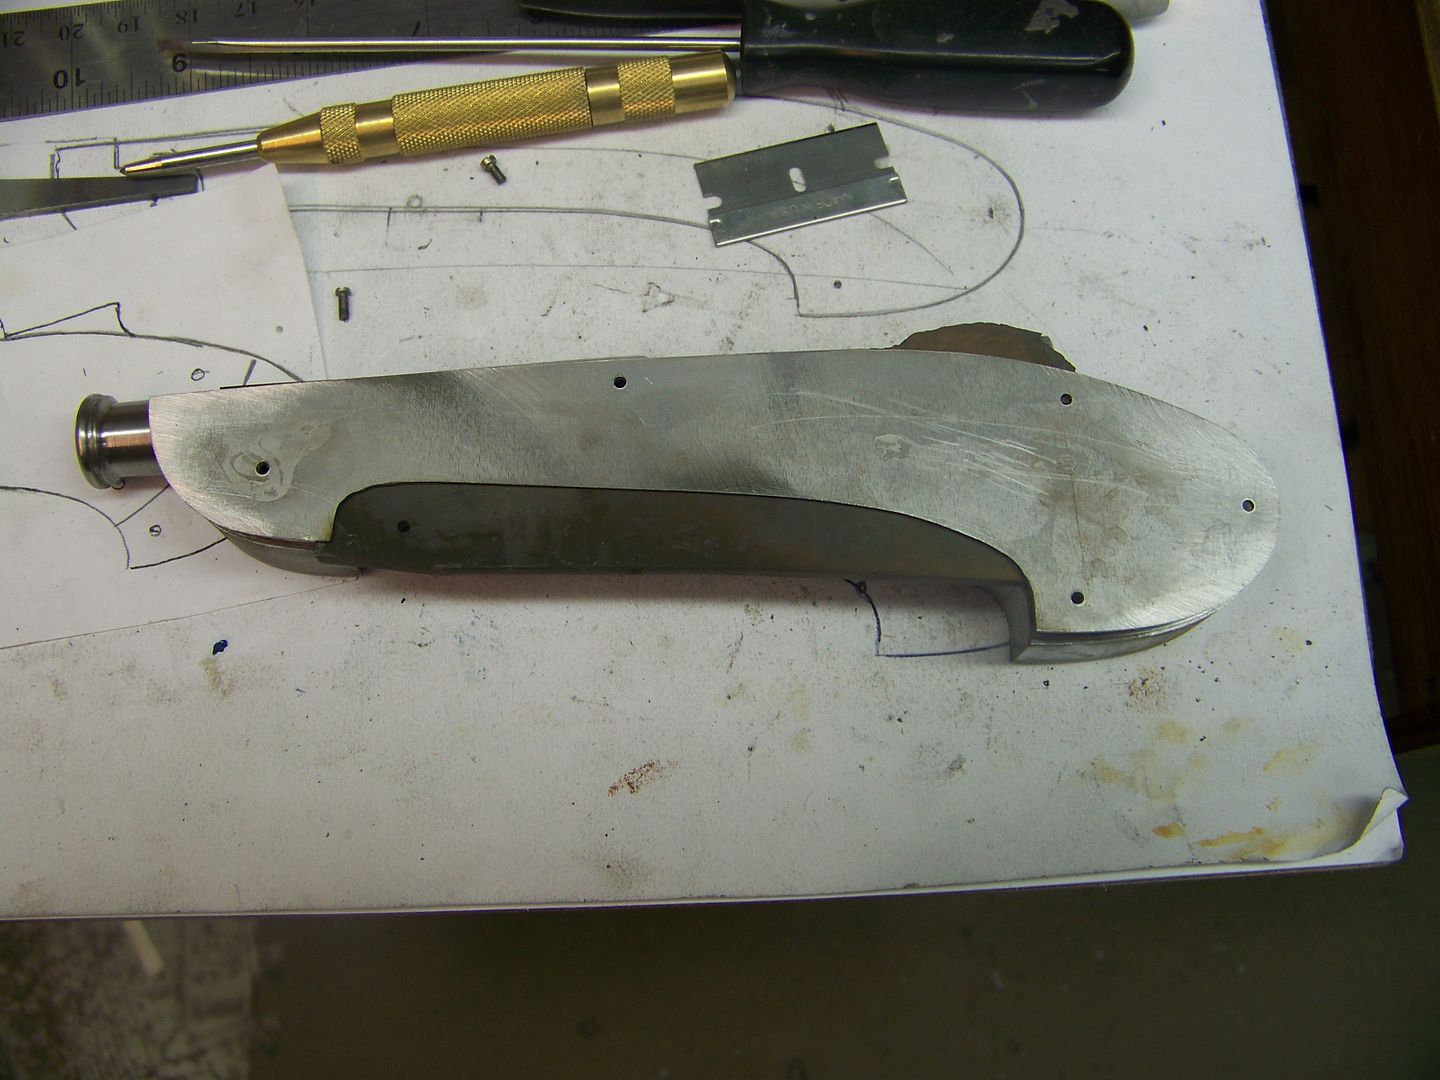
There is some much needed attention to details on the tang and lock bar. Some hand filing and a disc and table help make it possible.
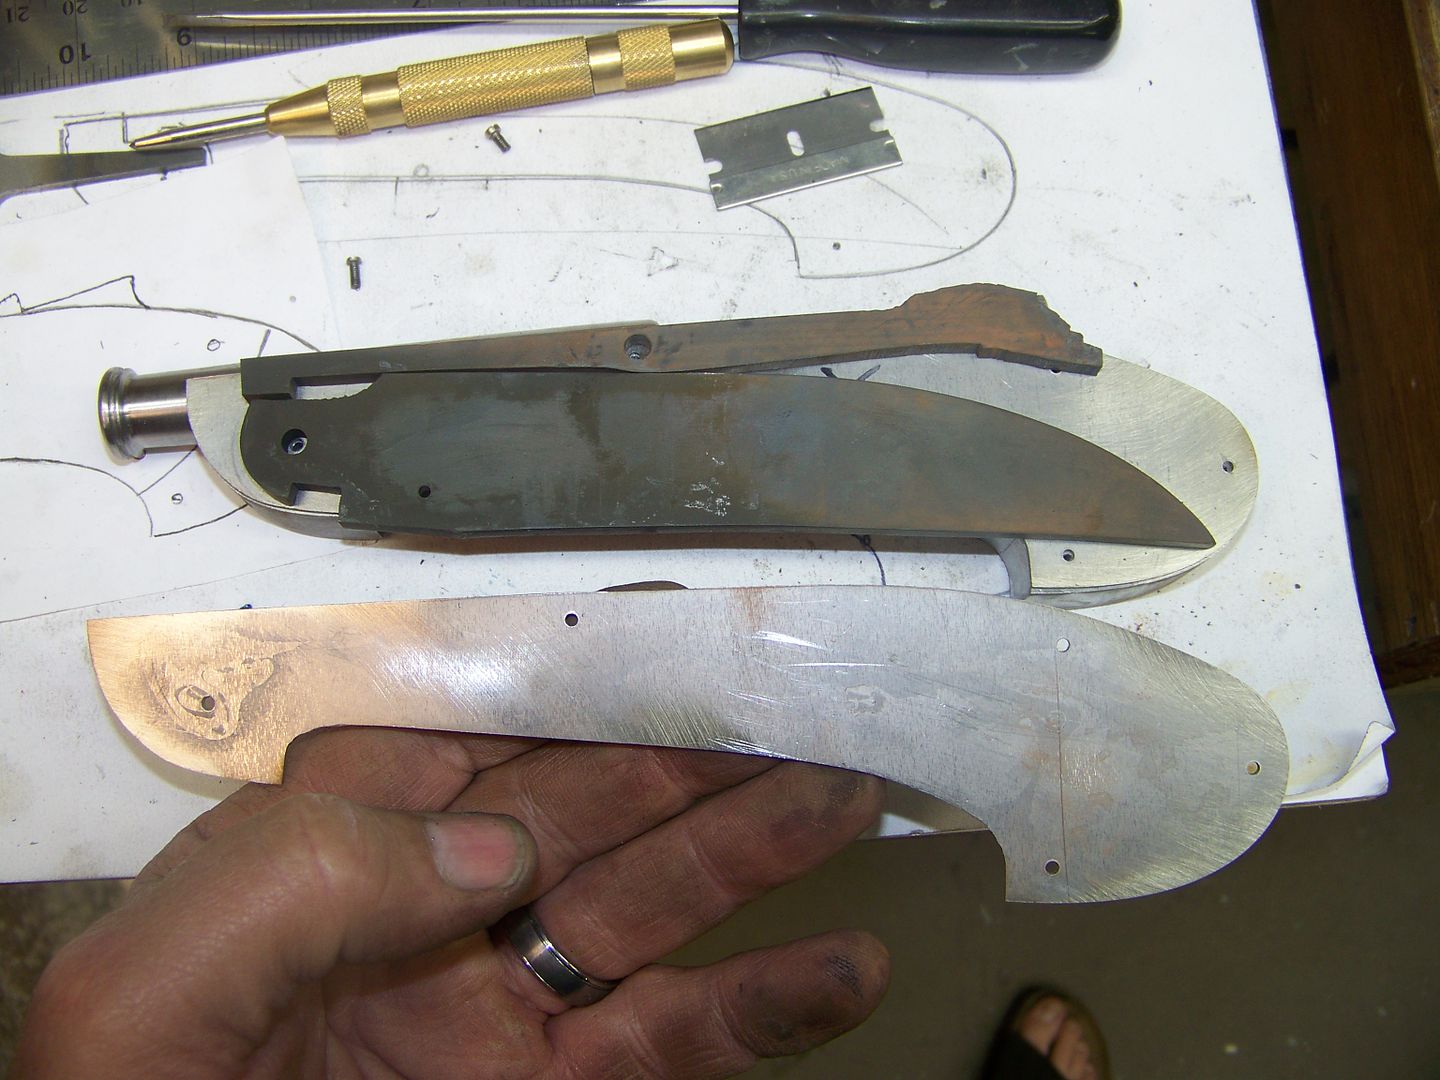
I made the outside liner also using the left side liner as the template. The bolsters and handle slabs will be attached to both outside liners. The middle liner makes a good marriage from the gun to the knife.
You guys are awfully quiet. Everything ok?

Mylar is used to draw the shape of the lock bar and photocopied onto paper and glued to the damascus. I bandsawed it out and drilled it to .187" also at the pivot. It wont get a bronze bushing but instead a hardened drilled dowell.
Blade and lock bar get painted with blue layout fluid and closed up on a stainless envelope and go into my oven for normalizing twice, annealing and stress relieving thermal cycles. The blue layout fluid eats any oxygen in the envelope to prevent scale. When I austinize to quench I'm going to use PBC Anti-scale from Brownells.
There is some much needed attention to details on the tang and lock bar. Some hand filing and a disc and table help make it possible.
I made the outside liner also using the left side liner as the template. The bolsters and handle slabs will be attached to both outside liners. The middle liner makes a good marriage from the gun to the knife.
You guys are awfully quiet. Everything ok?
Bruce Bump
Forum Owner-Moderator
Hey Ben,
I wish it were legal in this state to make an auto opener. Our son is a PO and everybody is watching this thread so to avoid having my doors kicked in at 2 am Mark and I decided to make life simpler. :biggrin:
I drilled the blade for a jeweled thumb stud but you're right theres plenty of room to pinch this one.
Bruce,
It is very interesting to see the lockback come together. Will the blade just be pinched to open it? It looks like there will be enough room to do so. As an aside, an auto opener would freak people out so much that you'd never have to use a bullet...
Bruce Bump
Forum Owner-Moderator
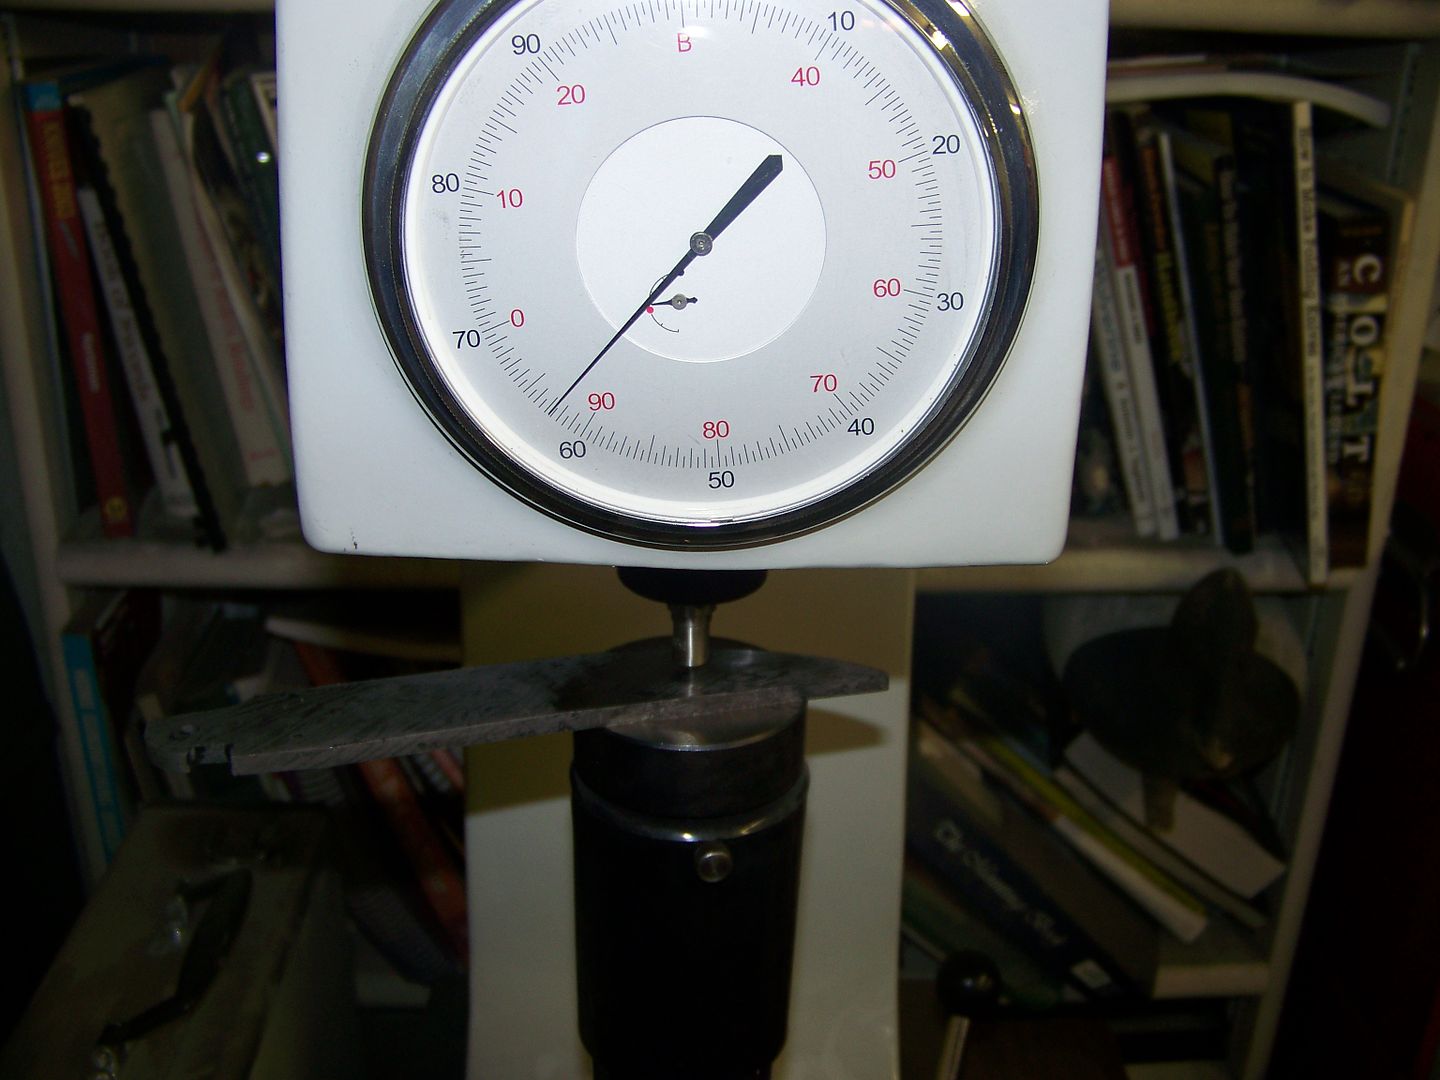
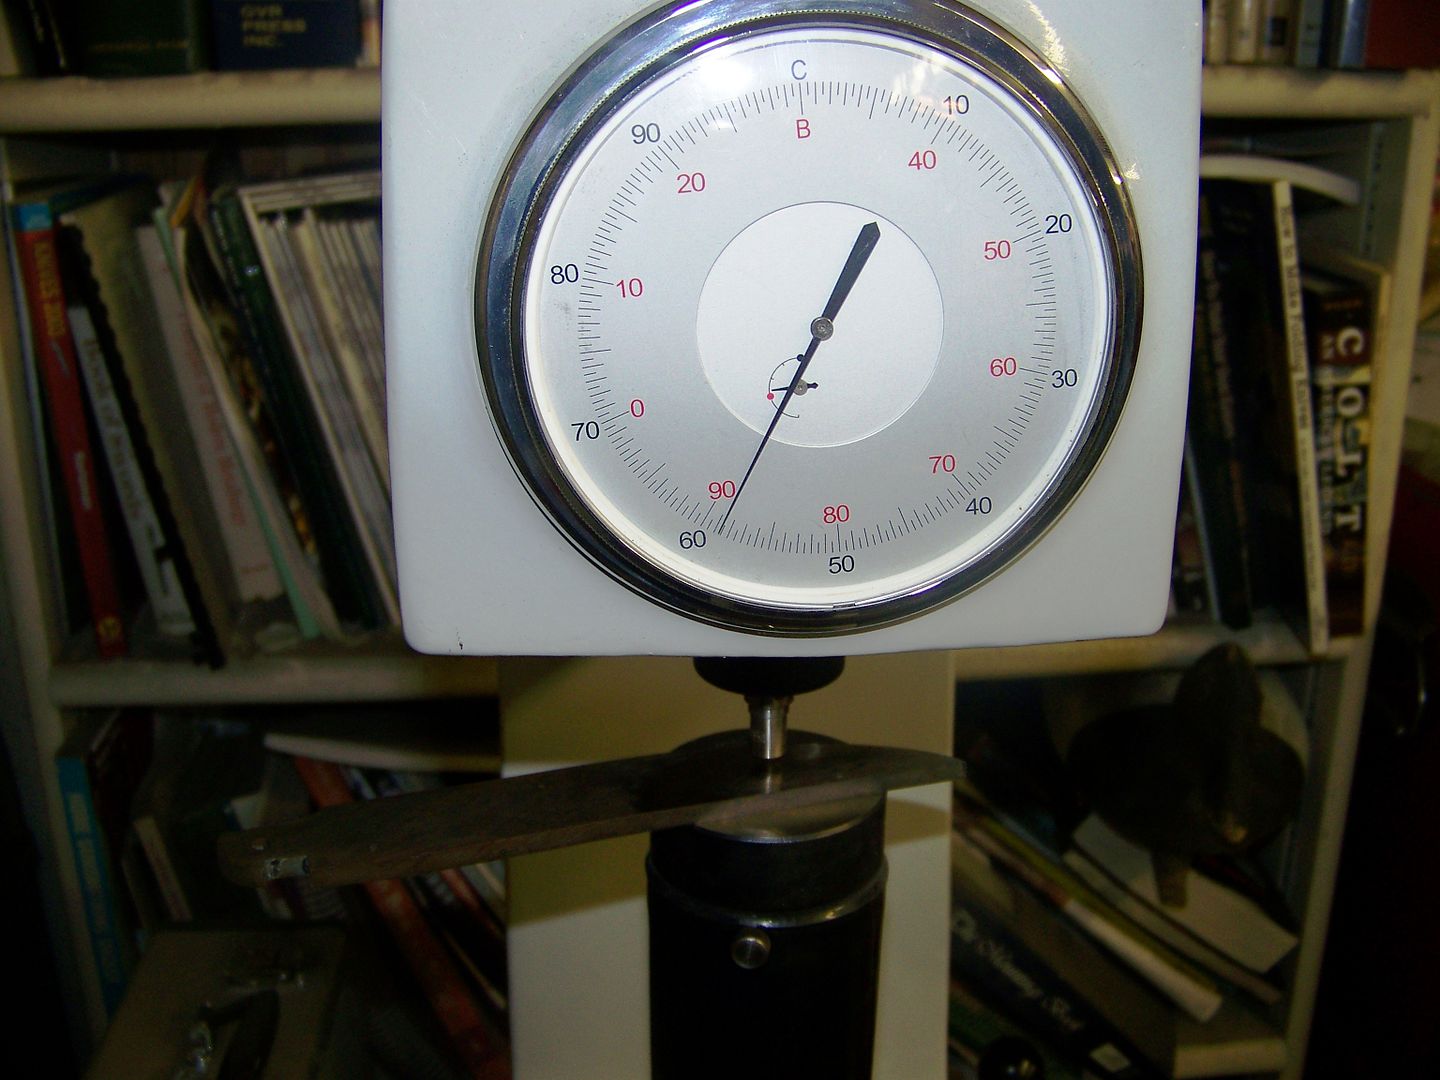
I heat treated the blade today. It soaked at 1500 deg for 10 minutes with PBC anti-scale and went in point first into Parks 50 quenching oil and rockwell tested at nearly 63 hardness. Two hours in the tempering oven at 395 degrees and it tested at a nice edge holder 59 rc. The lock bar recieved the same treatments but I forgot to do the filework on the thumb rest so that area will need to be softened again with a torch.

BRad704
Well-Known Member
You guys are awfully quiet. Everything ok?
I'm great actually... Had a "first date" with a girl Friday night, and ran a 5k for St. Jude yesterday in Memphis. Thanks for asking...
OH, you meant about the gun and knife... I think I am literally SO speechless as your abilities, that I don't want to just keep posting things like "OMG", "WOW", or "That's AMAZING!"... But those all apply here. I think a collection of these pics needs to go into one of those coffee-table books for posterity. (Ahem, Mr. Janik... paging Mr. Janik....)