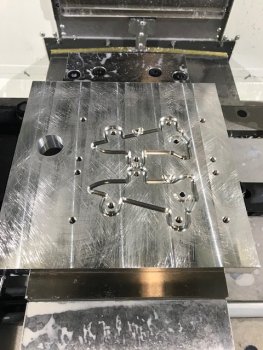
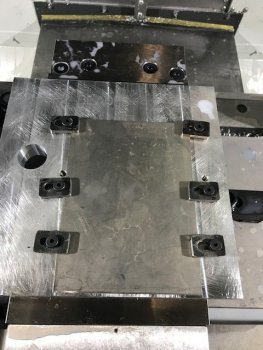
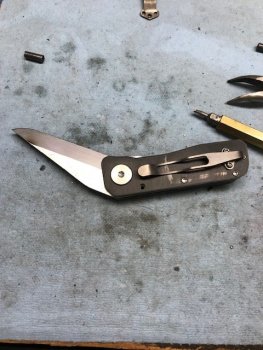
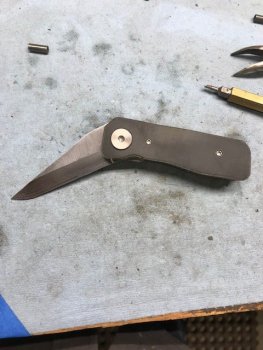
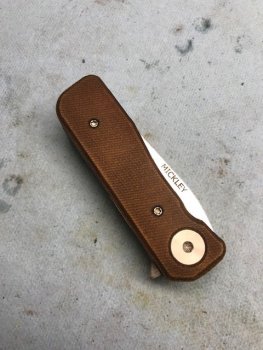
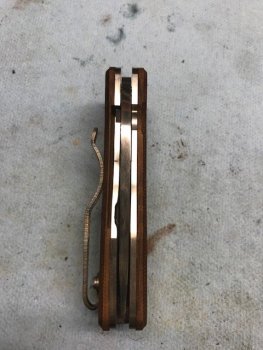
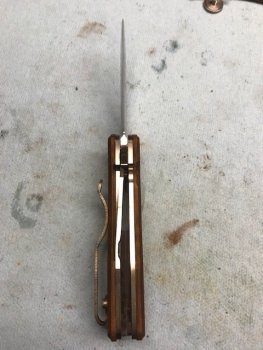
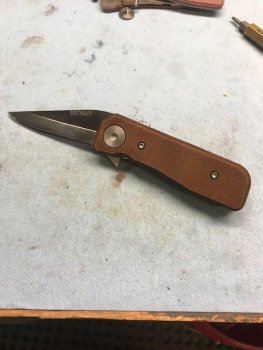
CNC WIP - small flipper.

I also fired up my copy of Gwizard and finally spent some time learning how to use it. Gwizard is a stand along program that helps you figure out the feeds and speeds.

I'm reading this whole thread, and it's bringing back A LOT of memories. It will get easier with time!

Yeah, calculating feeds and speeds can be fun!

Also, coatings can change things dramatically. AlTiN seems to give me really good tool life in the miserable stainless steels we like. It's worth the cost of the coatings, once you get past smashing cutters into parts! :)

Just a heads up with Gwizard, I've been getting really screwy numbers with it lately. Been running it for several years, and some of the recent updates are giving just down right stupid results with small cutters. Like recommending 400+ SFM feeds, and Full slotting in 440C with 1/8" carbide at .750" DOC in a single pass sort 'stupid stuff'. At this point, I've tired several times to report weird issues in the past and haven't gotten positive responses. I just seem to get blown off, even though I'm only trying to provide feedback to fix things! Not the kind of support I was hoping for.

It also ended up busting some expensive .012" carbides due to recommended feeds being about 10 times more aggressive than they should be. Went back to Harvey Tool's recommended feeds and speeds, and everything was fine. Knowing what I know now, I may not have spent the $$ on Gwizard. The old versions were pretty good with the small cutters and weird steels we knife makers use, but this new version is just trying to smash expensive carbides! Anyway, my $0.02. Just double check the number before you trust them...

Good luck with the milling. I emailed earlier about shop hours on weekends. If you're around two weeks from tomorrow we could chat about milling knife parts. I'm willing to share what I know, even though there may not be much to offer! LOL! :)

Dan
 
Hi Dan,
I did see some strange numbers from Gwizard. I thought it was just me. I'll pay closer attention to those. Still, it's been exceptionally helpful as I didn't have any experience to even base a guess off of. If I see some odd numbers I'll report them and maybe they will be addressed if enough users do that.

I have not finalized on a tool brand yet but need to. I have a bunch of different ones and it's a real chore to find chip load and SFM manufactures data. It's worse with the budget tools than the more expensive ones. Just another reason they are budget tools I suppose. I am trying Lakeshore carbide tools now and will see how that goes. I have not tried Harvey tools but should look at them. Everything I have heard has been positive.

I'd try and be here for you upcoming visit but I have a niece's wedding to attend. I really rather be working on the machine than attending a wedding but you have to do those things too.
 
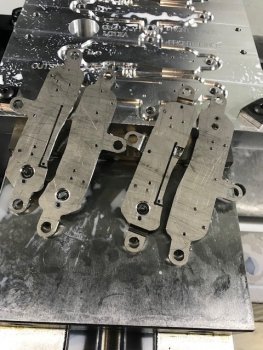
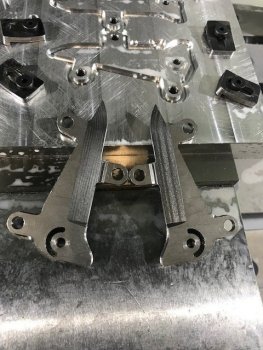
Success!

I have been over this program a half dozen times. I set it up to run this morning and naturally found a couple issues. A few hours later and finally a program that isn't bullet proof but isn't terrible produced these. I'll knock off the tabs, grind those flush and throw these in the tumbler for a few hours.

At this point I feel I have the program for these parts good enough to use. I still have to fine tune the edge finish to minimize hand finishing at the end. That can wait.

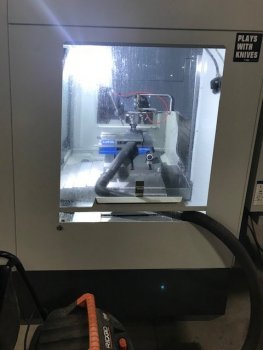
Now I'll move over the the scales and get those programmed using this same fixture. G10 isn't as spooky as titanium. I really don't expect the scales to be difficult. I am not planning on putting in any 3D shaping at this point but will need to get started on that soon - which is another challenge I haven't attempted yet. I am not looking forward to the g10 scales. I don't want the dust mixed in with the coolant so I'll run these dry and I'll have to stick my head in the side window often to vacuum up the swarf. I think this is where a CNC router would shine but I've got my hands full as it is.

IMG_3458.jpg
 
I continue to be impressed by how one small error in setup or programming can be disastrous.

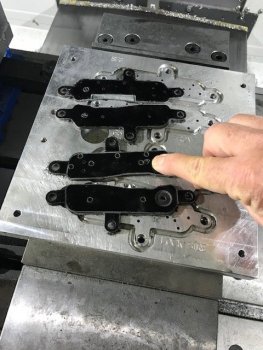
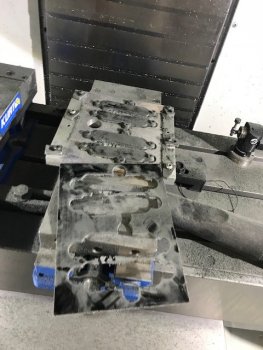
I am pointing to where my mill was going to go negative 3 more inches. I was testing this program on slow rapid of 5% and was able to hit the stop button in time before it buried it's self into the fixture. Long story short I had the wrong plane active for this op. All the other ops were fine, just this one was buggered up.

I ran several tests to isolate the issue. I checked the Gcode, I redid the chains, I redid the entire op, testing them each and still the issue.
Finally I noticed that this one op (out of 26) had the wrong plane active. I fixed that and tested again. Success. It only took about 3 to 4 hours to catch this issue.

Learning something by making lot's of mistakes pretty much sums up my knife making career.

IMG_3541.jpg
 
Success -- finally. Linen micarta. It cuts raggedy. I'll have to try some g10 and see how that cleans up.

IMG_3547.jpg

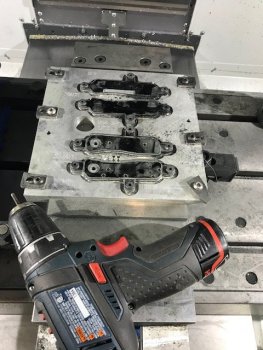
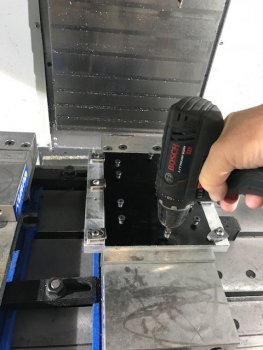
I drill helps with getting all the tab screws in and out quicker.
IMG_3546.jpg\

The webbing as it comes off leaving the scales with tabs bolted down.
IMG_3545.jpg
My jury rigged dust collector. A shop vac under the vise and wired in place to one of the hold down clamps. It catches the majority of the dust.

IMG_3544.jpg

I am using 6"x8" sheets. Here I am screwing it down just after the tab holes were drilled. I leave the side clamps in place until the contour (profile cut) is done so it isn't banging around.
IMG_3542.jpg
 
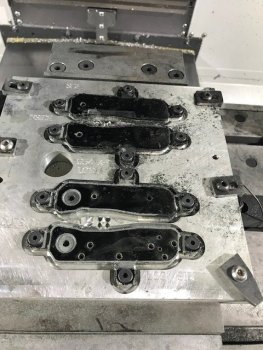
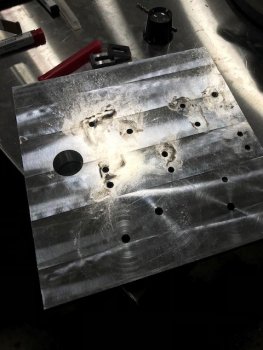
Buried and broken in half on one of these holes is a 1/4-20 tap in this aluminum plate I was working on for a new blade fixture.

Stuff like this kicks you right in the gut and sticks with you (or at least me) all day until you suck it up and move on. I don't even want to talk to anyone.

So.... I've started to square up a new plate of Aluminum to make a new fixture. This time it took 1/4 of the time it did the first time on the CNC. Previously I was squaring these up on the manual mill because it was faster. As I redo things for the 2nd, 3rd or 5th time, I can see I am getting a little faster which makes sense since I probably couldn't go much slower.


Later, for the practice on the scrap fixture, I'll bugger out the broken tap some how, drill out the holes for helicoils and put them in. I've never used helicoils before and I see a lot of guys using them for aluminum fixtures.

IMG_3563.jpg
 
I've had good luck drilling out broken taps with straight flute carbide drills that are roughly the flute diameter of the tap.

How did you get out of G17? MasterCAM issue? Typo? Just curious as that's not something I hear happening often unless you're using right angle heads, etc.

I'm wondering, isn't your coolant running through a sock filter? That should capture the majority of composite dust. G10 machines much nicer than micarta, but is miserable on tools.

Does your VF2 have Haas Quick Code?
 
The tap broke from the wrong feed rate. Mastercam toggled it to too slow of a feed rate for the TPI and I missed it. I was able to replicate the issue in Mastercam and now know how to avoid it.

I will probably have to dremmel out the tap with a carbide burr. It's a rabbit hole since I already made a replacement but I still want to try helicoils so I will use that fixture for testing techniques - like helicoils.

I was talking just today to another machinist that is running some g10 knife handles (for kits we sell) and he is going to use a sock. I'm going to see how it works for him and then probably add one to my mill -- and make it a point to change coolant more often.

There is some conversational codes buried in the HAAS somewhere. I've never used it but it's on the list of things to try.

I've had good luck drilling out broken taps with straight flute carbide drills that are roughly the flute diameter of the tap.

How did you get out of G17? MasterCAM issue? Typo? Just curious as that's not something I hear happening often unless you're using right angle heads, etc.

I'm wondering, isn't your coolant running through a sock filter? That should capture the majority of composite dust. G10 machines much nicer than micarta, but is miserable on tools.

Does your VF2 have Haas Quick Code?
 
so a much better afternoon.
I remade the fixture in just a few hours that had taken me days the first time - which is a huge win. I can't keep going this slow forever.
It was shiny as a mirror when done but I stoned it to clean off the burrs so it looks all scratched up.
This fixture is absurdly over sized. I'll worry about efficient nesting down the road if I ever need to scale up for bigger runs. This is just about learning for now.

IMG_3564.jpg


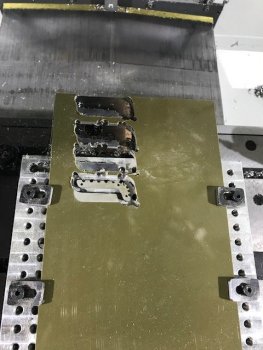
I have this set up to use 4" wide pieces of material. They are clamped down, holes are drilled for the tabs, the machine is paused while I add screws to the tabs holes and then the machine is allowed to continue to profile out the parts exactly like the process for the liners in an earlier post.
Now I will use some mild steel in 1/8" thickness to do some practice blades. After I get past the practice blades I can start milling some knife steel.
IMG_3565.jpg
 
G17- that was referring to how you got "out of the right plane" and were going to drill 3" into the table or whatever. G17 is XY plane, G18 XZ, G19 YZ. Or did you mean the wrong work offset?

To see the conversational stuff (which is really just macros) it's Edit -> Program Conversational (2x) if it doesn't come up on screen you then hit F2 and the list of loaded functions will come up. Only asking because for things like squaring up your block, knocking out a couple tooling holes to hold down before executing your program, etc, they make life a lot easier once you get used to them.

There's no learning like experience. Your fixture designs will evolve until you can't look at someone elses knife without thinking about how you'd tool up to make it :D
 
ok, now I follow you.
I created a new level to work on but missed switching to it as active in one op so it defaulted to TOP and went mental. That is technical jargon for I still don't know why it wanted to bury it's self as the default TOP level was only Z-.125"
It was the ghost in the machine.
Voodoo..

I know I need to get some time in on the conversational stuff for quick jobs. I'll have to poke around Youtube tonight and see whats there.

G17- that was referring to how you got "out of the right plane" and were going to drill 3" into the table or whatever. G17 is XY plane, G18 XZ, G19 YZ. Or did you mean the wrong work offset?

To see the conversational stuff (which is really just macros) it's Edit -> Program Conversational (2x) if it doesn't come up on screen you then hit F2 and the list of loaded functions will come up. Only asking because for things like squaring up your block, knocking out a couple tooling holes to hold down before executing your program, etc, they make life a lot easier once you get used to them.

There's no learning like experience. Your fixture designs will evolve until you can't look at someone elses knife without thinking about how you'd tool up to make it :D
 
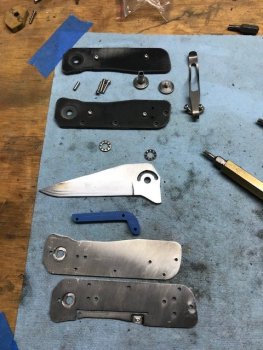
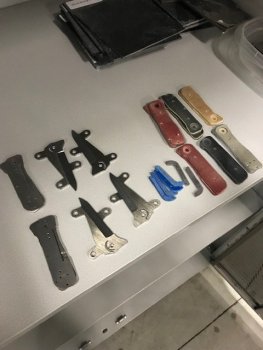
I now have a few parts to assemble for a rough prototype.
I seemed to have added an extra hole on the back side scale I need to remove. It's for an optional bolster and shouldn't be there for just a scale.
The lock isn't set and the blade is just mild steel anyway. Once I go through and make a few changes here and there I'll run a few more and repeat until I get where I want it.

I am playing with different finishes for micarta. These scales were sand blasted a bit.
IMG_3578.jpgIMG_3576.jpg

The back spacer bar is done on a general purpose jig plate so no dedicated fixture there. I need to get the thickness set in the CNC. I had to thin this one by hand sanding on a surface plate and the tolerance is all over the place. I understand how thin/small the lock bar looks. This is .08" Ti and the relief cut leaves .060". If it's not rigid enough in testing, I'll give some more beef to the lock bar in the next small batch.
IMG_3579.jpg

The blade looks like it has massive ripples. It doesn't, it's just the light. My plan is to get about this close and then hand grind them to final finish using a Norax belt on a flat platen.
IMG_3575.jpg
 
I was testing this program on slow rapid of 5% and was able to hit the stop button in time before it buried it's self into the fixture.
Get in the habit of running the simulation in your CAM software...it'll save a lot of work and tooling and vises and machine tables. It also cuts the stress way down...
 
Boss: Thanks for keeping this thread going. Very interesting to a CNC neophyte like myself. I use LinuxCNC because it's free and a fairly powerful program.

HeliCoils work like a champ - use them fairly often, especially in aluminum.
 
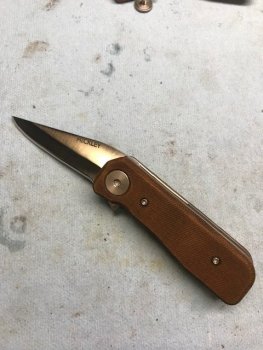
Here is the first one as "official" production.

There is a myth that you just screw these together and it's done. That would be wrong. There is, right now anyway, around 2 to 3 hours of clean up on each one. Machine time for all the parts for one knife is around 1.5 hours. The blades are hand ground to a clean finish. The detent and lock are set by hand - I don't see a way around that. The liners and scales all need to be finish ground to match up the profile evenly. The scales also have to be ground to get the slick resin coating off of them.

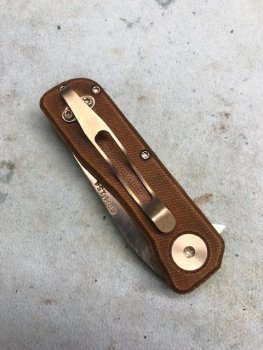
below, the scales are sandblasted brown canvas and then dyed with brown leather dye. They have a nice feel and have a bit of antique look which I like personally. I will try out different combinations of finish on the blades and liners. Lot's of options.
IMG_3613 (1).jpgIMG_3610 (1).jpgIMG_3612 (1).jpgIMG_3608 (1).jpgIMG_3609 (1).jpgIMG_3607 (1).jpg


Here I am starting to build up some parts. After I get parts for a half dozen or so I'll start working out how to knock down the time it takes to clean and tune them. Half of my time in the shop is looking for tools and setting them up to do a 30 second op. If I can do several at once it should really help.

These are really basic but the bones seem good. Now I need to start working on some 3D detail in the scales, blade and back spacer. The action is decent and it really snaps with a loud click with flipped open. Note: If you sit next to your wife in the evening and constantly flip one open with a loud click at some point your wife looks at you like you are a moron - more than normal I mean.
IMG_3606.jpg
 
It takes a lot of work to make a "CNC" knife. Like most things, people don't have a clue about what it takes to produce a quality knife. My pea brain hurts thinking about it. Congratulations on sticking with it. They are looking good!
 
I’ve managed to get a couple assembled and tuned.
I don’t expect too many of them to look the same as I plan on just trying some stuff.

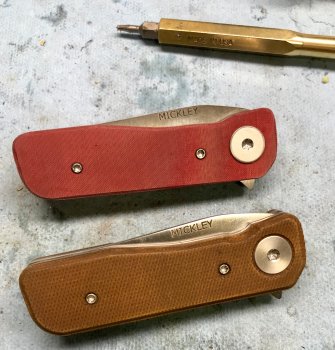
The brown one is canvas Micarta(tm), sanded, dyed brown, lightly oiled.
The red one is red linen micarta was sanded at 150, coated with poly wood finish to seal up the linen a bit and then lightly oiled which really brought out the color.
518C854E-9353-4CFA-AF9E-6B590757AFFE.jpeg
 
Lot's of tweaks to do to get the finish time down and the tool paths more efficient but I also want to start driving some detail into these.
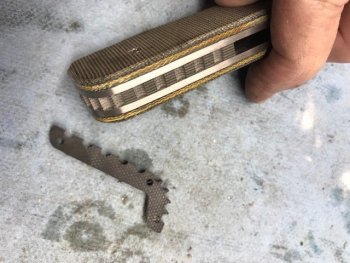
This is a scalloped spacer bar. It's done by drilling holes and then milling half of the hole away.

I struggled with this one for an hour to get the blade centered. Re-reamed, barrel lapped, shortened the stop pin, change spacers and stood on one foot. Then I noticed the blade had warped quite badly in heat treat. It caught me a bit off guard since I don't get many warped like that in a plate quench and wasn't looking for it. I set it aside and used a new blade. I'll see if I can grind out the warp later but I just wasn't interested today.
IMG_3626 (1).jpg


Here is the spacer material. I am just making one at a time and experimenting with the thickness to see how it affects the action. So far a few thou under = no good, a few thou over makes it looser.
IMG_3636.jpg

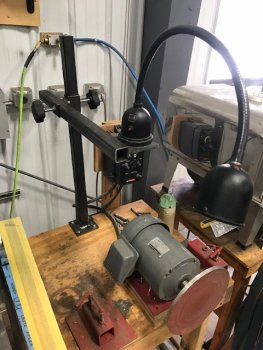
This has nothing to do with this thread. I had Alyssa, our crack welder and production team person weld me up a light stand. It's adjustable up and down and in/out. It has a small platform welded to the side I can sit my magnetic base LED light on and swivel it between the belt and disc grinders. Recommended.
IMG_3634 (1).jpg
 
Note: If you sit next to your wife in the evening and constantly flip one open with a loud click at some point your wife looks at you like you are a moron - more than normal I mean.
LOL!!! bet the sound was music to you though...
 
Time to etch a makers mark.

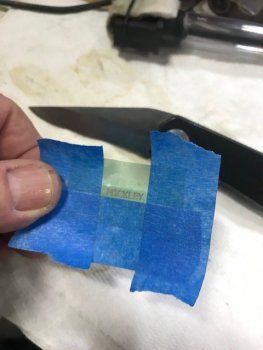
I used to use vinyl and switched to painters tape to mask off the stencil. I was getting a very thin line that crept out to the edge with vinyl tape and this stuff seals up the leaks better. I use 10 seconds on DC, twice to get the deep etch and then 10 seconds on AC to blacken the etch.

I keep seeing guys use salt water, TSP or vinegar as etch solution. The right solution that matches the material makes a difference.
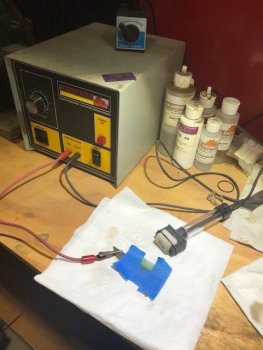
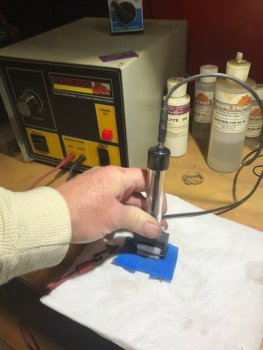
Positive lead clips on, the negative is built into the carbide block. I will saturate the etch pad and then tamp most of the solution out on a paper towel. I don't want it dripping with solution or it will leak and the electricity will follow the puddle and put black marks on your blade where you don't want it.

I don't tape the top off. This way I can carefully peel back the top and take a peak to see the mark is complete and what I want.
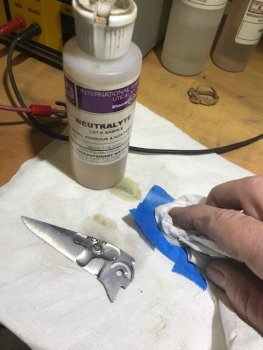
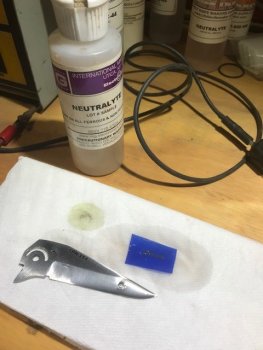
IMG_3640.jpgIMG_3642.jpg

I reuse the etch pads until they are so hard they just don't work well anymore. You want the tiny little fibers in the etch pad to stick through the stencil for a good deep etch. After the mark is make, hit it with neutralyte to clean up or the etch stuff will fog your steel. To clean the stencil I rub it (pretty hard) on a paper towel with more neutralyte. I get 30 to 40 marks on a stencil. I could get more but cleaning them isn't worth the time vs just using a new one.
IMG_3647.jpgIMG_3650.jpg

I tend to jump around on steel and I can't remember lunch yesterday so I mark the back side with the type of steel it is.
IMG_3658.jpg
 
Back
Top