You are using an out of date browser. It may not display this or other websites correctly.
You should upgrade or use an alternative browser.
You should upgrade or use an alternative browser.
2013 Knife Making Progress
- Thread starter Steven Long
- Start date
Steven Long
Well-Known Member
In the lower picture it appears that the grind line is going up hill toward the tip while the opposite side appears more level. Is this what you were refering to as more clean up?
That is one of the things that needs cleaned up. I am still trying to figure out how to keep both sides symmetrical, but I am getting better with every knife. I was thinking that it might be easier to fix after heat treat? Not sure though. Around the tang and spine also need a little sanding.
Getting both sides even at the top of the plunge has also been a little issue.
Steven Long
Well-Known Member
Second smaller one almost done...


All three...

All three...
Steven Long
Well-Known Member
Thanks Liam! I really appreciate the nice comments. I have been told that I am a little too hard on my self sometimes.
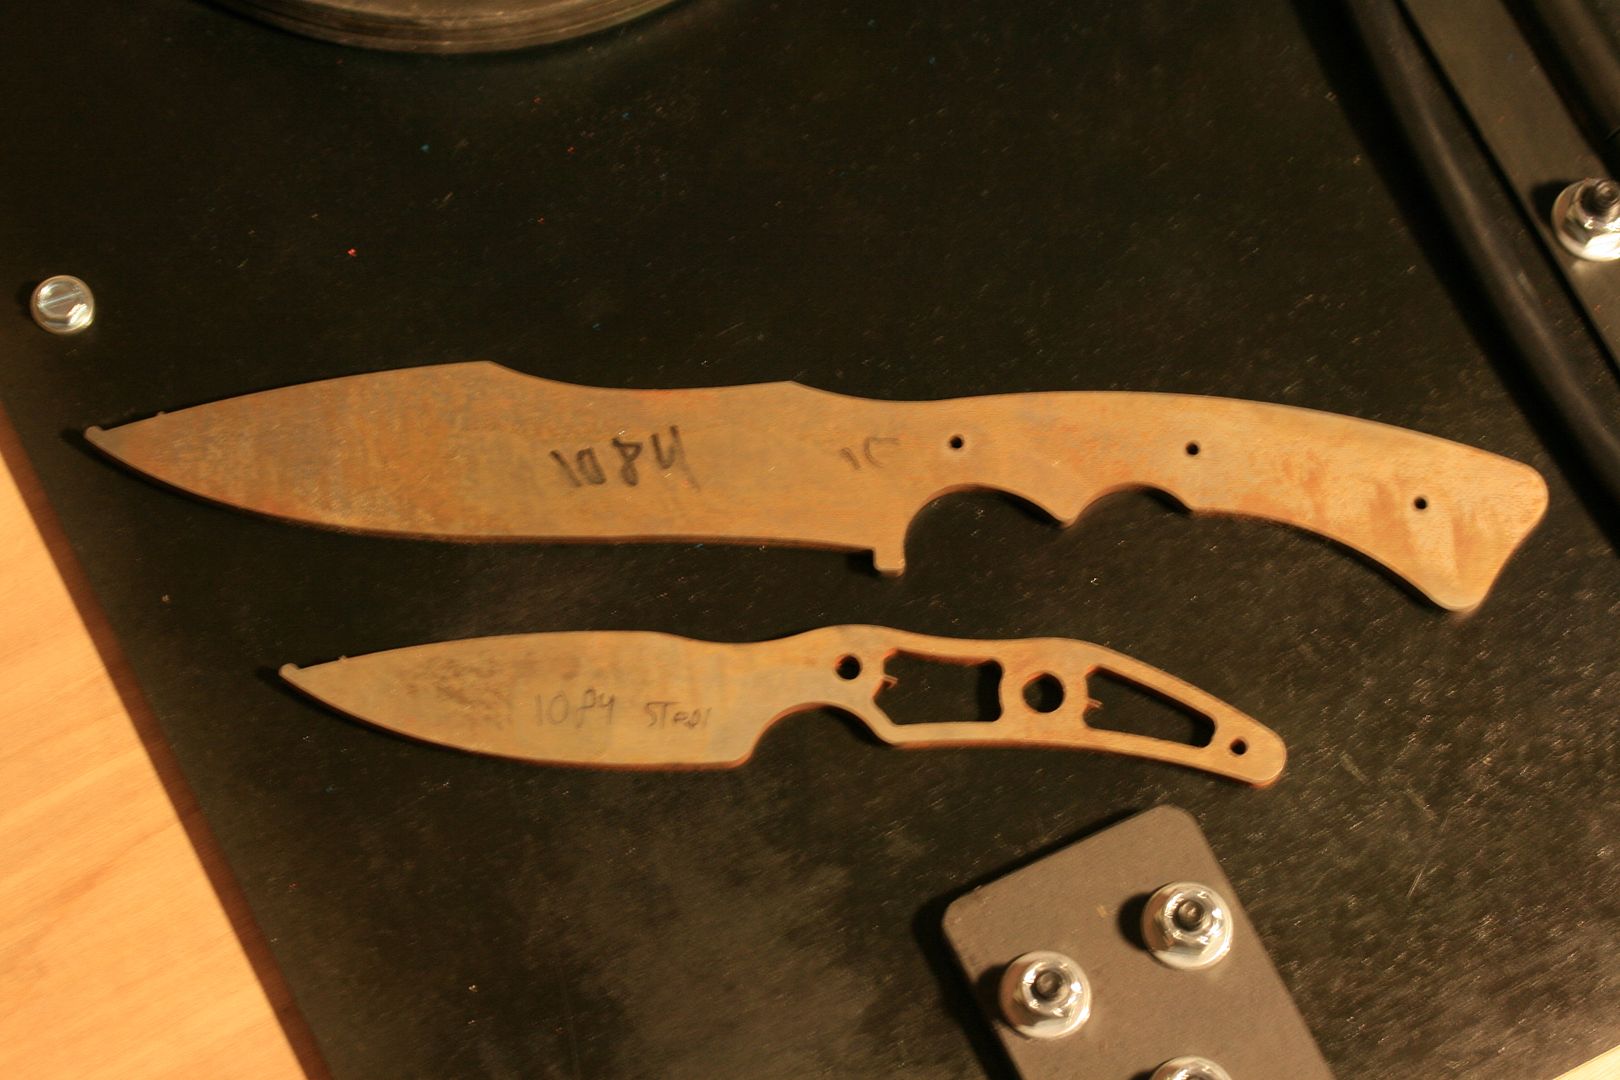
Got another one almost ready. Bushcraft style knife in 5/32" O1. I might bring the grind up higher on this one or I at least need to fix the tops of the plunge cuts. This one will get stabilized spalted box elder burl scales with two 1/4" black canvas micarta pins, two 3/32" SS pins in the butt and black G10 liners...

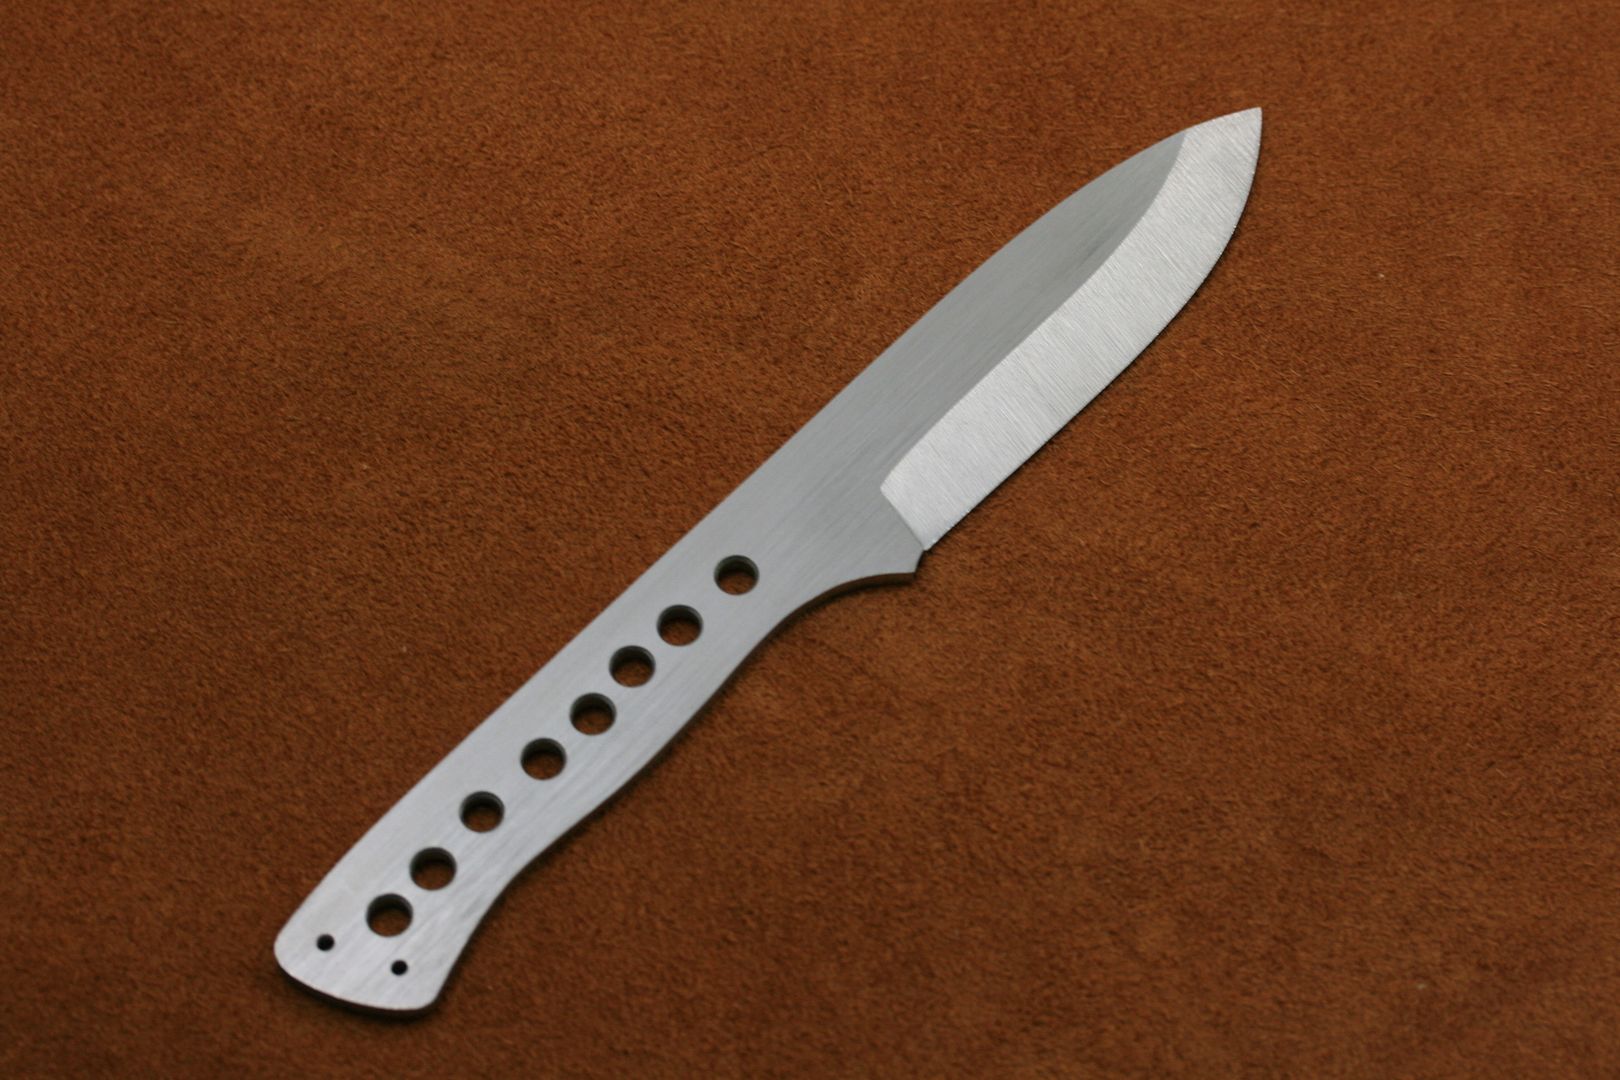
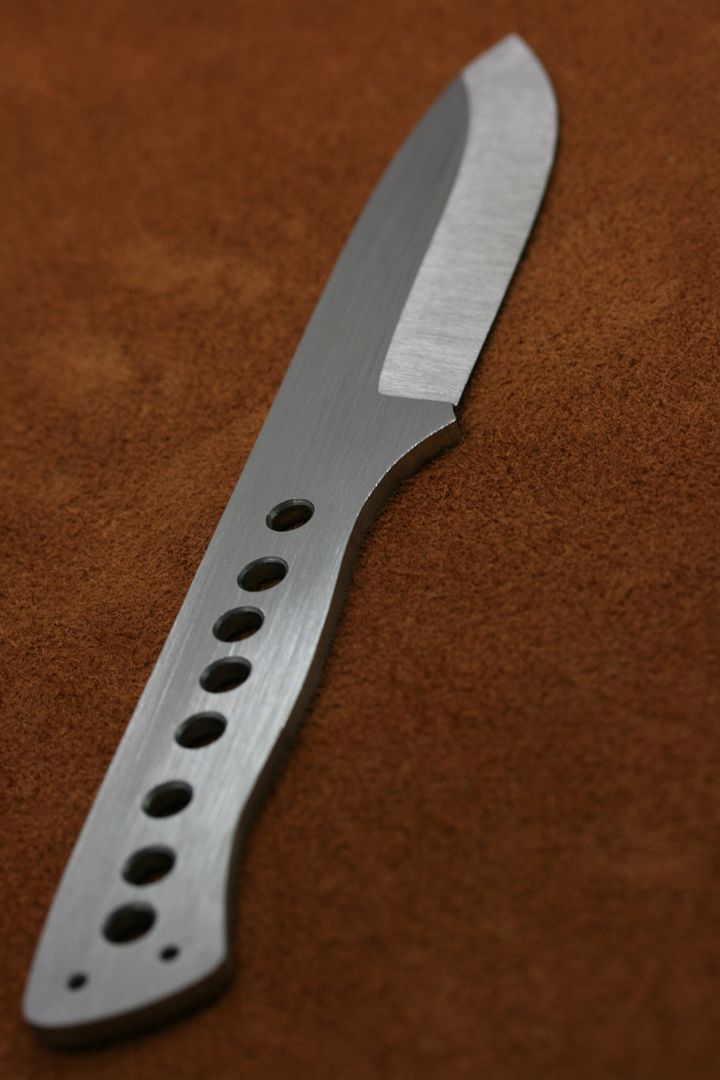

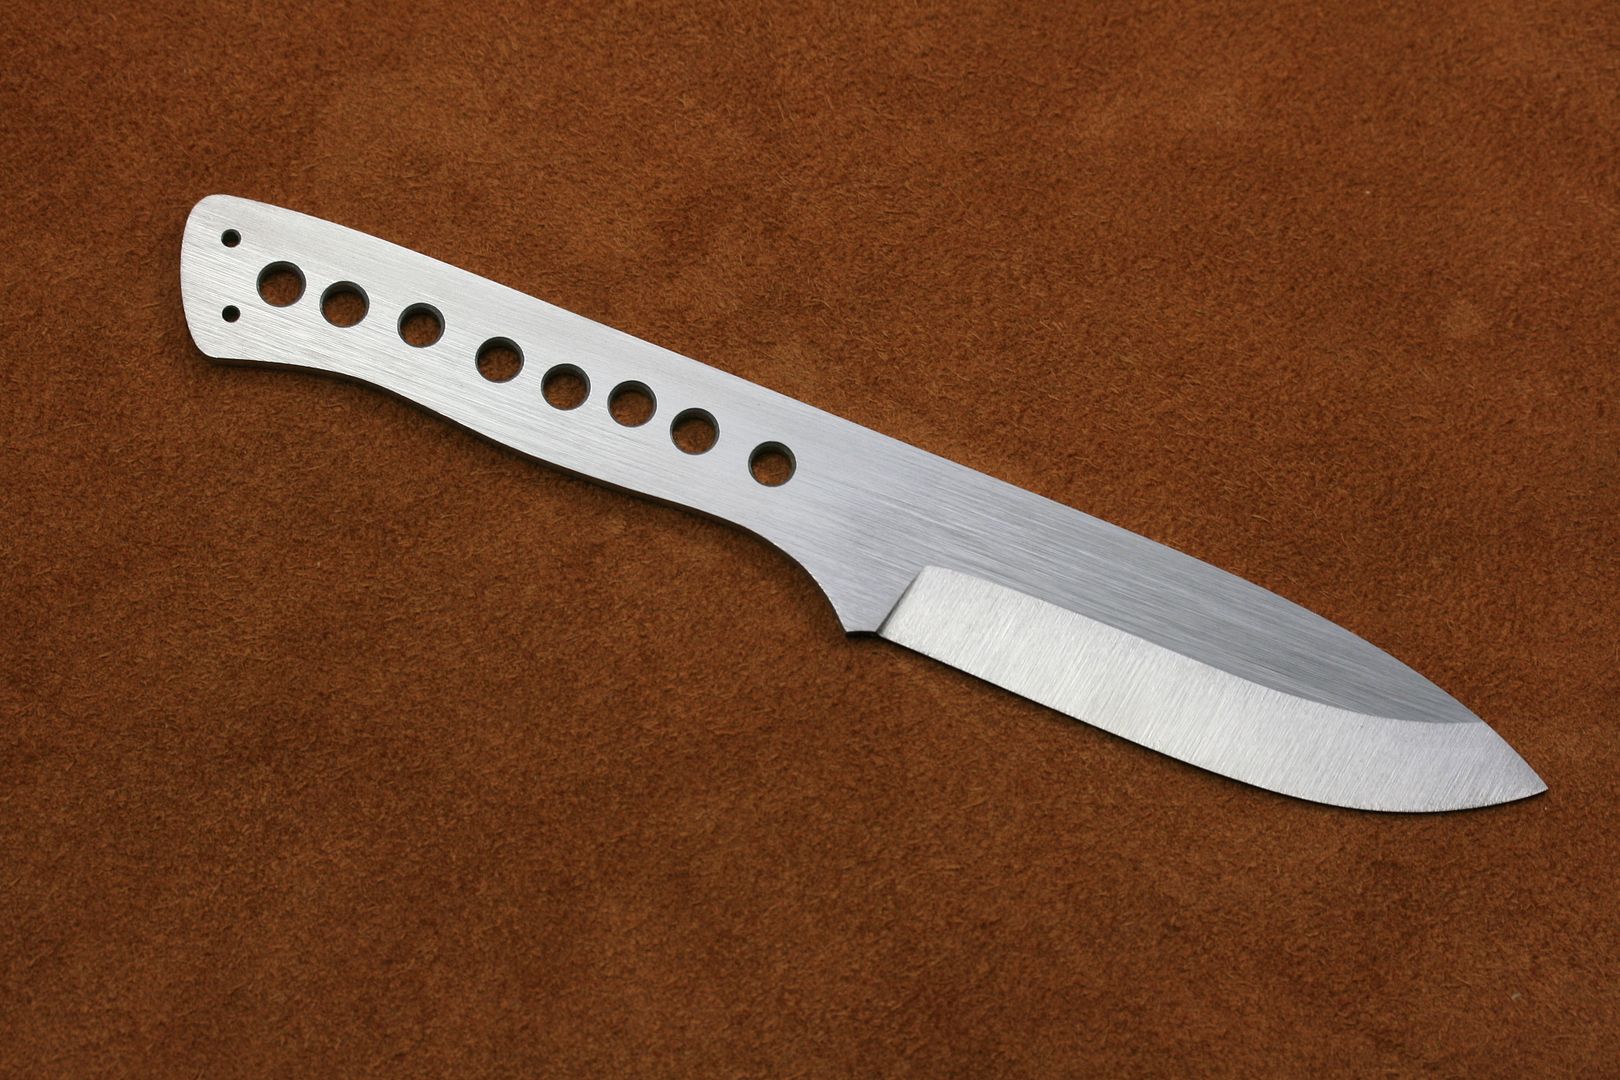
Got another one almost ready. Bushcraft style knife in 5/32" O1. I might bring the grind up higher on this one or I at least need to fix the tops of the plunge cuts. This one will get stabilized spalted box elder burl scales with two 1/4" black canvas micarta pins, two 3/32" SS pins in the butt and black G10 liners...
Steven Long
Well-Known Member
I received my new shop floor today and installed it. I went with hard rubber tiles and they seem like they will work out, I hope. I was expecting them to be a little harder but it should be good on my back. They clean up pretty good with a mop but I haven't gotten any steel shavings on it yet so we will see how it goes.
Here are the before and after pictures. The new shop space is only 10'x15' but I'm sure it will all be a cozy fit.
Not much to look at but a huge step for me...
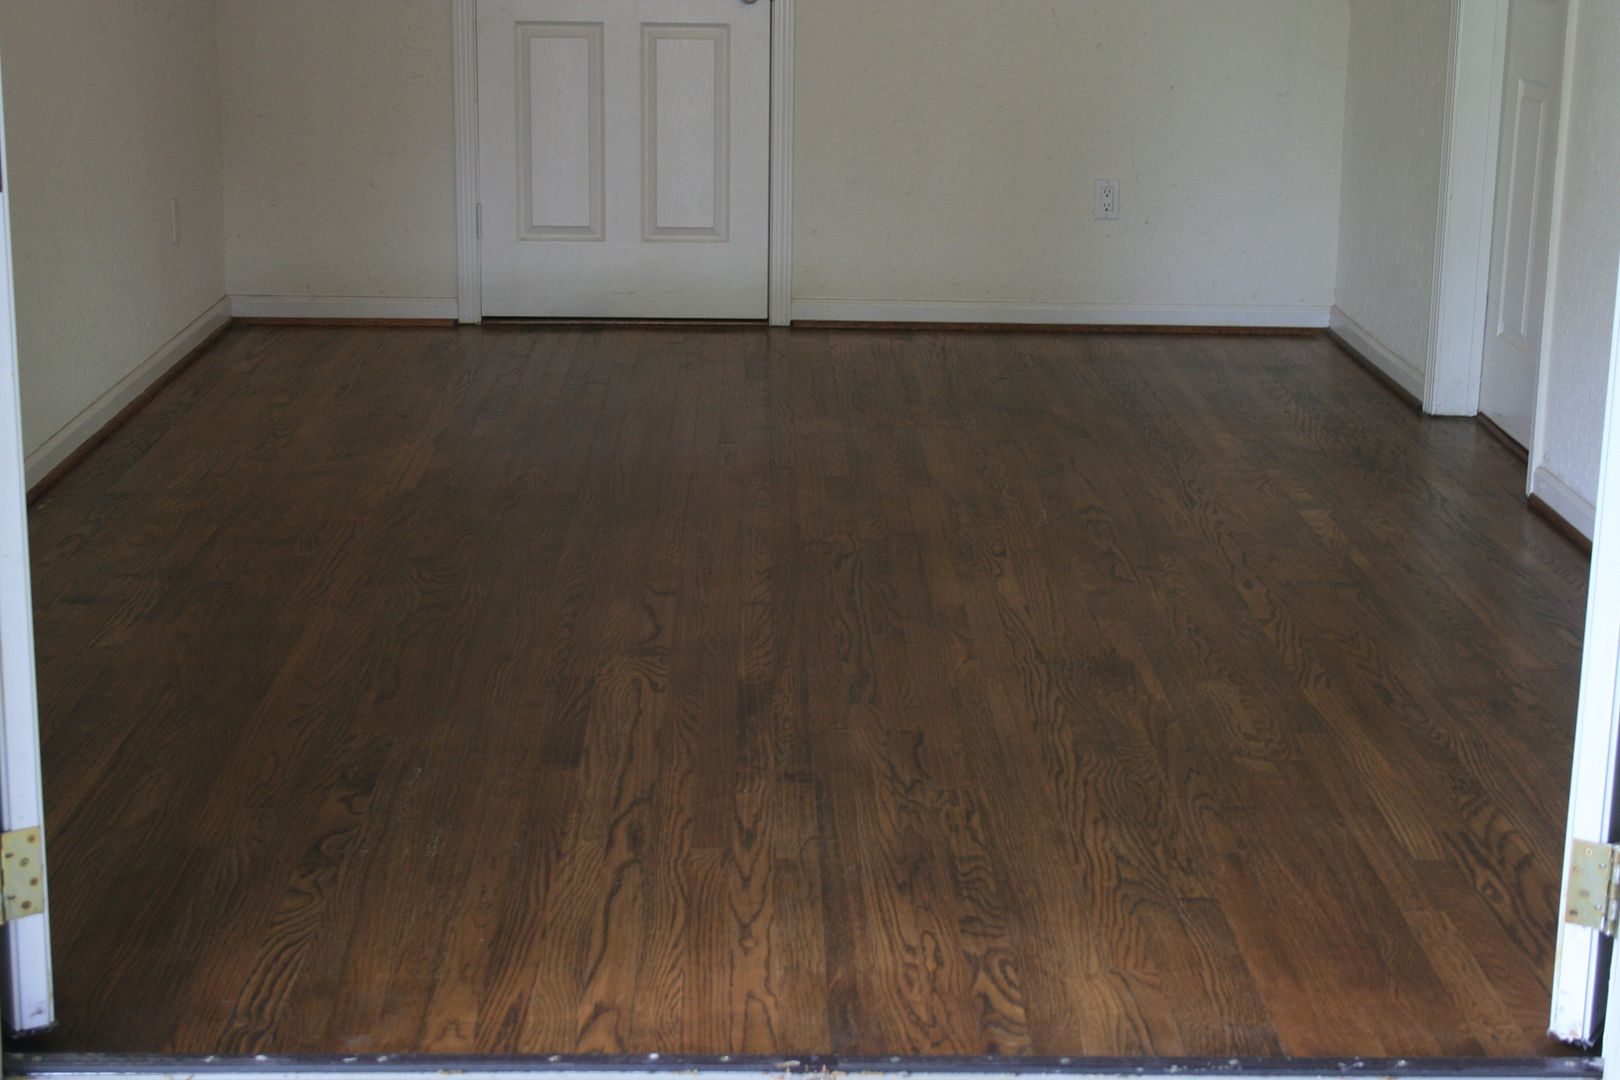
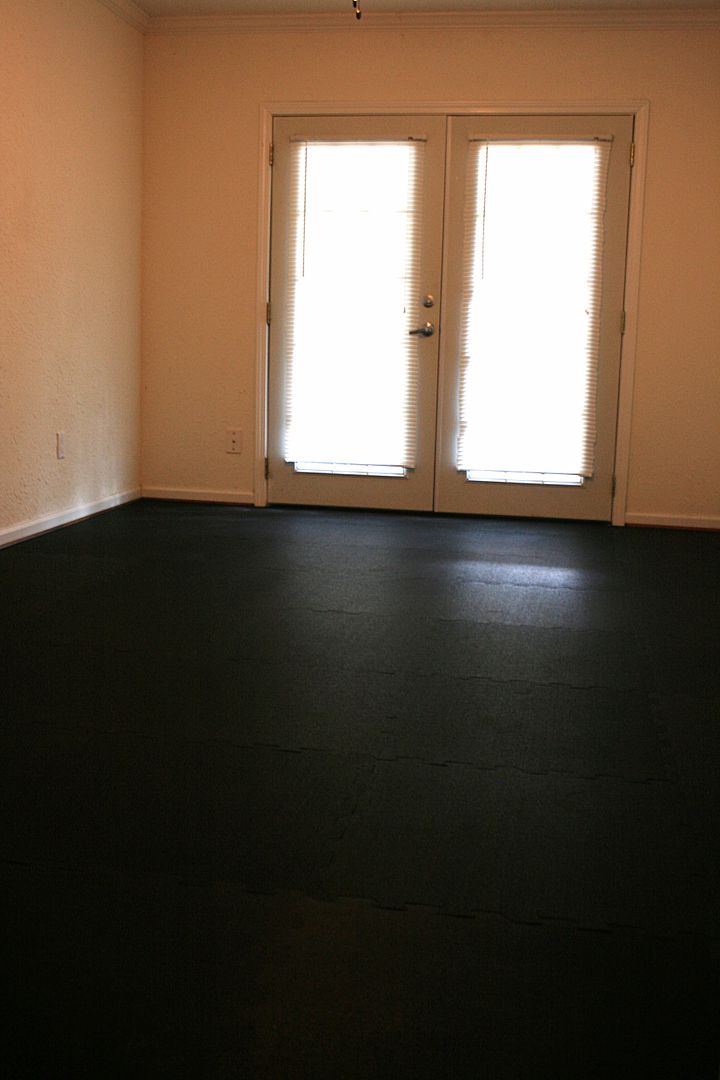

I am going to start moving everything this weekend. Hope to get it all done by Wednesday or earlier.
Here are the before and after pictures. The new shop space is only 10'x15' but I'm sure it will all be a cozy fit.
Not much to look at but a huge step for me...
I am going to start moving everything this weekend. Hope to get it all done by Wednesday or earlier.
Steven Long
Well-Known Member
You crack me up, man.
Well, you are welcome over anytime Eric.
Well, you are welcome over anytime Eric.
Steven Long
Well-Known Member
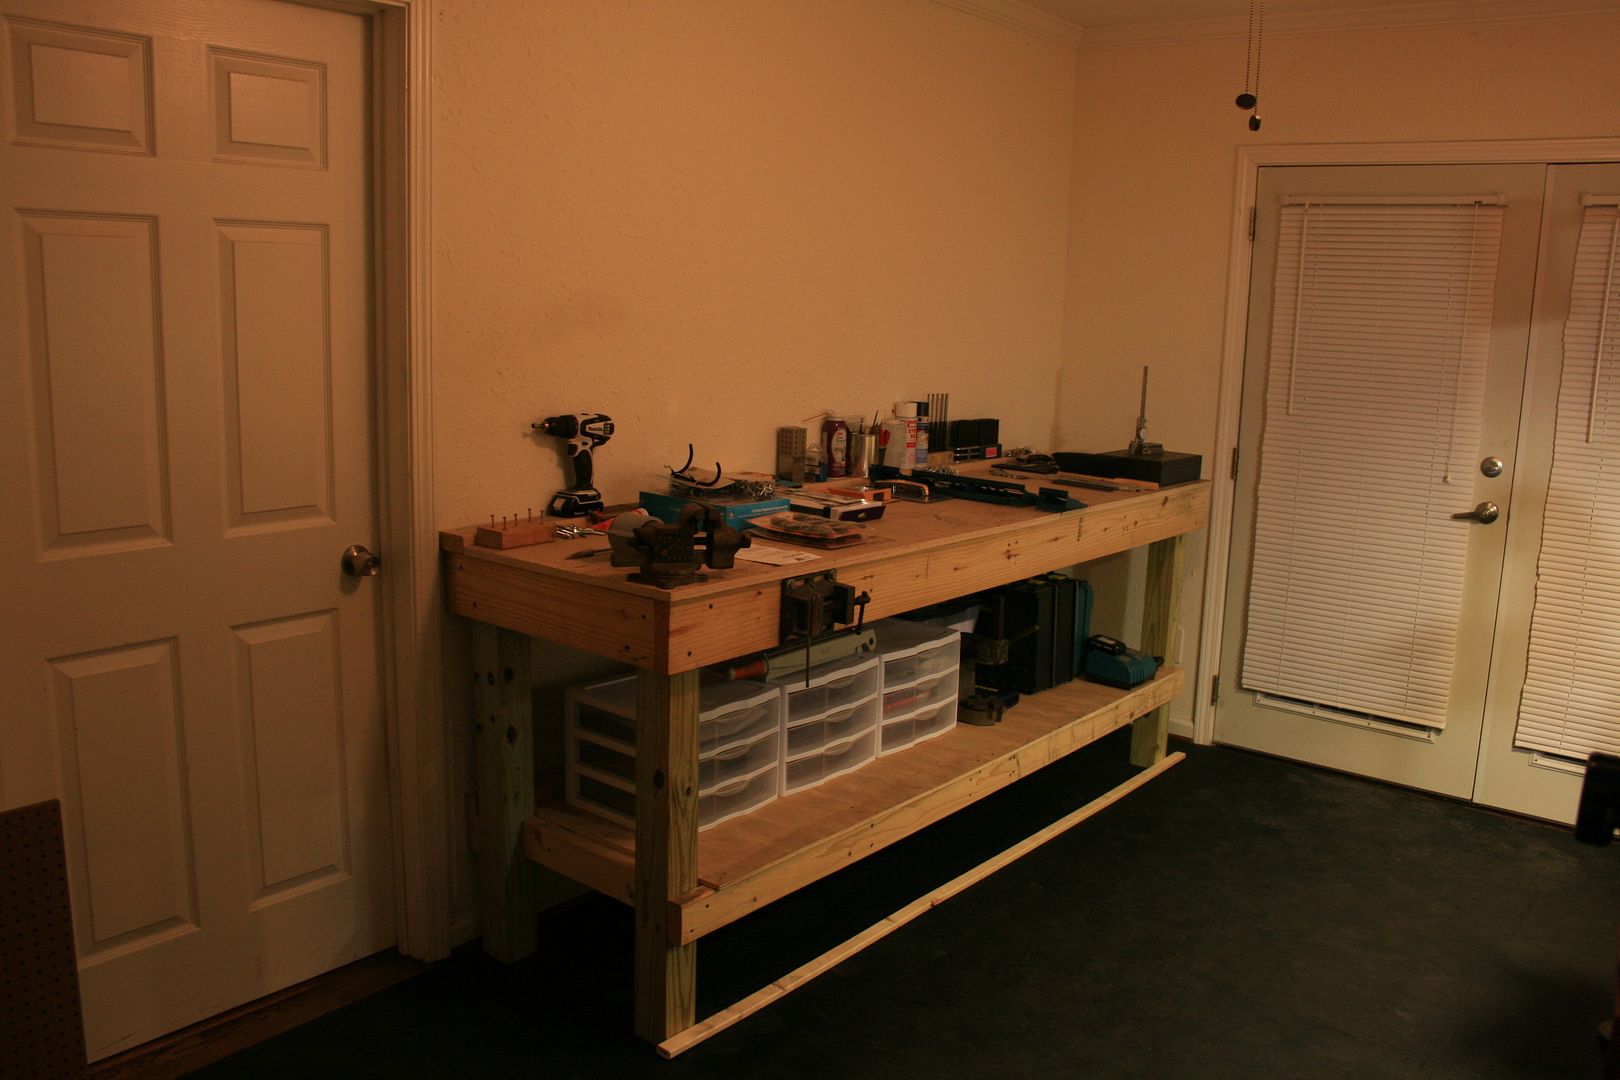
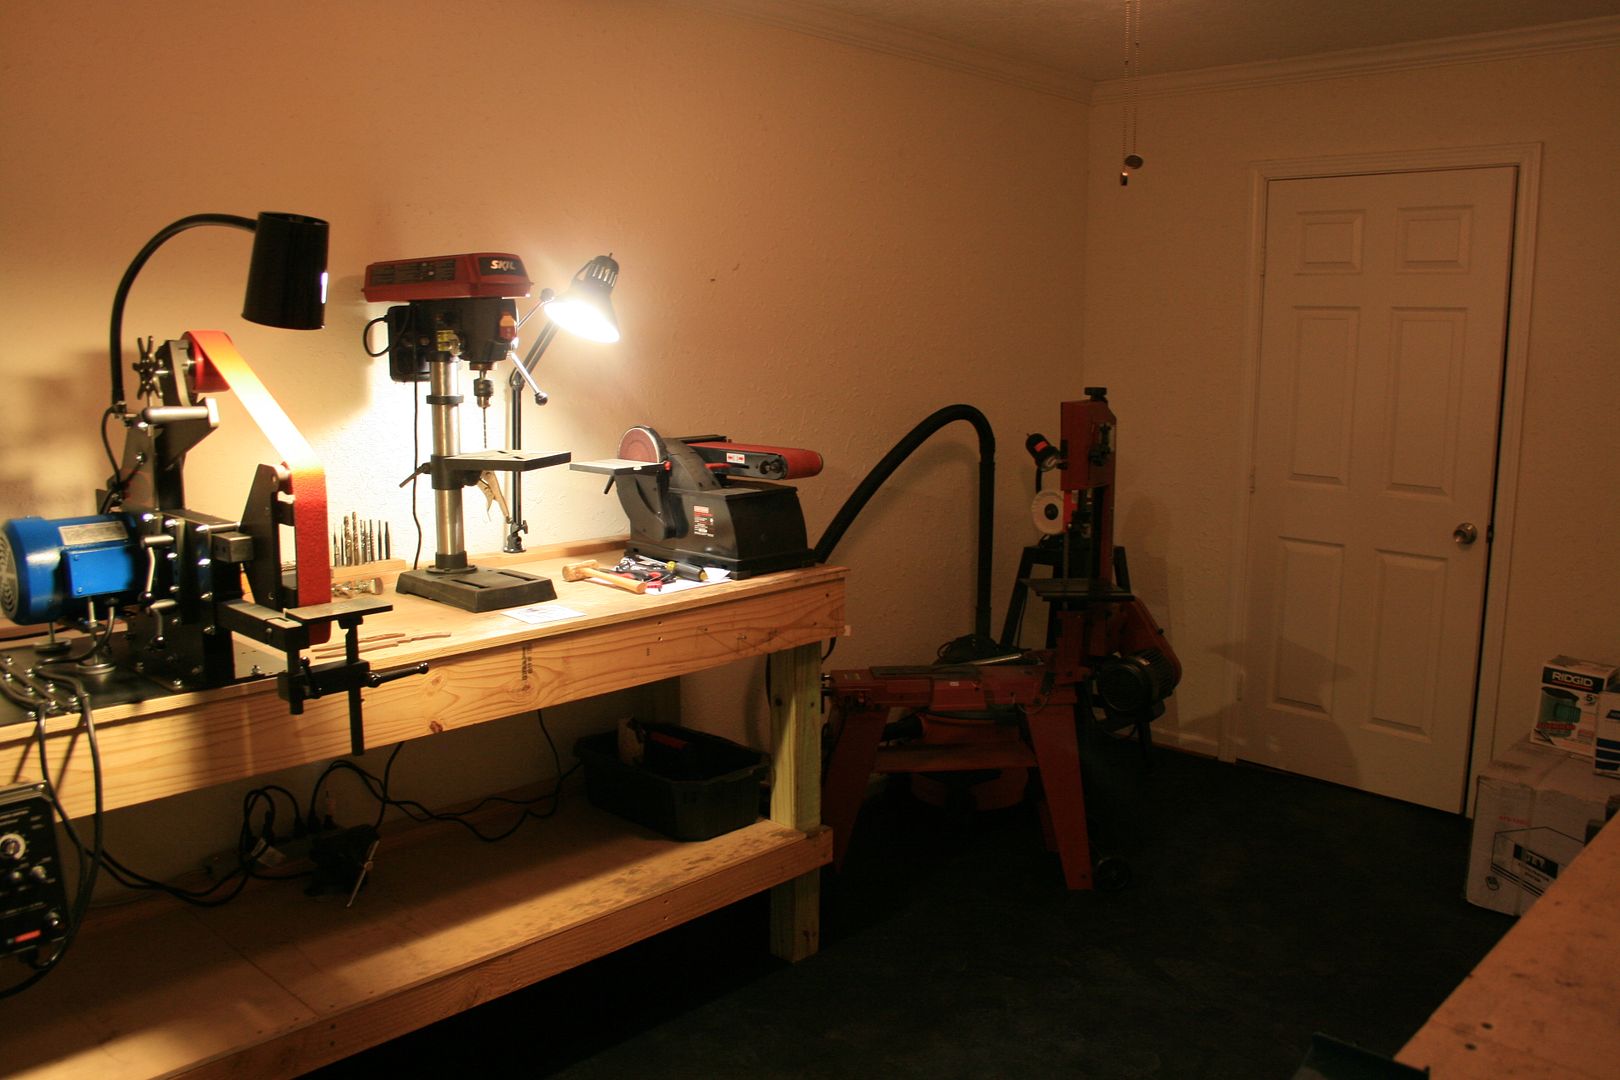
The shop is starting to come together. Still need to move one more bench, the lights, and all of the odds and ends. It is a small space so I think organization and cleanliness is going to be key to having good days.
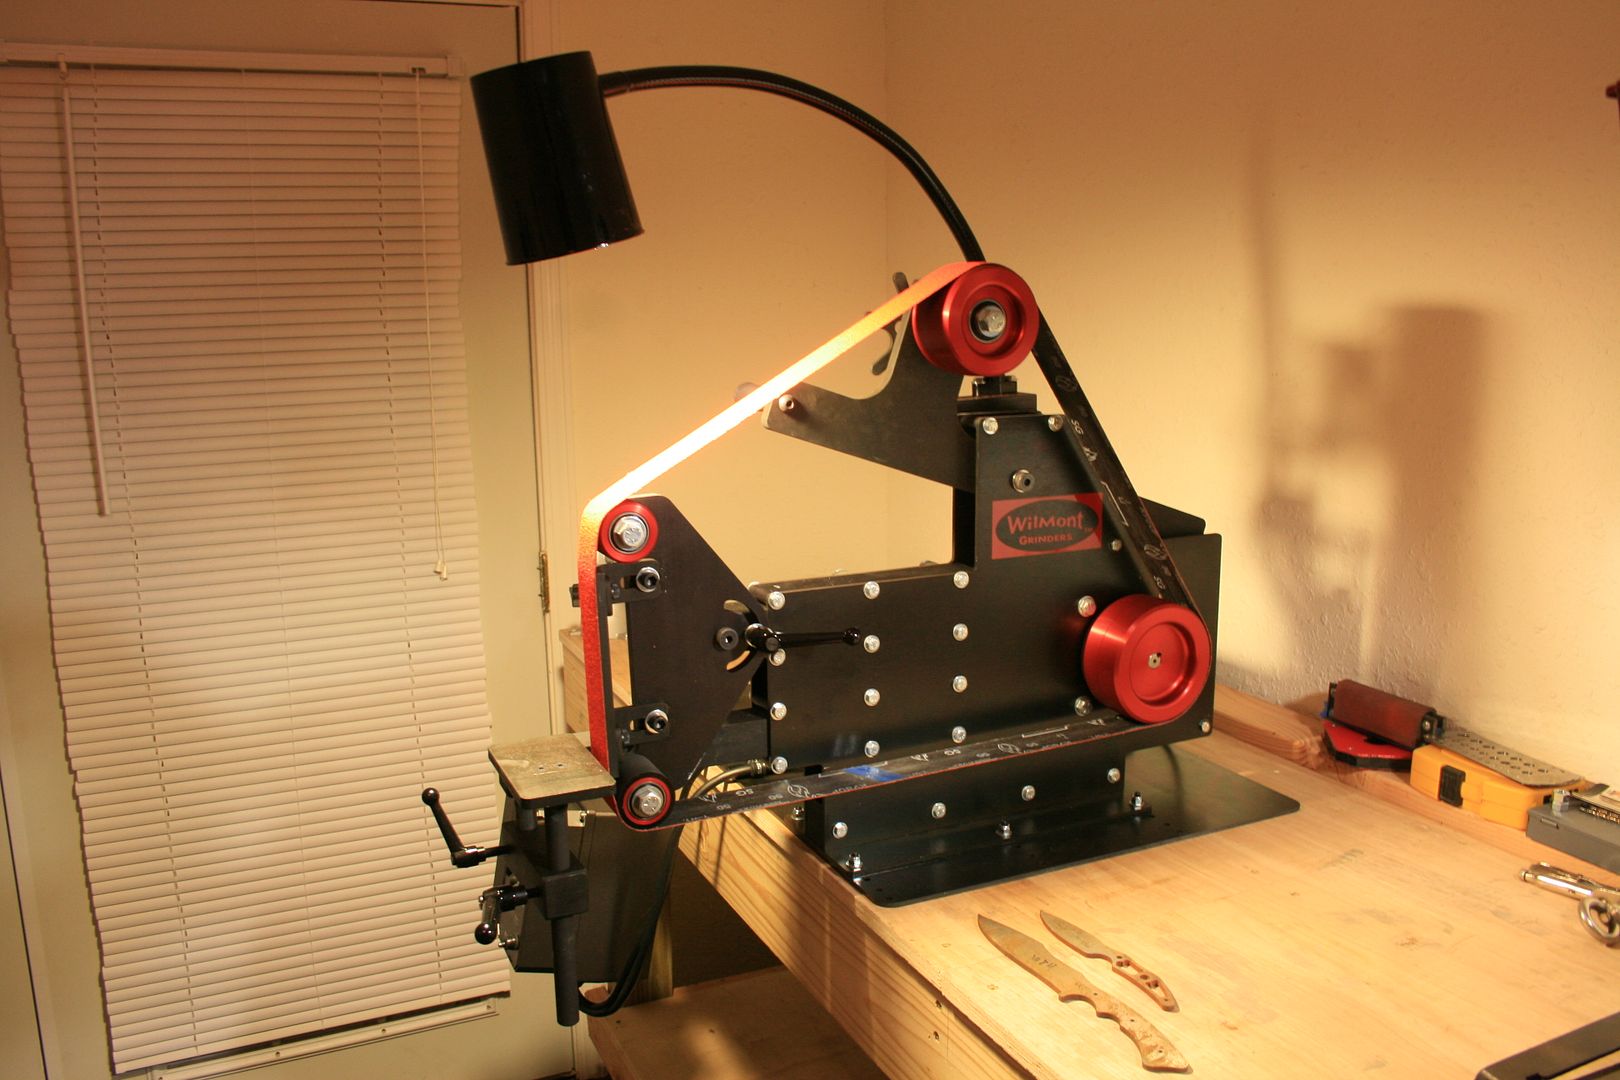
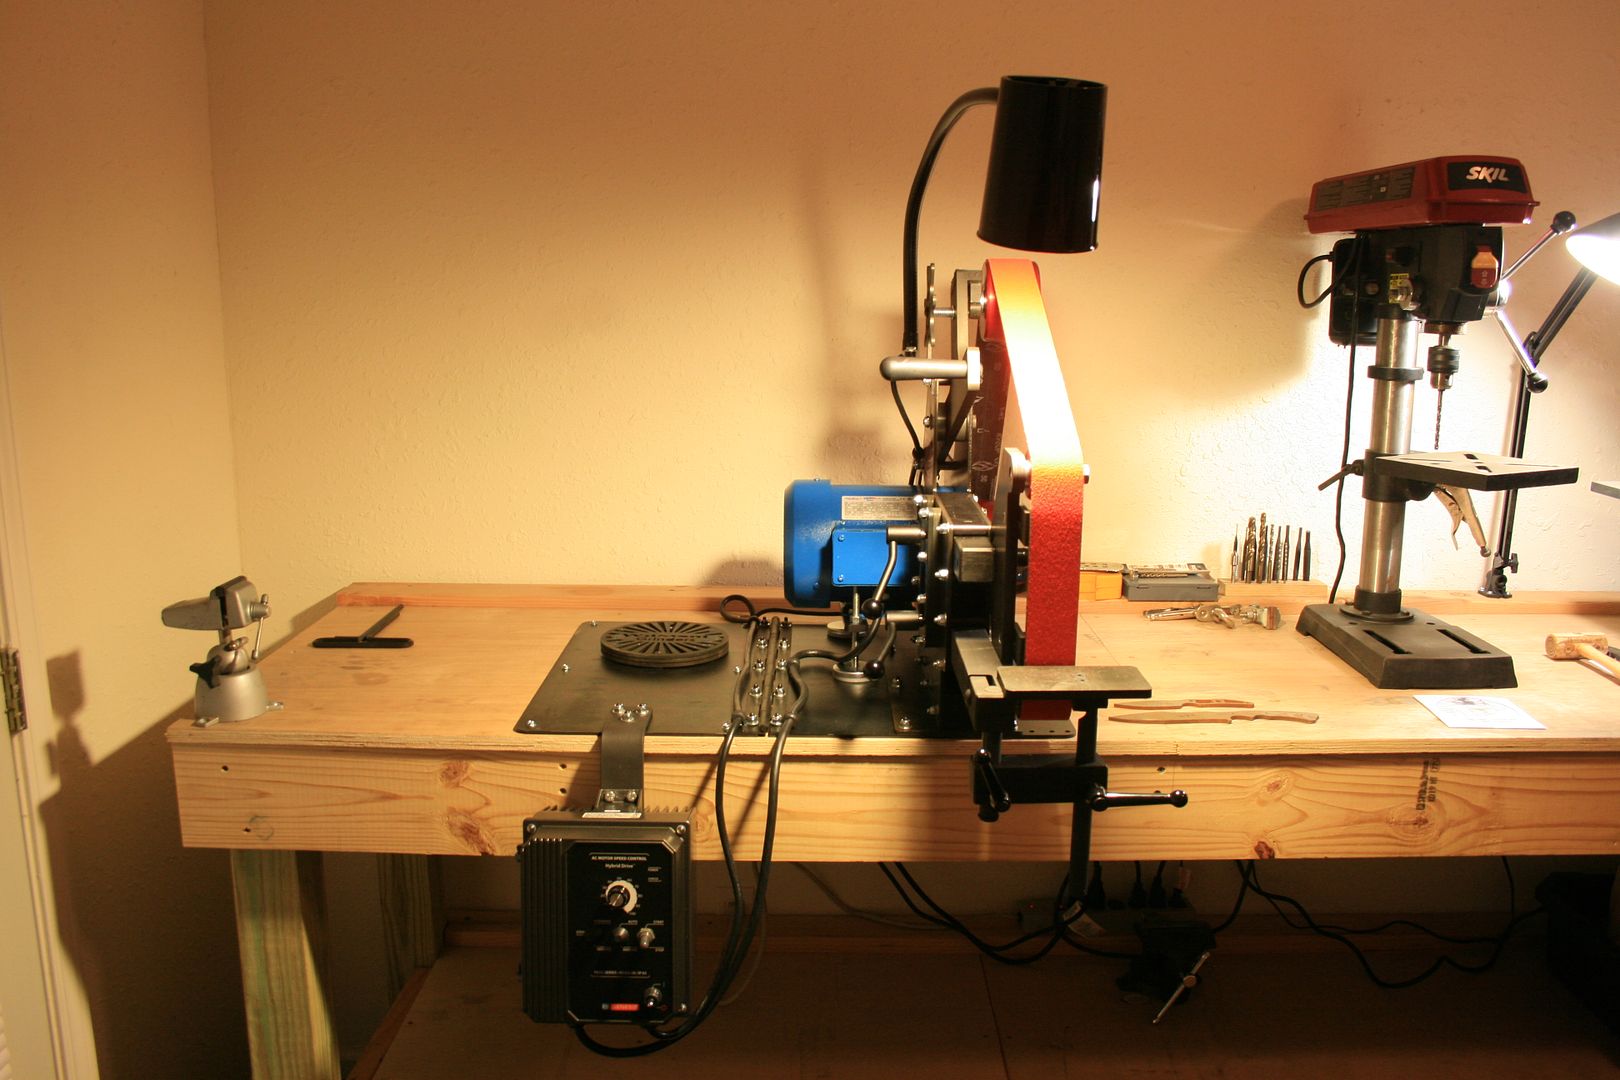
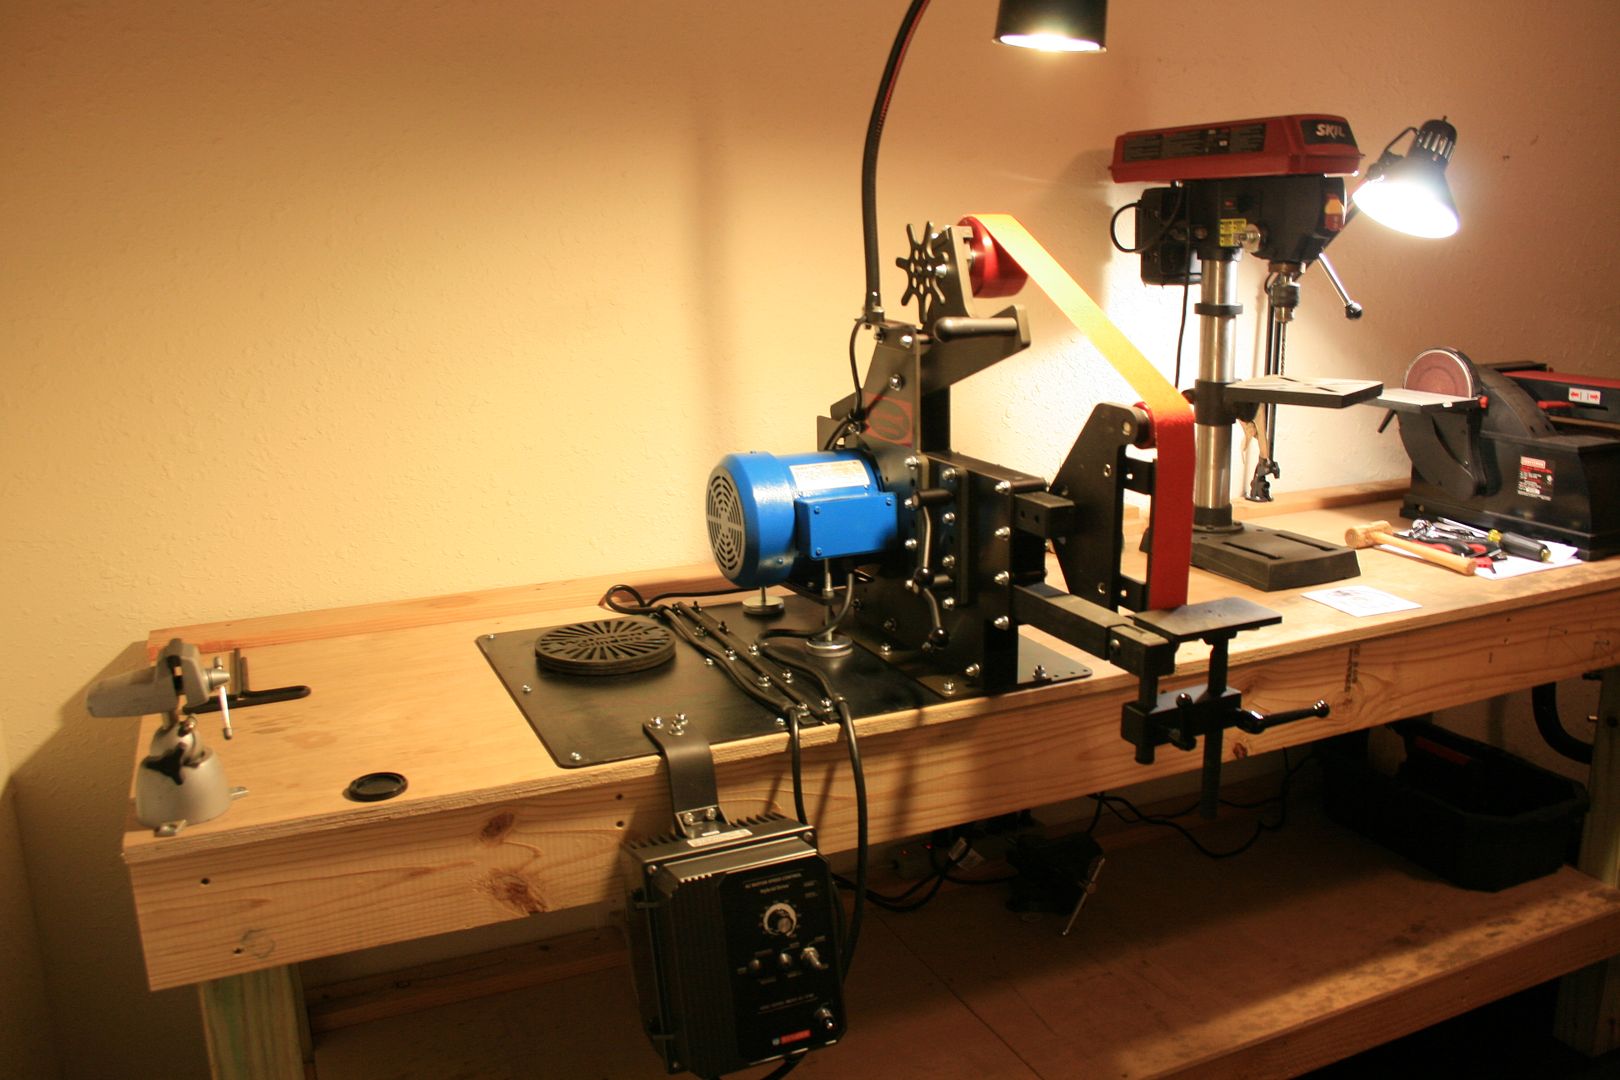
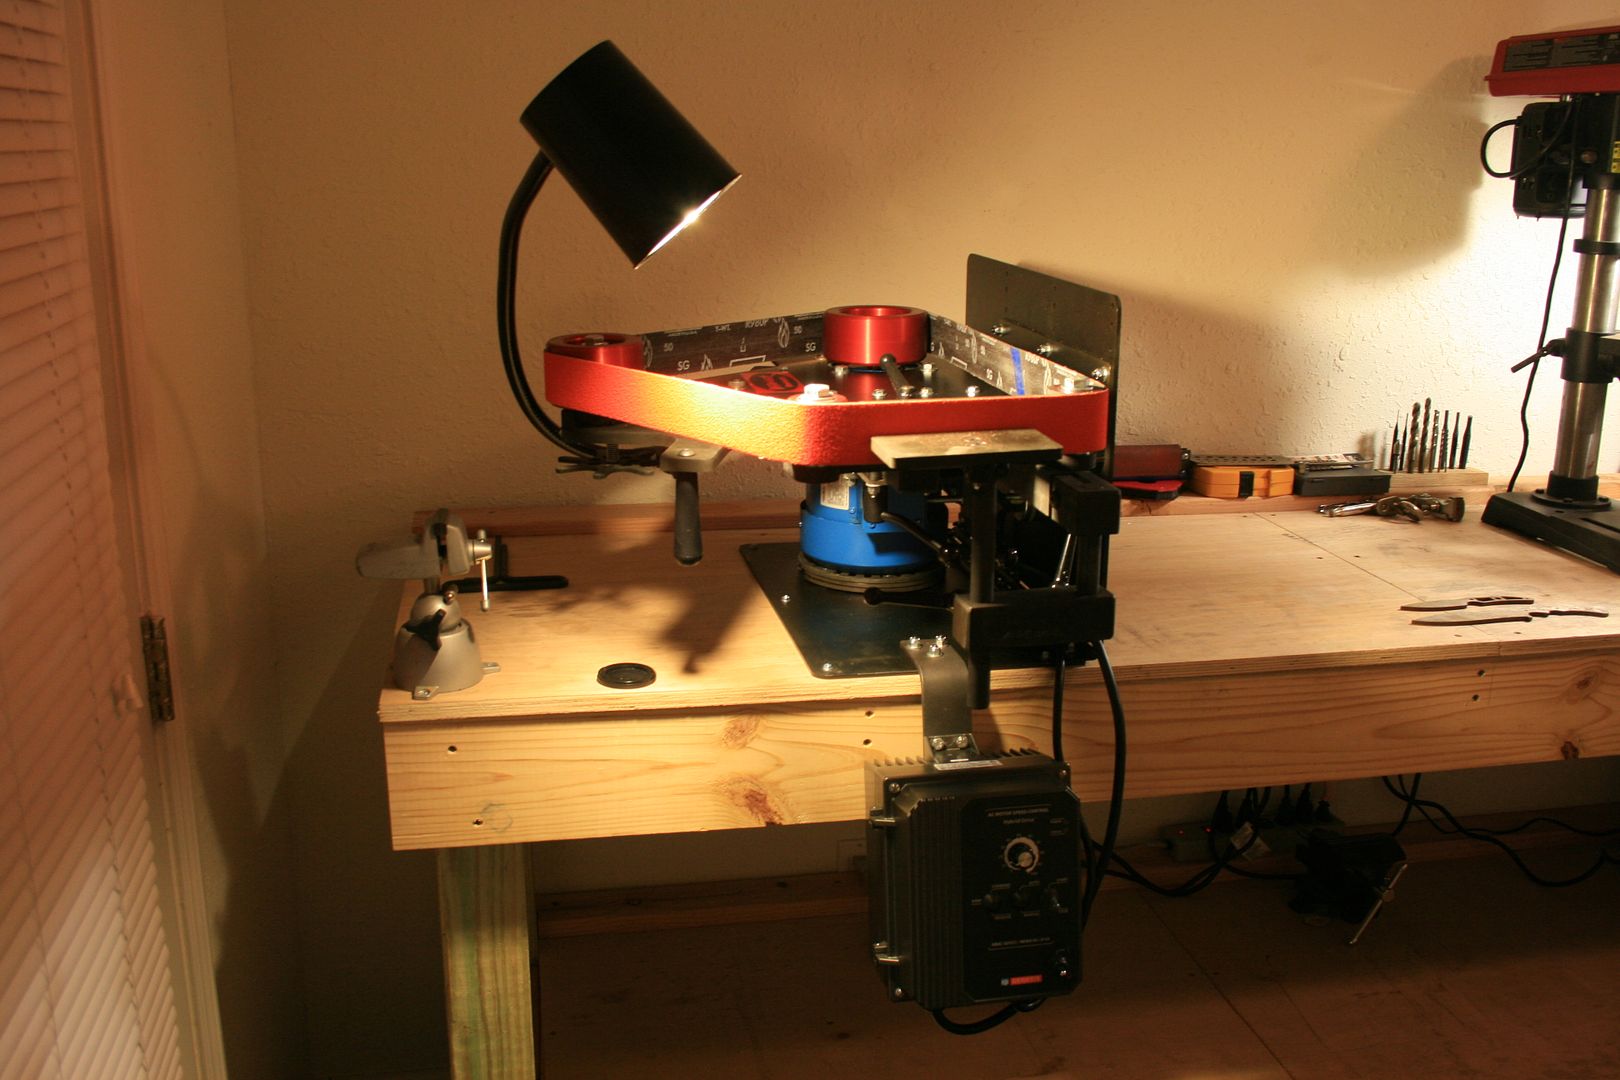
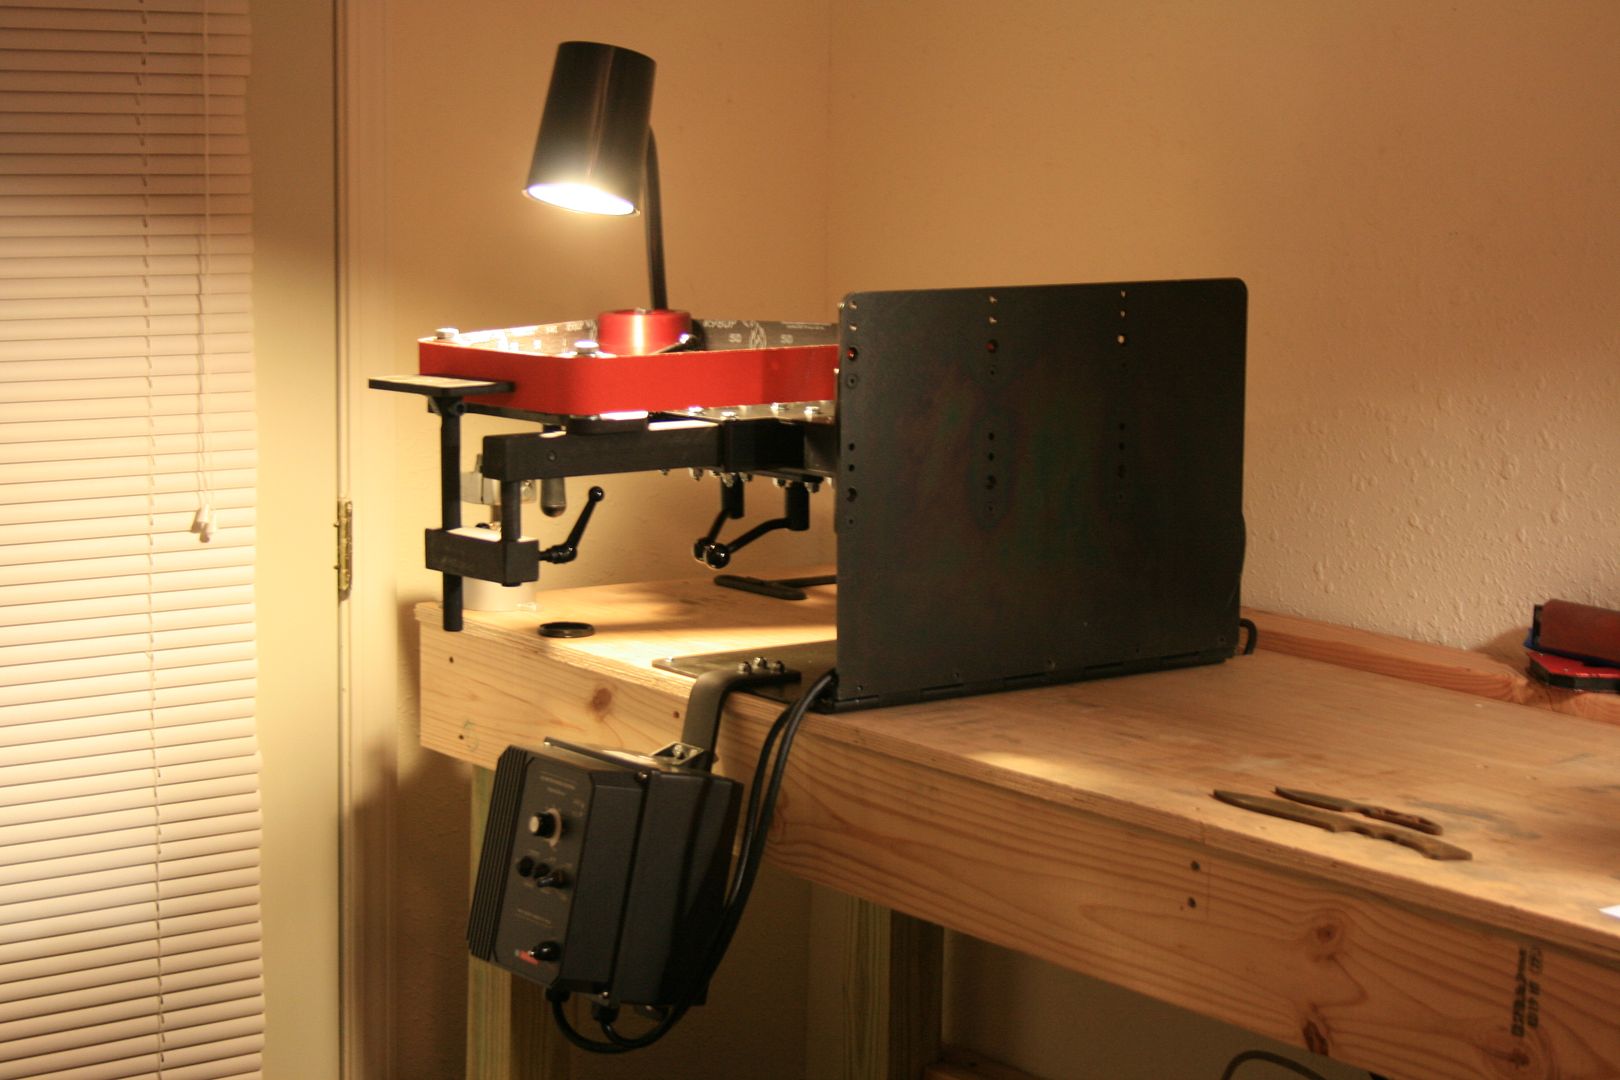
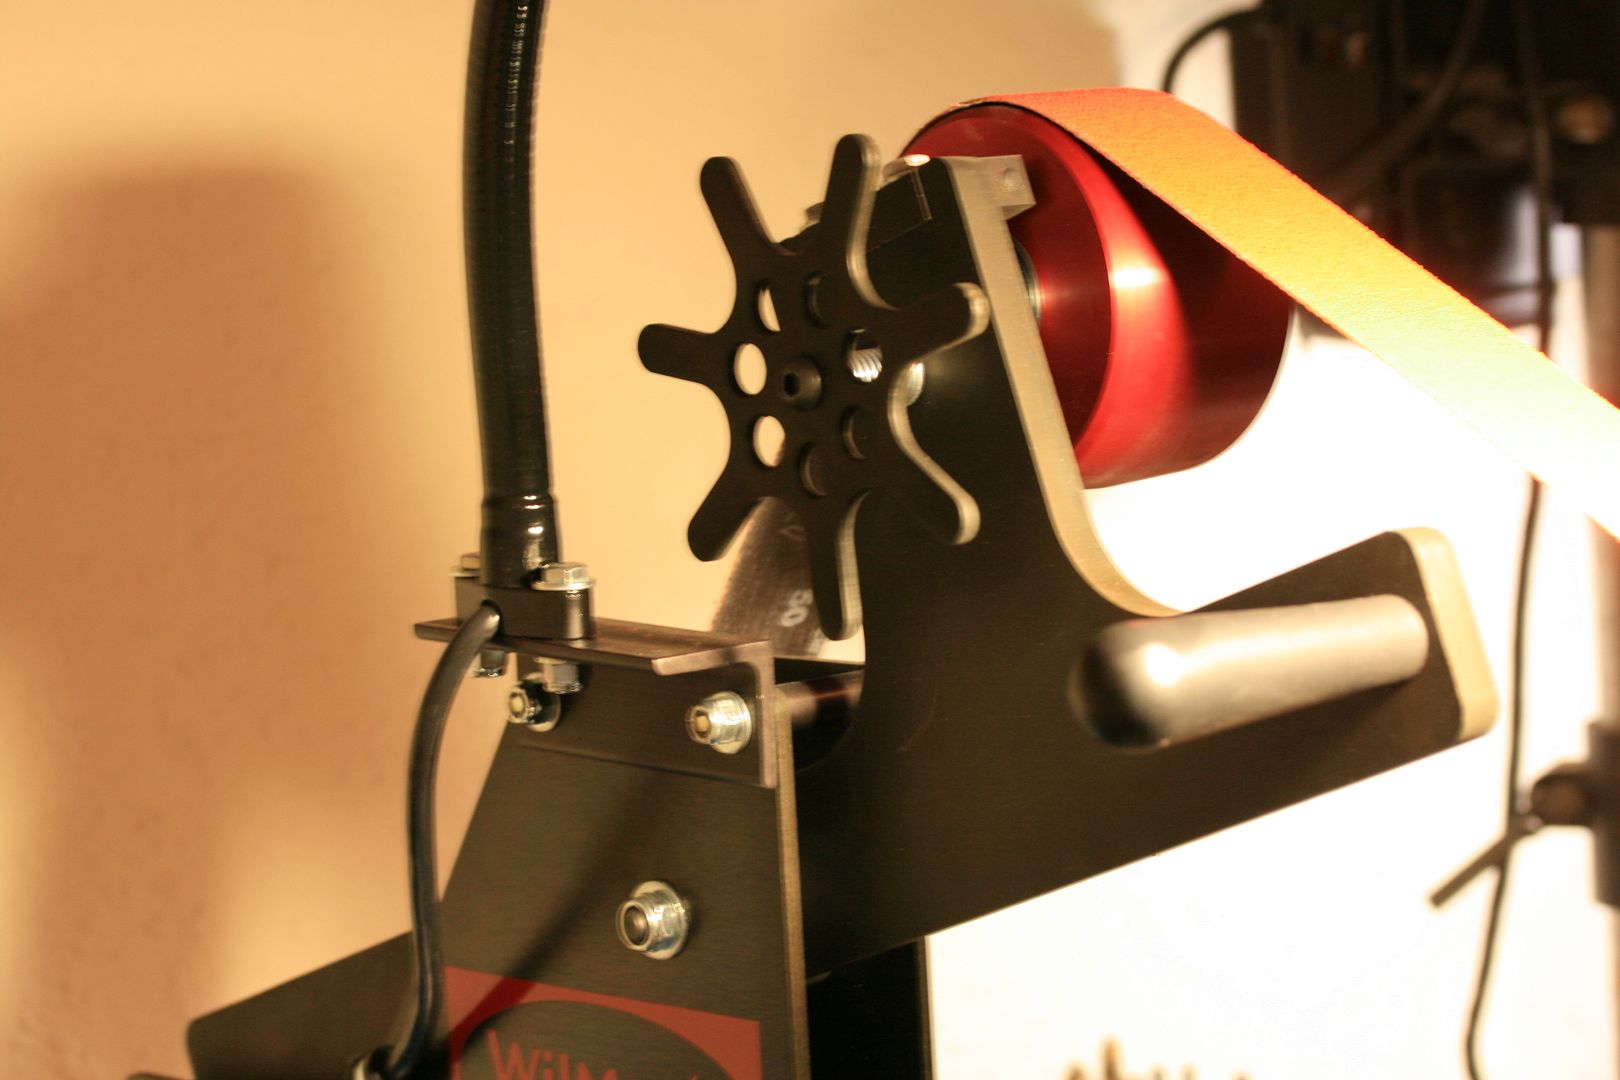
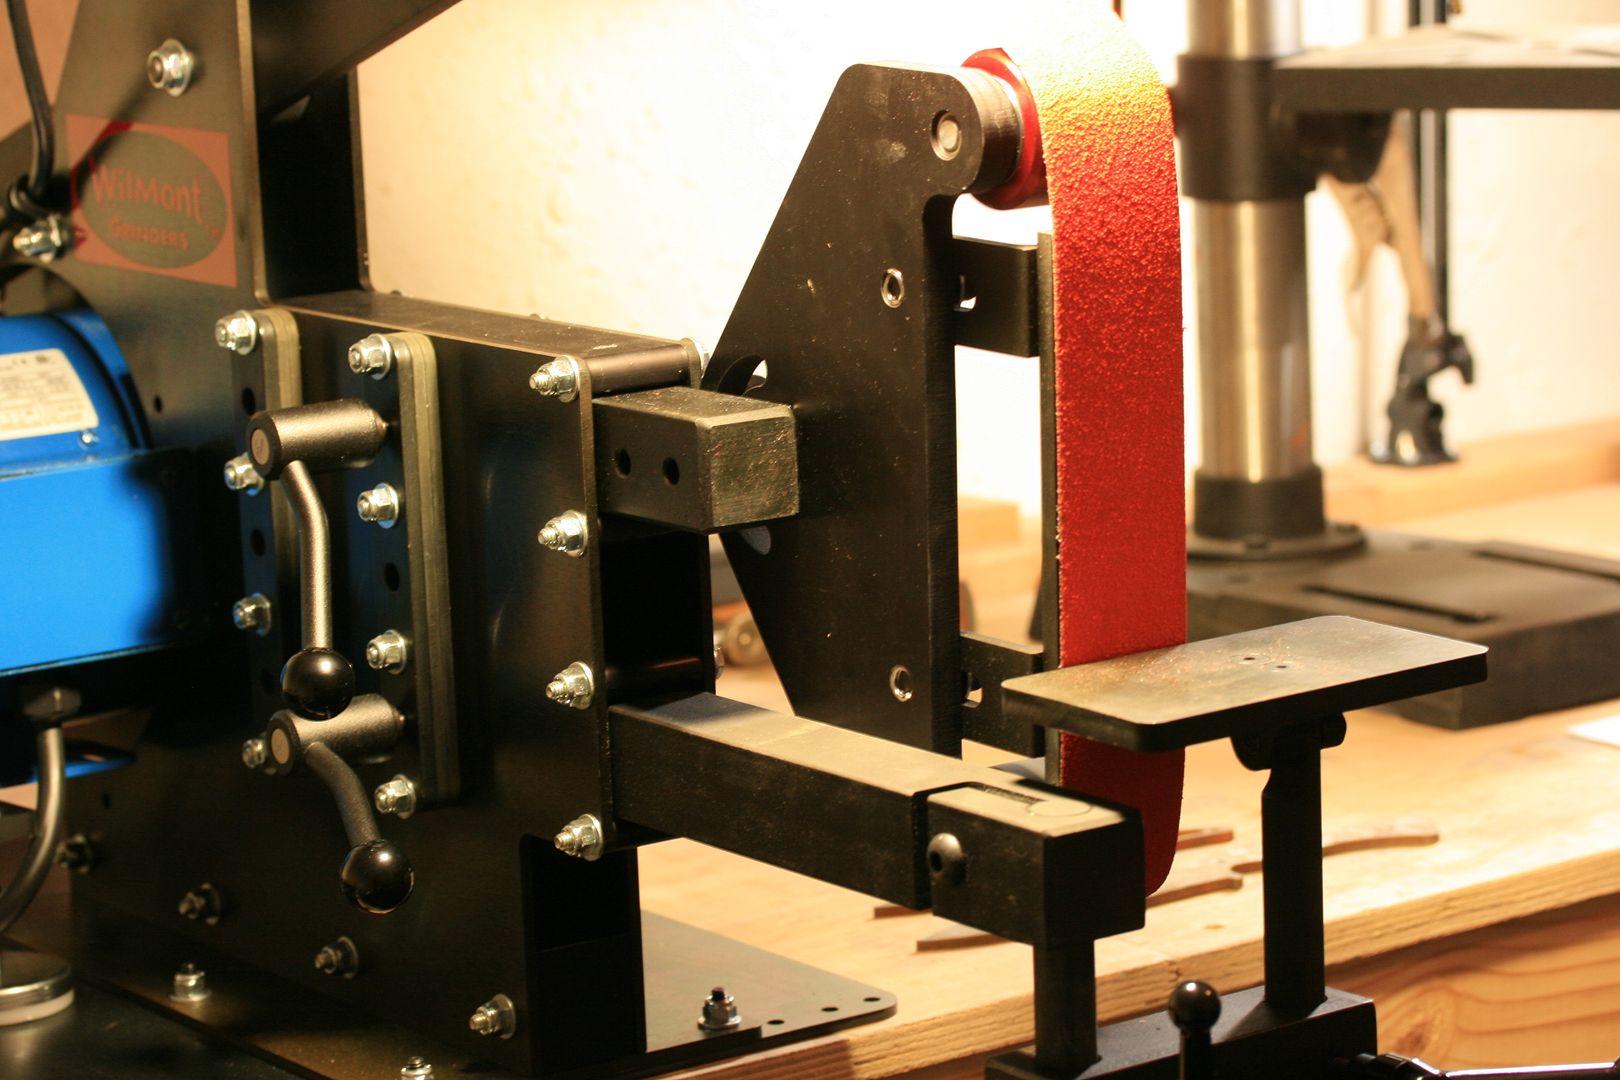
After saving pennies, selling a lot of stuff, and working my butt off, I finally got me a new grinder. I went all in and purchased a Wilmont TAG-101. First off, Chris is a pleasure to do business with. He gladly answered all of my questions very quickly and ended up getting me a grinder a lot faster than initially thought. He also through in two knife blanks and a t-shirt for free. This thing is built like a tank and feels like I switched from a smoking pinto to a Ferrari. I just finished setting it up and still need to do a little tweaking. I also received my air filtration system today. Going to hook that up tomorrow and start grinding. Hope it all works out. Not sure how I am going to sleep tonight...
Here is the new shop update and grinder...
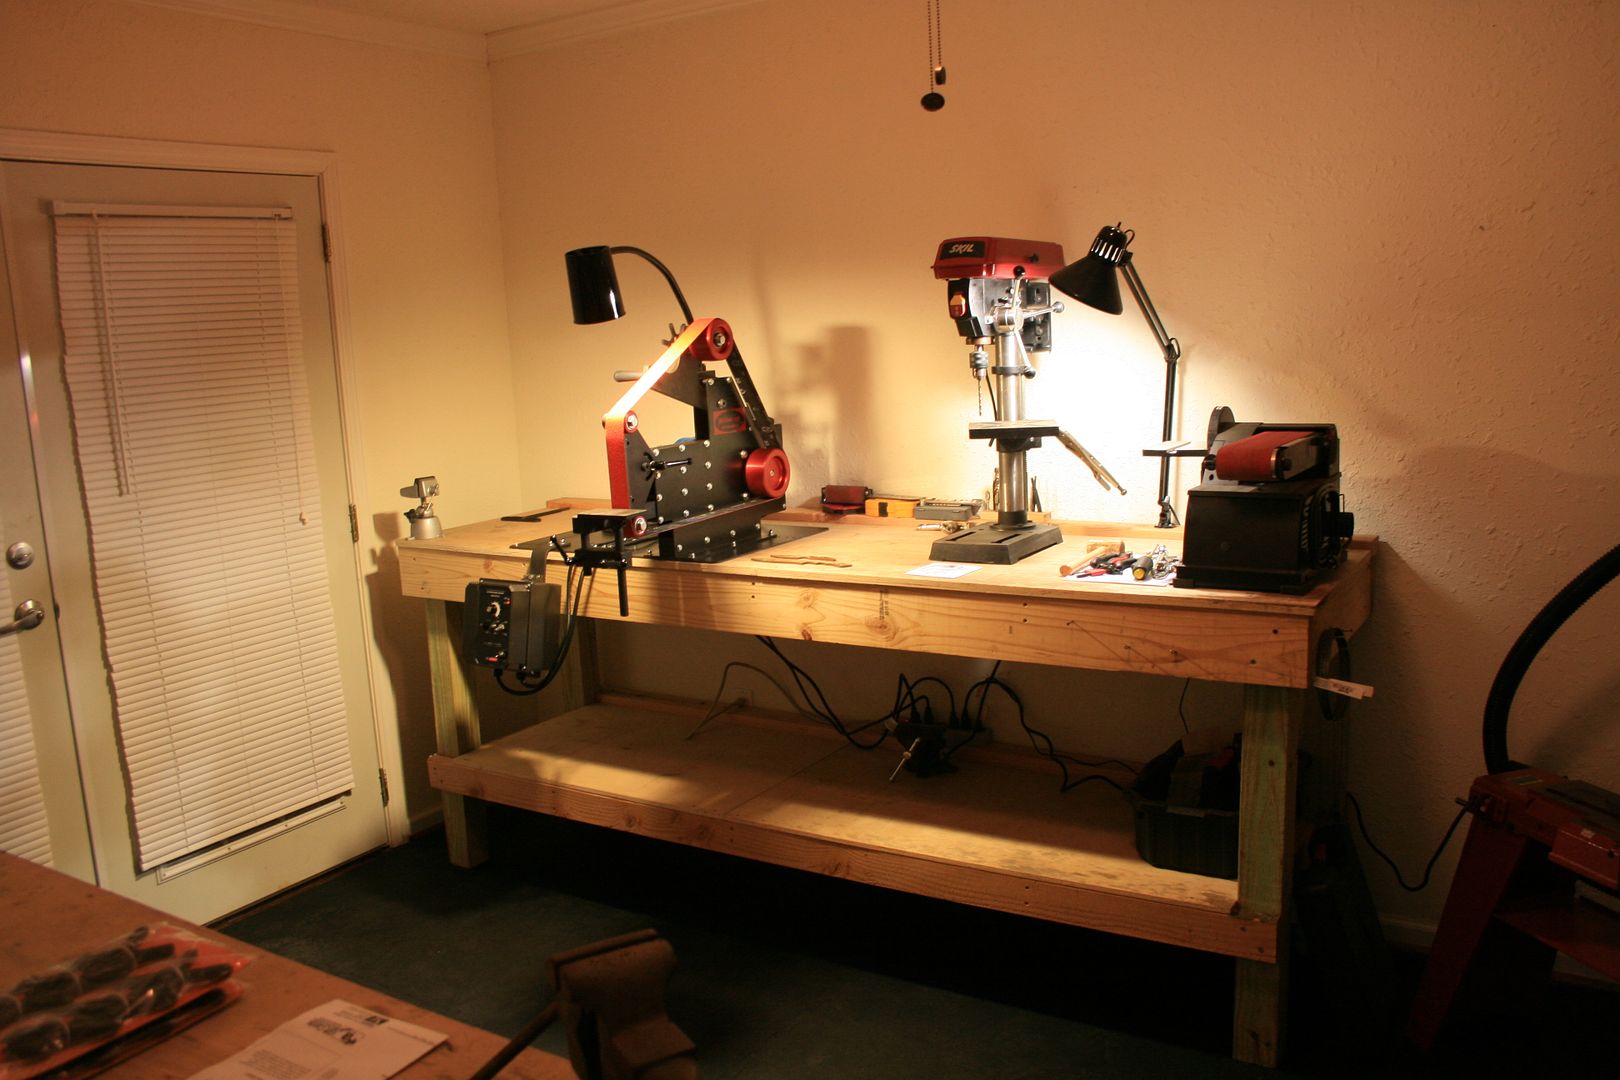
Bandsaw and small buffer in the corner...
The two blanks he sent...
I am very happy with it so far and have to say that I have had the best experience dealing with Wilmont Grinders. Thank you Chris!
I also just happen to get my belt order from TruGrit today. I was worried that I would have a new grinder and no belts for a few days.
After saving pennies, selling a lot of stuff, and working my butt off, I finally got me a new grinder. I went all in and purchased a Wilmont TAG-101. First off, Chris is a pleasure to do business with. He gladly answered all of my questions very quickly and ended up getting me a grinder a lot faster than initially thought. He also through in two knife blanks and a t-shirt for free. This thing is built like a tank and feels like I switched from a smoking pinto to a Ferrari. I just finished setting it up and still need to do a little tweaking. I also received my air filtration system today. Going to hook that up tomorrow and start grinding. Hope it all works out. Not sure how I am going to sleep tonight...
Here is the new shop update and grinder...
Bandsaw and small buffer in the corner...
The two blanks he sent...
I am very happy with it so far and have to say that I have had the best experience dealing with Wilmont Grinders. Thank you Chris!
I also just happen to get my belt order from TruGrit today. I was worried that I would have a new grinder and no belts for a few days.
Steven Long
Well-Known Member
Thanks Eric! The piggy bank has taken a huge hit but it is all worth it.
I just hope the new set up works out...
I just hope the new set up works out...
Lagrange
Well-Known Member
Considering your grinder set up, do you have plans for how to deal with the grinding debris?
I am thinking of re-arranging my entire set up using a similar idea of having my stuff lined up on a bench along one wall. I was thinking of cutting a notch in the back of the counter and and adding a quasi dust/debris collecting hood or scoop to direct undesireable material towards a collection system below the counter top. I'm not sure how well it would work.
I am thinking of re-arranging my entire set up using a similar idea of having my stuff lined up on a bench along one wall. I was thinking of cutting a notch in the back of the counter and and adding a quasi dust/debris collecting hood or scoop to direct undesireable material towards a collection system below the counter top. I'm not sure how well it would work.
Steven Long
Well-Known Member
Eric, this is the one thing that I am worried about. For now, I am going to use a bucket of water under the grinder to hopefully catch the majority, air filtration system hanging from the ceiling to collect the fines, and I have been trying to come up with a collection system for when I do the handles. I have been looking around Home Depot and have found some interesting parts in the A/C section. I was thinking of getting something similar to what Bob Loveless had under his grinder in his video but using a shop vac for the suction. My plan is to start grinding and fix the issues as they arise. I will also be putting up a 4'x8' piece of plywood behind my bench to protect the wall.
My wood bandsaw is going to be on a bench with wheels so I can pull it over to the doors and make my cuts, using the shop vac attached to the exit port of the saw and hopefully directing the rest of the debris outside.
Hope it doesn't get too crazy in there, but I have a feeling that it will. I am hoping for the best.
Steven Long
Well-Known Member
Question for the electricians here...
Electricity is something I need a lot more practice with so I am pretty timid messing with it in the first place. I have a ceiling fan in the middle of my new shop and want to install my air filtration system in its place. I would like to convert the wires that hook up the fan to a plug. Is this possible with the wires that are already there or would I have to do some re-wiring? I haven't googled it yet and was hoping that I could maybe get pointed in the right direction while I was at work today. I really want to set it up this afternoon. I will already have extension cords running from my lights and would love to be able to keep the filtration systems power up in the ceiling and not have extension cords running all over my shop.
Thanks in advance!
Calvin Robinson
Moderator Christian Forum
Question for the electricians here...
Electricity is something I need a lot more practice with so I am pretty timid messing with it in the first place. I have a ceiling fan in the middle of my new shop and want to install my air filtration system in its place. I would like to convert the wires that hook up the fan to a plug. Is this possible with the wires that are already there or would I have to do some re-wiring? I haven't googled it yet and was hoping that I could maybe get pointed in the right direction while I was at work today. I really want to set it up this afternoon. I will already have extension cords running from my lights and would love to be able to keep the filtration systems power up in the ceiling and not have extension cords running all over my shop.
Thanks in advance!
If you haven't figured the electrical out yet give me a call and I'll try to walk you through it. 850-572-1504
Steven Long
Well-Known Member
Thanks Calvin. That is very generous of you. I am going to attempt it tomorrow and will give you a call if I run into problems. It seems pretty straight forward so hopefully I can figure it out.
Steven Long
Well-Known Member
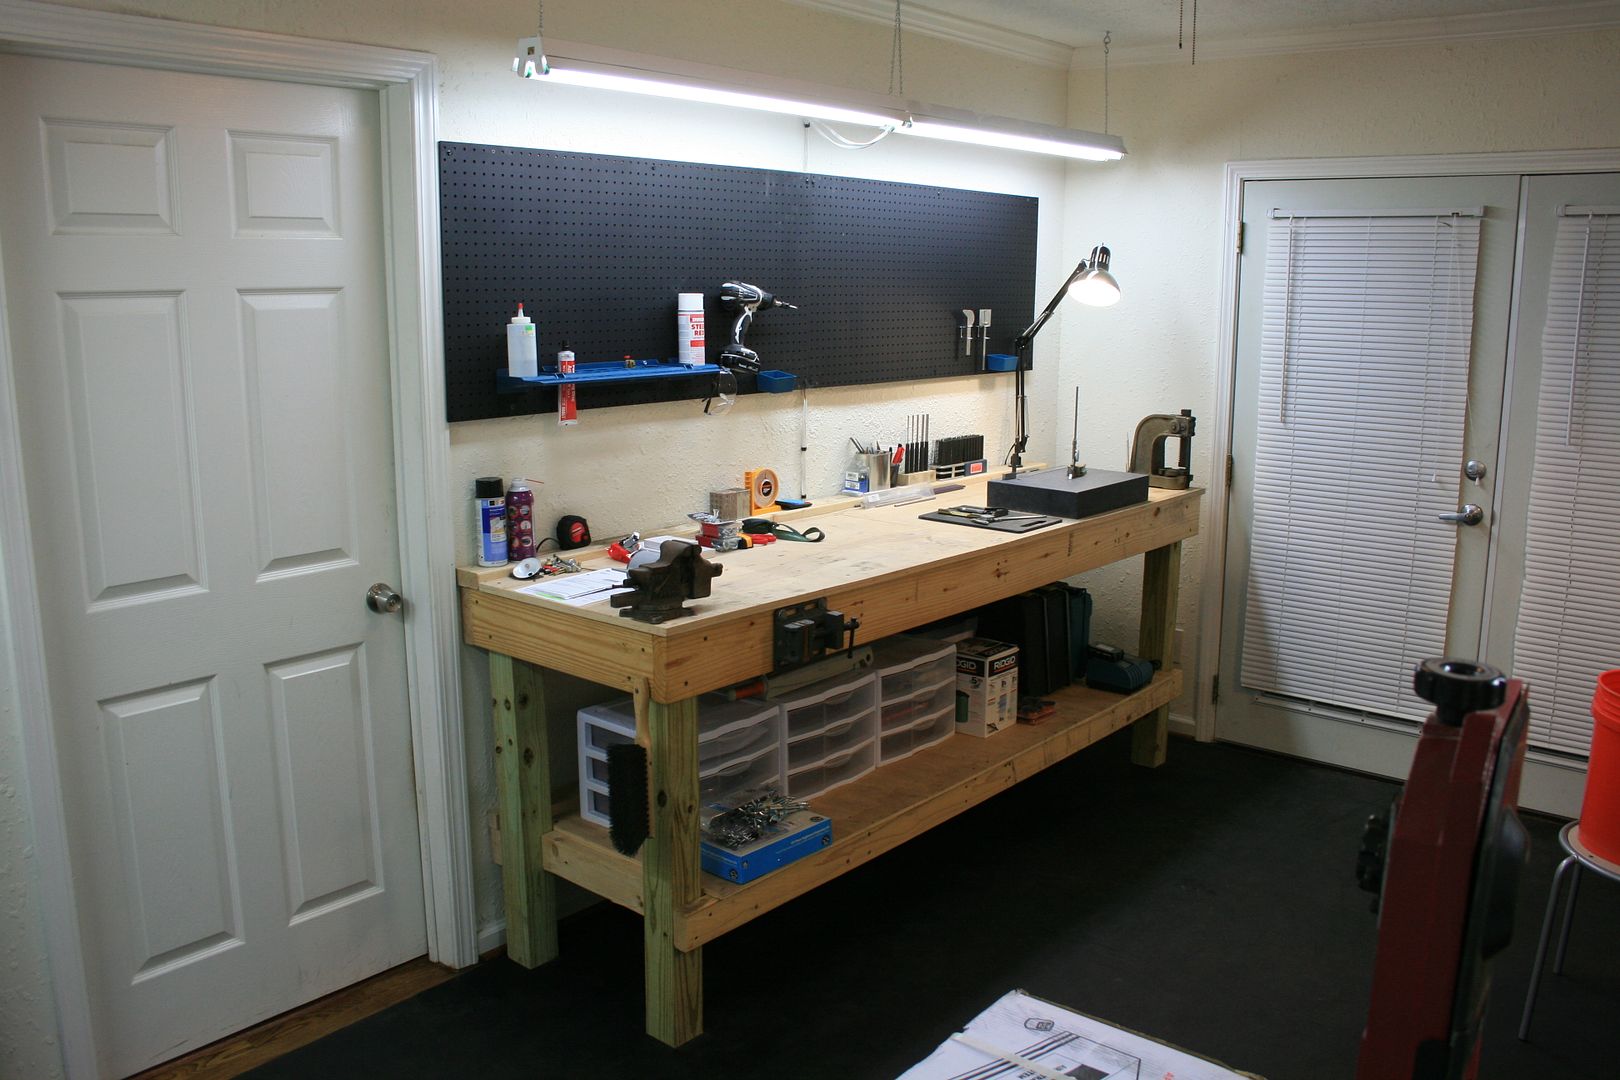
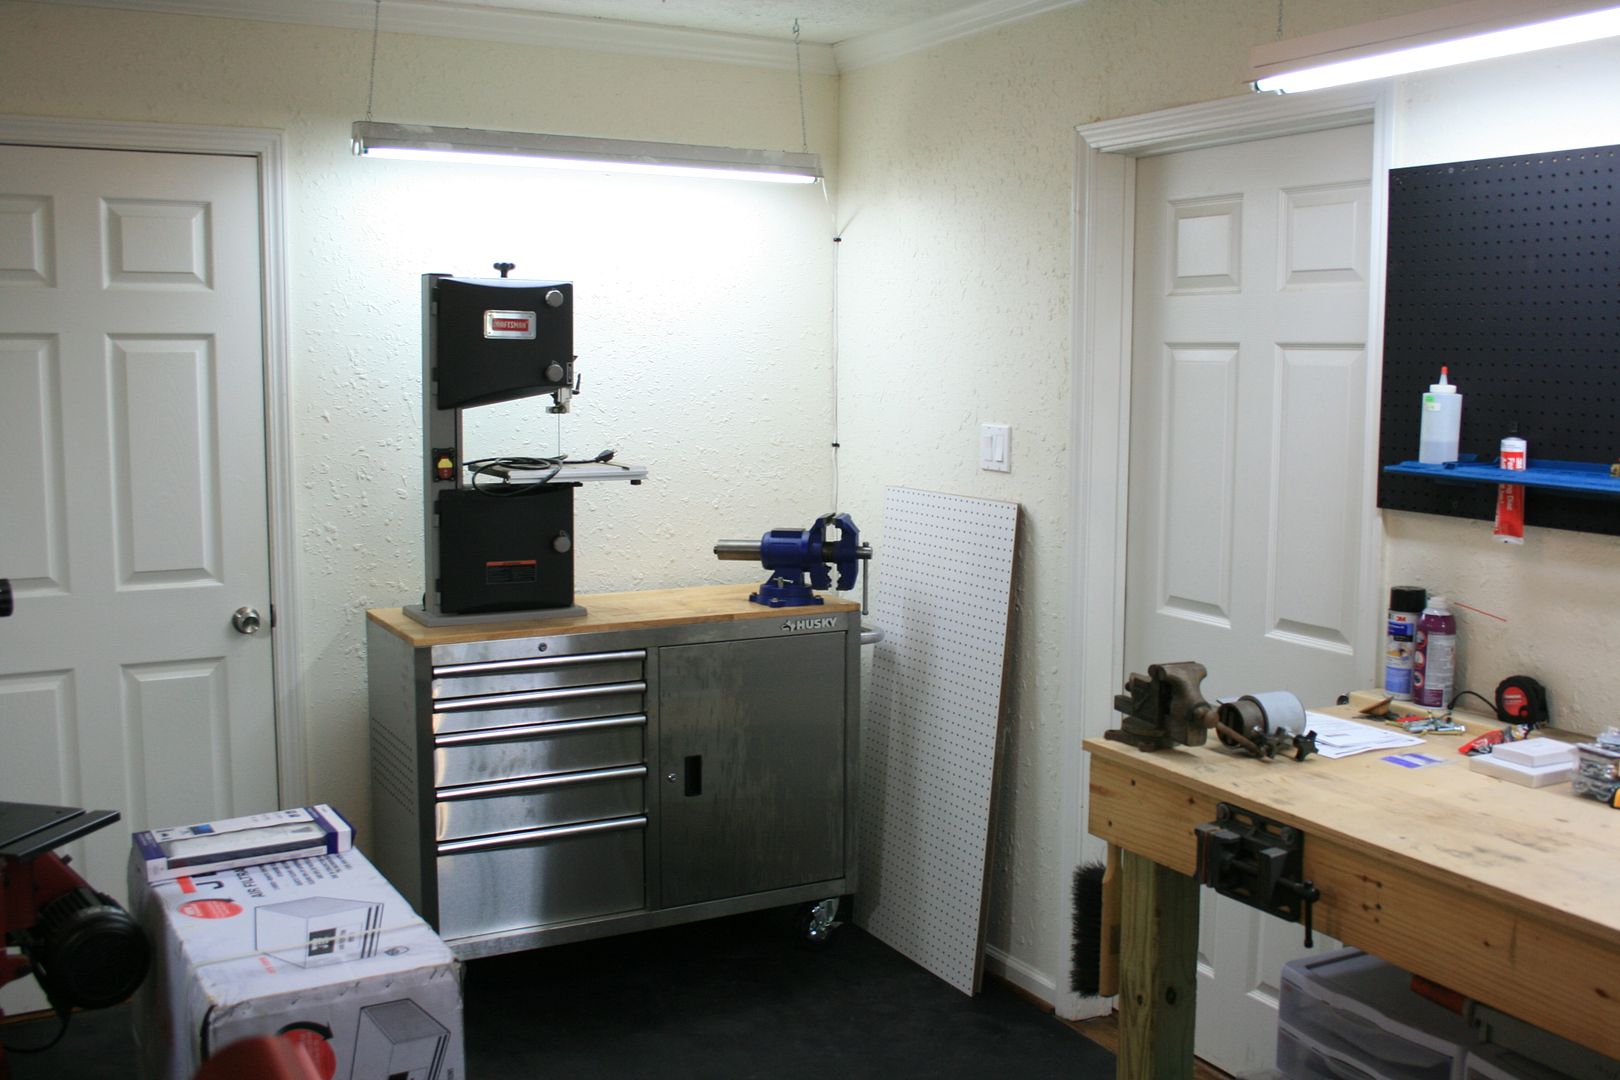
Worked on the shop a little more. It is starting to come together now. Still haven't messed with the air filtration yet but Sunday is my deadline to be up and running. Still need to hang three lights, paint a few peg boards and install them , organize all of the electrical cords, hang the belts, move a few more things from the old shop and organize everything. The list grows by the minute.
Looks pretty much the same on the "dirty side"...

Coming together on the "clean side"...
It is definitely smaller but feels more comfortable. Hope it all works out...
Looks pretty much the same on the "dirty side"...
Coming together on the "clean side"...
It is definitely smaller but feels more comfortable. Hope it all works out...