2013 Knife Making Progress

Steven Long

Well-Known Member
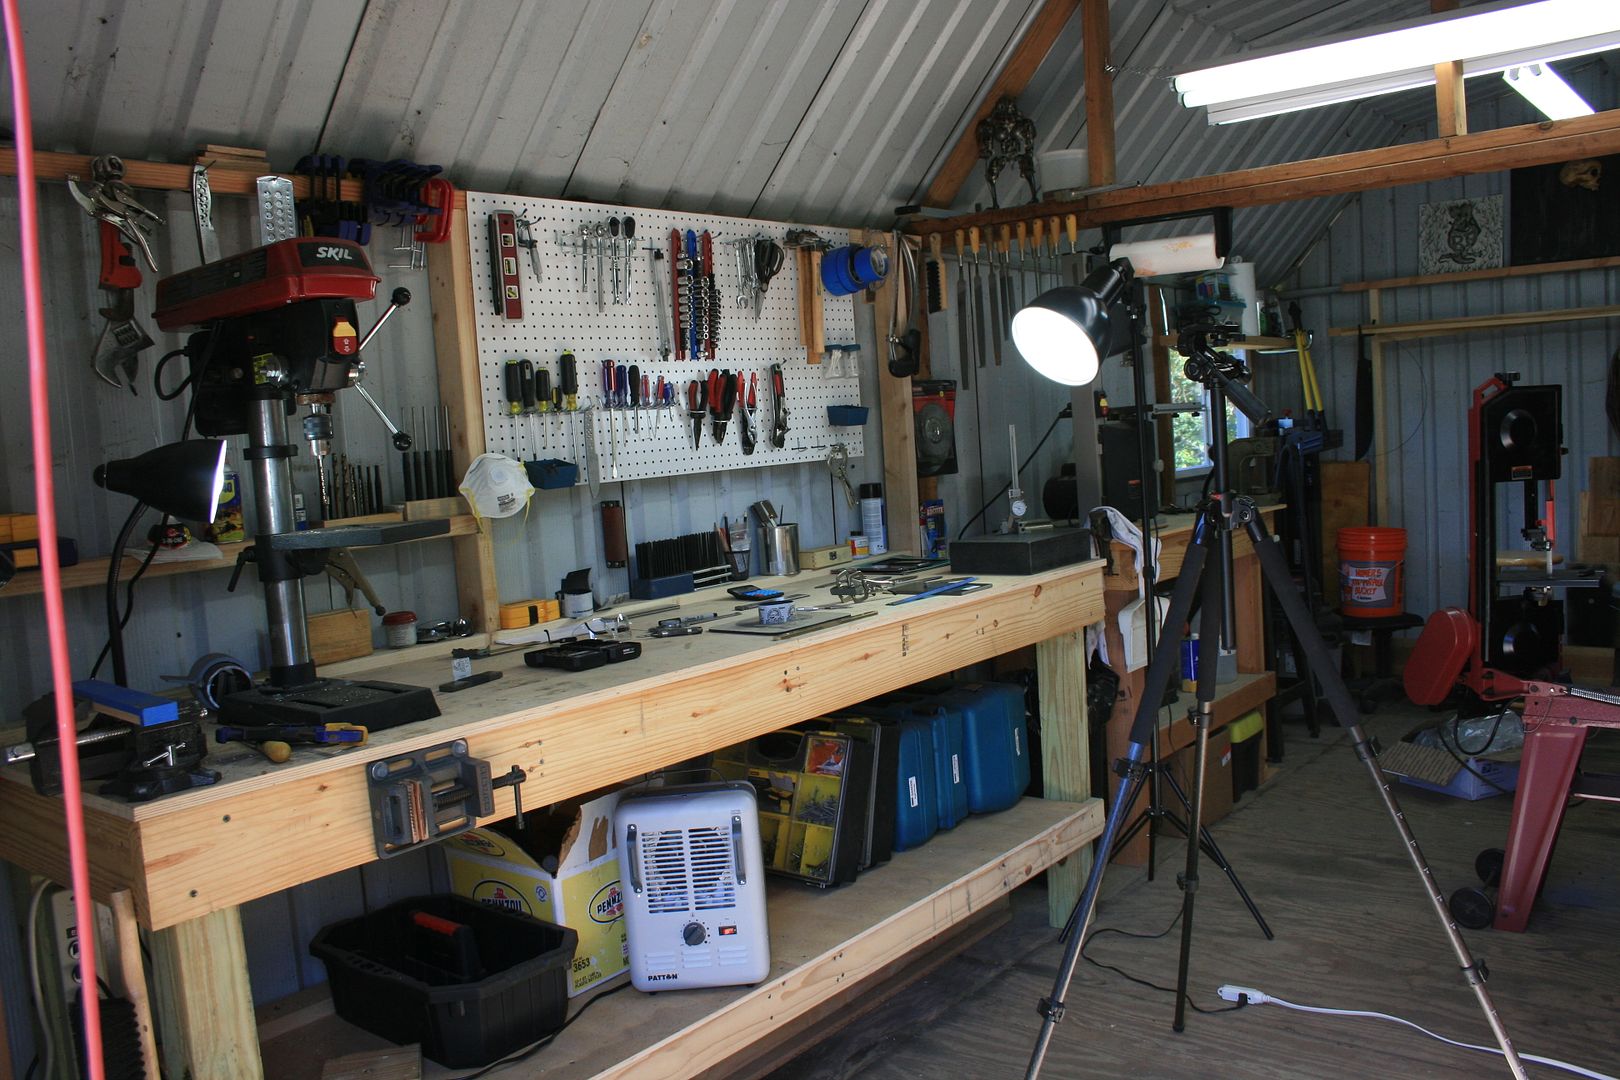
I am going to go ahead and put all of my knifemaking progress into this thread so I don't keep starting a new thread when I feel proud about something. It will also help me see my accomplishments over a period of time, which should help my progress.

I have been at it off and on for about 6 months now and have not completed one knife as of today (1/8/13). I keep getting one close to where I think it needs to be before heat treat, then screw it up somehow and start a new one, but I get closer and closer everyday. Once I screw it up, I stop and figure out what caused it. Doing this has helped me concentrate more.

Updates:
-First knife completed 1/24/13... Post #55
-Second knife completed 1/29/13... Post #72

I am a little embarrassed to show my first attempts at grinding, but we all have to start somewhere and maybe this will encourage another new maker to keep at it.

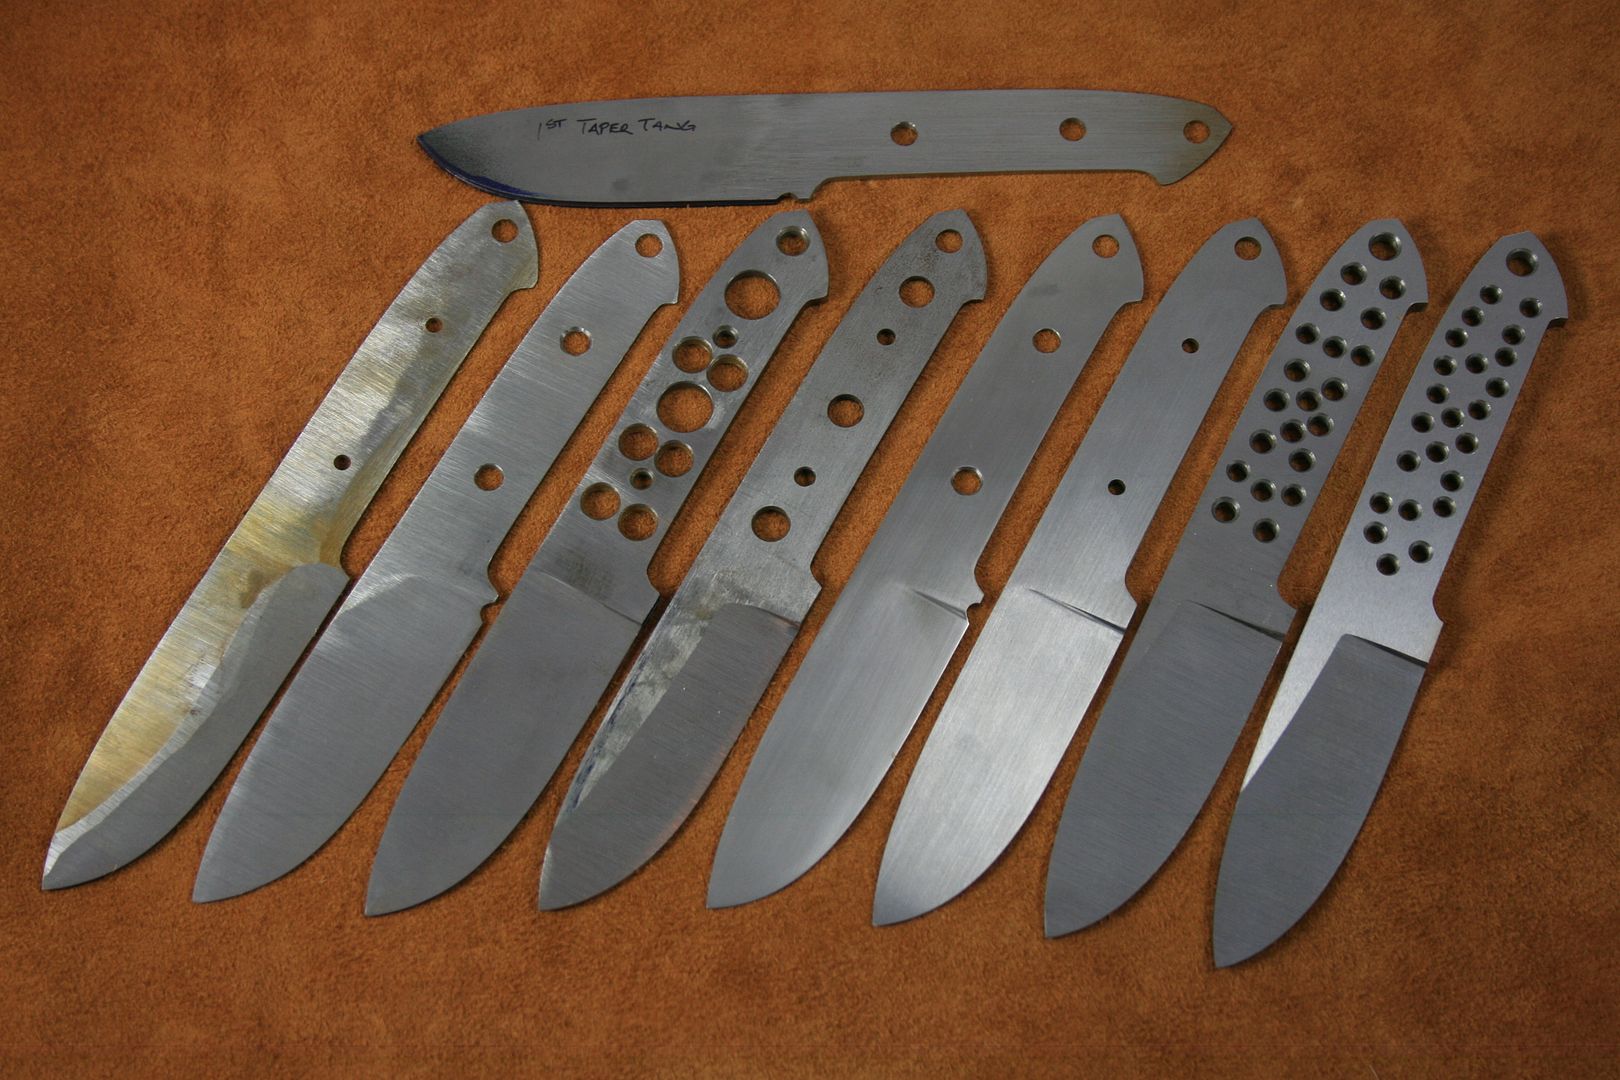
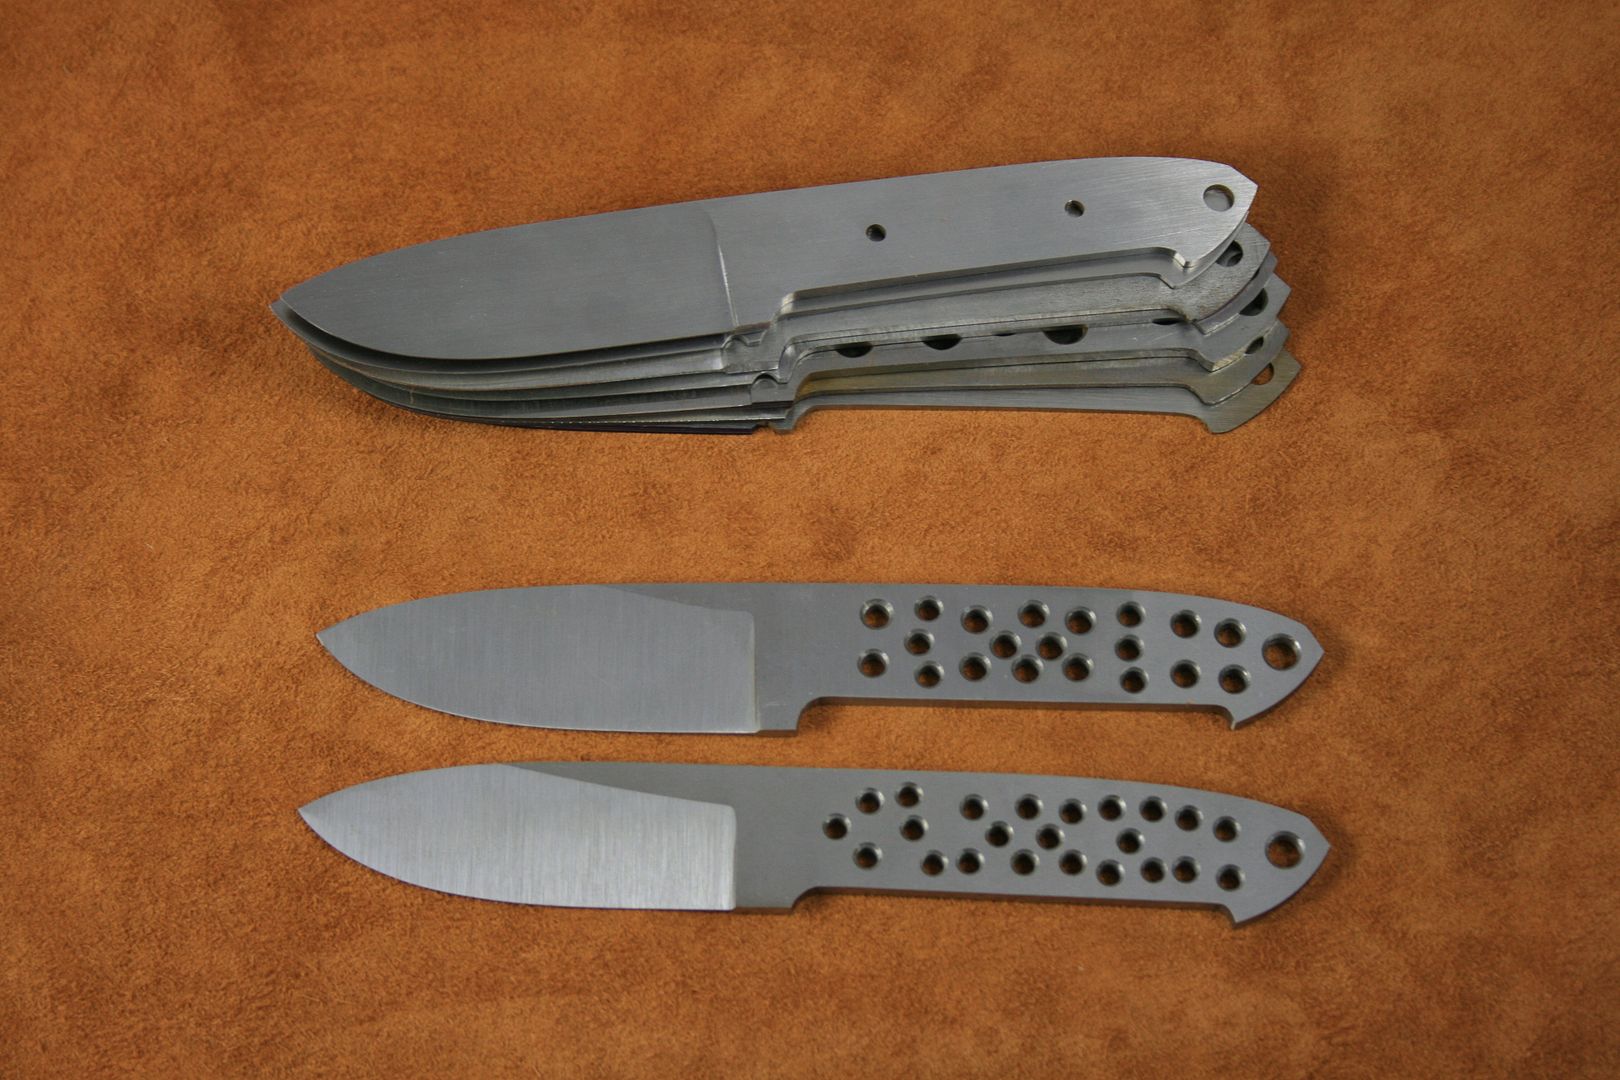
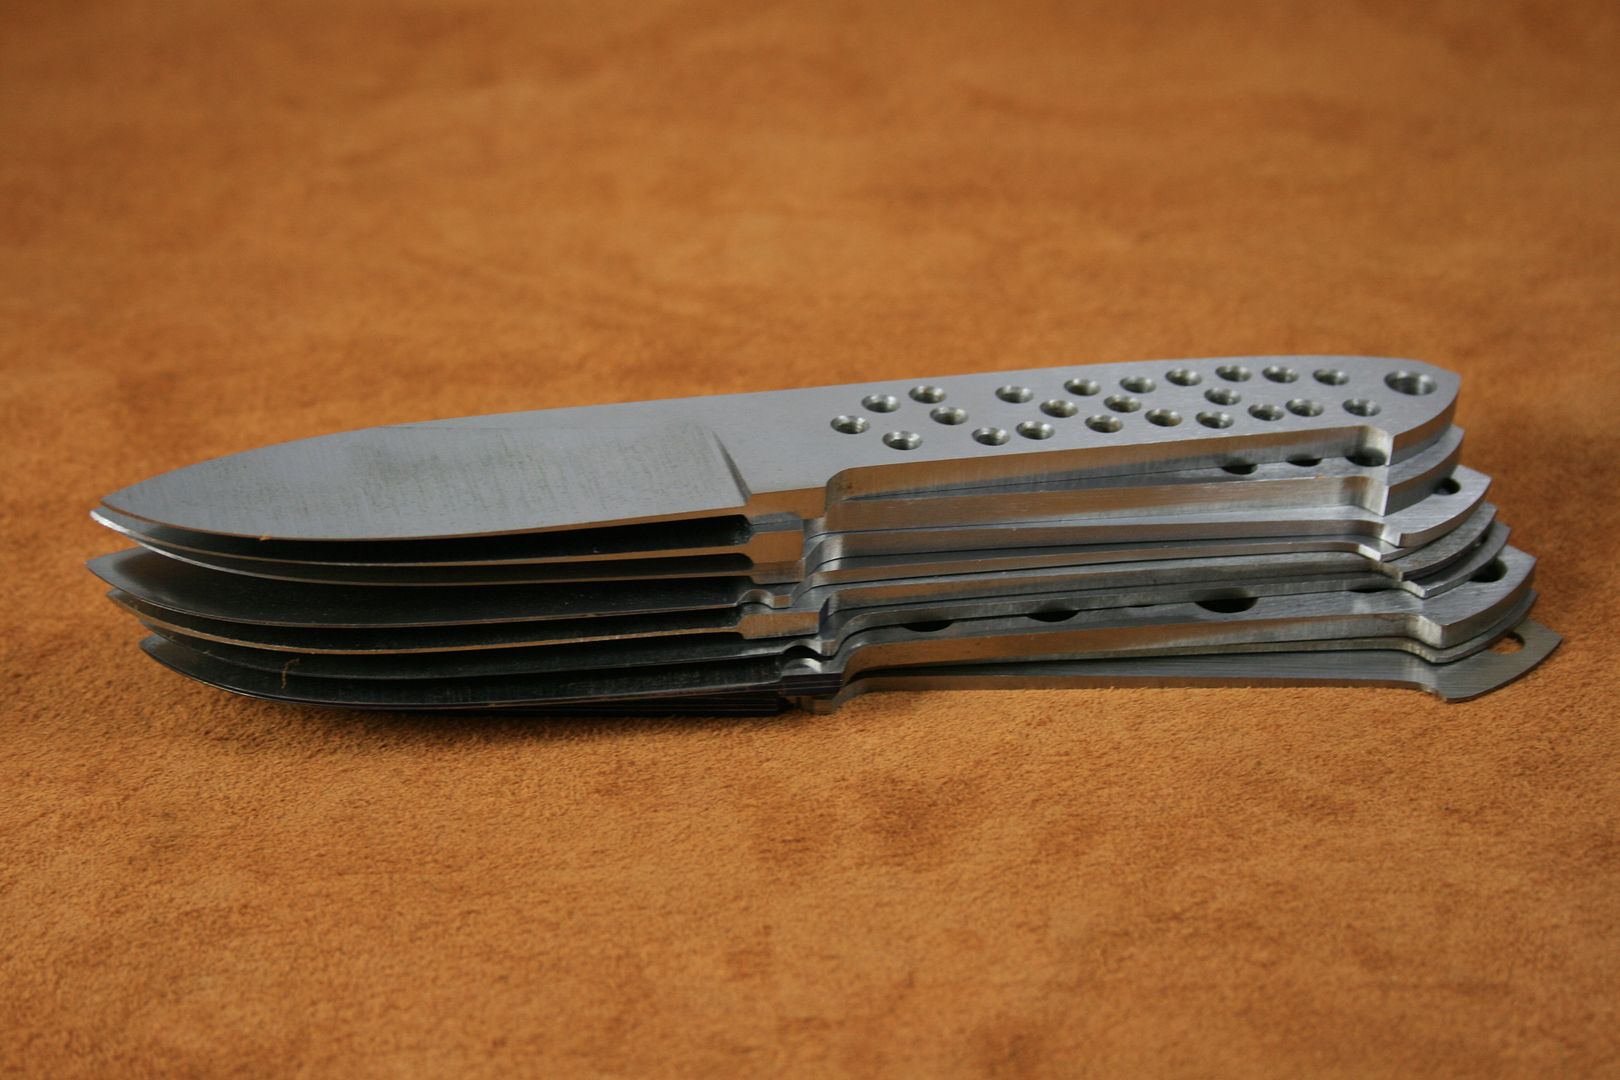
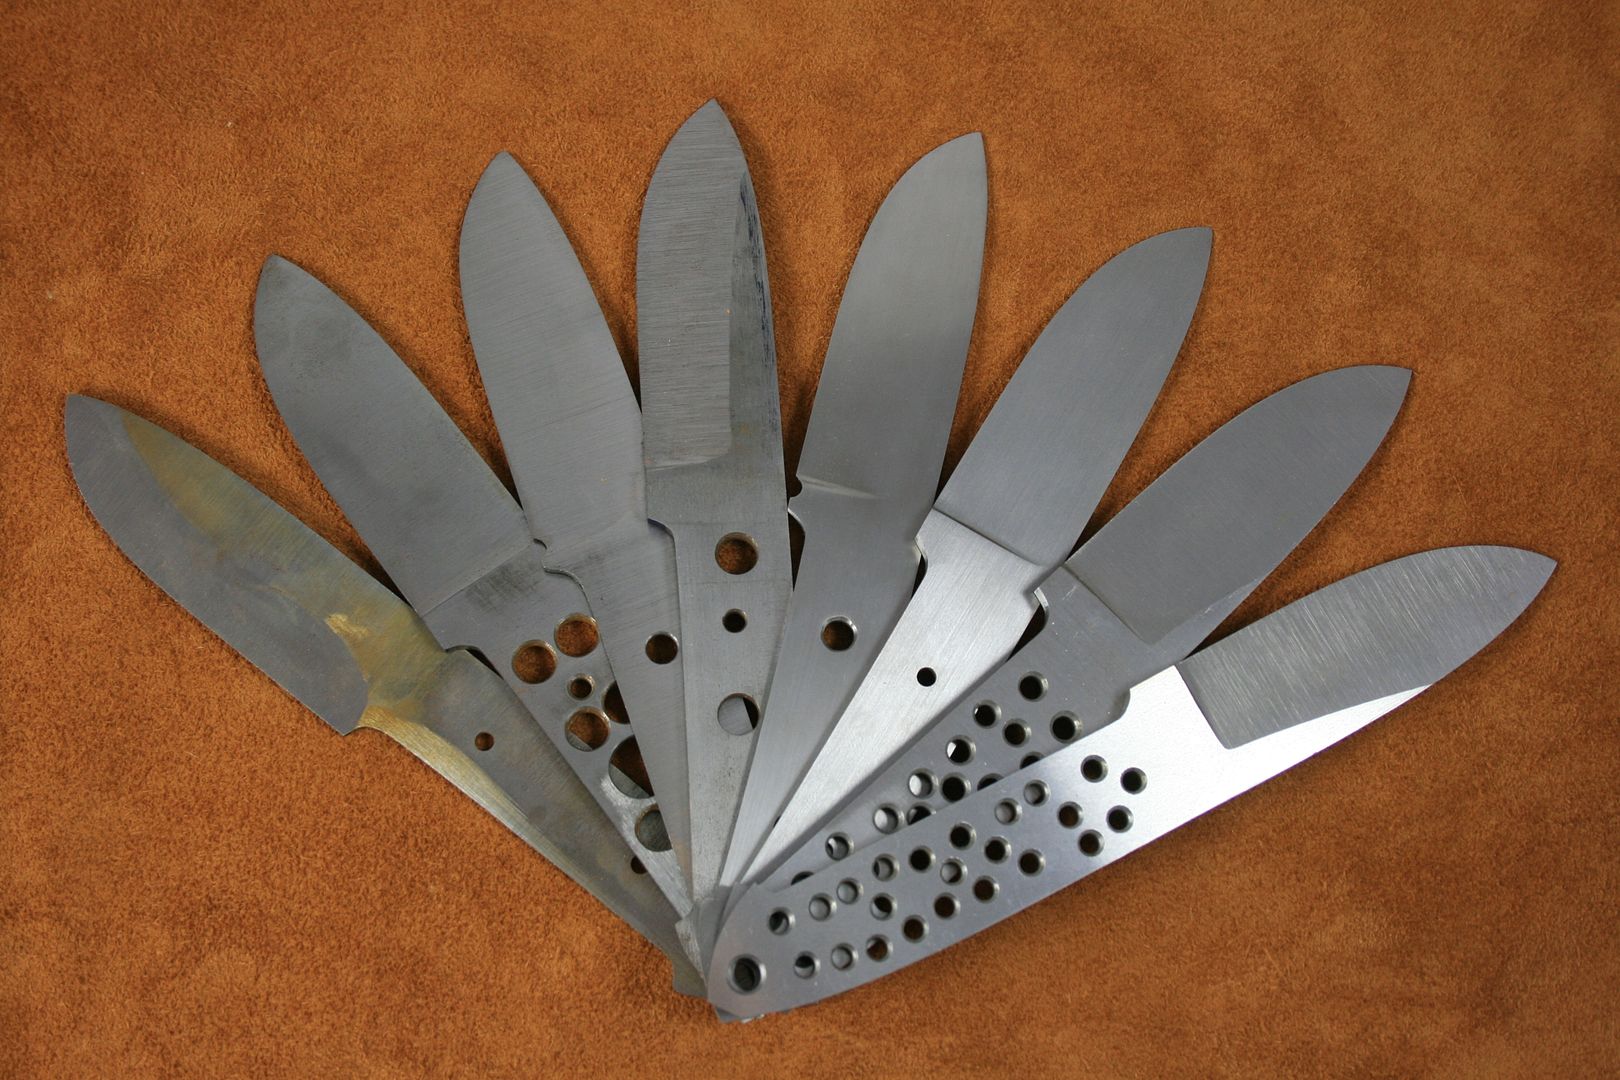
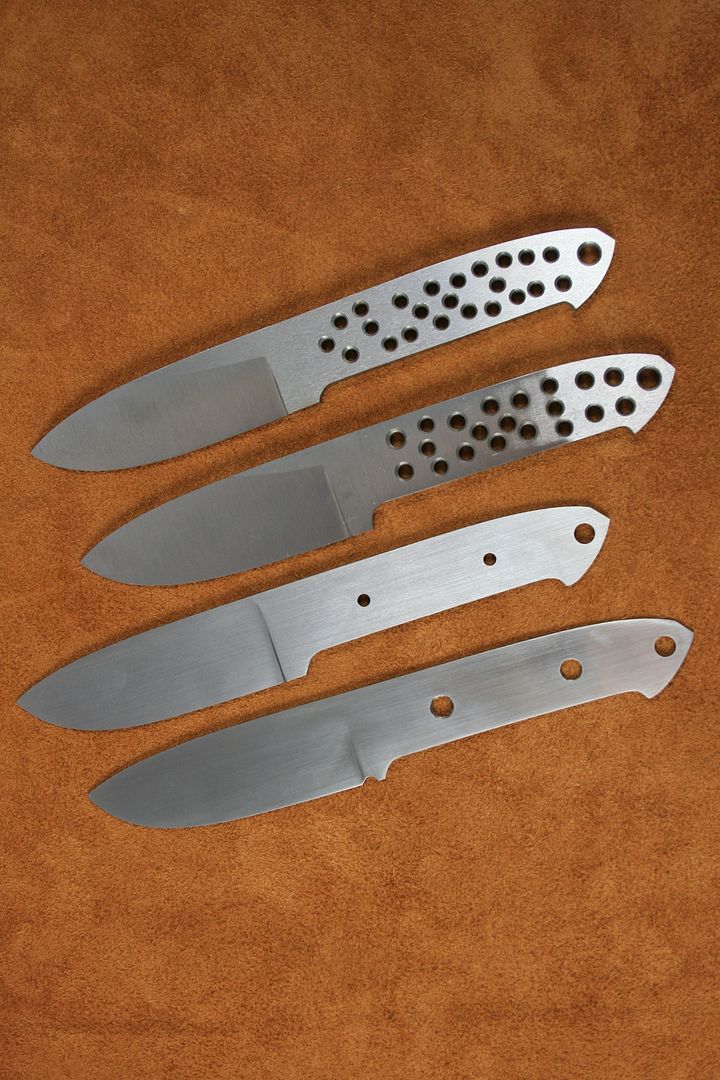
Starting from the left is my 3rd attempt grinding a bevel with a grinder, ending in my 10th attempt (just completed today).
2013Progress001_zps9662d766.jpg


2013Progress004_zps08e8b8ac.jpg


2013Progress005_zpsd8f49bf5.jpg


2013Progress006_zpsb3ef7433.jpg


2013Progress007_zps2044b00d.jpg


2013Progress009_zps6c8c0743.jpg


2013Progress013_zpsbf91ab7a.jpg


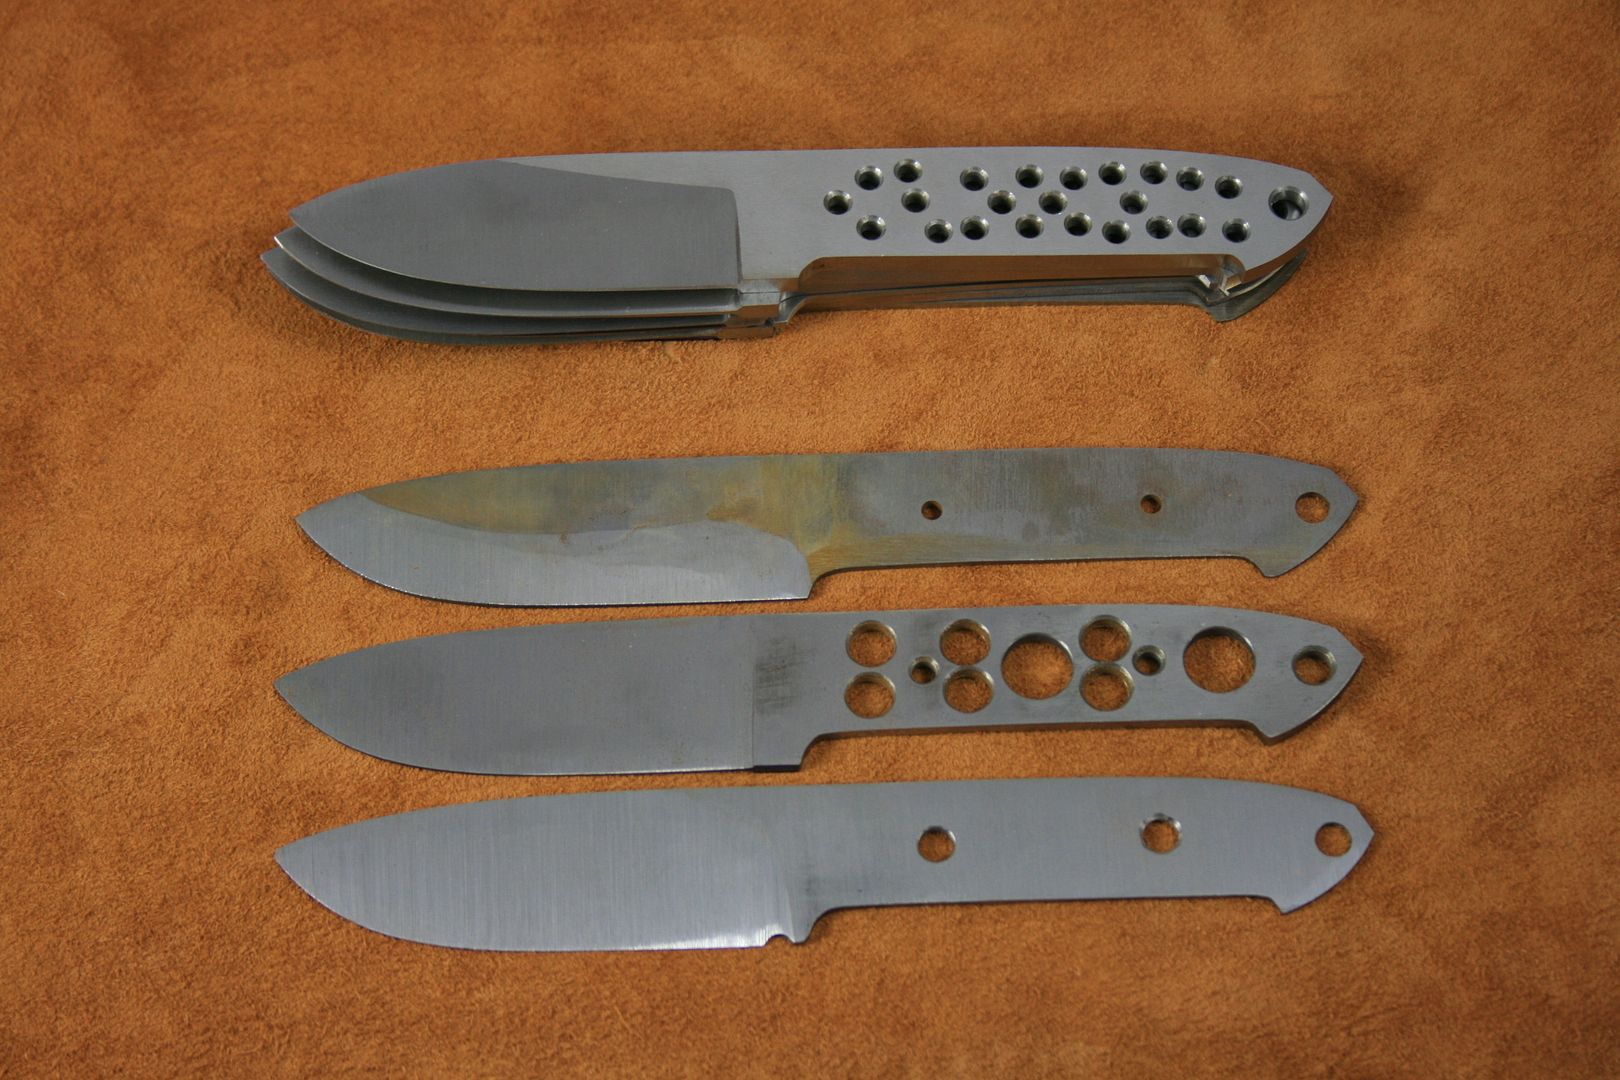
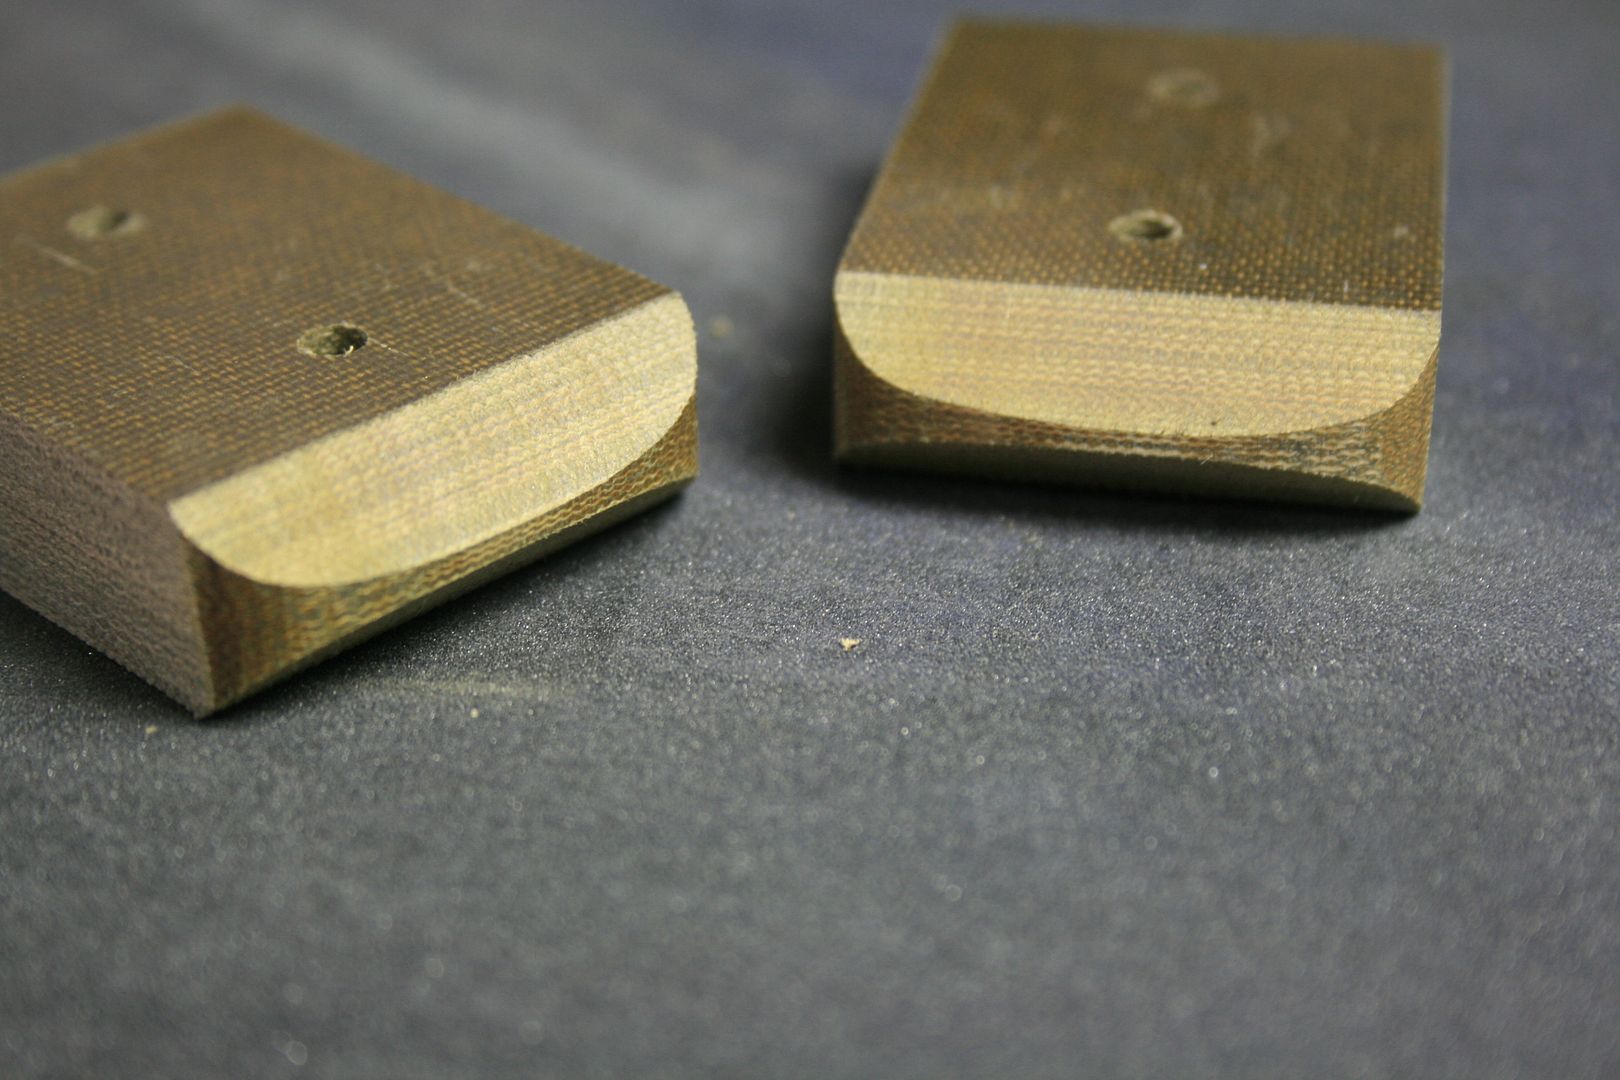
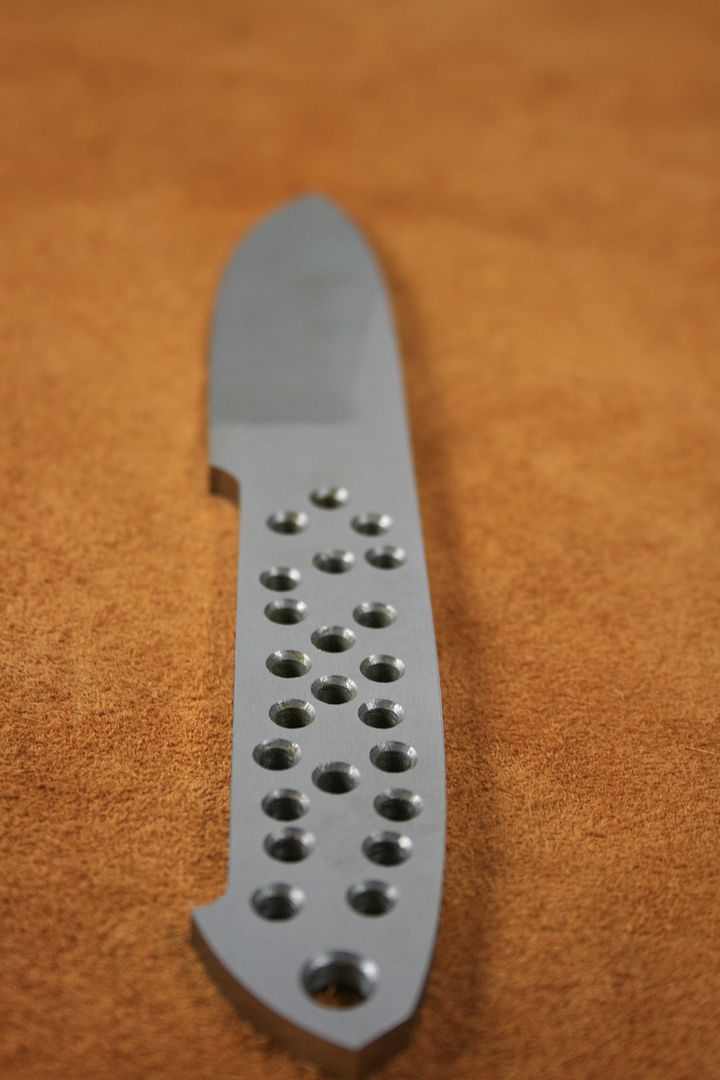
I am having a problem while grinding the bevels. The area from the plunge to about 1" down the blade, and the tip, stay thicker at the edge; and in between those areas (the middle) gets thinner way quicker. I see this causing major problems during and after heat treat, as well as when the time comes to sharpen. I have not been able to figure a way to keep it symmetrical. My guess is that since it's in the middle of the blade, it stays in contact with the belt more than the plunge area and tip, causing it to grind off more metal. The way I have become comfortable grinding is always putting the blade to the grinder at the plunge line and move across to the tip. Every time I try and start at the tip, my grind gets way out of whack and too much steel gets ground off. Is this a common problem for beginners?

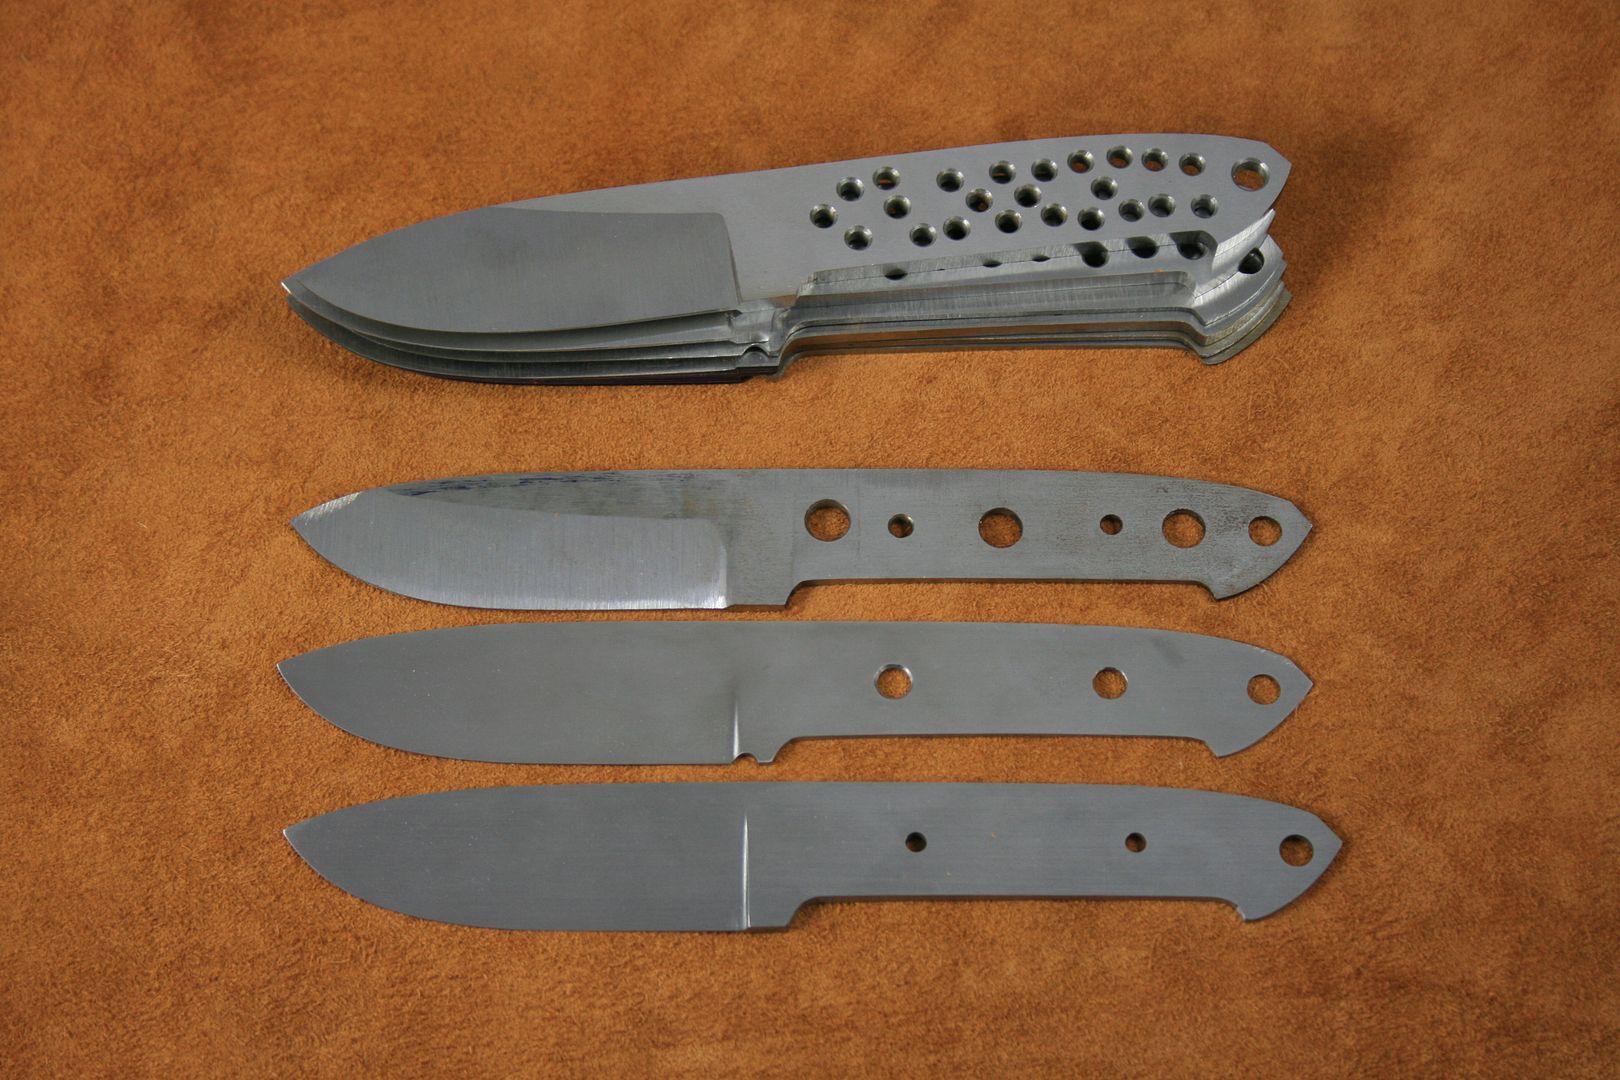
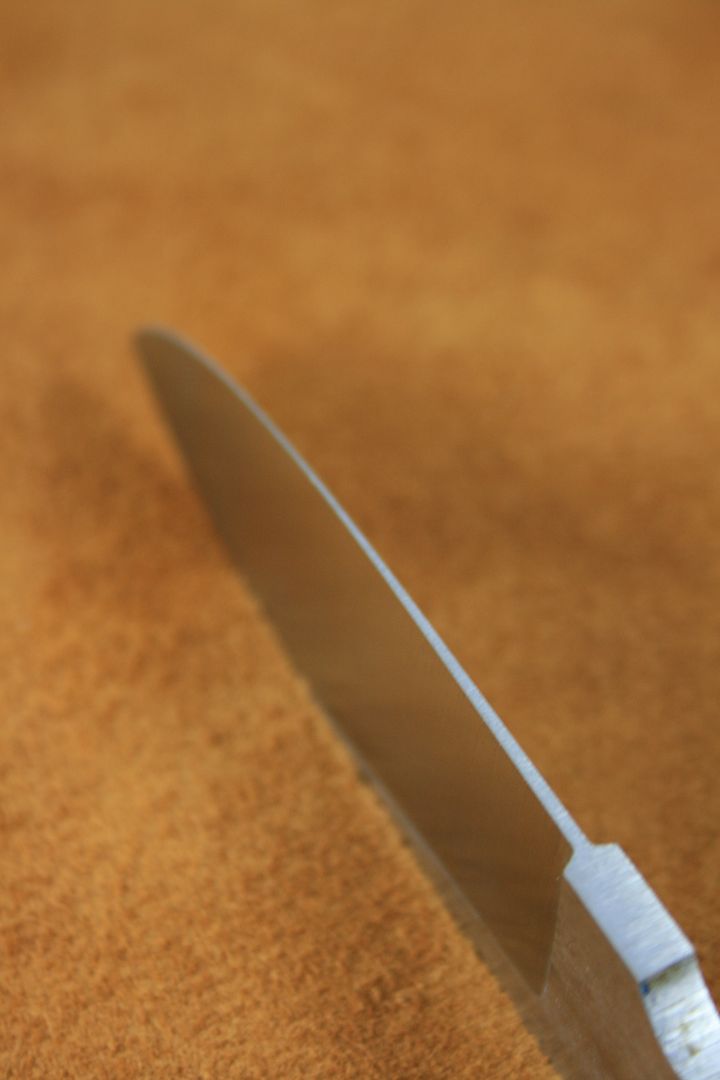
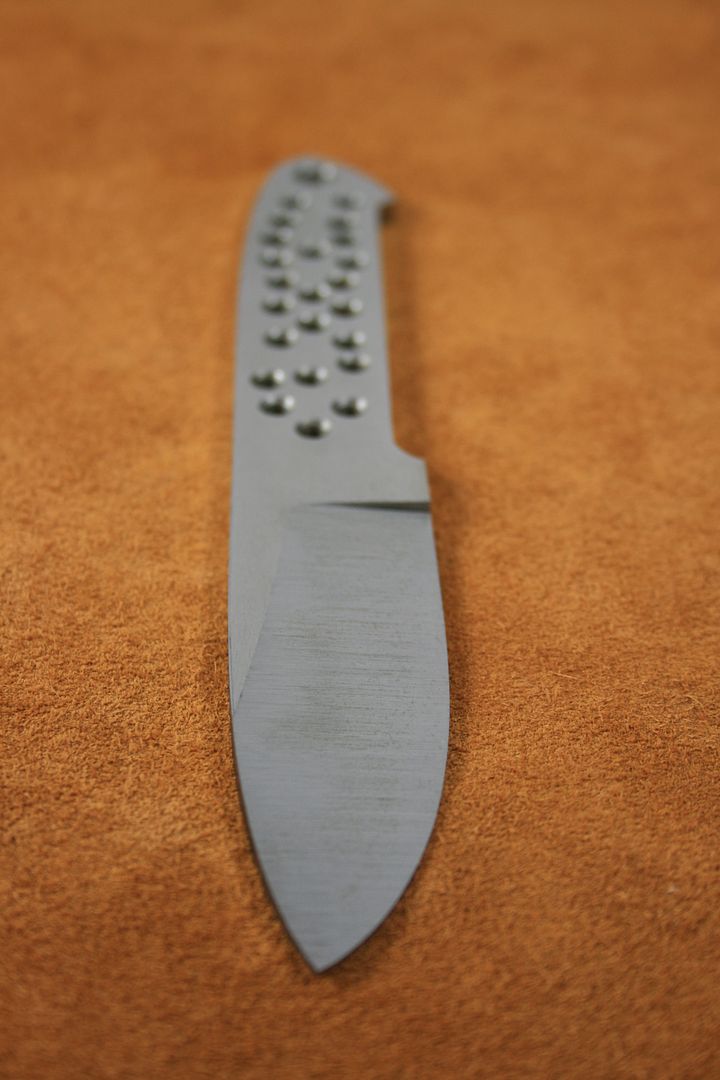
It's hard to see but here is the edge somewhat showing the difference in thickness at the plunge compared to the middle.
2013Progress010_zps13baa676.jpg


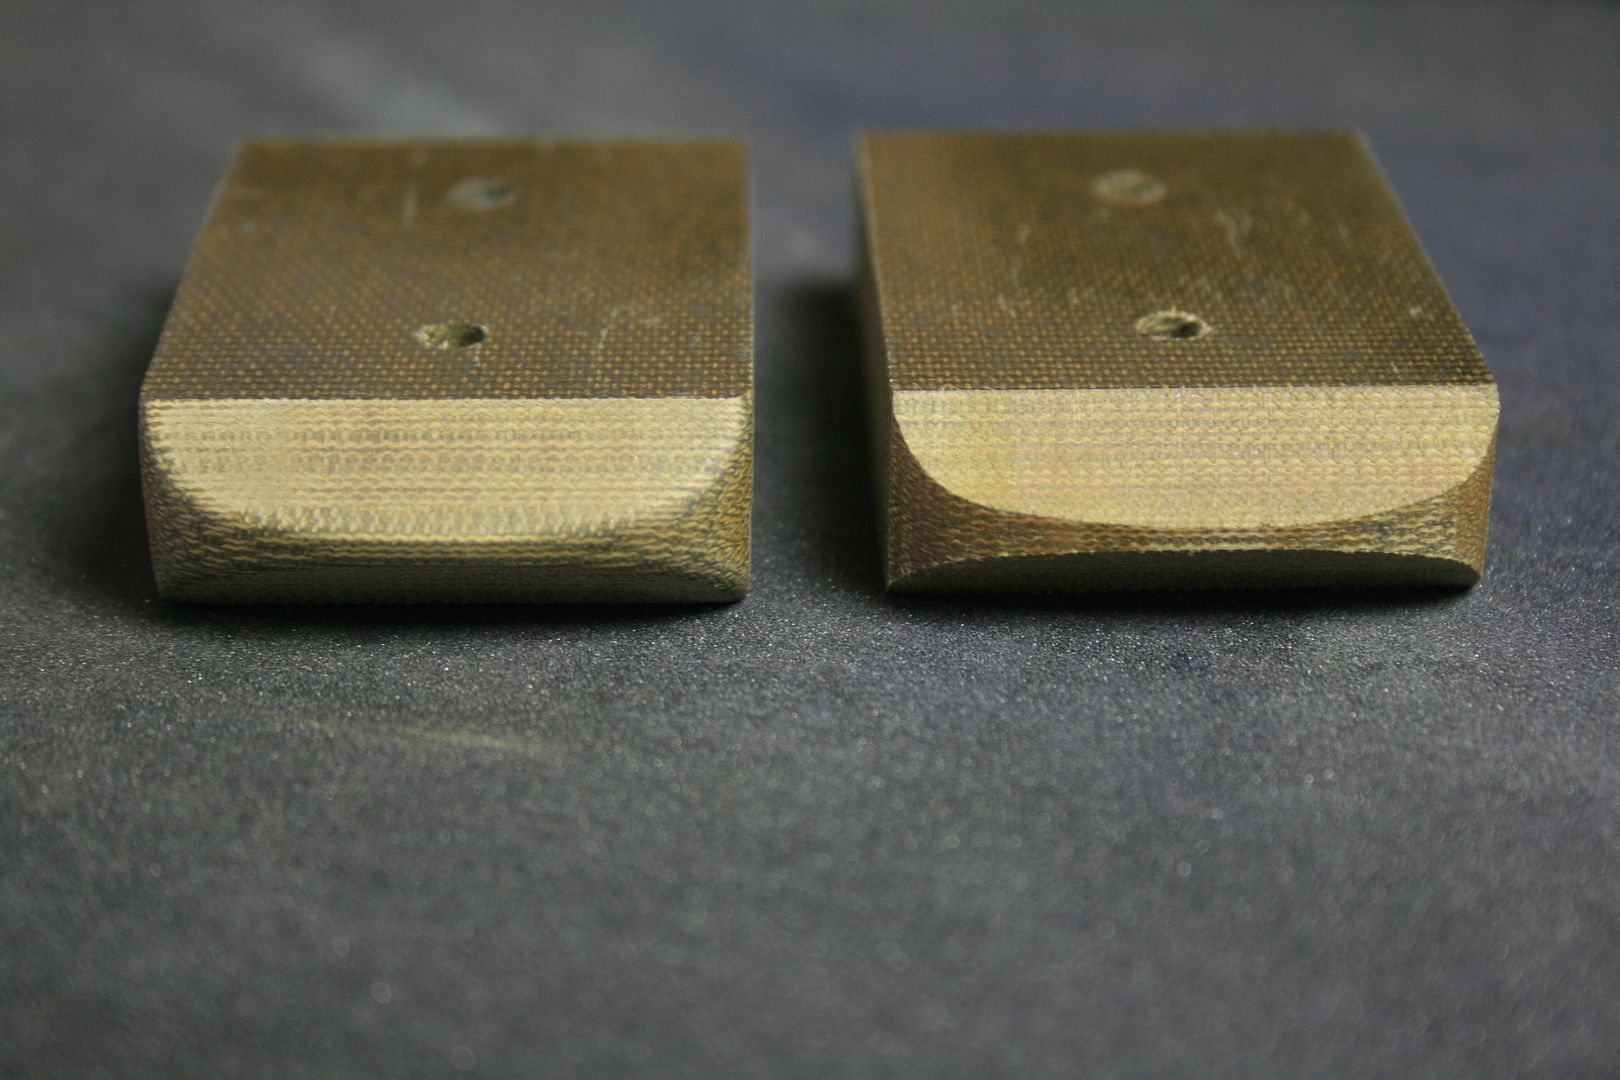
Another issue I have is keeping the top of the bevel on each side symmetrical. I am starting to get the feel for it though, so hopefully in time this will work itself out. When holding the tang in my left hand, I tend to hold it higher than the blade (instead of level), and also a little awkward. When holding the tang in my right hand, I tend to hold it a little lower than the blade.

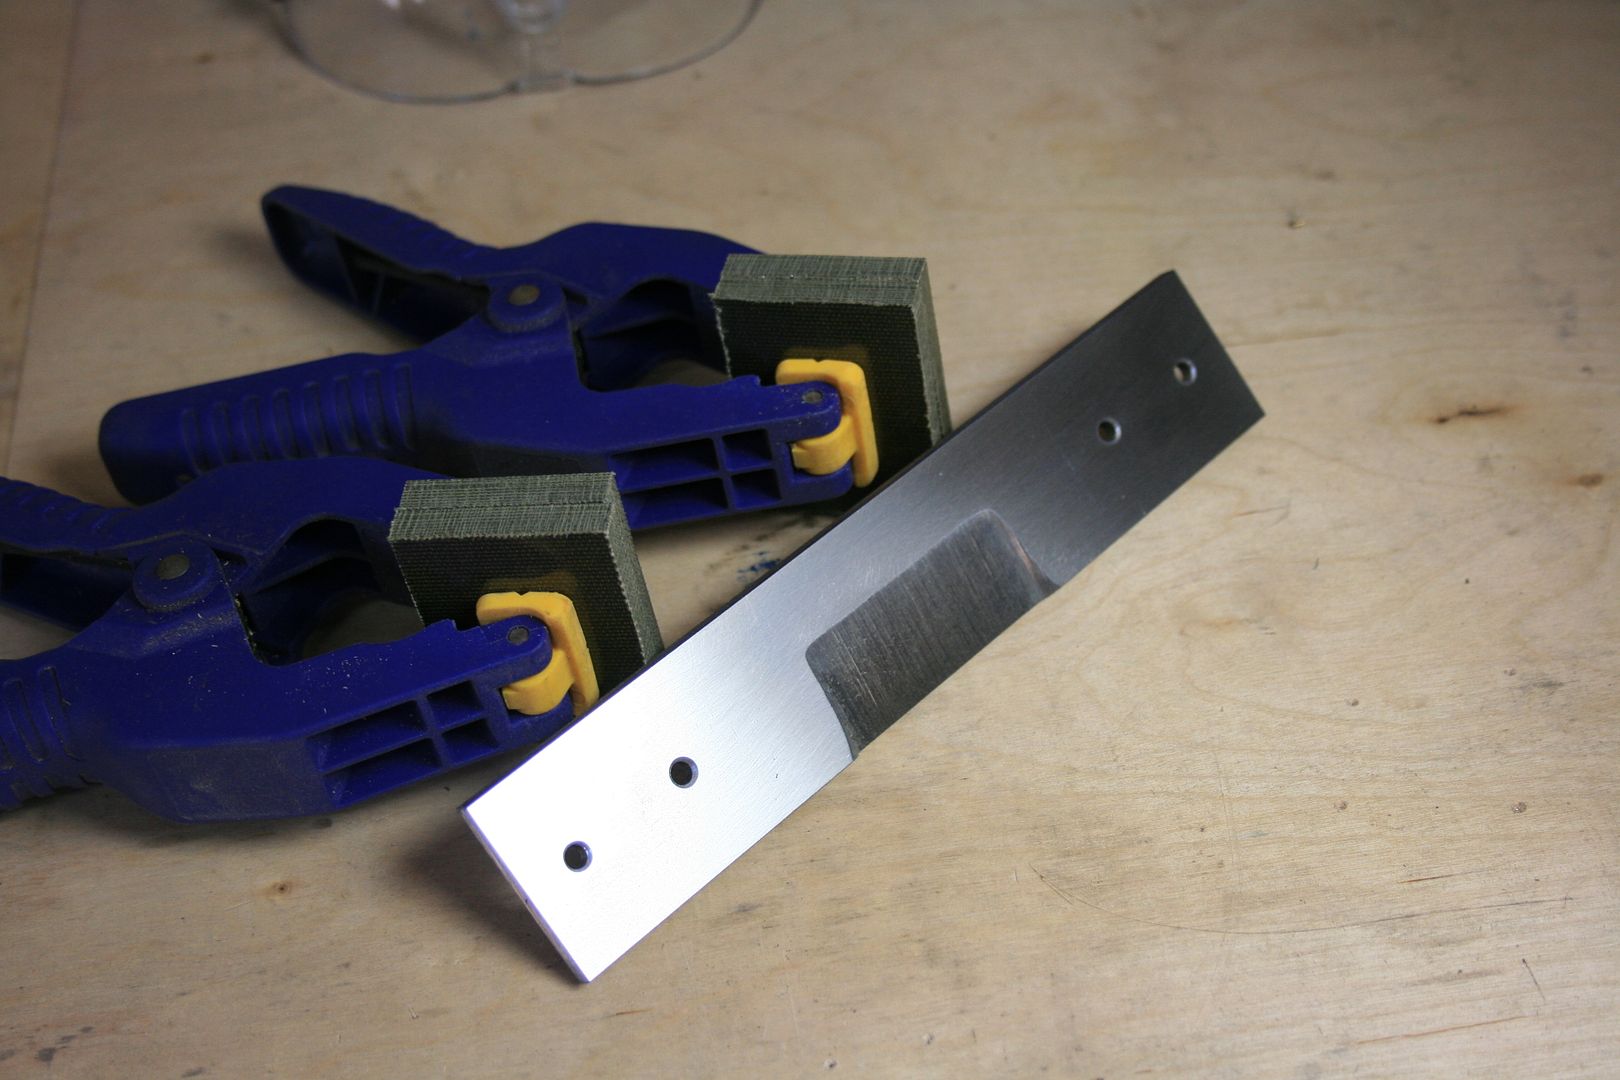
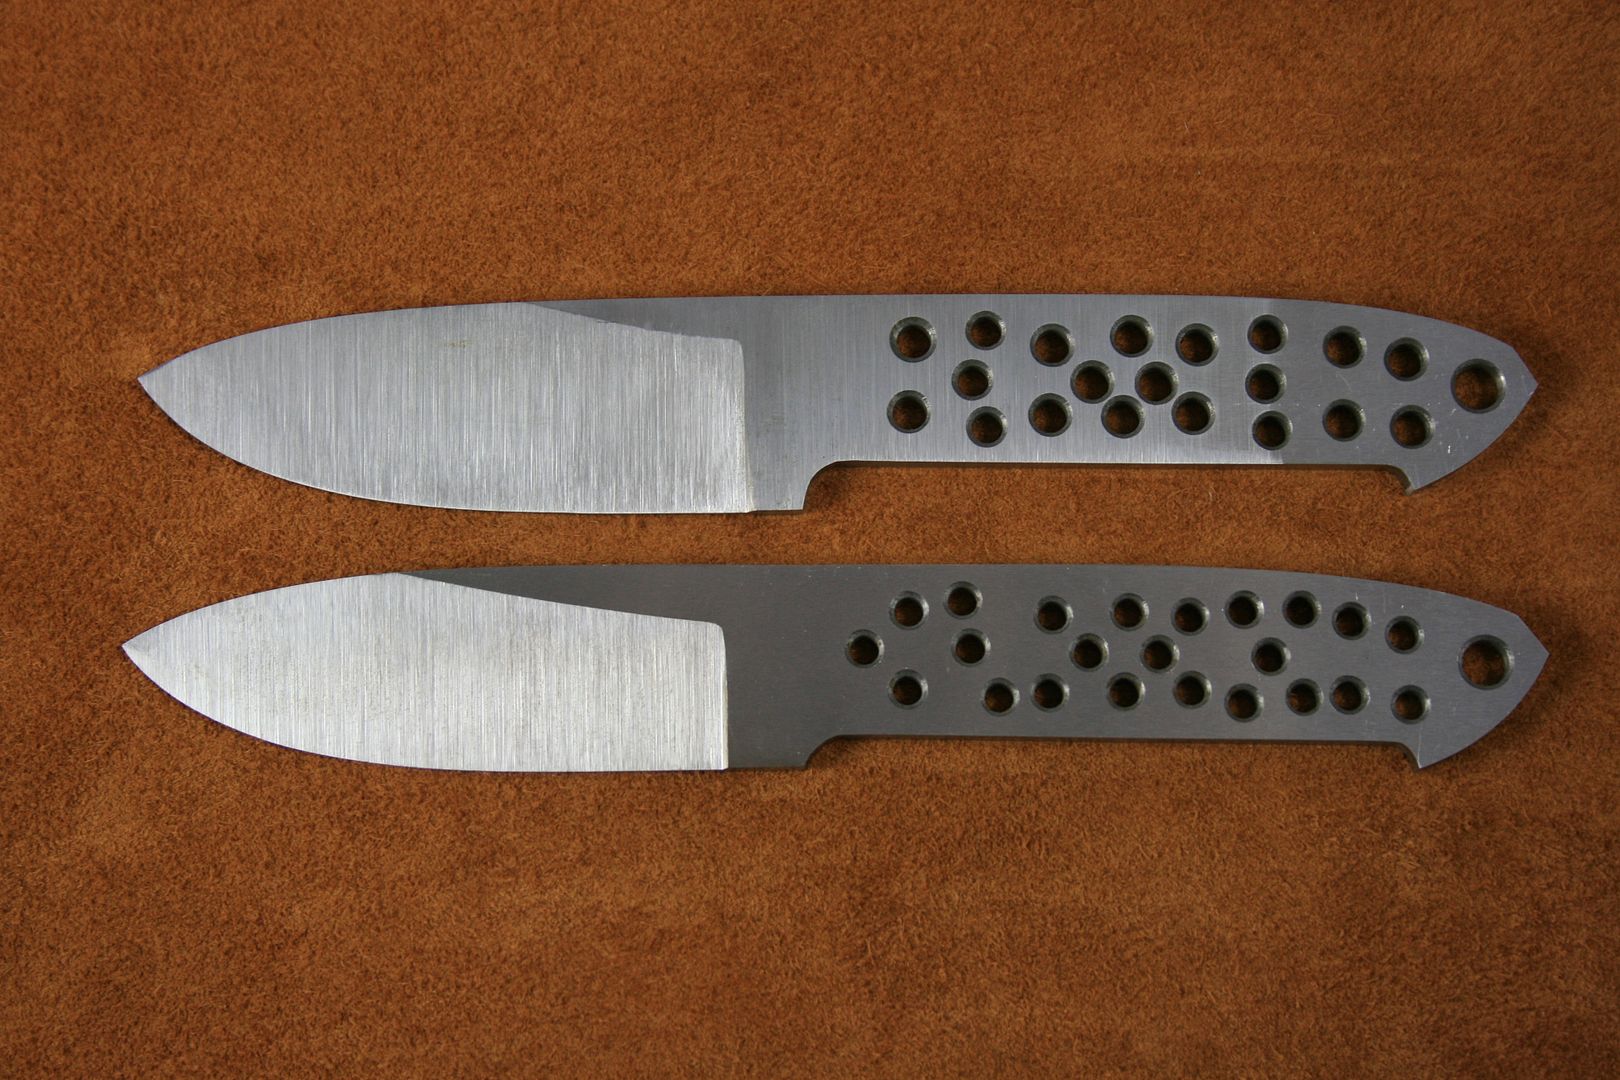
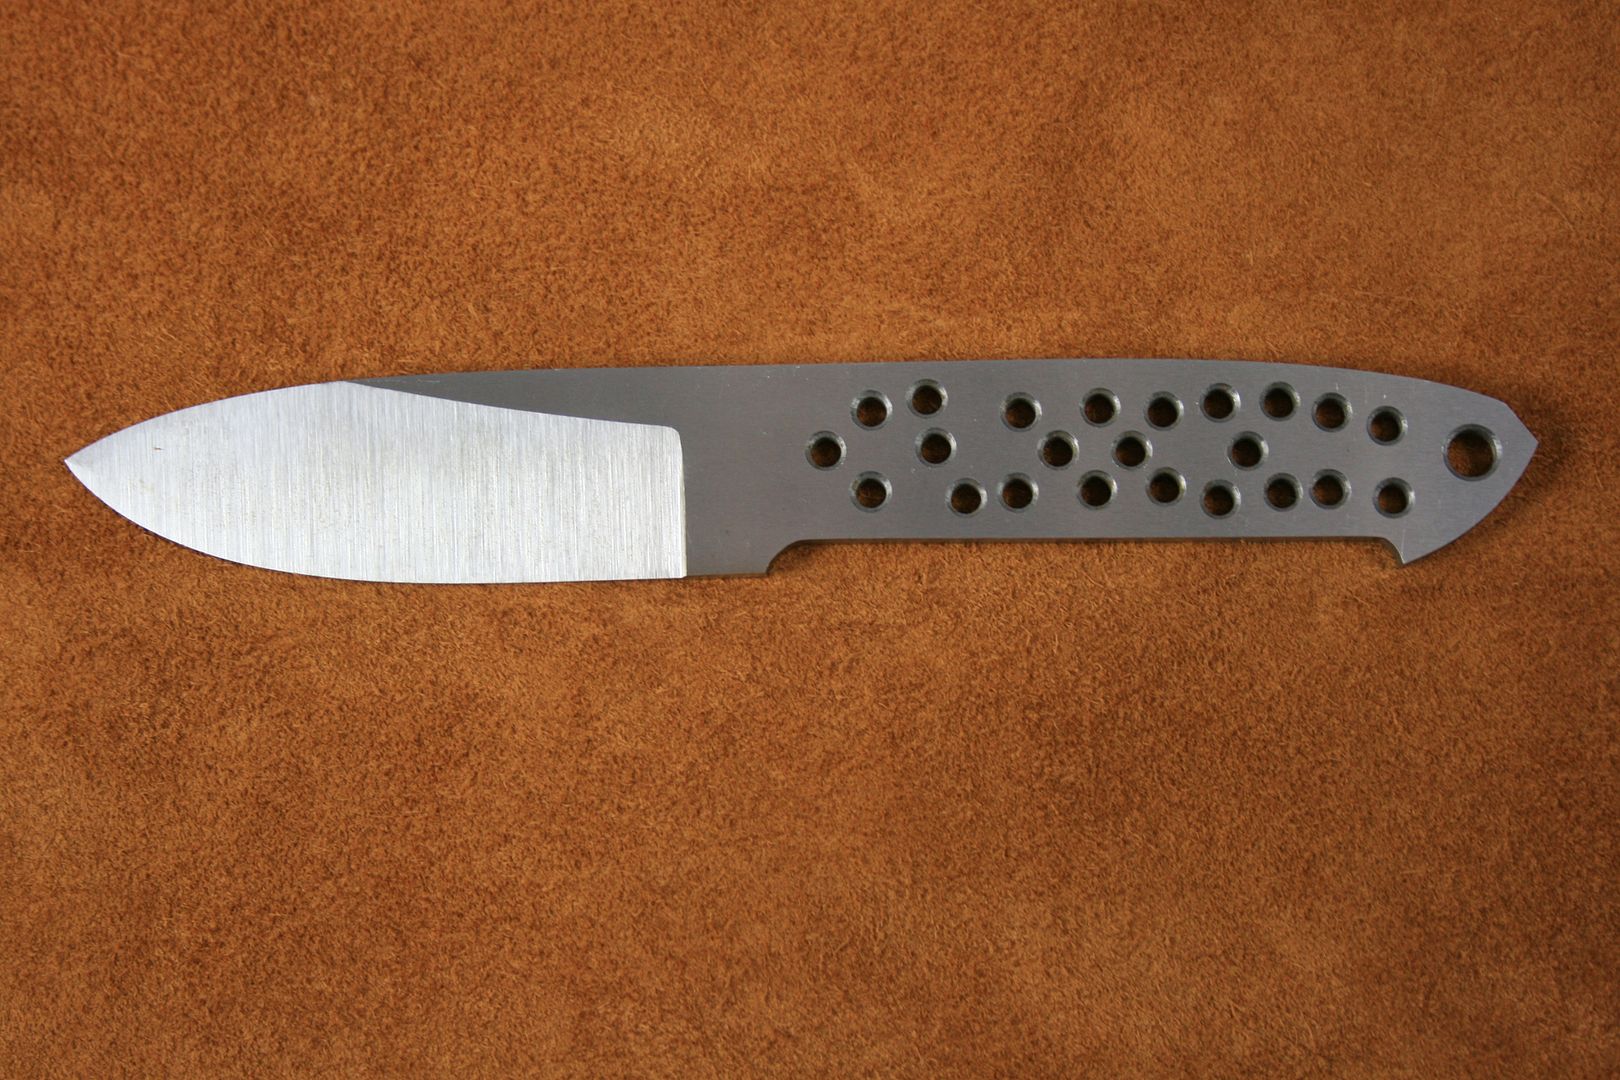
This is the most recent one, rough ground today. Feeling a lot better at my progress after seeing this one next to the first one.
2013Progress011_zpsd11cf341.jpg


2013Progress012_zps2b48488f.jpg


The one on bottom in this picture is the one I started a thread about the other day. The one on top is the most recent one and most likely the only one that will make it to the next step. I tried to do a tapered tang on a few of them also, which was a good learning experience and my questions on that will fill up another post. So I will save it for later.
2013Progress014_zps58976e10.jpg


2013Progress015_zps125577eb.jpg


2013Progress016_zps49e1a1a1.jpg


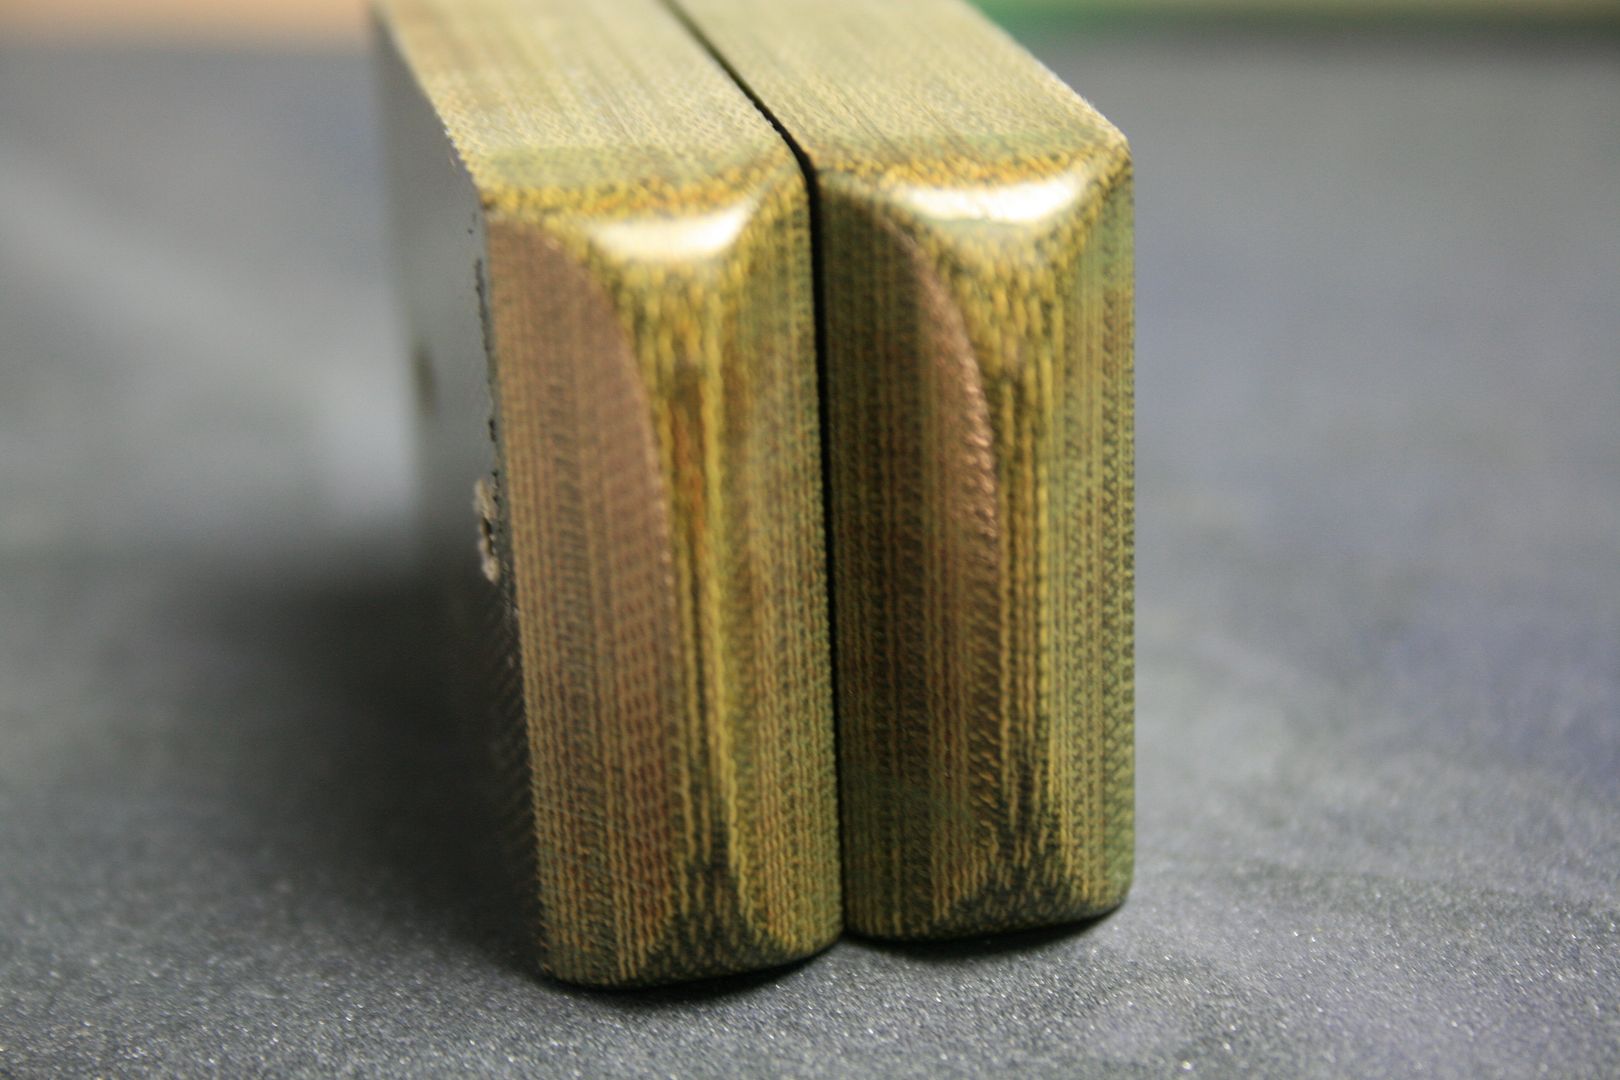
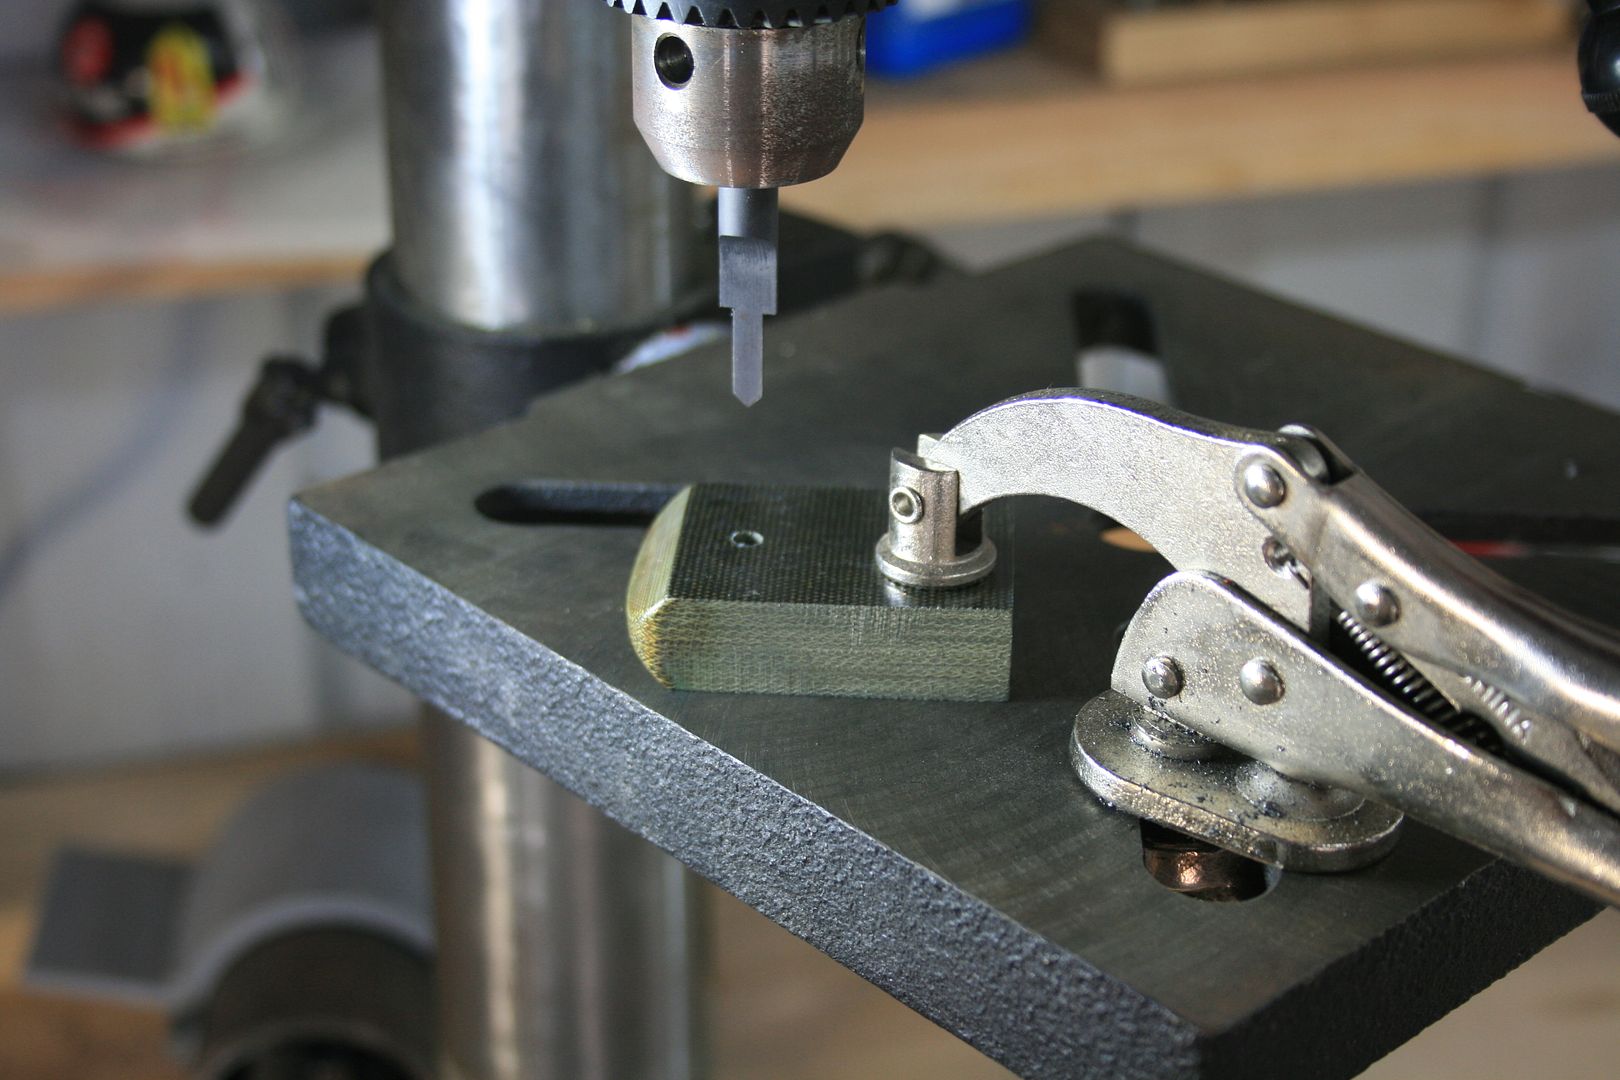
I am also having an issue getting symmetrical plunge lines. My process is to use a file guide and grind the plunges with a round file to my scribe lines. After this they are even. Once on the grinder, something happens and they get pretty crooked and scratched up. One thing I have noticed is that my belts are running a little crooked. I think one of the wheels is a little slanted. Or my ceramic platen I put on is a little crooked. So between my screw ups with holding the blade in opposite hands (I'm a righty) and the belt wobble, my plunge lines get crooked. Is there a trick to fix them with a file? I tried and only scratched it up real bad.

All in all, I am very happy with my progress and can't wait to have one completed.

Thanks for looking!
 
Last edited:
One thing I'd recommend is to start off left-handed with your grinding and then you're likely to have a better chance evening it up with your dominant side. As for control when you're grinding, brand-new belts are a real plus for doing a flat ground blade as you've got a great deal of surface in contact with the platen towards the end. Sometimes I'll push a belt a long time and then finally "tune up" the finish at the end with a very fresh one.
The blade thinning towards the middle is pretty common I'd say, are you grinding from the ricasso to the tip exclusively? I had some major issues for a long time with that, and even was getting some nasty gouges 2" from the plunge from rocking the blade. Going in one direction only seems to have helped.
 
I have been switching hands when starting because when I got the bubble jig, I decided it would be a good idea to start with my left hand for the reasons you mentioned. After doing this, my right hand felt awkward. Now, I am starting to feel a little more even on each side if that makes sense. I did start using brand new belts today (just got a new shipment in). Before, I was using them way too long. What a difference a new belt makes! I also found that using the bubble jig to get my initial grind then free handing the rest was producing better results. I think I was focusing too much on the jig and not the blade and grinder.

I am grinding from the ricasso to the tip for the most part. Sometimes I backtrack to the ricasso when trying to even it all up from accidentally placing the knife on the platen a little crooked and gouging the edge. Today, my grip slipped and I ground off a chunk of skin on my knuckle. This made me put my fingertips against the tip instead of under the tip (the grit getting into the cut was aggravating). This was actually a blessing in disguise because I feel more in control and seem to get the tip cleaner this way. I was having issues with the belt grabbing the knife and jumping it. So, the more I think about it, the way I held the blade before was putting a lot more pressure in the area that is getting thinner than the rest. Now, I think I will try to even out my fingers along the blade to keep even pressure on the whole area instead of using one or two fingers in the same spot on the blade.

Thanks for the advice Frank!
 
Last edited:
For heaven sake. Stop starting knives and not finishing them. Put a handle on a couple of those and finish one already. Several of them look pretty good. I can tell from looking at them that you are changing your grind angle as you draw across. Keep the angle the same and draw straight right or left. Also when you start the cut. Don't do it right at the riccasso. Start a little in front then when you feel the bevel and the belt reach the same angle (using very soft pressure). Then back up to the riccasso and start the cut. If an area starts getting thin. Spend less time grinding that area. Etc. oh. And did I mention. finish a knife? :). I get obsessed when I have a knife going and HAVE to see it at the next stage. Which is probably why I'm awake at 1 am. Lol. Good luck.
 
Thanks SHOKR!

Ricky, It is driving me crazy not having a knife finished yet! Being a perfectionist is not helping. The most recent one is good enough for me to take it to the next step, finally. Now if I can only keep it somewhat crisp looking during hand sanding. I have noticed that I am having a hard time keeping the blade straight on both sides. With my right hand, I feel it stays pretty straight. With my left, the initial contact with the belt is straight, then as I draw it to the left, my muscles are having a hard time adjusting to stay straight. I will try the way to start the grind that you mentioned. If I recall correctly, that is how Weldon Whitley does it in his video. This makes a lot of sense at keeping better control. Start with light pressure, get it where it needs to be, then apply pressure as needed. I need to slow down and visualize every grind before making full contact with the belt. Thanks for the great tips Ricky, and hope to have a completed one soon to show off to you!
 
I work from the ricasso out, then back into the ricasso if the grind is too shalllow. For me its a matter of feel. It takes time and practice to get it right. I think you need to move on and get one done. Your grinds look pretty good.
 
One more thing, Although I said draw straight across right or left, I don't actually do exactly that. I just think It will help you to keep that angle from creeping up. What I do Is, when I am extending the grind down the WIDTH of the blade (on in other words cutting the ricasso deeper and closer to the spine) I use gentle pressure on the lower half of the blade, but Mostly AS I INITIATE THE CUT, It takes less pressure to maintain the angle once it is moving across . At the same time I watch the BACK side of the blade where it is touching the belt at the top. I look for the tiniest bit of clearance there, then I go straight across left or right at the new angle. Very light pressure until I'm sure My cut is where I want it. And VOILA my cut goes a little toward the spine.

As it nears the spine and I'm now concentrating on getting a uniform thickness at the blade edge, That pressure now shifts up toward the top of the blade and I lean the edge into the belt ever so slightly, then cut across.

I'm obviously no an expert LOL, I made my first knife the end of November. But This is what is working for me and each knife I FINISH ;)... gets a little better.

One more thing I see as a reason for you to finish some of those knives, You are stuck at the grind because you want perfection. Lets say you get one perfect at the grind. Are you also perfect at finishing or putting a handle on a knife? Probably not. What if you ruin that perfectly grinded knife because you have never completed all the rest of the steps? All those attempts at blades where you are getting better each time would also bring all the other skills in your knife making tool chest along at the same rate so that the FINISHED PRODUCT of each knife is better and better.

I don't think I can handle a thread where you have a stack of perfectly grinded knives laying in your finish and handle boneyard as you perfect those skill too. Just sayin LOL
 
Last edited:
A brave act on your part showing the 'step children' and I can see this helping a lot of people.
First thing I noticed in the first picture was, " he's discovered sharp belts"....that is key. I have a couple of points which may help.

*Know your machine intimately.
Resolve any issues in it's function with washers, tape and shims. You must illiminate the
variables so you control it instead of the other way around. The belt wobble could
be the belt itself or points to other problems in the machine.
*Start with a plan.
Lay out your blank with what you want the blade to be.
Double scribe lines for the edge will help you guage
problem areas. An upper grind line will help determine areas that require more or less pressure between blade edge and the line.
*When grinding, don't be afraid to move your hand up or down depending on the belly in the blade. Or even lifting the tip or heel of the blade. Your scribe lines will guide you as to lift or drop. I'll often start a pass towards the middle of the blade lightly and work the edge of the belt towards the bevel in thick areas with more pressure. Use caution in doing this and know when to stop , then blend the whole grind flat again. Use fluid motions, don't linger in one spot.

There's much more but seeing your progression looks like you're heading in the right direction. 6 months isn't much time unless you do it every day. We all discover what works for us individually. If you get the chance, spend some time with an accomplished maker....seeing it done is much more effective than talking about it. I have a freind who's got his head over my left shoulder while grinding.(We're just freinds !) It's kind of annoying but I understand what he's doing.

Good luck,
Rudy
 
Steve,

Thanks for an interesting post. I'll throw in my 2 cents, and those who know better are encouraged to correct me so we'll all learn. First, I'd say that I like your profile and grinds, especially the later grinds. But, maybe you're putting too much emphasis on a perfect grind before heat treat. After heat treat you can "clean up" most of you're concerns with less course belts working at a slower pace. When the steal is annealed bad things happen more quickly. Second, are you marking the center line of the cutting edge and the spine, with parallel lines, . Marking the spine helps me make the sure the grind is centered on the cutting edge and spine. Third, I think one reason that the edge gets thinner as you grind away from the ricasso is that the grind lines are not parallel to the cutting edge. They rise. If the height of the grind is, say 3/4" from the edge at the ricasso, it should be that height to the point. The taper will come naturally as you apply more pressure grinding to the centerline at the tip.

Jay
 
I work from the ricasso out, then back into the ricasso if the grind is too shalllow. For me its a matter of feel. It takes time and practice to get it right. I think you need to move on and get one done. Your grinds look pretty good.

Thanks Eric, and I agree that I need to just get one done. I am starting to get the feel for it, especially on the most recent one. I felt more control of the blade, felt like I knew what needed to get done after almost every pass, and also the feel of different pressure needed in different spots. The first few knives felt very awkward (as you can see in the grinds) and I was way too new to the process and also the grinder. I guess I should have mentioned that I use a Craftsman 2x42 and since the first few grinds, I have been modifying the grinder as needed. Ceramic Platen, better belts, height of the machine, tilt of the machine, and most importantly - More Light. After experimenting with this, I feel I have made the grinder "more comfortable" and more efficient (which shows in the later grinds). Thanks for the advice!
 
One more thing, Although I said draw straight across right or left, I don't actually do exactly that. I just think It will help you to keep that angle from creeping up. What I do Is, when I am extending the grind down the WIDTH of the blade (on in other words cutting the ricasso deeper and closer to the spine) I use gentle pressure on the lower half of the blade, but Mostly AS I INITIATE THE CUT, It takes less pressure to maintain the angle once it is moving across . At the same time I watch the BACK side of the blade where it is touching the belt at the top. I look for the tiniest bit of clearance there, then I go straight across left or right at the new angle. Very light pressure until I'm sure My cut is where I want it. And VOILA my cut goes a little toward the spine.

As it nears the spine and I'm now concentrating on getting a uniform thickness at the blade edge, That pressure now shifts up toward the top of the blade and I lean the edge into the belt ever so slightly, then cut across.

I'm obviously no an expert LOL, I made my first knife the end of November. But This is what is working for me and each knife I FINISH ;)... gets a little better.

One more thing I see as a reason for you to finish some of those knives, You are stuck at the grind because you want perfection. Lets say you get one perfect at the grind. Are you also perfect at finishing or putting a handle on a knife? Probably not. What if you ruin that perfectly grinded knife because you have never completed all the rest of the steps? All those attempts at blades where you are getting better each time would also bring all the other skills in your knife making tool chest along at the same rate so that the FINISHED PRODUCT of each knife is better and better.

I don't think I can handle a thread where you have a stack of perfectly grinded knives laying in your finish and handle boneyard as you perfect those skill too. Just sayin LOL

Ricky, you have me cracking up! I really appreciate you taking the time to post your methods. It makes a whole lot of sense. After reading your post, a small light bulb popped on in my head and I figured out another reason I am probably getting the edge too thin in the middle. I have been afraid to place the blade on the belt at a different angle then before. I tried this before and took way too much off, but this was one of the first knives. I have been placing the knife on the belt at the same angle as the previous pass (with way too much pressure I'm sure), then adding more pressure at the bottom of the blade to try and walk the angle up. This is causing me to take too much steel off of the edge. I am also having a hard time placing the knife on the belt evenly (I am getting better at this though), so I also gouge the edge a bit and then try to fix it by bringing the rest of the bevel to that same depth, does that make sense?

When you said "At the same time I watch the BACK side of the blade where it is touching the belt at the top. I look for the tiniest bit of clearance there, then I go straight across left or right at the new angle. Very light pressure until I'm sure My cut is where I want it. And VOILA my cut goes a little toward the spine.", the light bulb clicked on. Watching the back of the blade for a small clearance makes a lot of sense. I have just been watching the back side to make sure the knife was flush to the belt. I think what I was trying to do was just add more pressure to the bottom (spine) of the knife instead of initially changing the angle. More pressure along the whole angle = the same angle, just deeper in the steel, DUH! For some reason, I felt that it was changing the angle. All it was doing was making the edge thinner which in turn brought the grind higher to the spine.

You are correct about not having experience with a knife after heat treat. This has popped up in my head so many times and it freaks me out. There is no way I can shape, drill, and grind on another ten knives, get them good enough for the final process only to mess them up in the handle and finish process. It would break me financially and most importantly mentally. So, I am going to take yours and Eric's advice about just finishing one. I don't think I could handle a thread like that either.

Thanks for the advice and humor. I needed a good laugh today.
 
A brave act on your part showing the 'step children' and I can see this helping a lot of people.
First thing I noticed in the first picture was, " he's discovered sharp belts"....that is key. I have a couple of points which may help.

*Know your machine intimately.
Resolve any issues in it's function with washers, tape and shims. You must illiminate the
variables so you control it instead of the other way around. The belt wobble could
be the belt itself or points to other problems in the machine.
*Start with a plan.
Lay out your blank with what you want the blade to be.
Double scribe lines for the edge will help you guage
problem areas. An upper grind line will help determine areas that require more or less pressure between blade edge and the line.
*When grinding, don't be afraid to move your hand up or down depending on the belly in the blade. Or even lifting the tip or heel of the blade. Your scribe lines will guide you as to lift or drop. I'll often start a pass towards the middle of the blade lightly and work the edge of the belt towards the bevel in thick areas with more pressure. Use caution in doing this and know when to stop , then blend the whole grind flat again. Use fluid motions, don't linger in one spot.

There's much more but seeing your progression looks like you're heading in the right direction. 6 months isn't much time unless you do it every day. We all discover what works for us individually. If you get the chance, spend some time with an accomplished maker....seeing it done is much more effective than talking about it. I have a freind who's got his head over my left shoulder while grinding.(We're just freinds !) It's kind of annoying but I understand what he's doing.

Good luck,
Rudy

Thank you for the tips Rudy. The machine and I are starting to finally get along. Working out the kinks in the grinder has been helping out tremendously. One thing I noticed while trying to taper tangs is that my platen is a little bent in the top right corner. It protrudes farther out than the rest of the platen. This is causing major problems when trying to taper the tang. I have since decided that tapered tangs can wait for now. I need to get the obvious knife making skills under my belt first. Not having a plan is one of my worst bad habits. I jump from one thing to another before actually fixing or finishing the previous thing.

I do scribe double lines on the edge before grinding, but lack in actually laying the knife out. I seem to get too ahead of myself and dive right in it. I will definitely put the upper grind line on the next blade. That should really help out with keeping it all symmetrical and show where pressure needs to be as you stated.

I have been at it, on and off, for about six months now. In my field, work slows to a crawl during the holidays and I have had quite a bit of time off work which has given me free time to research my butt off and get as much shop time in as possible. I have become obsessed with knifemaking over the past few months and have accomplished most of this progress in that time frame. Unfortunately, I am starting a new project in February that will have me driving 100 miles a day to and from the job site on top of putting in 10 to 12 hours a day on the job site. I love the money but not the freedom. My one and only new years resolution is to figure out a way to balance the two.

I think I have learned more about grinding in these few posts than anywhere else over the past six months. You guys are great! Thanks Rudy!
 
Thanks for the comments and tips Jay!

First, I'd say that I like your profile and grinds, especially the later grinds. But, maybe you're putting too much emphasis on a perfect grind before heat treat. After heat treat you can "clean up" most of you're concerns with less course belts working at a slower pace. When the steal is annealed bad things happen more quickly.

I have to say that you are 100% correct. Way too much emphasis on the grinds. After all of the things I have read, I have been a little nervous about sending a blade to heat treat when it is not symmetrical. I'm afraid of it warping. I am sure that is just an excuse coming from the perfectionist side of me.

Second, are you marking the center line of the cutting edge and the spine, with parallel lines, . Marking the spine helps me make the sure the grind is centered on the cutting edge and spine.

I mark parallel lines on the cutting edge but not the spine. I can see this really helping out also. I will have to try this on the next one.

Third, I think one reason that the edge gets thinner as you grind away from the ricasso is that the grind lines are not parallel to the cutting edge. They rise. If the height of the grind is, say 3/4" from the edge at the ricasso, it should be that height to the point. The taper will come naturally as you apply more pressure grinding to the centerline at the tip.

This has been driving me crazy. Holding the tang in my right hand, I can get a straight line to the cutting edge. When holding the tang in my left hand, I get a rise. Compensating for this, I make the opposite side the same. I feel that I am holding the blade parallel to the grinder, but once I check the results, its crooked. I have been passing a knife across the grinder over and over while it is turned off to try and figure out what is going on. I still have no clue. It still feels a little awkward in my left hand and I am pretty sure it is just that. I need to train my left side by practicing with the grinder off more.

Thanks Jay!
 
Well I'm going on 5 years and have not made my first knife from scratch. I've done a couple of kits and lots of study. I find myself going over and over trying not to make mistakes... About a month ago I talked with a gentleman here in Washington who has been making knives for over 40 years. When I told him my hang ups he laughed so hard I thought he was going to stroke out....

Here is the advice he told me...

"If your going to make a perfect knife, then use a mill or other machine and guess what it still won't be perfect..

what we see as flaws other see as and character. Even production knives are not all perfect and have their own little differences....Just keep at it....you are your own worst critic.

Just go ahead and finish one, and then another and keep going..."


You do very nice work, keep it up you will make it work...you can't fix all the problems the first or 15th time...

After 5 years and tons of personal and health issues I'm on my way to finishing my first knife....it wont be pretty and that's great, because I get to learn how to make # 2 better

Good Luck, just my 2 cents

Pandaman
 
Last edited:
Steve,

What type of steel are you using? Steels like A2 are pretty warp free (and relatively inexpensive), especially with the amount of steel left on your grinds. Again, I wouldn't worry about warping, if you don't grind the edge until its sharp. And if you do get some warpage, at the cutting edge, you could probably grind it out although your profile may change a bit. I've even ground CPM 154 to a pretty sharp edge on slipjoint blades, which are small and thin, and not had warping.

I had, and still have, the same problem holding the blade at a perfect right angle to the belt while grinding, especially holding the blade in my left hand. Something that helps me is to put masking tape at a right angle to the cutting edge, on the handle side of the ricasso, with the tape facing me, so when I start to grind I can use that as a reference point. In other words, grind with belt parallel to the tape. I think the problem comes from the belt contact point being substantially below your eye level. For some reason I also tend to grind with the tip higher than it be. The tape helps me as a reference.

And, I know what you mean about "chasing" grinds to make the sides symmetrical. I think that is just part of the "sport". But, as I said, save some of that final work for after haet treat. And although you haven't asked, one word of caution after heat treat. I ground a folding knife blade to exactly where I wanted it before heat treat. After heat treat, the blade had to be cleaned up. So I used what I thought was a pretty mild 400 grit belt. Man, did that wreck my perfect grind PRONTO!

Jay
 
Panda,
The man was absolutely right, just keep at it.
As incentive, I have a severely gone bad hollow ground blade hanging right over my grinder. When I look at it I always remember what went wrong and makes me pause long enough to think about what I'm doing. That was over 25 years ago, they can't all be right but there's a lesson somewhere in each one.

Rudy
 
Last edited:
Well I'm going on 5 years and have not made my first knife from scratch. I've done a couple of kits and lots of study. I find myself going over and over trying not to make mistakes... About a month ago I talked with a gentleman here in Washington who has been making knives for over 40 years. When I told him my hang ups he laughed so hard I thought he was going to stroke out....

Here is the advice he told me...

"If your going to make a perfect knife, then use a mill or other machine and guess what it still won't be perfect..

what we see as flaws other see as and character. Even production knives are not all perfect and have their own little differences....Just keep at it....you are your own worst critic.

Just go ahead and finish one, and then another and keep going..."


You do very nice work, keep it up you will make it work...you can't fix all the problems the first or 15th time...

After 5 years and tons of personal and health issues I'm on my way to finishing my first knife....it wont be pretty and that's great, because I get to learn how to make # 2 better

Good Luck, just my 2 cents

Pandaman

Pandaman, That is great advice! Thanks for the comment and I am most likely going to go ahead and send my best 4 to heat treat. About to get out in the shop for some hand sanding. Good luck on your first one my friend!


Steve,

What type of steel are you using? Steels like A2 are pretty warp free (and relatively inexpensive), especially with the amount of steel left on your grinds. Again, I wouldn't worry about warping, if you don't grind the edge until its sharp. And if you do get some warpage, at the cutting edge, you could probably grind it out although your profile may change a bit. I've even ground CPM 154 to a pretty sharp edge on slipjoint blades, which are small and thin, and not had warping.

I had, and still have, the same problem holding the blade at a perfect right angle to the belt while grinding, especially holding the blade in my left hand. Something that helps me is to put masking tape at a right angle to the cutting edge, on the handle side of the ricasso, with the tape facing me, so when I start to grind I can use that as a reference point. In other words, grind with belt parallel to the tape. I think the problem comes from the belt contact point being substantially below your eye level. For some reason I also tend to grind with the tip higher than it be. The tape helps me as a reference.

And, I know what you mean about "chasing" grinds to make the sides symmetrical. I think that is just part of the "sport". But, as I said, save some of that final work for after haet treat. And although you haven't asked, one word of caution after heat treat. I ground a folding knife blade to exactly where I wanted it before heat treat. After heat treat, the blade had to be cleaned up. So I used what I thought was a pretty mild 400 grit belt. Man, did that wreck my perfect grind PRONTO!

Jay

Jay, I am currently sticking with 440-C. A few of the knives in the pictures are O1. I will have to try using the tape idea. What I have been doing is setting my plunge cuts with a file guide and round file. I try not to grind in the plunge until the end but it has proven to be a little more difficult to achieve than expected. So, when I am grinding, I have been using the plunge on the side of the knife facing me as a reference to how to hold the blade. I just line the plunge up parallel with the belt. Once I figured this out (on my latest attempt), they became a little more symmetrical.

I am pretty nervous about the process after heat treating, but I am going to take yours and others advice and take it slow using new belts. Now I have to try and remember which one of these is O1. I knew I should have marked them!
 
Panda,
The man was absolutely right, just keep at it.
As incentive, I have a severely gone bad hollow ground blade hanging right over my grinder. When I look at it I always remember what went wrong and makes me pause long enough to think about what I'm doing. That was over 25 years ago, they can't all be right but there's a lesson somewhere in each one.

Rudy

That is exactly where all of these are hanging. They remind me of my mistakes to hopefully keep me from making the same ones again.
 
A few Hours in the Shop

I had some free time to play around in the shop today. My hand sanding tools and set up are lacking to say the least, so I spent a little while making two sanding sticks. All I had available was a piece of 1/4" X 3/4" X 12" brass barstock and about 7" of 3/16" 440-C. I am going to get a piece of angle iron for the vise because my wood set up is a bit of a pain. I figure I will go ahead and up my odds at completing a better blade from the get go by putting in a little work in the beginning.

Took some pictures along the way...

Here is my little shop... 10' X 20' shed. I am going to have to figure out something better before summer time hits. I was thinking about framing it out and insulating it...
2013Progress003.jpg


2013Progress004.jpg


2013Progress007.jpg


2013Progress008.jpg


These are the materials except I changed my mind about the hardware. I went with 1/4" brass tubes on the brass bar and stainless loveless bolts on the 440-C...
2013Progress001.jpg


Ground down a bevel in the middle and rounded off the corners...
2013Progress009.jpg


Cut out the micarta and glued the two pieces together to sand them symmetrical...
2013Progress002.jpg


Holes drilled, micarta sanded flat on the granite block, epoxy areas scuffed up including pins, and everything cleaned with acetone...
2013Progress010.jpg


Glued up and clamped down...
2013Progress013.jpg


Starting the stainless one. I decided to put micarta on both sides of the steel on this one. There are probably better ways to do the next steps but this is what I came up with. Glued and clamped the four pieces of micarta together and laid out a pattern on the steel...
2013Progress017.jpg


Drilled the holes and then sanded as flat as possible by hand on the granite plate...
2013Progress018.jpg


Ground the bevel in the middle...
2013Progress019.jpg


Evened up the micarta on all four sides...
2013Progress021.jpg


Next I sanded a 45* angle on the micarta and glued it up to the steel where there was a little bit of material sticking out all around the steel...
2013Progress022.jpg


I did this to drill my holes...
2013Progress023.jpg


Popped them off and now time to clean up the front of them...
2013Progress024.jpg


Rounded off the corners...
2013Progress026.jpg


Time to round all of the edges using 400 grit on a mouse pad...
2013Progress027.jpg


Here is the difference between the two after sanding one on the mouse pad...
2013Progress030.jpg


Both sanded and somewhat polished. My buffing wheel is very dirty and I really need to replace it. It probably has 4 different types of compound on it :shush:...
2013Progress031.jpg


Drilling the countersink for the loveless bolts...
2013Progress035.jpg


Looks pretty good to me. I countersunk the hole about halfway through the micarta, maybe a bit more. Is this what all of you do when using loveless bolts?...
2013Progress036.jpg


Popped them apart and sanded the glue off and tried to get as flat as possible on the granite plate...
2013Progress038.jpg


Put it all together to check the fit...
2013Progress041.jpg


Take it apart and get ready for the epoxy...
2013Progress042.jpg


So after all of this (about 4:00PM) I started to get a little dizzy and realized I hadn't eaten anything today. Time for a late lunch. Peperoni pizza made from scratch on garlic bread...
2013Progress044.jpg


Whhooo! Now I feel better.

Here I have everything ready to stick it all together with epoxy...
2013Progress046.jpg


Scuffed up everything with 80 grit, drilled a few extra holes, and cleaned with acetone. Next it got clamped in the panavise and all put together...
2013Progress047.jpg


Cleaned up all of the overflow epoxy and will let it sit overnight to cure...
2013Progress050.jpg


Next, I got the brass bar and cut the excess brass tubing off...
2013Progress045.jpg


Countersunk the brass tubing a bit and shaped the handles smooth and comfortable...
2013Progress054.jpg


2013Progress052.jpg


Tomorrow I will hand sand it a bit and clean them both up. This should help me eliminate my problem with washing out all of the clean edges and help keep an even surface.

Thanks for looking!
 
Back
Top