2013 Knife Making Progress

Steve,
Awesome tool. Well crafted. Reminds me that I put together a GIB grinder and had as much fun doing that as any knife I've made. A friend of mine bought a Beaumont KMG because he wanted to get started making knives right away. I told him I wanted to learn how to work metal. Anyway never regretted the time it took to learn how to drill and tap holes.
You said that you're using 440C. I wouldn't worry about that warping. O1 I have not used. Maybe you could put a little lemon juice on the blades and see which stain to learn which is O1 and which is 440C?

Jay
 
Thanks Jay! There is always a great feeling turning raw materials into something useful. Putting lemon juice on the O1 will make it stain worse than the 440-C, correct?
 
Steven, one question. Do you wear glasses? I have noticed that my eyeglasses(old fart) no line bifocals distort the lines when I am grinding just enough to throw me off square. Once I figured it out, things went alot better. Just a shot in the dark. Awesome looking shop, BTW. I have the same bandsaw, but I never put the legs on it. I lag bolted it to a dresser hieght bench and it makes the table the perfect level for me to cut out blanks. LaGrange had it right I think, you need to grind some more blades to get to know your machine-you are doing fine. Gil Hibben says your rough grind should be about 80%, not perfect and send it to heat treat. you can clean it up afterward, and by all means, finish one. You will not be completely happy with it, but thats what spurs you on to make the next one. I look forward to seeing it man, dont make us wait too long :)

-sd

Superdave, I do not wear glasses, but I think it might be getting close to where I need them. Thanks for the comments. I am having trouble with this bandsaw at the moment. After trying to adjust the blade tension over and over, my blades keep popping off. I need to spend more time tinkering with it. Keeping it on its legs is also causing it to rock back and forth which seems to be caused by the motor and belt system. Does yours feel more rigid having it attached to a bench?

I am going to finish the hand sanding set up today and work on getting a few blades out to heat treat. I hope we don't have to wait too long for a finished one. :3:
 
Last edited:
Superdave, here are a few shots of my old shop. When the weather got a little cooler (below 100*), I cleaned out the shed and called it home. Working under a patio has its drawbacks, like equipment exposed to the elements. Things were getting rusty fast. Now they get rusty a little slower.

253_zpsf4b09090.jpg


This is when the baby grinder was new...
255_zpsc940d3a0.jpg


256_zps43bcbe79.jpg


I was sitting down working. It was at a very bad height and caused quite a few back pains...
257_zps48adb048.jpg


I am very glad I was able to upgrade to an indoor (sort of) shop.

Man, I really need to clean that green crap off of the house!
 
. I am having trouble with this bandsaw at the moment. After trying to adjust the blade tension over and over, my blades keep popping off. :

On the outside of the tension arm which holds the upper wheel, there should be a set screw that kicks the upper wheel in and out. On mine, turning the screw in tilts the top wheel outwards to keep the blade tracking correctly. Just an idea.

Rudy
 
Thanks Rudy, I have been messing with the screw and am still having problems. I have been setting it and the blade tension to different tensions and experimenting. It seems I can get about 20 minutes or less of cutting before it pops off. I also keep having a problem with teeth breaking off of the blade on the first few cuts. I am almost sure it has to do with the initial contact from blade to steel. I am using the bi-metal blades (from Harbor Freight). It is like everything else, trial and error, luckily my errors are getting fewer and fewer, I think.

One cause could be from trying to slightly turn the steel while cutting. I noticed that it doesn't like to get off track from a straight line very much. Although, it has popped off when cutting a straight line.
 
Steve,
I don't know if annealed 440c will stain but even hardened O1 will stain Grey with acid like in citrus fruit, tomatoes etc. Hardened 440C won't. Just a dumb questioning the band saw. Is it a metal cutting band saw ?
Jay
 
First of all......
Get rid of the HF blades unless they're a name brand. I did see that they had Starrett blades at my local store but I have mine made locally. If you're losing teeth, it might be you need a higher tooth count for what you're cutting. I find that 14-18 teeth per inch in the wavy configuration works on everything I cut (3/32-1/4), even moderate radii. The wavy blades give you more kerf and relief in a cut. The adjustment took trial and error but I ran the blade with the wrench in the set screw and did quarter turns untill it behaved properly. If you over adjust the wheel, the rim on the wheel will dull your blade because it's always trying to climb up the rim. It takes a bit of tinkering but I haven't touched it in about 10-12 years. While on the subject....check your gear box. Mine dries up at least once a year and I repack the gears and shaft with a heavey gear grease. That gear box is marginal at best, it doesn't seal properly, bad design. The lubricant is always sitting at the bottom of the box where no moving parts touch it. Know your tools inside and out. I bought that saw in '86 and it's still kicking, think I got my $130 worth ? lol.

I found that keeping the guide block all the way up aids in cutting a radius. If it's down, there's not enough play in the blade. It still helps to back out and open up the cut so the rear of the blade can move.

Rudy
 
Last edited:
Steve,
I don't know if annealed 440c will stain but even hardened O1 will stain Grey with acid like in citrus fruit, tomatoes etc. Hardened 440C won't. Just a dumb questioning the band saw. Is it a metal cutting band saw ?
Jay

Jay, Yes it is a metal cutting saw. It's one from Harbor Freight. Actually pretty good machine for the price.

First of all......
Get rid of the HF blades unless they're a name brand. I did see that they had Starrett blades at my local store but I have mine made locally. If you're losing teeth, it might be you need a higher tooth count for what you're cutting. I find that 14-18 teeth per inch in the wavy configuration works on everything I cut (3/32-1/4), even moderate radii. The wavy blades give you more kerf and relief in a cut. The adjustment took trial and error but I ran the blade with the wrench in the set screw and did quarter turns untill it behaved properly. If you over adjust the wheel, the rim on the wheel will dull your blade because it's always trying to climb up the rim. It takes a bit of tinkering but I haven't touched it in about 10-12 years. While on the subject....check your gear box. Mine dries up at least once a year and I repack the gears and shaft with a heavey gear grease. That gear box is marginal at best, it doesn't seal properly, bad design. The lubricant is always sitting at the bottom of the box where no moving parts touch it. Know your tools inside and out. I bought that saw in '86 and it's still kicking, think I got my $130 worth ? lol.

I found that keeping the guide block all the way up aids in cutting a radius. If it's down, there's not enough play in the blade. It still helps to back out and open up the cut so the rear of the blade can move.

Rudy

Rudy, Just ordered a Starrett, 14 -18 TPI, wavy pattern. Thanks for the tips. I am going to play with it in the morning. I did move the guide block back up earlier and it did cut pretty good cutting a curve. Well, I hope they still make them like they did in '86! That is crazy! That is a prime example as to why to take extra good care of your equipment.
 
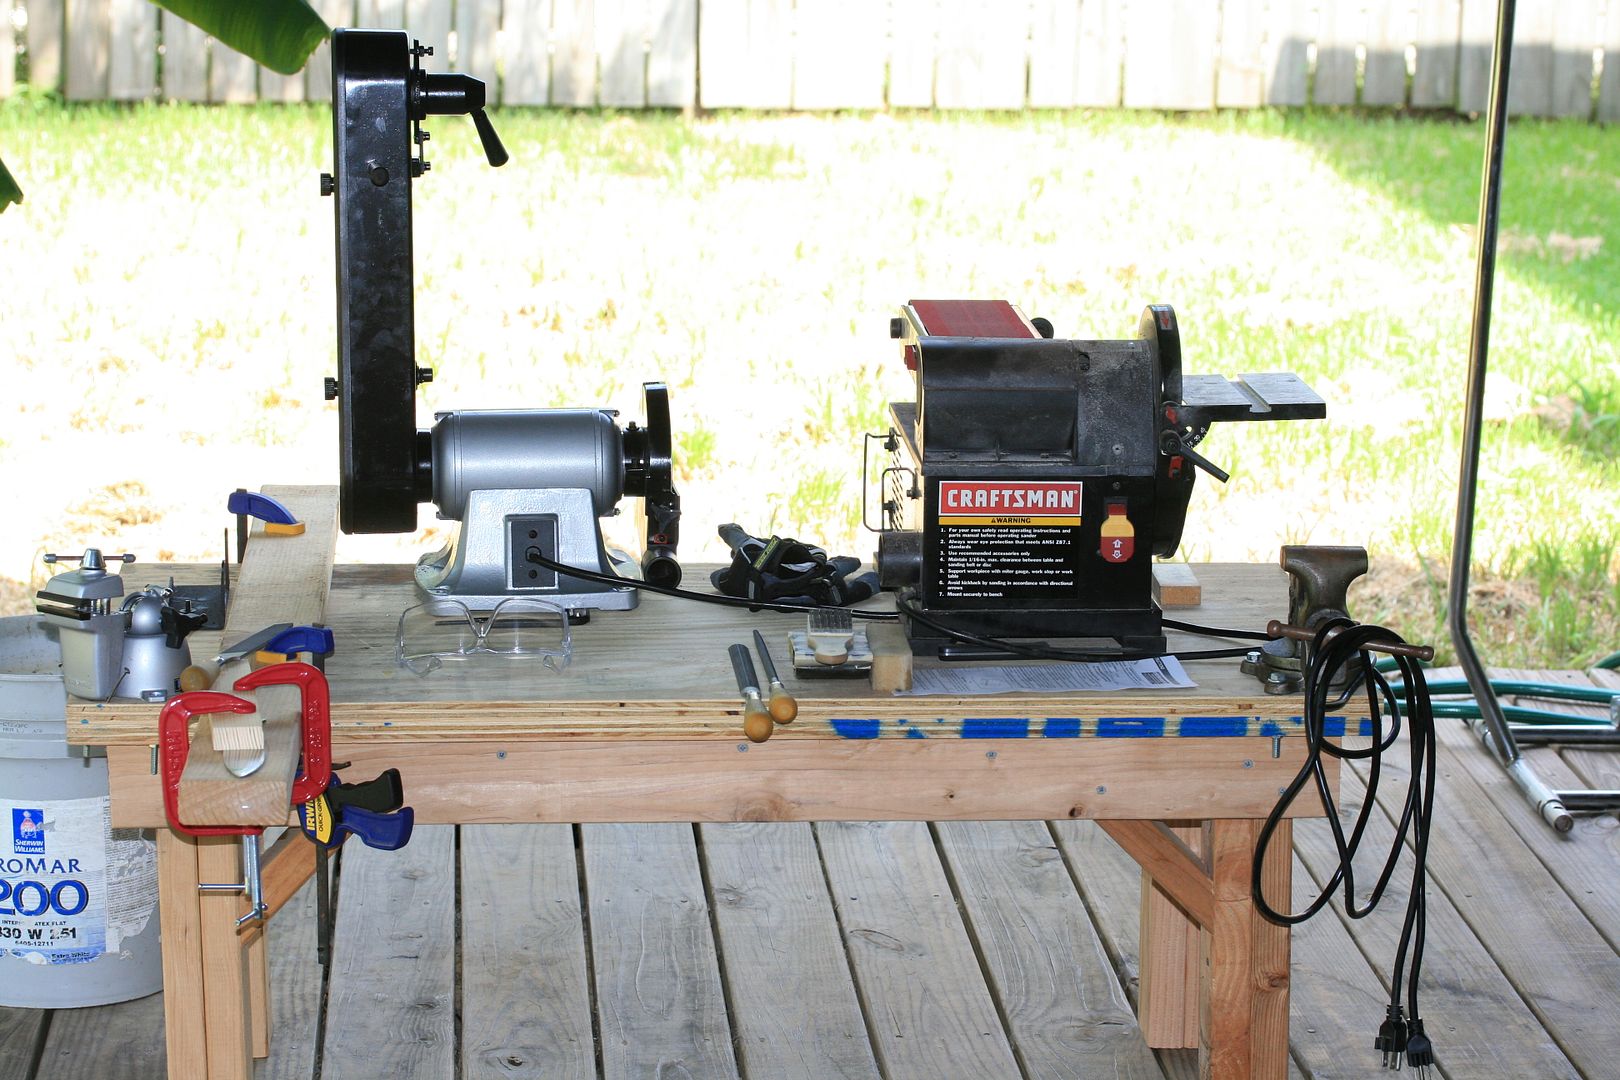
Got a little more work done on the hand sanding set up today. Not as much as I would have liked, but I found a tool store close to my house and couldn't pull myself out of there. The difference between a well made machine and a Sears machine is astounding. I sat there playing with everything in amazement of how smooth and robust they feel. Now I need a new drill press, bandsaw, mill, etc. :biggrin: Back to reality!

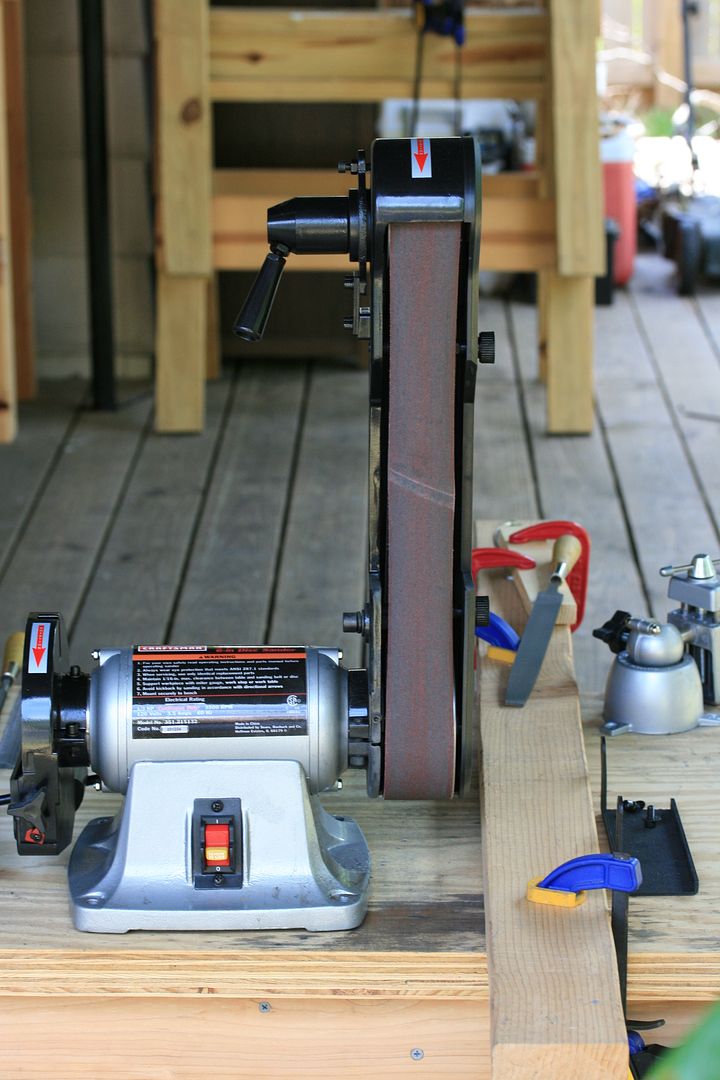
All of these ideas for the hand sanding set up came from watching Nick Wheeler's youtube videos and reading one of his WIP threads. After watching his videos, I realized that most of the things I was doing were causing more problems than good; washing out the edges and plunge line, tip not supported, bench shaking like crazy, and so on. Instead of fighting the issues, I decided to go ahead and build a little sanding station and jigs. Since I use a craftsman, every blade will most likely need a lot of hand sanding anyway.

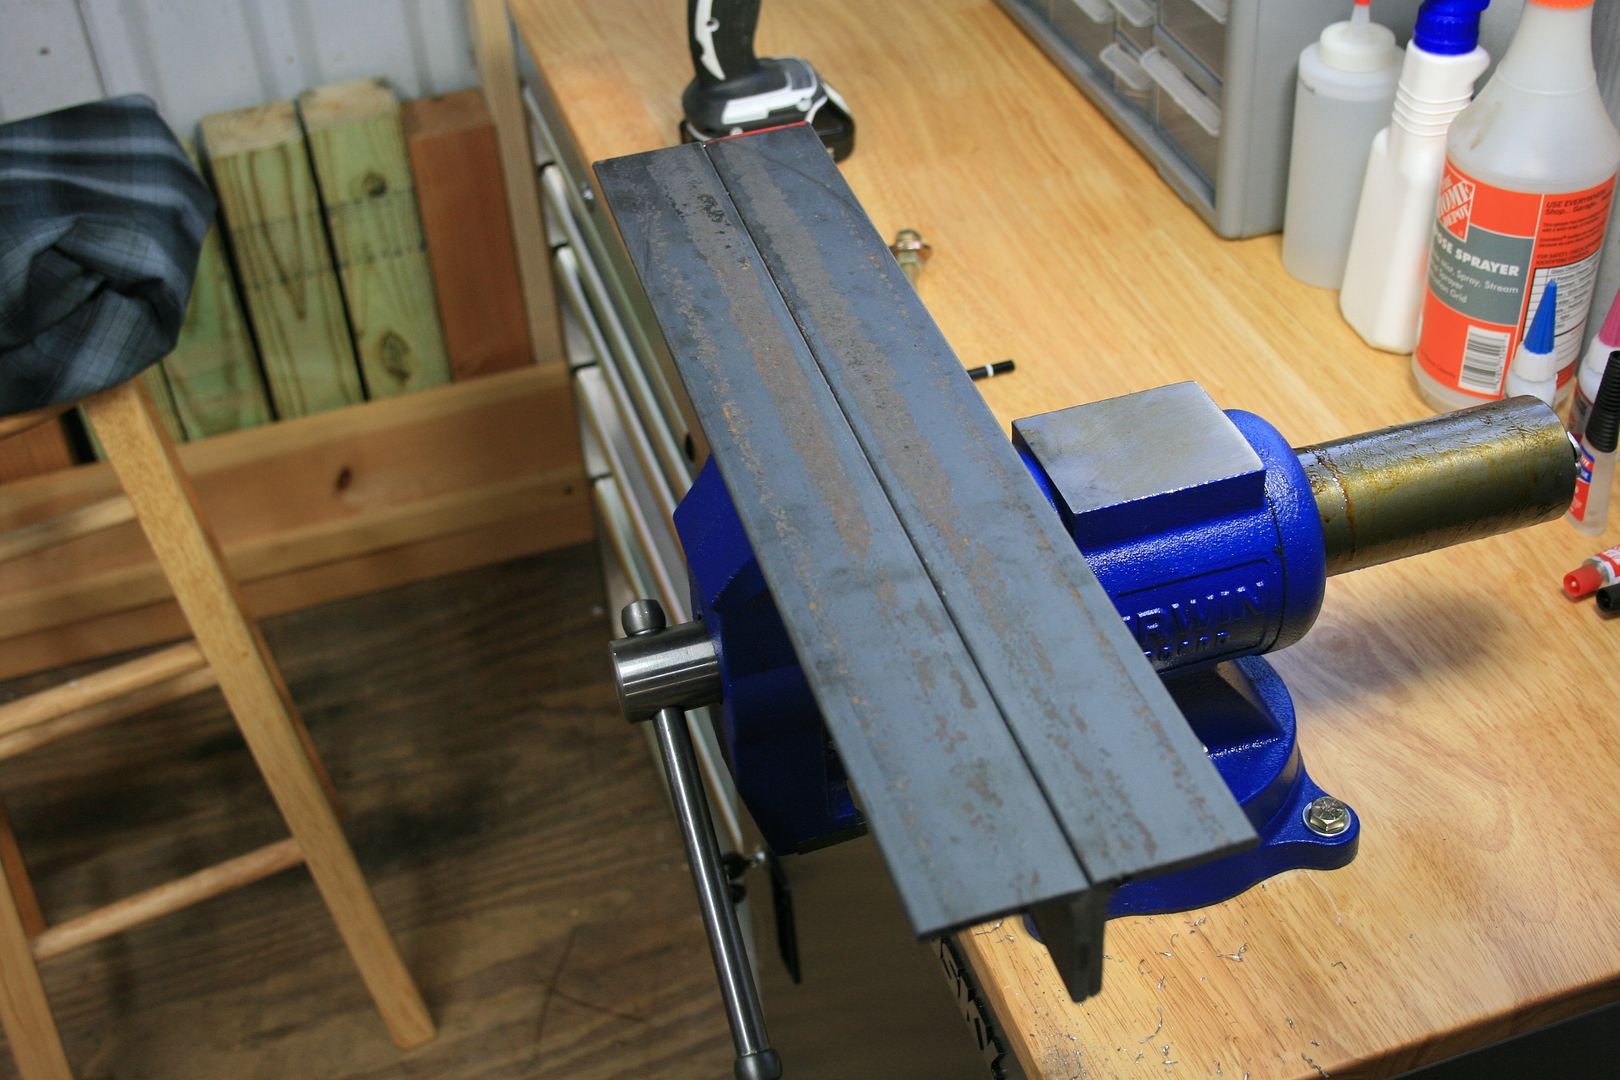
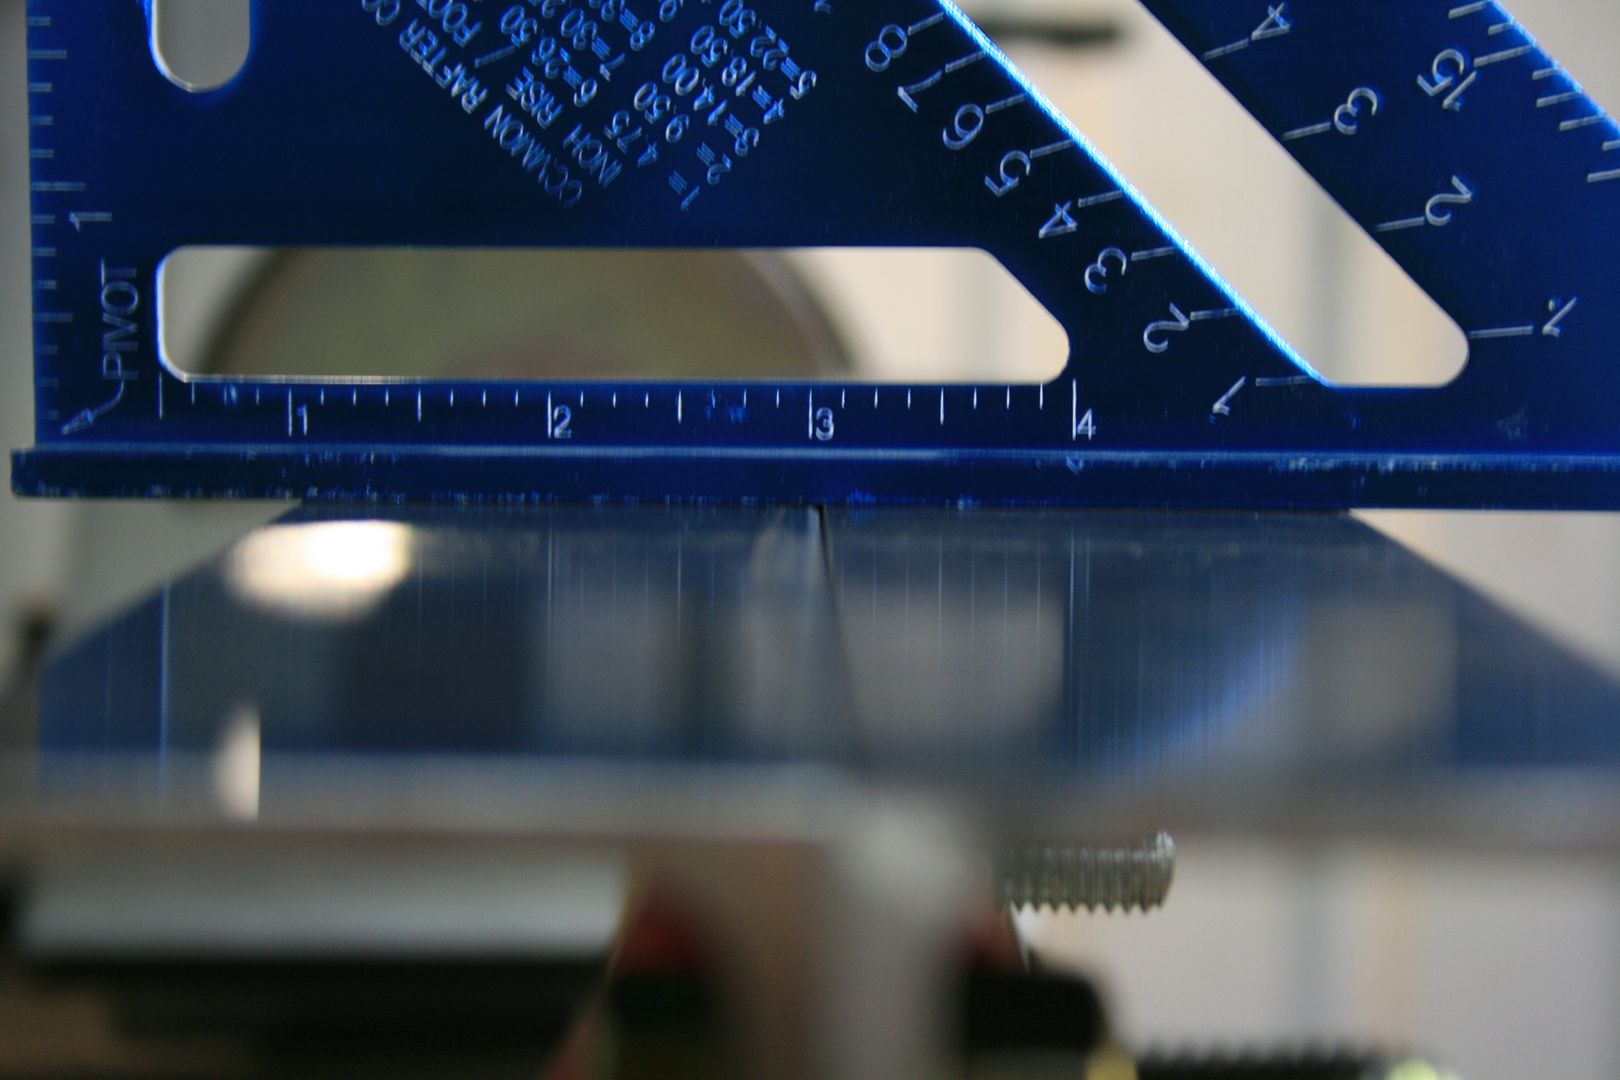
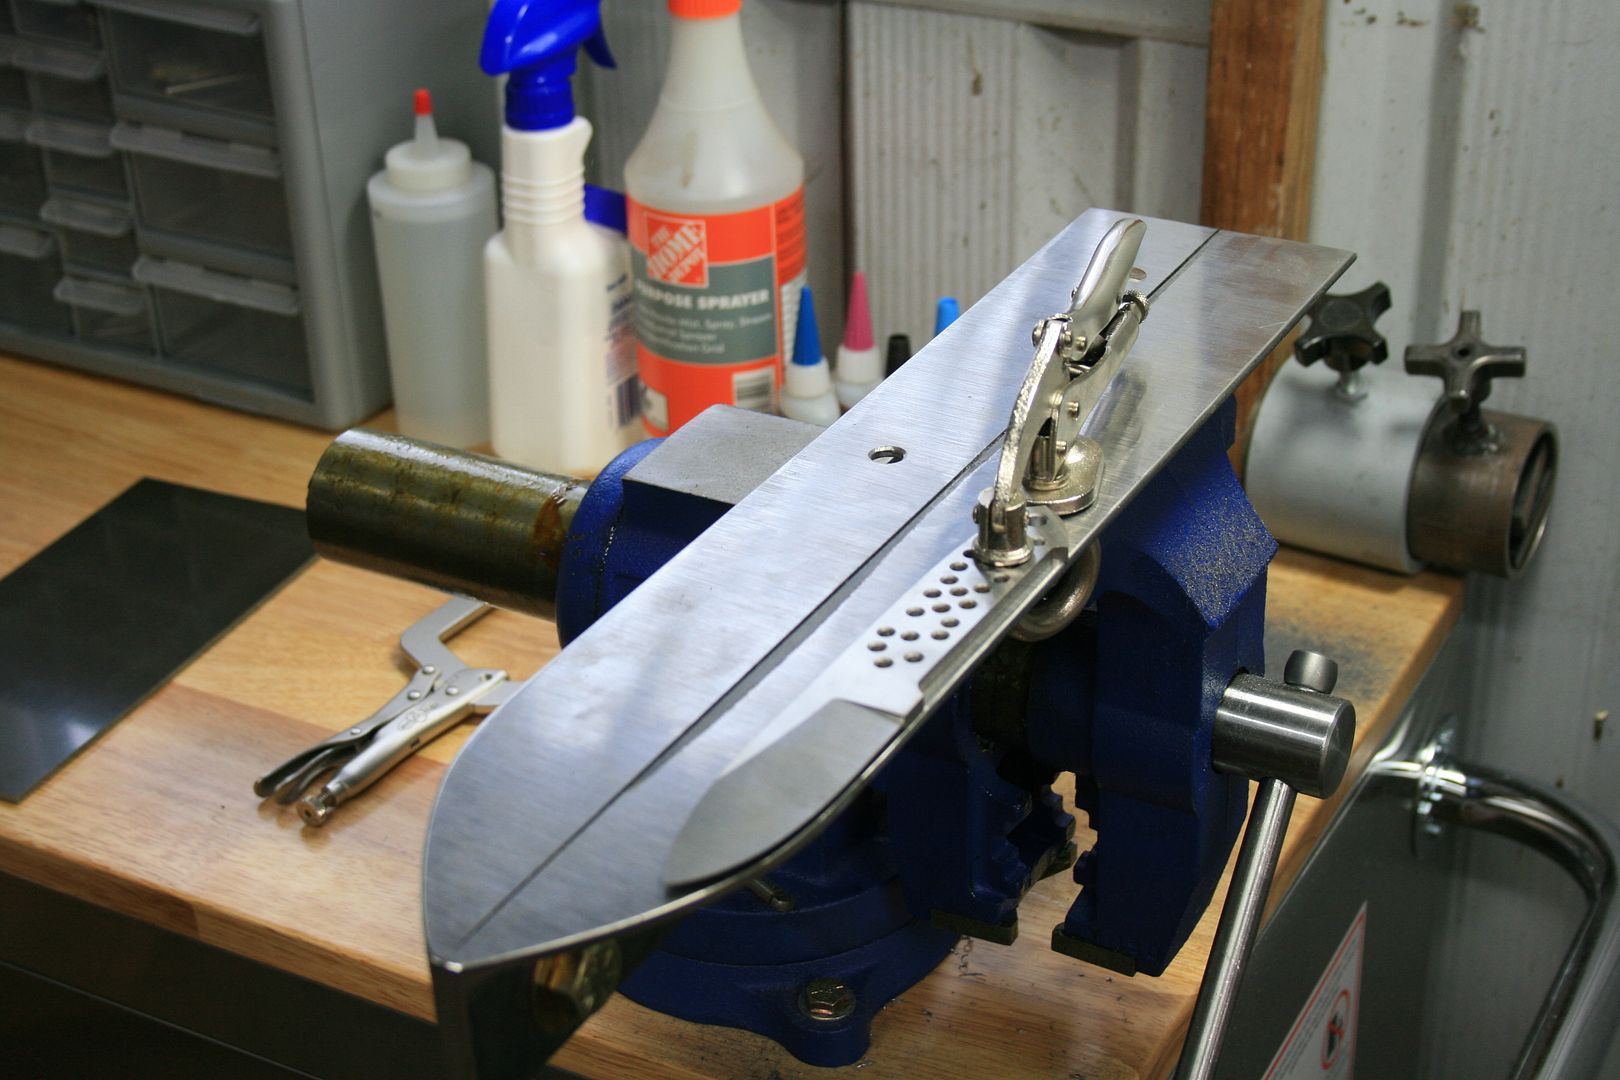
I picked up a piece of 2" x 36" angle iron, brought it home and cut it in half. Now I have 2 pieces at 1 1/2' a piece...
2013Progress001.jpg


Stuck them in the vise to where the top was as even as possible and drilled 4 pilot holes somewhat evenly spaced...
2013Progress002.jpg


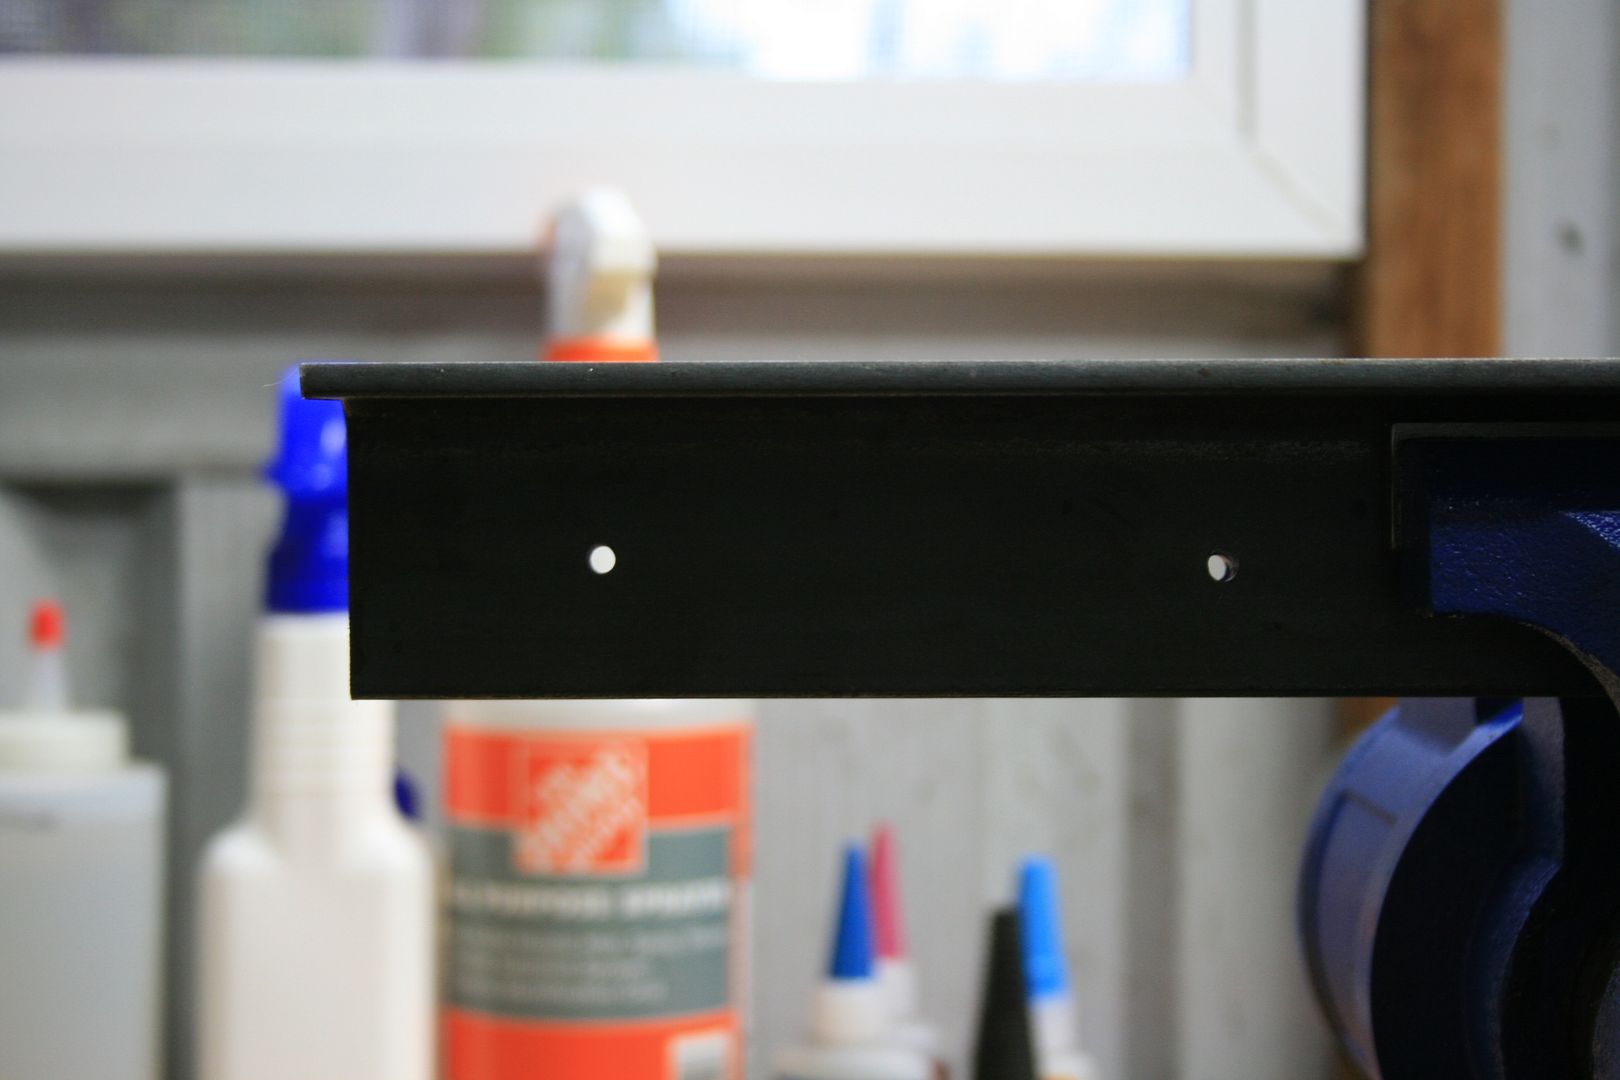
Next I drilled a 1/2" hole at each end and two 3/8" hole in the middles and also cut a point out of one end...
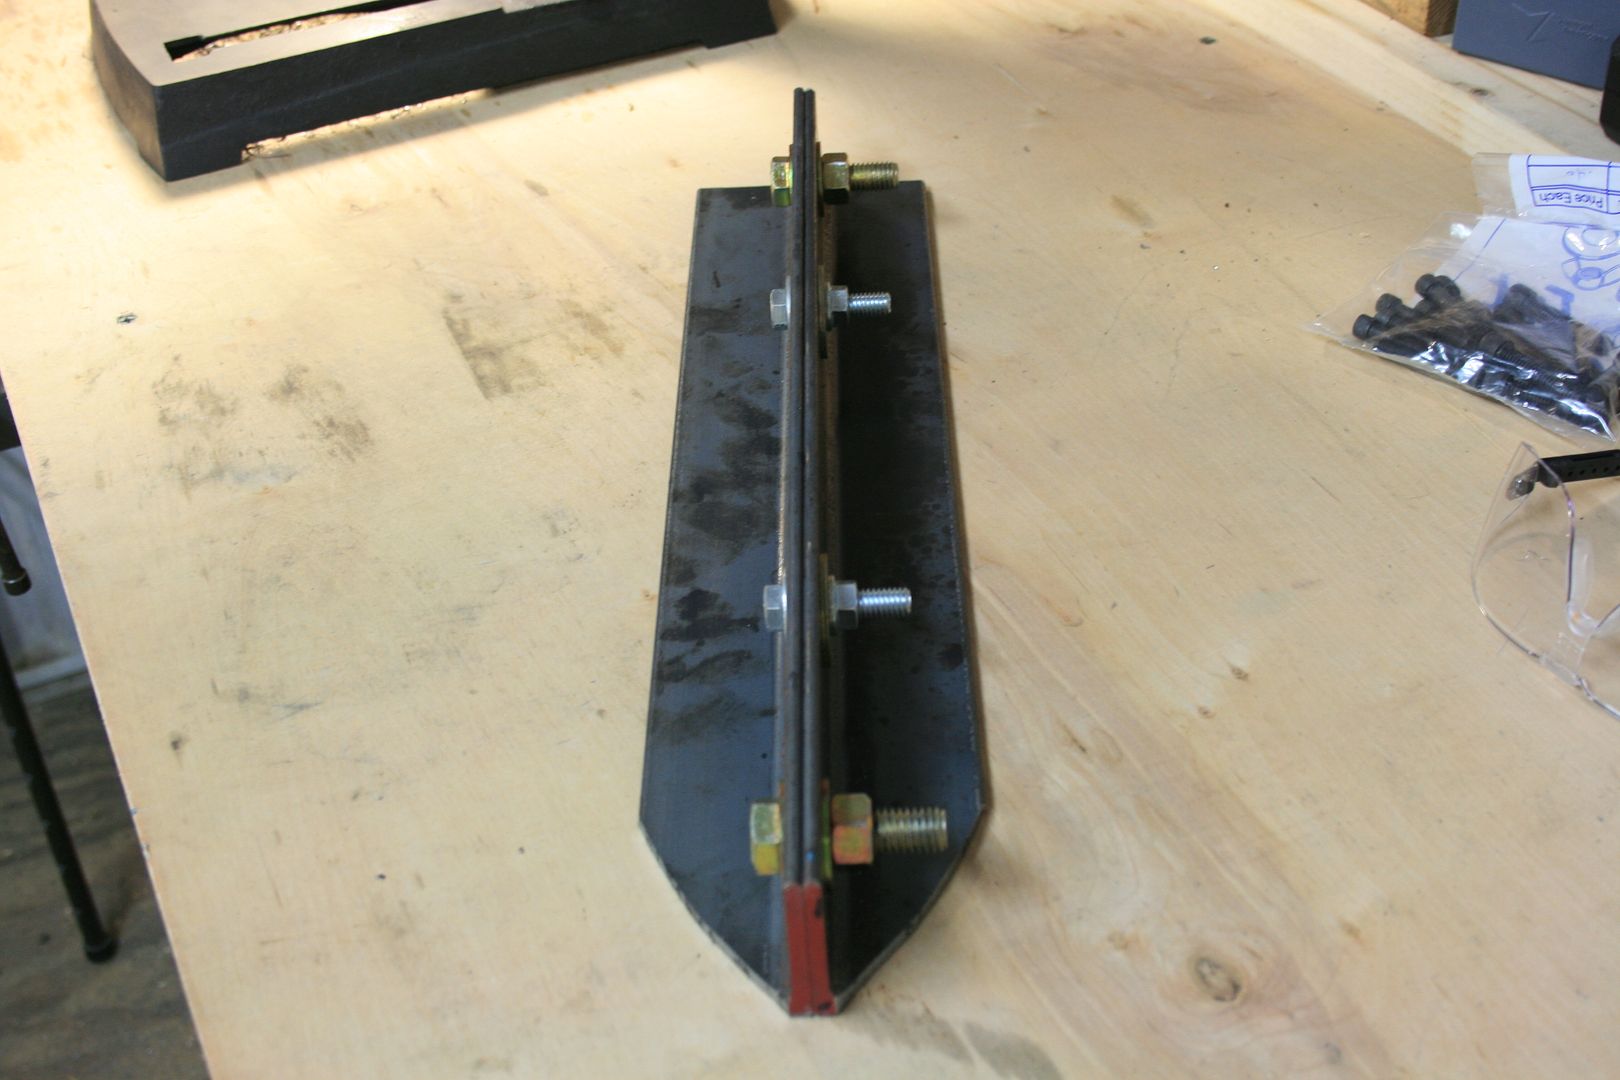
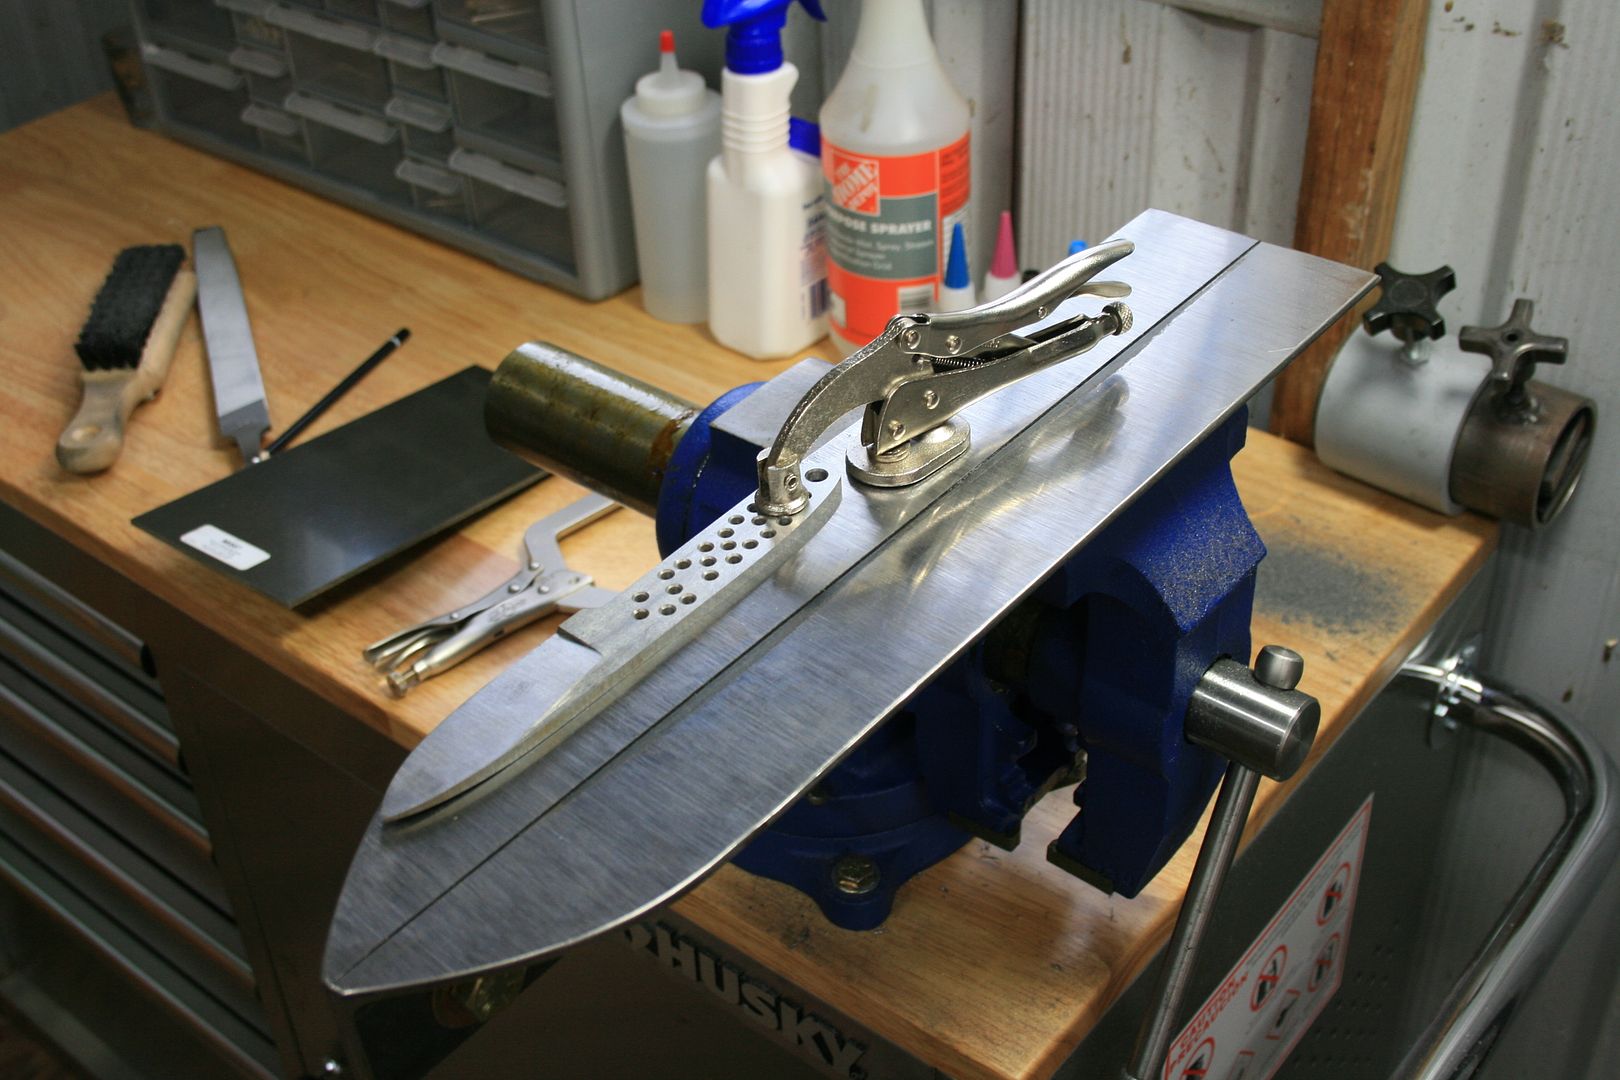
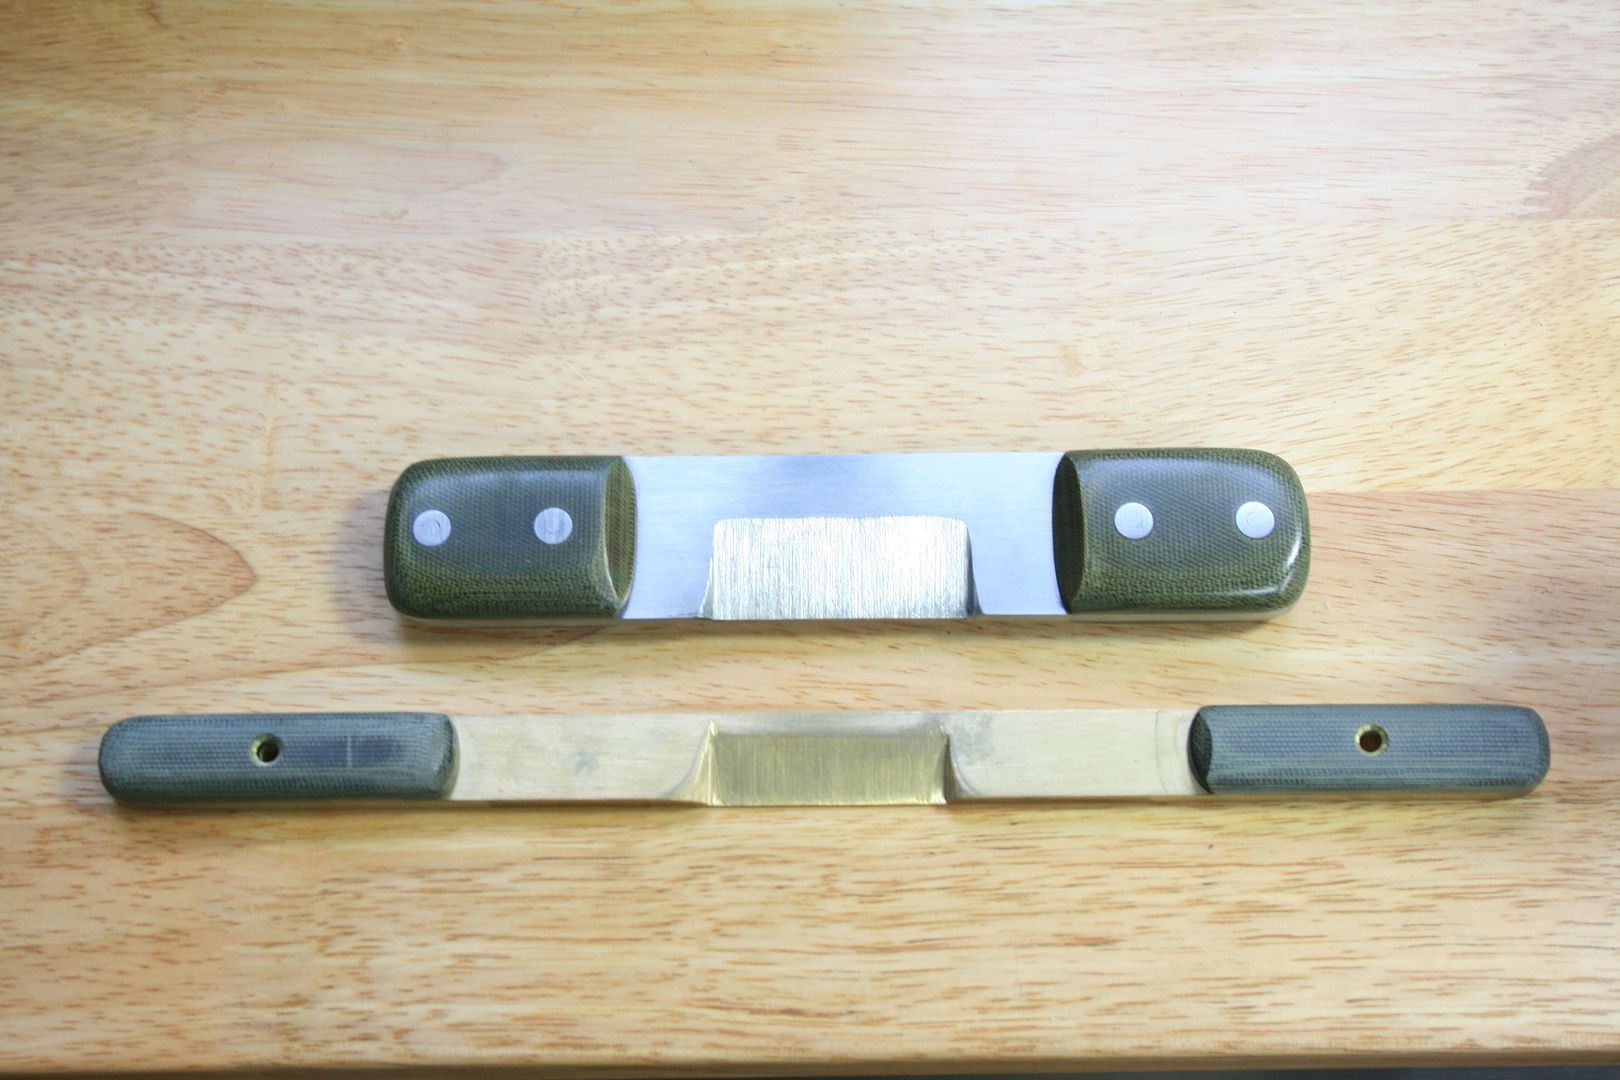
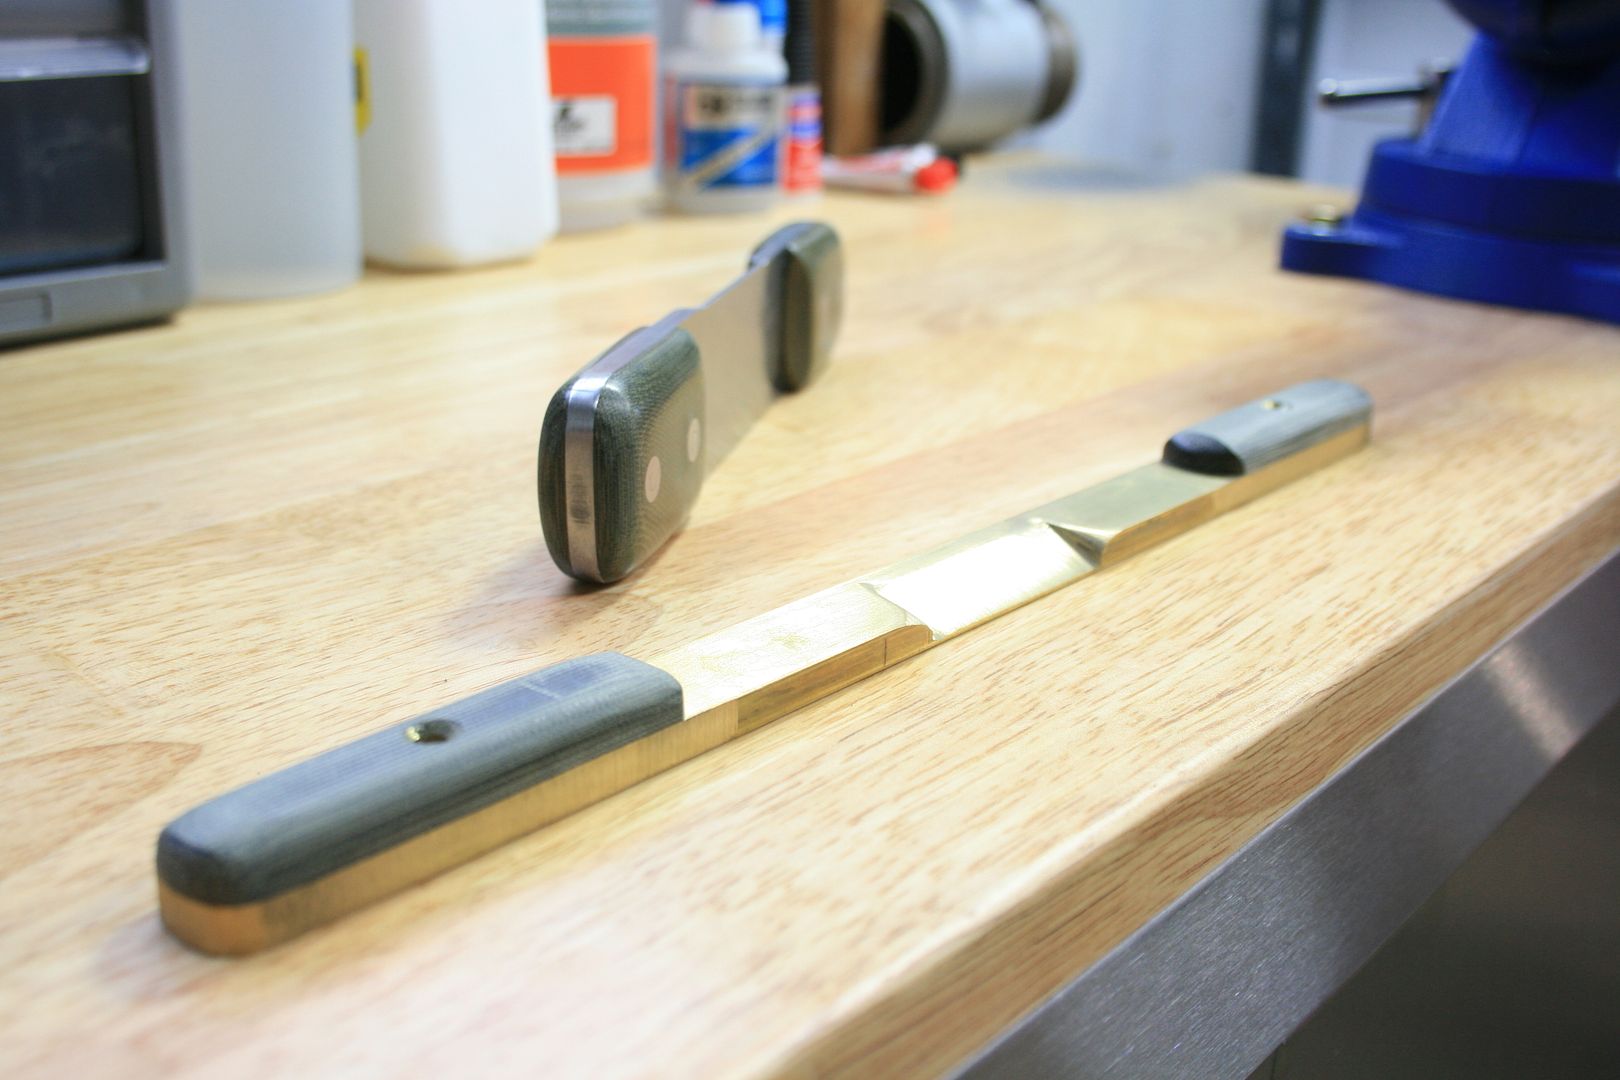
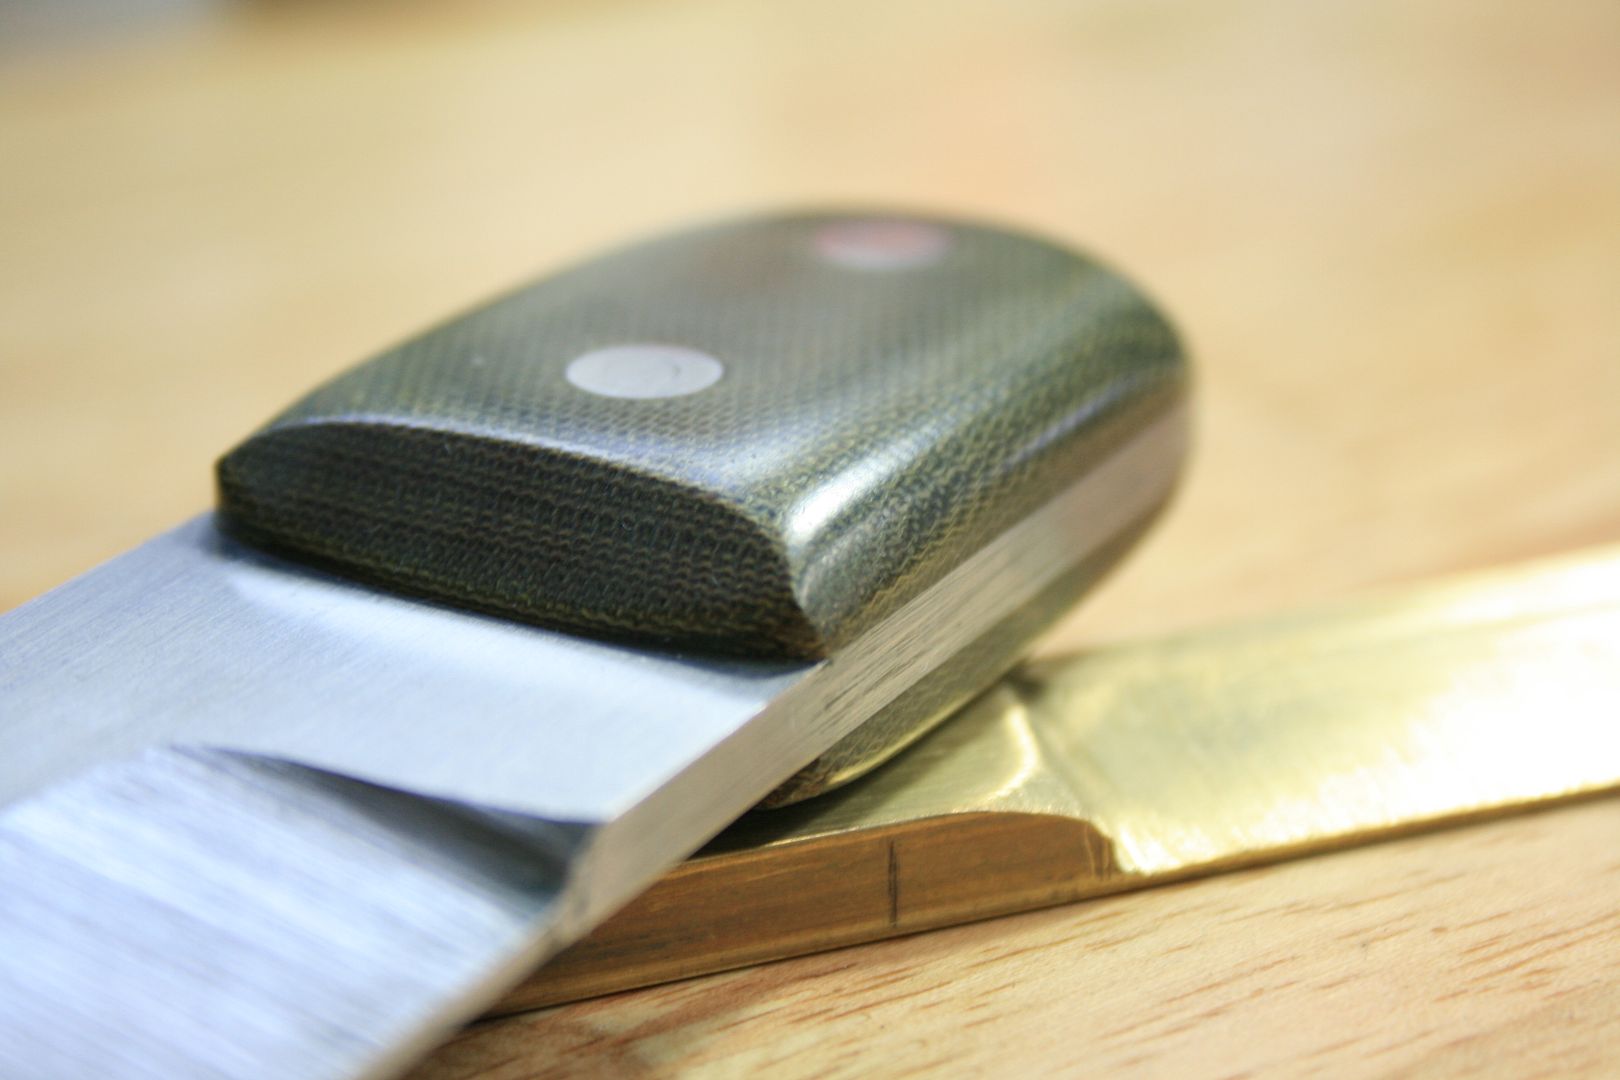
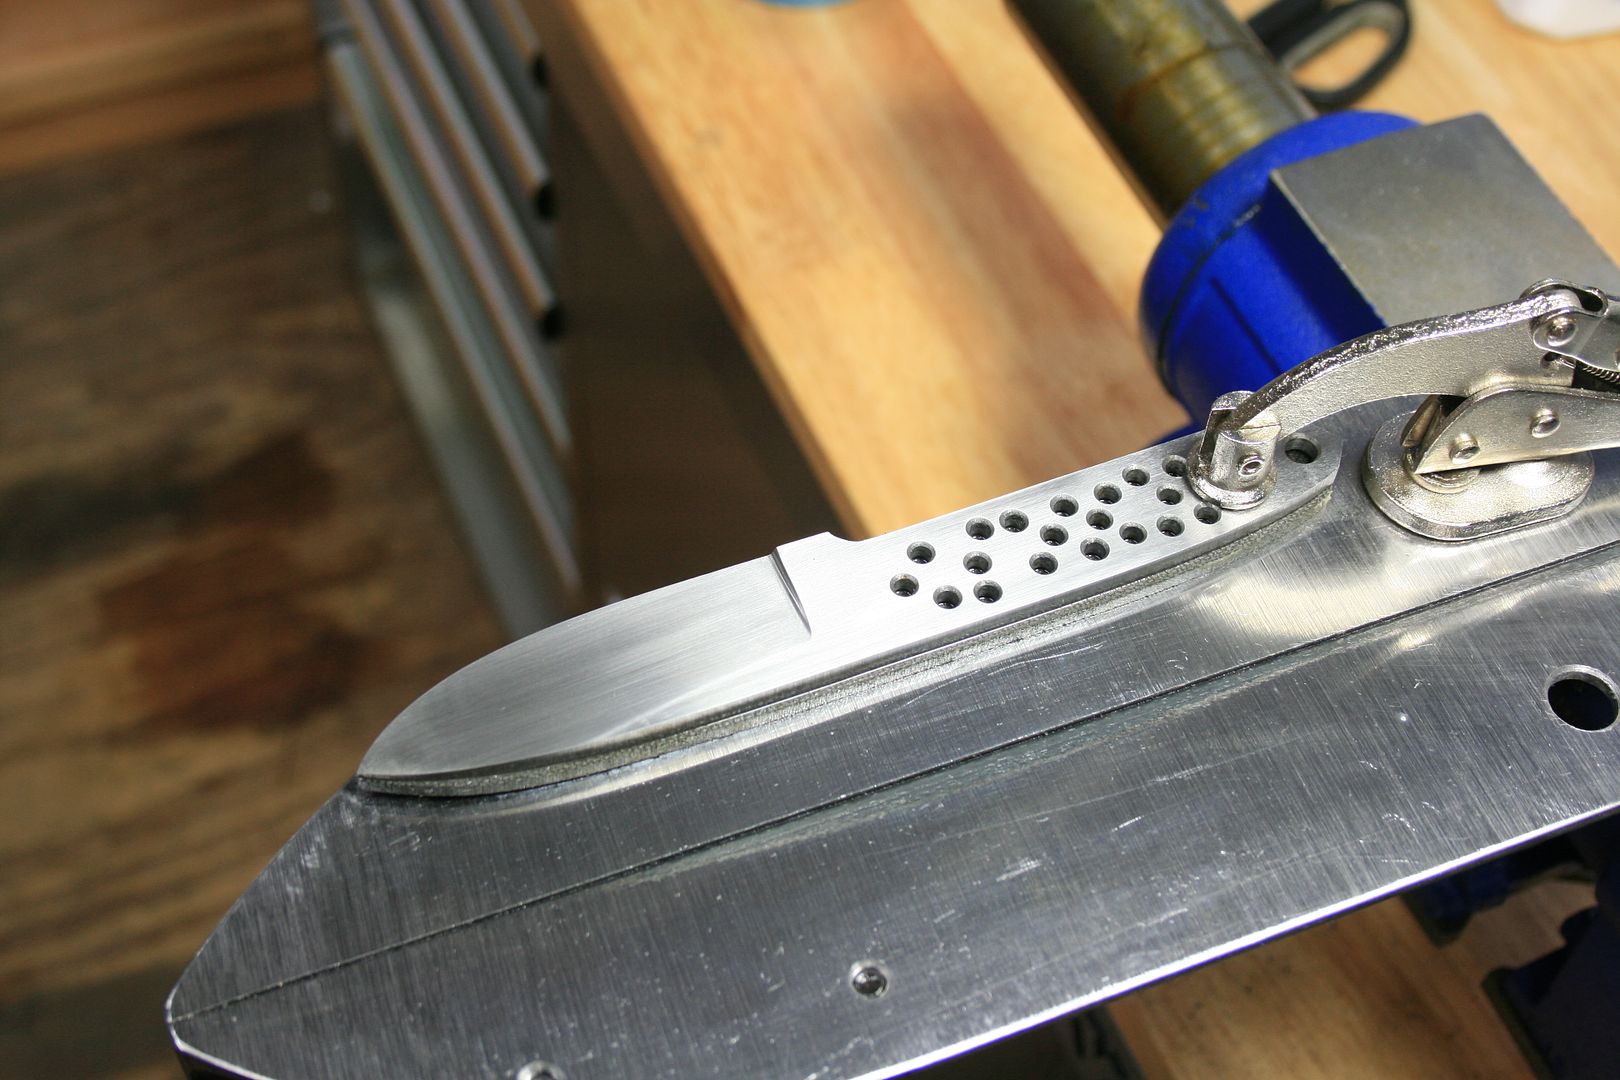
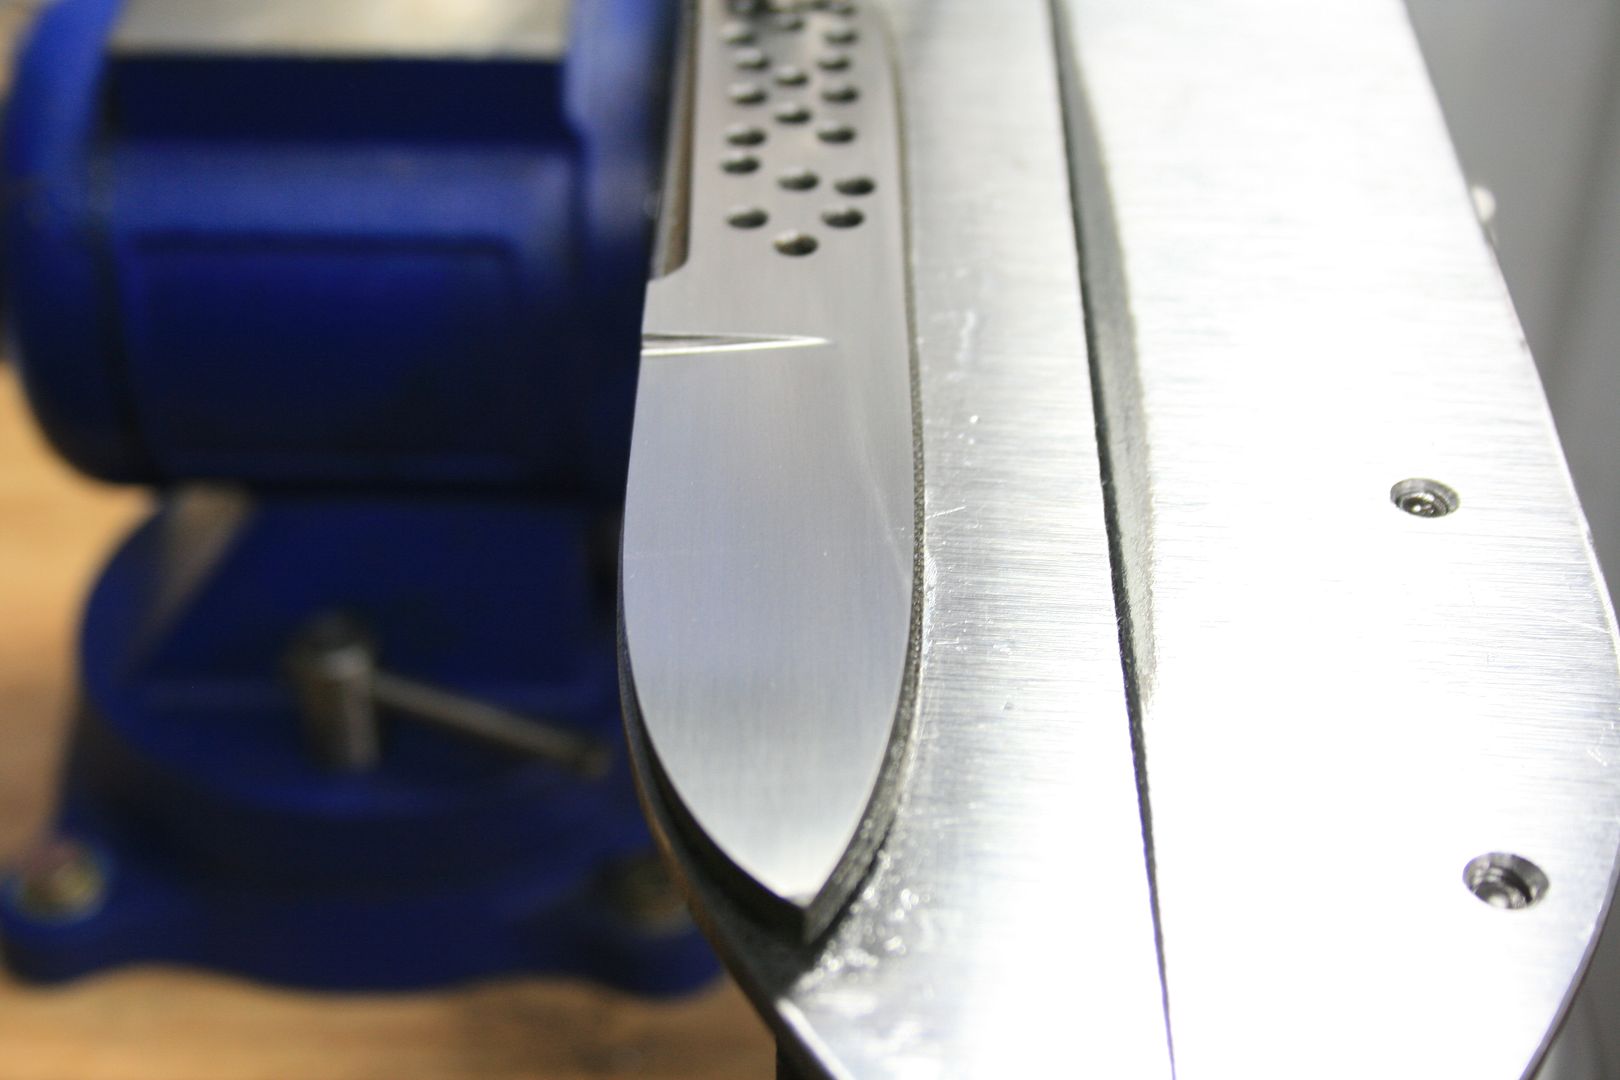
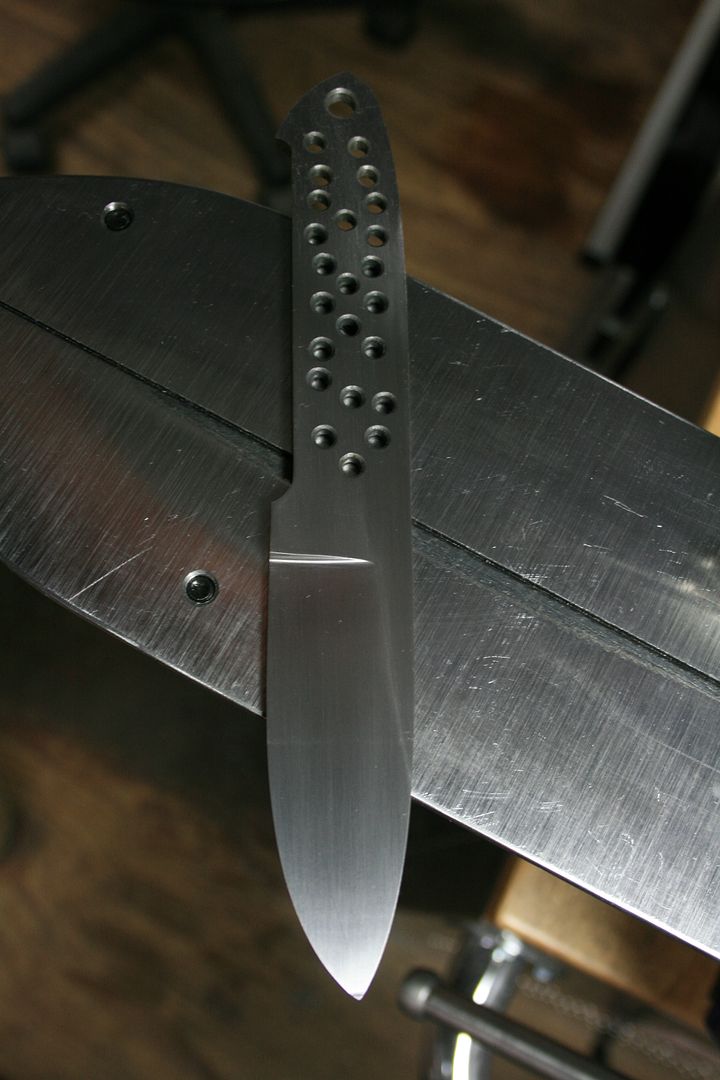
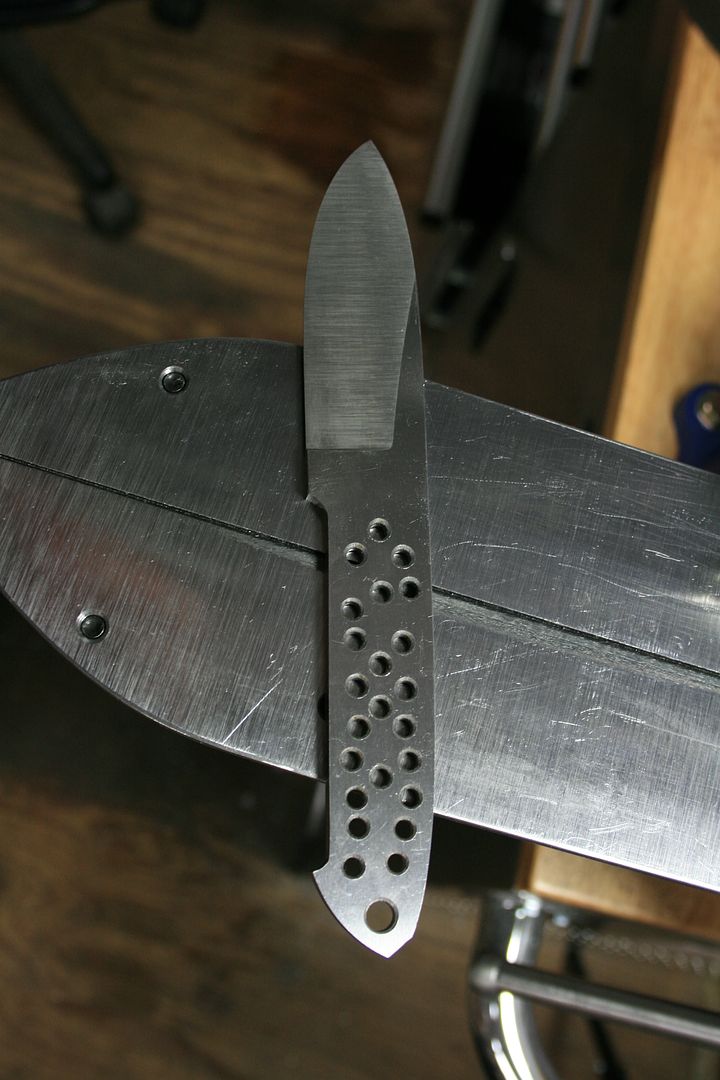
2013Progress003.jpg


Checking the fit...
2013Progress006.jpg


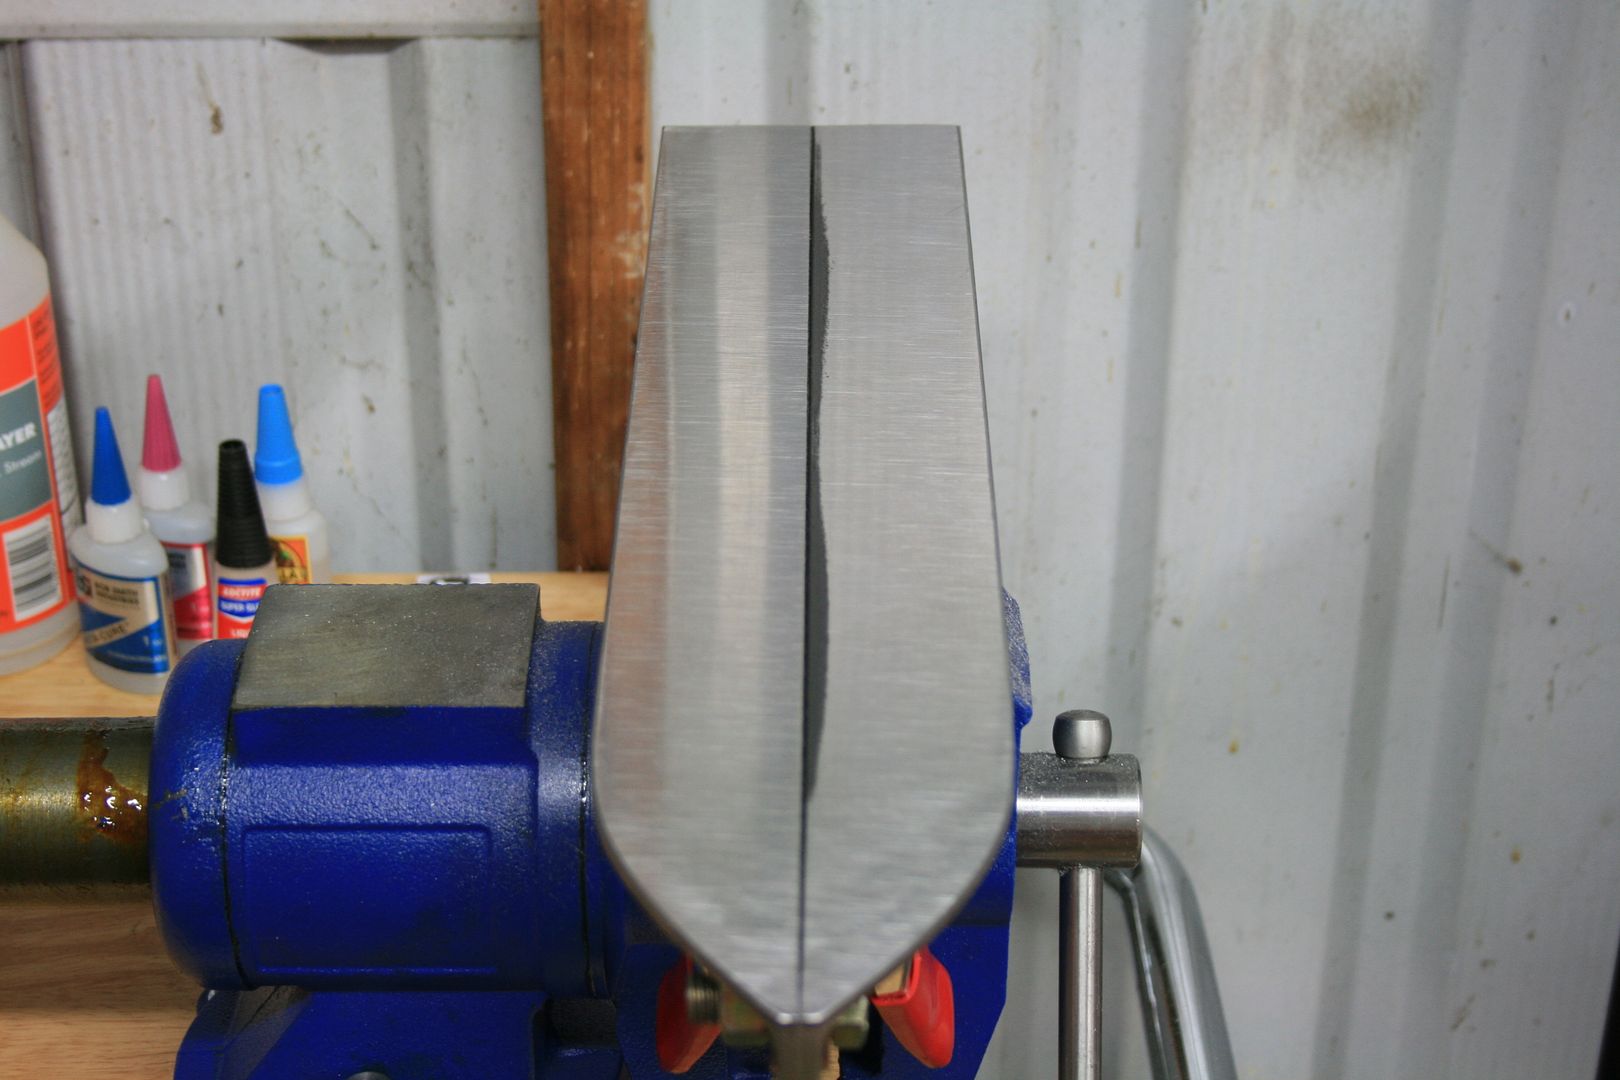
After putting it together I realized that I should have kept the two pieces clamped together while drilling instead of taking them apart. Of course the holes didn't line up perfect so one side was raised a bit. Not a big deal, take it to the grinder. Not sure why, but it took a very very long time to grind this thing even. My back hurts now...
2013Progress008.jpg


2013Progress007-1.jpg


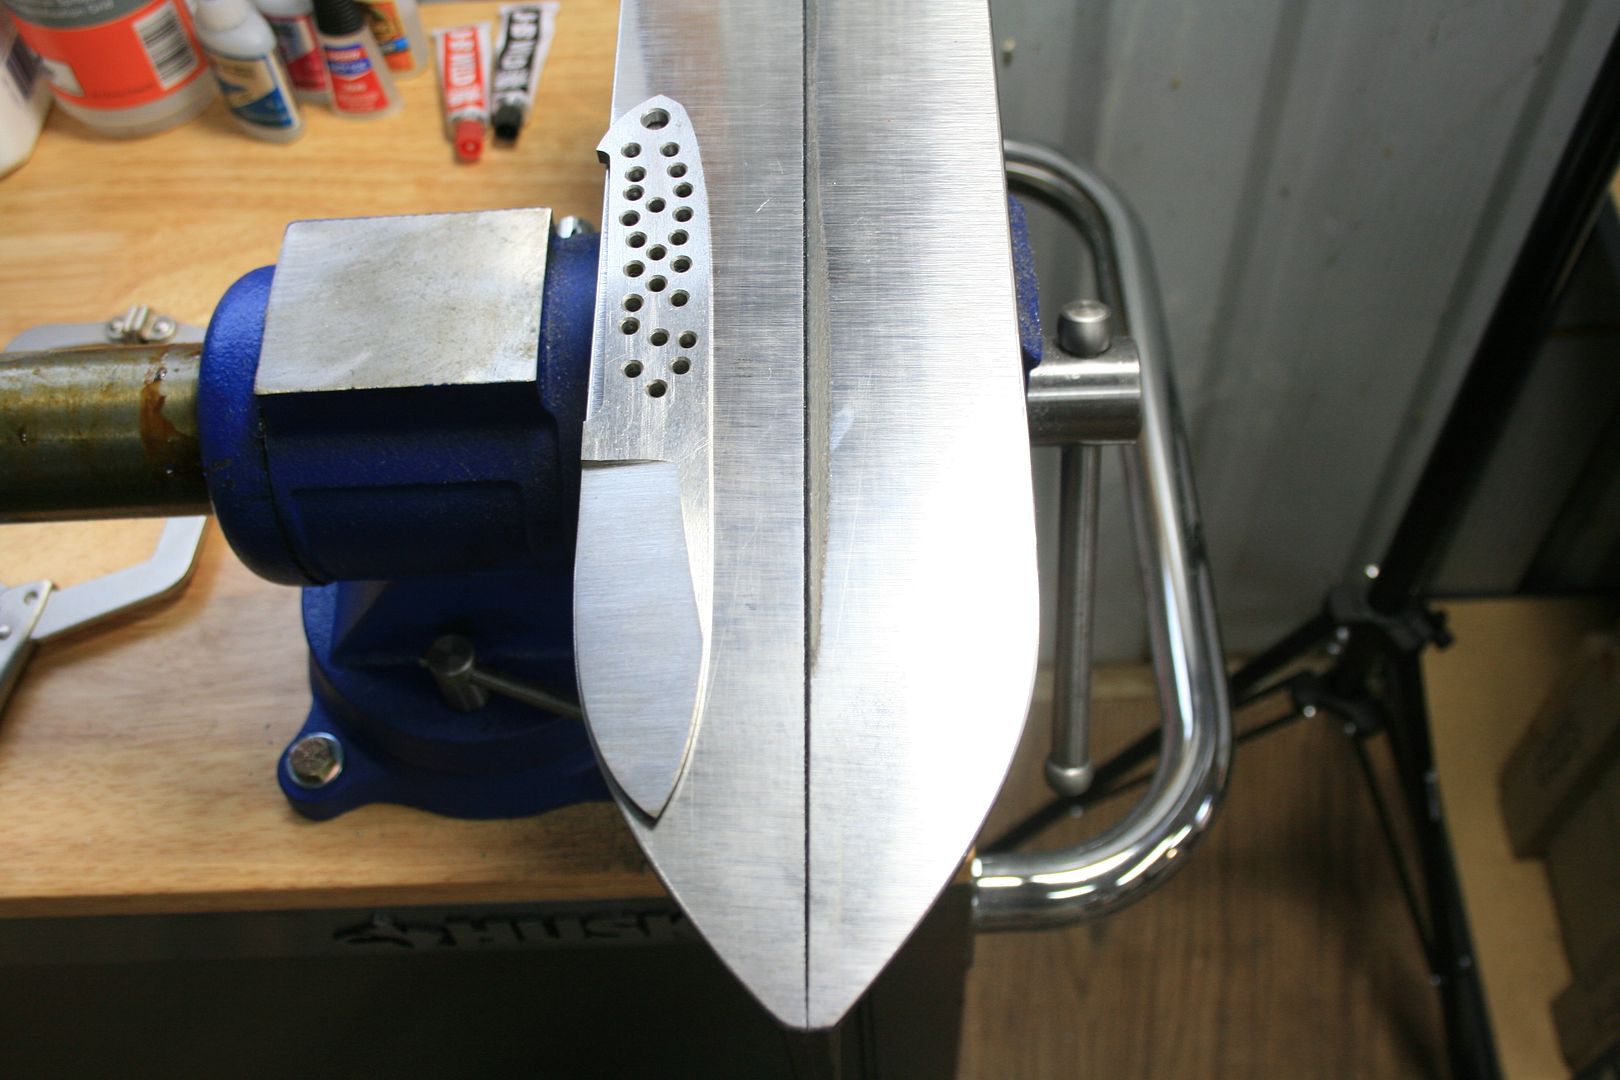
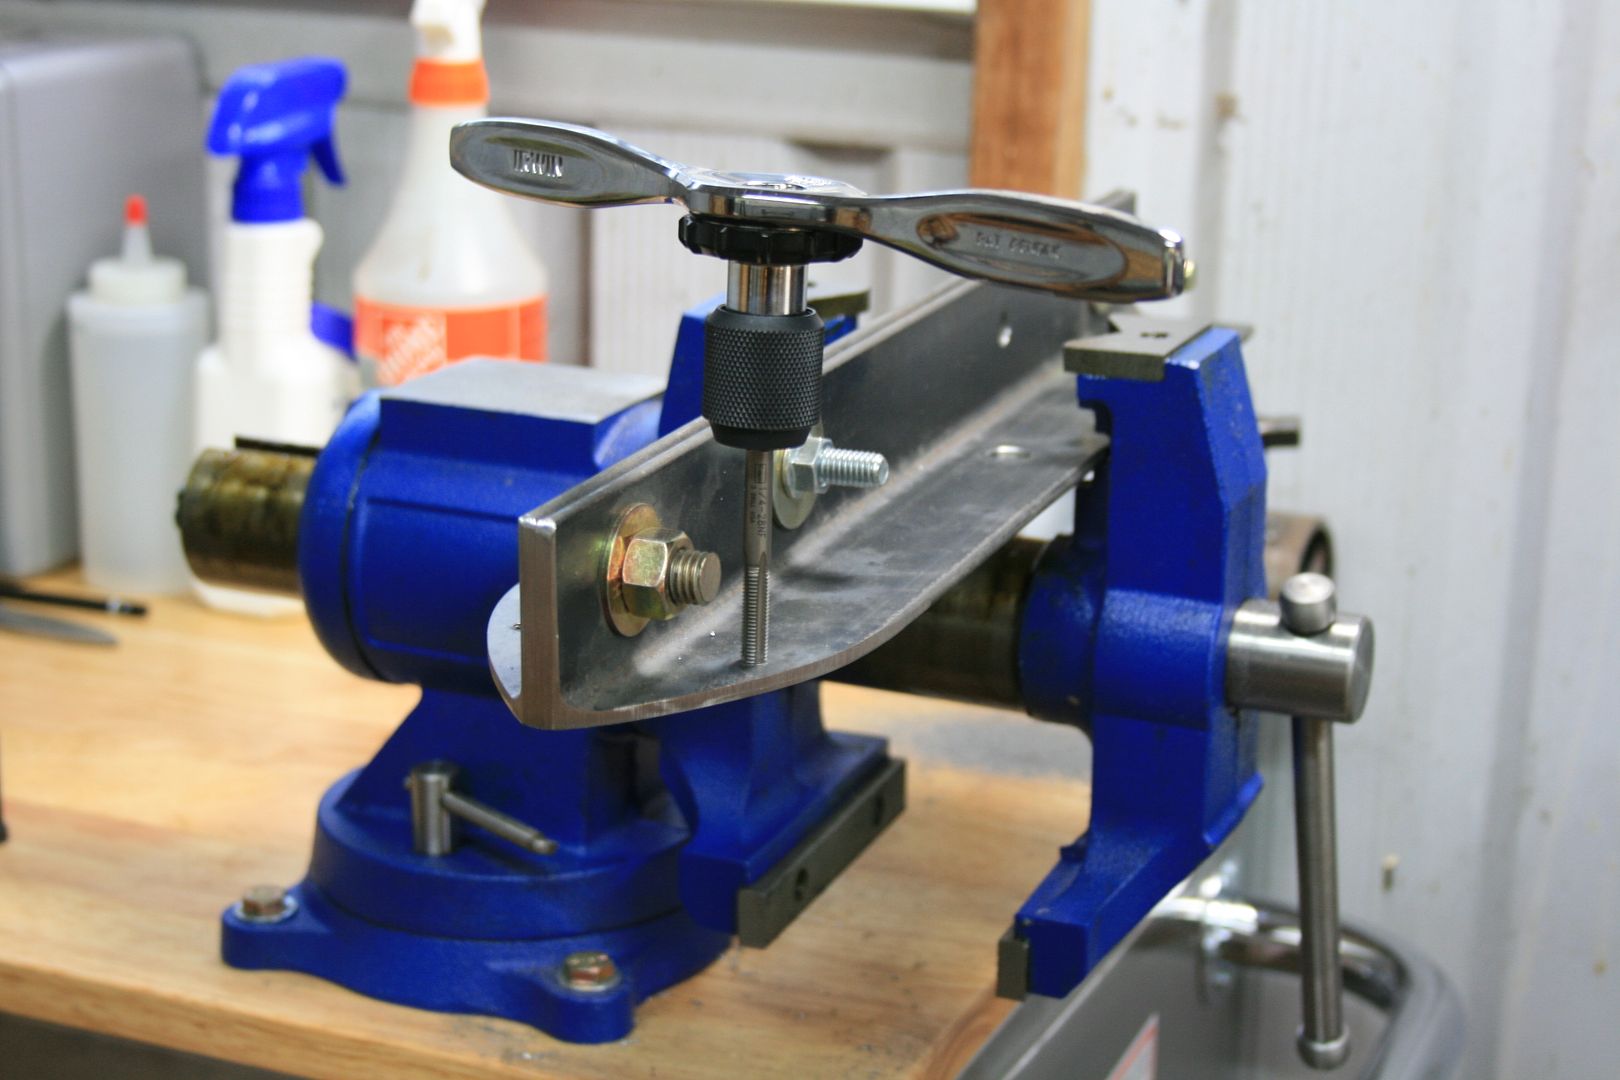
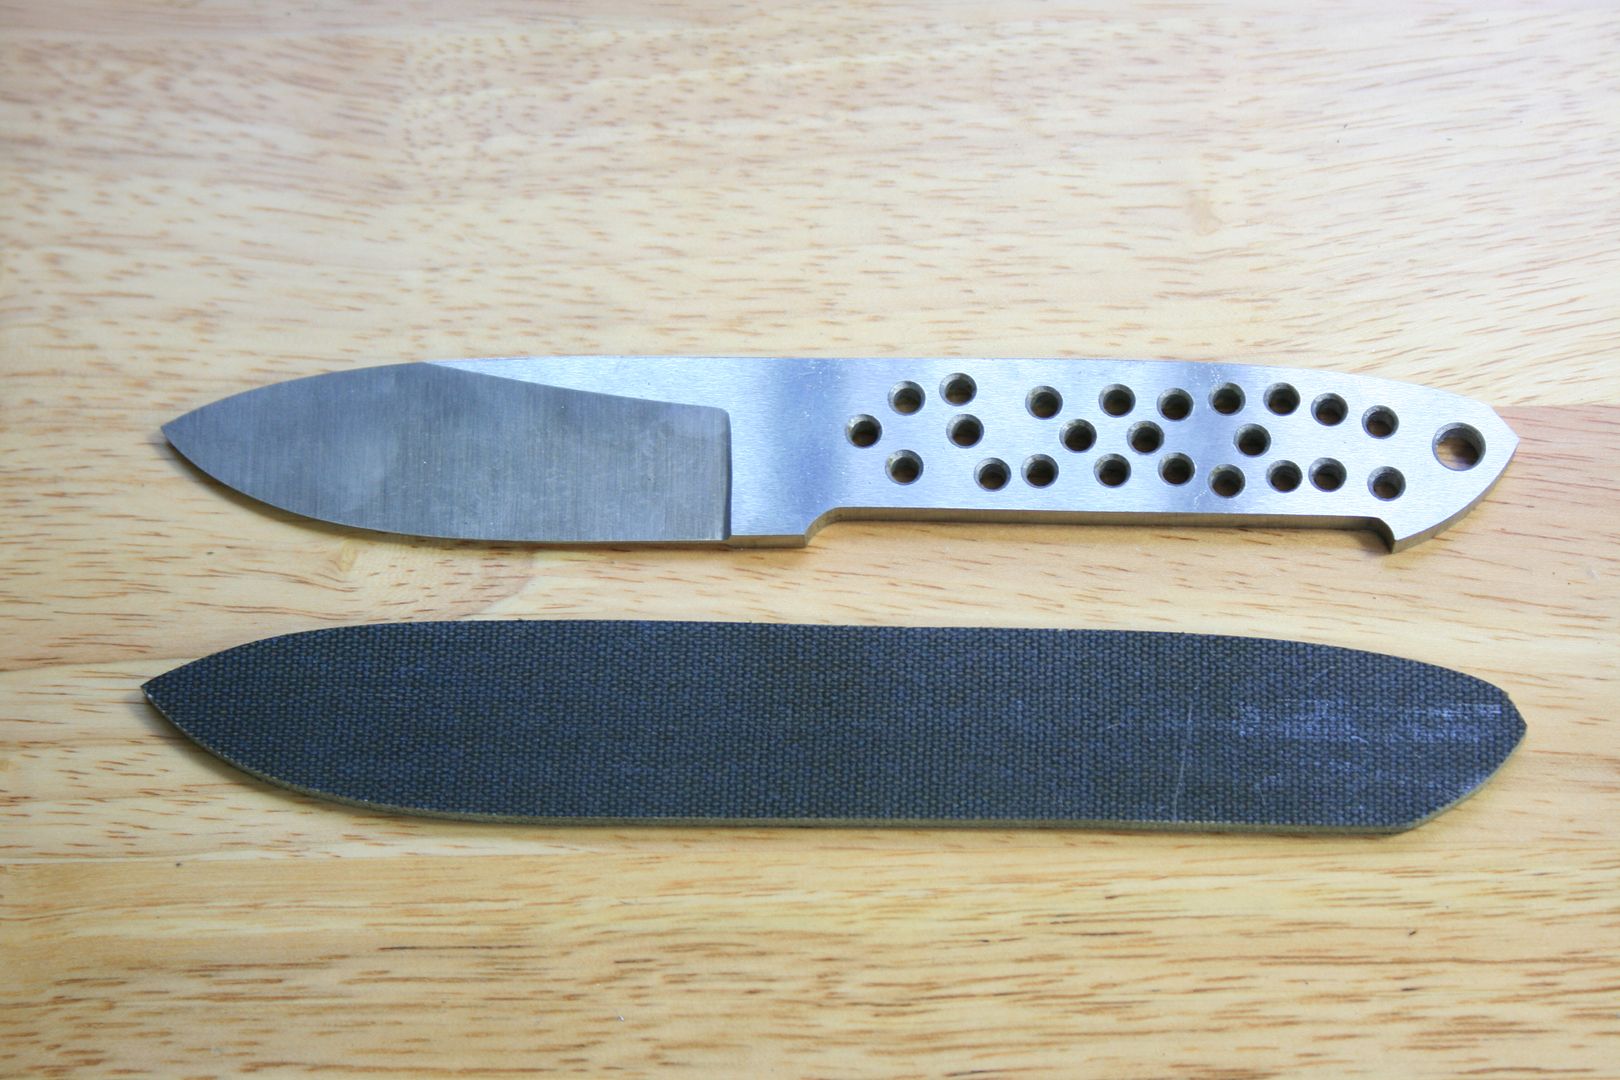
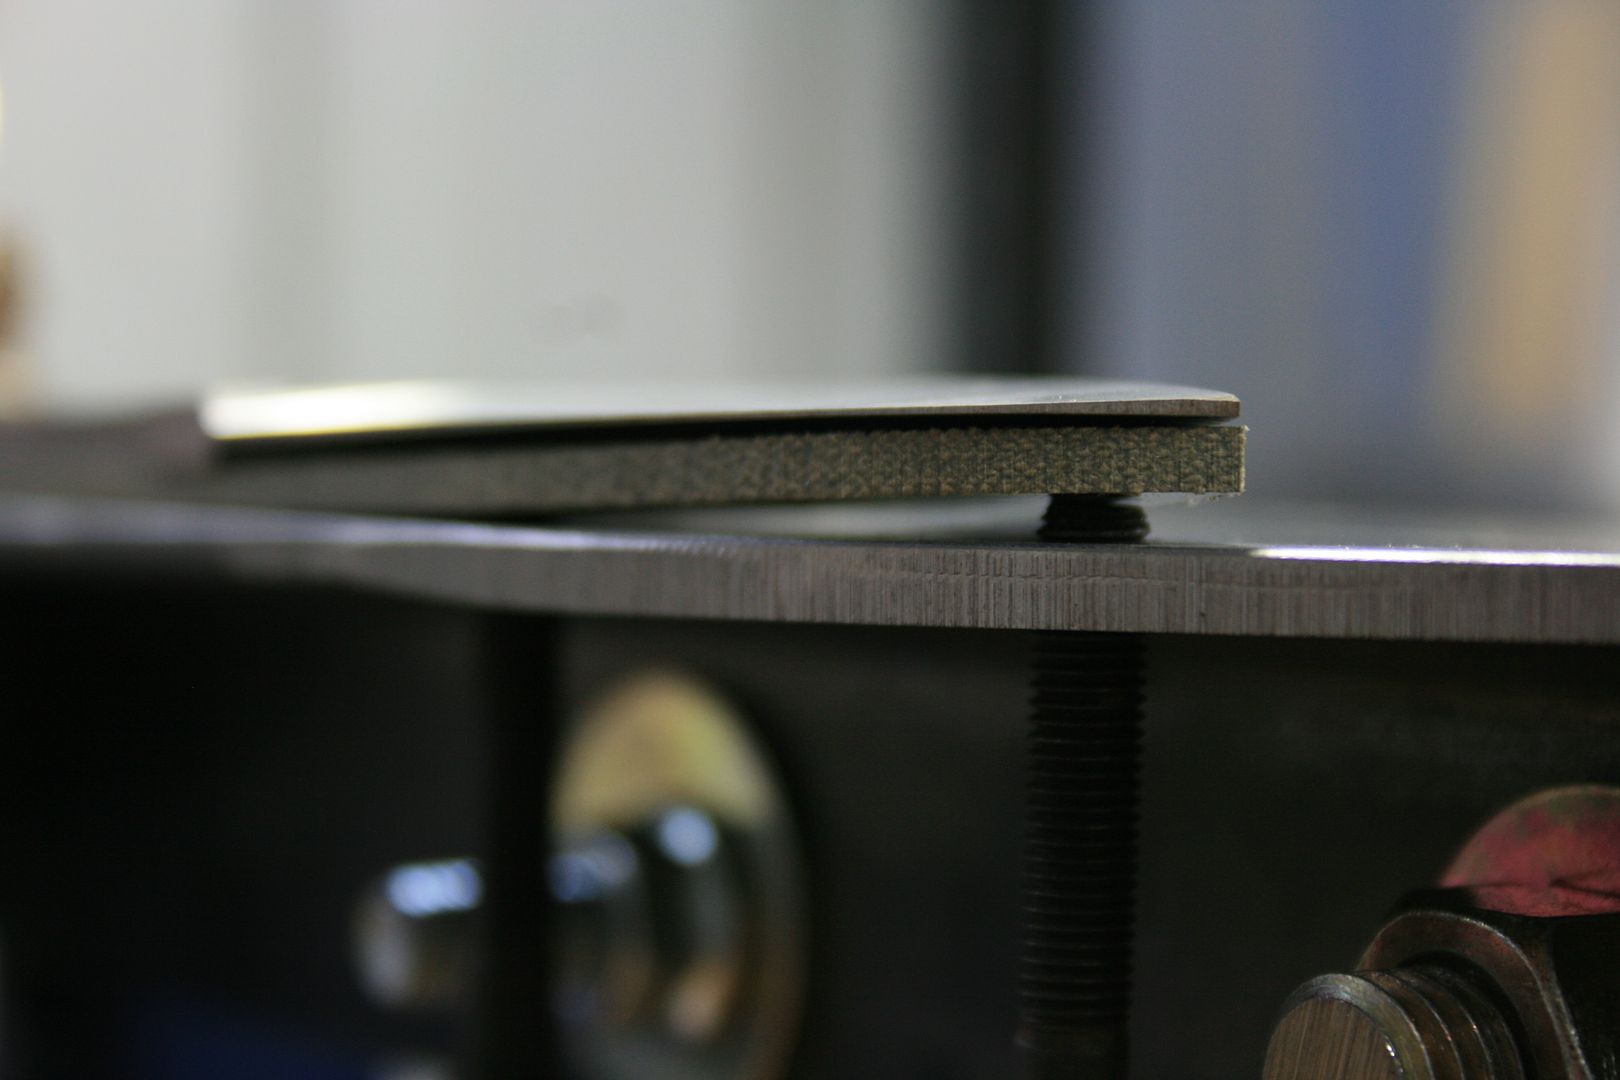
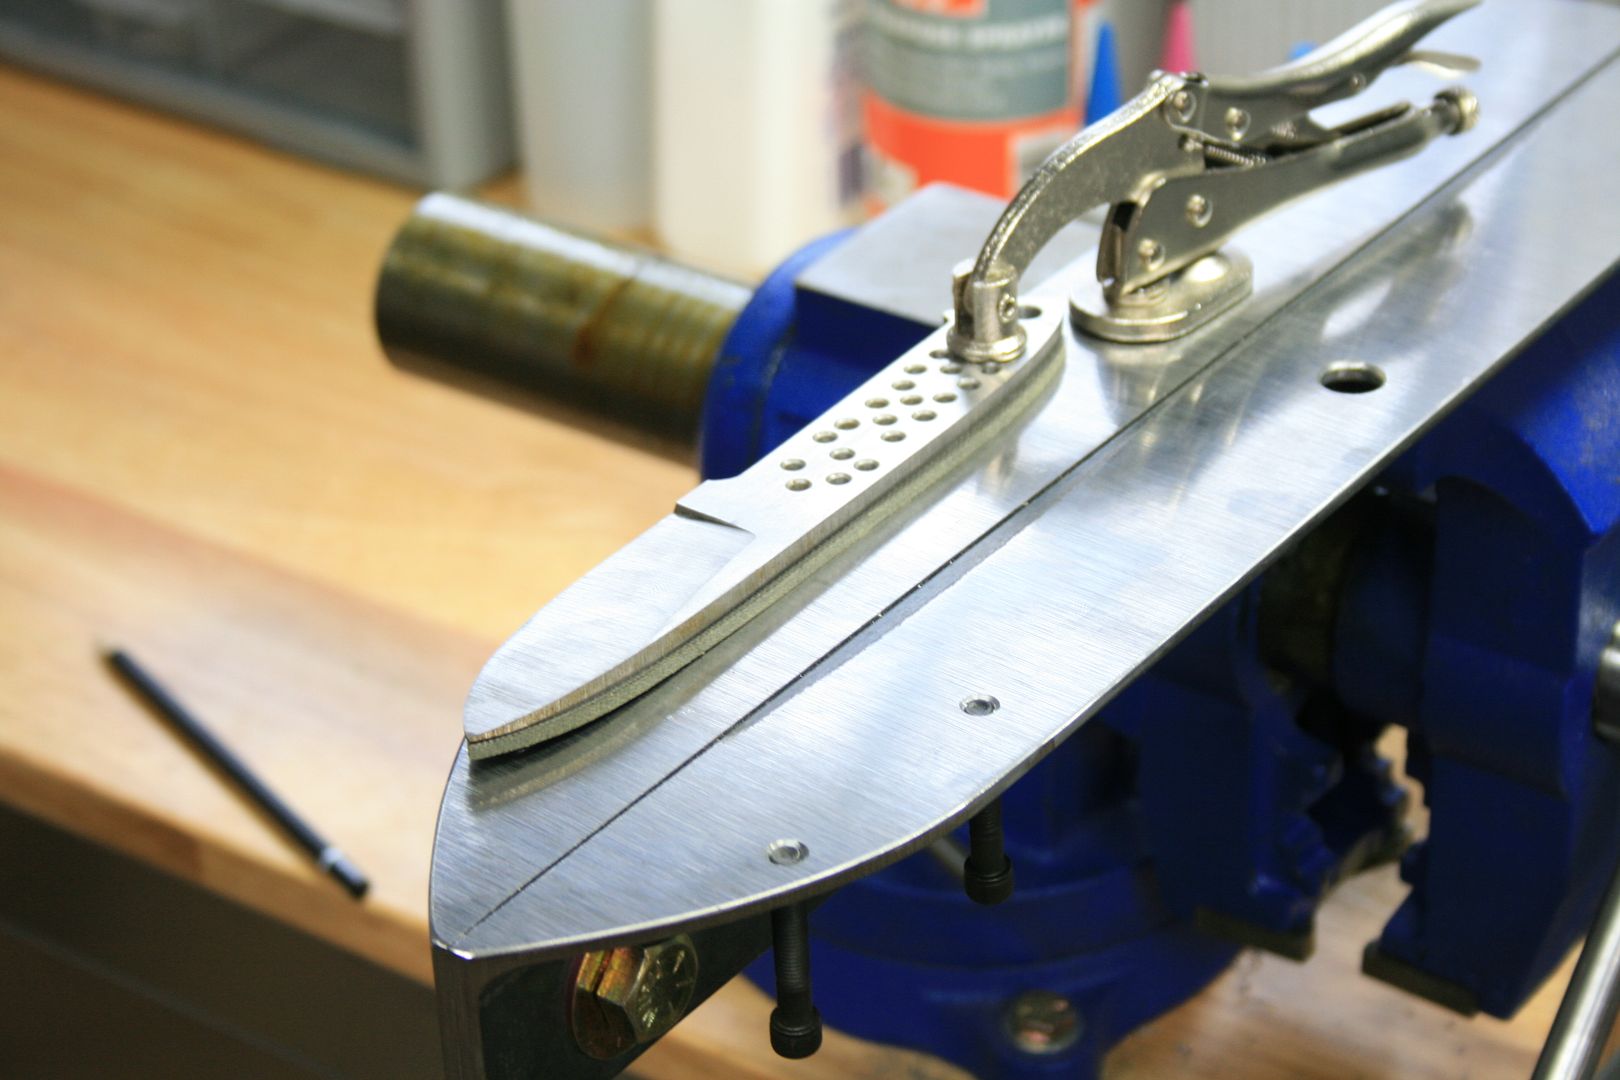
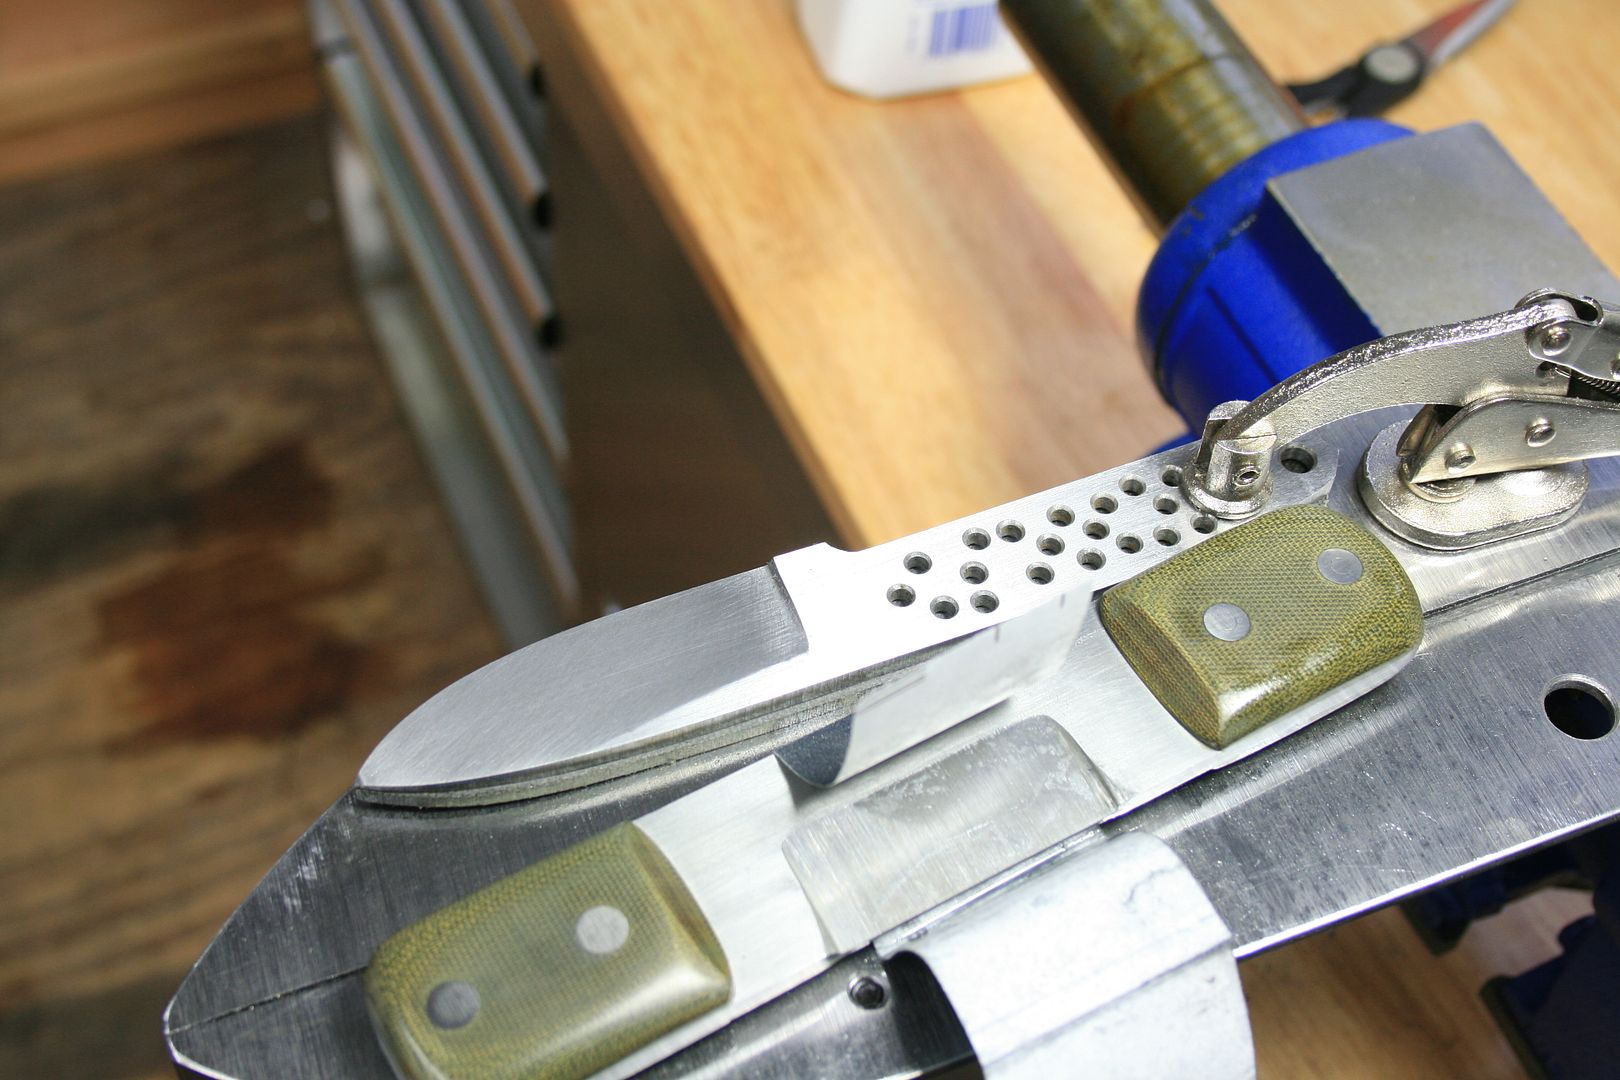
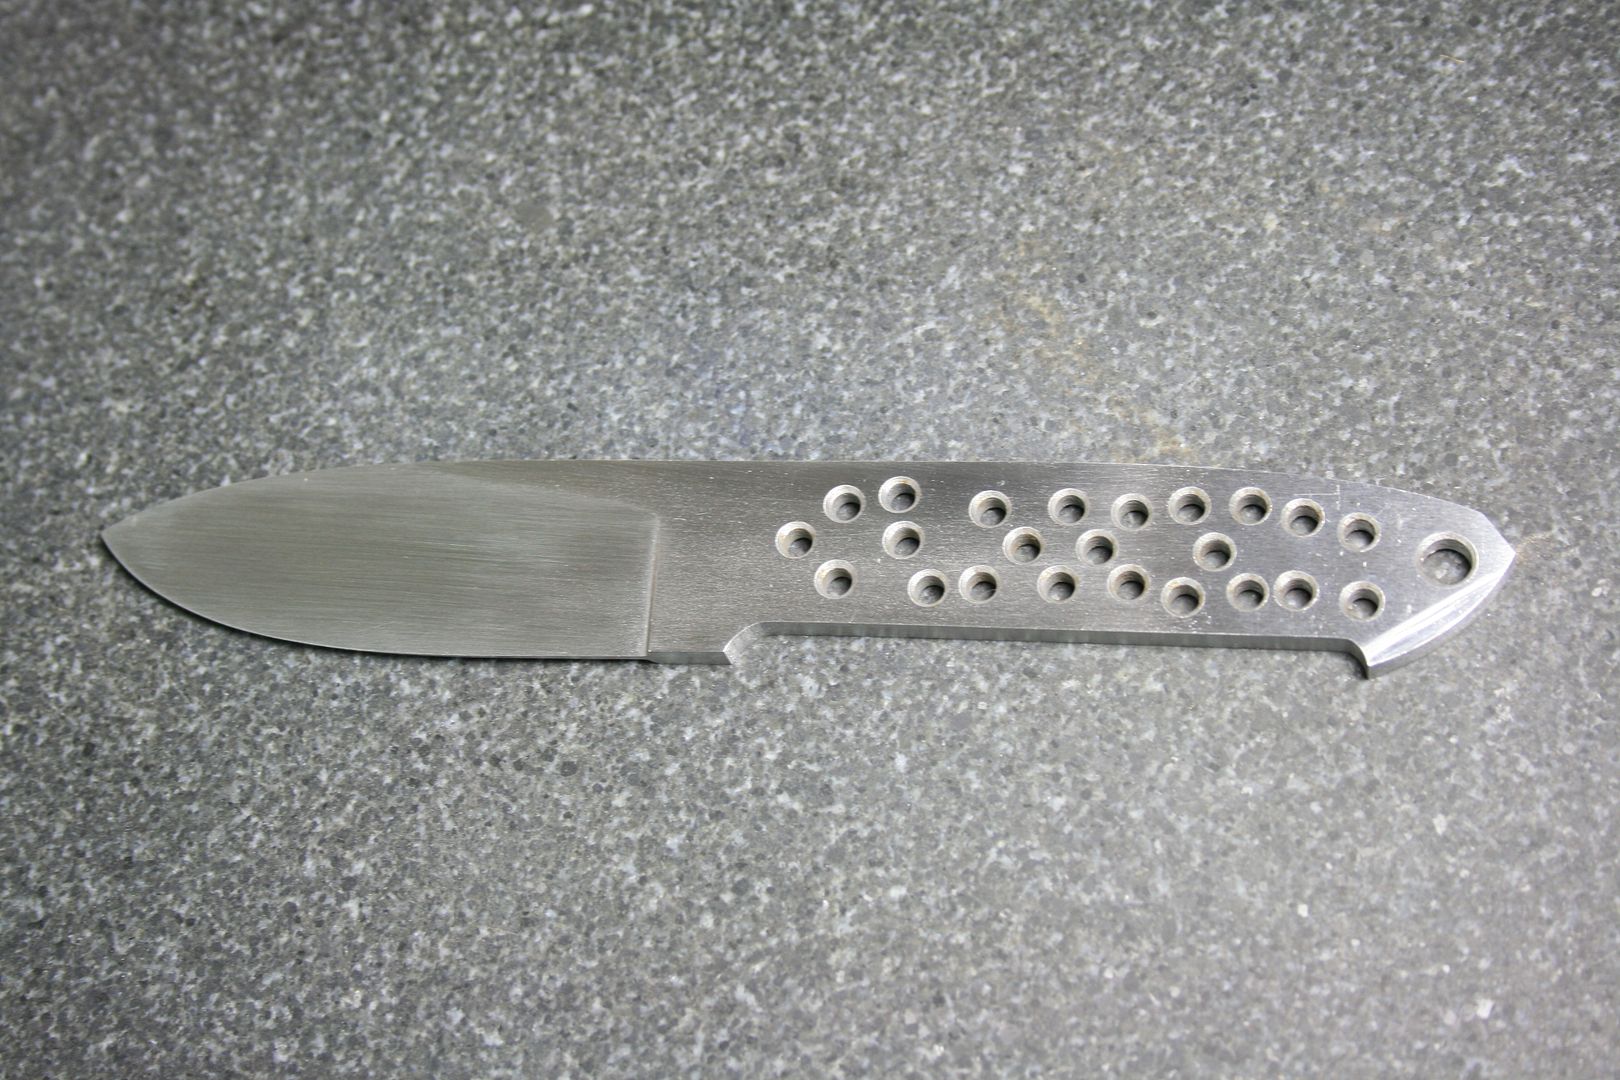
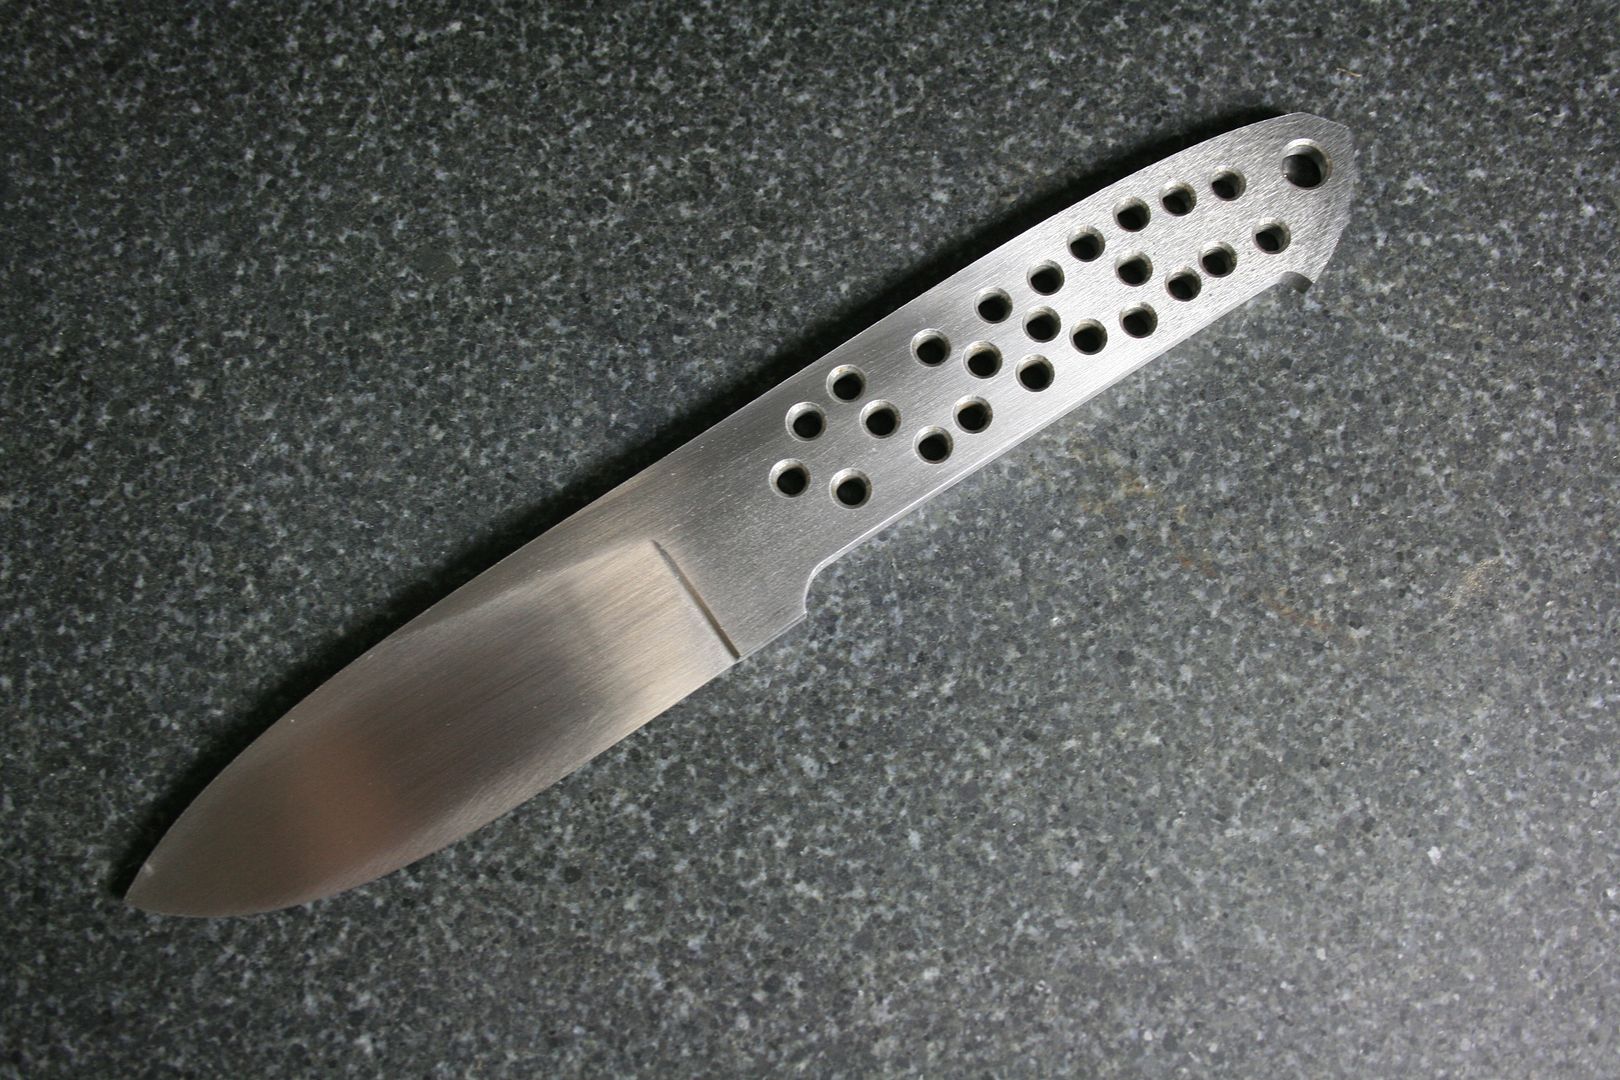
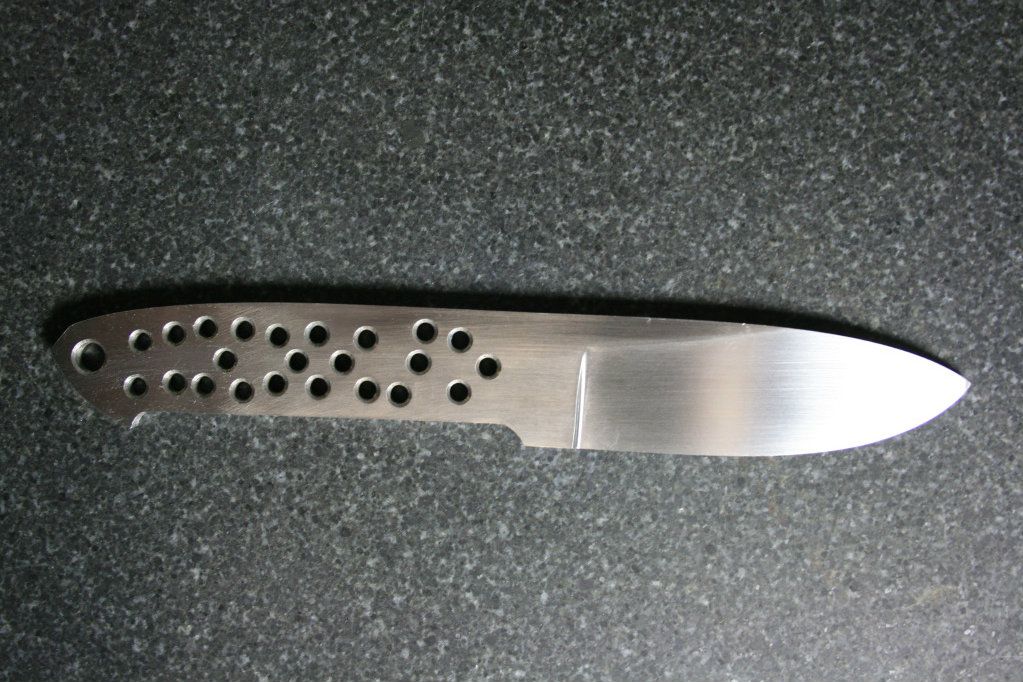
There is still a little line down the middle but no big deal because I will be using a piece of micarta for below the blade...
2013Progress010.jpg


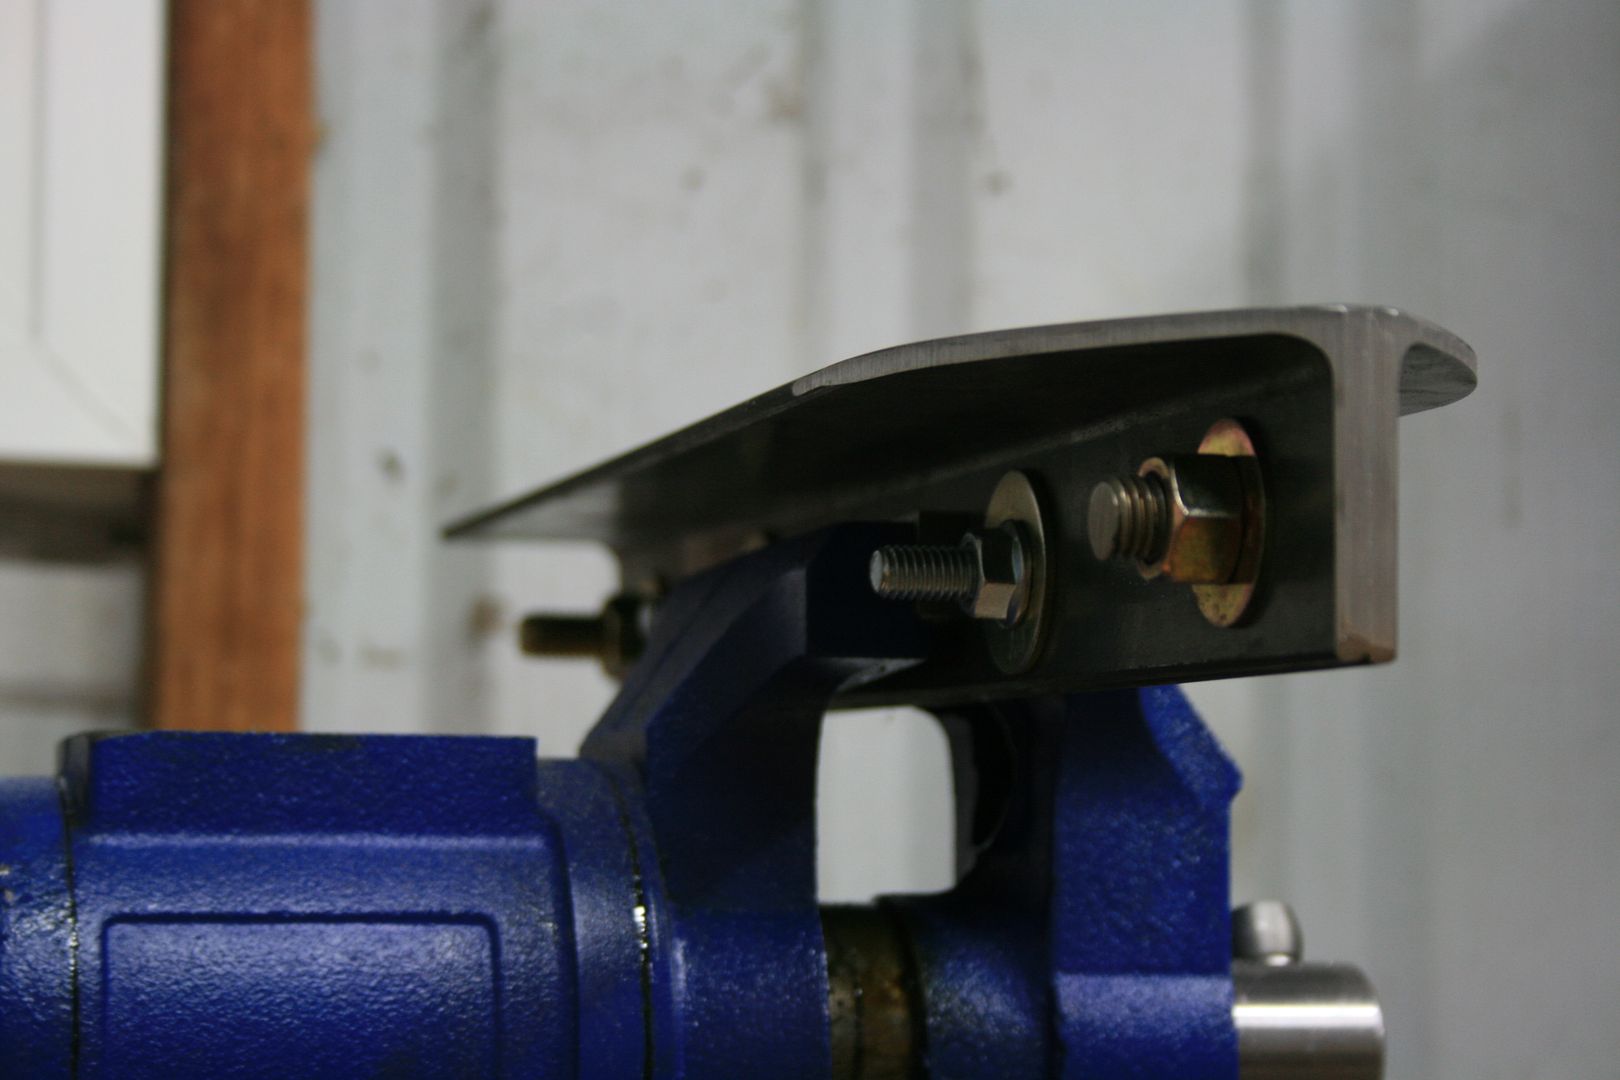
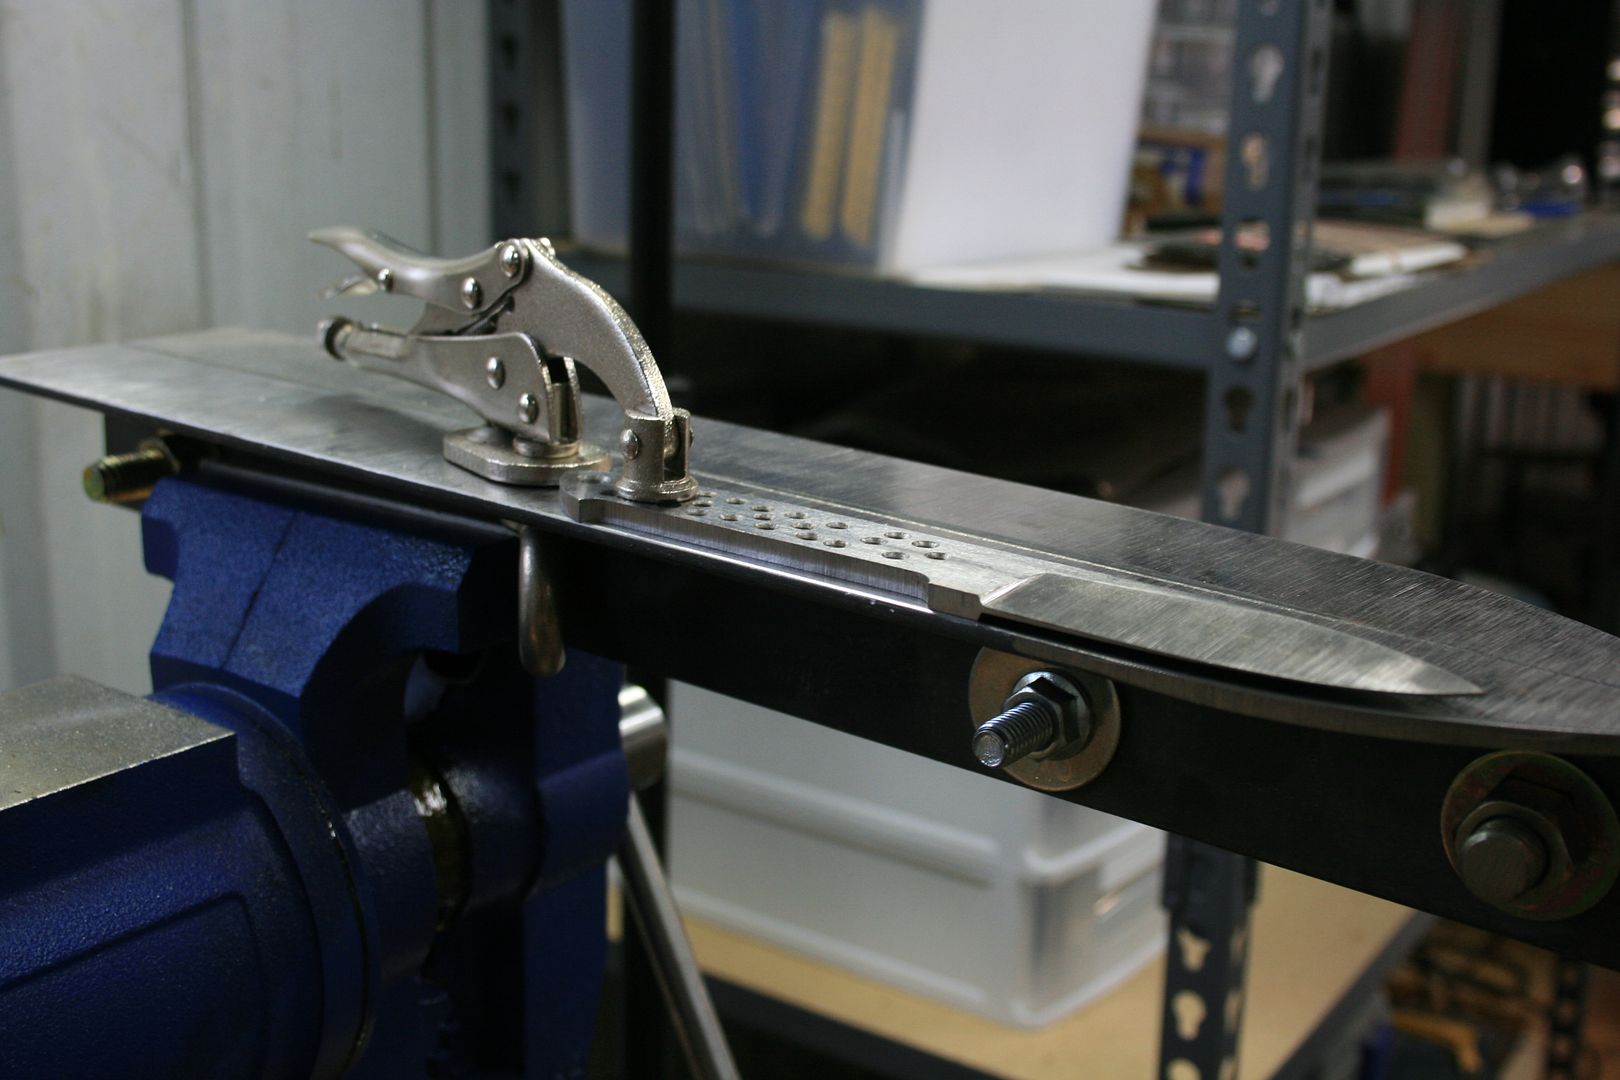
Going to cut the excess bolts off tomorrow and drill/tap holes for the support screws...
2013Progress011.jpg


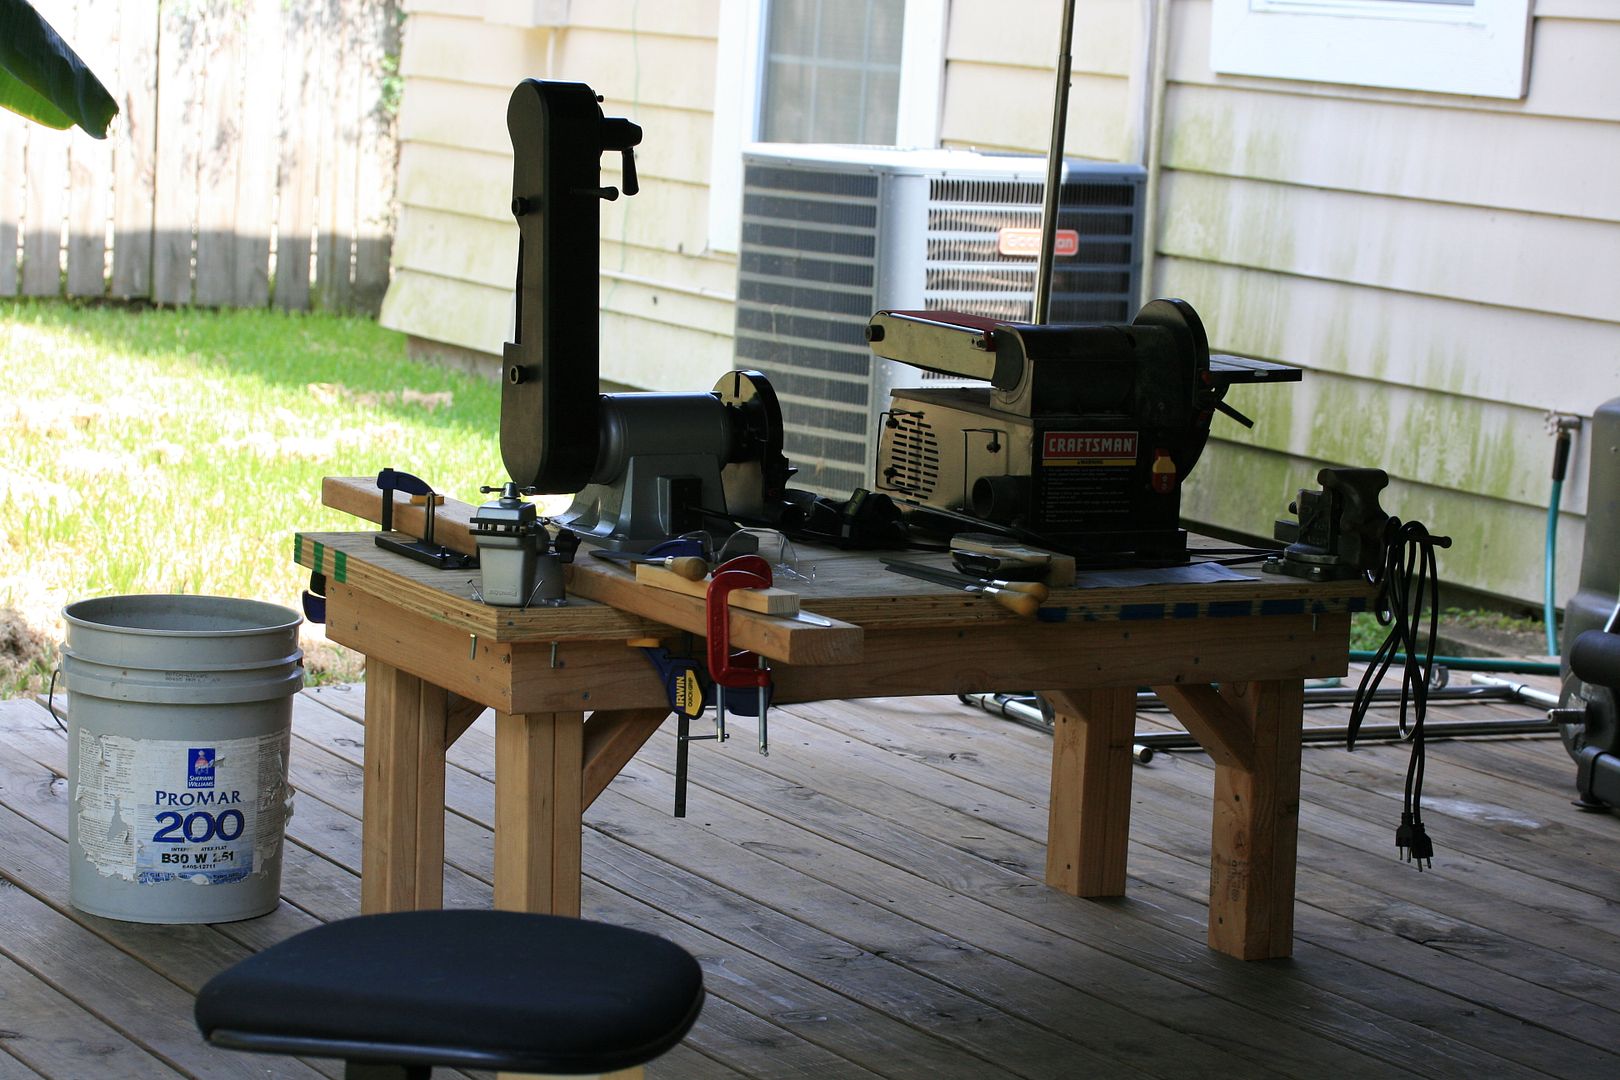
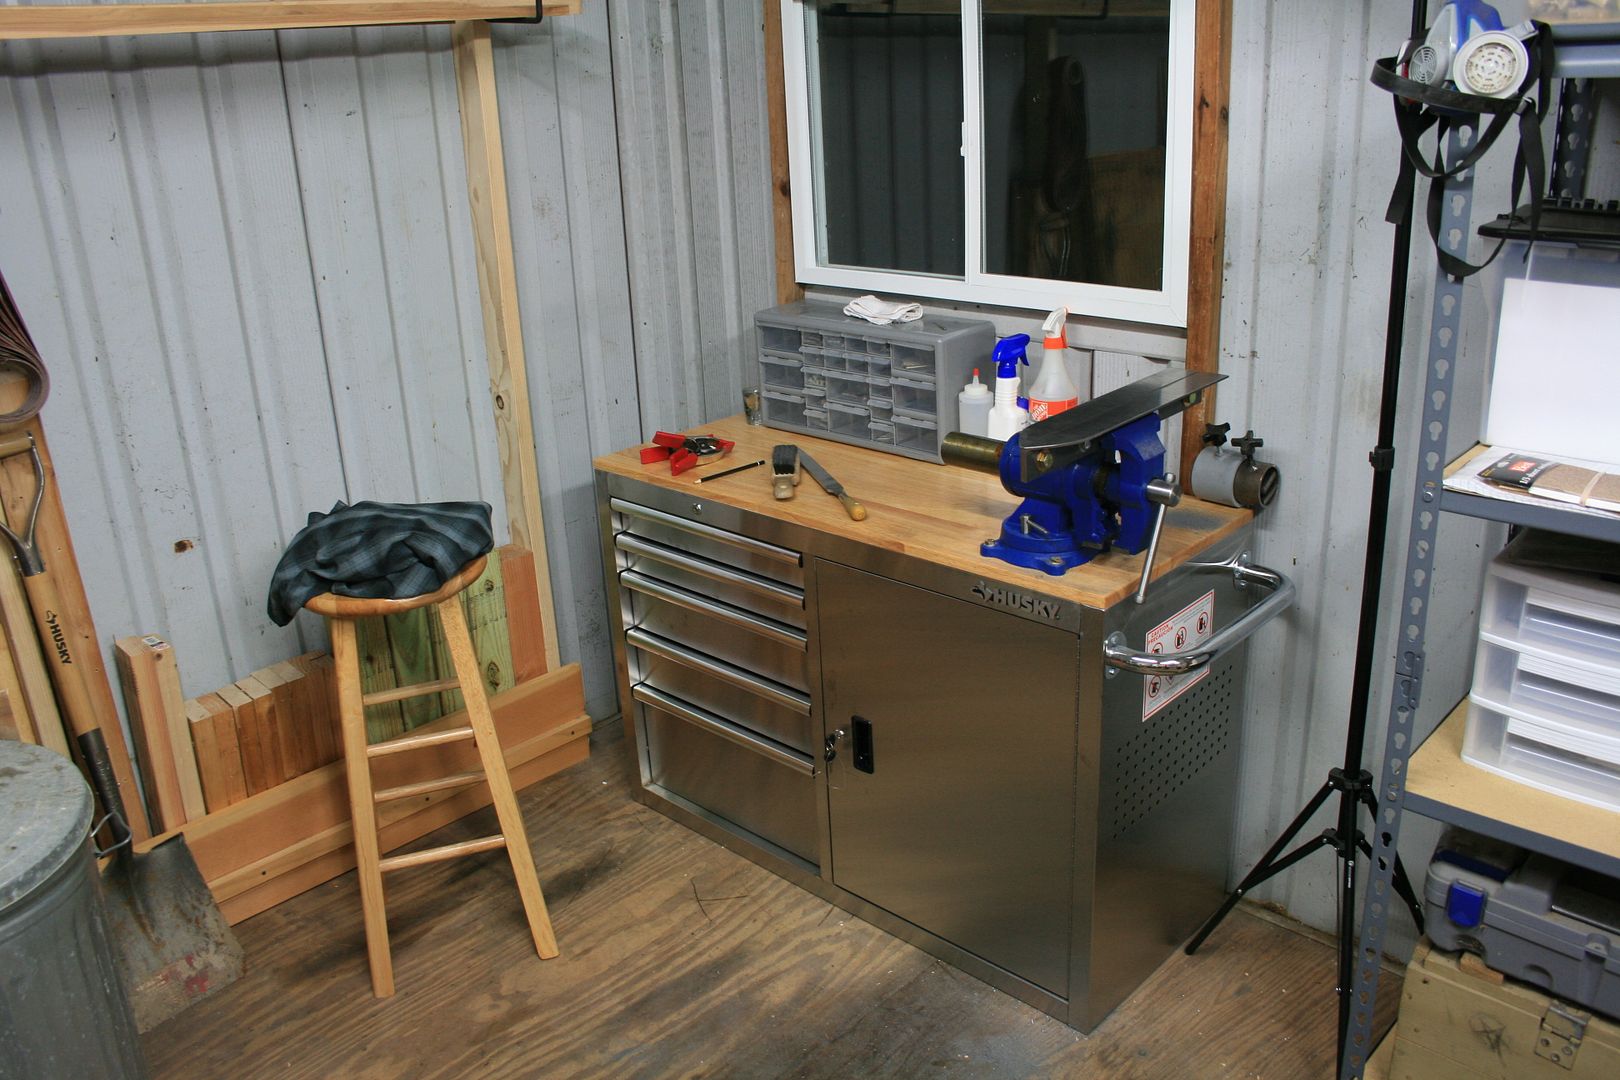
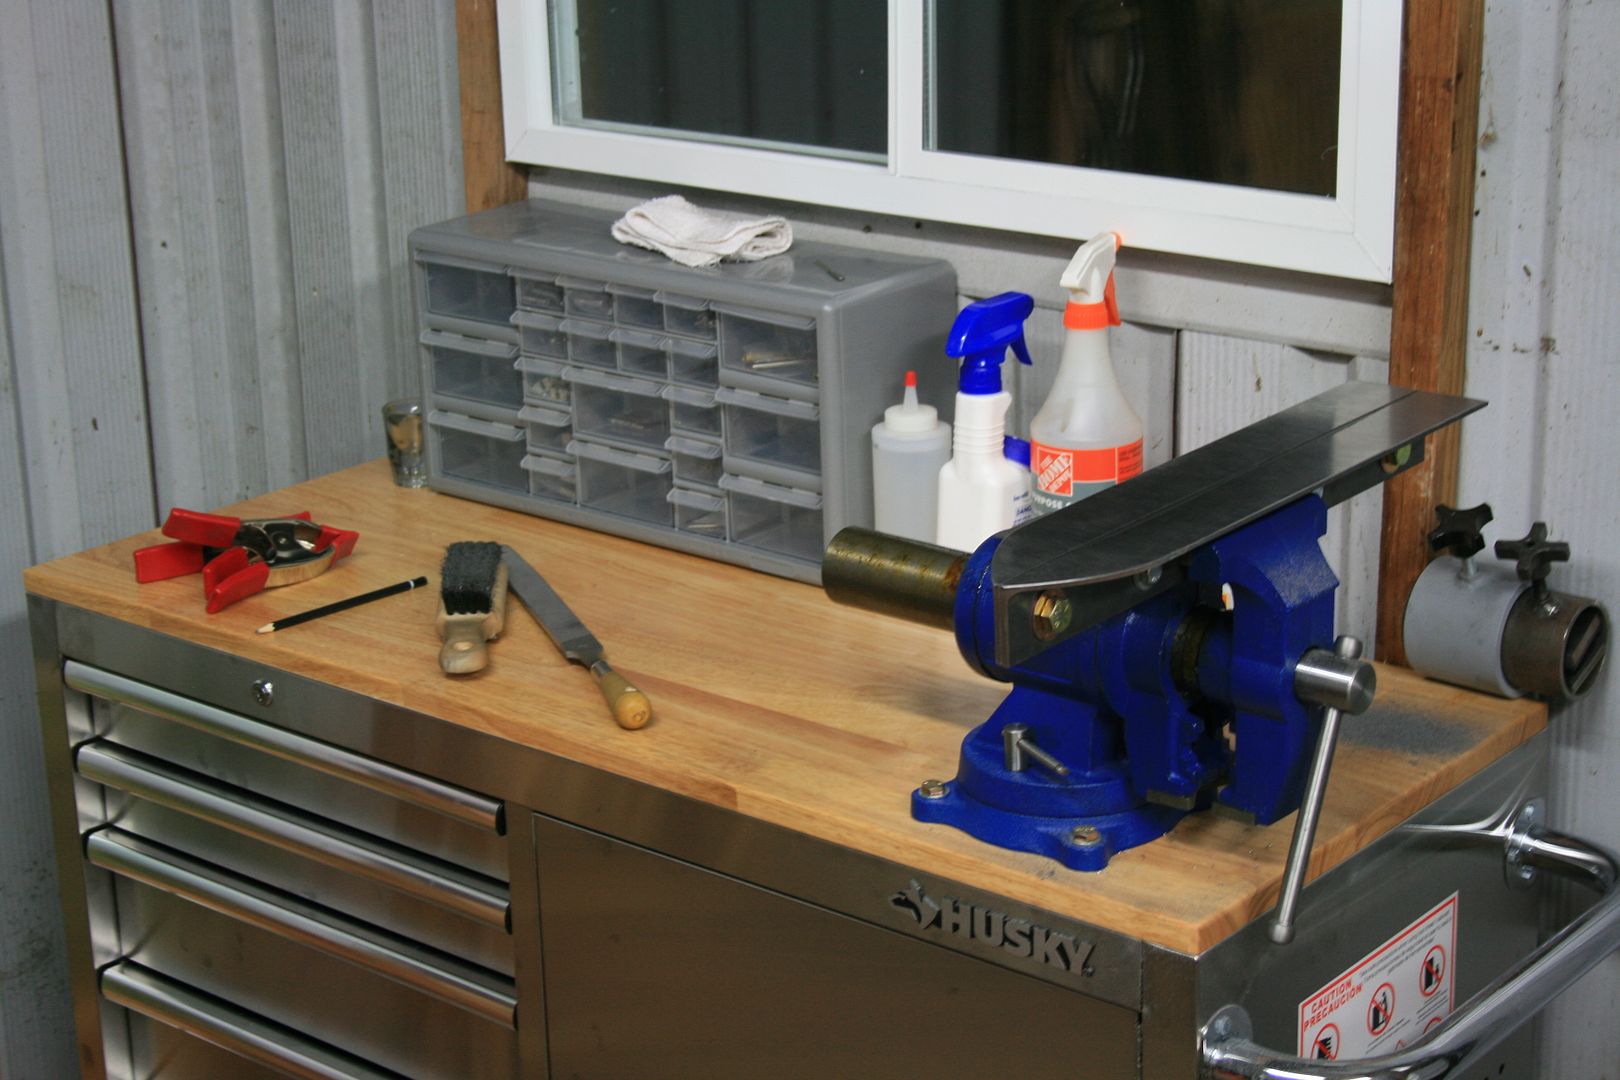
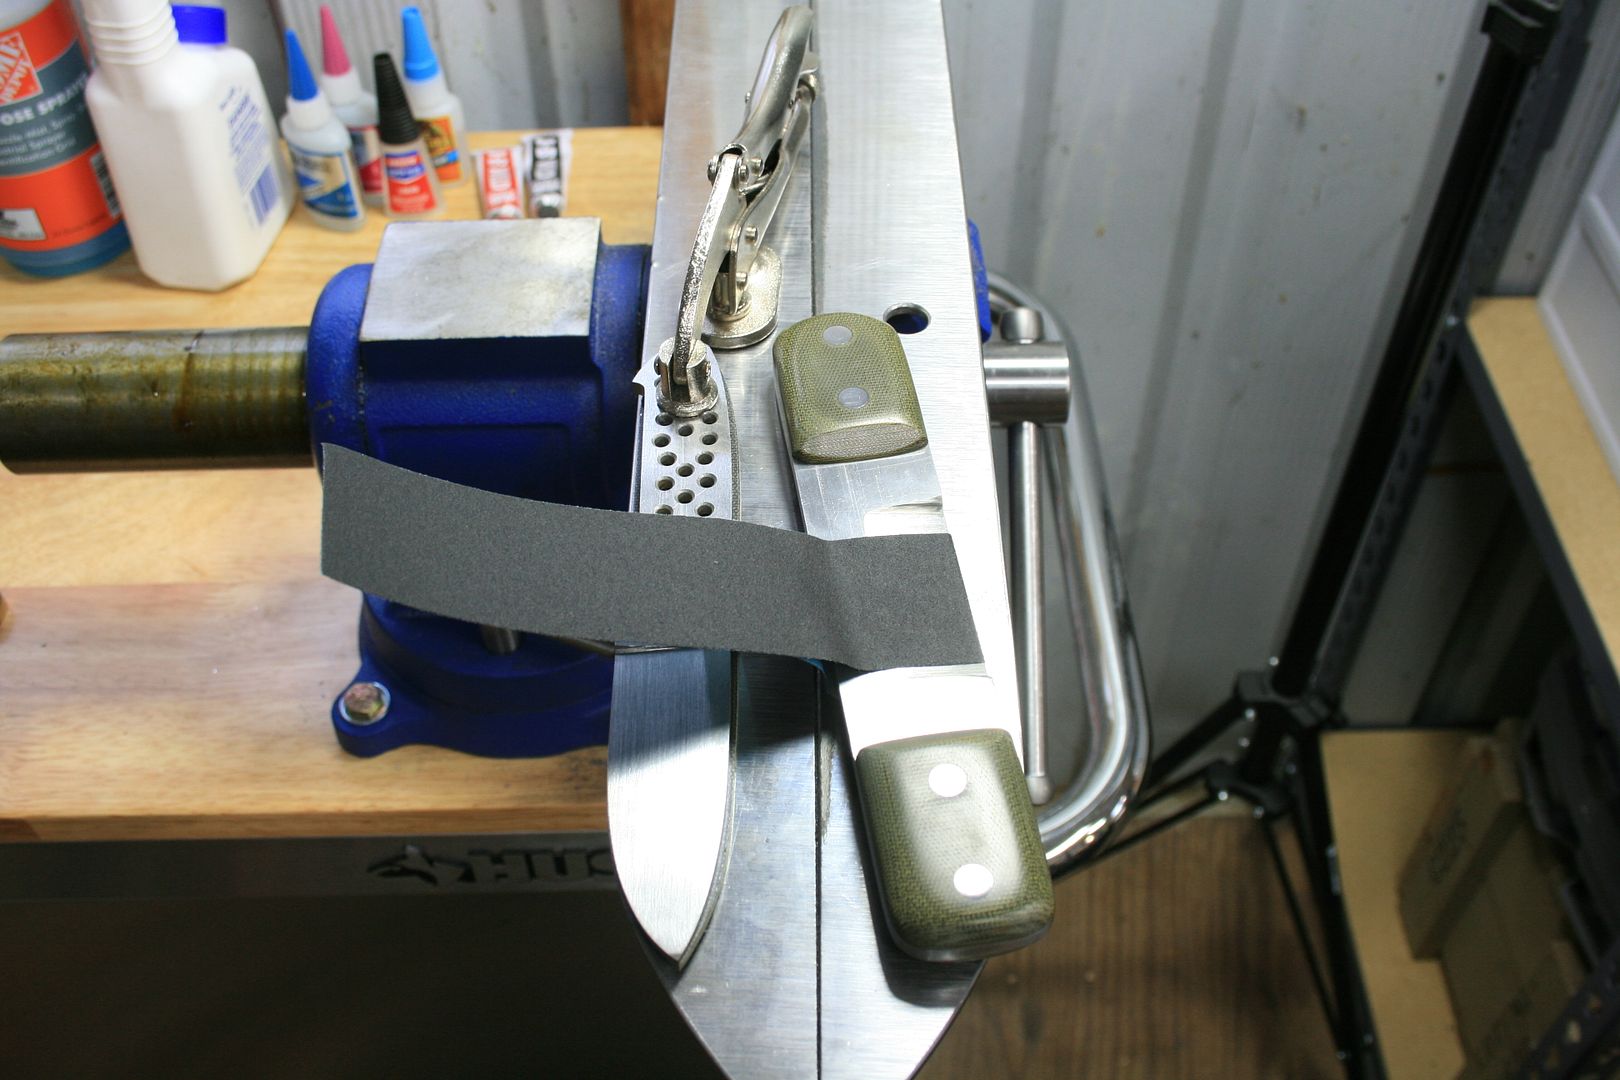
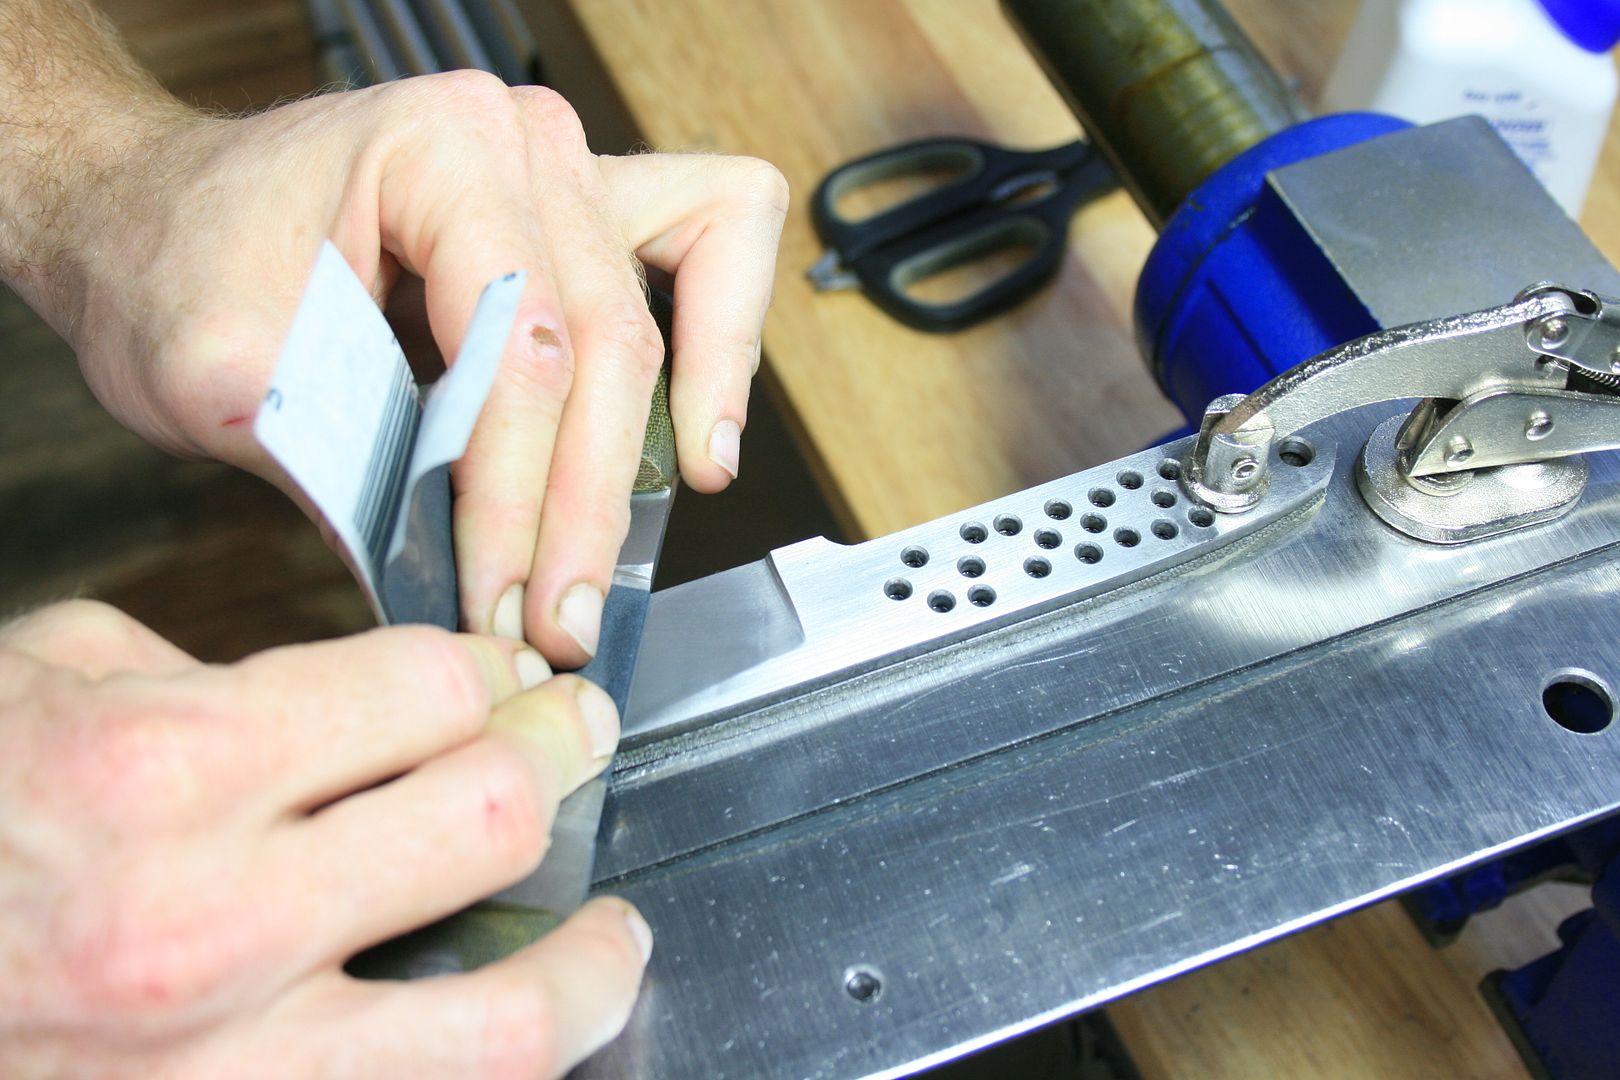
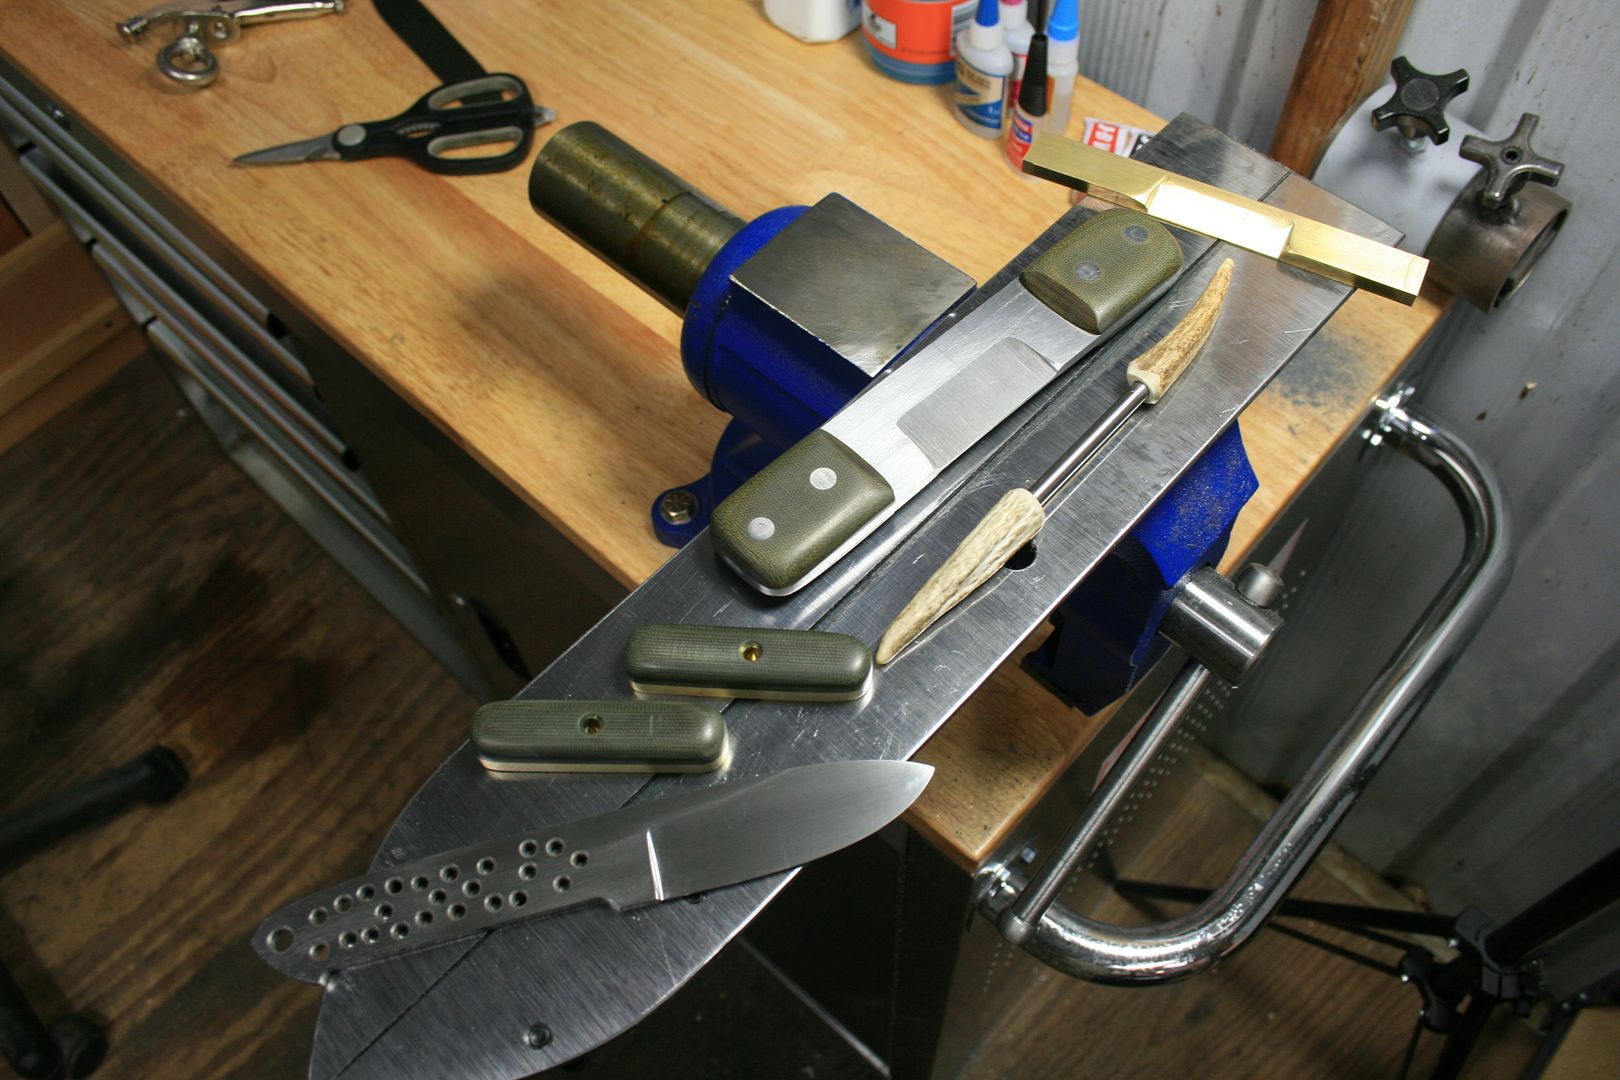
Here is the set up so far. I bolted the bench to the wall and the floor and it is pretty stable. Not perfect but that's what happens when you work in an old beat up shed. Plan on using it as an area to do all of the epoxy work also...
2013Progress013.jpg


2013Progress014-1.jpg


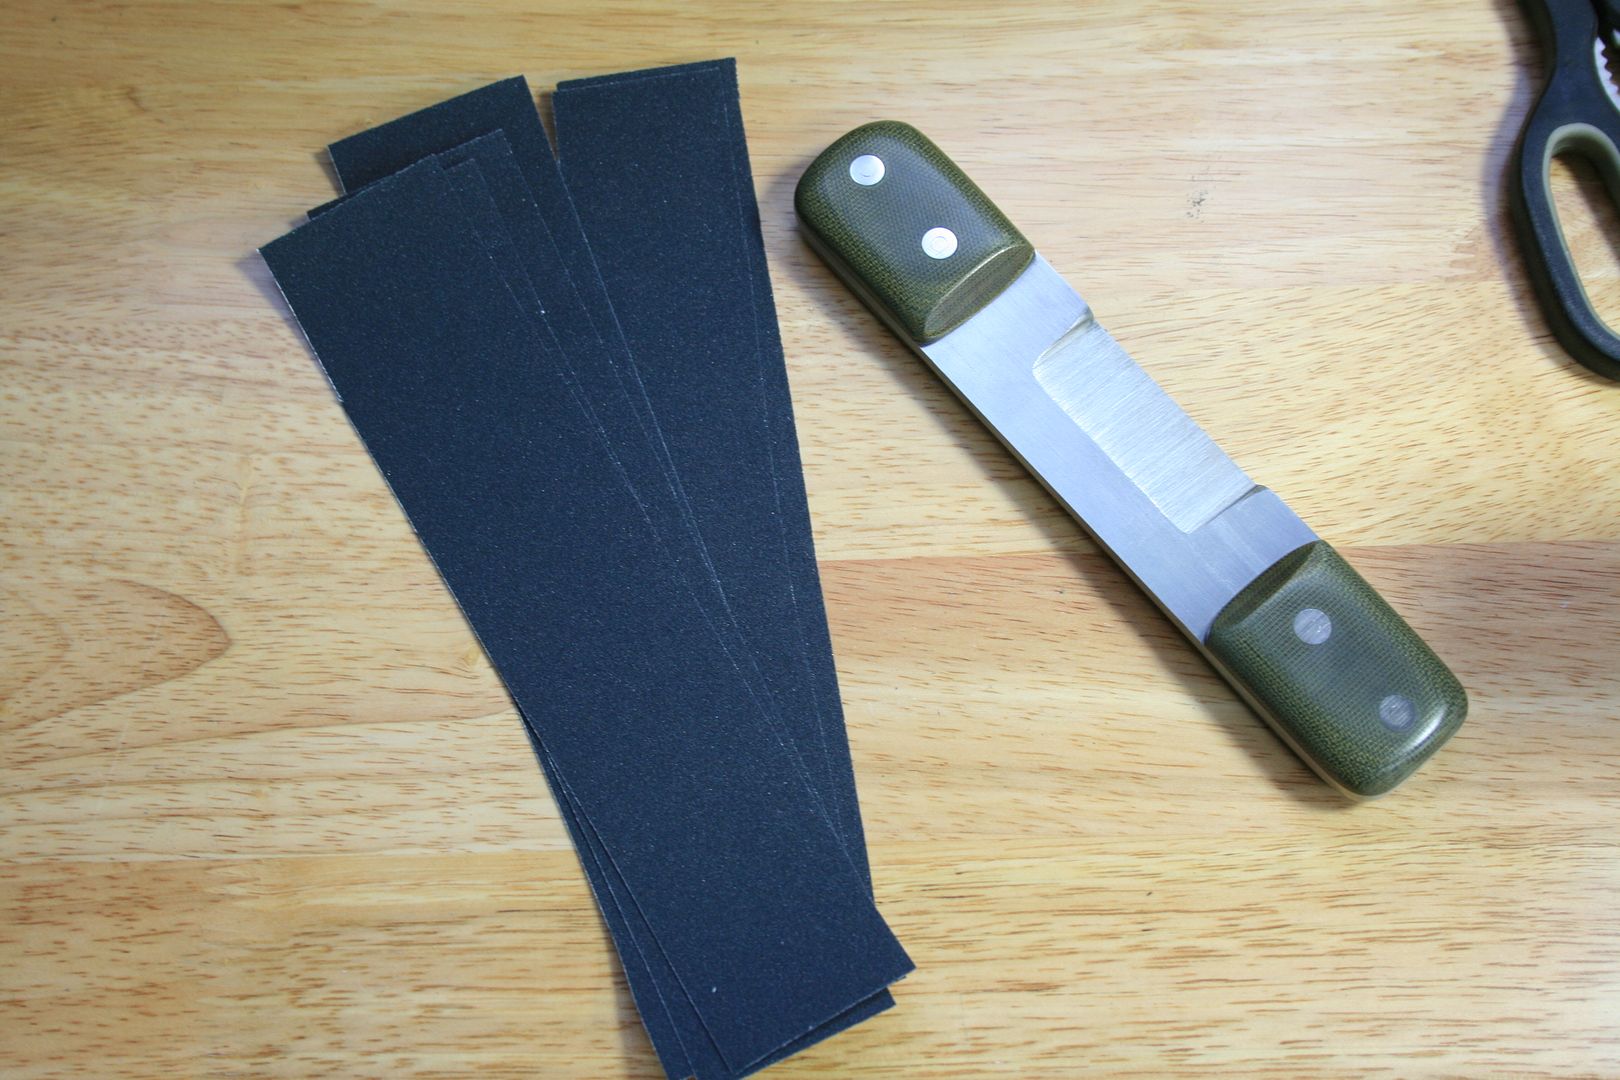
That's pretty much all I did today. Going to finish the jig and sanding sticks tomorrow and hopefully get some of these blades fixed up and off to heat treat.

I know all of this is nothing new and I am sure most of you are tired of seeing this stuff, but I thought it would be pretty cool to keep up with this for the year and see where it takes me. Hopefully a few of the other new guys will benefit from it too. I have already learned more in this thread than most books have given me. They seem to skip over the details which, to me, is the most important part of learning something. The other thing is that I re-read my posts multiple times and can see where I made mistakes, areas that need improving, etc. Plus you guys tell me the secrets.:3:
 
Last edited:
Finished the sanding jig today and I have got to say, WOW! The difference in this set up compared to my last is insane. The rigidity of the base plate and sanding sticks is 100% better. It is about 8" to 10" lower than the old one and my back is thanking me now. I can't believe that little distance makes that much of a difference.

Here I'm just lining up my knife to where it fits best. The set up is a little big for this small of a knife but works very well and now I have room to expand...
2013Progress001.jpg


Drilled a hole and attached a clamp...
2013Progress003.jpg


2013Progress004.jpg


Next, match the other side...
2013Progress005.jpg


Drill and tap the holes for the support screw...
2013Progress006.jpg


Looking good so far...
2013Progress009.jpg


Cut out a profile of the knife out of 1/4" micarta...
2013Progress010.jpg


To use like this...
2013Progress011.jpg


I also drilled and tapped another hole about midway from the tip to ricasso. This helps support the middle. Without it, there was a very small flex to the blade. Here it is clamped up and ready to use...
2013Progress012.jpg


The little clamp actually holds the knife complete still. I was worried I would have to use another clamp but luckily it works perfect.

Then it was time to finish the sanding sticks. I round the corners off and made the handle comfortable on the steel one.
2013Progress013.jpg


2013Progress014.jpg


2013Progress015.jpg


2013Progress016.jpg


Time to finally work on a knife...
2013Progress018.jpg


I go ahead and cut up a bunch of 1 1/2" strips of sandpaper to keep the process going a little quicker...
2013Progress021.jpg


Seems to be working excellent...
2013Progress022.jpg


Changing directions through each grit...
2013Progress026.jpg


2013Progress028.jpg


2013Progress031.jpg


This is sanded down to 400, but not completely done yet. There are still a bunch of j-hooks and 320 lines...
2013Progress032.jpg


This is what the untouched side looks like...
2013Progress033.jpg


I am very happy with the new set up. It really didn't take that long, or cost a lot, and should improve my sanding abilities. Now it's time to get back in the shop so I can get a dang knife built!

Thanks for looking.
 
Finished hand sanding my best pick of the knives. I learned quite a bit today. After sanding one side to 400 grit, I figured out a few mistakes I made and corrected them. Number one being; make sure you have sanded EVERY scratch out from the previous grit. Take it off the platform and inspect it under multiple light sources. I can't tell you how many times I have read this, but for some reason I just kept sanding. Those scratches really show at 400. Number two; I have always read to change the direction of sanding for each grit. What I was doing before was sanding the length of the blade, then sand perpendicular to that. This would wash out all of the lines and essentially sharpen the edge. After seeing Nick's videos, I noticed he would sand the length of the blade, then sand at about a 45* angle in one direction, then 45* in the other direction. By doing it this way, My lines are crisper and the edge is not sharpening. Number three; Make sure the sandpaper is snug and tight on the bottom of your sanding stick and not loose and bowed out. I am still having some issues with this but am slowly figuring it out. I might spray a little amount of weak adhesive to the bottom of the stick to keep it from doing this.

I feel that I can do a better job on this blade so I am thinking about re-doing the finish tomorrow. There are some scratches here and there and also the tip on one side was nicked on the grinder when grinding the bevels. For some reason I am still washing out the top line on the bevel. Does anybody know how I can keep from doing this? Could it be from not having the sandpaper tight enough?...

2013Progress040.jpg


2013Progress041.jpg


2013Progress042.jpg


After playing around with the brass stick, I decided it was too long and was going to cause issues by bending over the work area. Cut off the handles and cleaned them up. Now I have three tools instead of one. On one of them I am going to file a small radius on the bottom of one side to hopefully help get in the plunge cuts. The other small one will get a piece of leather attached to the sanding side and the bigger piece will get new handles....
2013Progress034.jpg


2013Progress035.jpg


2013Progress036.jpg


I needed a round sander to get in those curved areas so I cut up some antler tines, drilled a hole in the center of them and attached a section of stainless round bar in between them. I will need to get a few different sizes of stainless because this one is a little small...
2013Progress038.jpg


2013Progress039.jpg


Admiring my hard work.
2013Progress045.jpg


Thanks for looking!
 
Small Update...

Dropped the first knife off at Texas Knifemakers yesterday for heat treat and should be able to pick it up tomorrow. Pretty excited about getting it back and finally finishing one. Since I had been practicing on the same shape of blade for a while now, I decided to draw up a new one. Cut this one out today, drilled the holes, and laid out the design that I am trying to achieve. I have the whole day tomorrow to work in the shop and see if I can't get it done before going to pick up the other one.

Thanks for the tips on the bandsaw Rudy. I have seemed to have gotten it up to speed using your advice. A Starrett blade did wonders!

Let me know what you guys think...
2013Progress001_zpsd5f7bfe0.jpg


2013Progress002_zpsc59d3438.jpg


2013Progress003_zps418fd37a.jpg


Sorry about the blurry pictures.
Thanks for looking!
 
Glad I could help Steven.
It's amazing all the little tid bits of information you have to store in your squash for years. Keep us posted on finishing your knife, the new one's looking good too.

Rudy
 
Steve,

Its not up to me to suggest machinery for you, but it looks like you're using a single speed grinder that probably moves pretty fast. Given that setup, I think your grinds are very good, better than I could do. You seem pretty committed to this. And you enjoy making your own tools. Have you considered getting a variable speed 2 x 72 belt grinder. There are a ton of options. I bought the Polar Bear forge GIB frame kit, around $250.00, 1/2" plate cut with most holes, and had as much fun putting that together as making a knife. I have been happy with that. If you use top quality components, you won't save a lot of money over something like a KMG, but you can build it over time and spread out the cost.

Jay
 
Steve,

I really like the profile of your new blade a lot. I don't mean this as a crtique, but in making Loveless style drop point hunters, like your profile, the cutting edge and heel are a continuos line. I had trouble maintaining the profile when sharpening, forget re-sharpening. It ended up looking a little ragged. In the future, I will either have the cutting edge extend below the heel, like Schuyler Lovestrand's drop point, which I copied from an internet photo.
IMG_8739.jpg

Or cut a notch between the heel and tang at the ricasso.

Jay
 
Last edited:
Jay,
Thanks for the comments! This is my dilemma right now. I will most likely go the personal build route due to the cost and how new I am at this. My plan is to complete a bunch of knives on the Craftsman first, then, if I still have the passion for knifemaking as I do now, start a grinder build. The good news is that I start a new project in the next few weeks and will be getting a ton of overtime again, which is where my dilemma is. Once this project starts, I will pretty much be limited to Saturday evening and Sunday to work in the shop. With having extra cash from the overtime, I might just save up and buy a KMG or Wilmont. Then there is the next dilemma, choosing a grinder. There are quite a few options out there and each one seems to be very well built and all get great reviews.

I bet grinding on a machine you built yourself gives you more satisfaction then grinding on one purchased.

But first, I need to see if I can complete a few knives. :biggrin:
 
Steve,

I hear ya about the cost. By the time I was finished I had about $1,200.00 into the GIB. But I bought Beaumont's KMG parts: platen, drive wheels,etc. and 10" rubber wheel. And the KBAC control unit as used by Beaumont on its KMG. The ten inch wheel and KBAC unit combined were about half of the total cost. But I haven't regretted it, especillay the variable speed.

Jay
 
$1200 is not bad at all. If I start one, do you mind if I PM you with a few questions as I'm building it? I might have to start looking into this option a little more seriously.
 
Last edited:
Back
Top