What's going on in your shop?

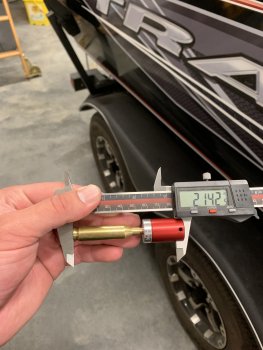
This is pretty cool.


I spent 1/2 a day Friday building my new work shop (inside a 16' cargo trailer). Now I do not have to finish my knives in the hot sun. Since I work away from home 95% of the year, I can take this with me and set it up at the RV parks I stay in. I am going to wire it all up to a 30 amp plug and
install an air conditioner next week ( yeah, I'm soft). I will be able to pull up, take my anvil and forge out the back and start making knives!
 
...

Lot's of shenanigans around the shop this week.
I'll spread it out over a few posts.

Here is a ribbon burner "hull" given to me by John Emmerling and Rome Hutchings a few years back. I am finally getting around to using it. In the mean time, we are building a few more you can seen the back ground. Note on the sides are two square bars to push down to later.


IMG_5613.jpg

We made a mold and part of the mold had holes drilled to hold crayons. (Any Marines reading this, these are not snacks. (thank you for your service tho))
IMG_5710.jpg

I had a few bags of unidentified stuff I bought several years ago for the refractory.
IMG_5711.jpg

Luke is getting it in between the crayons. The consistency is a bit runny since we have to push the "hull" into the mold and force some of the refractory into the hull part way.
IMG_5713.jpg

Here he is pushing the hull down into the mix.
IMG_5718.jpg

See the bar resting on top of the mold. The hull has been pressed about an inch into the mold. The refractory pushed up into the hull. This leaves an open area on the round pipe side of the hull chamber. Once the refractory has been allowed to cure for a couple days, we will take it out of the mold and drill out the crayons. After that it gets plumbed to a blower forge which will be built for this ribbon burner. Some one on IG see the pic and suggested there maybe too many holes (crayons) and I might have to plug some which will be trivial. Once I get it up and burning, I'll post a video.

IMG_5719.jpg
 
Lot's of salt.


This is NitreBlue bluing salts from Brownells. Using this is what gives you those bright blue/purple blades or bolsters or (metal) scales you see often.
It's pretty basic, heat these to 550F to 600F, dip your part for 5 to 10 minutes, cool in water and then soak in water displacing oil. Time and temp variance will give you different colors as will the types of carbon steel you use. It will not blue stainless steel. Fun and a bit dangerous. I will be using a small portable propane hot plate to heat this stuff to temp outside. The fumes are bit nasty and will rust every thing it can attach to.
IMG_5726.jpg


Finally, this is the prototype salt pot we got from Evenheat. We are getting it set up for a test run in the morning. We will be using "low temp" salts so in 1400F to 1600F range. Basically hang your carbon blade in this through the top hole for 5 to 10 minutes and then quench. No decarb and super clean finish. REALLY dangerous and fun.
IMG_5725.jpg

and finally (no salts) here is a tile of mosaic canister Damascus I made. I will use a mill to cut away the remaining can you can see on the outside of the pattern. Then I will cut the billet into 1/8" thick tiles. The tiles will be stacked and mig welded to a core of 1/8" 1095 for a san mai billet. I will use a thin layer of nickel (.003" thick) between the tile layers and the core to help it all stick. Then I will weld a sacrificial piece of mild steel sheet metal over the whole stack so no seams are exposed. Heat it and squish it. I'll use the new salt pot to heat treat and the new bluing salts to color it.

I love my job.
IMG_5727.jpg
 
...

Lot's of shenanigans around the shop this week.
I'll spread it out over a few posts.

Here is a ribbon burner "hull" given to me by John Emmerling and Rome Hutchings a few years back. I am finally getting around to using it. In the mean time, we are building a few more you can seen the back ground. Note on the sides are two square bars to push down to later.


View attachment 69955

We made a mold and part of the mold had holes drilled to hold crayons. (Any Marines reading this, these are not snacks. (thank you for your service tho))
View attachment 69956

I had a few bags of unidentified stuff I bought several years ago for the refractory.
View attachment 69957

Luke is getting it in between the crayons. The consistency is a bit runny since we have to push the "hull" into the mold and force some of the refractory into the hull part way.
View attachment 69958

Here he is pushing the hull down into the mix.
View attachment 69959

See the bar resting on top of the mold. The hull has been pressed about an inch into the mold. The refractory pushed up into the hull. This leaves an open area on the round pipe side of the hull chamber. Once the refractory has been allowed to cure for a couple days, we will take it out of the mold and drill out the crayons. After that it gets plumbed to a blower forge which will be built for this ribbon burner. Some one on IG see the pic and suggested there maybe too many holes (crayons) and I might have to plug some which will be trivial. Once I get it up and burning, I'll post a video.

View attachment 69960

But the crayons taste so good...LOL

Semper fi

Branson
 
I have some friends that were taking damascus to a gun smith to be blued and they said he was running around 210 degrees to blue the damascus. We knew the temper would not be affected in this area.
 
I have some friends that were taking damascus to a gun smith to be blued and they said he was running around 210 degrees to blue the damascus. We knew the temper would not be affected in this area.

There are different types of salts that blue at different temps that produce different types of finish. Gun bluing is typically lower temp salts. This Nitre stuff operates at 500 to 700f and gives colors the lower temp salts do not. The soak time is 5 to 10 minutes and no doubt will affect the temper if left in for longer. I have asked several guys about this and the answer has always been the steel isn’t in the salt long enough to appreciably affect the temper.
 
Since I'm in need of a work rest for my grinder I picked up a 2 ft x 3 ft x 1/2 inch road plate.
Road plate.jpg
For the work rest I only need a small piece, probably 8 x6. So it got me to wondering what to do with the rest. I figure I could stow it for some future project that needs 1/2 inch steel for...or....

An anvil? I'm throwing this out for thought. What if I cut the rest into 8" x 6" pieces and stack and weld? That would give me a 110 lb stack roughly 9 inches in height. Then I could get a piece of heat treated 4140 for the top plate.

OK I know I'm a cheap bastard. The plate cost me $30.00. But right now I have more time than money.

Am I insane? (Don't answer that) Let's go with crazy. Is this feasible or am I in for more grief than it's worth? I'd probably do this some time this winter, so there's no hurry. I've got plenty of other projects.

(Plus I still have a KITH knife to do. Thus the reason for the work rest)
 
Sean, by the way this is how I did the swedges. The wedge I made is cut from a piece of plastic Seaboard / Star board because I had it on hand. I left a foot on the bottom so I’d have a way to clamp it to my rest.
 

Attachments

  • 3596ECE8-3568-4317-B33E-6A9CF95FA8CF.jpeg
    3596ECE8-3568-4317-B33E-6A9CF95FA8CF.jpeg
    2 MB · Views: 16
Where does one get a plate like that for $30? I’m just starting to learn welding and haven’t got a good line on low cost steel.
I hunt the local want ads for stuff like this. There's a local TV station KSL that has ads on their website that are like Craig's List on steroids. Easily searchable. This plate was literally on the road.
 
Sean, by the way this is how I did the swedges. The wedge I made is cut from a piece of plastic Seaboard / Star board because I had it on hand. I left a foot on the bottom so I’d have a way to clamp it to my rest.
Cool. Thanks for showing the photo John. That's really helpful. Much appreciated!
 
Nothing is happening in my shop.

Nothing because the south half of my shop lights quit turning on and since they are old T12 fixtures with those big honking ballasts I figured they were just wired together and one finally died. So after messing with reworking the wiring in the rafters a couple hours, I did a power check and nothing. Tested all the way back to the box and...dead leg coming in. Hooray. Somewhere between the meter loop and the breaker box, it's kaput. $$$$$$$$$$$
Isn't that the power company's territory? Shouldn't they be the one to fix it? I don't really know, but that sounds like the way it should be.
 
Isn't that the power company's territory? Shouldn't they be the one to fix it? I don't really know, but that sounds like the way it should be.
No, it appears to be on my side of the loop because there's no issues with the power to my house. It could be a splice in the overhead line or simply the main breaker breaker on the pole. Electrician work either way.
 
@Sean Jones I think it would not be worth the time to try and turn those pieces into an anvil. But if I wanted to do it. I would probably plug weld each piece together but that would take a long time to do. Also you need a welder that can handle 1/2 thick steel. I think mine max's out at 3/8" plate
 
Nothing is happening in my shop.

Nothing because the south half of my shop lights quit turning on and since they are old T12 fixtures with those big honking ballasts I figured they were just wired together and one finally died. So after messing with reworking the wiring in the rafters a couple hours, I did a power check and nothing. Tested all the way back to the box and...dead leg coming in. Hooray. Somewhere between the meter loop and the breaker box, it's kaput. $$$$$$$$$$$
Did you lose half of the entire house at the panel, or just one leg of a double throw breaker to the shop?
 
Did you lose half of the entire house at the panel, or just one leg of a double throw breaker to the shop?
Just one leg to the shop. So it's between that main breaker and the shop. I did look this morning and I have 3(!) splices in my overhead line so I might get away without too much trouble.
 
Back
Top