You are using an out of date browser. It may not display this or other websites correctly.
You should upgrade or use an alternative browser.
You should upgrade or use an alternative browser.
"The Alaskan" - WIP
- Thread starter Karl B. Andersen
- Start date
Karl B. Andersen
Well-Known Member
Sorry about the time lag on this project.
I just finished file size reduction and uploading 72 more picture to Photo bucket. :what!:
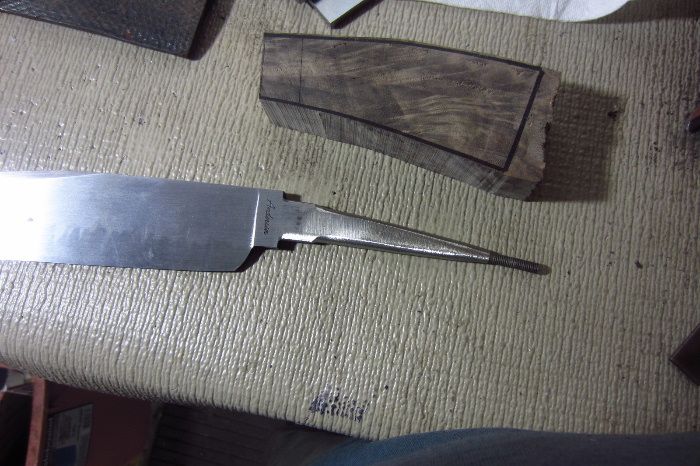
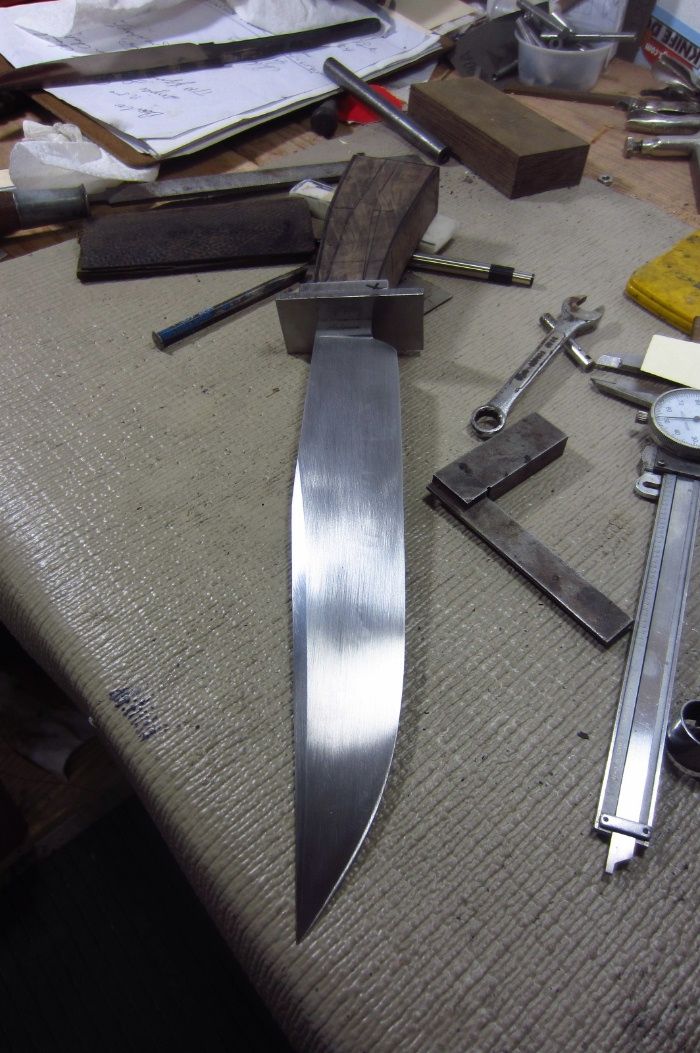
Here is the direction we're headed on this one.
I just finished file size reduction and uploading 72 more picture to Photo bucket. :what!:
Here is the direction we're headed on this one.
Karl B. Andersen
Well-Known Member
I've got a bit of a philosophy - the more time I take up front getting things to be right and fit right, the less time I need to take LATER to make things be right and fit right.
Just the way I am.
I've built so many high end houses in my life, I learned that if things are to fit right when you're finishing out the house, it goes a lot easier if you made the ground-up portion of the house right in the first place.
So, hurry up and slow down.!!
Just the way I am.
I've built so many high end houses in my life, I learned that if things are to fit right when you're finishing out the house, it goes a lot easier if you made the ground-up portion of the house right in the first place.
So, hurry up and slow down.!!
Karl B. Andersen
Well-Known Member
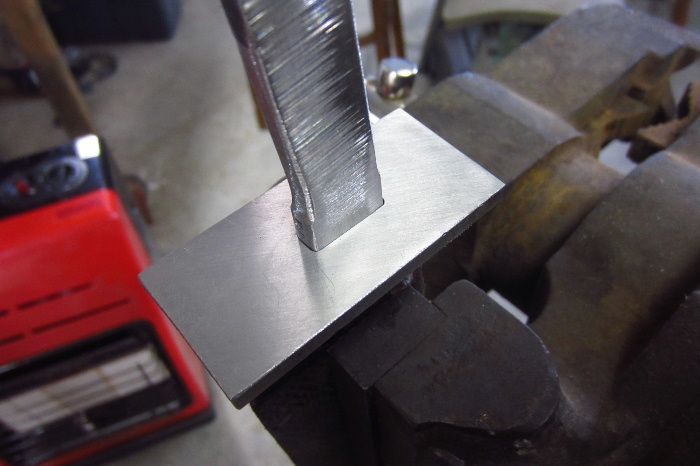
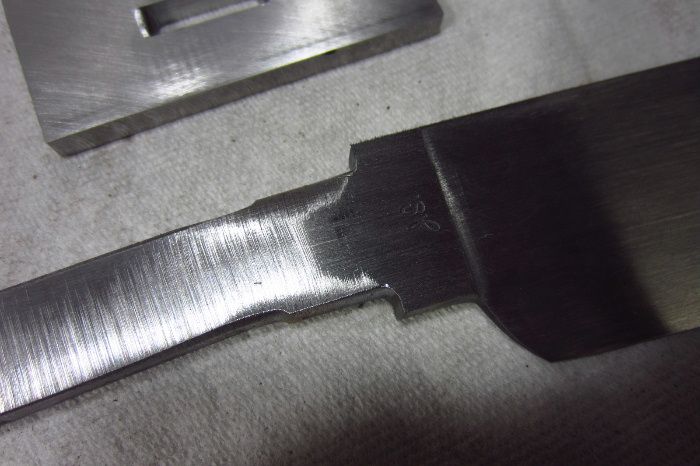
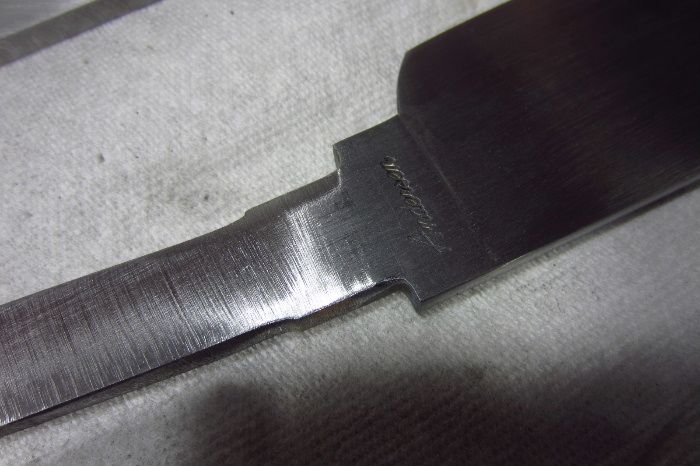
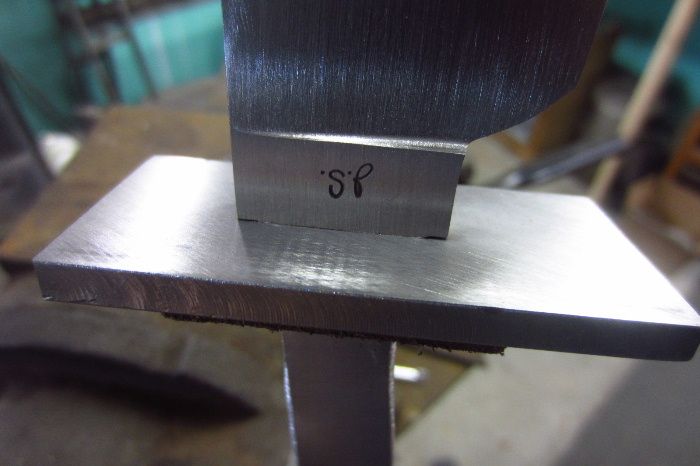
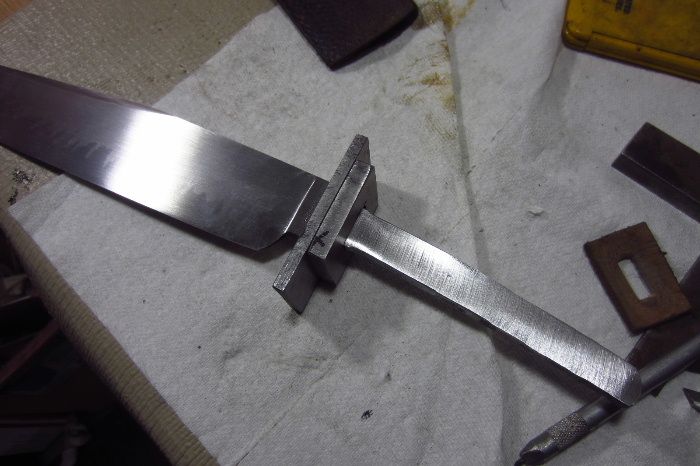
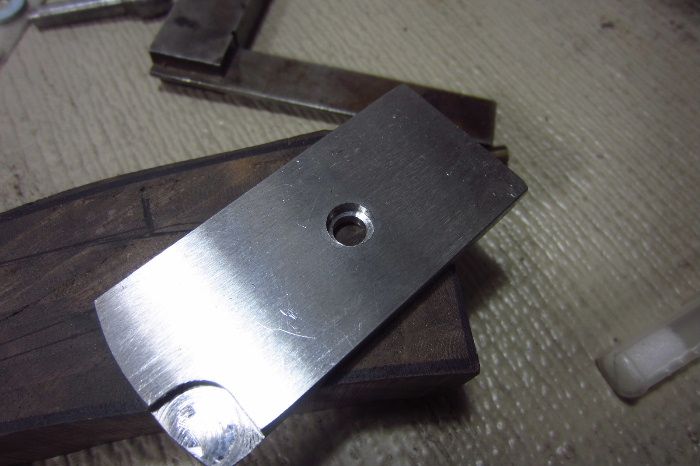
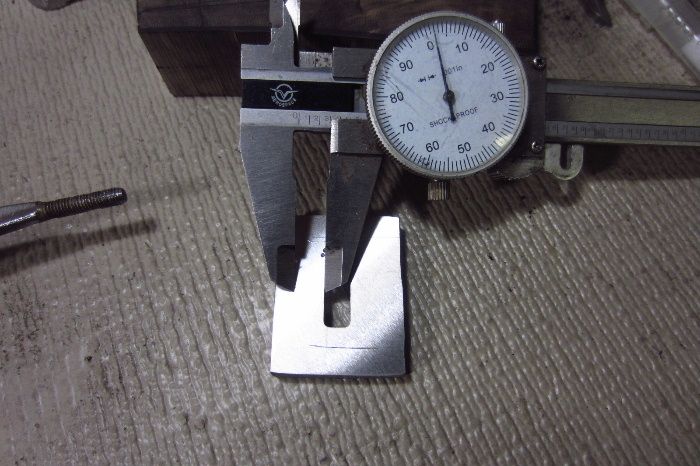
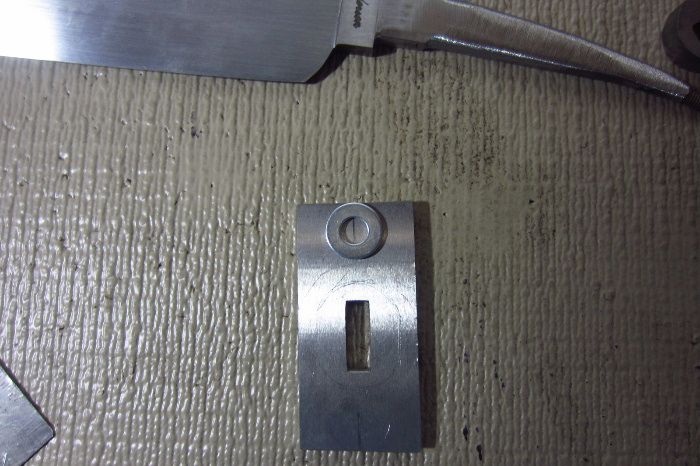
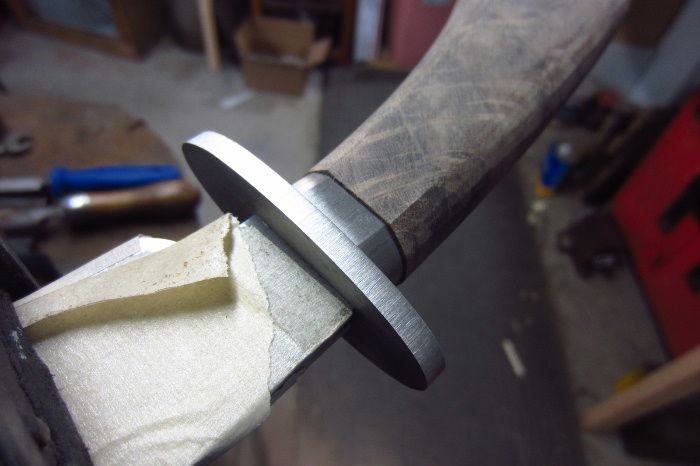
So, this is the fit of the guard RIGHT OFF THE MILL!!!
See? I went to a lot of work earlier to get things flat and parallel, etc., and some folks might think that's too much of a time investment, but look at the time necessary to make the guard fit - very little.
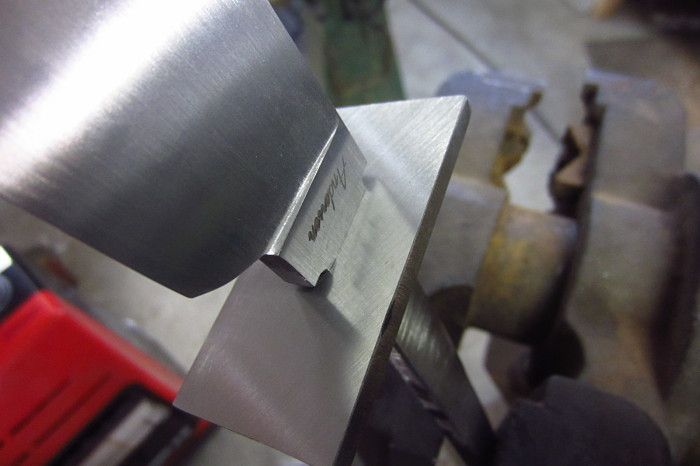
Both sides:
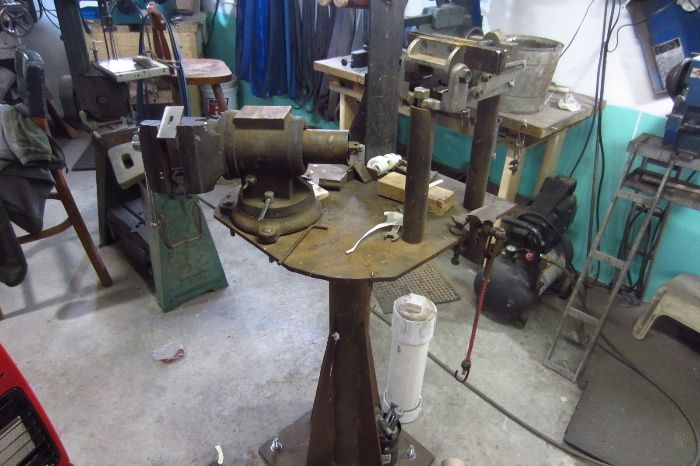
It's been a good five years ago I made this vise stand, and it's one of the few smart things I've ever done in my life.
As well, that vise rotates in all directions.
This way, it's not like a vise sitting on the edge of a bench - I can access the workpiece from all directions and I'm not limited by the front edge of the bench.
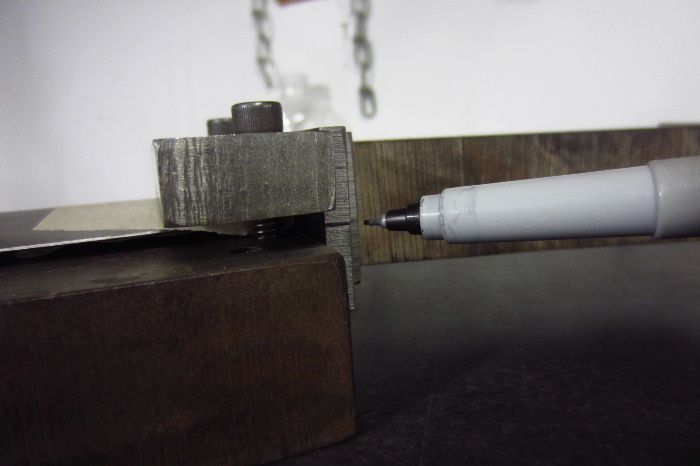
Notice the guard in the vise jaws:
Now I take a safe edge file and radius the top and bottom of the slot to fit the 1/8" radius of the guard shoulders:

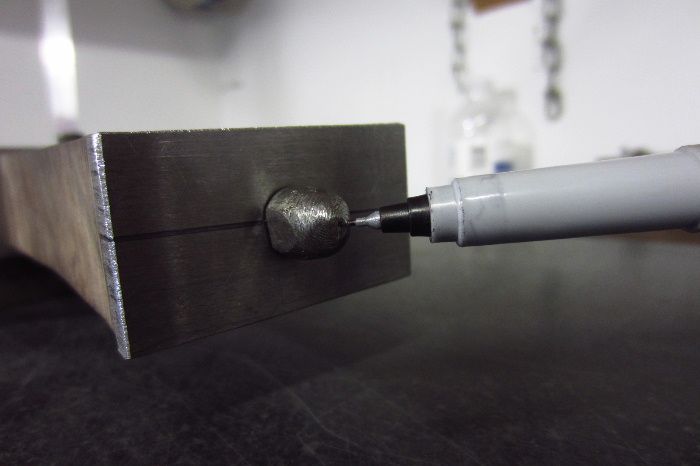
rear view with the knife placed in the vise jaws:
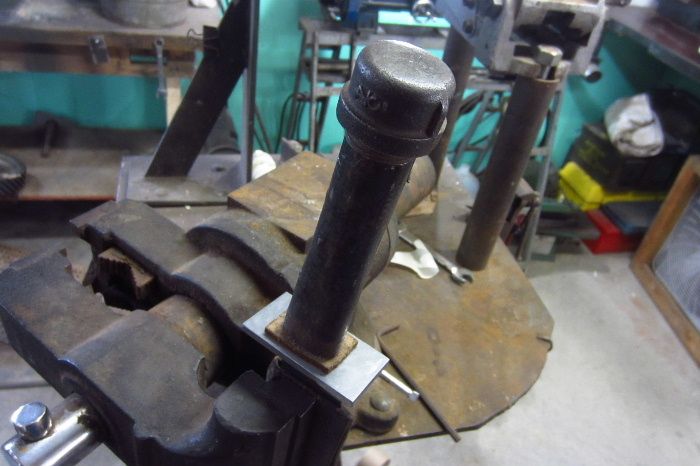
Protect the back of the guard with a piece of leather:
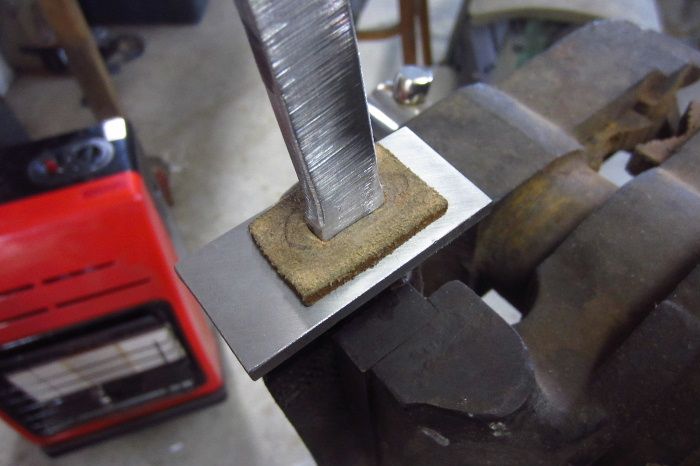
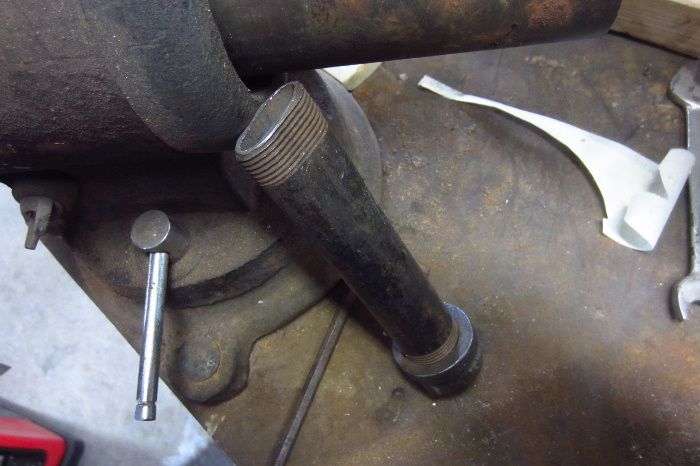
And give it a tap with a flattened pipe nipple:
See? I went to a lot of work earlier to get things flat and parallel, etc., and some folks might think that's too much of a time investment, but look at the time necessary to make the guard fit - very little.
Both sides:
It's been a good five years ago I made this vise stand, and it's one of the few smart things I've ever done in my life.
As well, that vise rotates in all directions.
This way, it's not like a vise sitting on the edge of a bench - I can access the workpiece from all directions and I'm not limited by the front edge of the bench.
Notice the guard in the vise jaws:
Now I take a safe edge file and radius the top and bottom of the slot to fit the 1/8" radius of the guard shoulders:
rear view with the knife placed in the vise jaws:
Protect the back of the guard with a piece of leather:
And give it a tap with a flattened pipe nipple:
Karl B. Andersen
Well-Known Member
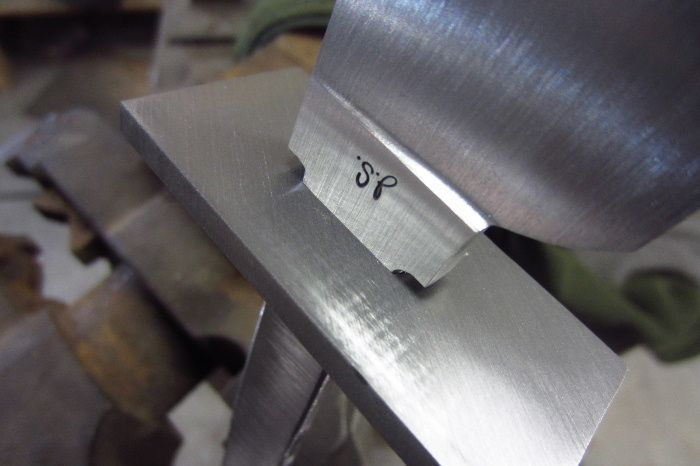
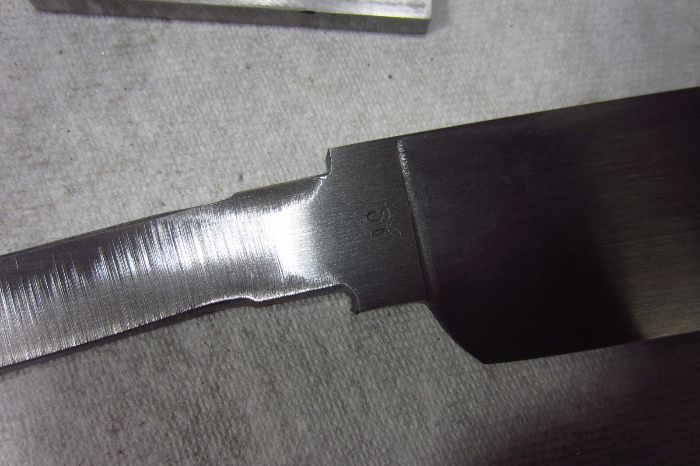
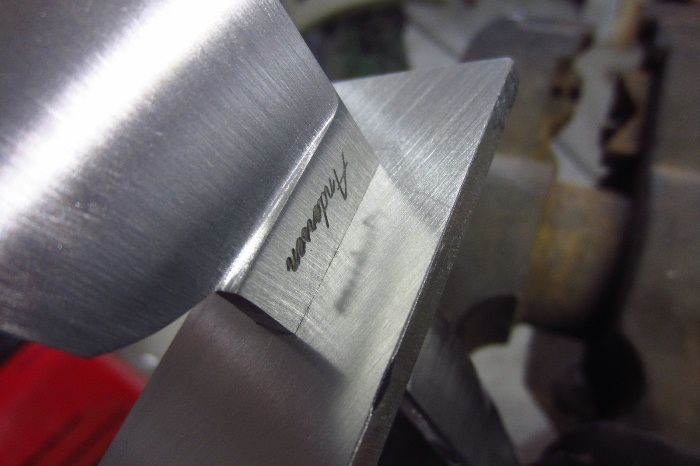
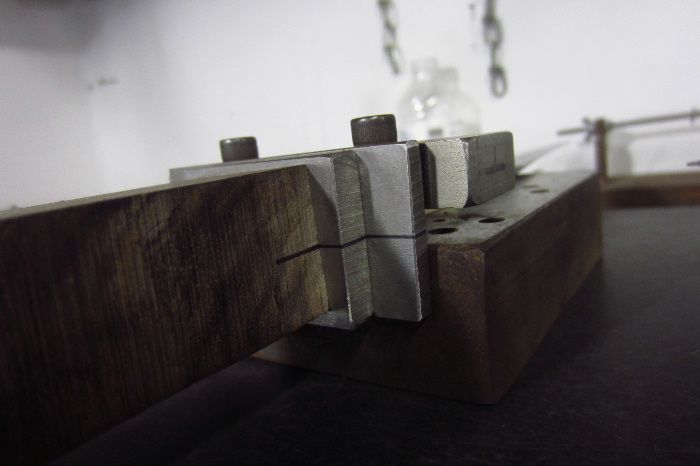
If you look closely, you'll see where the guard lightly scratched the sides of the blade on both sides:
Now take the knife to the surface plate and lightly sand off the sides of the knife:
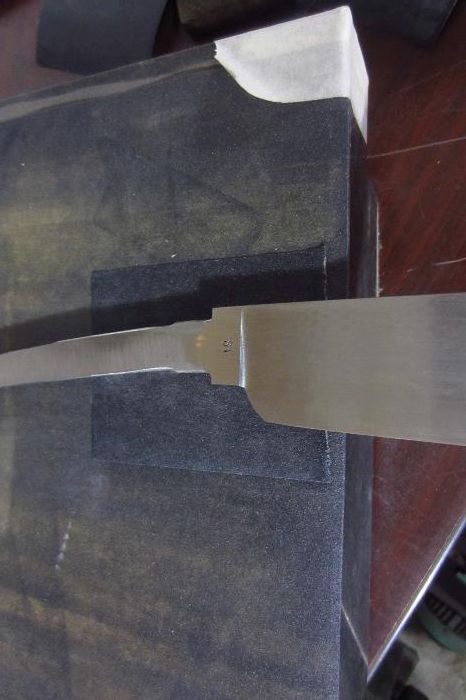
No scratch marks:
And try the fit again:
Scratch and sand one more time and tap:
And she's in place!
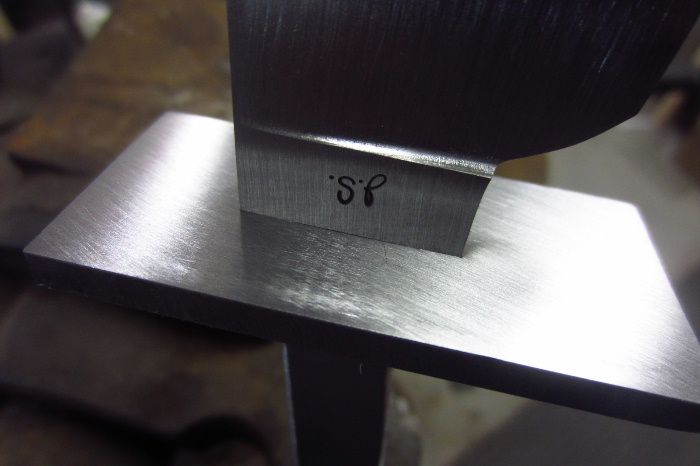
Total fit time was about 2 minutes. :35:
Now take the knife to the surface plate and lightly sand off the sides of the knife:
No scratch marks:
And try the fit again:
Scratch and sand one more time and tap:
And she's in place!
Total fit time was about 2 minutes. :35:
Karl B. Andersen
Well-Known Member
Repeat for the spacer:
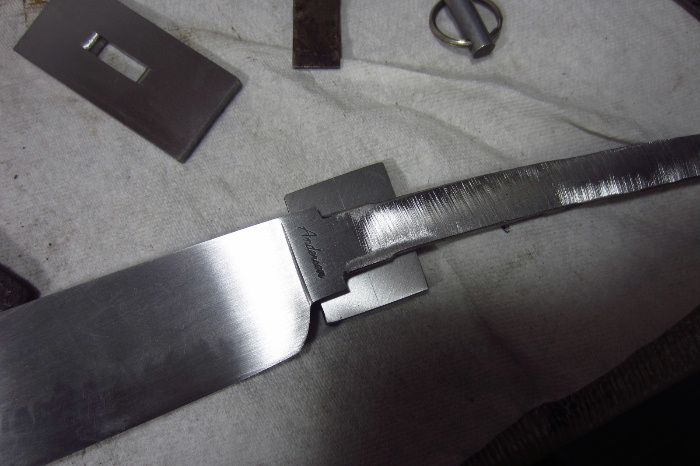
Good to go.
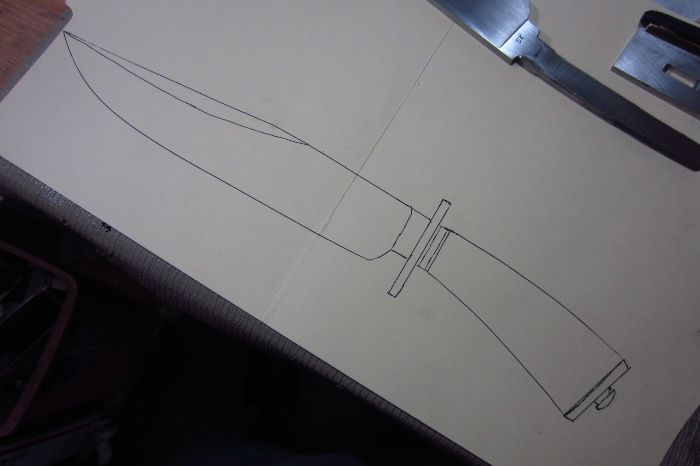
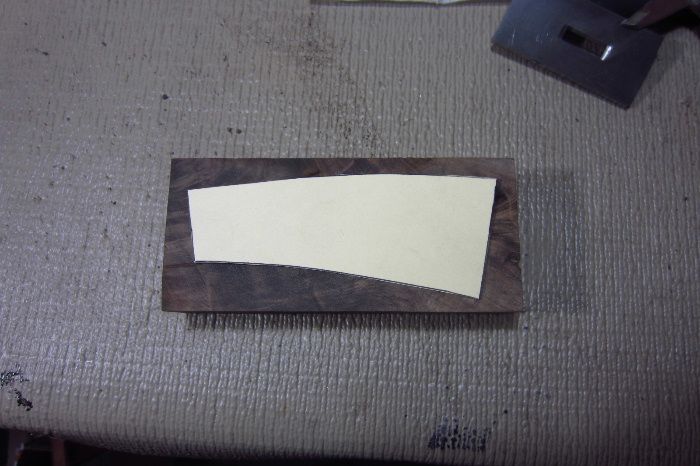
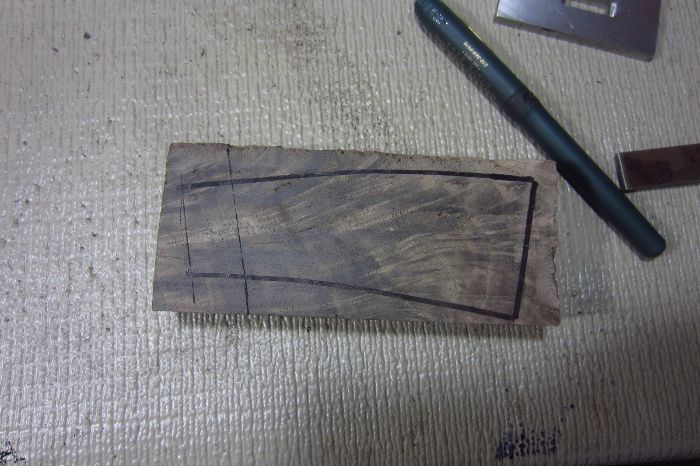
I draw every knife on a manila folder and keep the handle patterns:
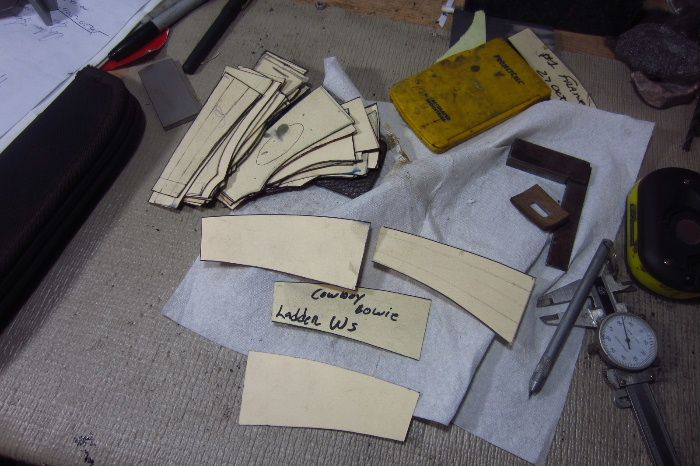
Then I make a new drawing and cut it out for the handle material, saving each one for reference and to facilitate later drawings.
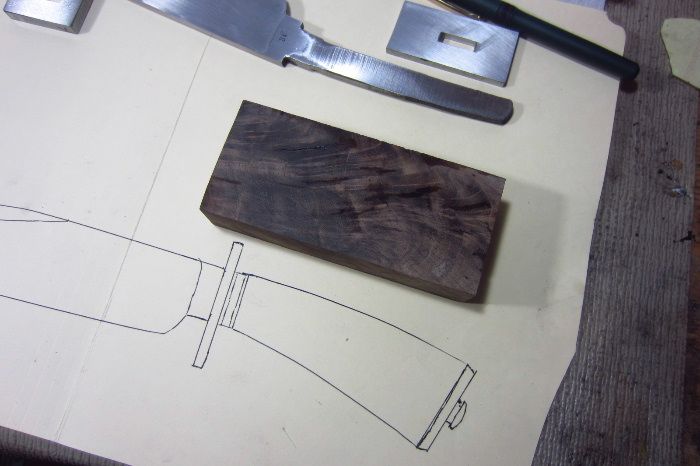
Check out the stabilized Walnut box for the customer's order:

This'll do:
Good to go.
I draw every knife on a manila folder and keep the handle patterns:
Then I make a new drawing and cut it out for the handle material, saving each one for reference and to facilitate later drawings.
Check out the stabilized Walnut box for the customer's order:
This'll do:
Karl B. Andersen
Well-Known Member
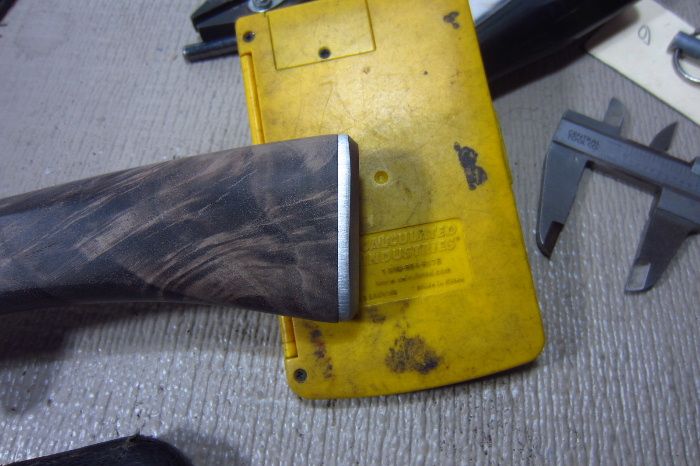
I always send them off to be stabilized plenty thick and wide:
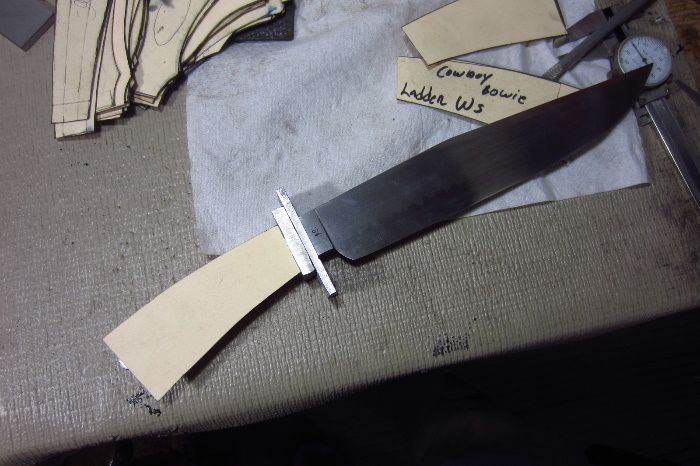
Cut out the handle profile and check for size:
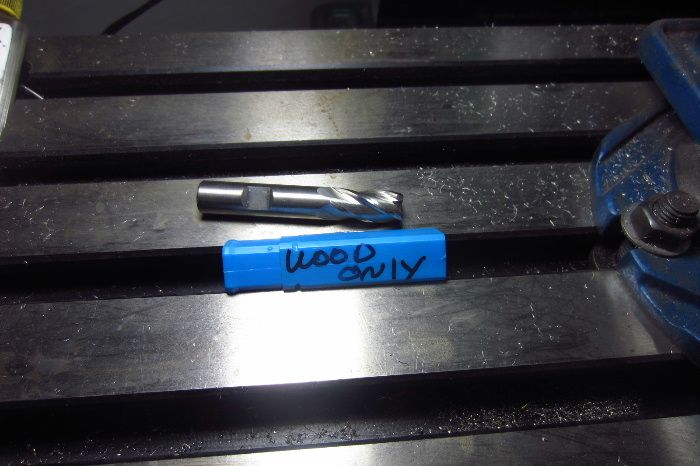
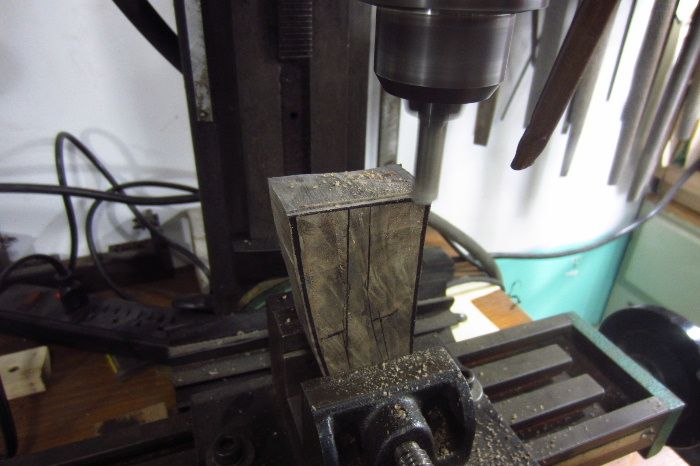
Now get out a dedicated 1/2" carbide end mill:
And get this thing squared up:
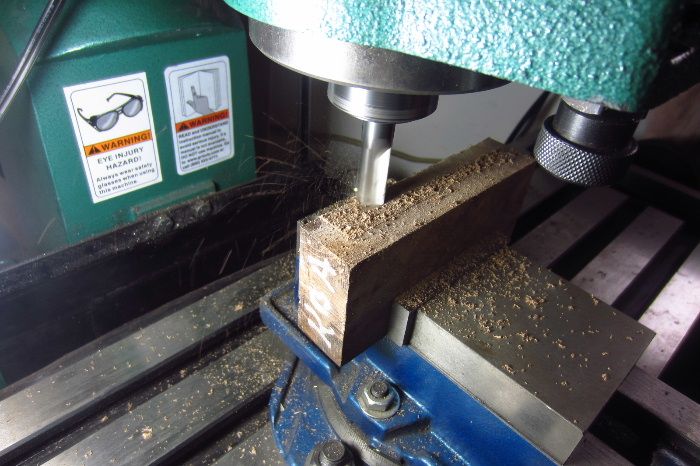
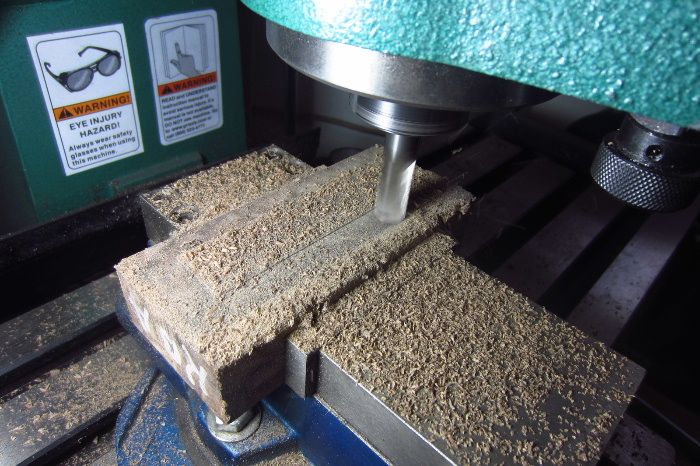
The way I assemble a knife, it's important that all four sides be flat and perpendicular:
transfer pattern to squared block:
Square leading edge on small mill:
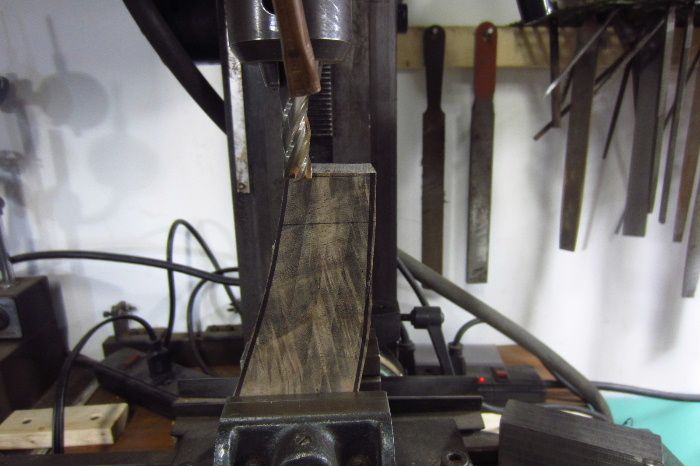
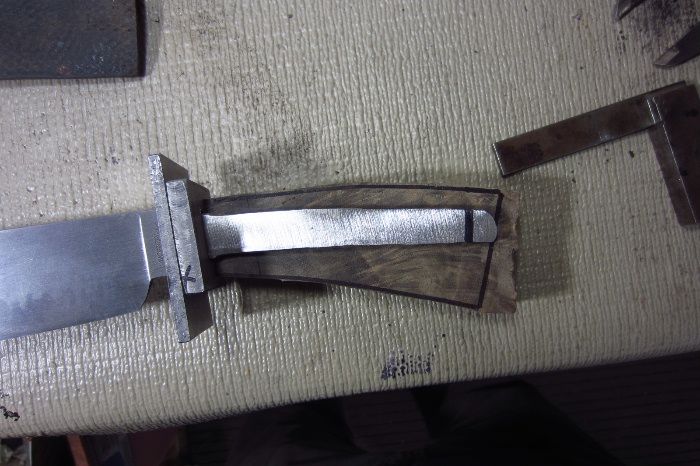
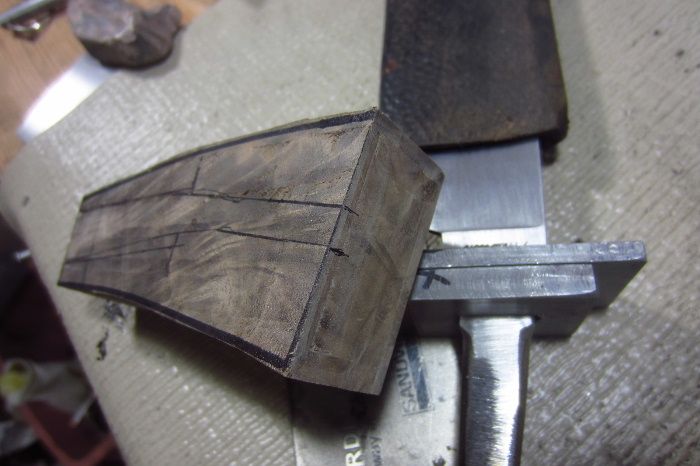
Slide up against spacer and check for the correct angle of the dangle:
Now lay knife on top of block and mark for tang length. Need to cut off a tad:
Cut out the handle profile and check for size:
Now get out a dedicated 1/2" carbide end mill:
And get this thing squared up:
The way I assemble a knife, it's important that all four sides be flat and perpendicular:
transfer pattern to squared block:
Square leading edge on small mill:
Slide up against spacer and check for the correct angle of the dangle:
Now lay knife on top of block and mark for tang length. Need to cut off a tad:
Last edited:
Karl B. Andersen
Well-Known Member
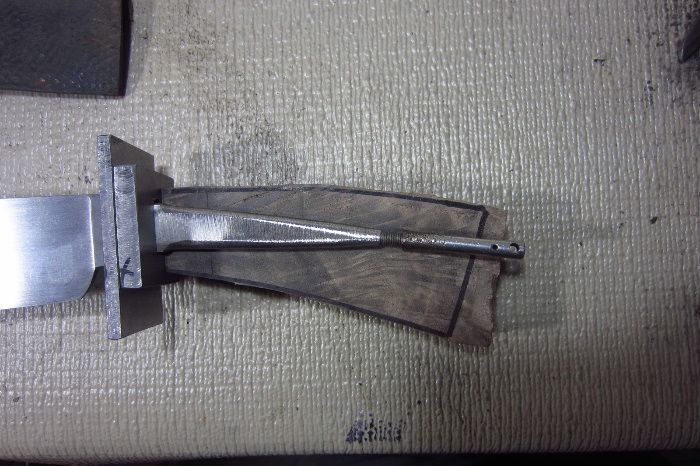
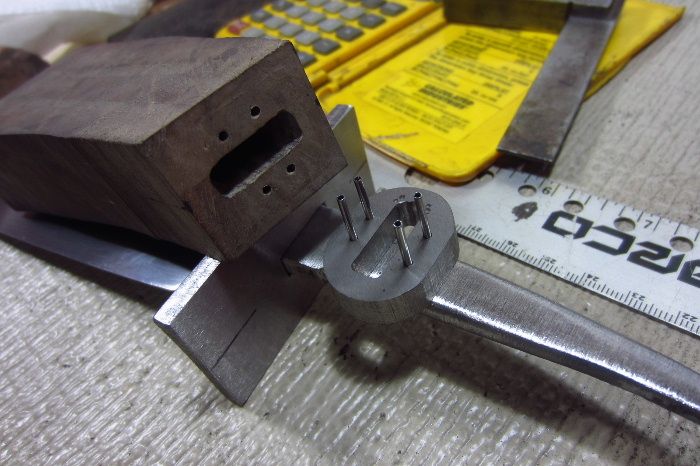
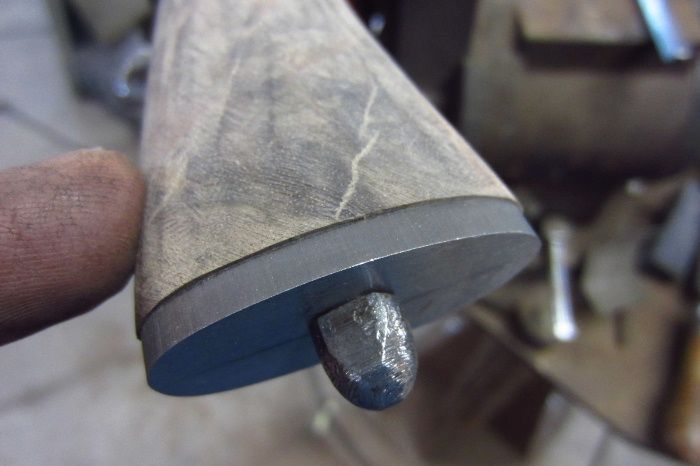
Now let's thread the tang.
I often use 12-28 threads or 10-32.
This one is going to be a 10-32, which needs to be about .190" for me to thread.
So, I first square the tang on my flat platten at about .200":
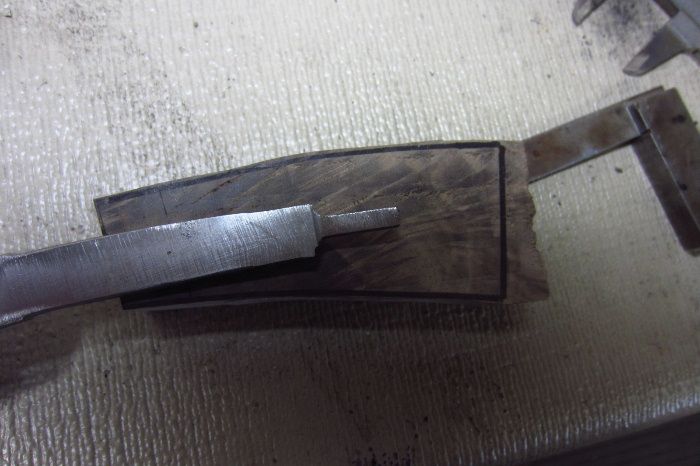
Then I cut the four corners off and turn it into an octagon with all facets at about.200".
then round the 8 corners off on the flat platten:
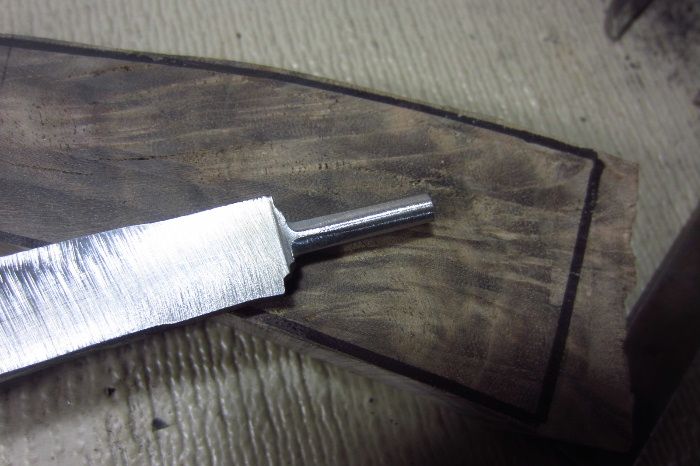
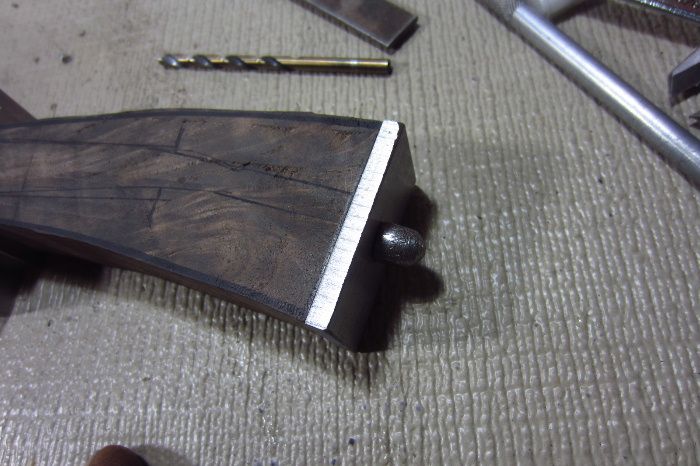
Then thread it:
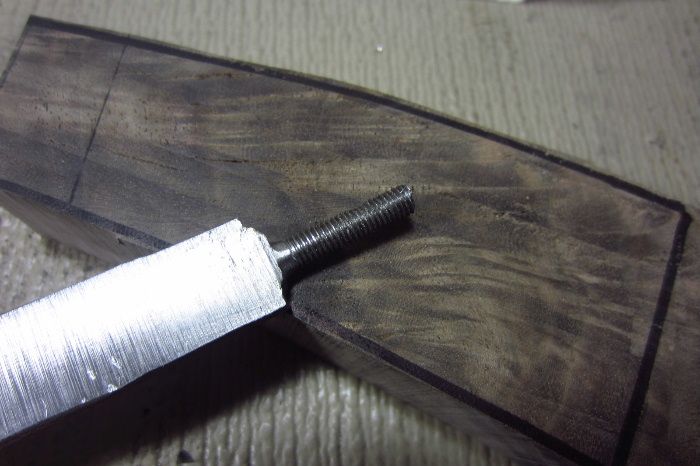
Reduce the tang material:
Thread on a little extension to see where it exists the handle, which is too high:
So, bend it!!
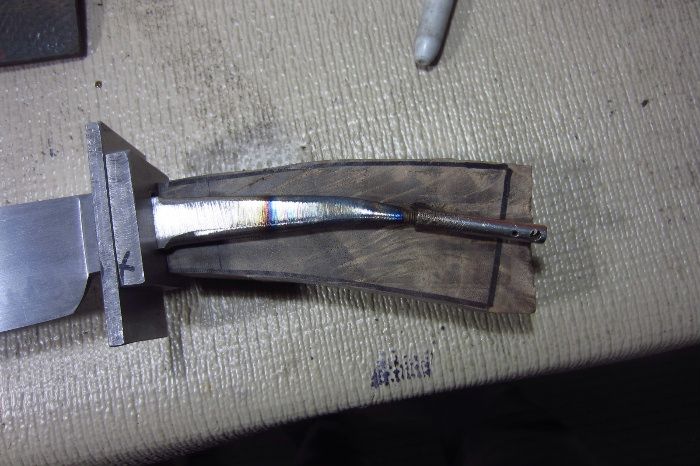
Notice I have not cut off the butt end yet. I have marked where the tang lays and have made a NEW mark that is square to the threaded tang:
You can see the new ink line:
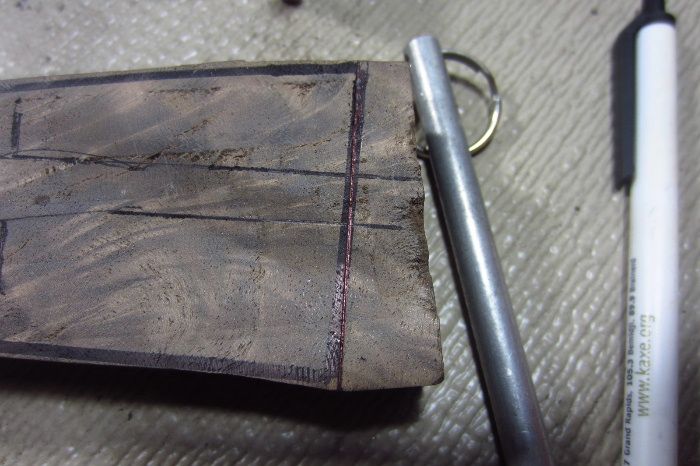
Square that off:
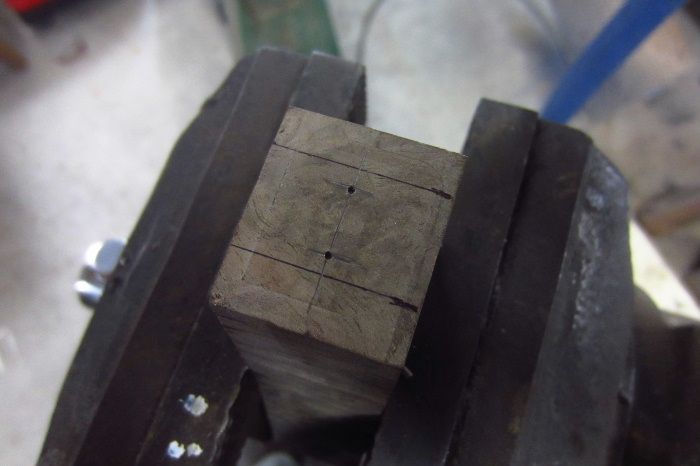
Transfer the tang lines to the end:
As well as the front end:
and mark center.
I often use 12-28 threads or 10-32.
This one is going to be a 10-32, which needs to be about .190" for me to thread.
So, I first square the tang on my flat platten at about .200":
Then I cut the four corners off and turn it into an octagon with all facets at about.200".
then round the 8 corners off on the flat platten:
Then thread it:
Reduce the tang material:
Thread on a little extension to see where it exists the handle, which is too high:
So, bend it!!
Notice I have not cut off the butt end yet. I have marked where the tang lays and have made a NEW mark that is square to the threaded tang:
You can see the new ink line:
Square that off:
Transfer the tang lines to the end:
As well as the front end:
and mark center.
Karl B. Andersen
Well-Known Member
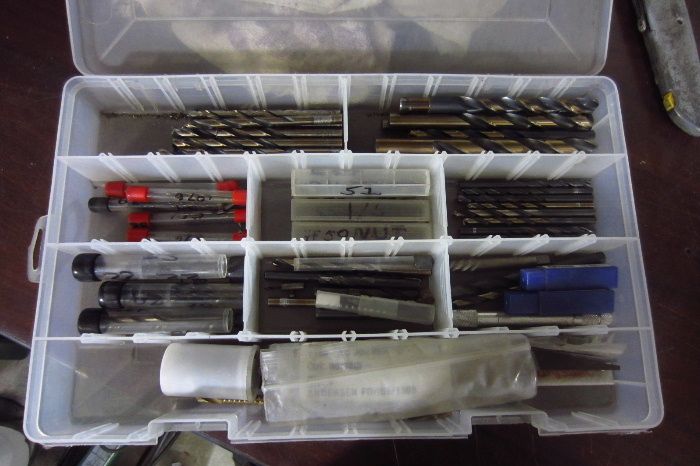
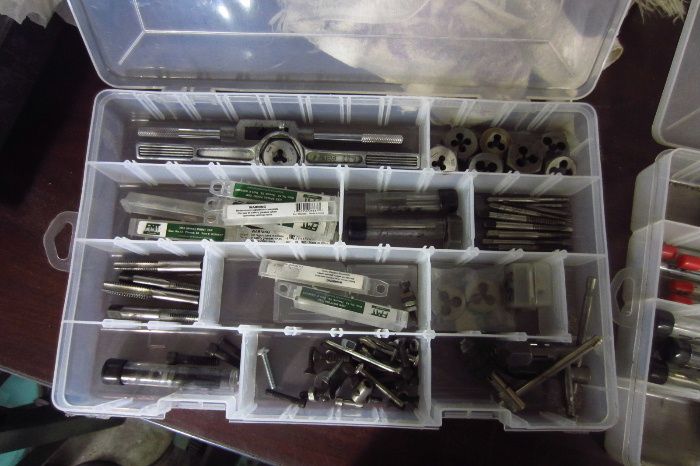
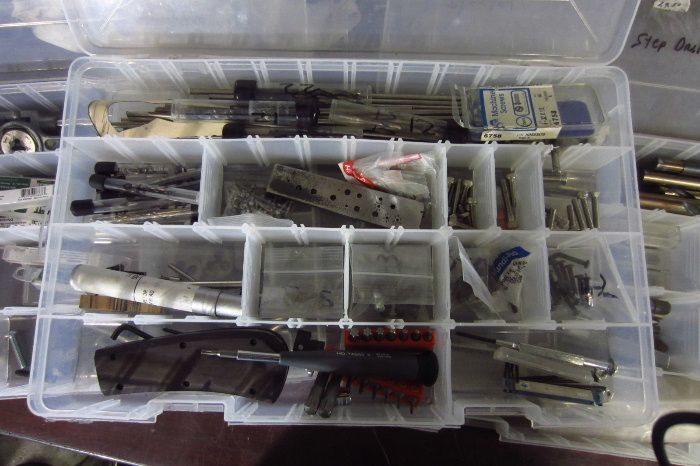
Dig into the bit box.
I like to keep small tooling in plastic boxes so I can move them from work station to work station.
I do have two tool boxes on my bench, but mostly for things that I will only use in that location.
I work in three or four different spots, so I like to be able to take my tooling with me:
Now this is why I squared up my handle block on all six sides - to keep the tang holes running in line with the handle length, and perpendicular to the ends!!
Simple geometry.
I also go to lengths to make sure both mills and all my drill presses and drilling at 90 degrees to the tables and vises.
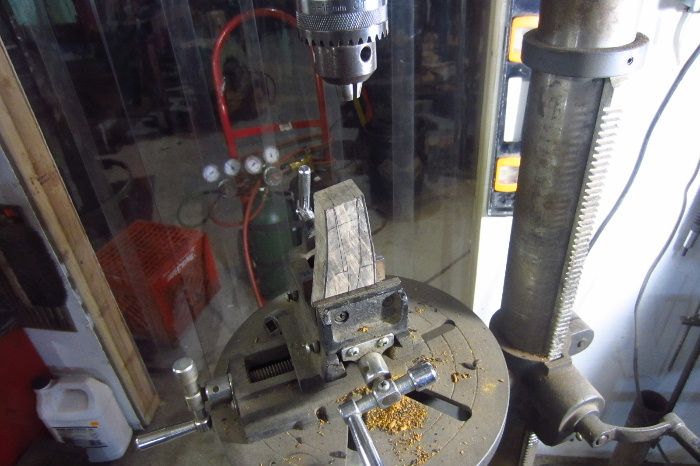
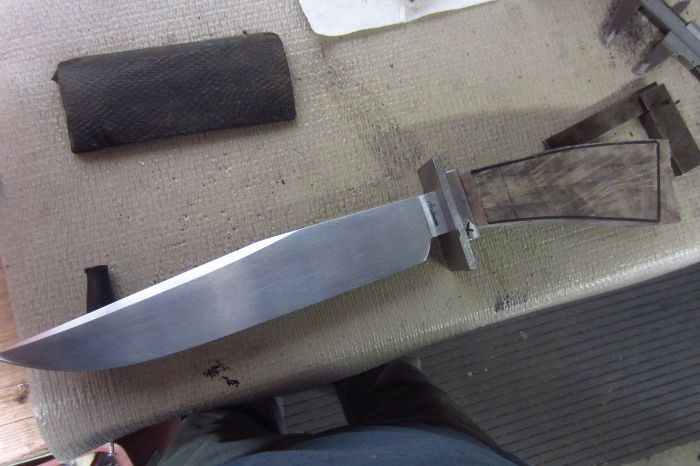
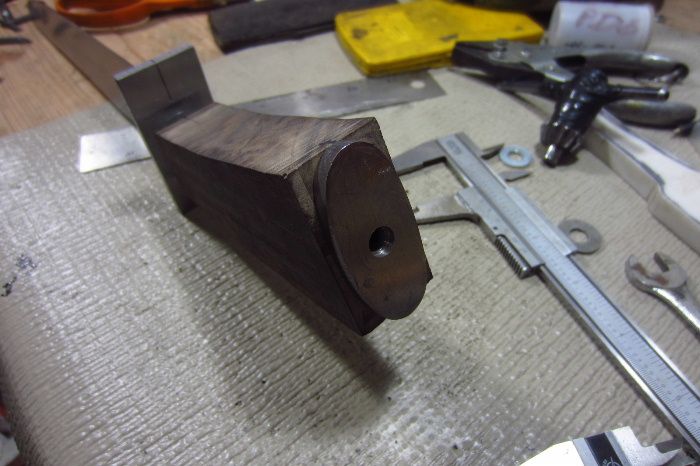
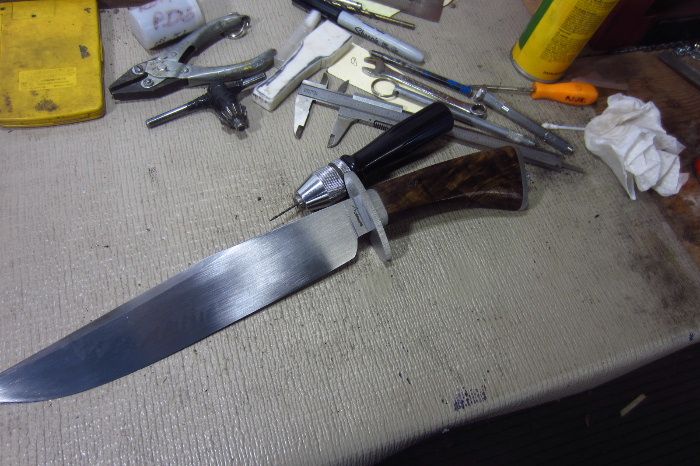
Slide the handle on with a temporary finial:
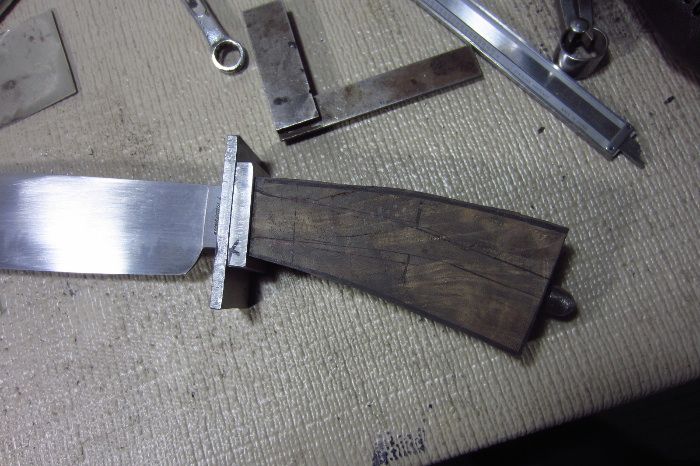
Sexy blade!
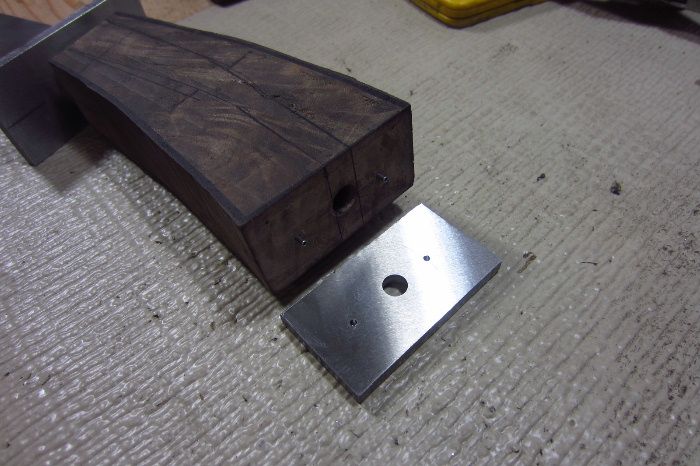
Now for a butt cap with a step drill to accept the finial I'll be making in the morning:
Try fit:
I like to keep small tooling in plastic boxes so I can move them from work station to work station.
I do have two tool boxes on my bench, but mostly for things that I will only use in that location.
I work in three or four different spots, so I like to be able to take my tooling with me:
Now this is why I squared up my handle block on all six sides - to keep the tang holes running in line with the handle length, and perpendicular to the ends!!
Simple geometry.
I also go to lengths to make sure both mills and all my drill presses and drilling at 90 degrees to the tables and vises.
Slide the handle on with a temporary finial:
Sexy blade!
Now for a butt cap with a step drill to accept the finial I'll be making in the morning:
Try fit:
Brad Lilly
Moderator and Awards Boss
:35::35::35::35:
Wow I am very impressed! Great job
I have a question about cutting the shoulders on the knife for the guard. do you grind a distal taper in your blade and tang?
Wow I am very impressed! Great job
I have a question about cutting the shoulders on the knife for the guard. do you grind a distal taper in your blade and tang?
Mark Behnke
Well-Known Member
I am paying attention and taking notes.
Karl B. Andersen
Well-Known Member
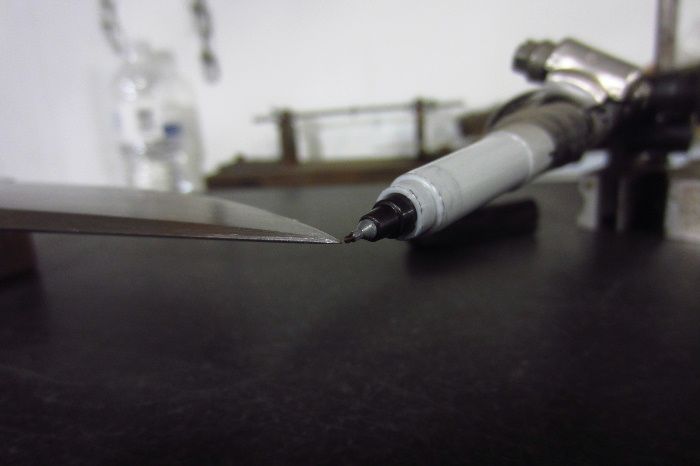
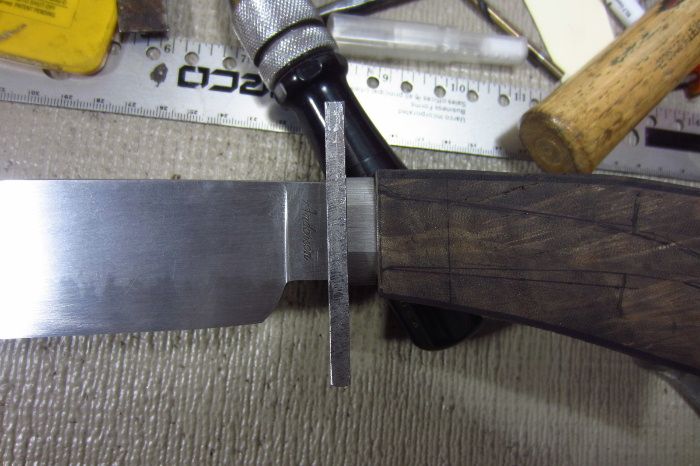
I forge in distal taper in the blade from the beginning.
It comes to a fine point. I'll get a picture of that today.
I try to keep the tang exactly the same thickness as the ricasso until the guard is fitted. Then it tapers some down to the dimension of the threaded end.
It comes to a fine point. I'll get a picture of that today.
I try to keep the tang exactly the same thickness as the ricasso until the guard is fitted. Then it tapers some down to the dimension of the threaded end.
:35::35::35::35:
Wow I am very impressed! Great job
I have a question about cutting the shoulders on the knife for the guard. do you grind a distal taper in your blade and tang?
Brad Lilly
Moderator and Awards Boss
I am paying attention and taking notes.
Me too!
I taper my tangs and drive the guard the last 1/2", and I find that easy enough to have gaps. By having the tang the same thickness as the slot in the guard any excessive gap would show like a neon sign. Your workmanship is amazing Karl!
Karl B. Andersen
Well-Known Member
Well, I just had a long new post to the thread here and the electric company decided to bo a planned outage!!
Maybe they planned on it - I didn't.
So - here we go again:
With all the parts assembled, I go back to the surface plate and the "dead nuts" block.
The block has been surface ground on all surfaces, so everything is parallel.
When I clamp in the blade on the ricasso, the ricasso becomes the foundation for the remainder of the knife:
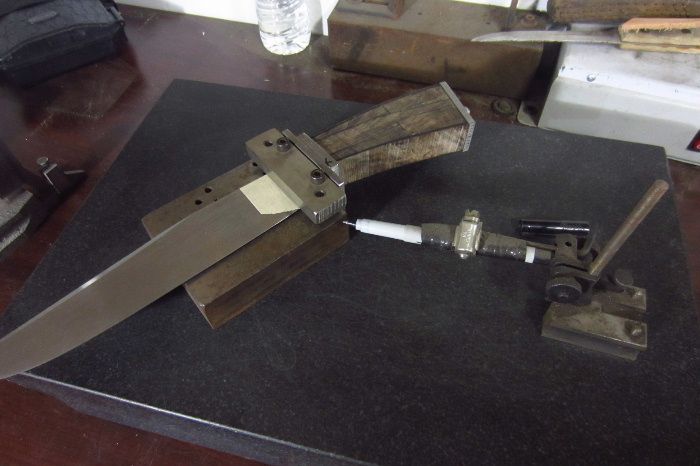
Find center and mark and check all areas on the entire perimeter of the blade:
Maybe they planned on it - I didn't.
So - here we go again:
With all the parts assembled, I go back to the surface plate and the "dead nuts" block.
The block has been surface ground on all surfaces, so everything is parallel.
When I clamp in the blade on the ricasso, the ricasso becomes the foundation for the remainder of the knife:
Find center and mark and check all areas on the entire perimeter of the blade:
Karl B. Andersen
Well-Known Member
Some folks may say these steps are over the top and unnecessary.
I disagree.
I say they ELIMINATE time later on.
In one way or another, we all try to keep things straight and more often than not find ourselves needing to make corrections later on.
I'm just getting the center figured out now, at the beginning.
I'm not a very smart guy. :15:
I need these things to keep me in the zone.
These steps do NOT complicate things - they keep things simple.
Last edited:
Karl B. Andersen
Well-Known Member
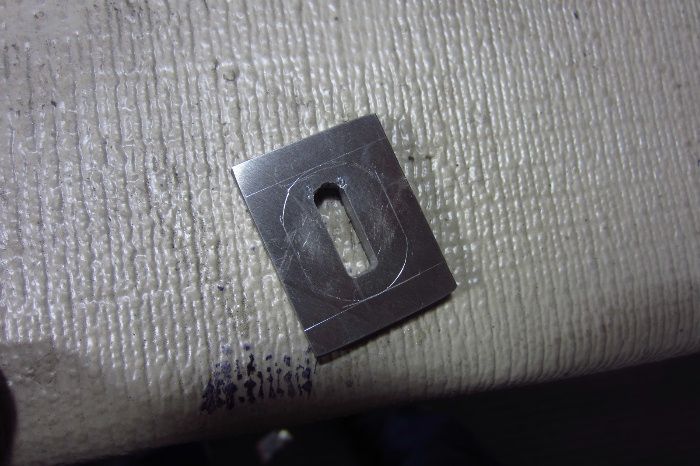
The first piece I shape is the spacer.
It is NOT!!! a ferule. If you don't know what a ferule is - look it up.
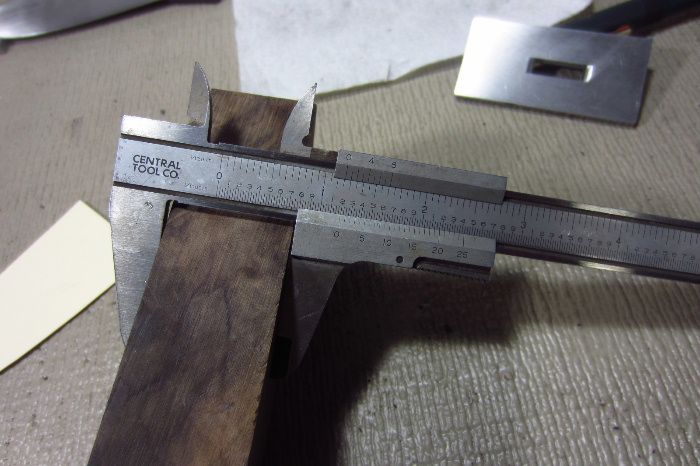
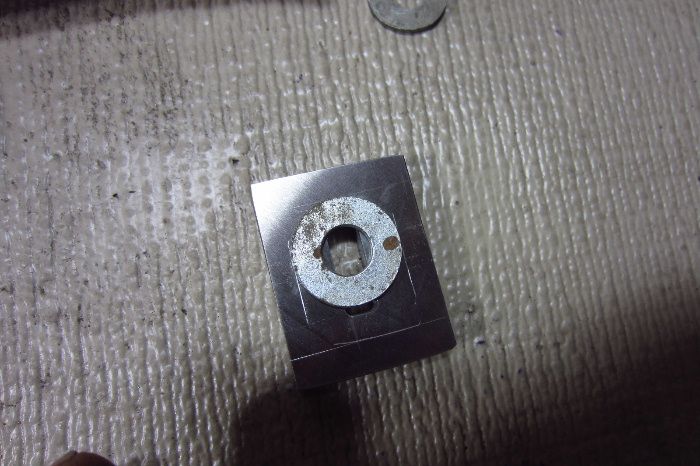
I use the slot to mark the outer sides of the spacer. Using the slot and a caliper keeps everything centered.
Simple - right?
I keep on hand a selection of different sized washers:
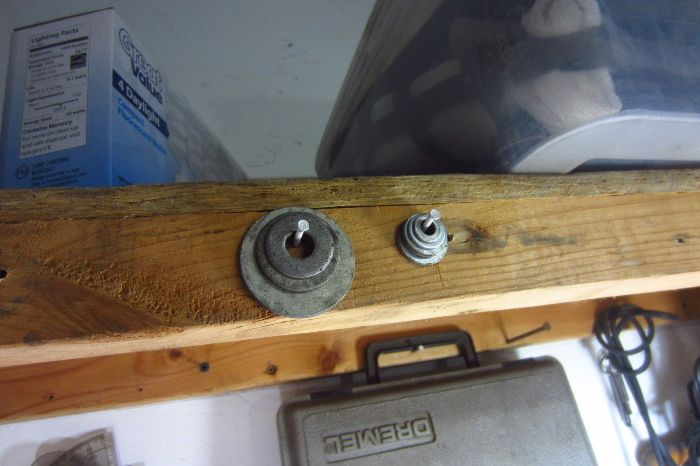
Put the right size in the middle and scratch it in:
I also pin everything to keep things where they're supposed to be and to add lateral strength.
I did not mention earlier on that the handle slot was file fitted to the tang, so there is no slop in the handle.
On many knives I use two roll pins, which are .625" long.
On this one I used four - just 'cause.
Figure out your own methods.
I use my small vertical mill. There's a zillion different ways to do it, so I'll leave this step up to you.
See how she fits:
It is NOT!!! a ferule. If you don't know what a ferule is - look it up.
I use the slot to mark the outer sides of the spacer. Using the slot and a caliper keeps everything centered.
Simple - right?
I keep on hand a selection of different sized washers:
Put the right size in the middle and scratch it in:
I also pin everything to keep things where they're supposed to be and to add lateral strength.
I did not mention earlier on that the handle slot was file fitted to the tang, so there is no slop in the handle.
On many knives I use two roll pins, which are .625" long.
On this one I used four - just 'cause.
Figure out your own methods.
I use my small vertical mill. There's a zillion different ways to do it, so I'll leave this step up to you.
See how she fits:
Karl B. Andersen
Well-Known Member
Now pin the butt cap:
Then, get it profiled:
Now, I profile the guard:
And see how things are moving along:
Back to the vise pedestal and my knife vise.
The combination of these two tools let me place the knife in any position on the map:
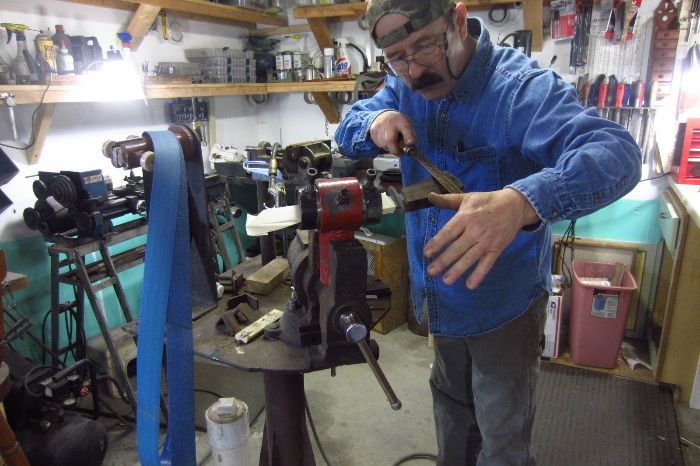
I use Nicholson Cabinet Maker's rasp. They're about 60 bucks apiece, but are precision instruments that are easily controlled.
Gun stock makers use these to shape entire gunstocks!!
They work pretty well on knife handles, too.
Back about '98 I met Jerry Rados, who happened to live only 30 miles from me.
We became close friends.
Jerry is one of the world's top damascus makers and high end art/auto folder makers.
He said if a knife maker NEVER gets his handle material hot, they remain much more stable that they would if they were overheated.
That's why I use files.
In fact - and this is the truth!! - I am still using the one and only belt for shaping knife handles that I began using in the Winter of '09. :what!:
One belt.
A 36 grit that I sometimes use with a 2" wheel to knock off the corners of my handle blocks.
Then, I go to my files.
I have spent $6.00 on "belts" for shaping handles in 3 years.
And I'm still using that one belt.
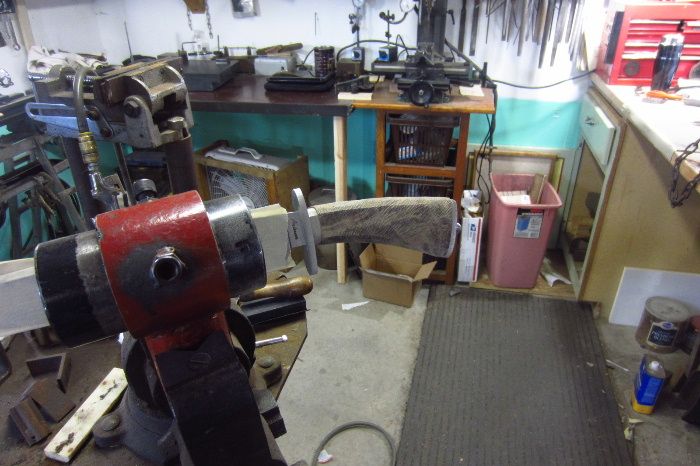
I am sure the splicing tape on the belt will wear through before the belt is dull.
So, here is the knife after just a few minutes:
Then, get it profiled:
Now, I profile the guard:
And see how things are moving along:
Back to the vise pedestal and my knife vise.
The combination of these two tools let me place the knife in any position on the map:
I use Nicholson Cabinet Maker's rasp. They're about 60 bucks apiece, but are precision instruments that are easily controlled.
Gun stock makers use these to shape entire gunstocks!!
They work pretty well on knife handles, too.
Back about '98 I met Jerry Rados, who happened to live only 30 miles from me.
We became close friends.
Jerry is one of the world's top damascus makers and high end art/auto folder makers.
He said if a knife maker NEVER gets his handle material hot, they remain much more stable that they would if they were overheated.
That's why I use files.
In fact - and this is the truth!! - I am still using the one and only belt for shaping knife handles that I began using in the Winter of '09. :what!:
One belt.
A 36 grit that I sometimes use with a 2" wheel to knock off the corners of my handle blocks.
Then, I go to my files.
I have spent $6.00 on "belts" for shaping handles in 3 years.
And I'm still using that one belt.
I am sure the splicing tape on the belt will wear through before the belt is dull.
So, here is the knife after just a few minutes:
Karl B. Andersen
Well-Known Member
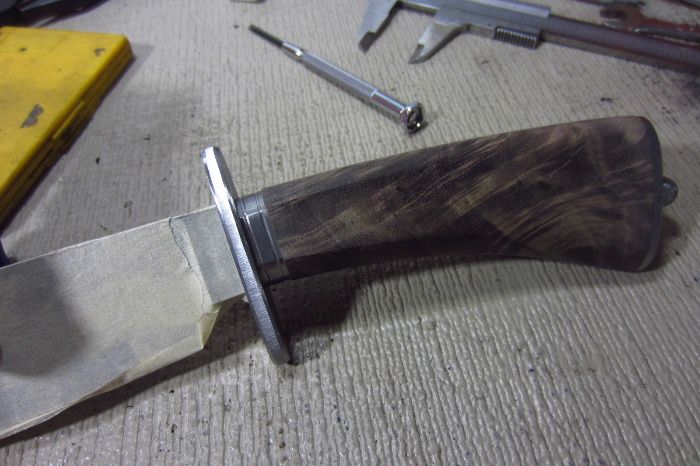
You may have gather what I'm doing here - I shaped the knife hardware FIRST!
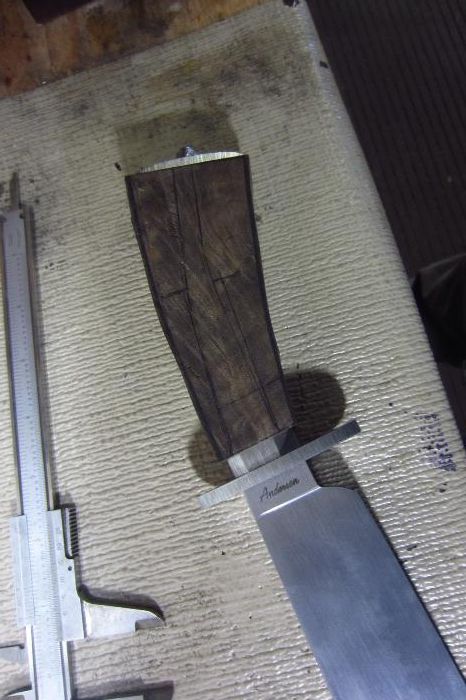
Then, using those as my guides, I shape the handle material TO the pieces.
I just use them as my guide.
A little 220 sand paper work to clean up the file marks:
Some denatured alcohol:

And we can see where we're at:
Then, using those as my guides, I shape the handle material TO the pieces.
I just use them as my guide.
A little 220 sand paper work to clean up the file marks:
Some denatured alcohol:
And we can see where we're at:
Karl B. Andersen
Well-Known Member
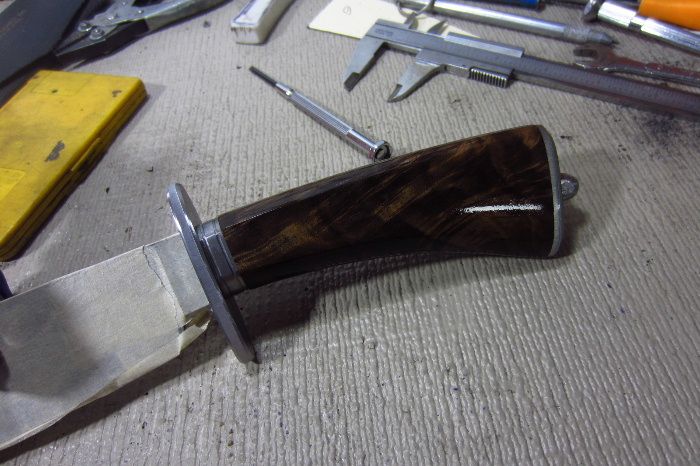
Now scribe a couple guide lines.
I do this free hand on my flat platen.
Amazing how just taking the corners off can entirely change the character of the knife:
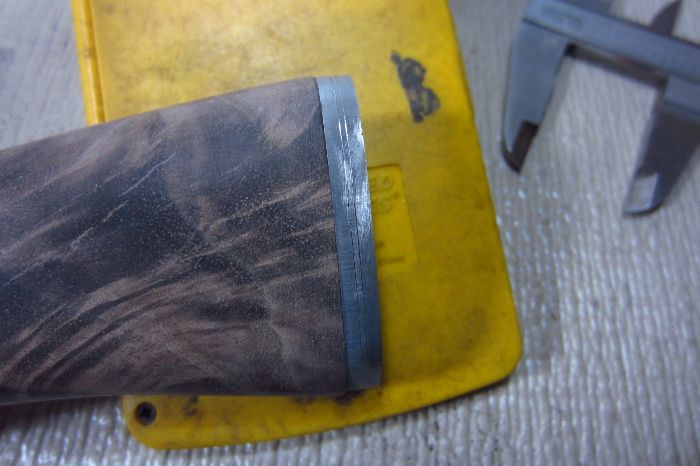
Do the same to the guard and cut in a couple slots in the spacer:
A little alcohol:
I do this free hand on my flat platen.
Amazing how just taking the corners off can entirely change the character of the knife:
Do the same to the guard and cut in a couple slots in the spacer:
A little alcohol:
Last edited: