"The Alaskan" - WIP

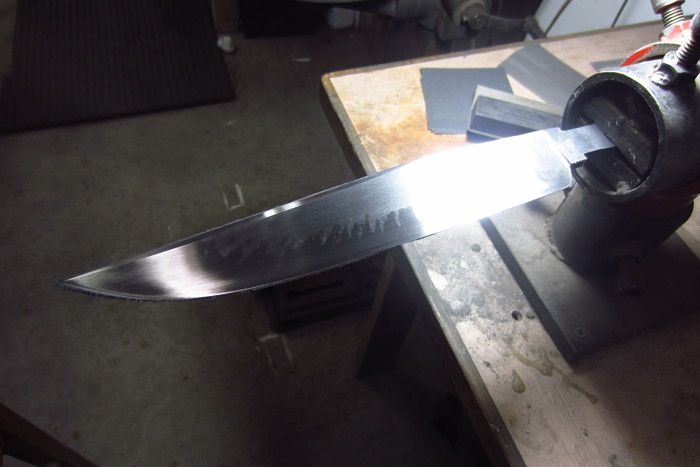
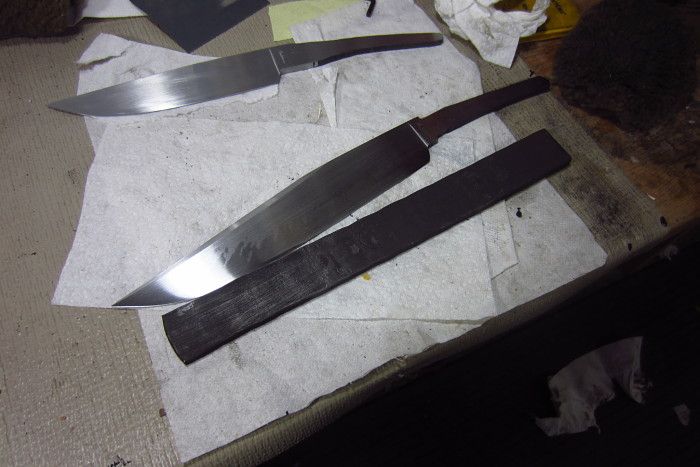
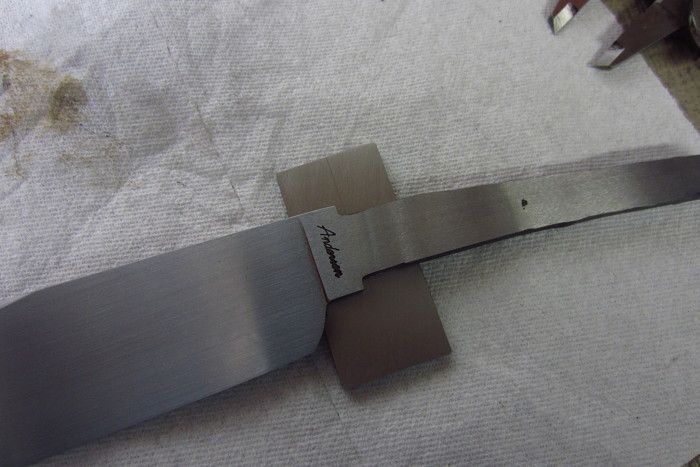
I'm in the process of getting three sheaths done so I can get some knives shipped out, but I was able to get the "Alaskan" hardened and tempered yesterday.
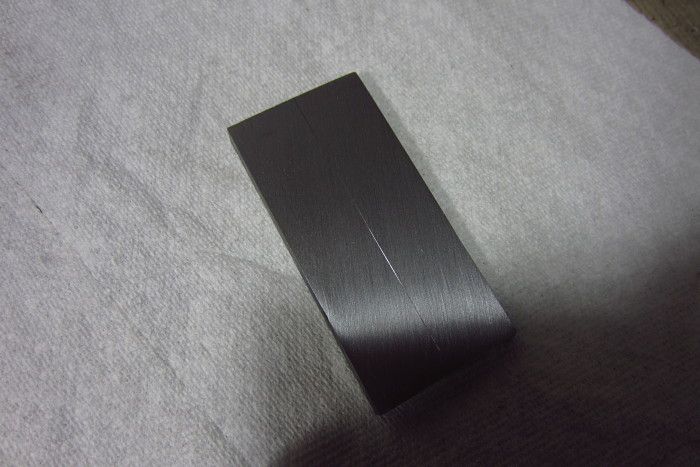
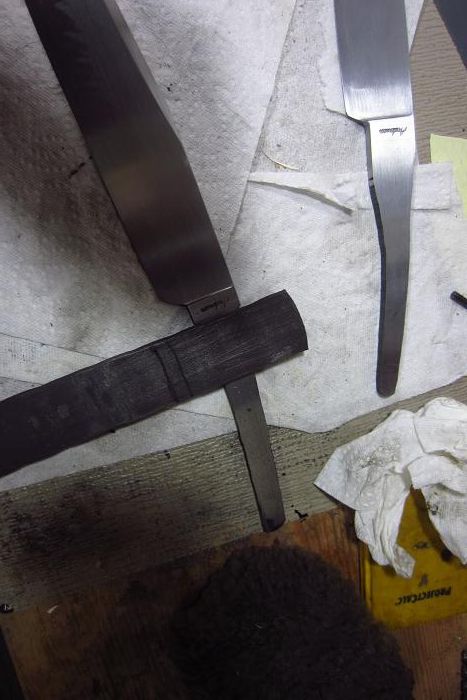
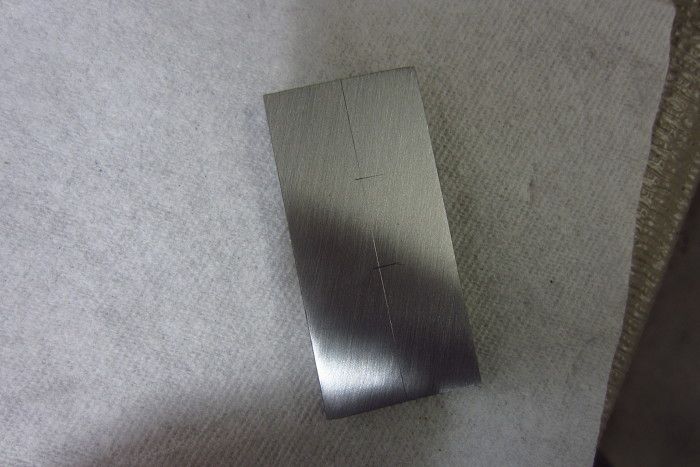
This is a shot of the post-tempering clean-up without any etching.
I will wait until the knife is completely built before I etch the blade.
I can see now that I achieved my intentions during the hardening process to produce this hamon.

Alaskan-d9-1.jpg
 
Slow progress today, and maybe tomorrow as well.
Got two knives mailed out and had a flat while I was out scouting some new grouse hunting territory.
And then seriously jammed a finger while changing the flat!! :sad:

So, got the 416 flattened out and spherodized.

Alaskan-e2-1.jpg


Cut to approximate guard length.

Alaskan-e3-1.jpg


Mill sides and faces to thickness - gotta love power feed!

Alaskan-e4-1.jpg


Alaskan-e5-1.jpg


Guard and spacer ready for layout and slotting:

Alaskan-e6-1.jpg
 
Great job Karl! I love watching your WIPs progress. BTW nice bows hanging up in one of the first pics! Can't wait to see how you slot, fit and shape the guard. This is the spot where I seem to have the most trouble.
 
I've been a traditional bow hunter since I was 14 in 1968.
I will use my mill to cut the slot.

Great job Karl! I love watching your WIPs progress. BTW nice bows hanging up in one of the first pics! Can't wait to see how you slot, fit and shape the guard. This is the spot where I seem to have the most trouble.
 
I forgot - after the mill, I toss the pieces on my surface grinder to clean them up a bit.

Alaskan-e7-1.jpg


Then, check opposite corners on the comparator for consistency.
I think I'm good to go, eh?

Alaskan-e9-1.jpg


Alaskan-e8-1.jpg
 
Yea I think your close enough for the guard. How do you find the stainless for forging? I hear lots of horror stories about it crumbling. The knife is looking great.
 
I think it may only crumble if one was to get it way too hot.
It does NOT! like to move, in my experience.
I'm guessing people try to get it too hot to overcome its difficulty in forging.
A good strong press will spank it into submission. :nothing:


Yea I think your close enough for the guard. How do you find the stainless for forging? I hear lots of horror stories about it crumbling. The knife is looking great.
 
Sorry about the delay, guys.
I'm swamped. I've been that way for months and I don't see it letting up in about, well, I don't know.

So, back to this knife waiting patiently on my bench:

I got my guard, collar and butt cap cap forged, milled and surface ground:

Alaskan-f1-1.jpg


I like to take my fittings to the granite surface plate and eliminate all surface grinding marks with 220 sanding marks running from corner to corner.

Alaskan-f2-1.jpg


So that when I scribe my center line even very lightly, it's easy to see:

Alaskan-f3-1.jpg


Mark top and bottom of my slot:

Alaskan-f4-1.jpg


Again, easy to see with contrasting line direction:

Alaskan-f6-1.jpg
 
Now, over to the mill vise.
Lock it in on parallels and find the center of the piece:

Alaskan-f7-1.jpg


Set dial indicator on edge of table and set to zero:

Alaskan-f8-1.jpg


Now do stair-step from line to line in just the center:

Alaskan-f9-1.jpg


Reverse in other direction to create void slot:

Alaskan-g1-1.jpg


Now some basic math. :les:

Ricasso is .260" even.
Eliminate actual measured diameter of end mill, which is .123".
That leaves .137" MORE material to remove.
Right?
Right.
Divide that by two and we get - 68.5 thousandths.
So go .0685" each direction from the ZERO.
I do this a few thousandths at a time - a few this way, travel to the end of the slot, then go the same the other side of zero and return to the other end.
Here we are at .025" on one side:

Alaskan-g2-1.jpg


Then to .025" on the other side:

Alaskan-g3-1.jpg


Continue to increase the lateral travel a few thousandths each pass until we reach, what?

That's right - .0685".
Go counter-clockwise from ZERO.

Alaskan-g4-1.jpg


This is what we end up with:
And I am within +/- .0005".
On a non-damascus blade I will NOT touch this slot AT ALL!!! EVER!!!
Why would I do that?
I surface ground the blade. The sides of the ricasso are equal and parallel.
The slot is straight and parallel.
If anything, all I may have to do is lightly sand the ricasso on the granite surface plate to get the guard to slide on.

Which I will do tomorrow! :35:

Alaskan-g5-1.jpg
 
Really enjoying your progress Karl and following with interest.

I'm learning to use my Mill as I go with no prior machining experience before getting into making knives. I am curious about the "stair step" technique for getting your slot started in the guard.

I typically drill a line of holes down the center then plunge down through the webbing with an end mill taking .030 in depth on each pass to get my slot started.

I guess my question is - What's the advantage of the stair-step over what I do ?

My second question is- It looks in the pics like you took your blade AWFUL close to finished dimensions before hardening so I'm wondering how you deal with de-carb and at what point in your process do you run a stress relief cycle ?

Take care,

-Josh
 
The advantage of the stairstep is that it only requires one piece of tooling that does all the work. It takes very little time and seems to be very efficient.
If it ain't broke - don't fix it.
It works quite well for me.

I take my blades to 95% finish before hardening, which I do in my forge, since I work mostly with shallow hardening/low alloy steels.
And since these are many times done with clay for hamons, I find a hand sanded 220 finish holds the clay so nicely I have to chip it off with a tool afterwards.
Decarb and such is more a matter of too much heat for too much time and possibly the addition of too much oxygen.
Right after quench I go right back to the grinder and grind off the skin to see my hamon anyway. I do remove a few thousandths. However, if you find you have to grind away too much skin, you'll be removing some of the hamon activity as well.
I got liite to no appreciable decarb at all.
Get your forge adjusted right if that's what you use.
 
Thanks Karl !

I've been using the Evenheat for hardening so I've got no atmosphere protection against de-carb. I built my forge long ago and it's not well suited for hardening. My forge volume is too small and my burner way oversized so it ends up very hot in the middle and cool at the ends. Fine for forging blades but not optimal for hardening. I'm FAR better equipped for buillding a new forge than I was when I built the first one so I guess I'd better start thinking about building a new forge :)

Appreciate the advice !

-Josh
 
Josh, I use an Evenheat as well on my 5160.
I haven't done it yet, but I've heard of guys sticking a piece of coal - not charcoal - in with the knife and as it comes up to heat and burns some, it consumes what oxygen is in the oven.
It should help with decarb, but I wonder about the soot getting on the coils.
I might research that some.

Thanks Karl !

I've been using the Evenheat for hardening so I've got no atmosphere protection against de-carb. I built my forge long ago and it's not well suited for hardening. My forge volume is too small and my burner way oversized so it ends up very hot in the middle and cool at the ends. Fine for forging blades but not optimal for hardening. I'm FAR better equipped for buillding a new forge than I was when I built the first one so I guess I'd better start thinking about building a new forge :)

Appreciate the advice !

-Josh
 
The coal sounds interesting but it may require some serious ventilation.

I've read that some folks use an inert gas in ovens but don't know anyone personally who does this.

Decarb really doesn't represent an issue for me I just harden my blade with some sacrificial meat left on for finish grinding. I typically only grind to about 75% before hardening but as you mentioned you don't want to put a bunch of effort into hamon then grind the activity off.

Enjoying the WIP and plan to give your construction method a try in the near future.

Thanks again,

-Josh
 
Please not trying to hijack your thread or anything karl but on the note of using forges to heat treat with this is what we use to heat treat..Its a standard two burner forge with a homemade muffle..the muffle extends out the back and front of the forge so theres no forge atmosphere insdie with the blade..just heat..A thermocouple is placed thru the rear of the muffle(thru a small hole whci is capped off otherwise) and stands inside but touches nothing so you get a true reading of just temp..With a couple of baffles on the bells you can keep the temp with about two degrees..You have to adjust the temp with the gas flow but it works..
100_3818.jpg

100_3819.jpg

100_3821.jpg
 
That can be a fairly effective way of dealing with some forge issues.
I don't have my heat directed any where near the one I see here.
As a person creates better forges where heat can be controlled, this becomes less and less of a problem.
I've been tempted to try that on some smaller knives, but I've always wondered what the temperature is where the blade is touching the wall of the tube?
I don't like hot spots.:5:
 
Back
Top