Swayback Wharncliffe How To

Very interesting to see a WIP on a slipjoint.

Roger

Hi Roger,
This could be challenging to do as slippies are something you have to experience to really understand but hopefully it will work out enough to get some feet wet. It sounds like they might sing along as we go. Hopefully they will post some of them here at the end. Should be fun to see.

Remember this procedure is generic and will work for any slipjoint model. Multi-blades are a whole nother level but lets be happy with a well made single blade for now.
 
This is the coolest thing I've seen in a while, which is really saying something given all the other awesome WIPs here in Bruce's subforum!
 
Remember this procedure is generic and will work for any slipjoint model. Multi-blades are a whole nother level but lets be happy with a well made single blade for now.

Speaking of which you have had the multi-blade book for a while now. I thought you would be knocking them out by now :D:bud:

Alistair
 
Speaking of which you have had the multi-blade book for a while now. I thought you would be knocking them out by now :D:bud:

Alistair

There not enough hours in the day. I have done some trapper two blades but not multi's yet.
 
Last edited:
I cut the spring from a .125" piece of A2 steel Its a air hardening steel and makes great blades and springs. I love the way it heat treats. It is so consistant and reliable. Anyway I used the template and superglued it to the A2 and drilled the holes to 3/32, bandsawed it out and roughed it out on the grinder.

Next came the heat treating. I sprayed the spring with blue layout fluid to burn off any trapped oxygen and did a double fold on the foil. The hammer taps the edges down so its airtight. In the oven at 1225f for 2 hours for a stress relieve and ramp up to 1775 for 30 minutes and quench the foil between two 1" thick aluminum plates until I can open the foil and plate quench it again. I just use my drill press as a press, seems to work fine.
I tested the hardness and it read 64 on the "C" scale. Wow thats hard. I'm not doing a cryogenic cycle as I doubt there is enough retained austinite to warrent it.

Maybe I should say that I bent the template for the spring so there will be some pre-load against the tang. This makes it snappy as opposed to lazy. The spring will get tuned up later so its not a nail breaker.


100_7153_edited.jpg


100_7155_edited.jpg


100_7156_edited.jpg


100_7158_edited.jpg


100_7170_edited.jpg


100_7171_edited.jpg


100_7172_edited.jpg


100_7189_edited.jpg


100_7190_edited.jpg


The pivot hole for the blade needs to be drilled with a .185" drill and reamed to .0187" for the bushing. These bushing are available at K&G finishing supplies. I could give a link for them if I have to.

I heat treated the blade and have it in the tempering oven right now. The spring also but it will need to be tempered much higher than the blade. I want a rockwell hardness of 48 rc if possible on the spring. I will just temper it and test it, temper it higher and test it, about $8 worth of electicity should do it. The blade should be about 59-60 rc.

100_7177.jpg


100_7180.jpg


This is the blade, made of damascus 1084/15n20 in a feather pattern. I protect it from scale with PBC, heat it to 1500f and quench it in Tough Quench from Brownells. Here is a shot of testing it for hardness. It is too hard so it will get a 2 hour temper at 395f and re-test.

100_7204_edited.jpg


100_7213_edited.jpg
 
Last edited:
I'm building along with materials on hand. Made a jig out of plate steel with an old dial I bought at a garage sale and knew someday I would find a use for it.

I found some .040 sheet steel and will use 1084 for blade and spring.

I need to buy a bushing, reamers, and was wondering what I should get for pivot pin?

Thanks Mark

The bolster material and the pin should be the same stuff. I use 410 bolsters and 410 pin stock. 416 pin stock is very very close to the same as 410 but I like to match them just in case one buffs a slightly different color.

This should be a good tutorial to get your feet wet and see if its your cup o tea. Slippies arent for everybody but for me I plan to make them when I cant forge and hammer anymore. They will find me dead draped over my slippie bench some day.
 
Thanks Bruce
I've got my patterns cut, but not fitted yet, I think that will be the "love it or leave it" part for me.
 
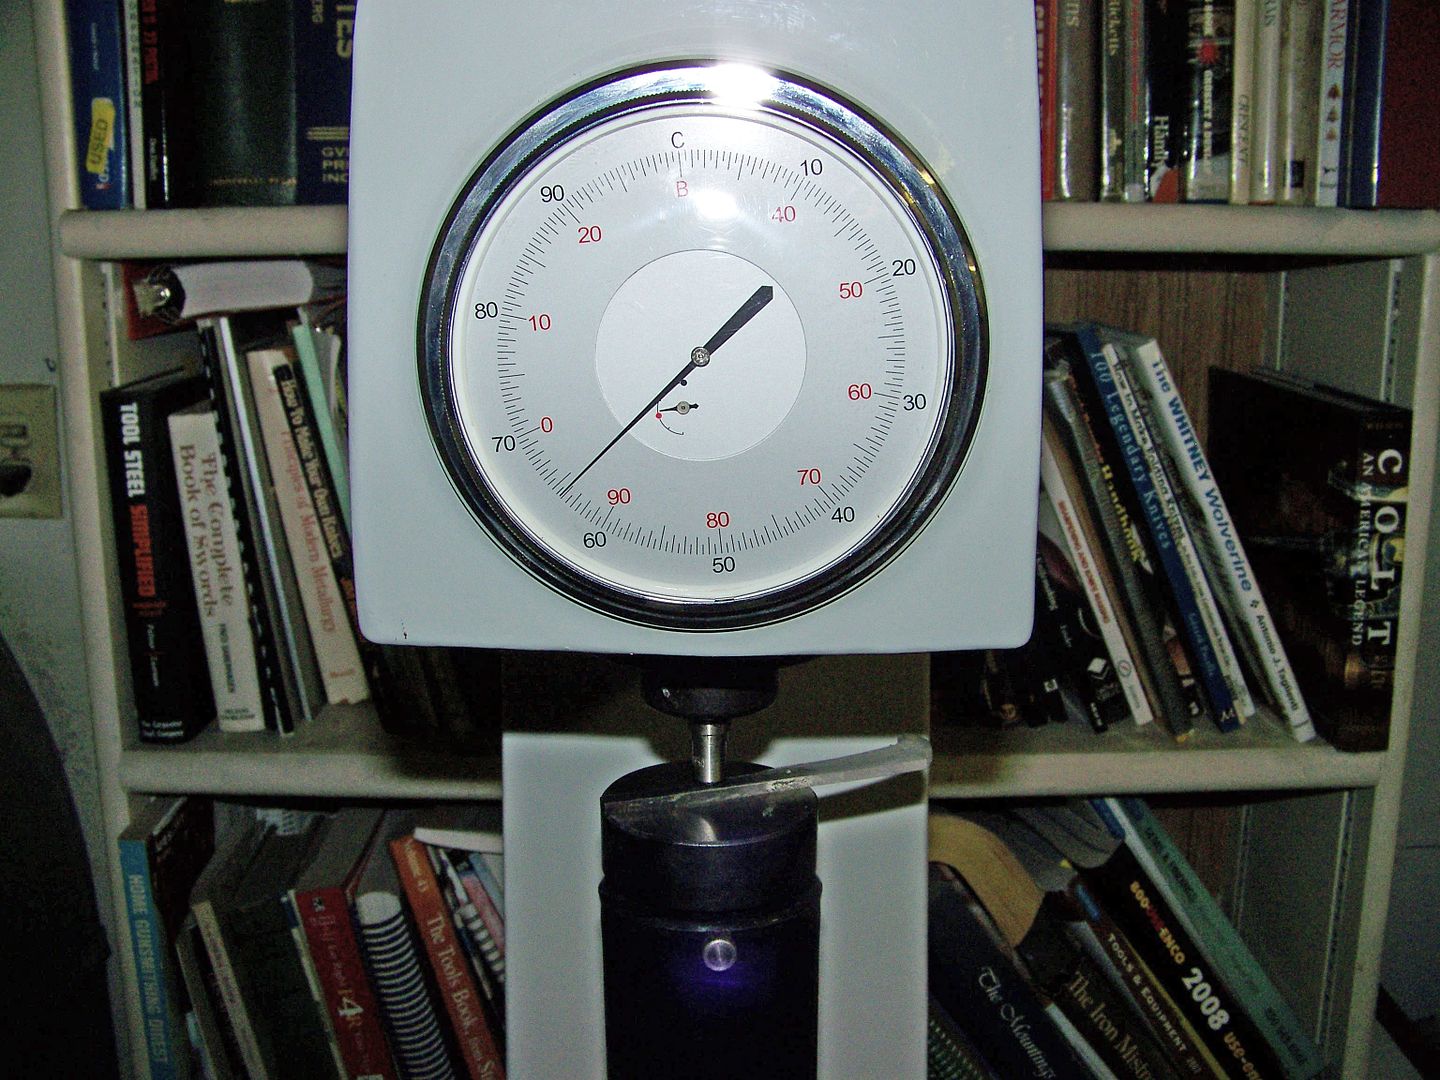
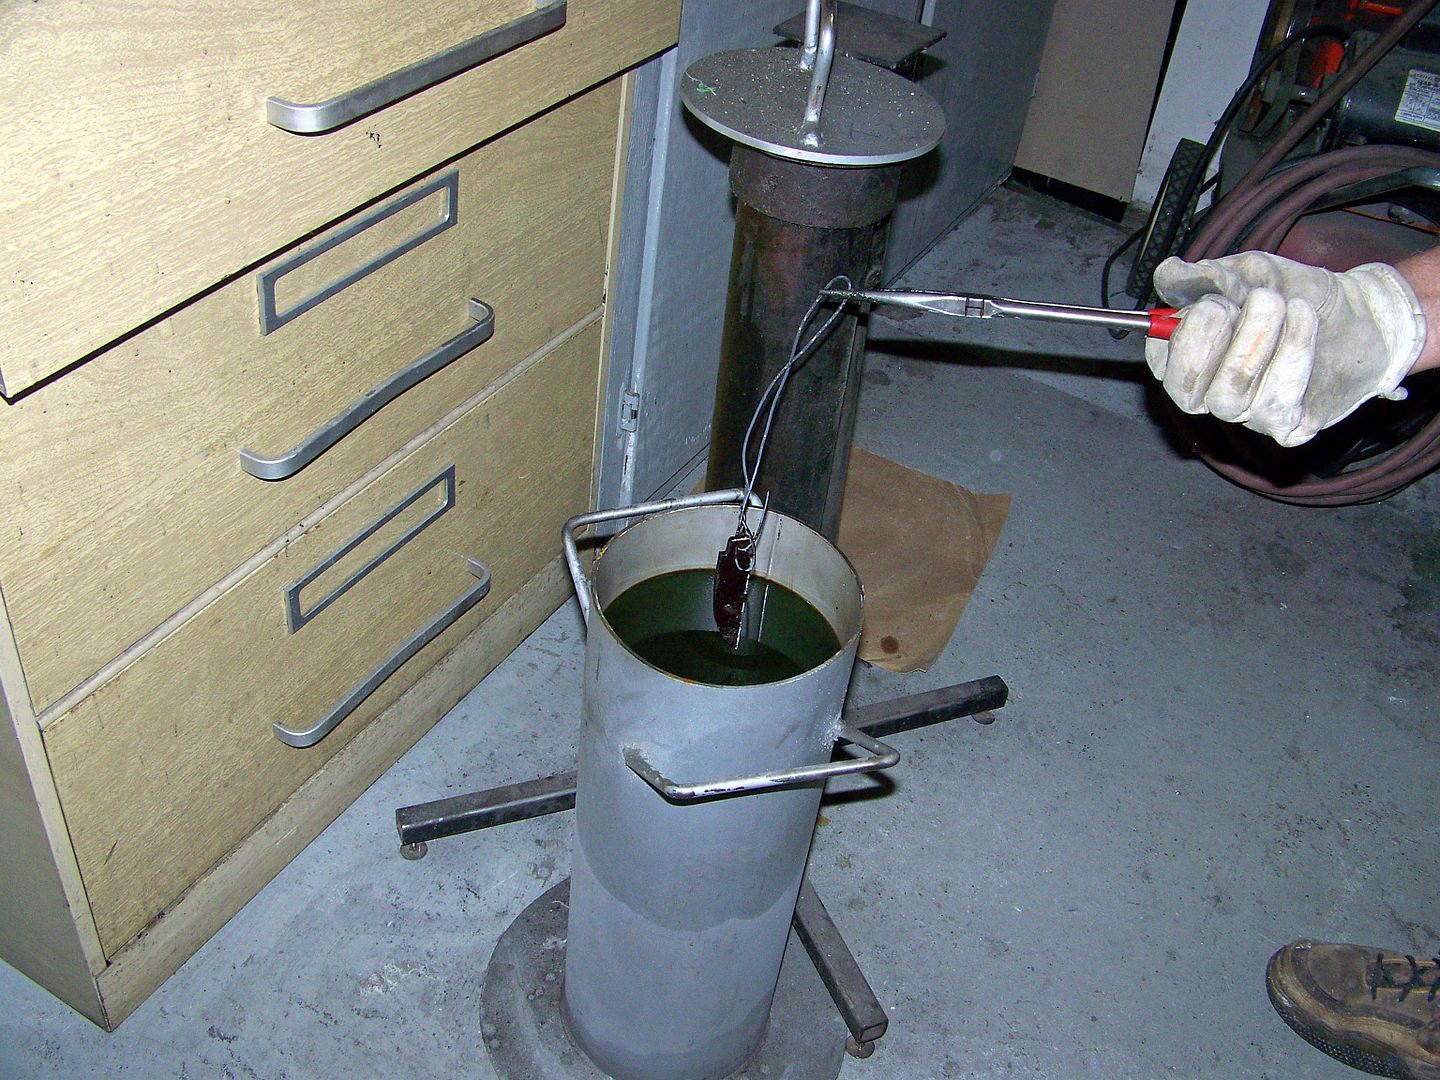
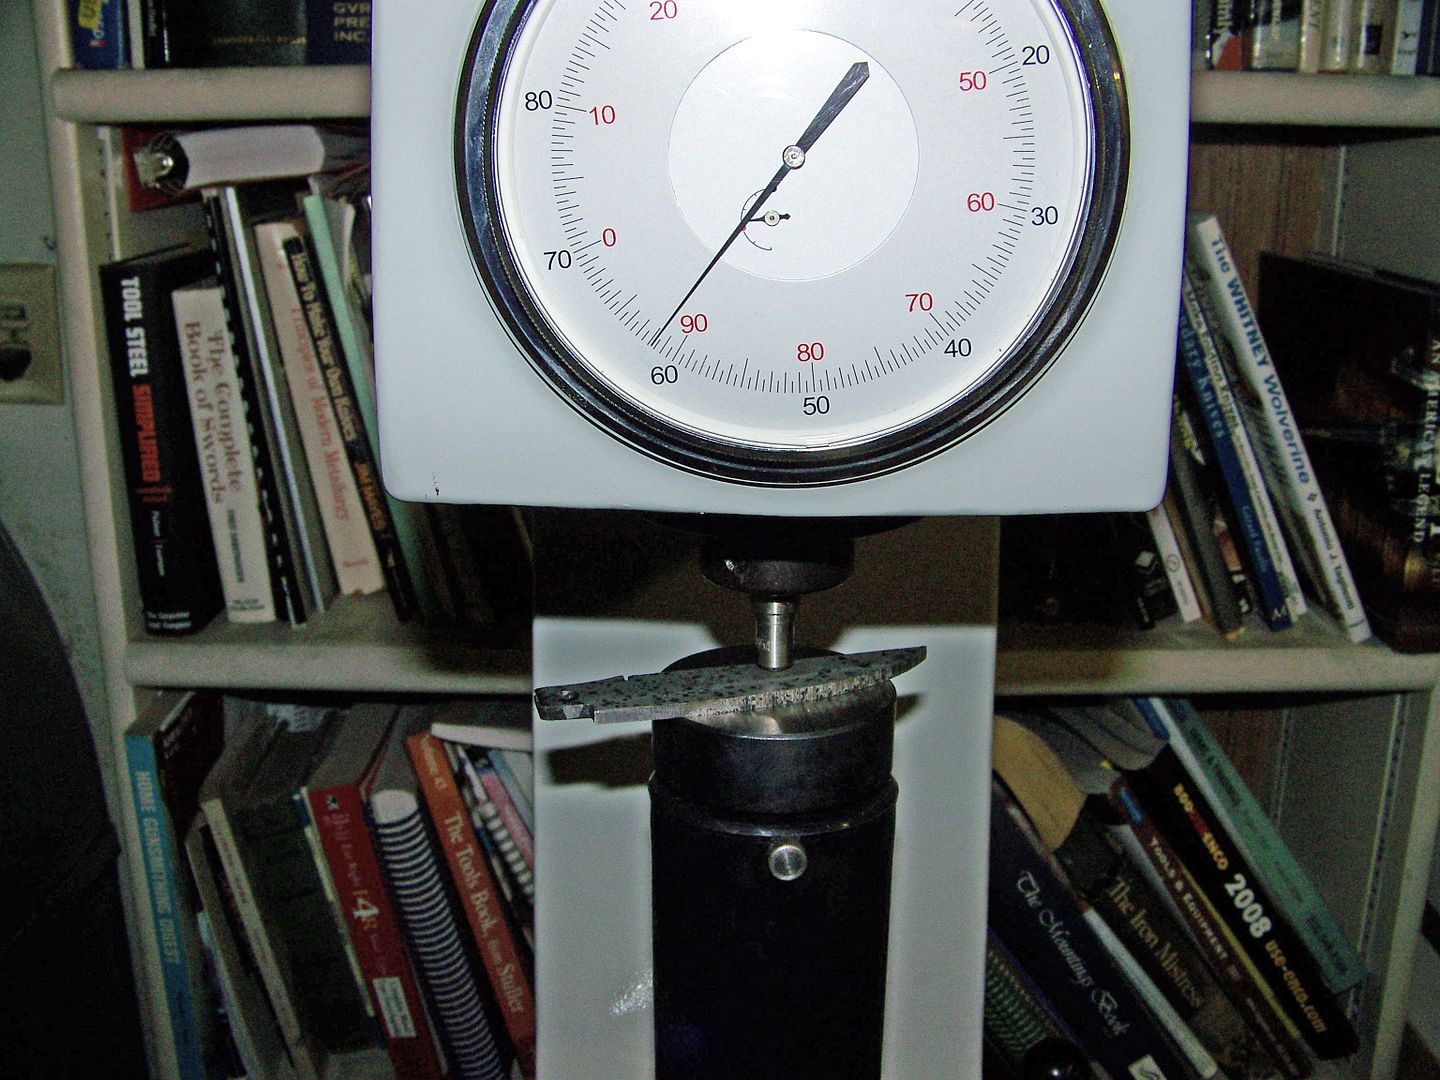
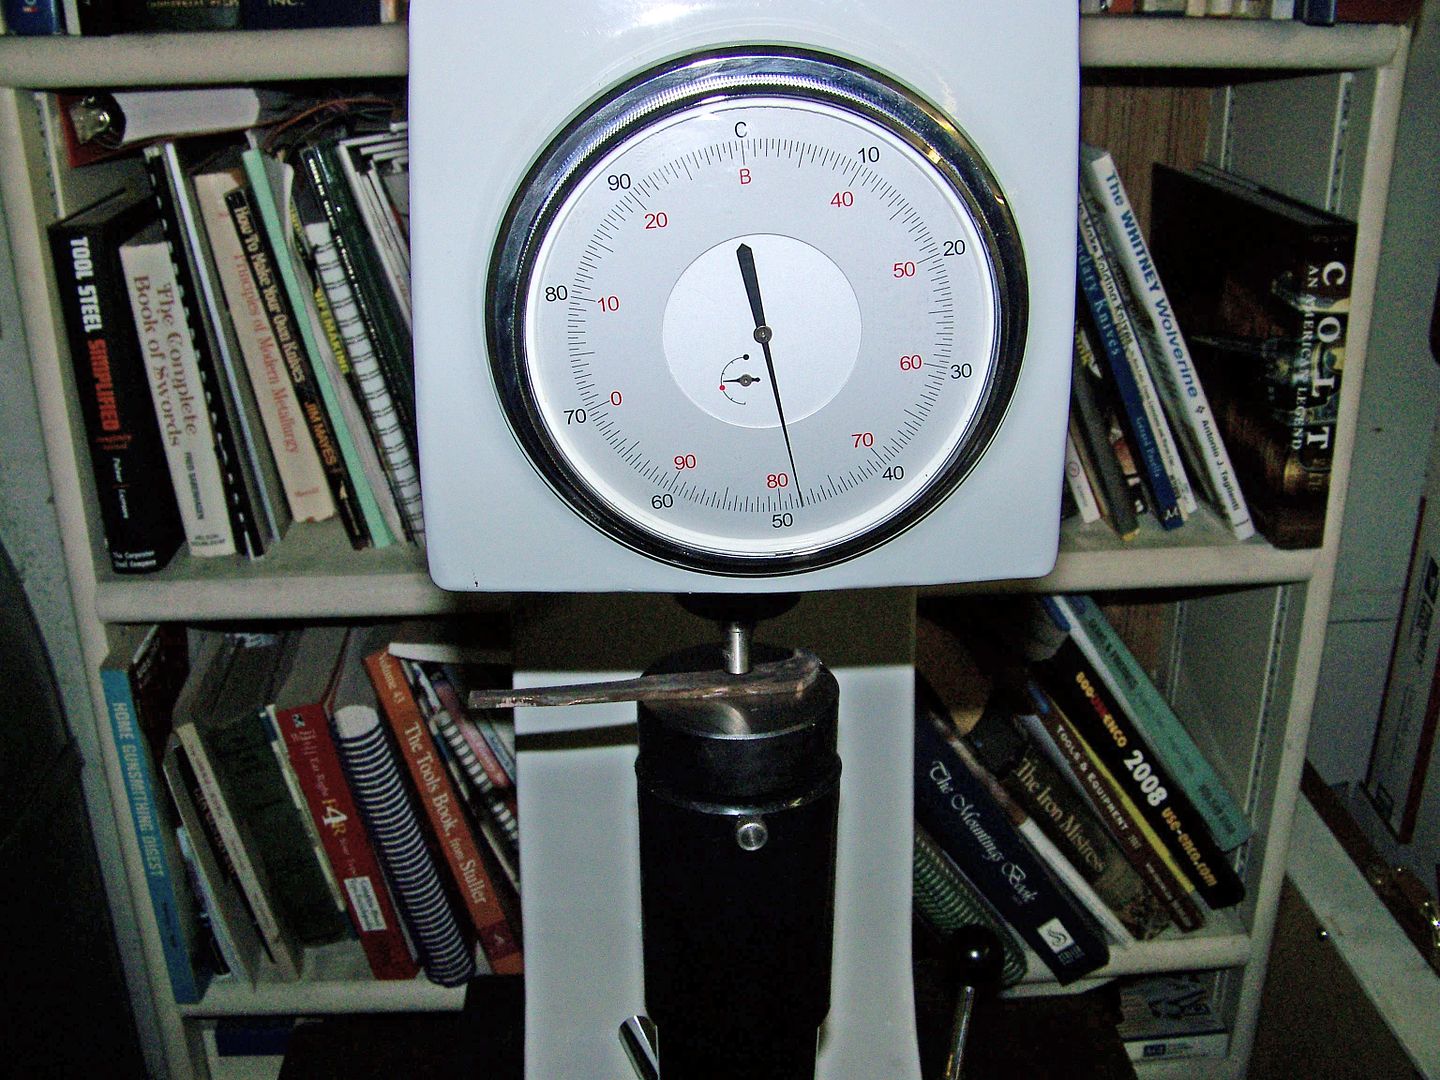
OK I had to re-temper the blade to arrive at 59rc hardness and the spring finally got down to 48rc after gradually raising the temperature and re-testing it every two hours. I'm happy with those numbers.

100_7231_edited.jpg


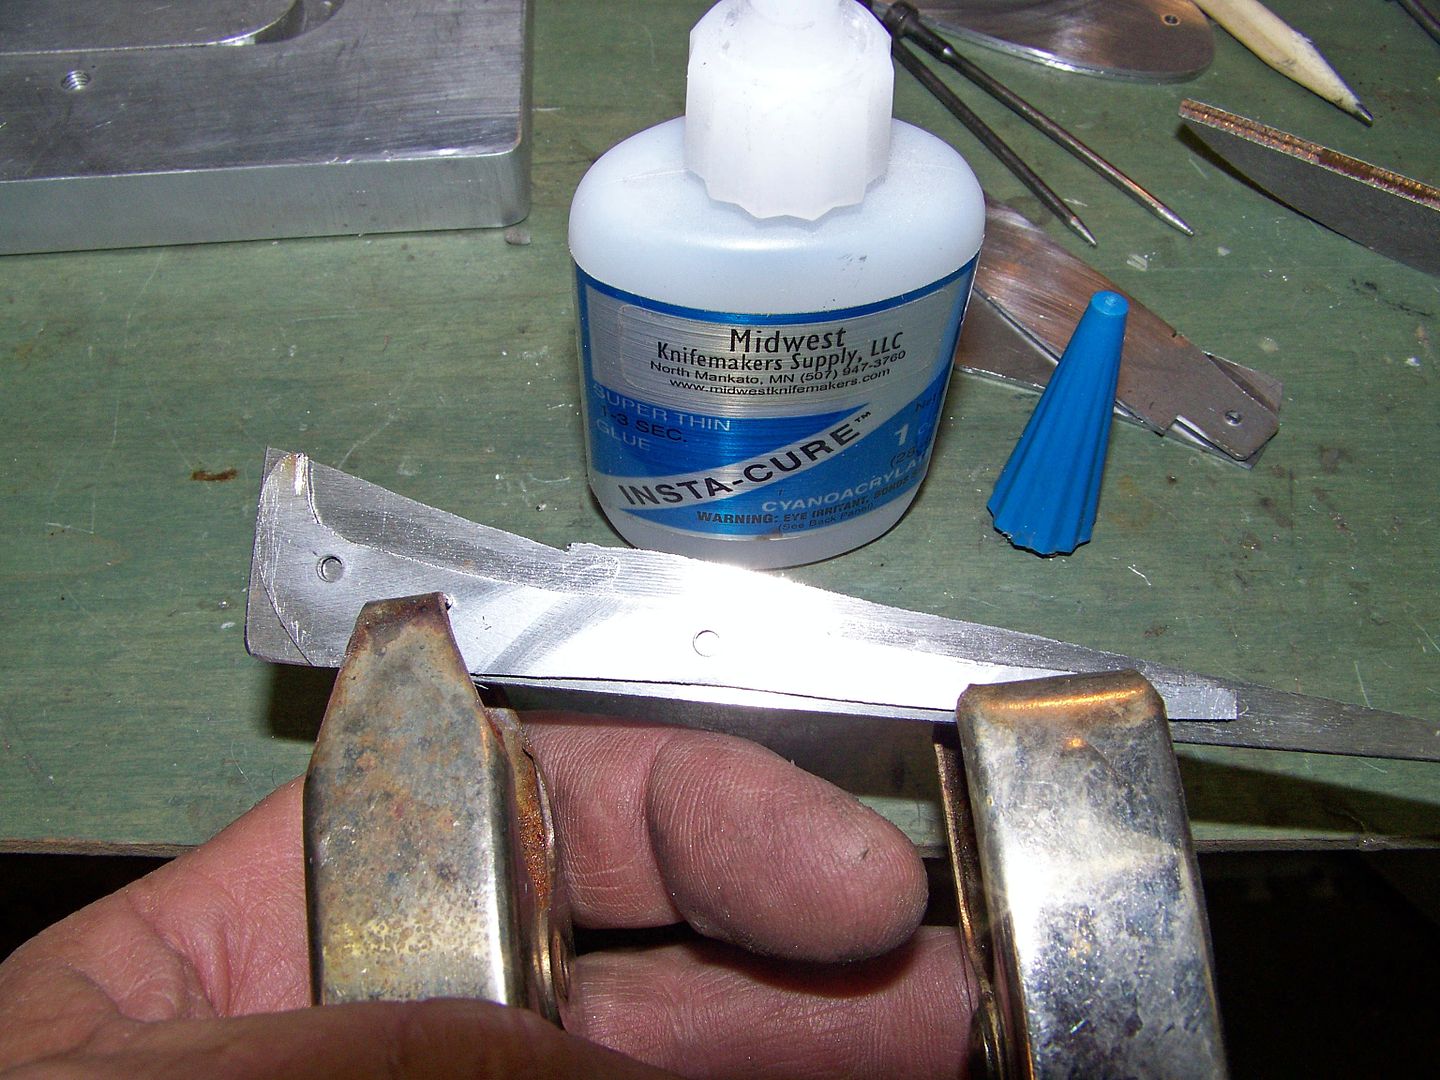
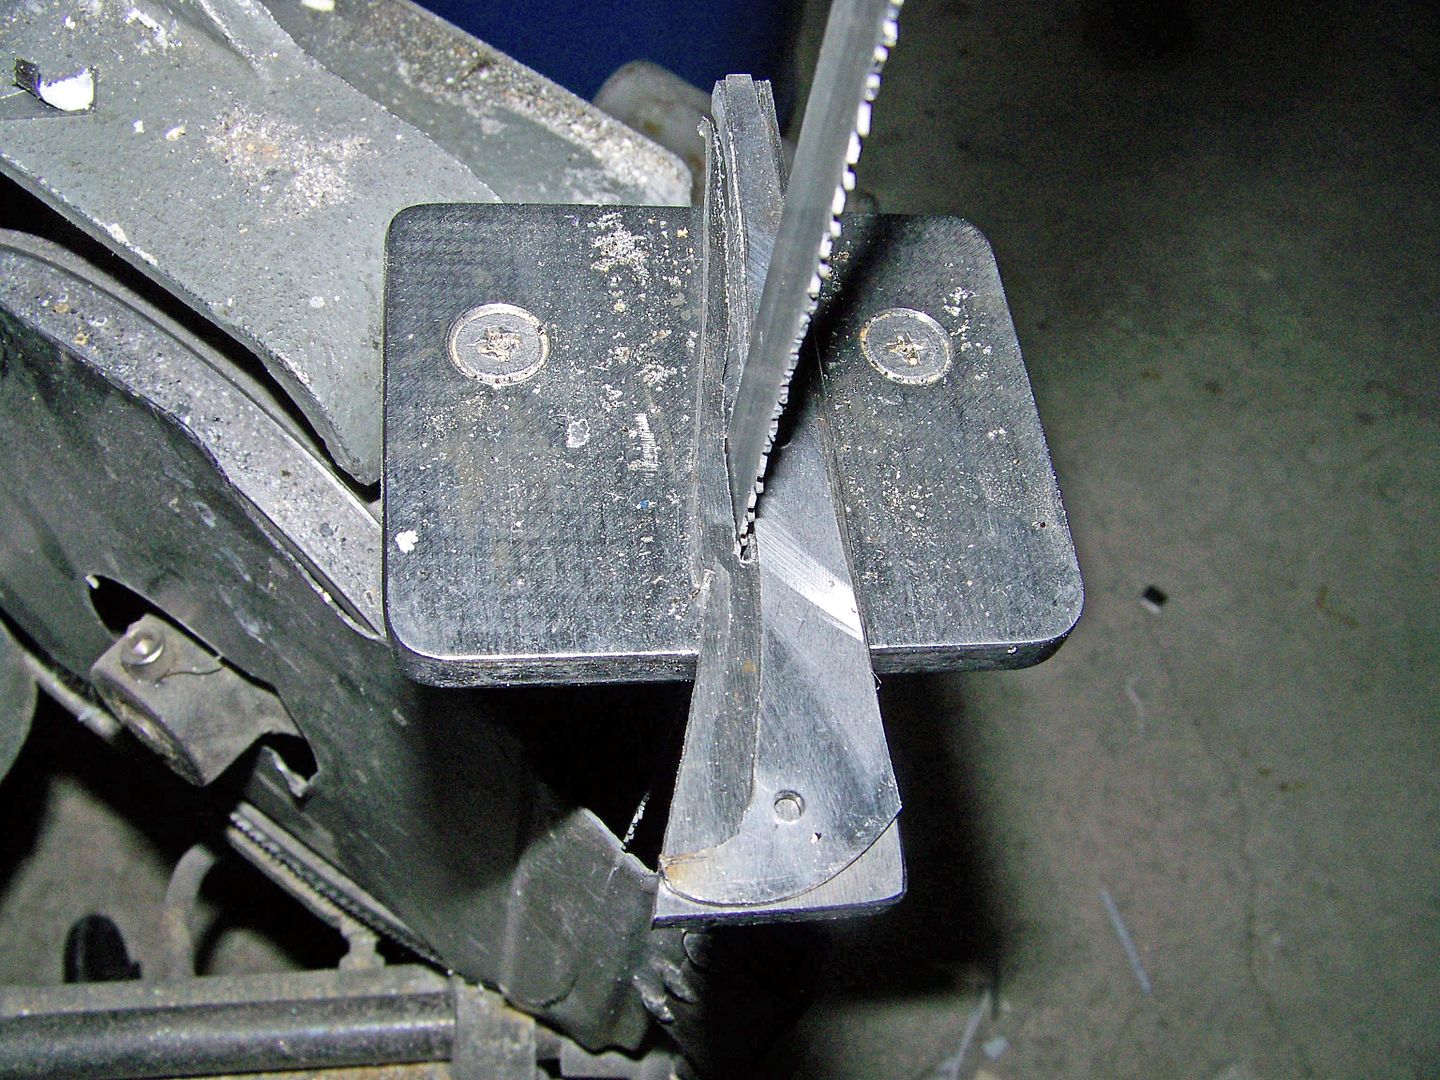
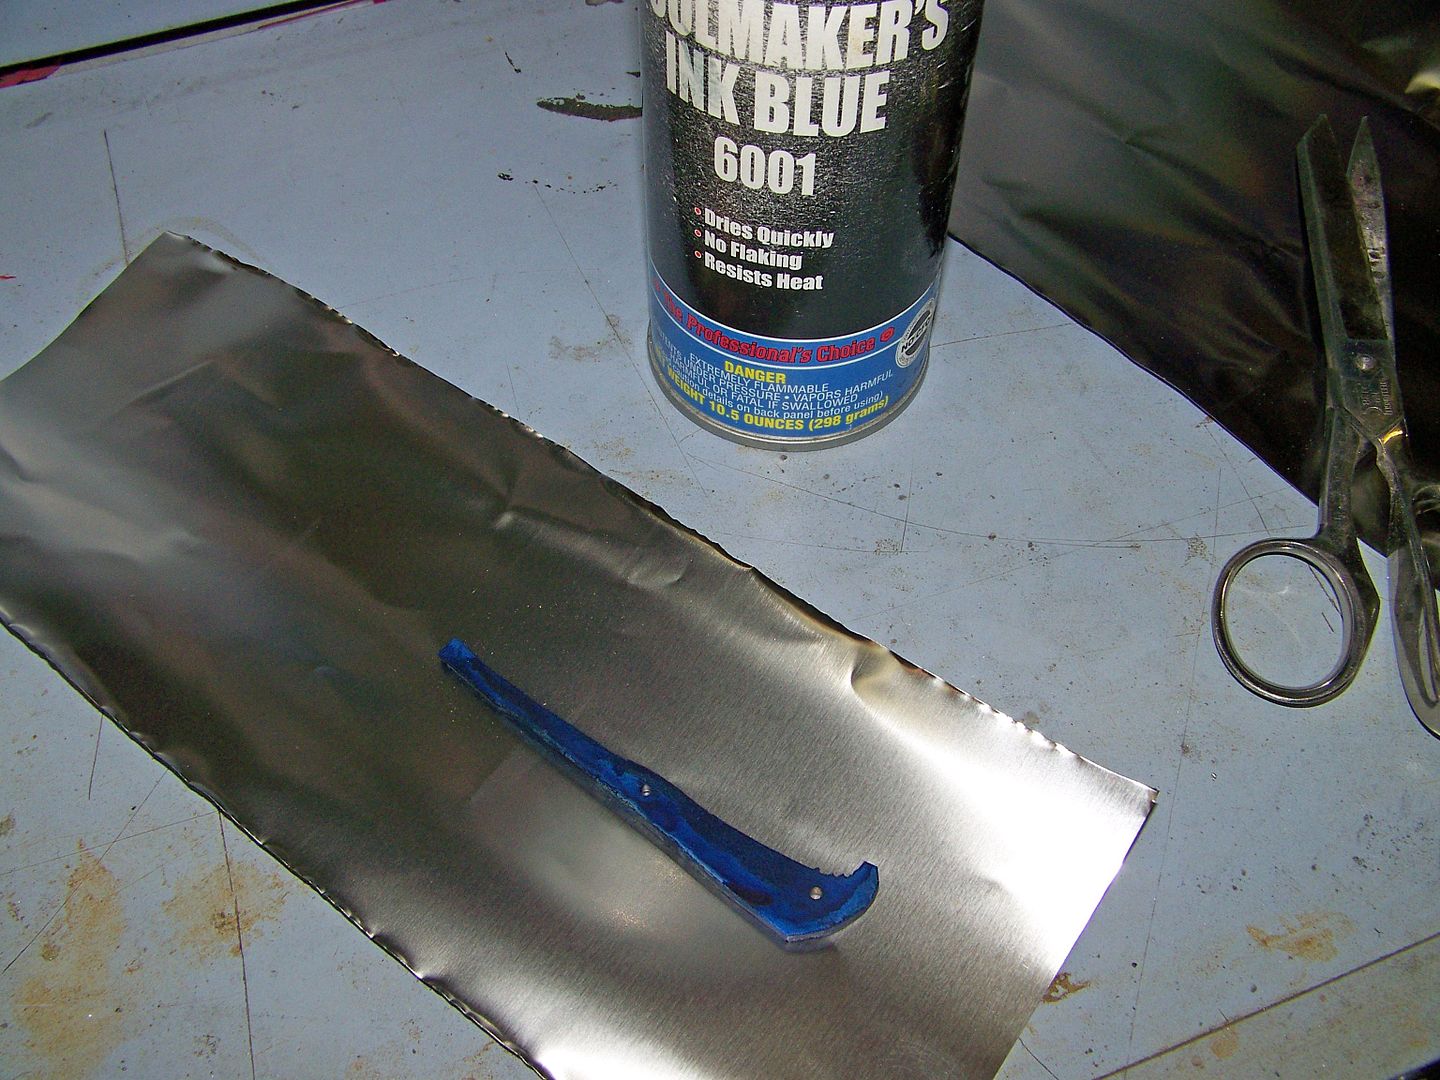
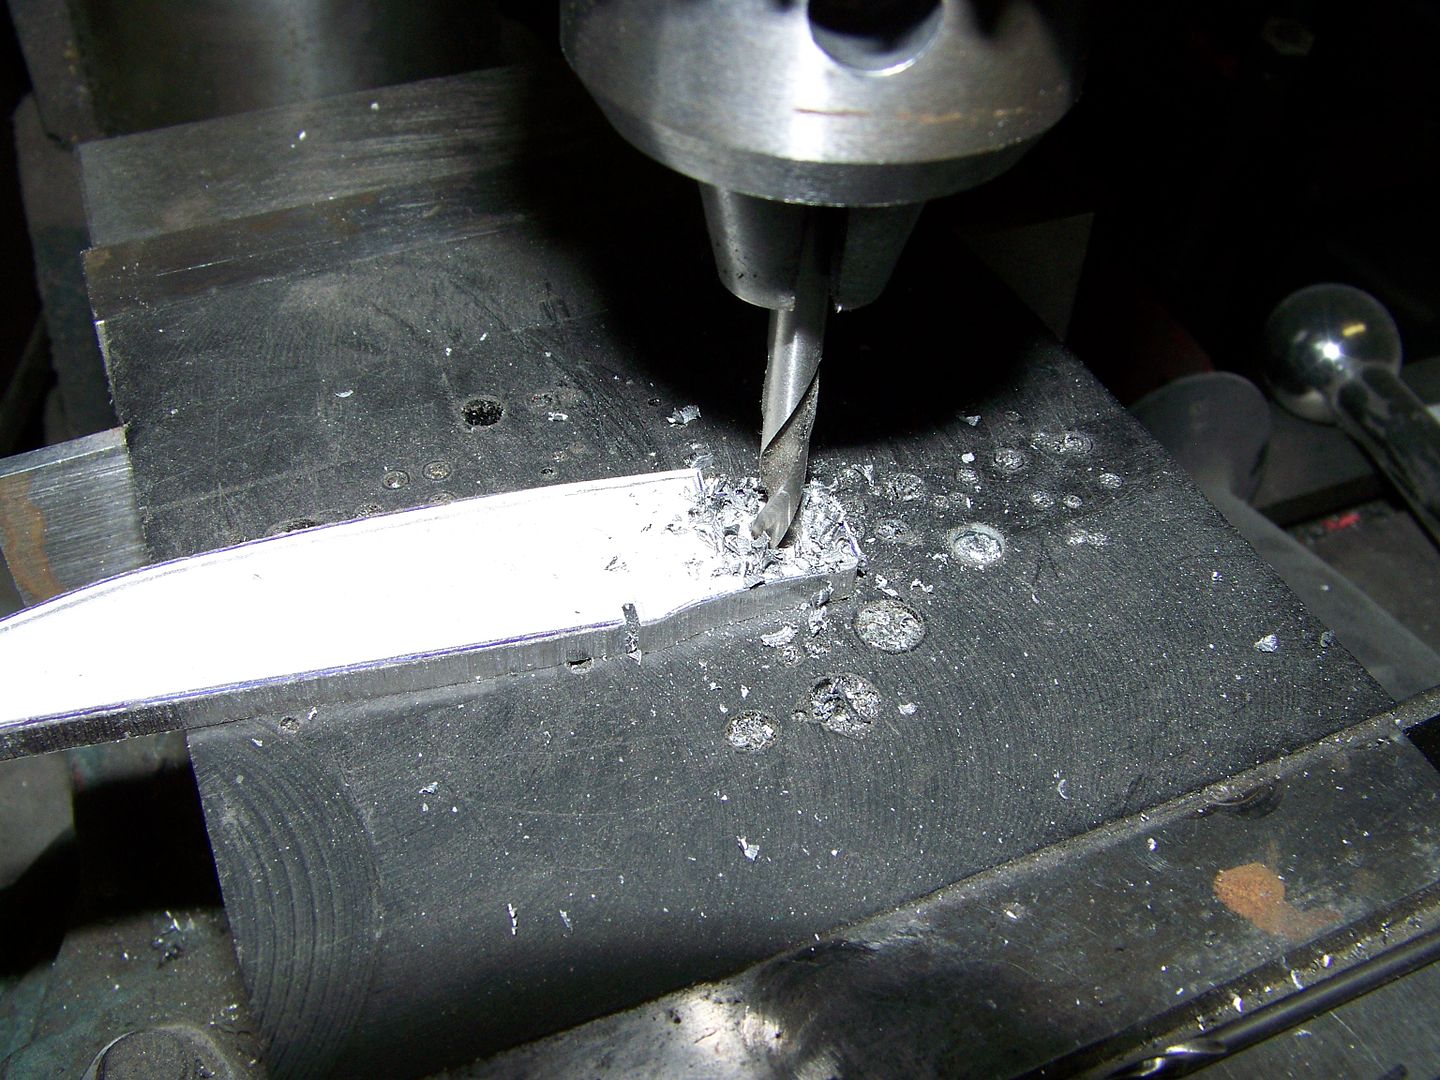
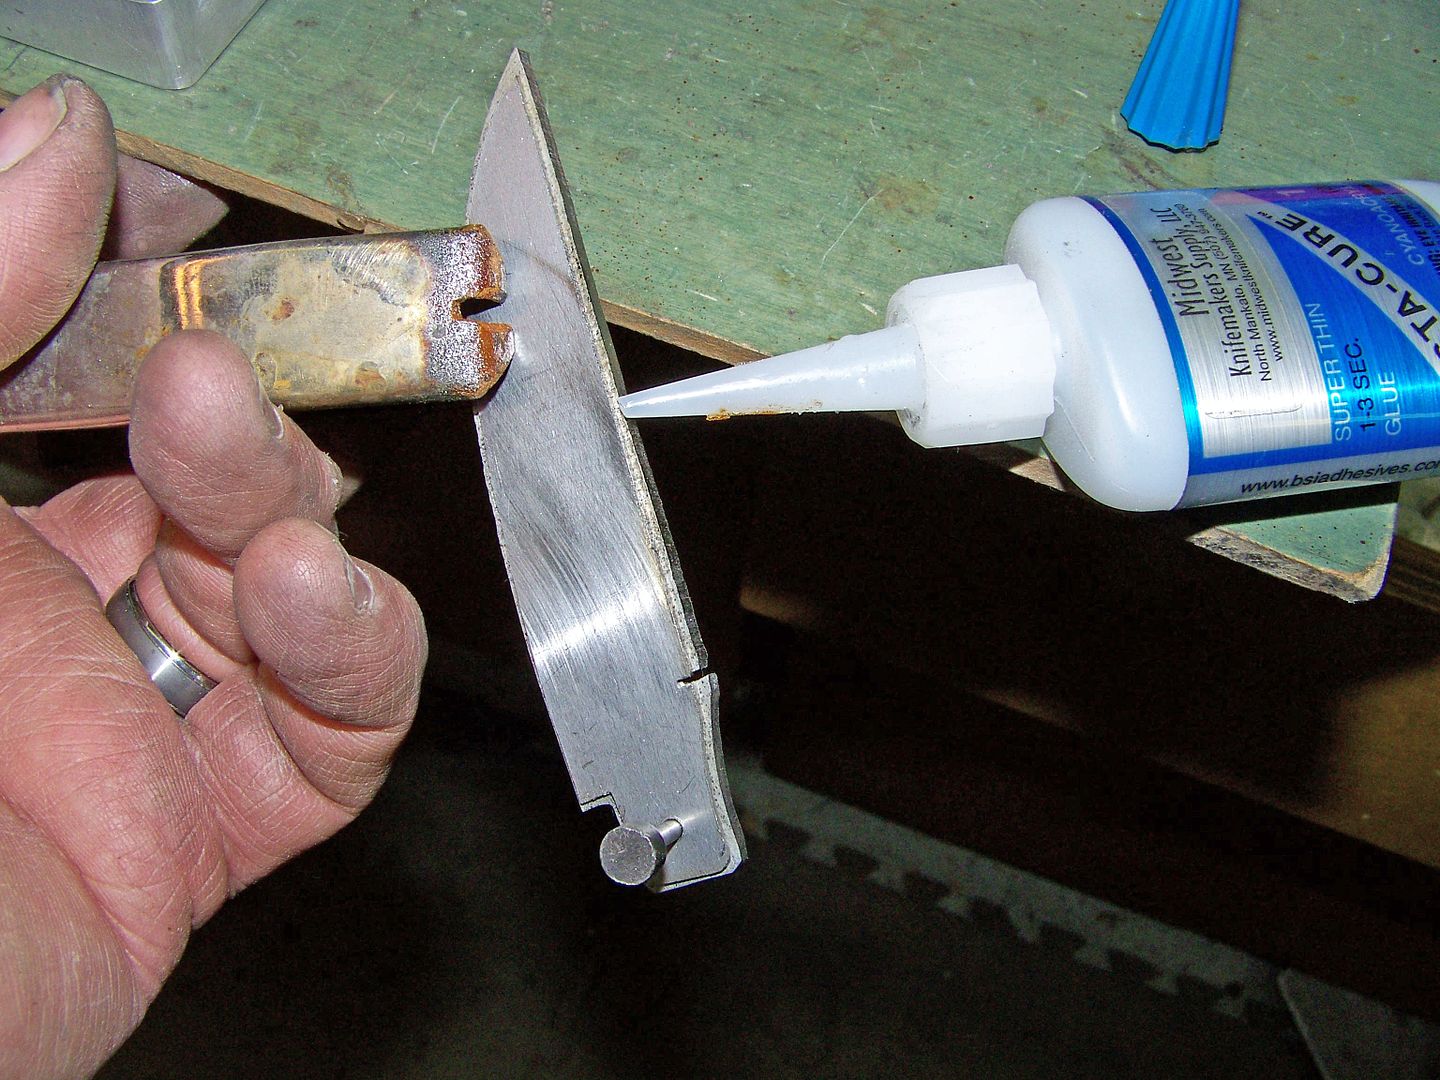
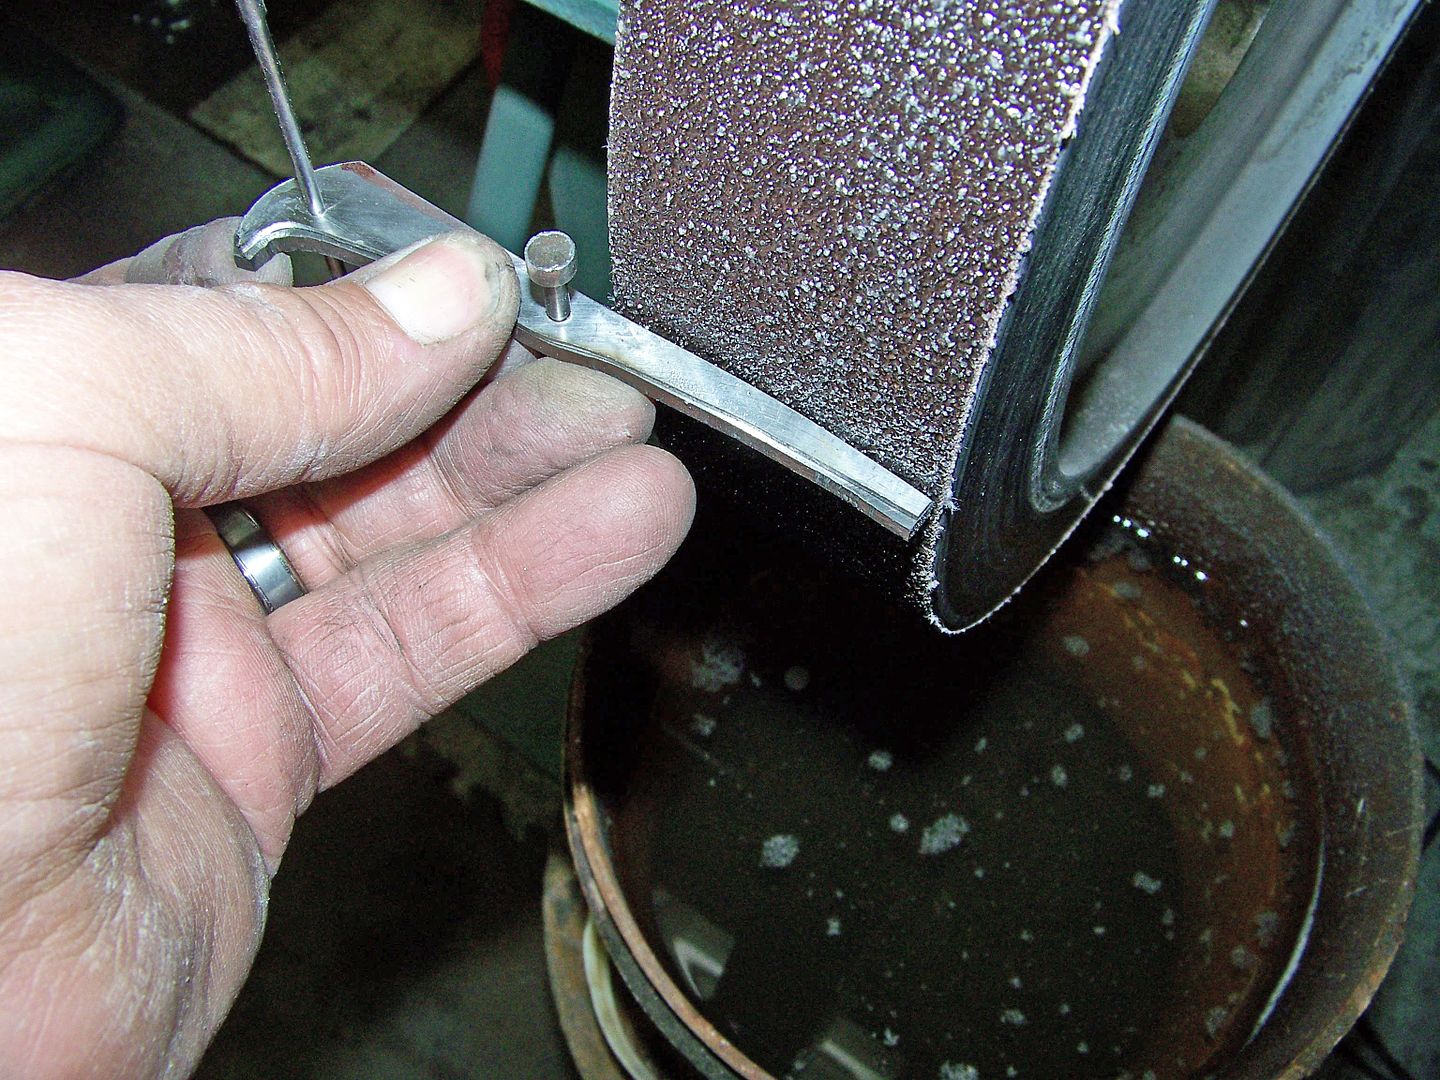
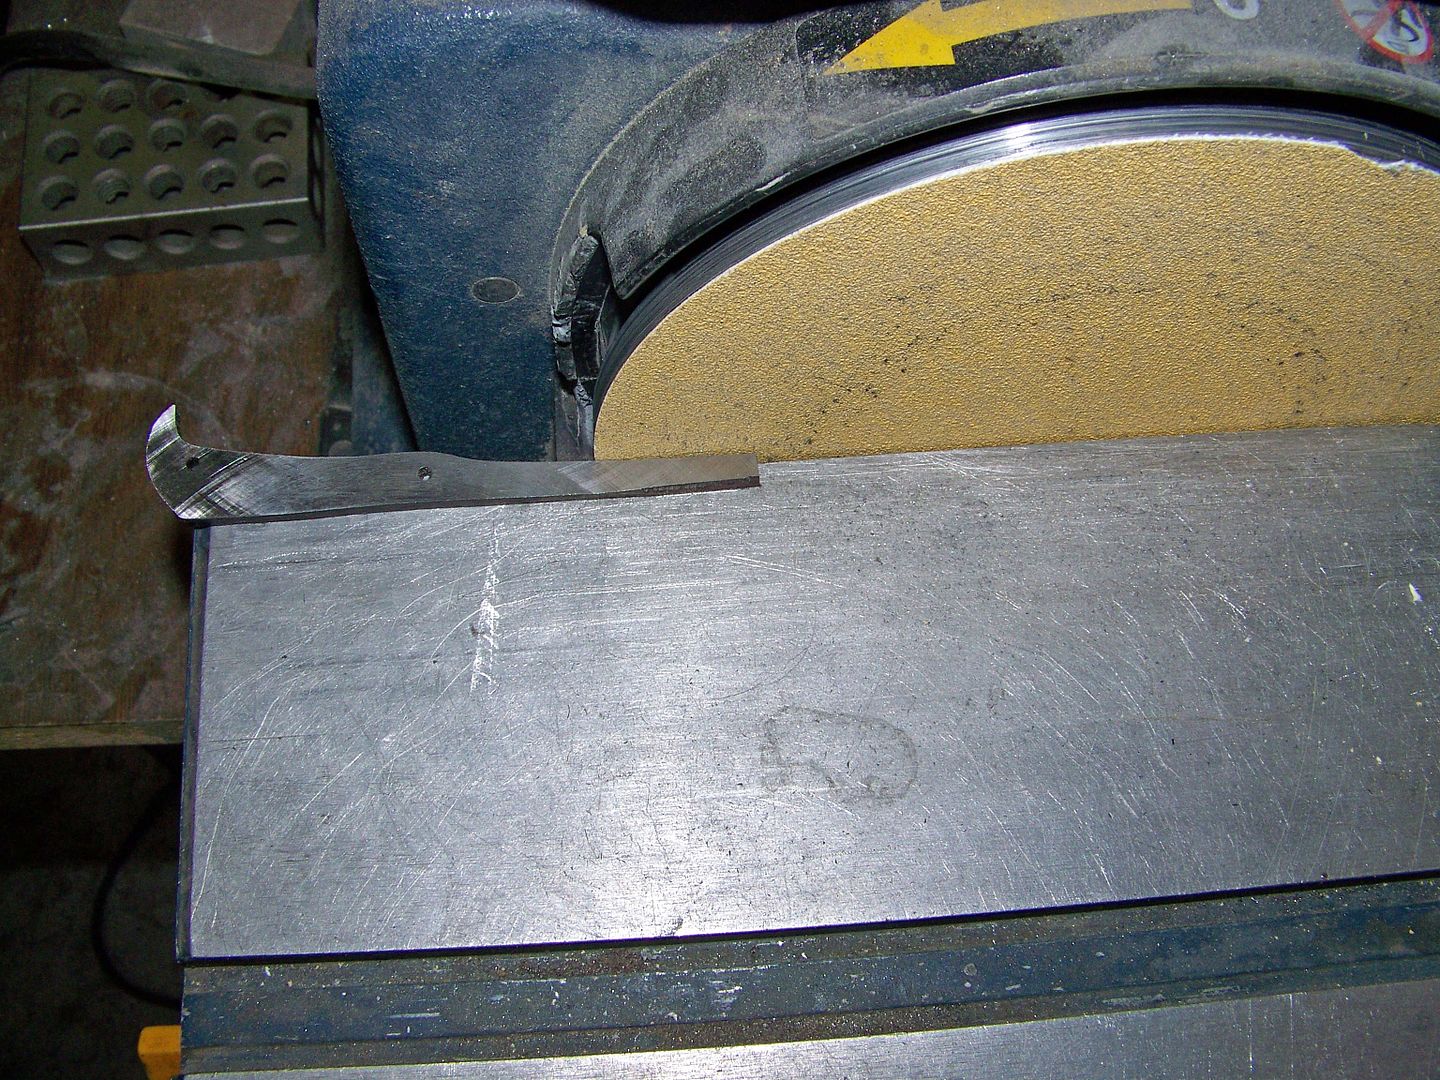
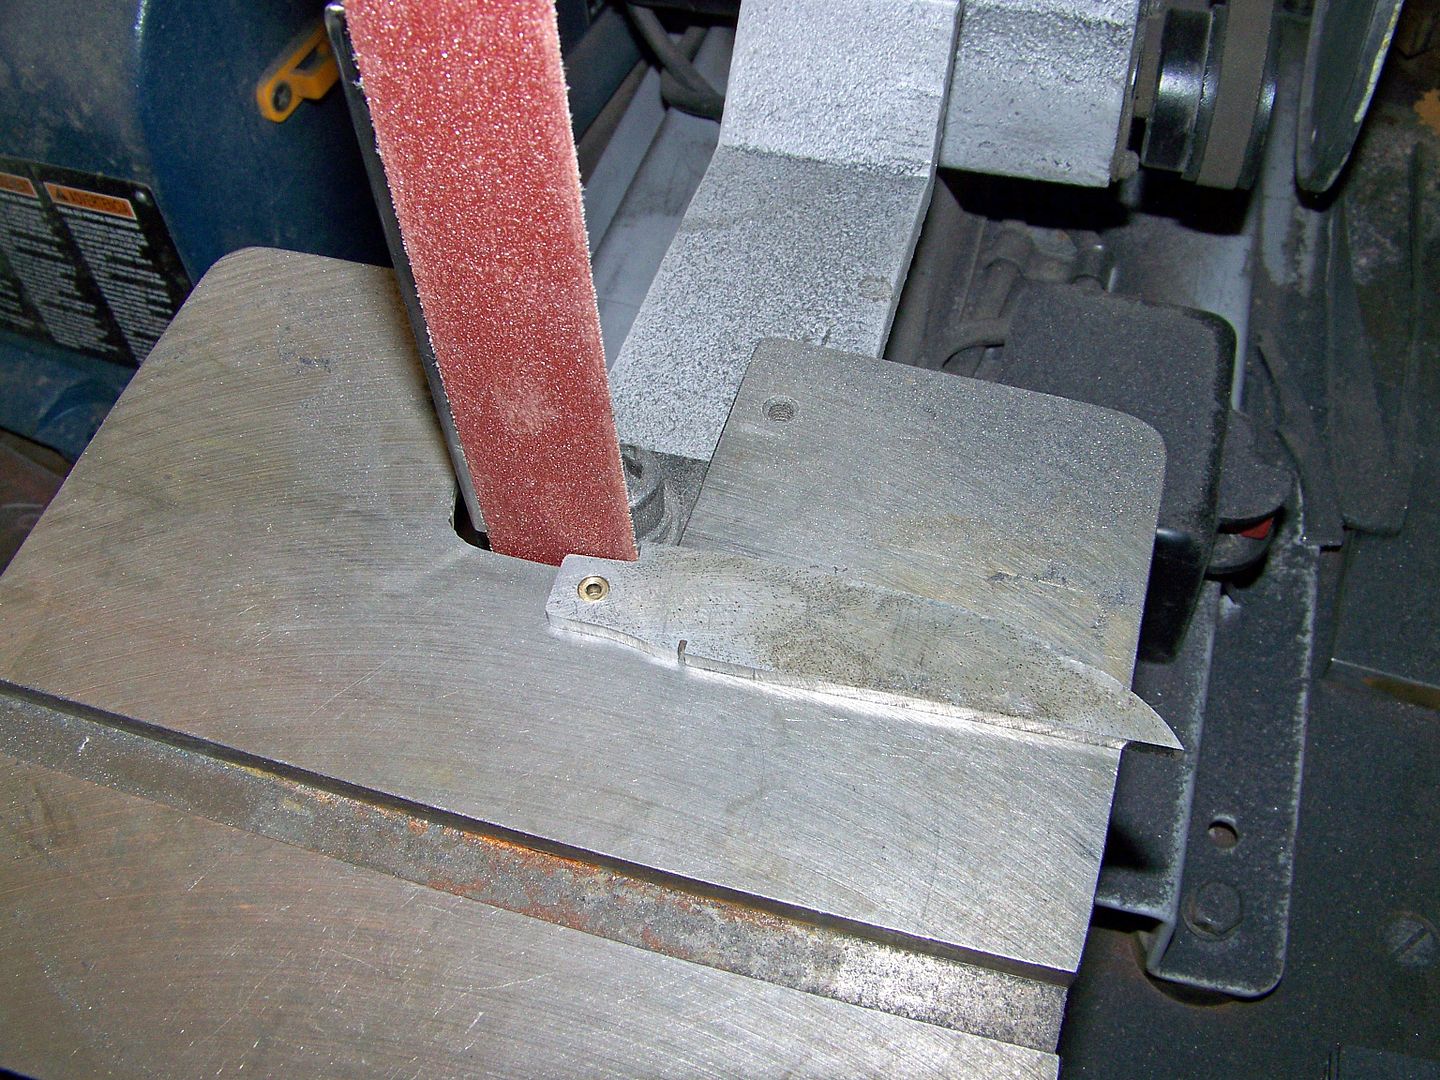
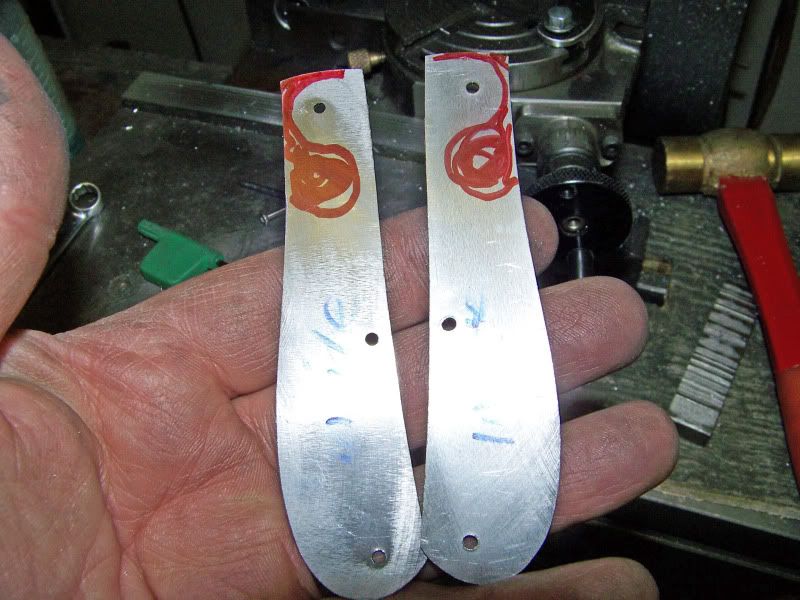
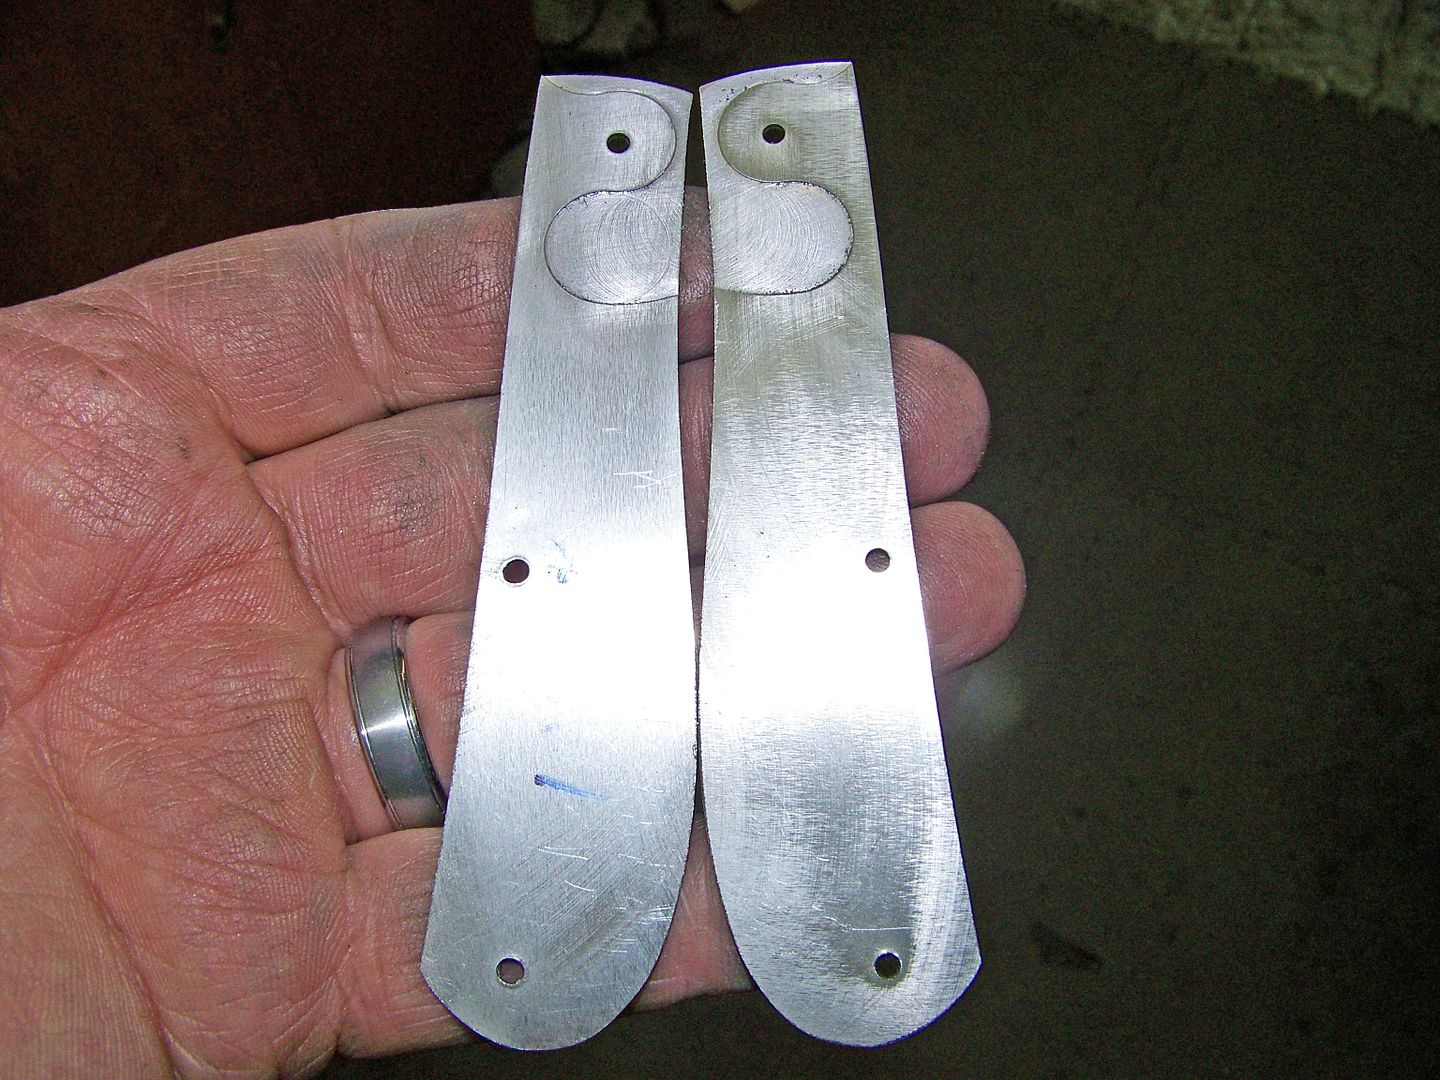
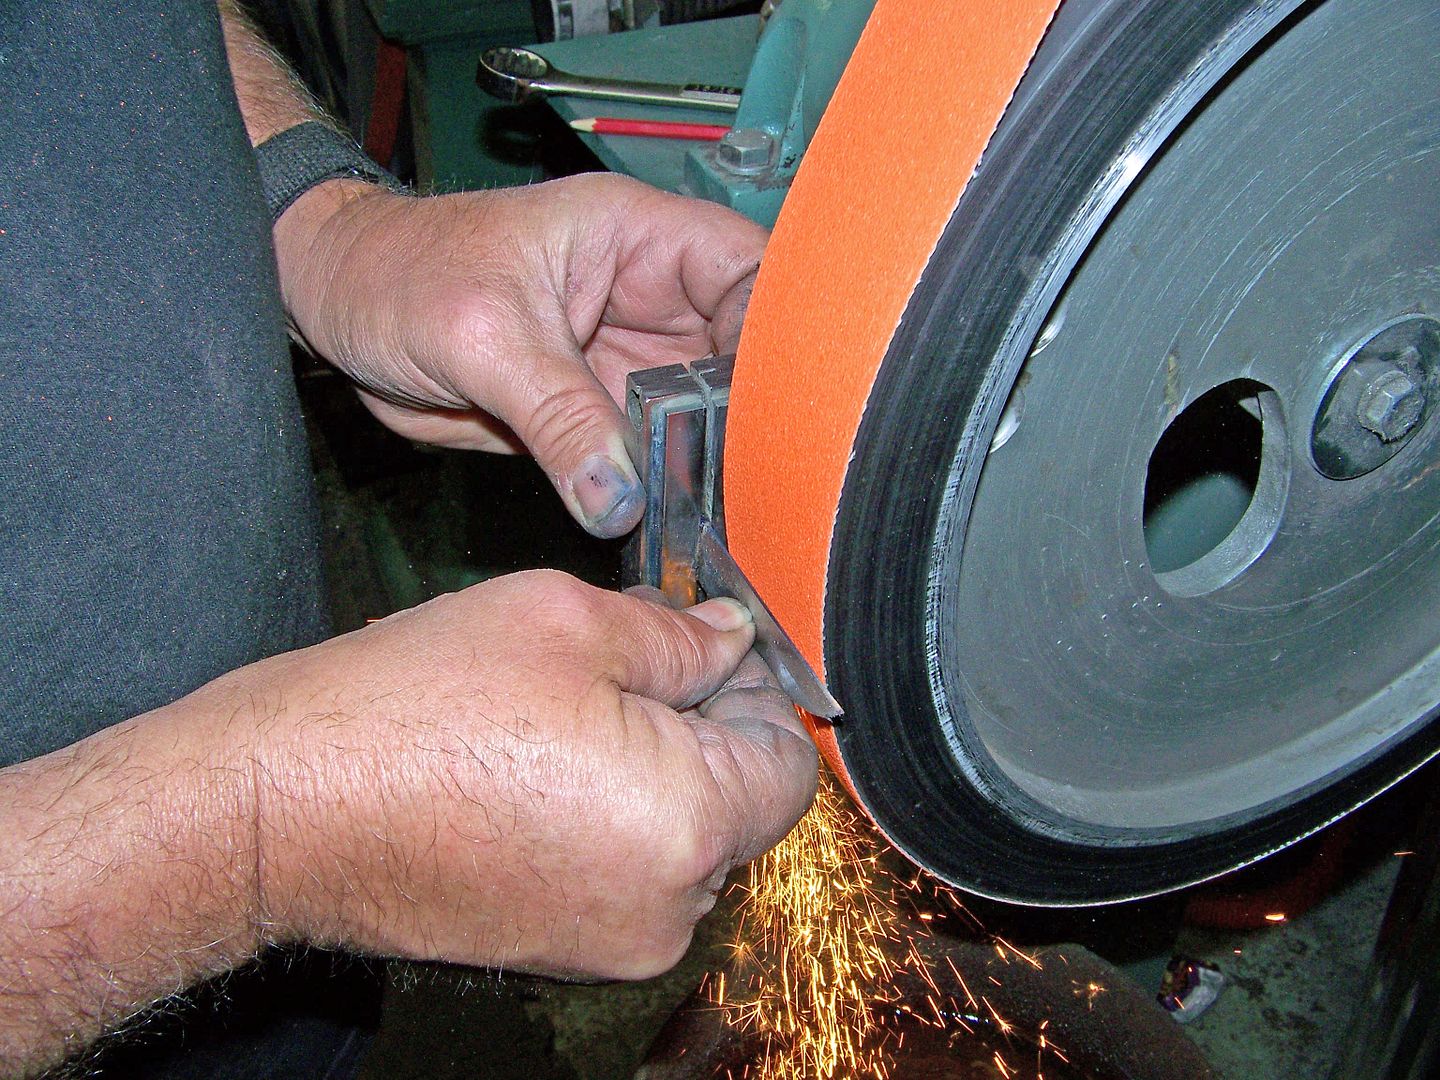
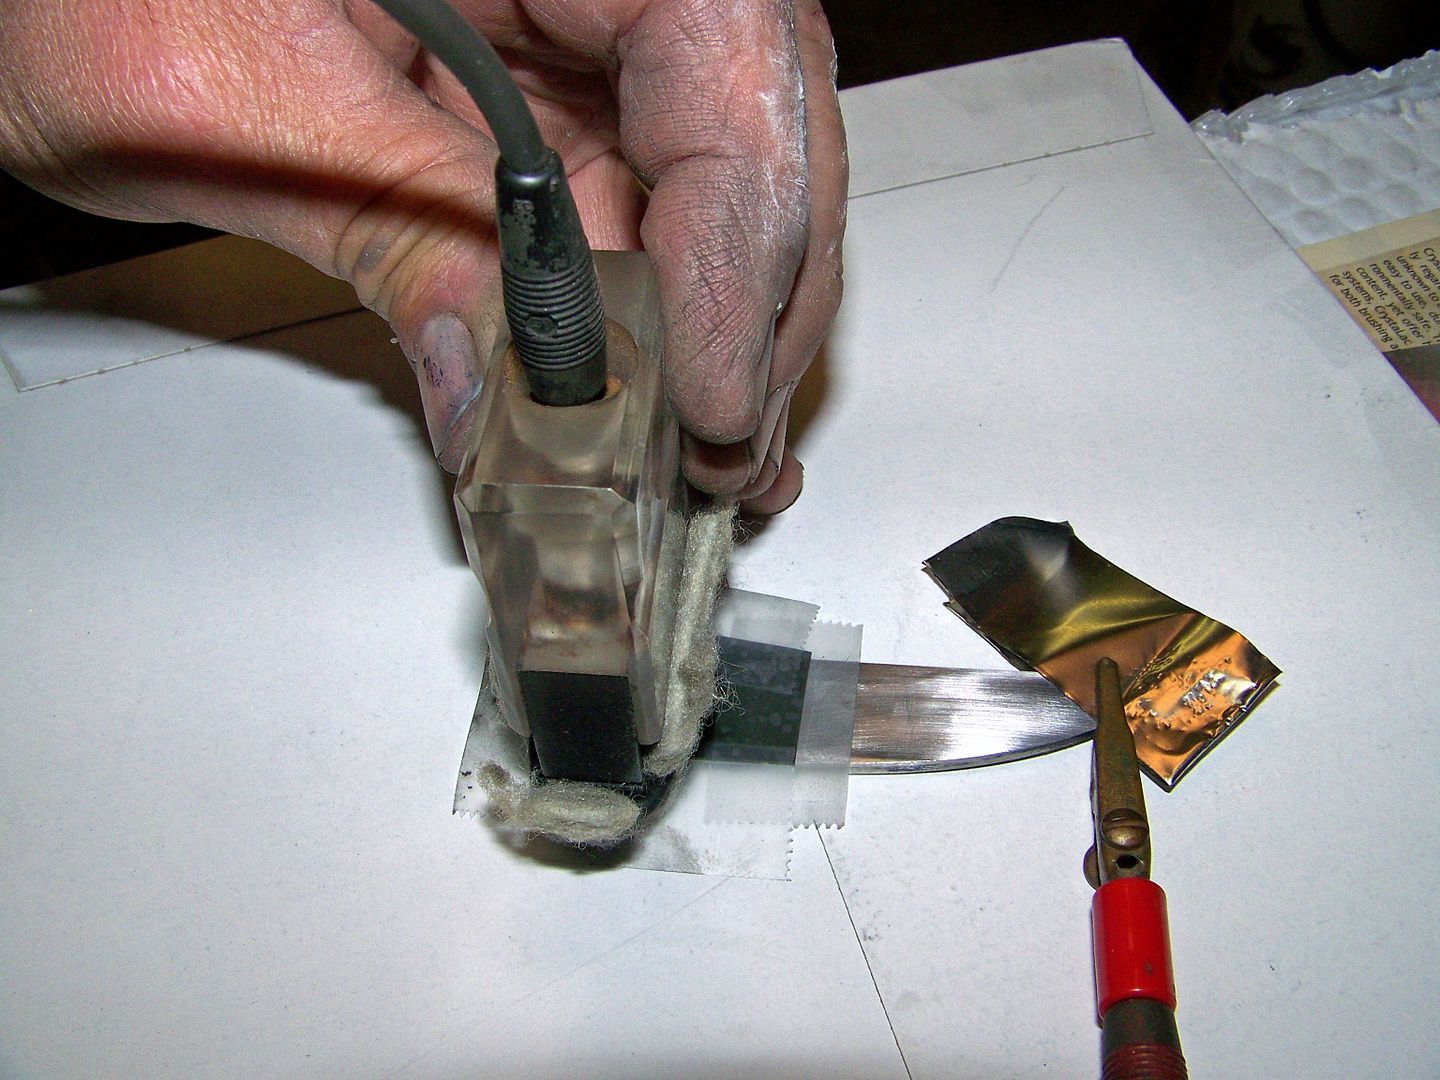
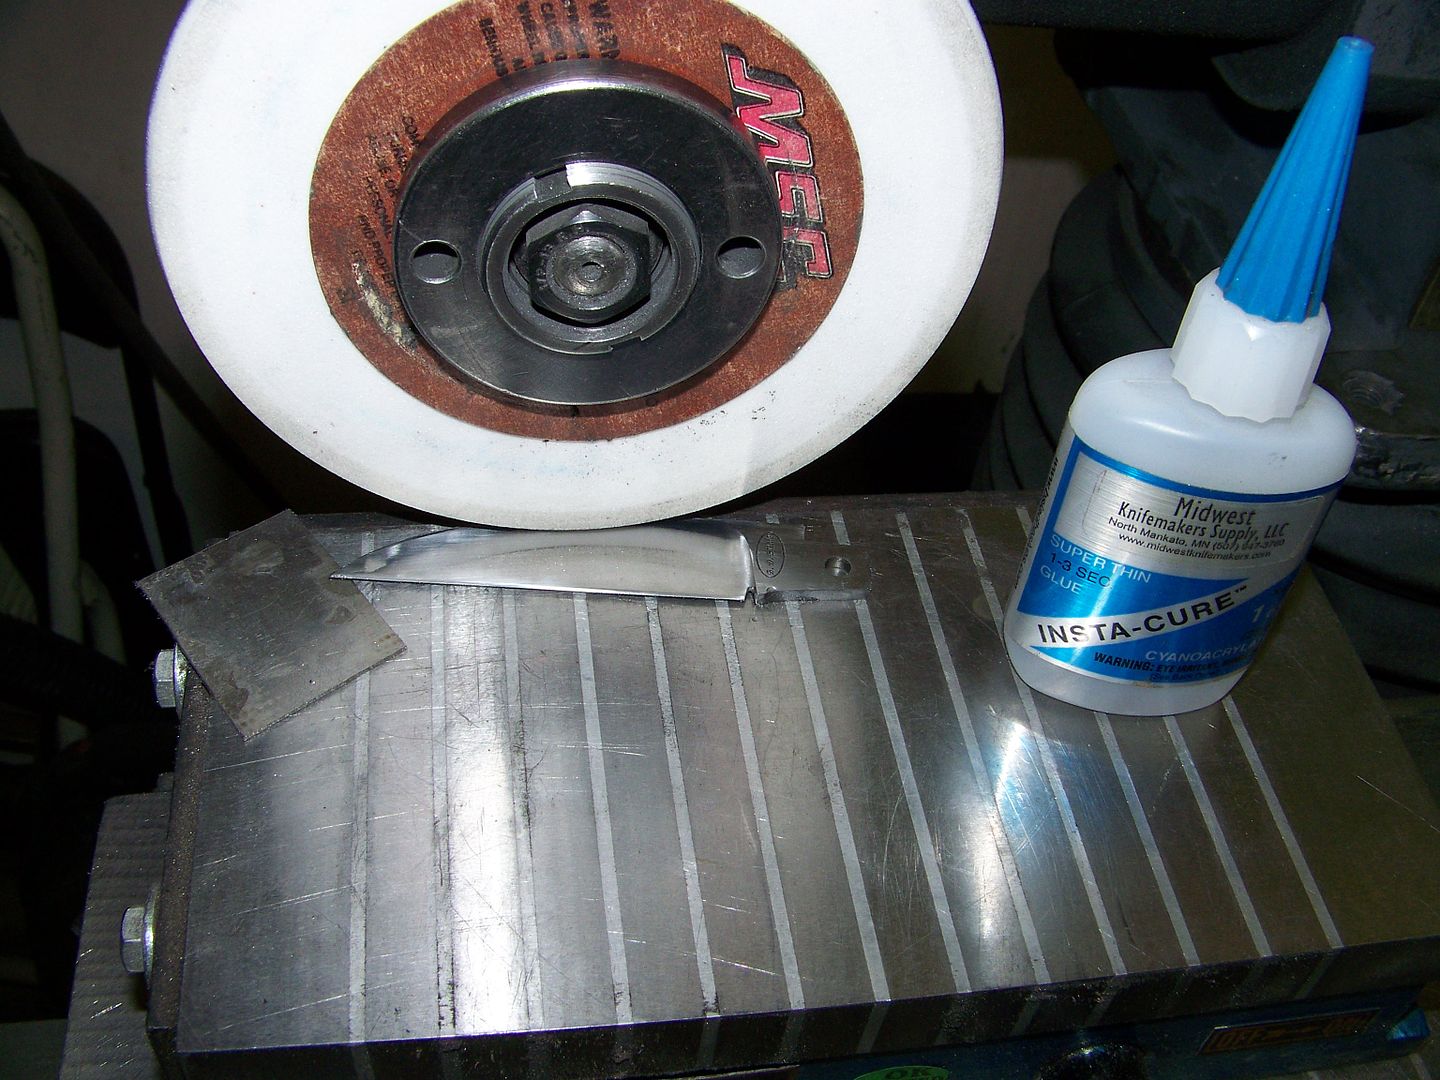
I finally tuned up the stainless templates good enough to use. I super glued them to the damascus blade and the spring and profiled them very close to the template. A new 36 belt takes material off fast without over heating them. Newer sharp belts need to be used to reduce chances of losing hardness from accidently overheating them. A dip bucket of water under the grinder is a must to prevent over heating and getting soft spots.

100_7247_edited.jpg


100_7255_edited.jpg


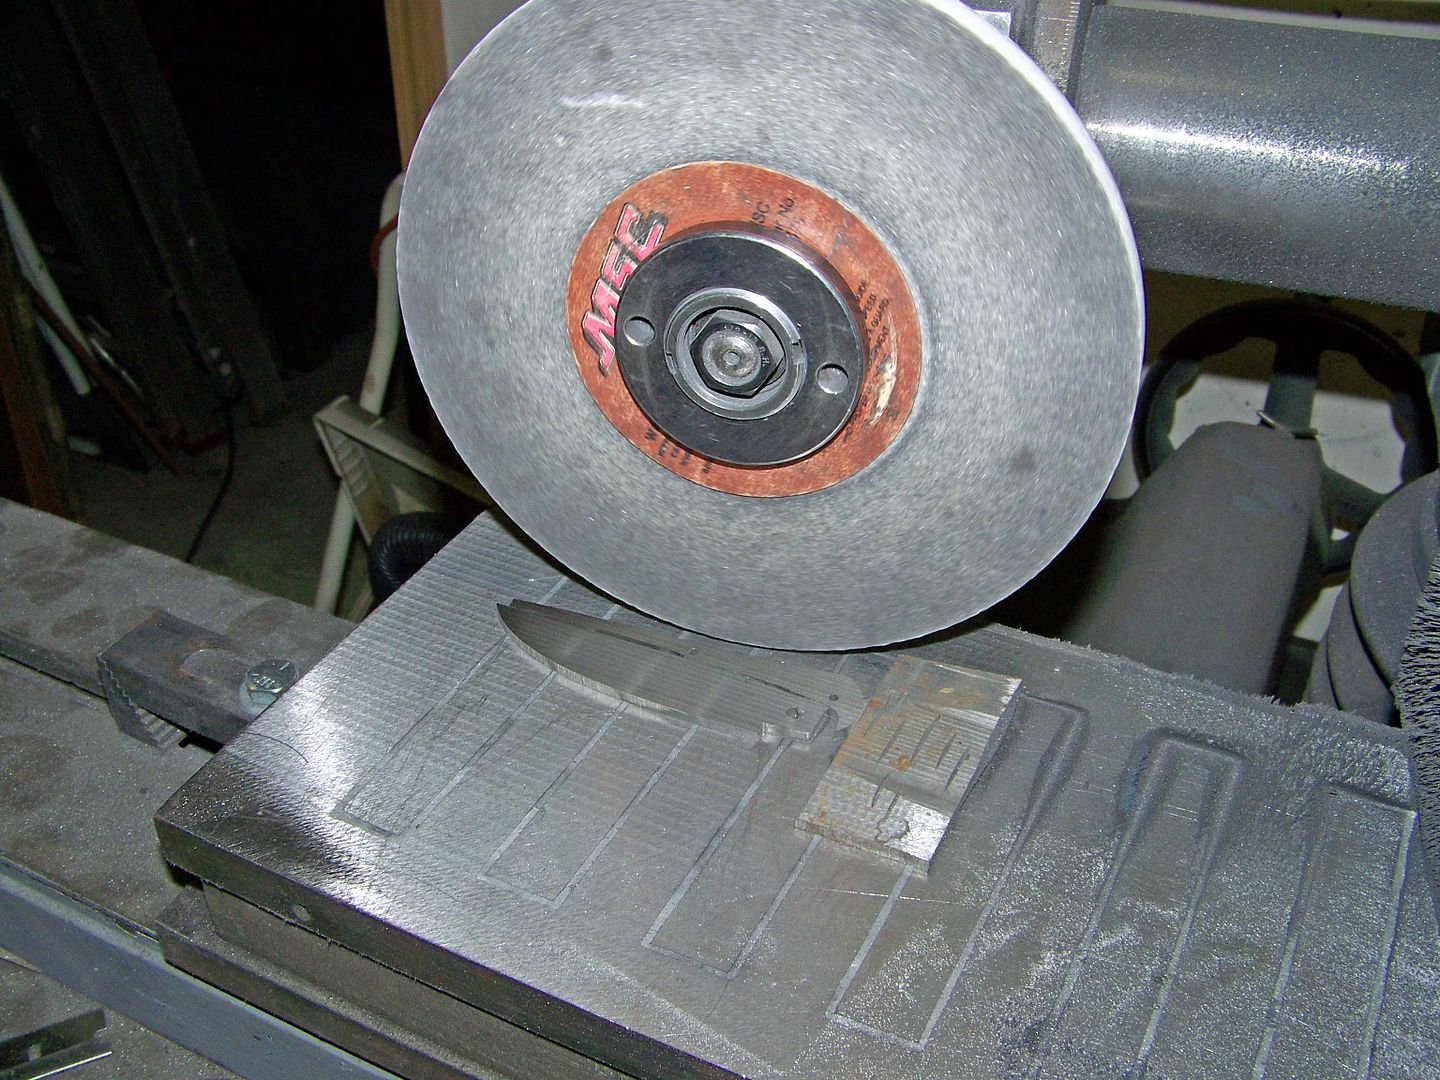
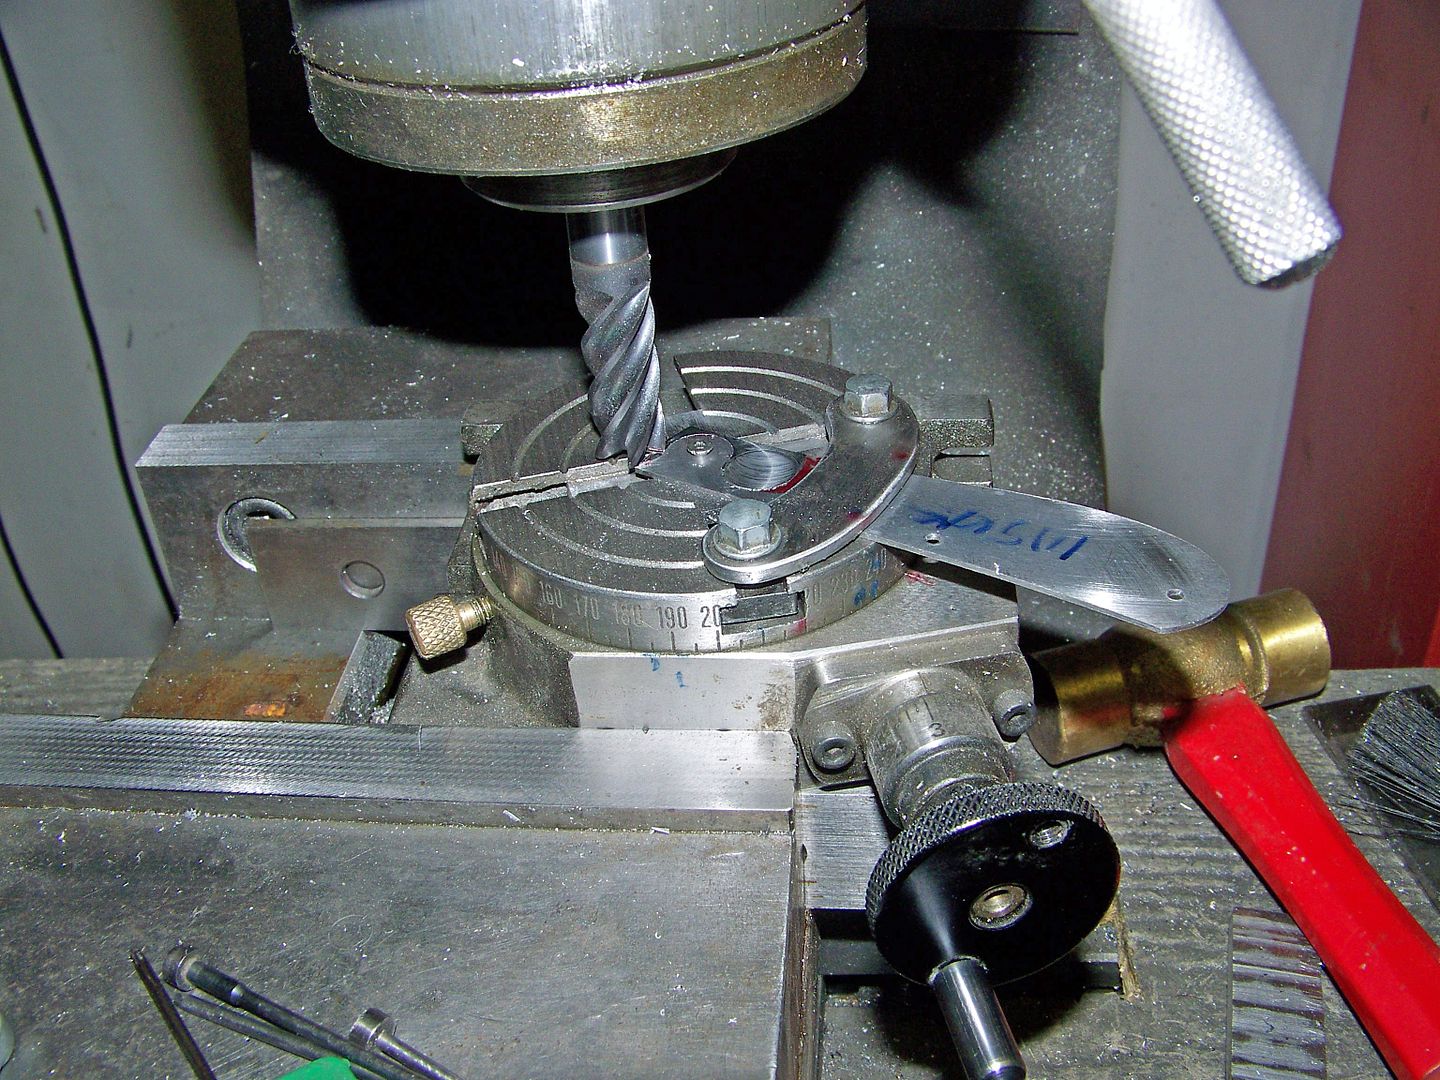
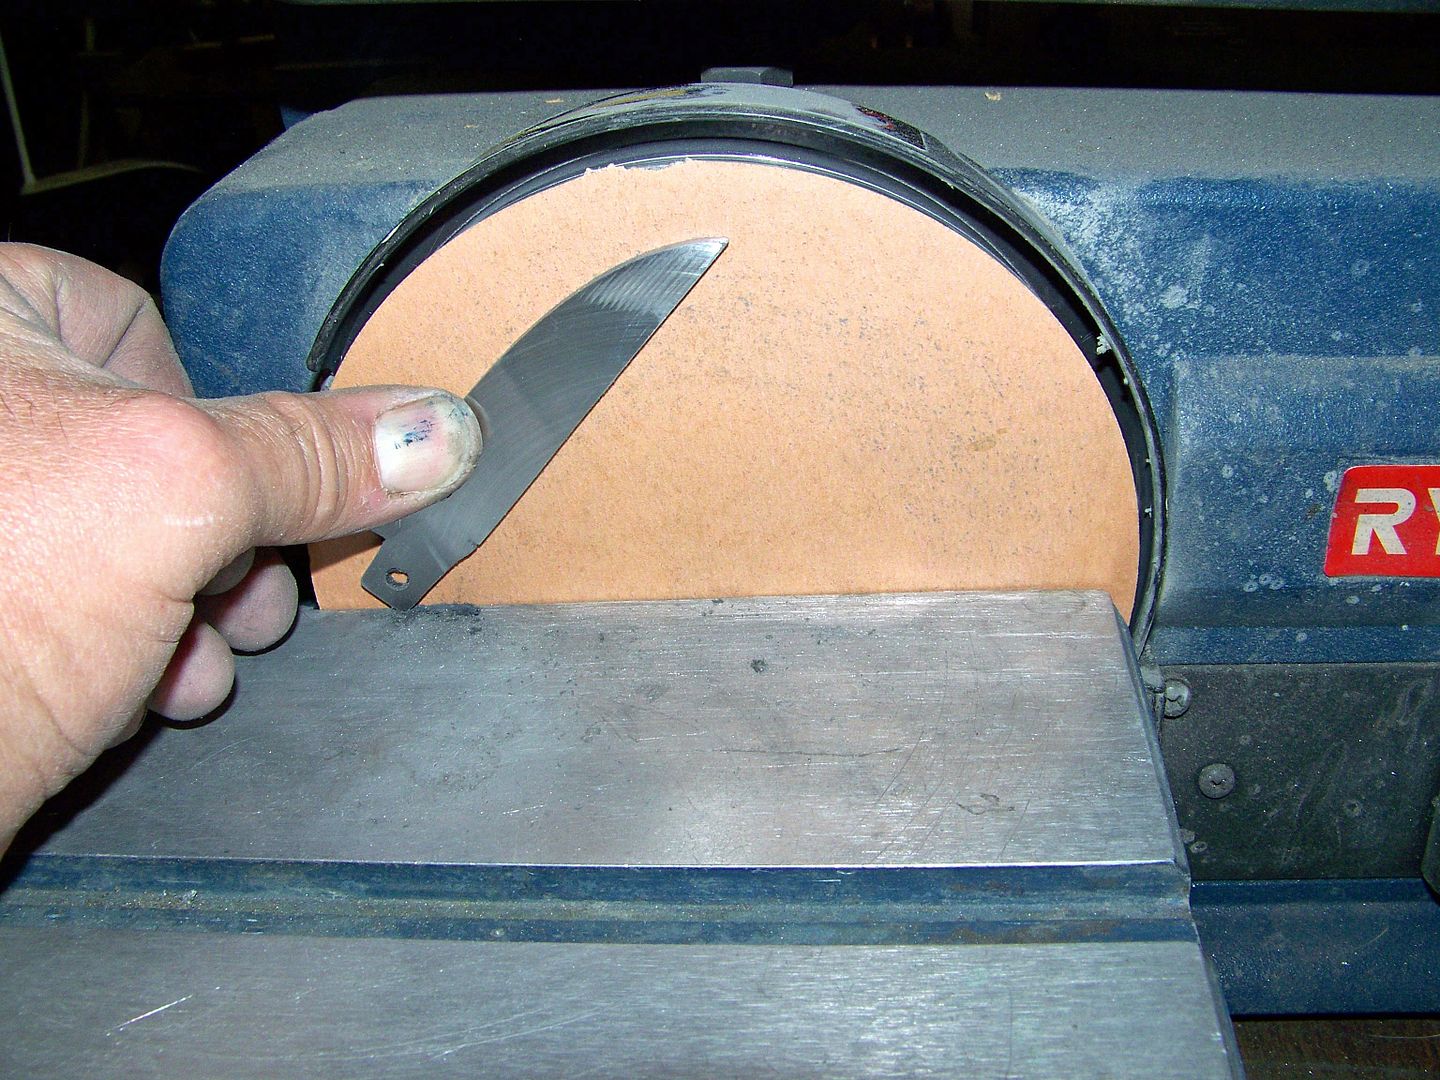
The tang/spring contact area needs to be straight and square. In fact everything needs to be ground square. It really pays to have a disc grinder even if its just an elcheapo like this Ryobi 6". It has a nice adjustable table and can be set to be perpendicular to the disc. I use a Delta 1" x 42" strip sander also. When you are within just a couple thousands of an inch it pays to have a foot control switch and a very fine grit disc and belt. Remember the precious "flush in all 3 positions"? The fine grit belt and disc will prevent over grinding.

100_7257_edited.jpg


100_7249_edited.jpg


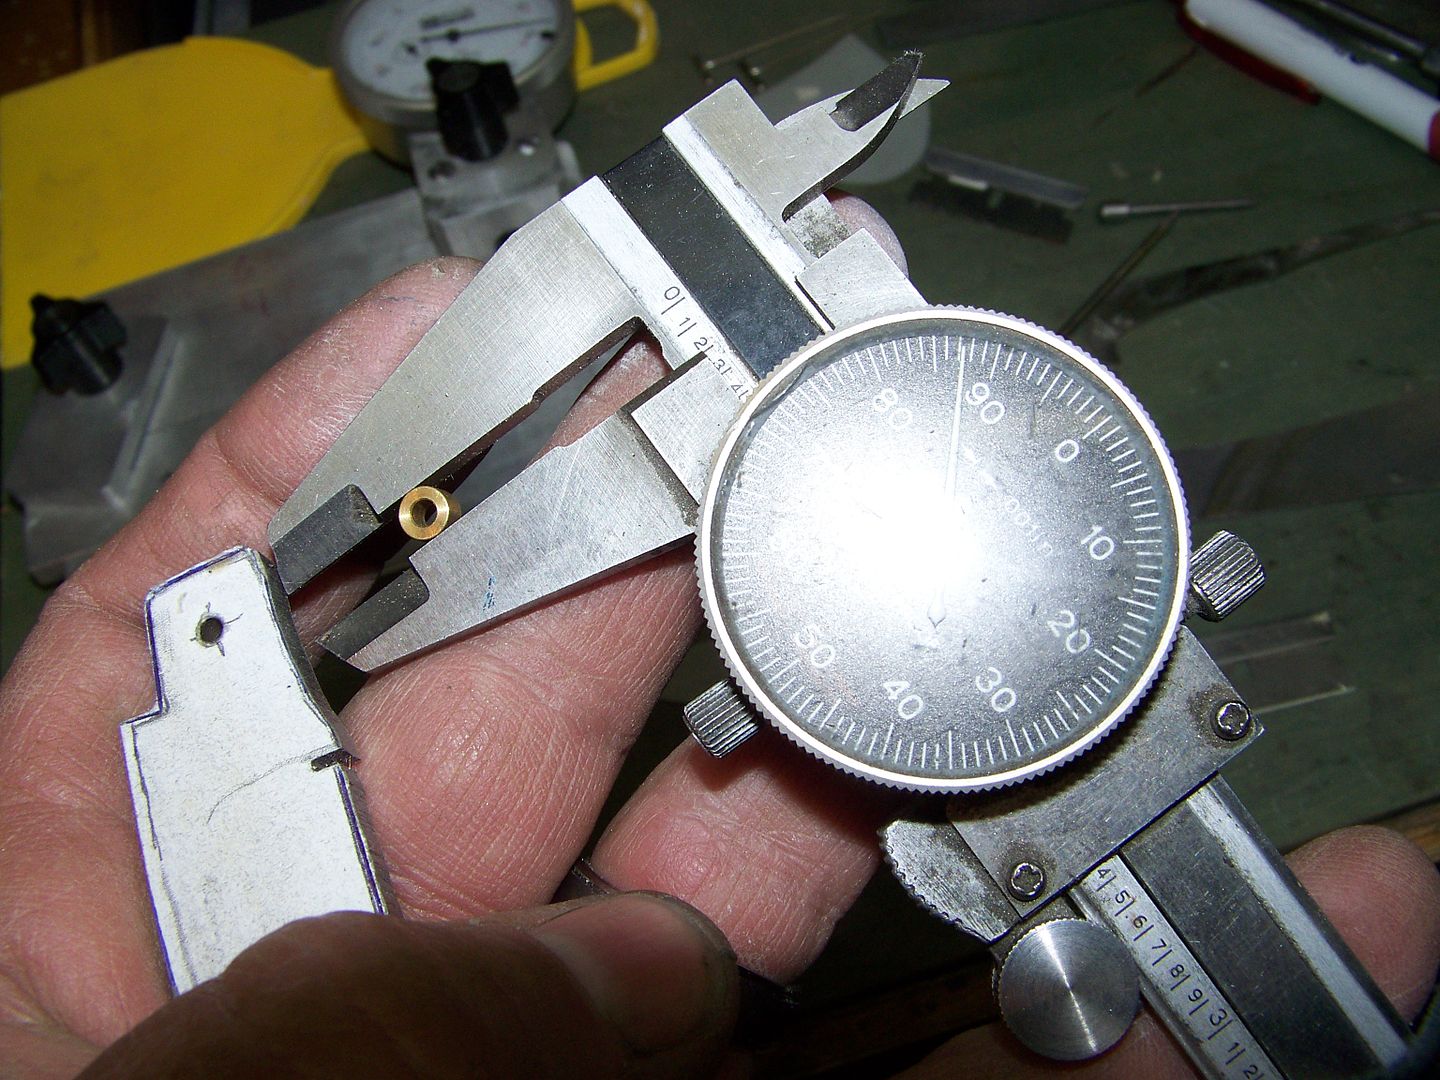
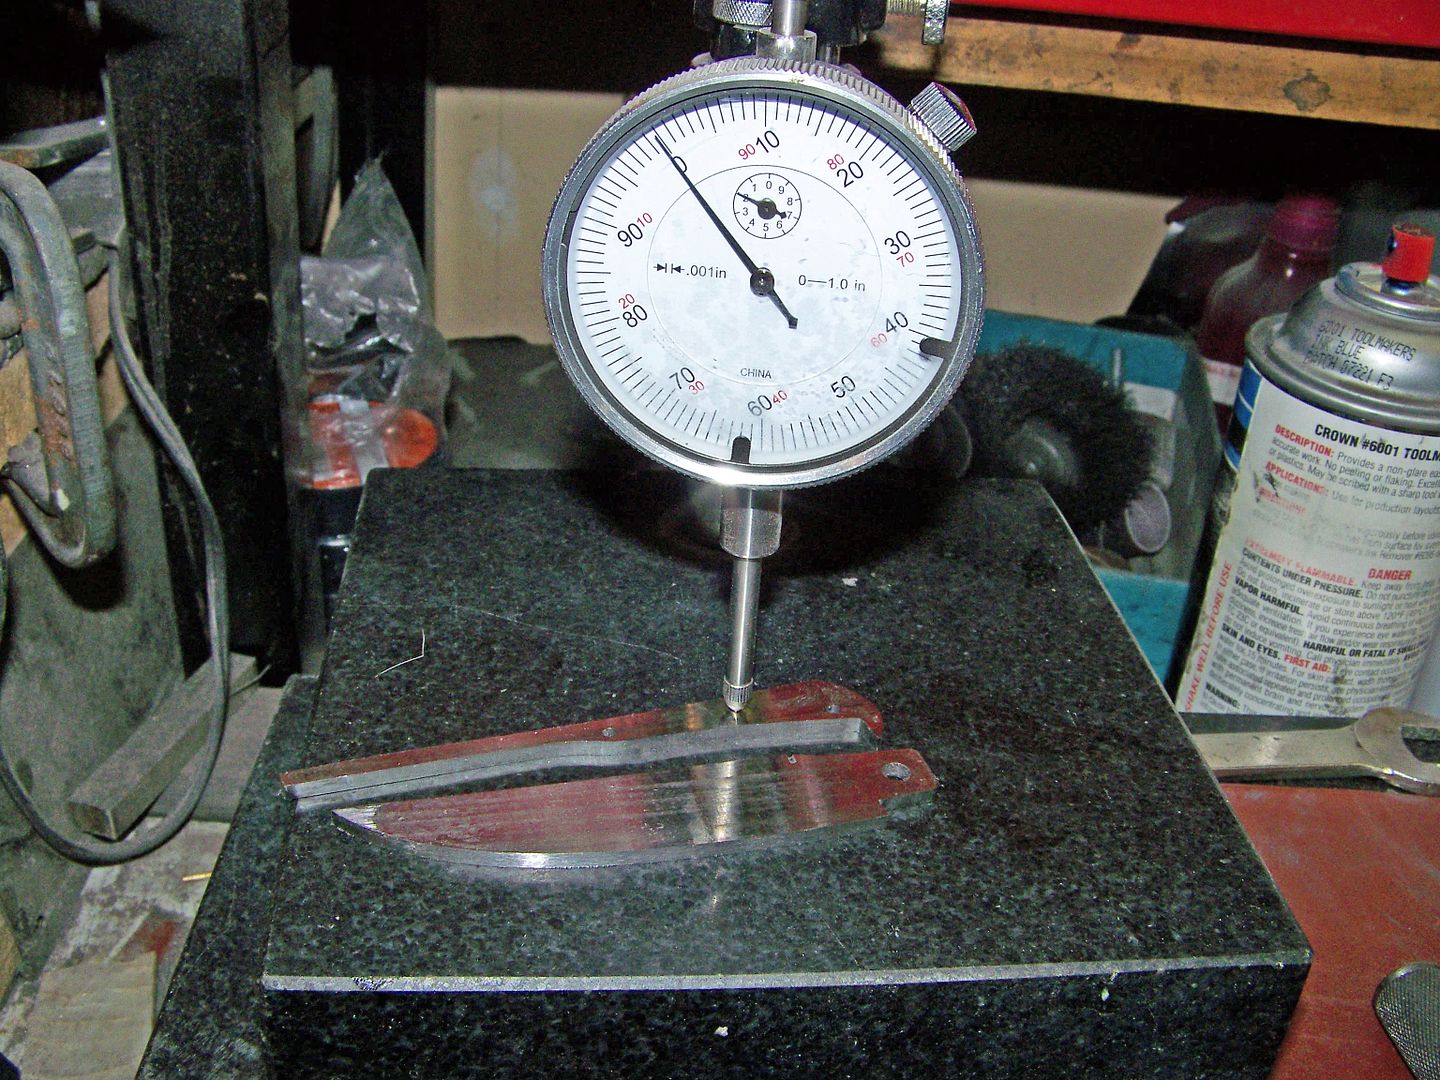
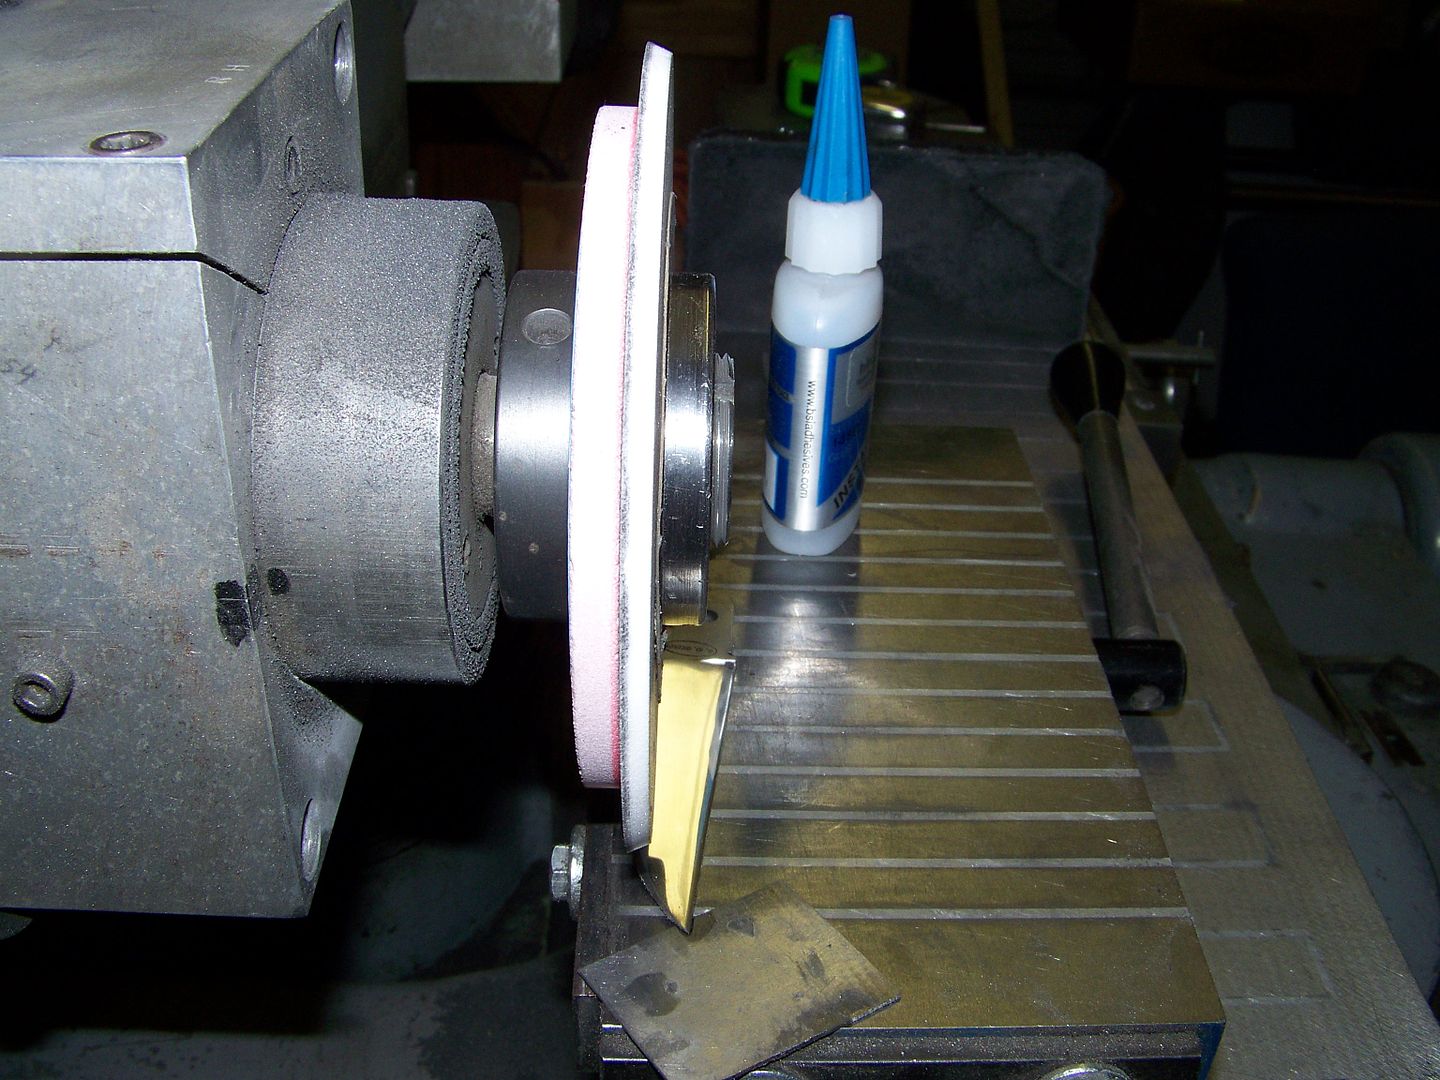
The blade and spring need to be the exact same thickness. The surface grinder isnt neccesary but I wouldnt be without one now. The thickness isnt really too important. This set is about .110" thick now.

100_7263_edited.jpg


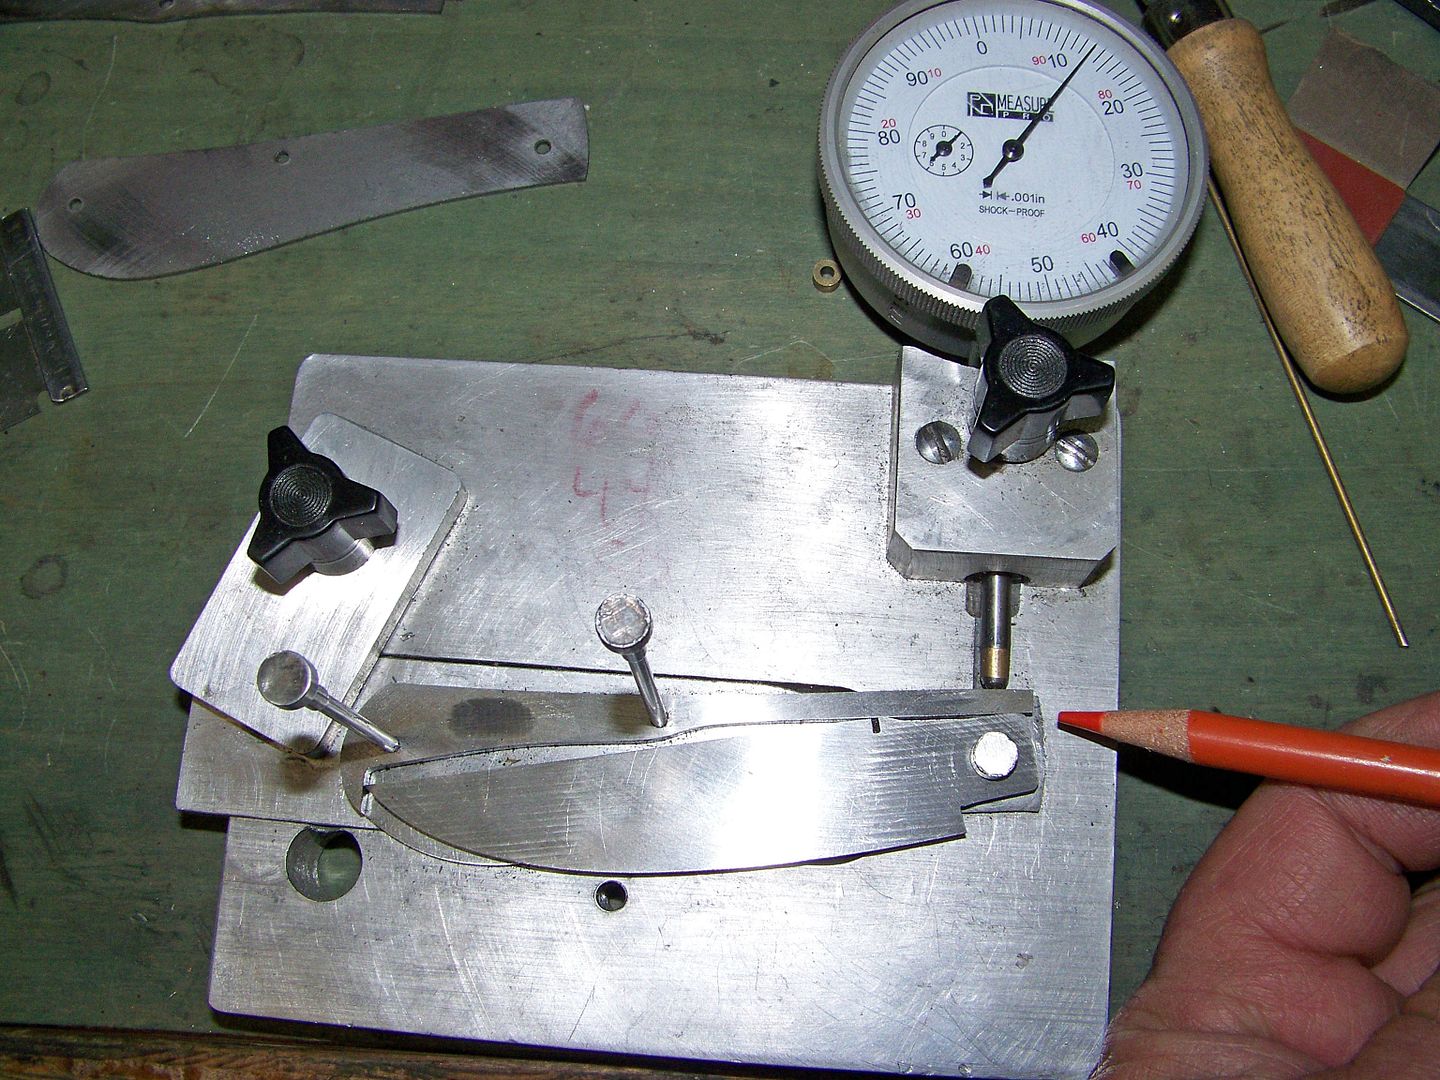
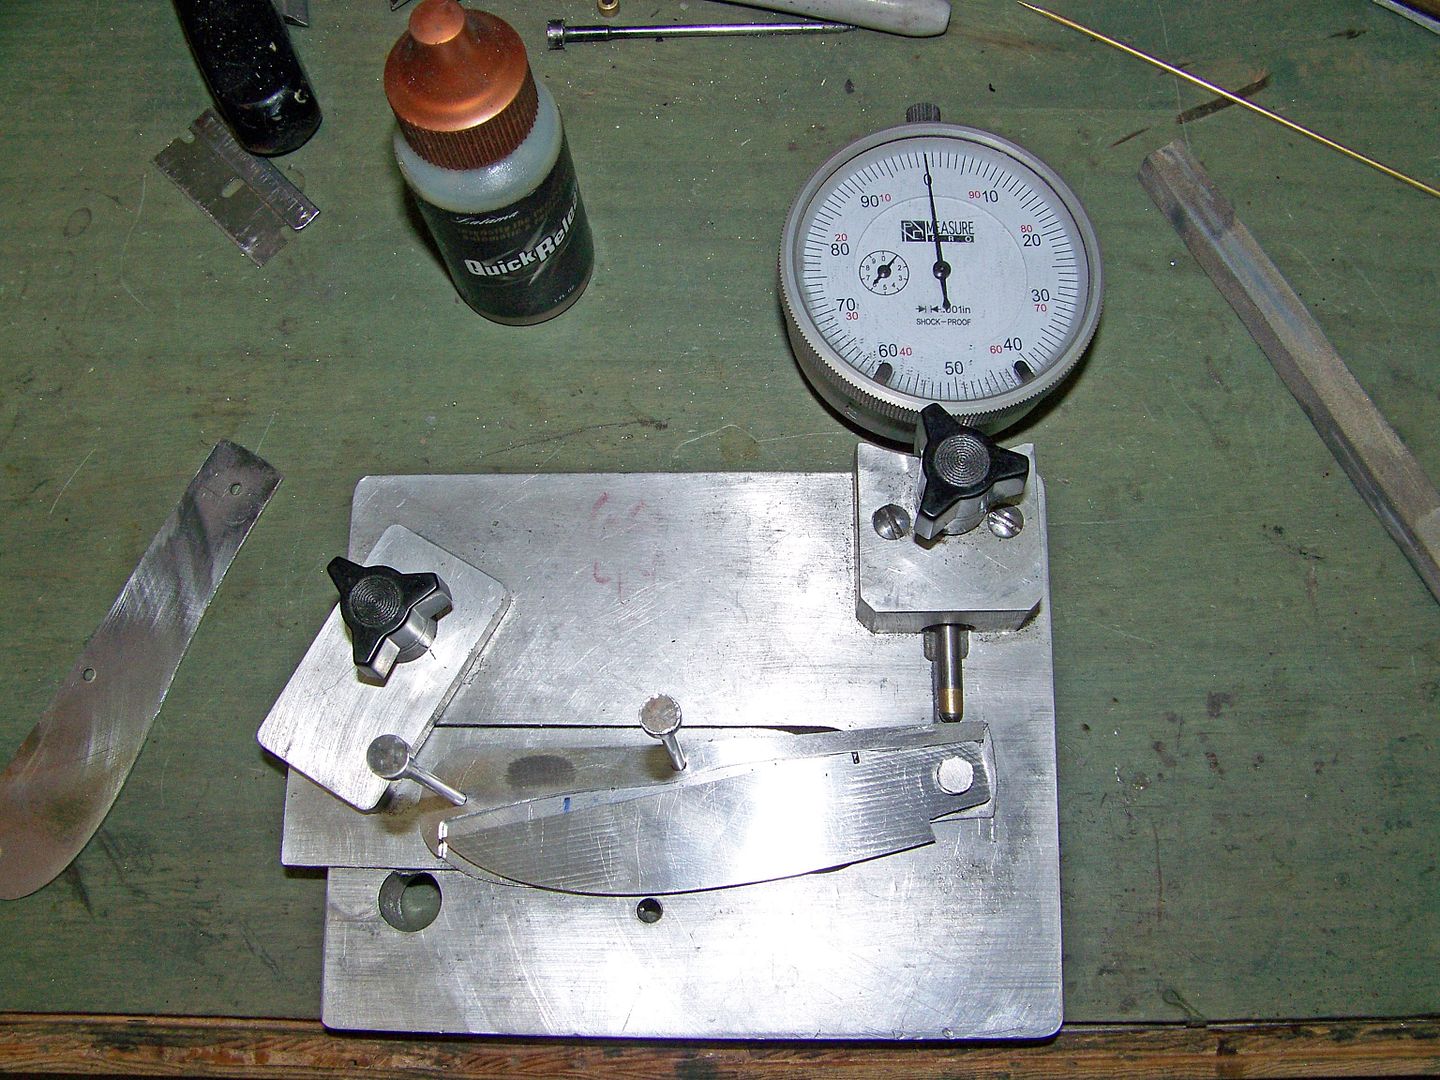
Place the left side liner, spring and blade in the dial indicator fixture. Make sure the spring is longer than the tang but shorter than the liner. The spring tip needs a slight angle and the blade stop also needs an angle so the contact area in the stop position is at the spine. I think its only about a 5 degree angle. I never measure it with a protractor actually but its important to give good contact area and still have no gap at the spine in the open position.

This is all going to be really hard to explain in words so we will get some good pictures and you will need to build or buy a fixture and follow along. It helped me alot to take apart a good fitting factory slipjoint to study it.

100_7269_edited.jpg


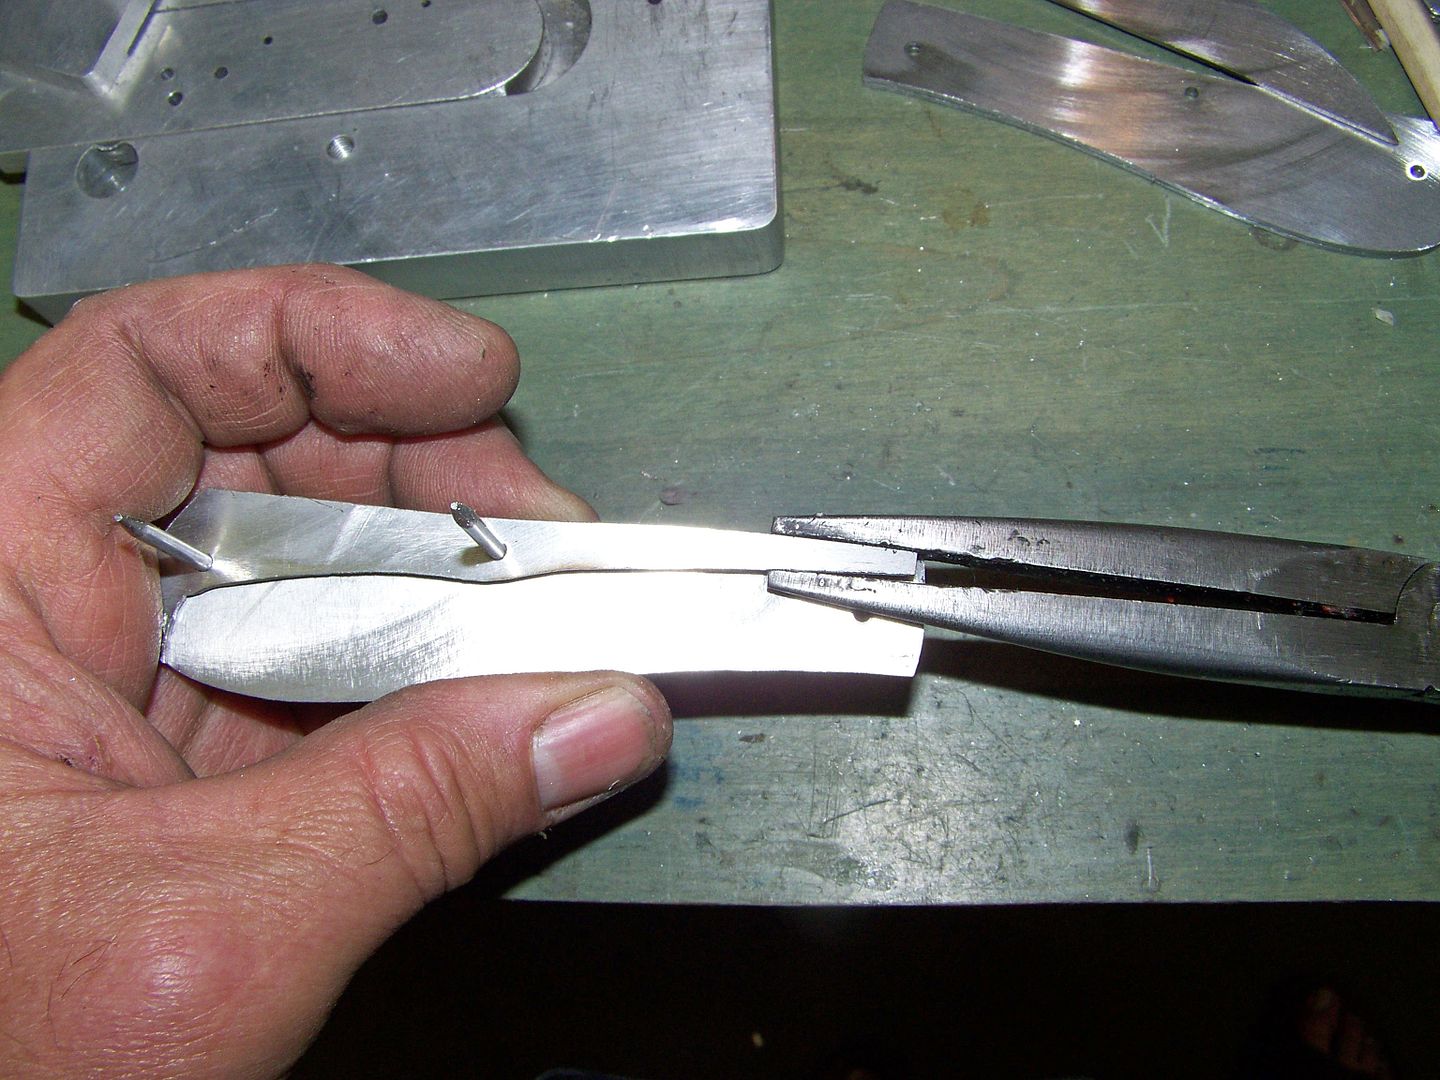
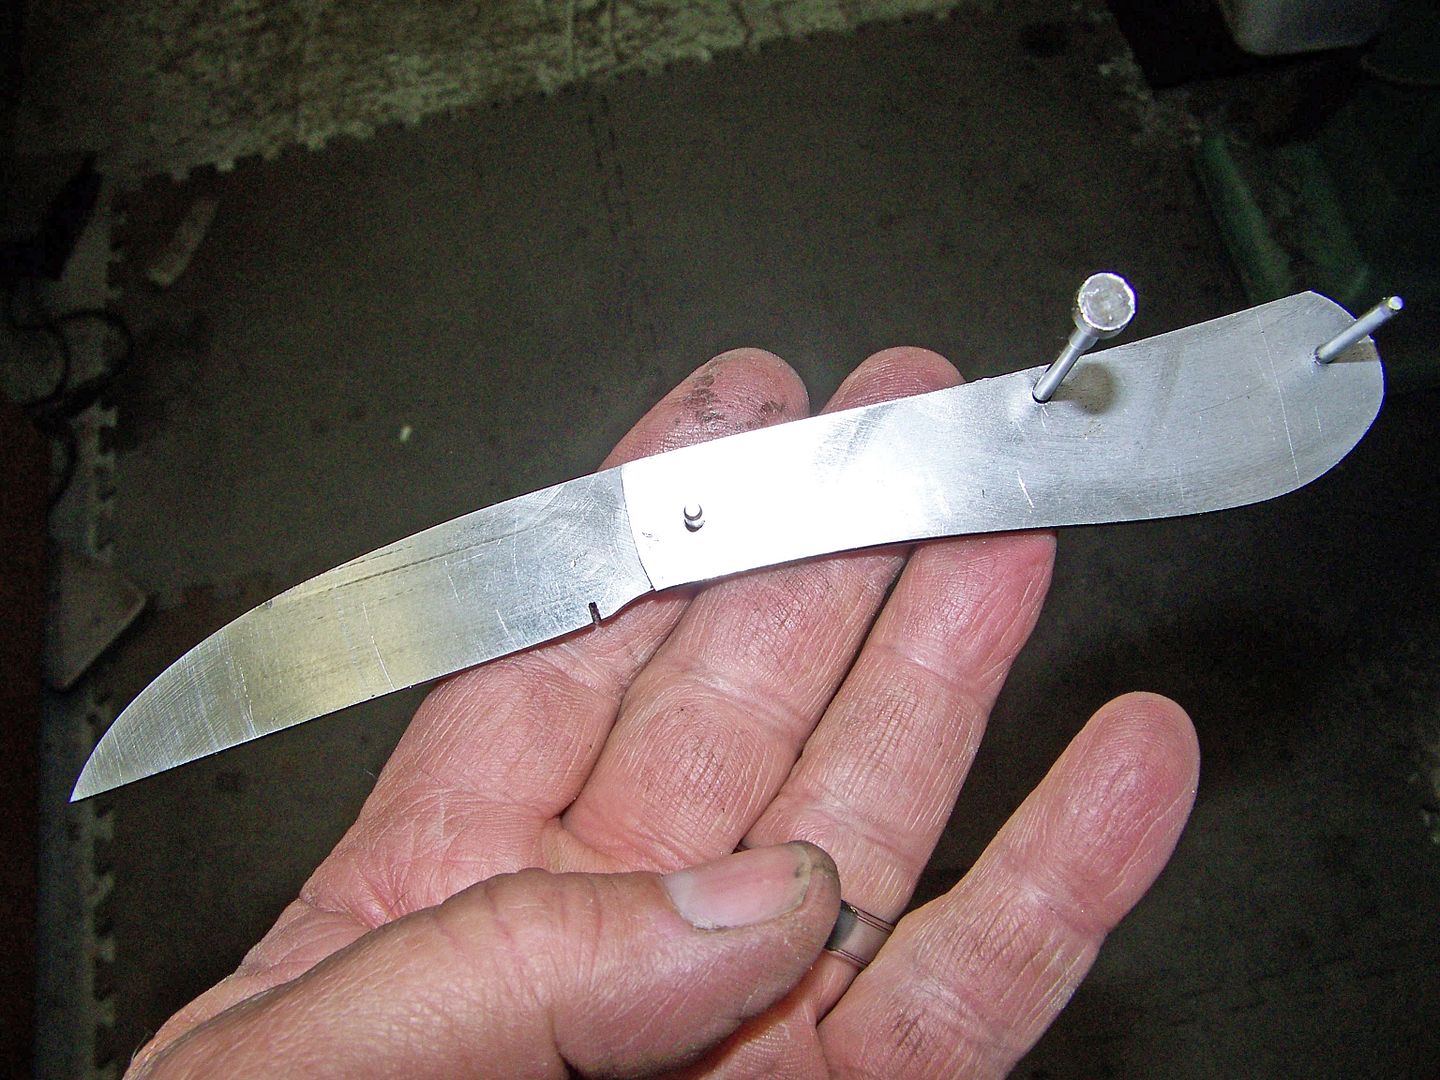
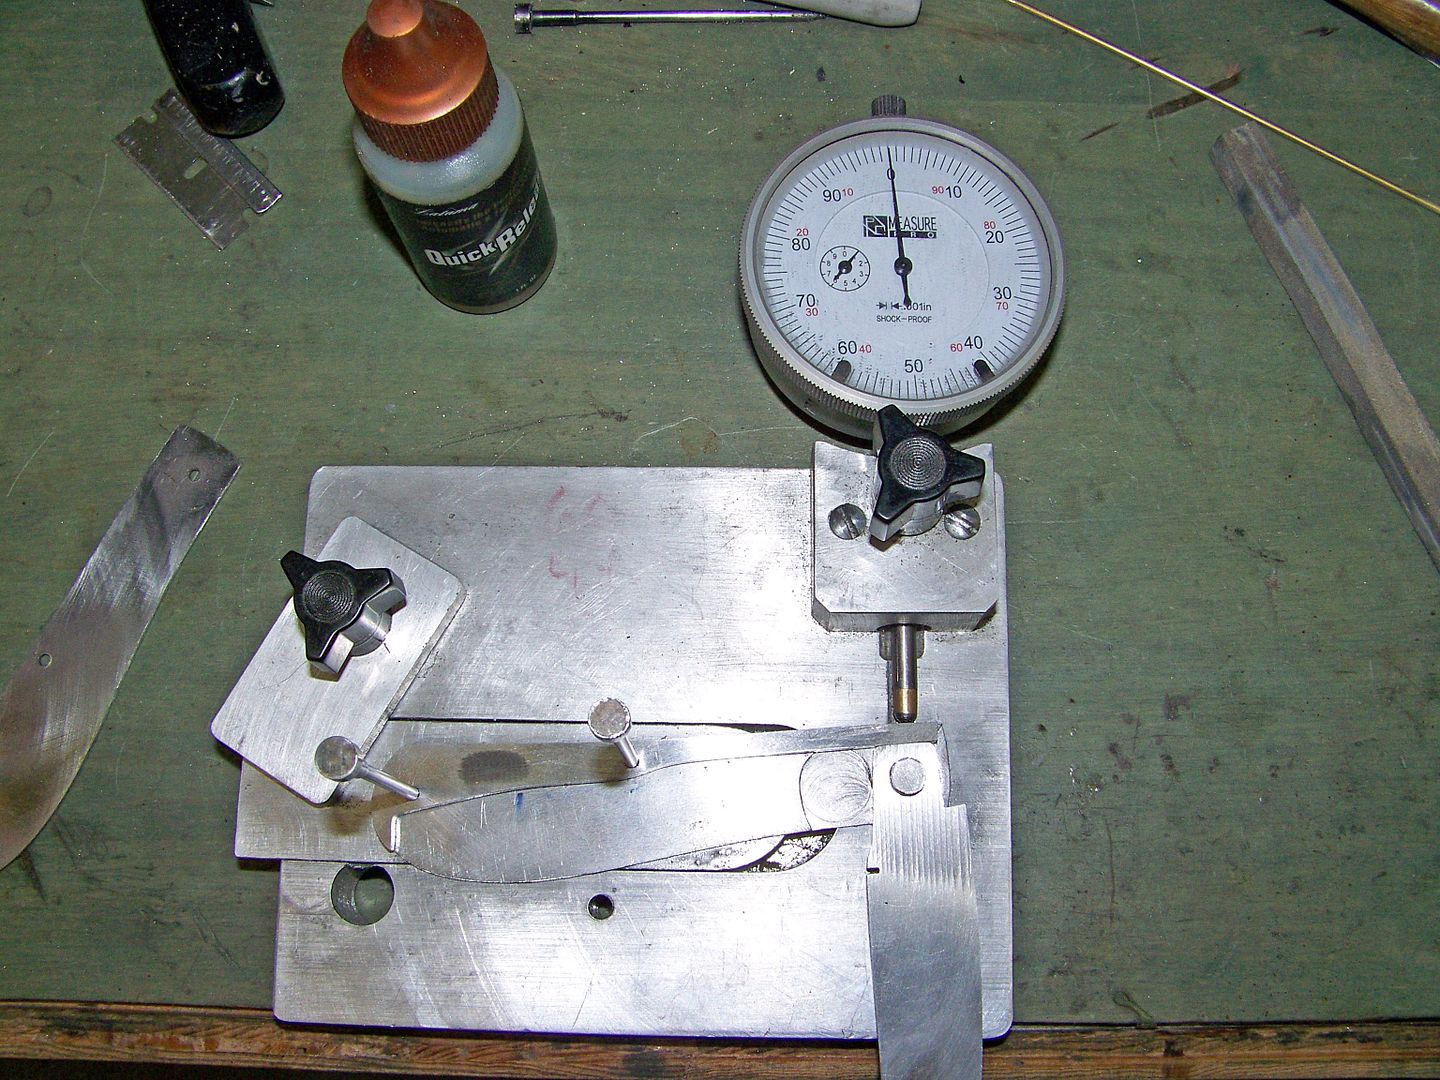
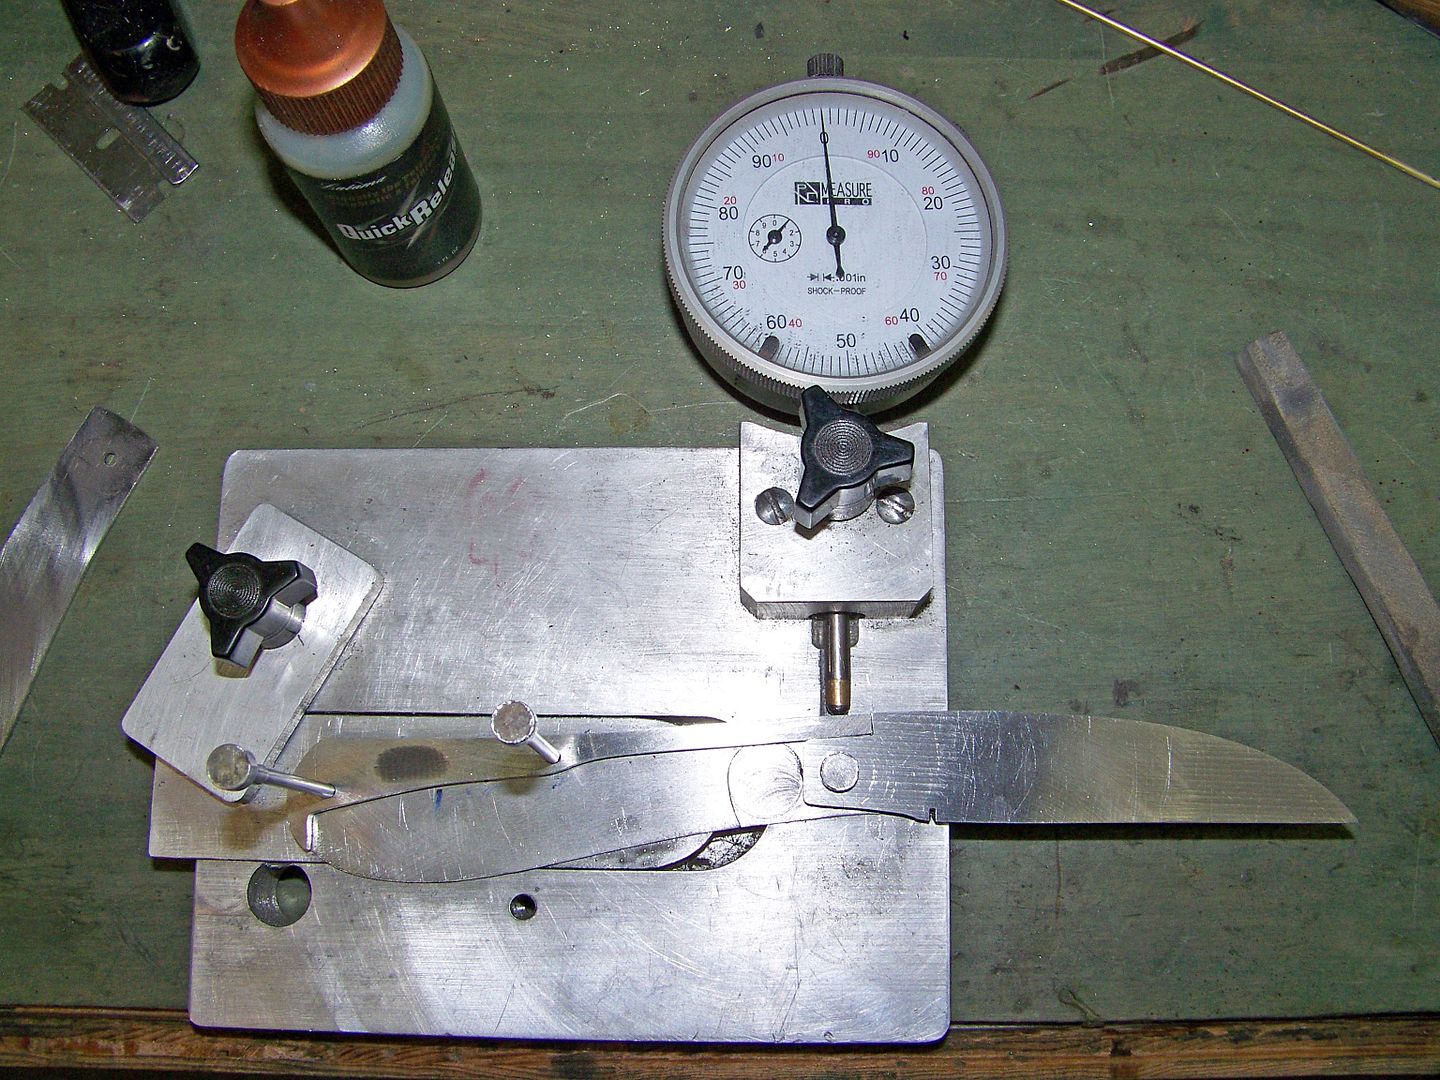
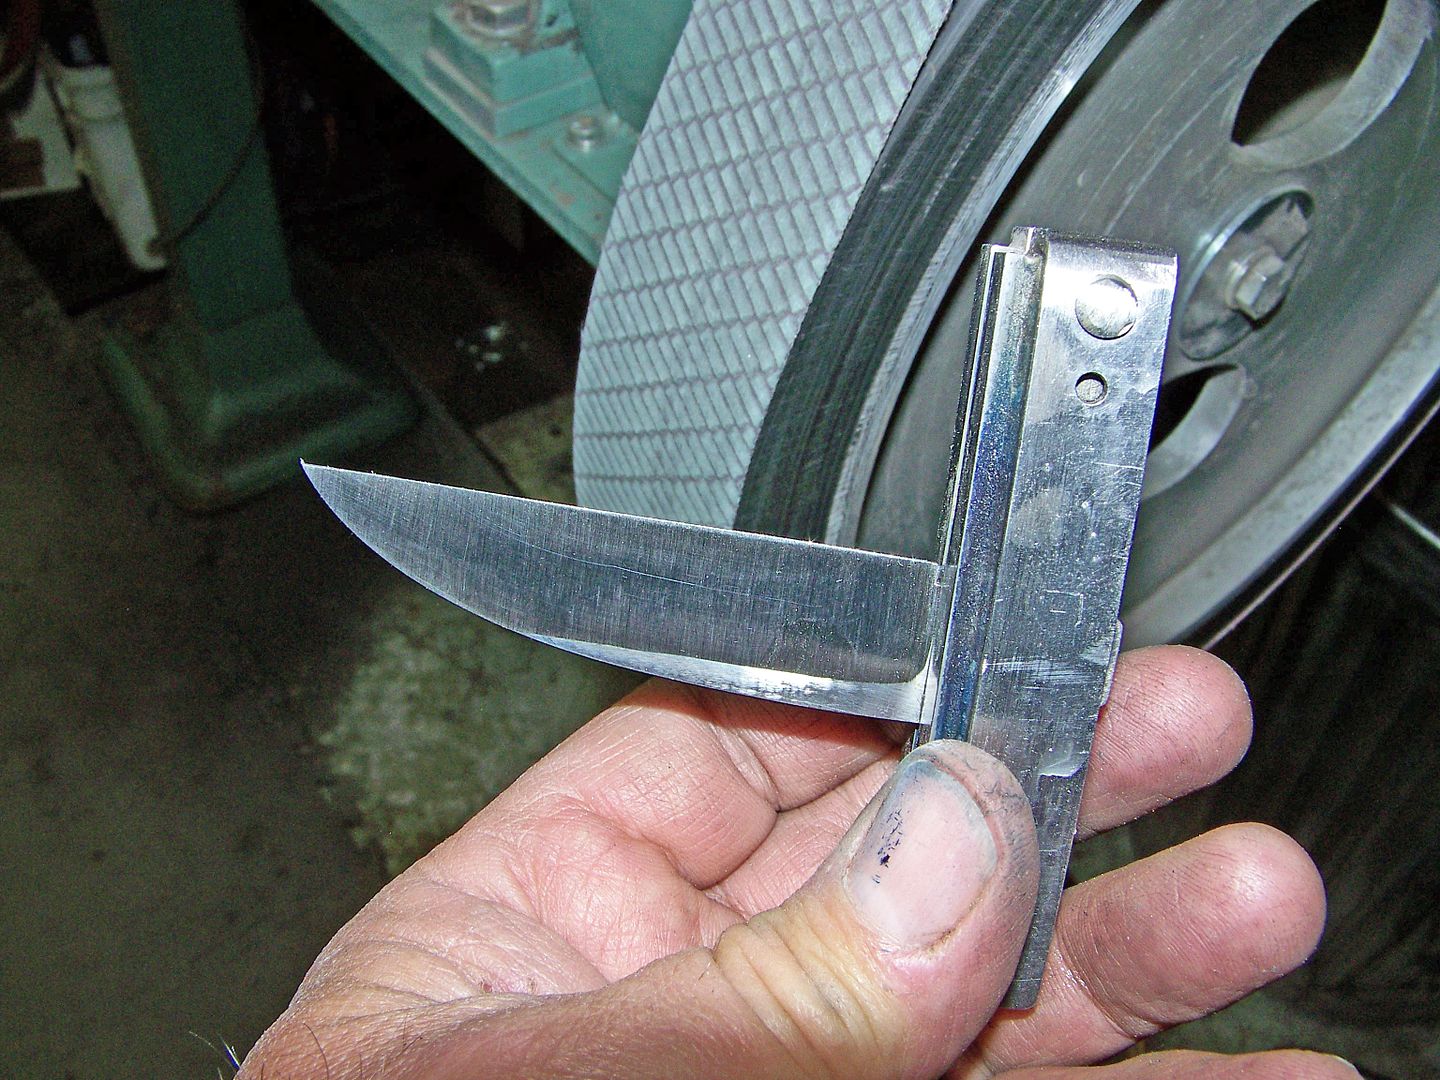
With the spring and blade fitted together the profile can be adjusted for a smooth flowing look. This one has a "nail breaker" spring tension so I need to remove some metal from the inside of the spring being careful to not remove too much and make it a wimpy spring. I like a snappy slipjoint, not a nail breaker.

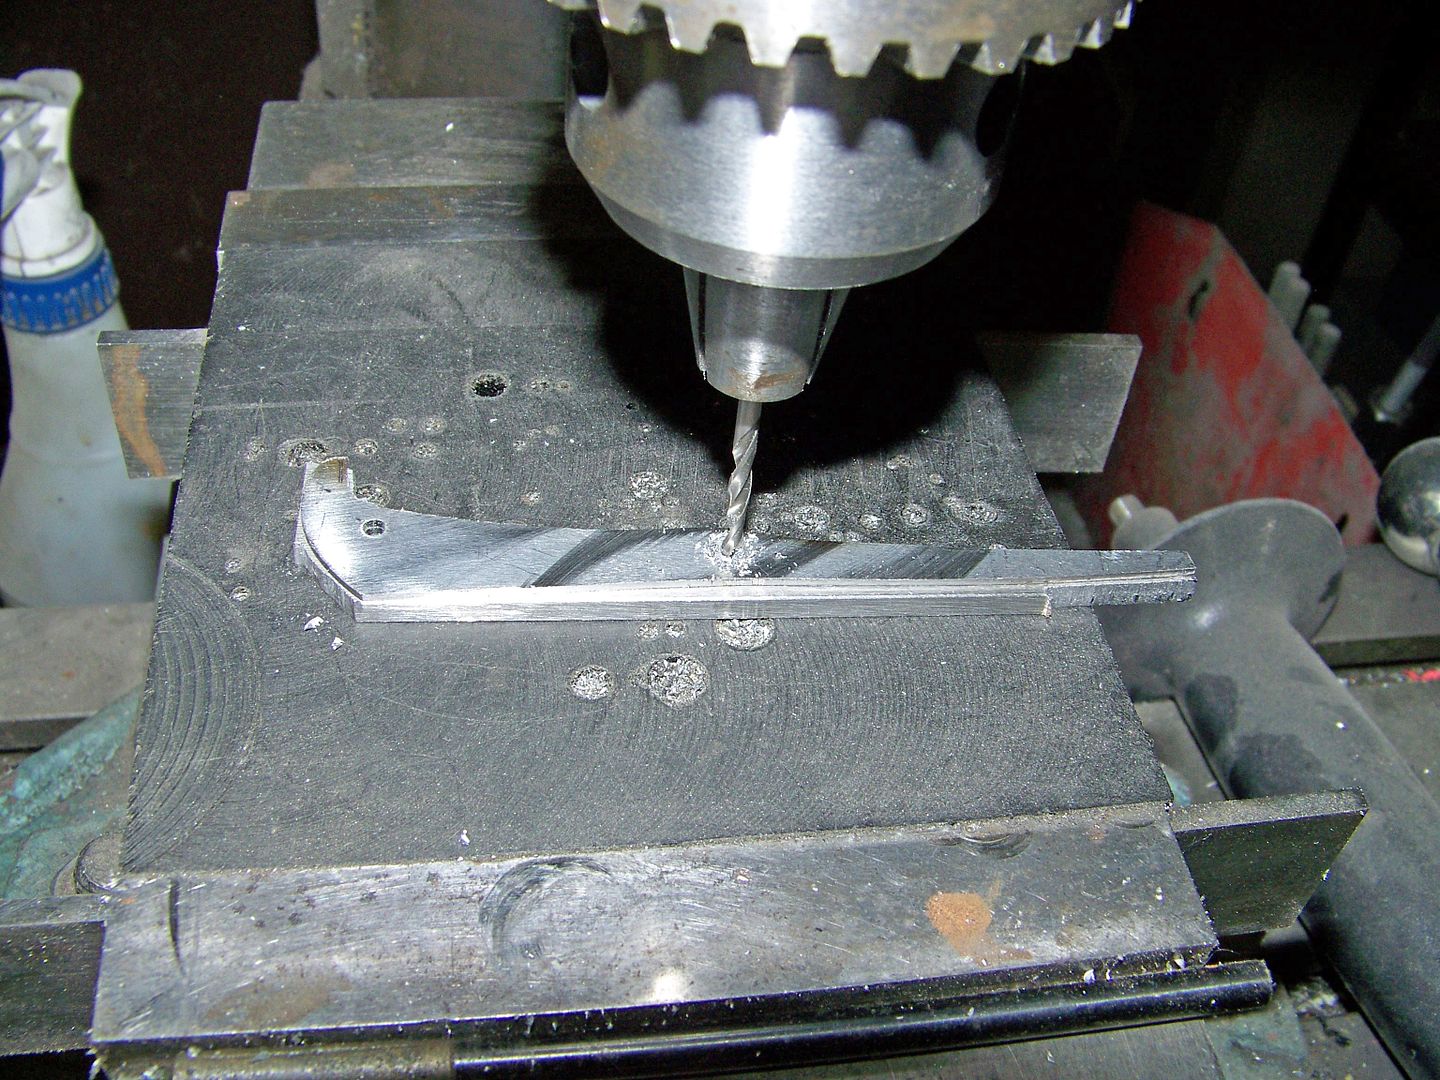
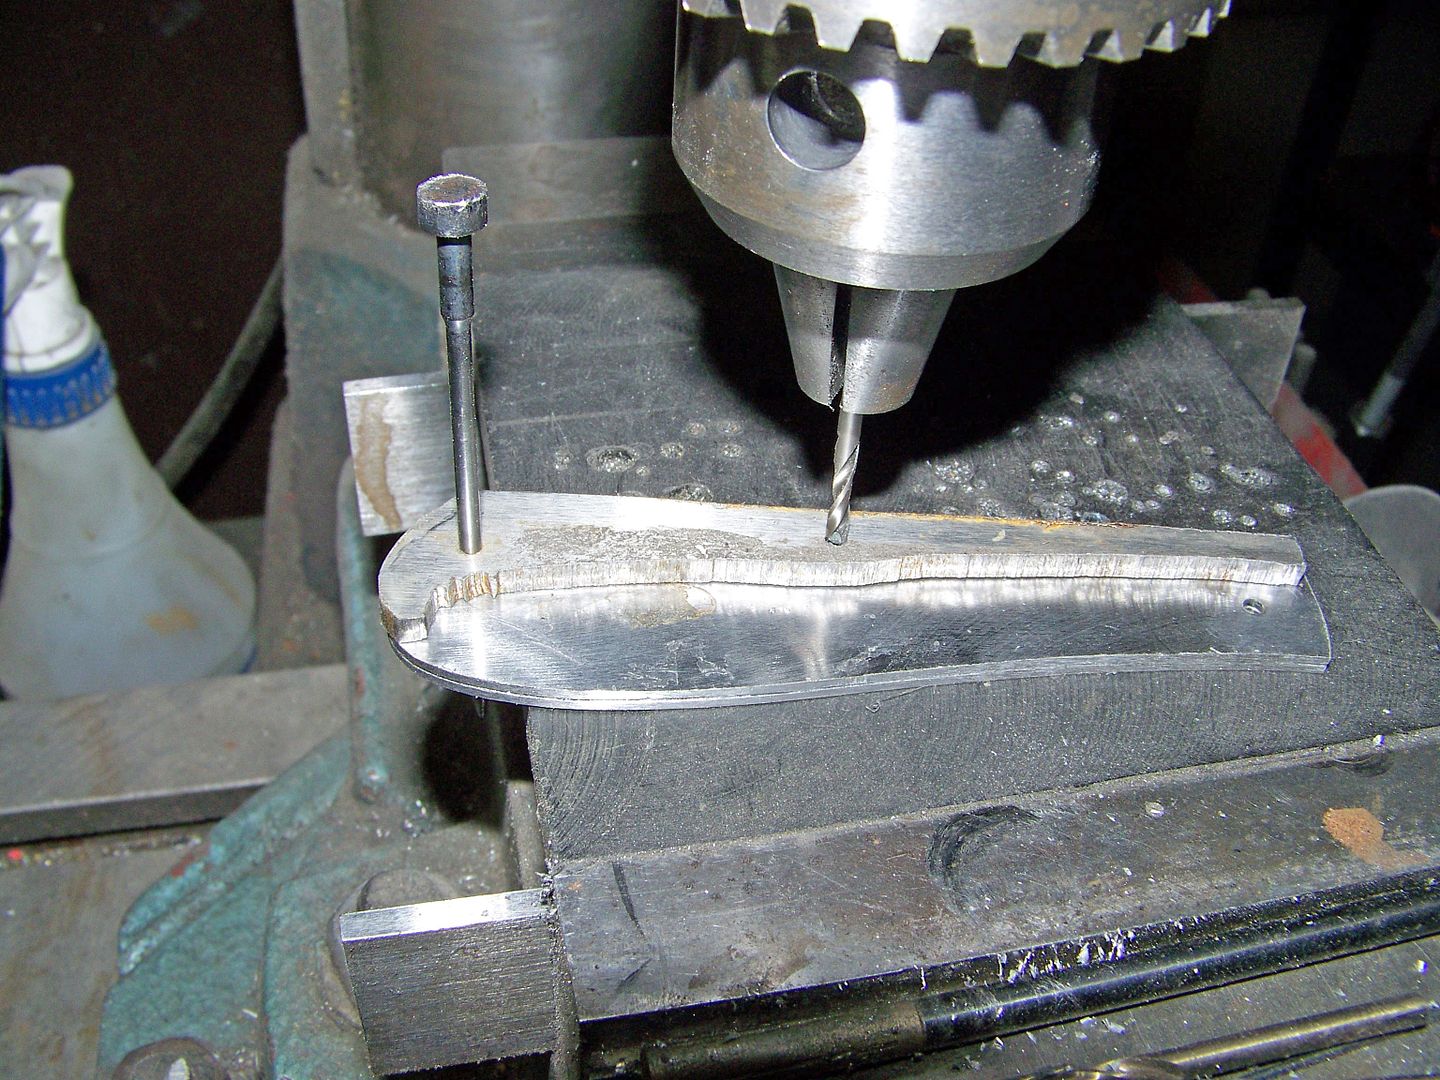
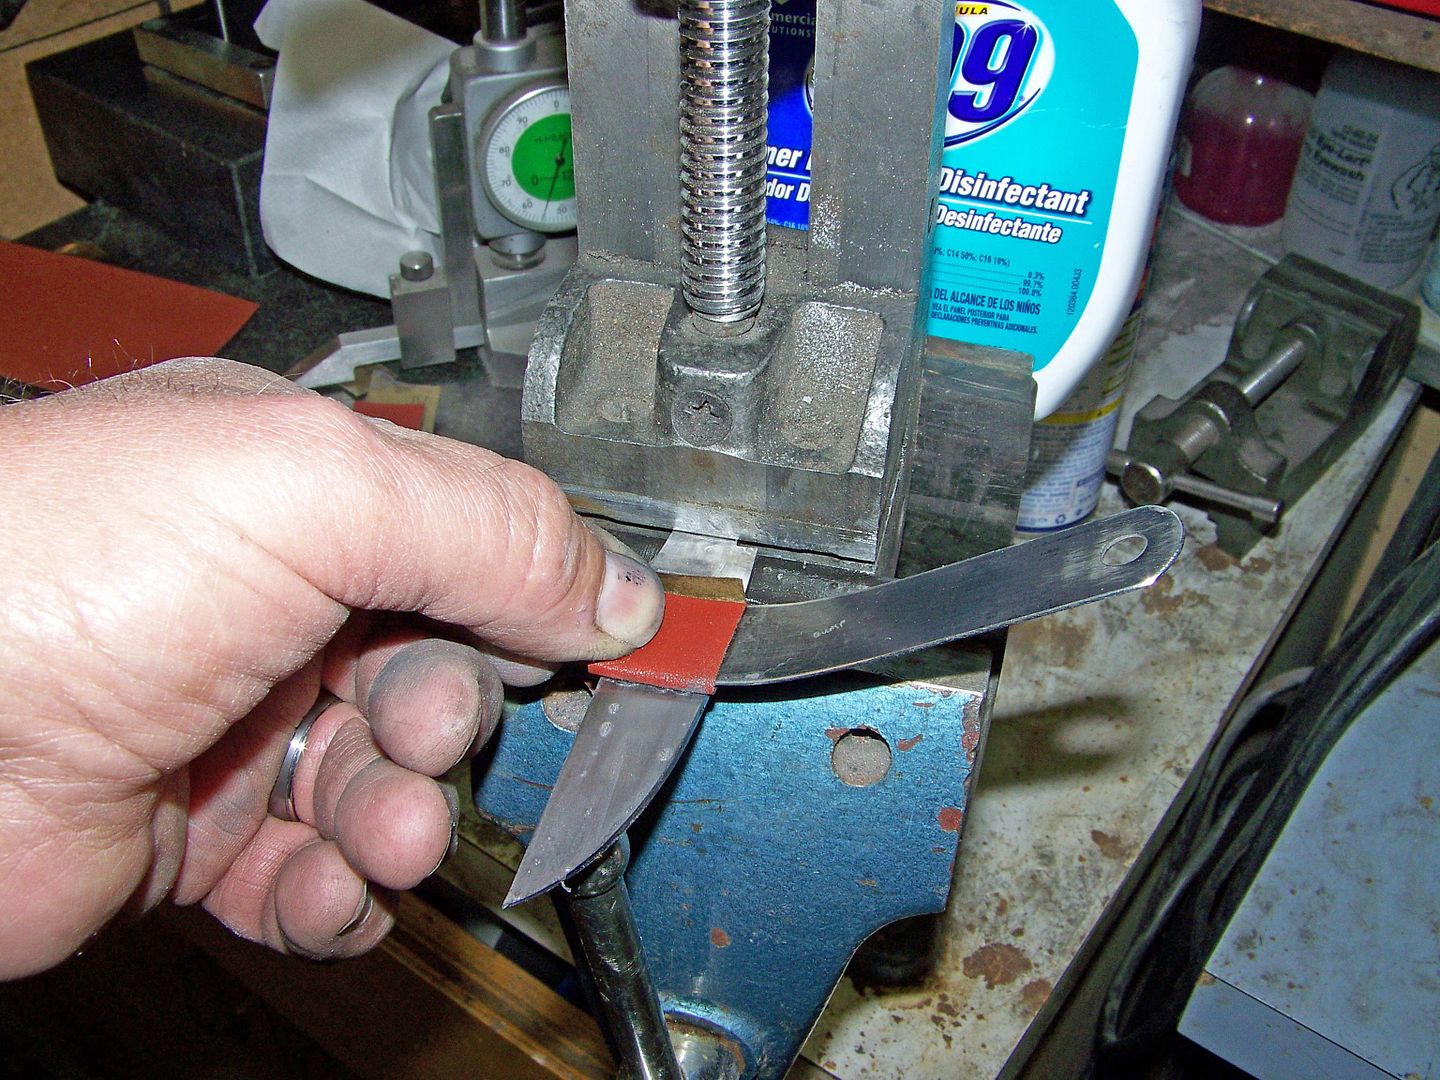
See the center pin in the picture below? It has a long tapered tip on it to make it go in and out easier. A drop on oil there and on the slip joint/pivot area will prevent gaulding when adjusting the tension. Dont force a too tight spring, just grind it narrower and retest until it feels right. If you break your thumb nail just wait until it grows back again. hehe. Actually we havent even cut the nail nick in yet but you can get it close by opening and closing with pliers.

100_7270_edited.jpg
 
Last edited:
Made some progress today,

I relieved the inside of the liners on a small rotary table from Grizzly. Its modified to just do this. This is a 1/2" dia. 5 flute carbide end mill. The relief is .008" deep.

100_7276_edited.jpg


100_7281_edited.jpg


100_7282_edited.jpg


I finalized the tang today also. Here is a shot of Zero in all three positions.

100_7286_edited.jpg


100_7285_edited.jpg


100_7284_edited.jpg


Both the spring and blade need to be flat and the exact same thickness. I had to go back onto the surface grinder after the blade was heat treated as it had just a small amount of bow to it. This height gauge has a dial indicator that lets me find high spots and warps. I cant believe Enco sells them for only about $29. Very handy but not neccesary really. I use the heck out of this little 6" disc grinder. Auto body stores sell fine grits that are self sticking. This one is 320 grit and makes hand sanding a snap afterward. Its extremely flat but the trick is to have a foot switch so you can put it on the disc and tap the foot switch for some great accuracy. It also works for tuning the tang and spring tip and the notch on the blade spine. When you only need to take .0005" off in the exact right place I cant think of any better tool. Of coarse you can use diamond files if you are on a budget but this machine is only about $100 at Lowe's.

100_7287_edited.jpg


100_7288_edited.jpg


I scribed center of the blades edge and hollow ground it on my 14" wheel and hand rubbed it out to 400 right now. It will get 2000 grit before etching to bring out the damascus pattern.

100_7293_edited.jpg


100_7296_edited.jpg


100_7297_edited.jpg


Also etched my logo onto the left side of the ricasso. The other side now has #015 as its the fifteenth slipjoint I've made.

100_7299_edited.jpg


Here is a couple I forgot to put in here until now. Its how I grind in the nail nick. Its done on my surface grinder with a fairly coarse stone that has been dressed only on one side to about a 45 deg. angle to a very sharp knife edge. It takes time to grind in but its very precise and can be done after heat treating.

100_7325-1.jpg


100_7326-1.jpg


The bolster soldering party starts tomorrow. Ya'all come back then.
 
Last edited:
Back
Top