Stabilizing Wood - Setting up and testing - Cactus Juice and Ultraseal

Tracey
Dyeing wood is a very long process I have found. I also use oil based leather dye mixed with 99% isopropyl alcohol. I will put the wood in with the dye and pull full vacuum for 2-8 weeks, depending on the wood. Spalted maple is usually good after 2 weeks. Curly maple takes about 8 weeks to get full penetration. I will then switch to 120 psi and hold that for 2-6 weeks. The only way to know for sure if it is done is to take a piece out and split in half. If it isn't done I put vacuum and pressure on again until it is done.
The 95-1000A is a lot safer to use than MMA. One of the comments I get quite often is that when people cut/grind the wood, it doesn't smell bad.
Jim

I think you are right on with your timelines. I am finding that to be the case also. I have not yet applied pressure simply because I am trying to get a good grasp on every step. I will start doing that soon. I will be ordering some 95-1000A tomorrow. I think the mechanical action of vacuum and pressure alternating a few times will help move the dye deeper into the wood.
 
...

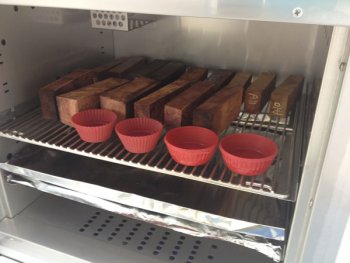
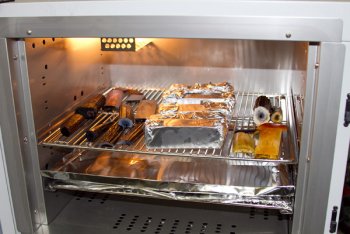
Here we have a batch of blocks going in the oven to cure. Also I have 4 different juices in silicone backing cups (very handy to have btw)..There is Cactus Juice, PK-TR90, Ultraseal and Resinol 90C
blocks-and-juice-in-the-oven.jpg

As I suspected from yesterday, the Resinol 90c I had onhand had not been catalyzed and did not harden. I thought it might have come pre-catalized but it didn't so now I will need to order some and add it.

This is interesting and you can make of it what you will. This is definitely not tightly controlled scientific testing.
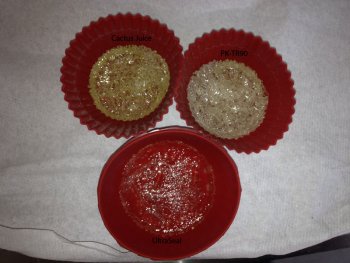
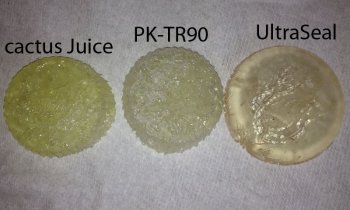
I put the juices in cups and cooked them. You can see the remaining 3. Each had a slightly different color when hardened. The Cactus juice has a slight amber color, the PK-TR90 was almost crystal clear and the Ultraseal was in between the two. The yellow tint of the Cactus Juice is not a deal break as far as I am concerned. It might be for someone else. Once this is in wood, the tint is going to be invisible.

None of these came out hard like an acrylic sheet. All of them had a rubbery feel and could be bent easily. PK-TR90 might have had a slight edge in hardness and this was mostly around the very edge where it was thinnest.
The Ultraseal cured with the least amount of bubbles and had the most "see through" look to it. The other two had a curious
crushed ice cube look to it with bubbles trapped in it. I would imagine this is outgassing of some sort from the hardening process. The composition of each, at least visually, is closest between the Cactus Juice and PK-TR90. Both of these juices are from one man shops that have put together an MMA mix and are repackaging it for small retail sales. Both of these guys will take care of you and are confident in their product. Everything I have seen so far is good with each of them. The Ultraseal is from a multi-national impregnation company and was developed specifically for sealing wood. It also is good and clearly has a different composition.
3-juices-in-cups.jpg

I popped the hardened samples out of the silicone cups. I will not be making a call one which one I "recommend". I will leave that up to you. I am just documenting my testing and sharing with you all to help broaden our knife making knowledge base.
3-out-of-cup.jpg


I will need to get the Resinol 90C catalyst added and tested. Larry from Gallery Hardwoods assures me no professional stabilizing shop is using Resinol 90C and I believe him. He uses a proprietary blend of 7 different chemicals.

I will be ordering and testing some 95-1000A also.

My next couple weekends are booked on other stuff so I won't be able to get back to this thread for awhile.
 
So a bit of an update.
I do all my tinkering on the weekends and the last two have had me busy out of town.
I did manage to get into the shop late Sunday and get a couple things done.

I received 5 gallons of 95-1000a. It comes in 5 gallon container of light amber looking liquid. It also comes with a quart jar that is about 1/3 full of chunky white paste that is mostly powder. This is the catalyst and it has to be mixed together. The catalyst is the agent that allows the material to harden when you hit around 200F. It dissolves slowly so it takes a day to get into solution.

I set up some assorted woods and will put them under vacuum for a couple weeks and then pressure for a couple weeks.

Since starting this thread I have talked to several people that have experience or have knowledge of the various processes out there. It is remarkable how differently every one is doing this. I'm not sure there is any one best method but I'm sure I would get 20 arguments about that. There are lot's of way to skin the cat.

Many (most) say hard dense woods take quite a bit of time to penetrate. On the order of a week or two and it can't just be vacuum. It also needs to be under pressure. In fact, more than one person tells me pressure does more than vacuum. Most use 120psi, some are using 400lbs of pressure, some are reportedly using even more pressure but of course they aren't talking.


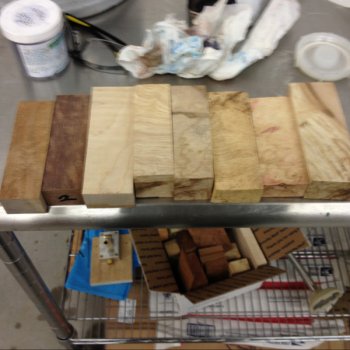
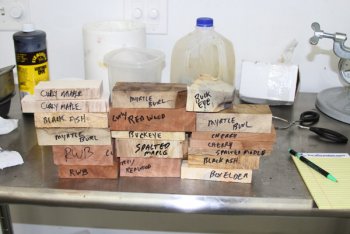
Here I have several different types of wood. I have them weighed and marked on the end with a correcting white pen. I kept my notes on each type and weight. I will weight them after they are done and then cut them open and see how they turned out.
951000-blocks.jpg

here I am using black powder aniline dye that is alcohol and water soluble. It's important to note that all of these dyes will fade from UV exposure. There is no dye currently that won't fade with UV exposure - at least that I could find. Most of the wood workers have vastly more experience dying wood than this stabilizing off shoot does. None of the forums I researched on dying wood offered any dye that would not fade over time. Now the length of time and UV needed to fade wood I believe to be way more than any knife handle will ever be exposed to. I just don't see it as a problem.

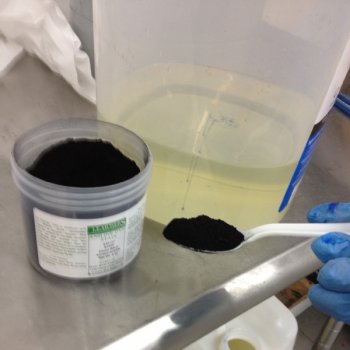
Here is my scientific method for measuring how much dye to use. I spoon full into about a 1/2 gallon of juice. Pretty high tech.
The juice is 95-1000a. It runs about $50 a gallon. I am wearing gloves to keep the dye off my fingers. If you get any of it on your skin, you are tagged for several days just like robbing a bank with a dye pack bundle of bills - not that I would know about that.
black-powder-dye.jpg

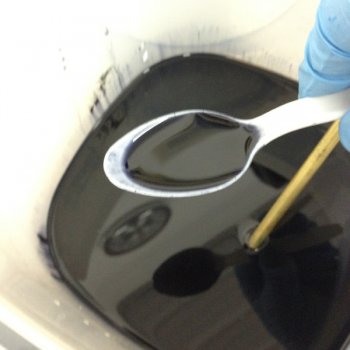
The dye is pretty dark. You can't see through it in this spoon. Scientific again.
dark-dye-in-spoon.jpg
 
continued....

The wood I am soaking in black dyed 95-1000a I will keep under vacuum for a couple weeks and then pressure for a couple weeks. What I didn't get a picture of was the few pieces of stag and bone I added to the pressure pot the next day. We will see how it all goes in a couple weeks.

In another pot, I have another batch of stag and bone soaking in two different solutions.
One is Tandy dark brown oil pro dye. The other is more stag and bone soaking in boiled linseed oil with dark brown powder dye added. I couldn't get any liquid dye (that I had) to mix in with the boiled linseed oil so I had to use powder dye. I will keep these under vac for a couple weeks and then pressure for a couple weeks.

When I break all these out I will post some pictures.

Some odds and ends I have learned. There are millions of old soda pop syrup containers out there that make a good pressure pot. These are rated to contain 120psi. These are sometimes called Cornelious kegs and the beer homebrew beer guys use them. They run around $50 to $60 used. New Cornelious kegs are quite a bit more money and are not the traditional old style Coke and Pepsi tanks. These are available as most everyone has switched to bagged syrup for soda pop now.
Paint pots are rated for 80psi but I have heard from several people they routinely take them to 120psi. Do this at your own risk. I am merely passing on what I have been told. I personally am comfortable pushing these to 120psi but i am stupid that way. One thing to note is the more chemical and less air you have in a pressure pot, the safer it is. It has something to do with volume of stored energy with more (or less) air in a container. It will also give you more to clean up if you spring a leak.

Some woods such as spalted or punky woods can take stabilizing juice in just an hour. Rock hard maple may never take stabilizing juice or dye all the way unless you have a very high pressure set up or soak for quite a bit longer than a couple weeks.

Some guys wrap every piece of wood in aluminum foil after soaking but before hardening in the oven. The aluminum foil is ground off all 6 sides to show the wood. You won't be able to peel it off. This keeps the juice from draining out before it catalyzes. I have seen this in a couple pieces. The top 1/3 of the wood will show it has clearly lost some solution and the bottom 2/3rds of a block of wood will show the solution has settled.

Here is something to think about.
When the oven reaches temperature, the outside of a block will harden first and as the higher temperature penetrates into the block, the chemical inside stabilizes. Once the outside of the block has hardened it now turns into a crude vessel of a sort. The inside of the block still has liquid chemical and gravity is pulling it down and it pools inside of the block. The aluminum foil helps hold the liquid in place on the top of the block as it won't allow air to replace the liquid as it drains to the bottom of the block. Doing this is up to you. I will have to try it out. It would make further sense to put the wood into a hot oven so it starts to harden quickly and help hold the stabilizing chemical in the block and not have it drip out.

I am hearing from multiple sources that dying is done separately. I am combining the stabilizing juice and dye to verify to my satisfaction the stabilizing juice has completely penetrated. Most guys are dying separately for more than one reason. 1. They don't have to deal with multiple colors of stabilizing juice, 2. They won't contaminate their main treating vessel with different dyes 3. They have better control dying separately and the dye remaining is easier to manage.

Several have used a mix of denatured pure alcohol with Tandy Leather dyes in a ratio anywhere from 4 to 1, or 6 to 1 alcohol to dye mix. Put this into a vessel and vacuum and pressure. Generally, everyone tells me dying wood takes a lot longer than getting stabilizer through wood. I am experimenting with Tandy Oil Pro dye, something called Transtint which is a liquid dye and some other powder aniline dyes with the brand J.E.Moser. I can tell you dyes are expensive and there doesn't seem to be a way around that. A gallon of alcohol is $13 bucks and you can't even drink the darn stuff....

Drying dyed blocks can take weeks. One tip I heard was to use this stuff: http://www.leevalley.com/US/garden/page.aspx?p=48083&cat=2,50560
put your wood into one of those electric coolers than can heat&cool and turn it onto heat. Cover the wood on all sides with this silica gel and let it sit overnight. Your wood will be down to less than 8% moisture in a day. Pretty cool. Leave the gel in the heater/cooler until the moisture is driven off and you can reuse it.

I finally got a hold of Henkle and they are sending me catalyzer for the Resinol90C I have will report back on that when I get that going.

Just to repeat, this is not meant to be a tutorial. It is just meant to document my experiments in dying and stabilizing wood. We all move forward as a community if we share information. If you have some experience or knowledge to share, by all means jump in any time. If nothing else, I have learned there are several different ways to do this and several different chemicals that can get the job done. The pro's all talk about how much they have invested in their equipment and it's a lot. More than the average guy would want to spend.

Now here is something I hadn't heard about until now. One guy had a batch of chemical catalyze in his expensive vacuum set up. He lost $400 in wood, $800 in chemical and had to cut the chamber apart to get out the hardened mess and reweld the chamber. Having a set back like that doesn't make for a good day...
 
I have not been able to do anything in the shop for the last couple of weekends.
Today I got in and checked on one vacuum pot that had some bone and stag. These pots has two juices being used.

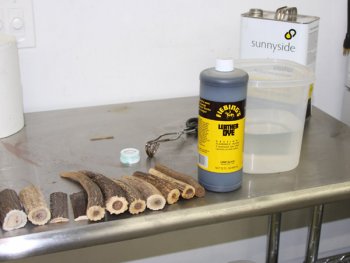
One was straight Fiebings Pro Oil Dye for leather. The other was boiled linseed oil with dark brown dye.

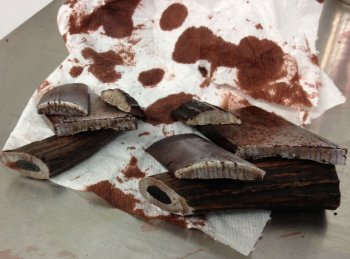
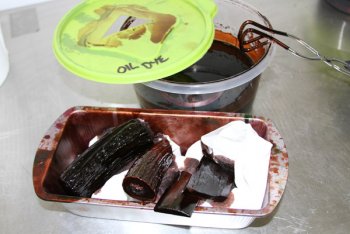
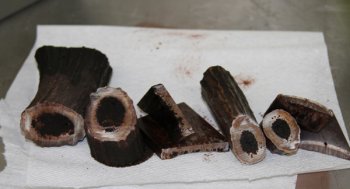
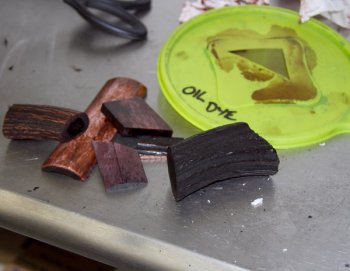
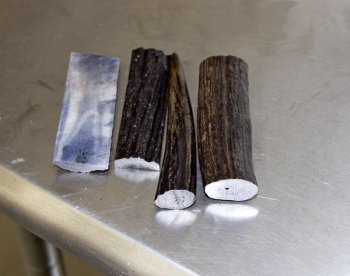
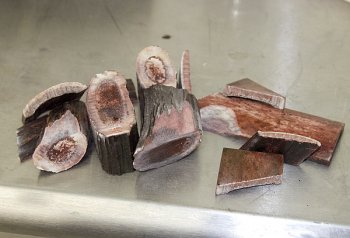
Here is the leather dyed batch. The dye has penetrated all the denser material. It appears a bit blotchy and uneven. The outside look fine....great in fact. The inside dense white part of the bone or stag appears a bit purplish. I saved one side of the cut pieces for reference and put the other back in the juice and will keep them under pressure for a couple weeks.
brown-leather-oil-dye-vacuum-11-days.jpg

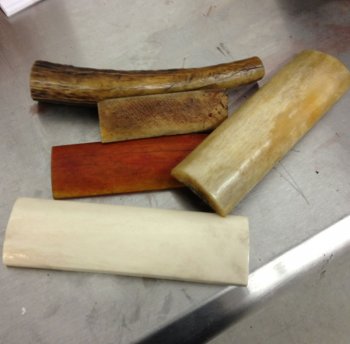
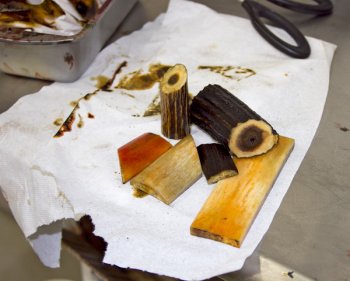
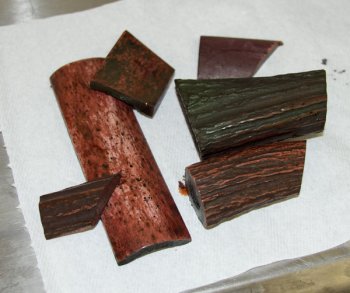
This batch has been under vacuum for 11 days in the same vessel as the batch above. This has boiled linseed oil and English Brown aniline powder dye from JEMoser. When I pulled these pieces out they had a definite green cast to them. I wiped off the oil and the green tint was just in the surface oil. This batch looks more promising. Not as dark as the leather dye but a more pleasing color for sure. The bone and stag has taken on an aged look through out the dense material. The reddish bone piece at the bottom I can't explain as I think it went in white. It came out with a reddish surface and then the aged look inside the bone. I will have to go back through my pictures to see what it looked like going in.
linseed-oil-and-dye-vacuum-11-days.jpg

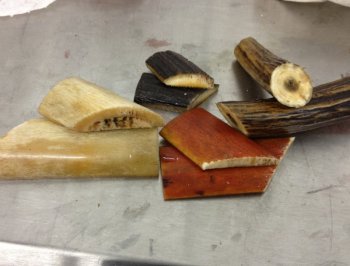
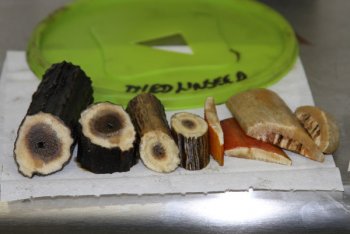
for comparison I grabbed a piece of bone that had not been put through the soak. You can see it is very white and
the other piece has a nice aged patina. Boiled Linseed oil takes a LONG time to dry. A long time ago I did a drying test with several kinds of wood finish comparing tung oil, boiled linseed oil, danish oil -- that kind of thing. I poured a 1/3" of an inch into small plastic sample cups and let them sit to dry out. The linseed oil took months to completely dry out. The other dried out in weeks. If you are going to age stag or bone doing this, be prepared to spend a lot of time on the back side drying them out. These pieces will weep oil for days until the surface dries out and slows the weeping down. You wouldn't want to put this on a handle right away and have it ooze oil for months in your clients hand and also loosen any adhesive.
compare-to-white-bone.jpg


I put these back into their goop and went to add pressure for the first time to any of these tests. My fancy 5 gallon vessel gave me a bit of a hassle. There is a safety valve on top that kept popping open at 60lbs pressure. I removed that and plugged the hole. I charged the vessel again and then a leak at 90lbs started around the rim. I took the top off and inspected the seal. I didn't see anything so I put it back on and really cranked down the lock top bolts. Pressuring it up again, the leaks returned around the rim all the way up to 120lbs. I let it leak back down to see how far it would go down. Around 90lbs the leak stopped or at least it wasn't clearly audible. It appears the rubber ring in the lid will only hold 90lbs of pressure and leaks down to that. I can't believe they engineered the seal to prevent over pressurizing but it appears they did. Clever. I will find a better seal method. In the mean time I am holding it 90lbs for the next couple of weeks and will have another look.

Next week I will be taking a batch of assorted woods, bone and stag out of a vacuum in 95-1000a. That will be two weeks under vacuum. I will switch it to pressure for a couple weeks and cut things open for a look.

I am interested to see how the bone and stag from the two oils look after a couple of weeks of pressure.

Now I need to source a large thick pressure vessel that will safely take up to 120psi. I need a large weld on pipe flange and some 3/8" thick pipe and will have to weld up a pressure vessel I can use for pressure treating. These paint paints I am testing with are just for testing or very small batches. I will need something a little bigger it seems. The size of pipe flange I will need is going to $300 to $500 depending on the pipe I find. That stings a little....

more later as I continue to test and dig through all of this...
 
Last edited:
. I will need something a little bigger it seems. The size of pipe flange I will need is going to $300 to $500 depending on the pipe I find. That stings a little....

more later as I continue to test and dig through all of this...

Theres a place in the city here T that sells steel by the pound.... definately recommend it for stuff like this. Larry
 
I've been watching Craig's list for a weldable pipe flange. No luck so far. I going to have to get lucky on this.
 
Last week I got in some 95-1000a from Godfrey and Wing.
Not so smelly, not as toxic, not flammable. All good things.
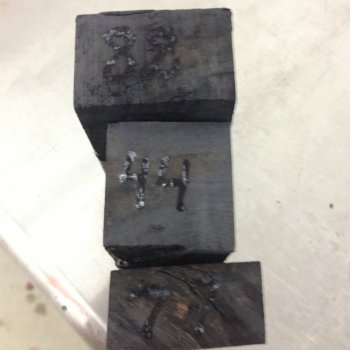
I added some black powder aniline dye to threw in several different kinds of wood. I made a mark on the end of each one with liquid correcting pen and then noted what kind of wood they were.
After a week, I pulled out a few blocks of what I knew to be the softer wood pieces. I left the rest of the harder blocks in to soak for another week under vacuum and then for two weeks under pressure.
3-ends-showing-numbers.jpg


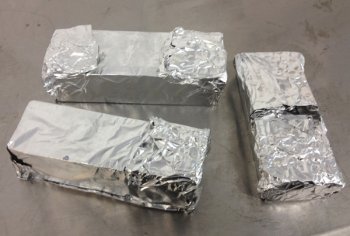
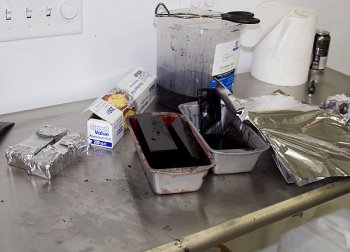
A couple guys told me to try wrapping each block in aluminum foil. So I did. It looks like loaves of banana bread at my house.
The idea is to keep the juice from draining out of the blocks before it hardens from the heat.
3-aluminum-bricks.jpg

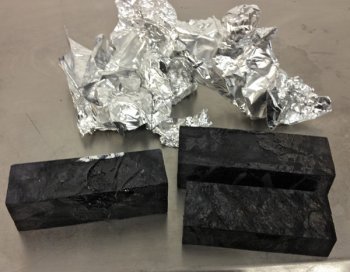
OK, after cooking for an 90 minutes I pull them out and unwrap them. I expected the foil to stick all over. It came off much easier than I thought it would.
One little piece of foil was bonded to the wood block and I just left it.
aluminum-off.jpg


Here you can maybe get a better sense of how the 95-1000a has hardened. This by far the hardest hardening juice I have tried so far. I am excited about this stuff. The liquid that has weeped out of the blocks and hardened on the exterior is rock hard.

The weights before and after:
Pecan (fairly soft but with some hard streaks in it) before 4.4oz, after 7.9oz
Maple splated black line before 5.5oz, after hardening 9.2oz
Box Eldor - a mix of softer sap wood and hard heart burl 2.3oz before, 3.5oz after
All of these are approximately a 50% increase in weight. The resulting hardness is of the blocks is excellent.

aluminum-off-close-up.jpg


From left to right.
spalted black line maple, pecan, box eldor
the maple took on a beautiful color tone. Just a little really dark black made it inside.
The middle blocks are dark fairly uniformly through out. This was a 1" thick block. A few hard spots did not pick up much dye. This could stand another week soaking but it's still not bad.
The scales on the right surprised me. This box elder burl was light weight and I thought fairly soft. It wasn't apparently. It was loaded with birds eyes and some red wood that often shows up in box elder. It really came out blotchy. At this rate, it needs at least a couple more weeks in just vacuum. I will have to get some more and take it a full couple weeks under vacuum and then two more under pressure.

3-scales-cut-open.jpg

At this point we might conclude at least this. Different wood species take in dye/stabilizing juice at remarkably different rates. It might be worth your time to keep records of which woods take in dye/liquid at what rates to minimize treatment time. Burls tend to be very tight, hard wood and in some cases don't take in dye very well -- or at all? Straight grained wood soaks this stuff up much quicker.

The aluminum foil wrap did a good job at keeping the juice in the block fairly well in the oven until it hardened. I will probably continue this practice.
 
not sure how you got the foil to come off so nice. I have to grind mine off. Great job and great thread.

Jim
 
...
I got a chance to get into "the lab" today...
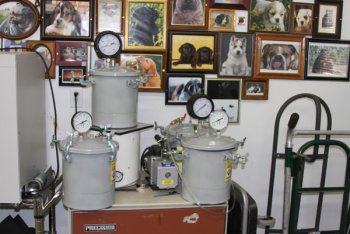
We added a couple more of the Harbor Freight paint pots and converted them for vacuum/pressure use.
I put pressure to one of them today and it holds 95PSI with no apparent gushing leaks. We have 5 of these we are using now for various tests.
lots-of-pots.jpg

I opened up one of the test batches today. This is stag that has been under vacuum for a couple weeks and under 90psi pressure for a week. This is Fiebings oil based "Professional Leather dye Dark Brown"
The exterior looks great. If you need to touch up some stag, you could do lot's worse than using this.
oil-dye-3-weeks-in.jpg

I can see a big difference in penetration with the week under pressure at 90psi vs. just having it under vacuum. I put this back in for another week.
oil-dyed-3-weeks-penetration.jpg


The boiled linseed oil test is a pleasant surprise. I had added some aniline powder dye....something like dark maple, I forget. The exterior takes on a nice old tone to.
linseed-oil-3-weeks-in.jpg

So does the interior. Quite a bit of the tone comes from the linseed oil but some also comes from the dye. With some fine tuning, this could be a nice way to give bone or stag an antique look. The linseed oil will have to be dried to be sure how this will turn out. I put it all back in this mix for another week of pressure.

linseed-oil-3-weeks-in-pentration.jpg


Now for a new test batch. I grabbed some different pieces of stag and mixed up 2 parts denatured alcohol to 1 part Fiebings USMC spirit based dye. I put all the stag into this and put a vacuum to it. After two weeks of vacuum, I will put two weeks of pressure to it and then dry it out to see the coloring.
first-test-black-stag.jpg

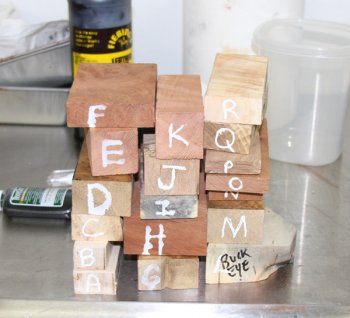
This is also a new test. I got all these from Larry Shagnaussey (I am sure I did not spell that right) for testing. These will all go in a batch of dark brown maple dyed 95-1000a. 2 weeks vac, 2 weeks pressure.
all-kinds-of-wood-to-test.jpg

I weighed all the blocks and keyed them so I could check the weights later. I know the magic marker will fade out.
all-kinds-key-coded.jpg

That's all I got done today. Several pots are in various stages and I will keep rotating in more tests on dying and stabilizing.

At this point, it appears using boiled linseed oil with some brown dye gives a nice antiqued look. After it is dried, which is going to take some time, should look quite nice. If you are in a hurry, there is no way to speed this all up unless you have a massive pressure tank that will really let you put it to it.
 
Tracy,
If your wood is dry (6 to 8 percent), using 99% Isoproply alcohol;
1) Draw under vacuum for 3 days.... Keep drawing air every 4 hours until it holds the maximum vacuum you can get with your pump.
2) Pressure the vessel 125 psi for 4 days. Keep pressure at maximum until it hold pressure at 125psi.
3) Ensure that the 'juice' is always over the wood by a couple inches. Use metal weights if required.

With the soft wood you are using I do not think anymore time in the vessel will change the product quality.

Just my thoughts on the issue....

DP
 
Hi Tracy I’ve been reading this thread in awe of all the nice woods you are trying to stabilize:35:, and I caught the part about the bone coloring with multi colors! I have never done it but my friend (SA Guild member) told me his way for coloring giraffe bone.
He takes his spirit dye blue or red or green and put it in the freezer to cool it way down over night or if you have some cryogenic method to cool it down it will save some time. The next morning he will heat the bone with a flame (oxy acetylene or gas flame he uses fire retarded gloves or tongs to hold the bone), the outside of the bone will char a little bit and when the bone is hot (not to hot)to the core you must dump it in you’re spirit dye. The HOT bone will suck up the COLD dye like we South Africans say “Koeksister”:rolleyes: effect!

We don’t know the way some guys make the bone multi color:confused2:.

This way is old school African way of dying giraffe bone or the matter of fact most bones!!! Ps this is only a guide that you can follow for you’re mission of stabilizing and dying so you have to play with the length of time with the flame on the bone

Greetings Martin Schutte
 
Are you still having problems with the vacuum pump discharging an oil mist in the exhaust? There are filters to control this. Here's a link: http://www.duniway.com/images/pdf/pg/p-69-70-mechpump-exfilt.pdf

I've used these type filters at work. We use them on the freeze drier vacuum pump.
ric

I am. It's horrid. I will be getting one of those. Thanks

I am also setting up a venturi style vacuum "pump" from Air-Vac Engineering.
These operate on (max) 75psi air pressure and pull nearly 30". I have one of Ultra-Vac http://www.airvacpumps.com/UltraVac.html and just need to get some connectors plumbed to it.
 
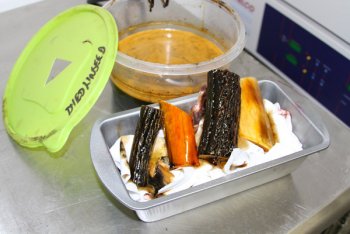
I pulled some test batches out today. They are in the oven curing or drying now.

All of these items have been under vacuum for a couple weeks and then pressure for a couple weeks, give or take a couple days.

The Fiebings Pro Oil dye.
oil-4-weeks.jpg

Here is some wood that was soaked in black dyed 95-1000A. I am wrapping it in aluminum foil to stop it from draining out of the block while it is curing in the convection oven.
black-wood.jpg

This stag and bone was also in the black 95-1000a.
black-stag.jpg

This is bone and stag in brown dyed boiled linseed oil. I am drying this in the oven but it will take a few weeks to fully dry.
linseed-oil-4-weeks.jpg

All in the oven curing or drying...
in-the-oven-all-kinds.jpg
 
out of the oven...

(Frefox is really being an problem posting pictures with this latest release. If you are having issues, switch to MS Explorer)

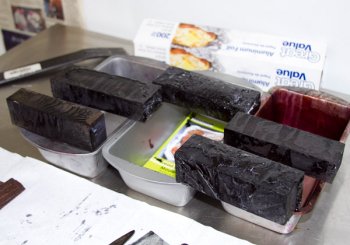
These blocks are cooling after taking off the aluminum foil. They all have crystal hard acrylic coating them where the aluminum foil held it into the block instead of dripping down in the oven.
black-blocks-cooling.jpg

No surprise here really. The boiled linseed oil treated pieces are not dry. They are sticky dry but have a ways to go. I popped them back into the oven to sit for a week or two or until I remember to check on them.
boiled-linseed-still-drying.jpg


This was dissappointing. The Fiebings Pro Leather dye left a green iridescent sheen on parts of the stag. This is a deal breaker for me adn probably you also if held it in your hand and moved it around in the light. The green tint wasn't uniform. It was blotchy and inconsistent making it even less predictable. I will try and give a buff to see if if the tint buffs out. I am sure you could give it a quick surface brush coat of the brown dye to cover up the green but this seems like a dead end to me.
green-tint-to-stag.jpg


This is what I am most interested in with this batch. Black dyed and stabilized stag. The bone seemed to ooze out stabilizing juice (95-1000a) in the oven. This bone might have been oiley but I can't be sure. It didn't seem that way when handling it but this might indicate otherwise.
black-stag-cured.jpg
 
Last edited:
now some results..

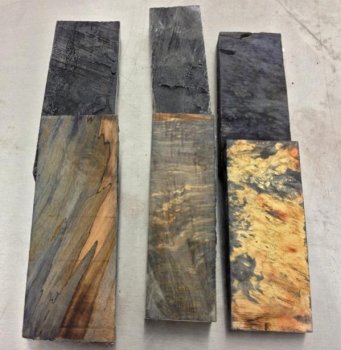
All of these items were in vacuum for 10 days and then under 90psi pressure for 10 days in black dyed solution of 95-1000A

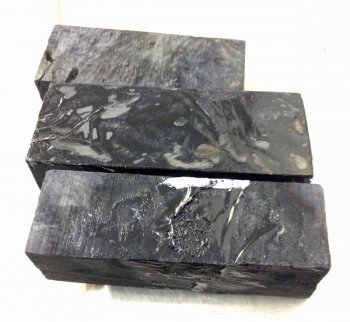
The wood came out rock hard. I messed up and cut open the blocks before weighing them after curing. I'd guess they increased 50% in weight but that is only a wild guess...

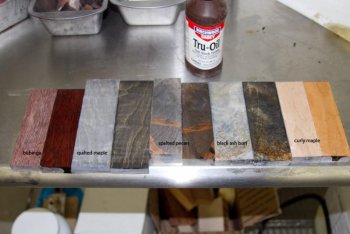
The scales to the right of each set has a light coat of Birchwood Casey Tru-Oil. This is mostly tung oil with some evaporants to help it dry quickly. It is a very common and popular gun stock finish and works very well for wood knife handles.

black-dyed-blocks.jpg

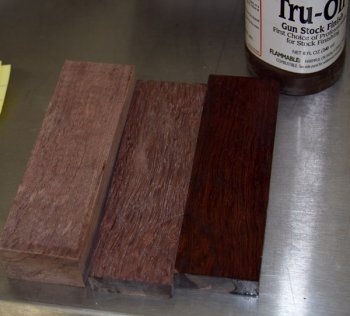
This is Bubinga that had already been stabilized by Hardwood Gallery. Larry does a great job with all of his stuff. I wanted to see if I could get another tone into the already stabilised wood. The block on the left is what it looked like before going in. The two scales to the right (far right has oil on it) show some additional contrast in the grain but not all that much.
bubinga-compared.jpg

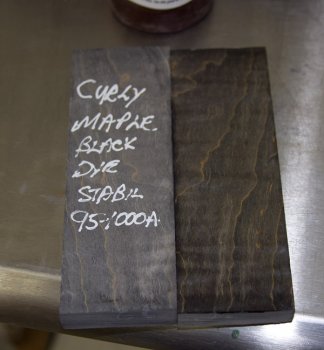
Curly maple really came out dyed quite nice. You can see the curl in the oiled up scale.
curly-maple-dyed-black-stabilized.jpg

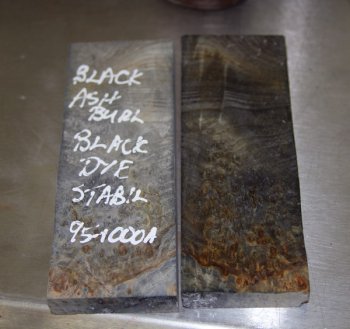
Here is some black ash burl and it also came out very nice from the black dye. Note the gold coloration typical of this wood but it really pops with the black dye. This will make a very nice handle.
black-ash-burl-dyed-black.jpg

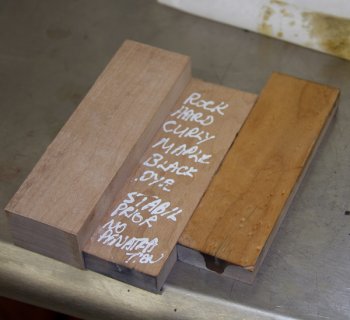
Here is some curly maple also from gallery hardwood that had been stabilized. The block on the left is what it would look like before. The scale on the far right is oiled up. There appeared to be almost no black dye penetration. I will have to try and dye a piece after it has been stabilized but in alchohol and not using the 95-1000A.
hard-maple-stabilized-no-deep-dye.jpg

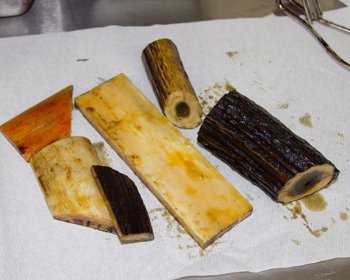
Here is the now dry stag and bone out of the Fiebings pro oil leather dye. The coloring came out almost purplish and a bit blotchy in both the bone and the stag. There was penetration all the way through but not a color that might be called attractive. The green iridescent exterior left from drying buffed away so that wasn't a big issue.
pro-oil-dyed-and-dried.jpg

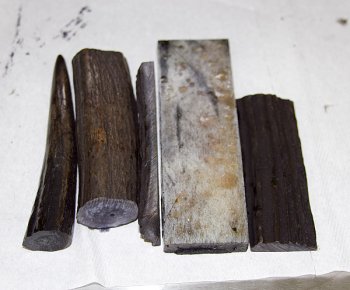
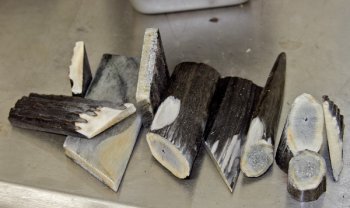
The stag and bone from the black dyed 95-1000a came out dark black on the exterior and a light gray inside in the hard parts. To get better penetration and a darker color, it will take maybe double the time this shows and that is 20 days. I like the color and effect and I will work on developing this a bit more.
black-dyed-stag.jpg


Some general comments:
I was hoping to be able to mix dye and stabilizing solution and putting it under vacuum and pressure get the dye and stabilizing soak done at once. It appears with wood, that can be done. The economics of having several gallons of differently colored stabilizing solution is questionable but you do save some time and a full step. Still, it appears the best way may be to dye, dry and then stabilize - at least for some colors and definitely for double dye colorizing. I will probably set up brown, black and clear tanks. The other colors will be done as a dye and dry step. The stabilized wood results I would classify as competitive with any commercial service currently stabilizing. I'm sure they might take exception. Note I didn't say better, I said competitive. It also takes a lot of time and equipment. I will leave the economics math up to you.

The bone and stag coloring remains a challenge. I have learned several ways that don't work so I am closing in on it. I am confident stabilizing juice can penetrate well enough. I am still working on getting vivid coloring results in bone and will need to concentrate on just dying tests for those.
 
Thanks BossDog,
It would seem that dyeing before stabilizing or both at the same time would work much better than trying to dye after stabilization, Was this just a test?

I really like that black ash block and if it's at least 5.5" long I will buy it from you!

Have Beth PM me if it's for sale? I bought out about thirty feet x 1.5" X 1" of Stabilized black Ash from Angus Campbell over 10 years ago. It was a bit lighter in color and was from a Gymnasium floor project. It's all gone now.

Please let me know?

Laurence

www.rhinoknives.com
 
I will check the length but I think it is 5", not 5.5"

black dyed black ash burl is really nice stuff. I need to find some more.

it was a test to increase the density and get some dye into the voids that was left from the first stabilizing.
 
I am not happy when I get woods back with voids that I have to fill with super glue.

I know when dealing with naturals anyone can have this happen & not to slam anyone else, But the best and most consistent stabilizer I have used is Mike @
WSSI. Also his Double dye work is far ahead of the others I've tried..

Even if the block of Ash is 5" I will take it please.

Laurence

www.rhinoknives.com
 
Back
Top