Stabilizing Wood - Setting up and testing - Cactus Juice and Ultraseal

T
Just my 2 cents here so .... I would alternate between vac and pressure. OR if you're not set up to push pressure yet I would try pulling a vac let it sit for an hour or 2 then release and pull again. The best IMO is when you can pull / push within a short period of time. I like pressure more than vac. Also if you warmed the wood up a little before you put them into the sauce it would help. Say like 180-200 degrees while you're getting everything set up, and then pull/push the sauce. I would like to see something that goes from a vac to pressure overnight at 60-80 PSI...

Interesting experiment to see, thanks for sharing your results. -Larry
 
I will be using some heat next. My pressure pots are rated to 80psi and I will throw that in the mix at some time also.
i wanted to stay pure vacuum at first as that was easiest and least dangerous.
 
the mad lab is back open for the weekend...

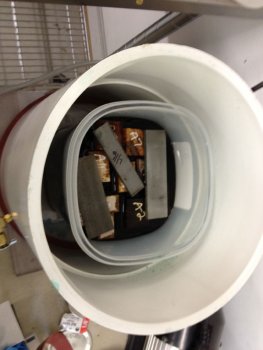
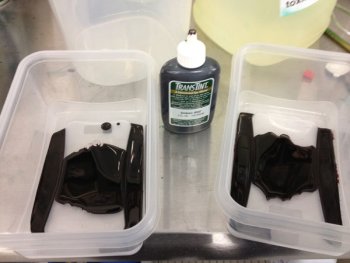
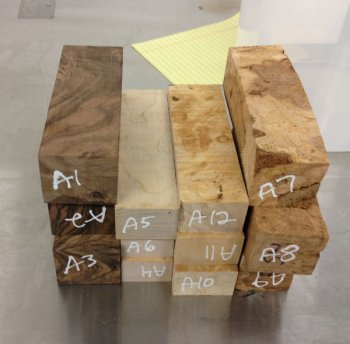
several types of wood are going into a batch of Ultraseal dyed with dark maple aniline dye called Transtint. I used a 1/2oz of dye in approximately a 1/2 gallon of Ultraseal...I gave them each a serial number so I can match each block up with my notes and weights.
blocks-for-juice.jpg

I have them in one of the clear top vac chambers. I want to see how it foams up. I am using scraps of 416 stainless to hold them down since they tend to float at first otherwise.
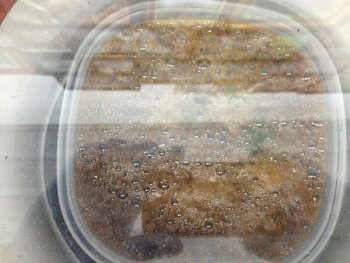
in-the-juice.jpg

Lot's of foaming but the container was tall enough to contain it which is what I wanted to see. The second or third time I pull a vacuum on this batch of juice, it doesn't foam up anywhere near as bad. The wood soaks up the juice fairly quickly and so there is a lot less foam.
foaming.jpg


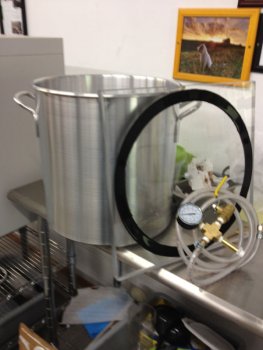
I got a new 10 gallon vacuum pot from ebay purchase. It is a 1" thick acrylic with a rubber ring molded into it as seal. The pot is nothing more than a large heavy duty stainless cooking pot. The plumbing that came with it is fairly simple.
new-10-gallon-pot.jpg

I need to replumb this a bit. There needs to be a valve to shut off the line so it holds a vacuum. I had to dig through my parts box and come up with some fittings. The vacuum pump doesn't hold a vacuum when it is turned off so it needs a valve. I have put a vacuum in this pot to see how long it holds...
new-10-gallon-pot.jpg

more later...
 

Attachments

  • replumbing-it.jpg
    replumbing-it.jpg
    87.5 KB · Views: 3
...
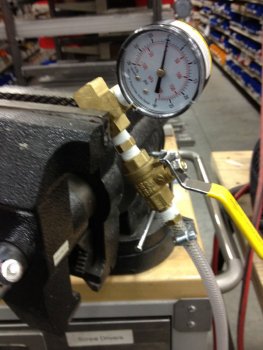
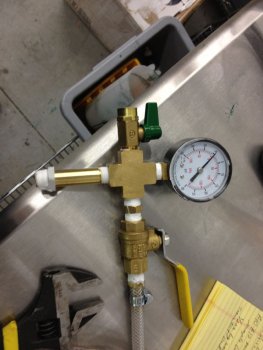
Here is the re-plumbed fitting for the new 10gallon tank. I moved the hose over the existing ballcock valve side, added a gas ball type relief valve to replace the hose and put a quick connect on the end of the hose. The hose end had a compression fitting instead of a standard NPT but luckily I had one. Quirky plumbing setup. This fitting connects to the acrylid lid with a tapered pipe thread. I hope it doesn't crack and fail too soon. I see this as a design flaw. It should have a through hole and compression nut set up. It will be too easy to bump the fitting and crack the fragile threads. When it does break, I'll just have to replace the lid using a different method of connecting it.
replumbed.jpg


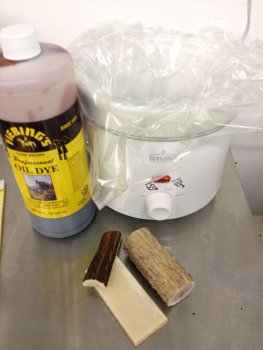
The testing for getting stag and bone to take a decent dye goes on. I bought a small crock pot and measured the temperature. It's high heat is around 187F so I throw in 3 pieces along with some Pro Oil Leather dye to simmer for several hours.
apply-heat.jpg
 
Do you have to worry about the ultra seal messing up the vaccum. I tried with wood hardner once and it clogged up the vaccum real bad and I had to rebuild it.
 
Do you have to worry about the ultra seal messing up the vaccum. I tried with wood hardner once and it clogged up the vaccum real bad and I had to rebuild it.

yes I do. wood hardner has some pretty caustive vapors as it boils off. This MMA stuff seems to have less of the corrosive type vapors but I expect it isn't doing it much good. My vac pump really shoots out an oily cloud as it is so I am hoping that oil lubricates and protects the pump seals from any damage. At some point I will switch to a venturi style vacuum specifically to avoid this. The big air compressor is at the back of the warehouse and I am working at the front so I am using the small electric vac pump for now as I test.
 
...
this just in..


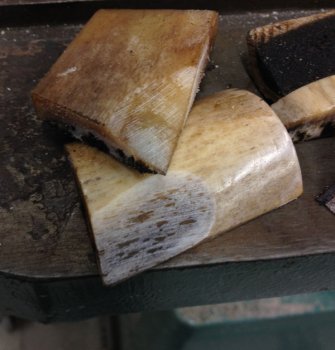
These came out of soaking under vacuum for a week in saddle tan leather dye. They actually look great.
Clearly the dye gave the stag and bone some very nice color on the outside, especially the stag. Several pieces ended up with the beautiful reddish/brown color that every one seems to really like. The bone took on a light brown color.
leather-dye-for-a-week-saddle-tan.jpg

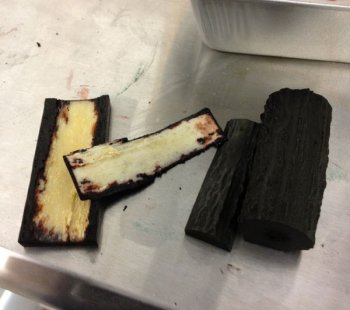
cutting it open showed the dye penetrated both but at a very much lighter color than the exterior would suggest for the stag. The bone on the other hand shows the deepest, most consistent dye through out our testing.
My guess here is if bone was left in dye under vacuum for several weeks you would get a decent dye. I do NOT think leather dye is the way to go if you want something dyed all the way through. If you want a nice exterior dye on stag, I was pleased with the look. Would it wear off with use? Probably but on stag it would seem to enhance the appearance. If you are familiar with the Culpepper and Company "amber" dye, this is not it and not the path to achieve it is what I would say at this point.
leather-dye-for-a-week-saddle-tan-cut-open.jpg

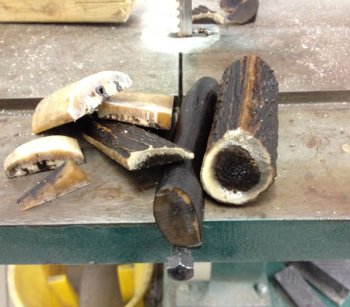
Here is a close up of the bone ground a bit on the grinder. You can see the dye has penetrated fairly well through out. There are still pockets of we dye seeping out here that should dry up just fine. I will try some aniline dye on bone under vacuum for 3 weeks to see how it comes out.
leather-dye-for-a-week-saddle-tan-bone-ground-open.jpg

First check into the crockpot test after 1.5 hours. The Pro Oil leather dye boiled readily at 185F which surprised me. I didn't think it would boil until at least 200F. The solvents in the dye tell me otherwise. Here the pitch inside of the bone came loose and peeled away. The exterior of the stag round was nearly white when it went in. It came out a very nice dark brown. All imported Sambor stag has been treated with potassium permanganate and that gives it the dark color. Some times you end up with a piece that didn't color or a piece that came from an exotic farm in North America that has not been treated and is still white like all other north American deer/moose/elk. A quick boil in this stuff will give you a decent dark colored piece of stag.
boiled-hour-and-half.jpg

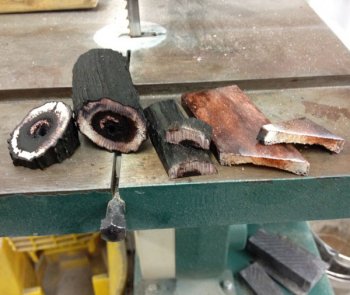
Inside look after an hour and half boil in pro leather oil dye. Some penetration for both bone and stag but it clearly needs a lot more.
boiled-hour-and-half-cut-open.jpg
 
...
spent the day at the warehouse so this was lunch today. It tasted worse than it looks.
lunch-today.jpg


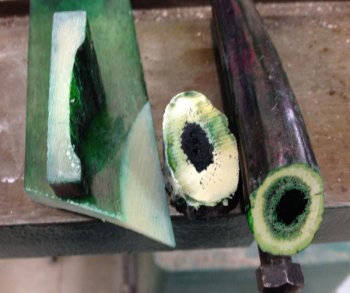
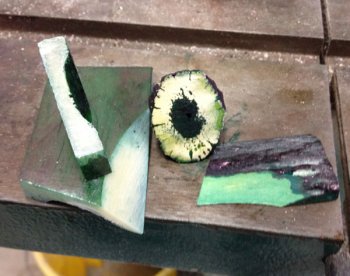
I checked on some stuff that had been sitting for a week in alcohol and green aniline dye. You can see it is working into the bone. This is just soaking, no vacuum. The pith in the stag is completely dark and still wet but you can see where the green has started to get into the hard part of the antler. It leaves a funky purple color on the outside that no one will want..
green-soaked-1-week-alcohol.jpg

Here is another jar, this had some time under vacuum and then soaking for a couple weeks. The stag scale is completely green. The bone is about 1/3 dyed. Given several weeks soaking with some occasional vacuum, you should be able to get a full dyed bone or stag. This is using denatured alcohol and green aniline dye.
stage-is-green.jpg

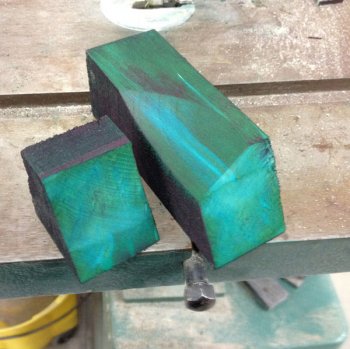
This really came out nice. This block of somewhat punky, spalted pecan soaked for a week in the same batch as the stag above. Completely green through out with nice streaks of lighter blue where it colored differently in the spalted areas. Soak under light vacuum (alcohol boils off so quick under a full vacuum) a bit and let sit for a couple weeks.
nice-green-block.jpg


Even the leather dye soaked bone started taking up dye. This one got some vacuum for a week and then soaked for a week in Pro Oil dye. You can see where the bone has taken a dye about 1/3 of the way through. You would think a soaking for 4 weeks or so would get you a completely dyed piece of bone from this. I don't know but I will be testing that.
brown-leather-dye-soaked-one-week.jpg
 
...

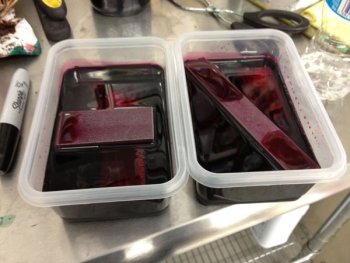
I am setting up for new goop to test. I found my 5 gallon bucket of Resionol 90c I bought last year. That will be one tub. The other is from a guy selling his own MMA blend he is calling PK-TR90. He is a duck call maker and is selling this stuff for $80/gallon matching Cactus Juice. Here I put in some liquid aniline dye, a nice Bordeaux color. Then mix in the goop and throw in a couple pecan blocks to soak under vacuum for a couple days.
new-goop-to-test.jpg

new-goop-soaking.jpg


At this point, I am taking a leap based on today's results that you can deep dye bone and stag if you soak them for several weeks under some occasional vacuum. I am guessing 4 to 6 weeks to get all the way through? ...and then who knows how it will turn out. I haven't been testing that long and will have to set up some long term tests but I am not patient enough.

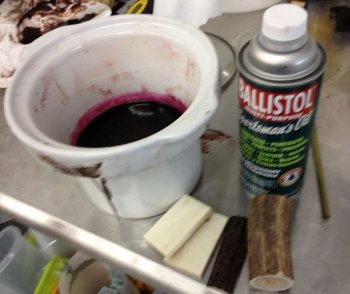
I thought since the leather dye boils off so quickly under vacuum and literally boils away at around 150F, I would try some mineral oil and aniline dye. I didn't have any mineral oil but I do have some Ballistol, which is mostly mineral oil with some extra mojo thrown in. I mixed in some dye and a quart of Ballistol and turn on the heat using my mini crock pot. The crock pot liner I was using on the first batch leaked right away so no liner this time. I heat it for a few hours and then shut it off to just soak. I will heat it up again tomorrow when I get back in. I think the aniline dye will soak in quicker than the leather dye and the mineral oil will hopefully carry it in. I will give some vacuum time also.
soak in mineral oil.jpg
 
Has anyone else tried 95-1000A for stabilizing. I have been using this product for a few years now with great results.
Jim
 
Your chicken dinner looks more appetizing than your green stag. :)

I will switch to brown later when I get the process down. I hope I don't use up all the stag I have on hand before you get here to go through it. :9:
 
..
a few more results from this morning..

first, this is stag that was soaked in Fiebings dark brown oil based leather dye using vacuum and soaking for a week.
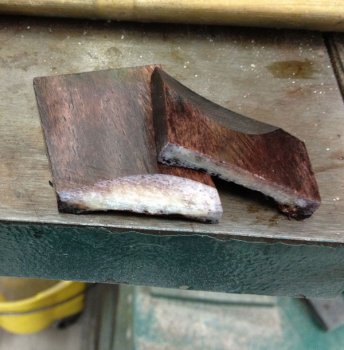
The bone (cut piece lower right) and stag (cut piece lower left) took dye all the way through but it is not a color I would call attractive. It came out more purple than brown. Maybe several weeks would darken the color to brown. I am going to put some in a jar and set it to the side for a month and check. I'd call the deep dye with this a bust.....but the exterior of the stag OMG...I pulled the pieces out and let them dry. After cutting the bone and being disappointed, I started looking at the stag.
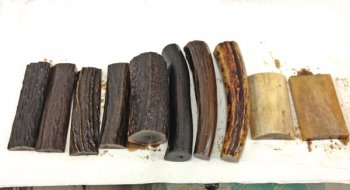
It had such a great color I went and buffed the stag up. The color is fantastic. It has just the right reddish brown that makes a stag amazing. These rounds and tapers I grabbed at random from my stock. They were fairly dull but after they dye and a little buffing BAM!
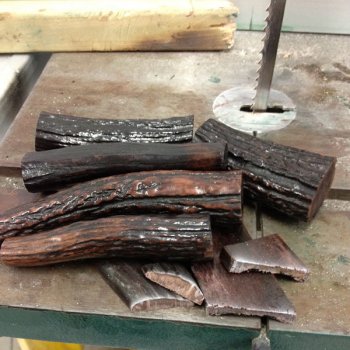
pretty-stag.jpg

Here I have three pieces I pulled out from maple brown dyed Ultraseal. They are Walnut, birdseye maple and maple burl. I soaked these under vacuum for 24 hours. I am trying different types of wood to see how long I need to keep them in the juice to get good dye penetration. The maple dye really looks nice here. The center piece picked up some chatoyance (3D look of wood when you rotate it in the light -- you can see into the wood and see the grain in 3D) in the soak. These are in the oven right now.
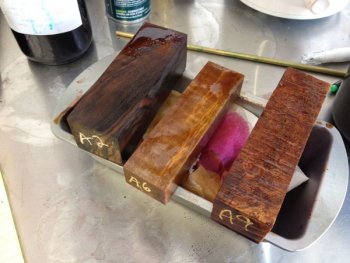
3-kinds-out-of-the-juice.jpg

The stag I had in Ballistol in the mini crock pot cooked for 4 hours or so. I cut and ground some this morning to see how it penetrated. It didn't penetrate worth a flip. I really thought the heat would cook the dye in quicker. Nope. I opened the pot and caught a strong whiff of Ballistol fumes. Not good. I opened the big roll up door and hit the exhaust fans to clear out the fumes.
Maybe it needs heat a lot longer. I am not going to pursue that right now. I will throw this in a jar and let it get a few vacuum cycles and then it can sit and soak for several weeks.
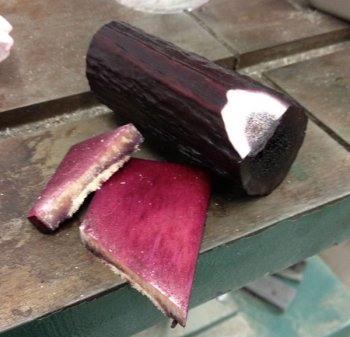
ballistol-dye.jpg

So far...
The 2 MMA's I have tried so far (two more in the oven right now) seem to work well. Weight on soft wood nearly doubled after soaking in a vacuum for a day and then heat cured. It all smells really bad. It's flammable, explosive and toxic. Still, this is with in reach of the average knife maker if you want to invest in the equipment and you work safely. I did not use any pressure, only vacuum.

Dyeing wood is more interesting. I had good success with using aniline dye in both powder and liquid. Liquid is easier to use. Soaking in denatured alcohol, under vacuum for a week gave a complete, very deep dye to (softer) wood. I have yet to test on dense, hard wood like rock maple. I expect that is just a matter of trial and error to get the time down.

Double dyeing is even more interesting. A dye session in one dyed batch of MMA, harden and then a longer soak/vacuum in another color and harden. Getting the results to repeat is going to be a challenge give how different wood is from piece to piece. Still, it's a matter of trial and error here it seems at this point.

Deep dyeing bone or stag continues to be a challenge. I was hoping for faster turnaround time. It's not going to happen. I am going to have to lengthen soak/vacuum times considerably.

Leather dye works well on the outside of stag and bone but beauty is only skin deep (ha!). Dark Brown Oil based leather dye gave the stag some exceptional mojo. Will it wear off? Yep, just like the potassium permanganate coloring wood but a soaking under vacuum for a week is going to get the dye slightly deeper than just the surface so it should wear for a long time.
 
Jim is the stabilized wood you gave to Dana some of the 95-1000A ? He sure likes the results.

Bruce
Yes it is Bruce. I have lots of people using the wood I stabilize and everyone likes it. I had people sending me wood from all over North America to stabilize for them. When I got home each night, I would be working on stabilizing wood rather than building knives. I finally had to stop doing custom stabilizing. Now, I just stabilize my own wood and go to a couple shows a year and sell some on line.
Jim
 
Tracey
Dyeing wood is a very long process I have found. I also use oil based leather dye mixed with 99% isopropyl alcohol. I will put the wood in with the dye and pull full vacuum for 2-8 weeks, depending on the wood. Spalted maple is usually good after 2 weeks. Curly maple takes about 8 weeks to get full penetration. I will then switch to 120 psi and hold that for 2-6 weeks. The only way to know for sure if it is done is to take a piece out and split in half. If it isn't done I put vacuum and pressure on again until it is done.
The 95-1000A is a lot safer to use than MMA. One of the comments I get quite often is that when people cut/grind the wood, it doesn't smell bad.
Jim
 
Back
Top