Metal Progression - What's Next After 1084?

MTBob

Well-Known Member
As a beginner knife maker, I've been using 1084 steel. I think I've got the heat treatment figured out, thanks to Kevin Cashen's DVD and the amazing information on this forum. I'm now interested in exploring other high carbon steel alloys. I want to stay with high carbon steel since I don't yet have a electric furnace to adequately treat stainless.
Here's my heat treatment setup: Propane forge with Type K digital temp indicator, Oil quench (dont' have Park's yet), plus a PID controlled table top stove tempering oven.
So, if this isn't too subjective or controversial, from less difficult to more difficult, what alloys would you recommend I consider after 1084?
Bob
 
What types of knives do you want to make?
I have had good, consistent results with 80crv2.
But there are others on this forum that have way more experience in this and they will be along shortly.
 
I'm really enjoying working with a bar of 1075 I got awhile back. I've done a fair amount of 80CrV2 in the forge as well.

The issue I can't get past with forge heat treating steels with a more significant amount of alloying is the feeling that I'm leaving something on the table. Maybe enough on the table that 1084 or 1075 would make a better knife with the limited heat control.
 
You have the right start with an all around, general use steel, that is exactly why I did my first DVD about 1080 and 1084. These two steels will make just about any knife with very good results. But now, if you want to explore higher performance in simple carbon steels, you should start looking at specialization. The next level in ease of working will be the hypoeutectoid steels that will make blades that will be tougher than 1084, like 1075, 1070. 1060 is problematic in hardening and 1050 is too low in carbon for anything other than a machete for my liking but it will give you experience in tougher steels.

Next, after the hypoeutectoids, comes the greater challenge of playing with carbides. For smaller, fine cutting, long edge holding knives you push the carbon content over .84% and go for the abrasion resistance that something like 1095 will provide. You will have to adjust your methods a little to deal with that extra carbon but the rewards can be worth it. I wouldn’t bother with 1090 for the same reasons as 1060, but if you want to take the next step up from 1095, W-2 will open up a whole next level of performance.

After that comes alloy steels, if you learn the different levels of carbon steels, basic alloy steels will be an easy transition with the right tools. The first, and easiest, alloying element to cut your teeth on will be chromium and for that the 5XXXX series will give you two classics. For the tougher blades 5160 is a good beginning, and for the finer cutting abrasion resistance, 5160’s big sister, 52100, will do the trick. But to be honest the carbon level added to that chromium will challenge you more than any of the carbon steels. These days I think I would be tempted to advise going to 80CrV2 and learning it like you did with 1084 before moving on to 5160 or 52100. Heck, you may find 80CrV2 eno0ugh for all your needs.

Although, once you have the tools, and skills, for 80CrV2, I would be tempted to jump to O-1 for fine edges, and L6 for toughness like you have not yet seen.

Between 10XX series and Chromium bearing alloys is also 15n20 for excellent toughness, if you can find it in useable blade thickness. If you have 1075 down pat it will be no problem.
 
I got a dumb follow-on question (one of many).
I've now heat treated a bunch of 1084 and have made some tooling with O1. It all seems to harden adequately - but, how do I know that I've got the process optimized? For instance, I follow all the necessary steips for heat treating 1084 - I heat to 1500F and check with a magnet, hold for 5 minutes, quench in Canola oil at 120F, temper twice at 400F. A bench file seems to indicate it's hard, but that seems like a fuzzy test. Short of getting a Rockwell hardness tester how do I know that I've achieved the right heat treatment? From what I've read hardness files are not all that accurate.
This question goes beyond HTfor 1084. If I want to venture into other steel heat treating processes what tests do I use to confirm that I've heat treated properly?
Controlling the HT "receipe" seems straight forward and manageable - but how do you know what the result is?
One method is called the Brass Rod test. Ed Caffrey explains it much better on his website here than I can. The nice thing about the brass rod test is it's simple.
 
Here's my process of starting with a new steel. I first research for as much information as I can find on the steel and heat treating it. Actually, this step may start before I decide to use a certain steel. I keep a word document on each steel I use and am interested in. When I see information on one of these steels, I will copy it and add to the document. I print and keep a copy of each in my heat treating log book in the shop so I can reference it when needed.

Once I have this info, I will decide on a heat treating process, normalizing temperature, thermal cycling steps and temperatures, austenizing temperature and soak time, which quenching oil to use and tempering time and temperature. Then, I will run some samples through the process and break them to make sure I have the grain right. I will temper some samples to break so I can get an idea of the toughness of the steel.

When everything is acceptable to me, I will make a knife using the same heat treat process, but temper it to the low side. I will grind this test knife thin, .010" or less behind the edge, and sharpen at 10 - 12 degrees. This will let me know what the steel will hold up to. Depending on what the knife is designed for, I can always leave the edge thicker or sharpen it at a different angle.

Now the testing starts. I will do cut tests first, usually cutting paper, leather, cardboard and rope. I want to make sure I can get it as sharp as I can and that it will stay sharp. Next, I perform the brass rod test and chop into a piece of kiln dried white oak. If it holds up here, I will chop on some deer antler. Basically, I want to test it beyond what it should encounter when it is used for what it was designed for.

If at any point I get a failure, then I back up and change the process. It may be the thickness behind the edge, sharpening angle, tempering temperature or the whole heat treating process. It all depends on the type of knife I want to make from the steel. If it's a kitchen knife, I don't want a thicker edge or blunter sharpening angle, so I would go to the tempering temperature next.

In my opinion, with the right testing and lots of experimenting, a person can make a top performing knife without a hardness tester. The benefit I see of a hardness tester is to make sure you are getting the maximun as quenched hardness from the steel. If the knife performs as required, does the rockwell number matter?
 
...The benefit I see of a hardness tester is to make sure you are getting the maximun as quenched hardness from the steel. If the knife performs as required, does the rockwell number matter?

Not necessarily, but it depends. If your plan is to set a goal for performance at “X” and you get that performance, then you have met your goal with whatever system or test you are working with. If you are at “X” and your goal is to see if you can achieve “Y” and eventually “Z”, then a really accurate test like Rockwell can be invaluable.

Always remember that Rockwell tests are for checking your heat treatment, not for assigning a value to the quality of the knife. Great Rockwell+ bad geometry (or any number of other factors) = terrible knife. To actually test the knife, use it like it was meant to be used and see how it works. I personally am not a fan of the brass rod, as it mostly just tells you about your grind thickness, and very little about your heat treatment.
 
Last edited:
Not necessarily, but it depends. If your plan is to set a goal for performance at “X” and you get that performance, than you have met your goal with whatever system or test you are working with. If you are at “X” and your goal is to see if you can achieve “Y” and eventually “Z”, then a really accurate test like Rockwell can be invaluable.

Always remember that Rockwell tests are for checking your heat treatment, not for assigning a value to the quality of the knife. Great Rockwell+ bad geometry (or any number of other factors) = terrible knife. To actually test the knife, use it like it was meant to be used and see how it works. I personally am not a fan of the brass rod, as it mostly just tells you about your grind thickness, and very little about your heat treatment.
What tests do you recommend , Kevin?
 
As I said, I have always thought that very hard, and extensive, use in the task the knife was intended for is about the best overall test. I have seen knives chopping cinder blocks or getting driven through car doors and all I could do is laugh, this nonsense doesn’t tell anybody about knife performance, all it does is dumb down knifemaking to sell blades to the uninformed. For larger choppers, one of my favorites was asking a friend if they needed a fence row cleaned up, several hours of non-stop swinging and chopping would tell me about everything from the edge to the handle design.

Seasoned barn beam was also one of my favorites for chopping knives. For quick edge checks, I do have my version of the brass rod, it is not about flexing, it is about impact. After the blade is sharpened, I will whack the edge with a half inch brass rod, hard enough to get around 1/8” penetration. If I am particularly worried about the impact strength, I will repeat that test at a 45 degree angle to the edge for lateral stress. This, and chopping white tail antler are my extreme edge tests.

For fine cutters, I have done things like drop blades off at butchering, or deer processing, facilities and told them to give me feed back after non-stop use. Rope cutting is another old favorite that I am not a fan of, neither hanging, a la ABS, or slicing on the bench. Testing very early on showed me that it was very inconsistent and easily skewed by the cutter. Different grades of cardboard is much better. Corrugated is good if you have a lot of the same stuff, as it varies greatly from piece to piece. Hard, solid shipper tube type cardboard is an edge eater and gives good, consistent testing of the same.

With Kitchen knives- use them! There is no substitute. Get on a good cutting block and make a big bowl of pico del gallo and meat fajitas. It sounds funny but there are so many knife techniques in that meal that it is one of my favorite tests (well, cleaning up the testing materials is my favorite part). During a lot of the real use testing that I do, I will put the edge under the microscope, it needn’t be anything fancy 100X will do, and examine how it is changing. I don’t think about sharp versus dull under the scope as much as observe those changes.

What is much more important than the test is what you learn from it. Take note of deformation- is it plastic or brittle in nature? Do you need to change your blade shape or handle design? Record the edge geometries that work- what is the included angle? How thick is about .100” back, .200” and so on? This way you can isolate problems and recreate the ones that work.

On the material testing, to troubleshoot heat treatment, I will give you some alternatives to what I do, since it would be ridiculous for most people to do Rockwell overall with Knoop microhardness for selective areas of the cross section, Charpy impact, and metallography work. If one doesn’t have a Rockwell tester, I would really encourage them to think about having one someday, if they plan on making a career of knifemaking. But if they don’t, files are about your best option, you just need to be aware that files do not read the exact same properties as a penetrative hardness test. In that case I would use the file along with other efforts, like breaking the occasional sample and checking grain size.

What most people need to be aware of is the difference between lab type testing, that gives accurate data by isolating variables and producing reliable numbers, and what most people consider testing. Just pushing a sharp edge into material and judging the ease with your hands is not the same type of testing. It is good enough for you to get a feel of things, but it does not account for uncountable variables, and it produces no numbers or quantifiable data to compare. The brass rod flex is a very good example, most people think this is telling them about the heat treatment in avoiding too soft or too brittle. It could give you some idea of that, but only after the yield point is exceeded, so it needs to be a destructive test to work. Before that point, all it is really reading is the thickness of the grind. Grind it thin and it will flex like crazy, regardless of the heat treatment. And, without measuring the exact angle, and amount of load, it is not giving us any objective numbers to work with.
 
Last edited:
As I said, I have always thought that very hard, and extensive, use in the task the knife was intended for is about the best overall test. I have seen knives chopping cinder blocks or getting driven through car doors and all I could do is laugh, this nonsense doesn’t tell anybody about knife performance, all it does is dumb down knifemaking to sell blades to the uninformed. For larger choppers, one of my favorites was asking a friend if they needed a fence row cleaned up, several hours of non-stop swinging and chopping would tell me about everything from the edge to the handle design.

Seasoned barn beam was also one of my favorites for chopping knives. For quick edge checks, I do have my version of the brass rod, it is not about flexing, it is about impact. After the blade is sharpened, I will whack the edge with a half inch brass rod, hard enough to get around 1/8” penetration. If I am particularly worried about the impact strength, I will repeat that test at a 45 degree angle to the edge for lateral stress. This, and chopping white tail antler are my extreme edge tests.

For fine cutters, I have done things like drop blades off at butchering, or deer processing, facilities and told them to give me feed back after non-stop use. Rope cutting is another old favorite that I am not a fan of, neither hanging, a la ABS, or slicing on the bench. Testing very early on showed me that it was very inconsistent and easily skewed by the cutter. Different grades of cardboard is much better. Corrugated is good if you have a lot of the same stuff, as it varies greatly from piece to piece. Hard, solid shipper tube type cardboard is an edge eater and gives good, consistent testing of the same.

With Kitchen knives- use them! There is no substitute. Get on a good cutting block and make a big bowl of pico del gallo and meat fajitas. It sounds funny but there are so many knife techniques in that meal that it is one of my favorite tests (well, cleaning up the testing materials is my favorite part). During a lot of the real use testing that I do, I will put the edge under the microscope, it needn’t be anything fancy 100X will do, and examine how it is changing. I don’t think about sharp versus dull under the scope as much as observe those changes.

What is much more important than the test is what you learn from it. Take note of deformation- is it plastic or brittle in nature? Do you need to change your blade shape or handle design? Record the edge geometries that work- what is the included angle? How thick is about .100” back, .200” and so on? This way you can isolate problems and recreate the ones that work.

On the material testing to troubleshoot heat treatment I will give you some alternatives to what I do, since it would be ridiculous for most people to do Rockwell overall with Knoop microhardness for selective areas of the cross section, Charpy impact, and metallography work. If one doesn’t have a Rockwell tester, I would really encourage them to think about having one someday, if they plan on making a career of knifemaking. But if they don’t, files are about your best option, you just need to be aware that files do not read the exact same properties as a penetrative hardness test. In that case I would use the file along with other efforts, like breaking the occasional sample and checking grain size. What most people need to be aware of is the difference between lab type testing, that gives accurate data by isolating variables and producing reliable numbers, and what most people consider testing. Just pushing an sharp edge into material and judging the ease with your hands is not the same type of testing. It is good enough for you to get a feel of things, but it does not account for uncountable variables, and it produces no numbers or quantifiable data to compare. The brass rod flex is a very good example, most people think this is telling them about the heat treatment in avoiding too soft or too brittle. It could give you some idea of that, but only after the yield point is exceeded, so it needs to be a destructive test to work. Before that point, all it is really reading is the thickness of the grind. Grind it thin and it will flex like crazy, regardless of the heat treatment. And, without measuring the exact angle and amount of load, it is not giving us any objective numbers to work with.
Thank you Kevin. There is a certified amount of knowledge in that answer. I will copy this one for my ongoing info.
 
As I said, I have always thought that very hard, and extensive, use in the task the knife was intended for is about the best overall test. I have seen knives chopping cinder blocks or getting driven through car doors and all I could do is laugh, this nonsense doesn’t tell anybody about knife performance, all it does is dumb down knifemaking to sell blades to the uninformed. For larger choppers, one of my favorites was asking a friend if they needed a fence row cleaned up, several hours of non-stop swinging and chopping would tell me about everything from the edge to the handle design.

Seasoned barn beam was also one of my favorites for chopping knives. For quick edge checks, I do have my version of the brass rod, it is not about flexing, it is about impact. After the blade is sharpened, I will whack the edge with a half inch brass rod, hard enough to get around 1/8” penetration. If I am particularly worried about the impact strength, I will repeat that test at a 45 degree angle to the edge for lateral stress. This, and chopping white tail antler are my extreme edge tests.

For fine cutters, I have done things like drop blades off at butchering, or deer processing, facilities and told them to give me feed back after non-stop use. Rope cutting is another old favorite that I am not a fan of, neither hanging, a la ABS, or slicing on the bench. Testing very early on showed me that it was very inconsistent and easily skewed by the cutter. Different grades of cardboard is much better. Corrugated is good if you have a lot of the same stuff, as it varies greatly from piece to piece. Hard, solid shipper tube type cardboard is an edge eater and gives good, consistent testing of the same.

With Kitchen knives- use them! There is no substitute. Get on a good cutting block and make a big bowl of pico del gallo and meat fajitas. It sounds funny but there are so many knife techniques in that meal that it is one of my favorite tests (well, cleaning up the testing materials is my favorite part). During a lot of the real use testing that I do, I will put the edge under the microscope, it needn’t be anything fancy 100X will do, and examine how it is changing. I don’t think about sharp versus dull under the scope as much as observe those changes.

What is much more important than the test is what you learn from it. Take note of deformation- is it plastic or brittle in nature? Do you need to change your blade shape or handle design? Record the edge geometries that work- what is the included angle? How thick is about .100” back, .200” and so on? This way you can isolate problems and recreate the ones that work.

On the material testing to troubleshoot heat treatment I will give you some alternatives to what I do, since it would be ridiculous for most people to do Rockwell overall with Knoop microhardness for selective areas of the cross section, Charpy impact, and metallography work. If one doesn’t have a Rockwell tester, I would really encourage them to think about having one someday, if they plan on making a career of knifemaking. But if they don’t, files are about your best option, you just need to be aware that files do not read the exact same properties as a penetrative hardness test. In that case I would use the file along with other efforts, like breaking the occasional sample and checking grain size. What most people need to be aware of is the difference between lab type testing, that gives accurate data by isolating variables and producing reliable numbers, and what most people consider testing. Just pushing an sharp edge into material and judging the ease with your hands is not the same type of testing. It is good enough for you to get a feel of things, but it does not account for uncountable variables, and it produces no numbers or quantifiable data to compare. The brass rod flex is a very good example, most people think this is telling them about the heat treatment in avoiding too soft or too brittle. It could give you some idea of that, but only after the yield point is exceeded, so it needs to be a destructive test to work. Before that point, all it is really reading is the thickness of the grind. Grind it thin and it will flex like crazy, regardless of the heat treatment. And, without measuring the exact angle and amount of load, it is not giving us any objective numbers to work with.
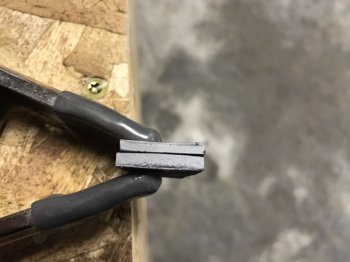
Kevin, thank you for such a thorough answer, very helpful. Could you elablorate on what to look for in a "proper" HT grain structure? I've heat treated some 1084 sample pieces and bent them until they broke. I saw the difference in the bending angle before the samples fractured. But, as I looked at the grain, it was not clear to me what to look for. Is it useful to polish the fractured piece and acid etch it to better see the grain? Is a smaller grain structure more desireable than a large grain structure?
Bob
 
Actually polishing it and trying to etch will make it harder, unless you have the lab equipment to do it that way. Instead the rough fractured end grain will give you a very good idea based on how the fracture will travel at the grain boundaries. * Good advice, that is often given, is to get your hands on a good Nicholson file, break it, and use that end grain as your standard, as it is often quite good. You do not want to be able to see individual grains with the naked eye or it is too coarse. It should not look like coarse sand, or even very fine sand, for that matter. The fracture surface should look like a ultrafine smooth velvet or lightly etched glass.

* It is more information than anybody should care about, but the laboratory polish and etch is how you measure grain size to modern ASTM standards, the fractured end is how you measure it according to an older system know as Shepherd grain size, and it still isn't too bad for checking. Most bladesmiths mean Shepherd when they talk grain size, as they most likely do not have the means to determine ASTM grain size. I can somewhat do it with my equipment, but it is a serious pain.
 
Another thing to consider is the equipment that you have to heat treat the steel. The 1084 that you are using is forgiving, not that it can't be damaged by bad heat treating, any steel can. If you get up into the hypereuticoid steels you can put too much carbon into solution and develope retained austenite which you will have to correct later. Something like 1095 can be handled with triple tempering; 52100 might need a dry ice/acetone or liquid nitrogen bath to convert the retained austenite. However, that's not to say that you absolutely cannot make a good blade from 52100 with the equipment that you described. I experimented with 52100 for a couple of blades. One was marquenched in 450° peanut oil (don't try this at home boys and girls) for I believe like 1 1/2 hours. It was a challenge to maintain an even heat and I'm luck I didn't burn my garage down. It's remarkable how much oil that hot will expand in the quench tank. The goal was to get about a 50/50 mixture of martensite and bainite. The second blade was quenched in warm peanut oil (which I've found out is not the best) and then tempered as I remember at 400° in my kitchen oven three times. They both did well at the 2X4 chop and edge retention. The marquenched blade bent to past 45° before breaking and the regularly quenched and tempered blade had to be beat with a 4 lb surveyer's hammer in a vice to get it to break. So yes, I can make good blade with a forge much like yours. The problem is to be consistent doing it. That's much easier with hypoeuticoid or euticoid steels.

Another thing to consider with the blade that was quenched and tempered normally. I had absolutely no way of telling how much retained austenite there was in it. The knife did great over a very short period of time. However, if it did have a large amount of retained austenite in it that wasn't corrected by the triple tempering that austenite would eventually convert to untempered martensite and cause the blade to become harder and more brittle over time.

Doug
 
Last edited:
I made a couple clean breaks on some test pieces I had in the shop to illustrate the visible grain vs not visible grain. The top piece is oven HT 80CrV2 and the bottom is my first test piece of 1075 in the forge. The difference is drastic in the picture. FE2C5878-9F58-4CC8-9DC2-921C27C9175C.jpeg
 
I made a couple clean breaks on some test pieces I had in the shop to illustrate the visible grain vs not visible grain. The top piece is oven HT 80CrV2 and the bottom is my first test piece of 1075 in the forge. The difference is drastic in the picture. View attachment 71605
Help me understand this. I assume the upper piece is the 80CrV2. Are you saying that you were able to get better grain structure (smaller grain) in the 80CrV2 because you used an oven to HT that sample -- and that because the 1075 was HT'd in a forge it resulted in larger grain structure?
 
No, I'm not making any claims about method or steel. I'm only showing what a good sample and a less than good sample looks like, because it was mentioned, with regards to grain size.

I will say that you can get that 80CrV2 result with minimal effort in an oven. But I like using the forge, too. It just takes more practice. My forge is not ideal for HT, either.
 
Back
Top