KITH official pictures thread

Sean Cochran

Well-Known Member
Hey guys sorry I have been late posting a new thread, I have been working 7 days a week. Finally got some time in the shop this evening.

Please post finished pics in this thread and we will draw on the 15th.

Here is my humble offering, its the first knife Ive had time to make in almost 5 months.
The pics looks like there are scratches but it must just be the lighting.
Specs
1084 hollow ground on a 14" wheel
green g-10 with black liners and stainless pins

0fc61050.jpg
 
Last edited:
Here is my offering.
Blade: 3,5 mm AEB-L Steel.
Total length: 215mm, and 28mm at the widest point.
Blade length: 10cm
Handle:black linen micarta, red vulcanfiber, lanyard tube, and loveless bolts.
Sheath: Hard Pressed leather.

bmicarta5.jpg
 
Here's my santoku

Santoku of AEB-L with spalted, mostly sapwood Ambonya burl that I had WSSI stabilize.
A pair of the boss's copper Corby bolts.

Same pictures as in the other thread but it's got an edge now :biggrin:
 

Attachments

  • P7072350.jpg
    P7072350.jpg
    64.1 KB · Views: 49
  • P7072351.jpg
    P7072351.jpg
    64.7 KB · Views: 36
20120517_101450.jpg20120517_101430.jpg

Older pic of this one. I have since added a few strategic holes in the sheath, and the scales...
Just need to neaten up the sheath and etch my mark on it, and this one is ready to go

5/32" CPM154CM, heat treat by Peter's
Flat ground with large swedge
Handle is Orange G10 with Toxic Green 0.030 liner and SS hardware. Now also includes orange and green lanyard.
Sheath is 1 solid piece of kydex with integral belt loop. My first try at something like this...
 
Last edited:
kdkith1.JPG

1/8" 1084, stabilized red wood handles, mosaic. The sheath is carbon fiber appearance kydex setup for iwb.
The blade IS a belt finish, but not as rough as it looks in the pic. I did a little more cleanup after the pic in general, but most of what's showing in the image is actually just polishing compound I hadn't wiped sufficiently.
 
Last edited:
Here's mine I'm about to go out to the shop and finish last minute clean up and polish, sorry pics are so bad I'm horrible with a camera, Its ats 34, stabilized spalted maple wood , and my first time using brass for bolsters . after final polish it should be pretty shiny, I'll post better pics tommorow
Anthony
 

Attachments

  • P1010118.JPG
    P1010118.JPG
    78.6 KB · Views: 57
  • P1010122.JPG
    P1010122.JPG
    73.1 KB · Views: 66
  • P1010121.JPG
    P1010121.JPG
    79.7 KB · Views: 77
Here's mine I'm about to go out to the shop and finish last minute clean up and polish, sorry pics are so bad I'm horrible with a camera, Its ats 34, stabilized spalted maple wood , and my first time using brass for bolsters . after final polish and marking I'll post more pics.
 
I posted this in the other thread, but here it is again. My camera really stinks, but I tried to get some better pics. A photographer friend of mine is supposed to bring her D-SLR over this weekend, so I''l update if we get some better pics.

OAL: 11 1/4"
Blade (tip to guard) 6 1/2"
Blade Steel: 440C with a blasted finish
Hardware 304 guard and 303 pins
Scales: Black linen Micarta
Heat treat by Peters' at 57-58 HRC

tf1.jpg

tf2a.jpg

tf7.jpg

tf5.jpg
 
Here's mine I'm about to go out to the shop and finish last minute clean up and polish, sorry pics are so bad I'm horrible with a camera, Its ats 34, stabilized spalted maple wood , and my first time using brass for bolsters . after final polish it should be pretty shiny, I'll post better pics tommorow
Anthony

Beautiful knife and model!!!
 
Very nice knives - great to see the different styles and types. Here is my offering - tried to use all my skills so soldered guard, hidden tang, leather stack, and sheath pouch.
AusbrooksKith7.jpg

AusbrooksKith2.jpg
 
man theres some cool knives floating around! should be fun.
 

Attachments

  • 100_3365.jpg
    100_3365.jpg
    92.9 KB · Views: 47
  • 100_3398.jpg
    100_3398.jpg
    97.5 KB · Views: 38
The knife is done, just have to make a belt loop.
it is 1084 forged by Burton Harruff of Burton cutlery and HT by Micheal O'Machearley
forge finish at the ricasso about .166" thick at that point
Blade: 3 1/2" Cutting Edge:3 1/4" Handle: 4 11/16" OAL:8 3/16"
OD green canvas "micarta" with coyote brown, and OD green G10 liners.
DSC_0533.jpg

DSC_0534.jpg

DSC_0535.jpg

DSC_0536.jpg

it isn't as nice as some of the other offerings but it is the best that I have made so far.
* I have changed the sheath after these pics were taken, I'll try to post new pics tomorrow.
DSC_0538.jpg

DSC_0537.jpg
 
Last edited:
Here's my entry in the July KITH.

It's a frontier fighter.
Forged 1084, 11.250" OAL
1/8" thick, 5.750" blade
Curly Hickory handle with acid finish
Copper pins and thong tube
Brown Leather sheath

JulyKITH12.jpg
 
Last edited:
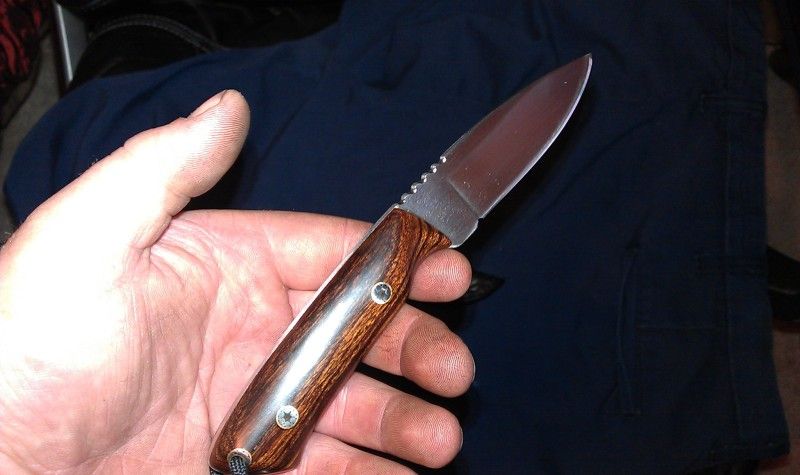
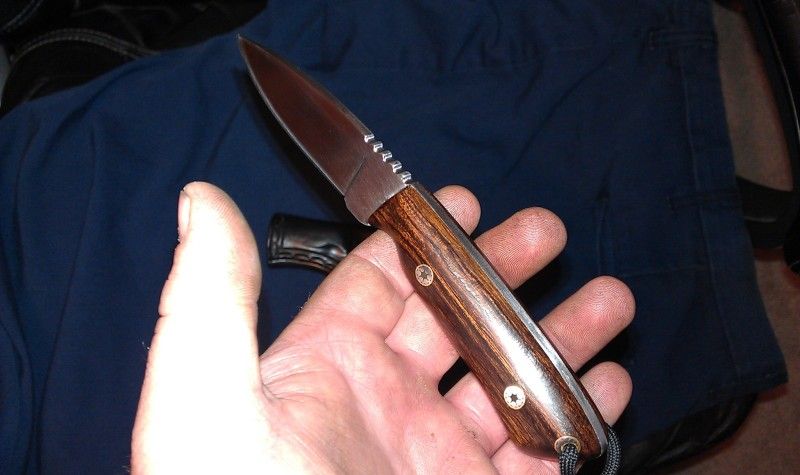
Here is my submission. As I reported earlier, this is a standby, not my first choice...kept having problems with the scales lifting for some reason and I didn't want to send it out hoping it would be ok, if I'm not 100% sure it's not going to fail, it doesn't leave my hands.

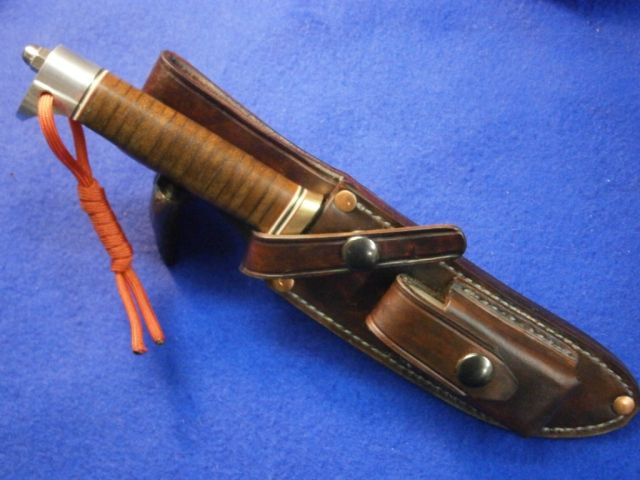
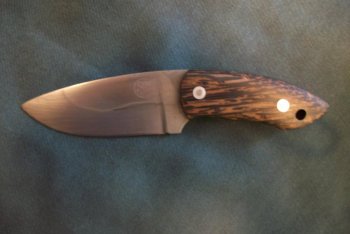
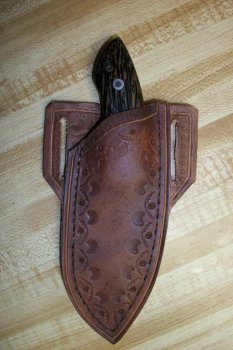
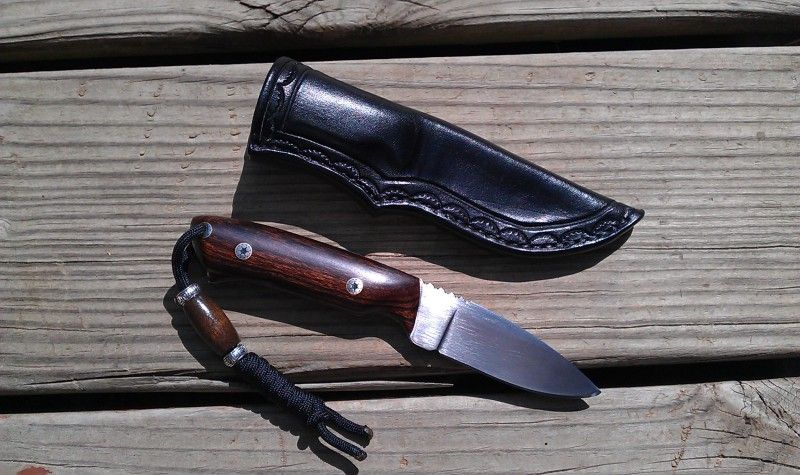
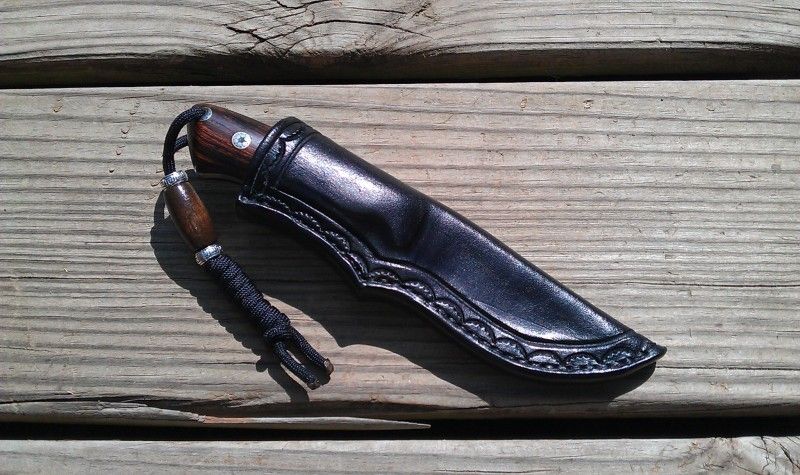
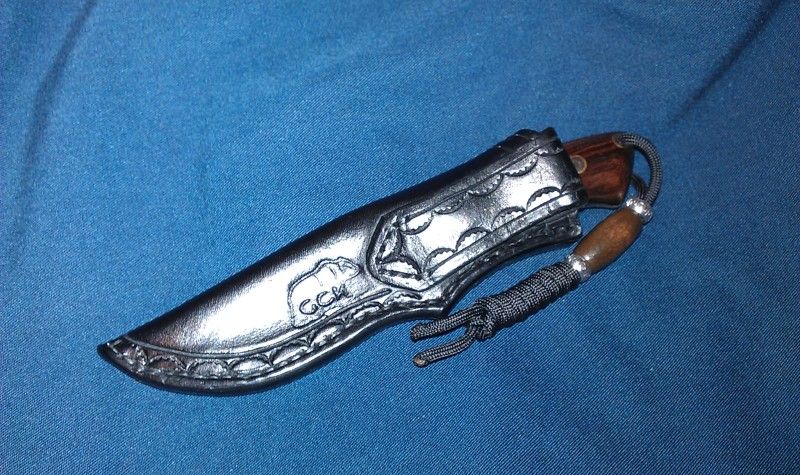
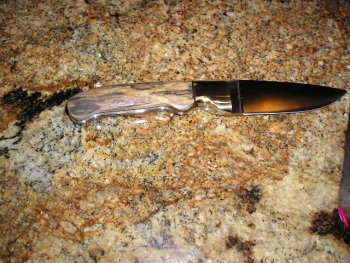
The blade is a drop point skinner in AUS-8 with cryo tempering, hand pulled "brushed" finish, jimping done with a carbide cutter. Handle is Arizona Desert Ironwood, finished to 2000g and waxed, with matching brass and stainless mosaic pins and a matching mosaic thong tube. Lanyard is black paracord, Chris Reeve style knot, 2 metal beads and 1 wood bead. The sheath is 8/9oz veg-tan, basic pouch design with accent tooling, wet formed, dyed black and hand stitched. Sheath is hot finished with a mixture of beeswax/paraffin/NFO, then multiple coats of Johnson's Paste Wax is applied and buffed.

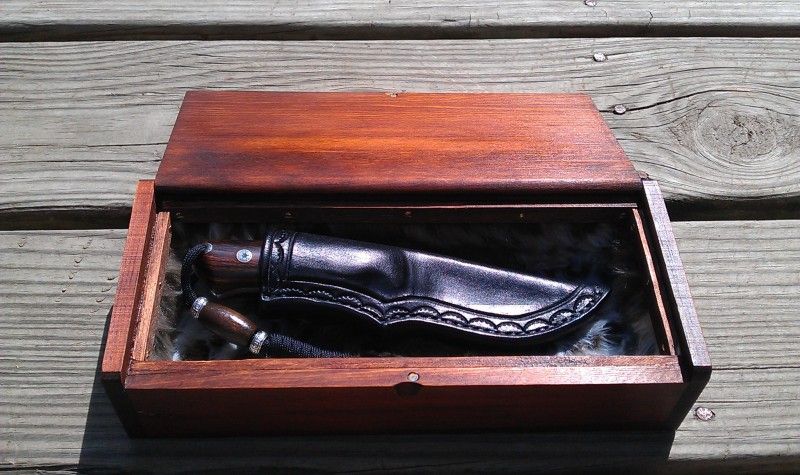
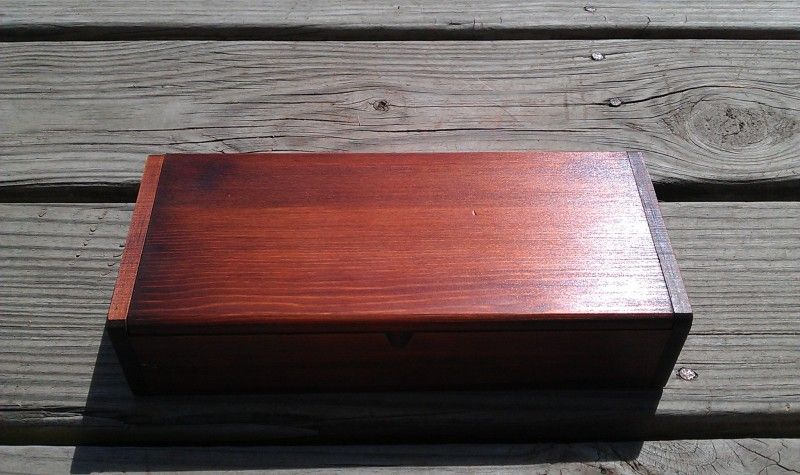
The display box was made by me, stained and lined with faux fur.

Dimensions:
Total Length: 7"
Blade: 2 3/4"
Thickness: 5/32"

***NEW PICTURES ADDED***
IMAG0818.jpg

IMAG0817.jpg

IMAG0815.jpg

IMAG0814.jpg


IMAG0811.jpg

IMAG0809.jpg

IMAG0810.jpg


There is one tiny spot on the left hand side of the blade that I am pretty upset about. I was finishing the jimping with the carbide cutter (will use files next time, that thing is too unruly), and set the knife down next to the dremel. Some how, when I sit back down I bumped the knife and the cutter nicked the blade and left a small spot on the ricasso. Too deep to get out without multiple sandings, it'll just have to serve as a beauty mark and a reminder to always be careful when working in the finishing stages.

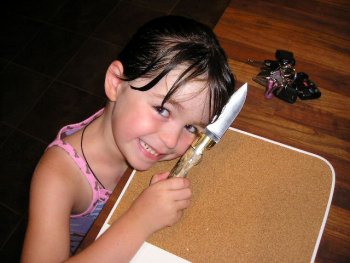
I really wish I had a better photo setup, but I needed to get pics on tonight. I'll try to get some natural light pics outside tomorrow, those tend to look the best. It looks MUCH better in person, lol. I hope the new owner enjoys it.
 
Last edited:
Back
Top