Hometown Hero build ~WIP~

Josh this is a great WIP, very informative Im learning from it. Stuff I can put into use to make my HT process better.. Thank ou for taking the time and being so detailed in your explanation etc. .

The blades look great.. I am interested to hear how they grind after HT..

Thanks
Randy
 
Randy,

No problem on the info in the WIP. Making blades is a process of learning that never ends for us all. Sharing info like this is a great way to spread info, spark interest, raise questions and answers, and give us all an oppertunity to learn something new.

I'm certainly still a student myself but being as detailed as possible allows me the oppertunity to learn, make mistakes, be corrected and continue to grow as a maker. (Many teachers will drop you a PM and offer advice and suggestions for improvement)


Since your's is the second comment about grinding post HT I'll share my thoughts on this and why I'm not worried about trouble grinding these hardened blades.

Hypothetically- lets say we've got 2 identical blades to grind, one 1084 and the other CPM M4 both hardened and tempered to 60 rockwell.

We pretty much know from others experience that the M4 is gonna trash belts, put hair on your chest, and make men out of boys. The 1084, no problem... beginners steel.

Now both blades are the same hardness so they should grind the same right ? WRONG and here's why- Carbides

1084 is a simple steel with just iron and carbon and will form iron carbides when the carbon bonds with the iron atoms. There aren't any other carbide forming elemnts in 1084.

Now lets look at the M4- Carbon, Chrome, Vanadium, tungsten, Molybdenum which will all form carbides. This is important- Not all carbides are created equal. I believe Vanadium carbides are the hardest and carbon carbides are the softest and the others fall in the middle. All these carbides are suspended throughout the iron which is why you can get a rockwell of 60 while maintaining the extreme hardness of those indivdual carbides. In a nutshell the Rockwell reading will tell you the hardness of the "matix" the carbide is suspended in NOT the hardness of an individual carbide.

Now as this applies to grinding it's those extremely hard carbides that wear out belts extra fast.

Now lets look at 52100's carbide forming elements 1% Carbon and 1.5% Chrome. The carbon will be no more of a problem than grinding 1084. At 1.5% we'll also have chrome carbides just not alot of them when compared to a typical stainless steel. I've never had an issue grinding ATS-34 after hardening so I'm not anticipating any roblems here.

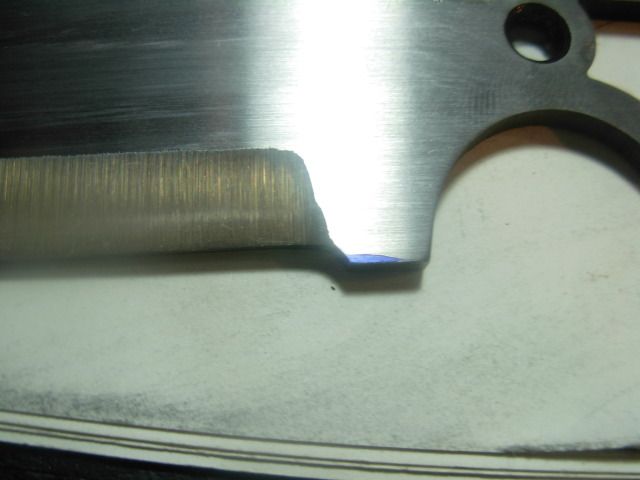
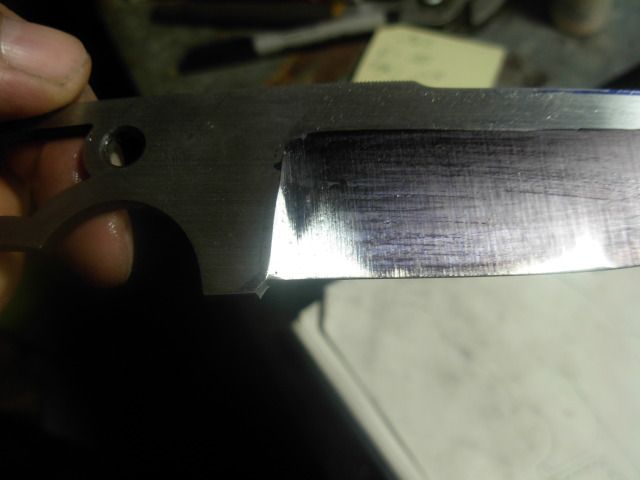
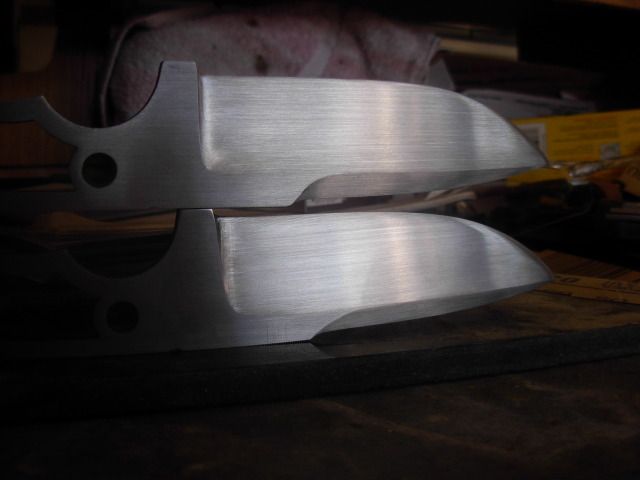
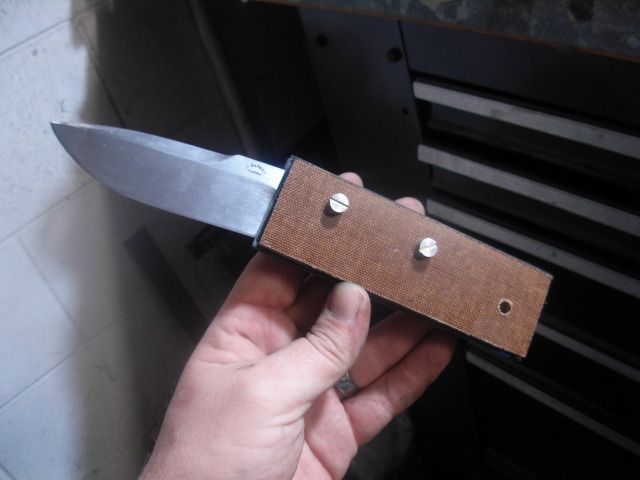
All this coupled with the fact that I gave these blades a soft (spring) back draw so the tang and upper portion of the blade is pretty soft in comparison to a typical blade hardness.

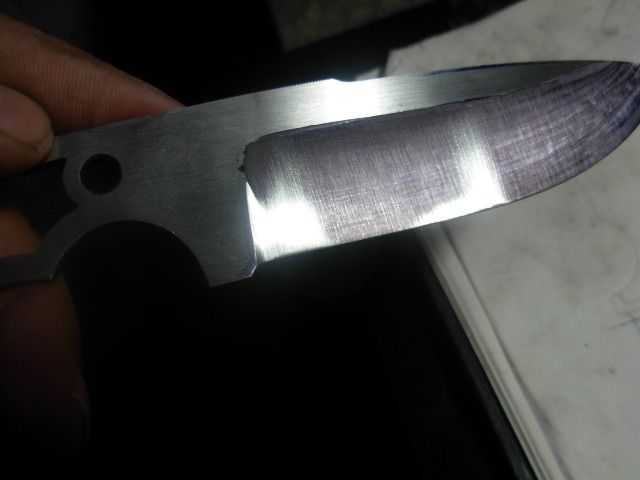
I'll report back after grinding these blades but my prediction is it won't be an issue at all.

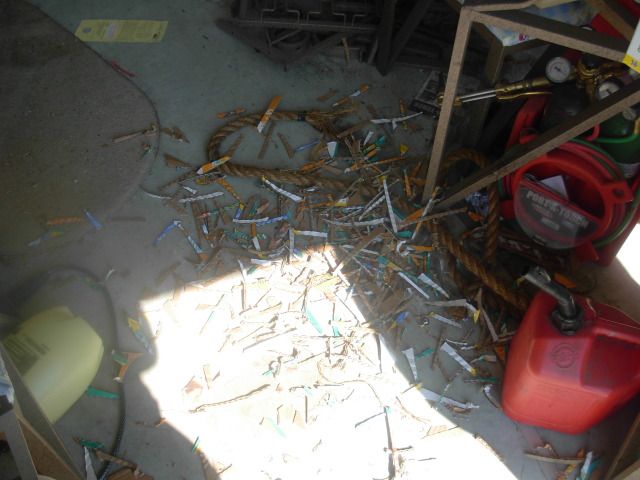
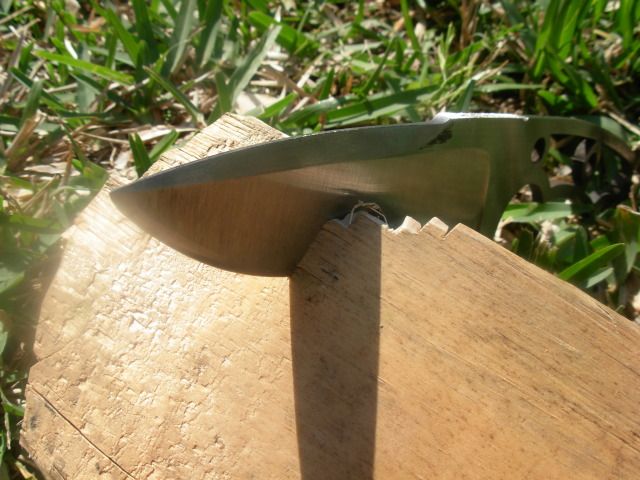
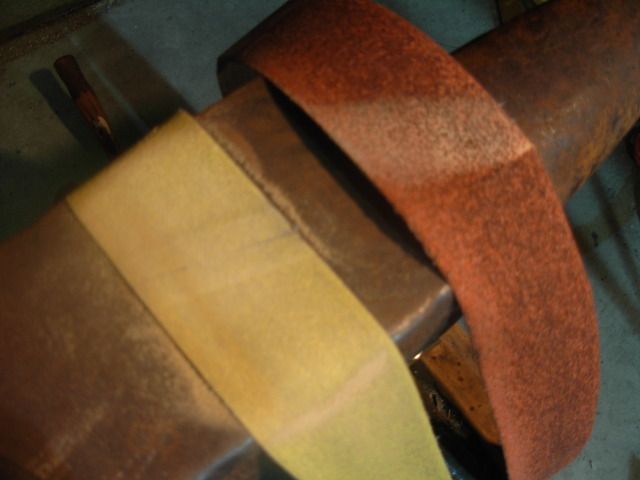
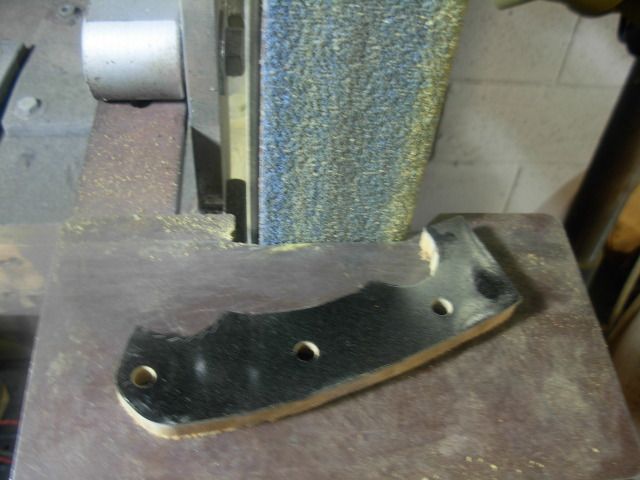
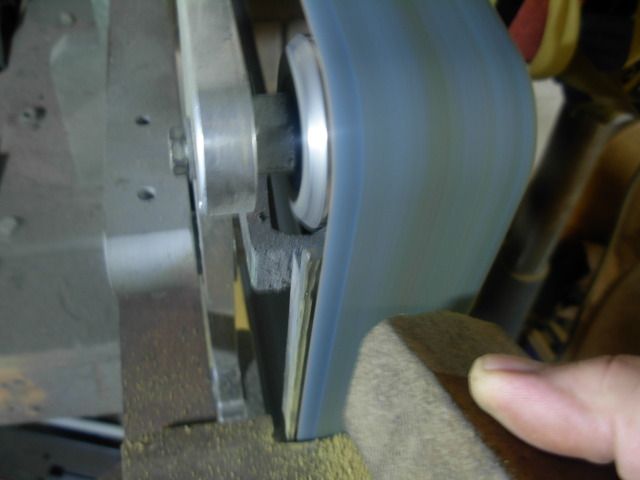
Knowing when the time is right to retire a belt helps too ;) ~It took me a looooong time to figure out that a worn out belt still has alot of texture too it and appears as though it'll still cut. And in fact it will still remove steel although requiring extreme pressure and with the added feature of building up extreme heat very fast~

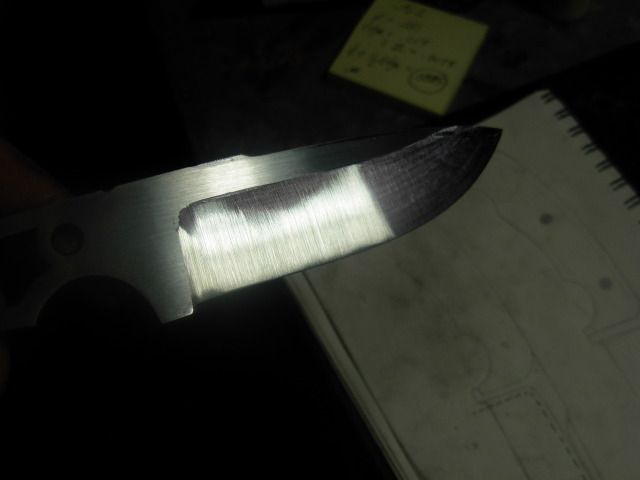
I think it's also worth mentioning while talking about grinding that as my skill and confidence in my grinding grew I can grind a blade MUCH closer to finished size with a rougher belt while finishing a small portion of the grinding with an 80 grit and using belts above 80 for finishing only. ( I define finish grinding like this- I'm not attempting to change the shape of the steel only refine the scratch pattern.

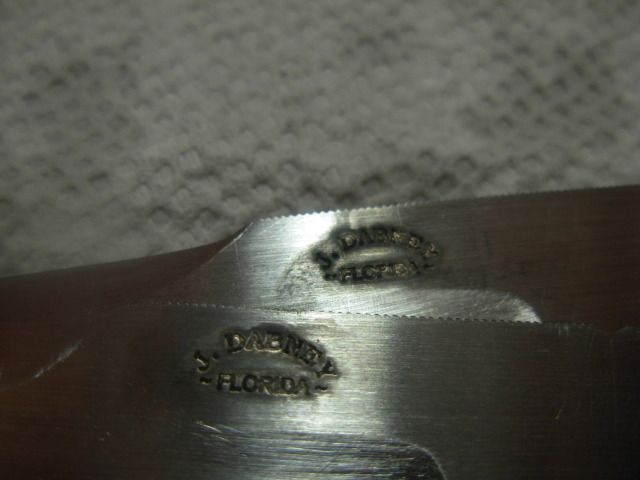
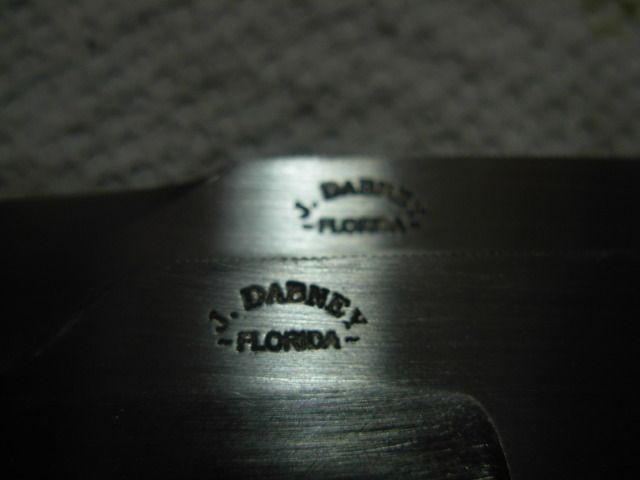
Thanks for the comments fellas- Josh
 
Does down time suck or what ! When I get into making a knife I like to stay focused and make steady progress till she's done but such is life. I got my belts and other supplies this week as expected and the wife's home from travelling so lets get to makin a couple knives shall we.

With the blades HT-ed we're ready to make some grinding dust but of course there's a little prep that needs done first like sanding all the oxides off the blades-
016-1.jpg


Next step is to cover the edge and spine of both blades with Dykem layout fluid. If you happen to still be using a sharpie for this pick up a bottle of dykem it's well worth it because it holds up to the heat and continued dunking in the water far better than ink from a sharpie.
017-1.jpg


Now we need to scribe some lines to assist in keeping the edge in the center of the blade and give us a visual refererence while grinding to help keep our grinds straight and parallel with the center of the blade. First we need to know how thick our blade is to determine the center
018-1.jpg


Now I want to grind my edge to .015 give or take a little. So we take half the desired edge thickness and add it to dead center. I wrote it out just so it's be easy to understand for folks who aren't accustomed to thinking in thousandths
019-1.jpg


I've yet to get a surface plate but it's on my list :3: till then I use this glass. I shopped all over for a deal on a height guage. The best deal I found was at Enco on this Import model when it goes on sale for 58% off. I think it was $86 and worth every cent. Zero the guage on the glass then come up to .0885, lock it in, scribe one side of the edge and clip, then flip the blade and repeat
020-1.jpg

021-1.jpg


I gotta run to the inlaws for dinner but I got alot of pics while grinding out blade #1. Stay tuned- Josh
 
I took a ton of pics while grinding. Learning to grind was something I really feared would have a steep learning curve and for a long time I considered it to be the most difficult part of making a knife. I'm finally to the point where I don't fear the grind anymore and rarely shank a grind so bad that it has to get donated to the wall of shame. That said I'm WAY out of practice though so we'll see how they come out.

Hogging- I basically want to get rid of excess steel while avoiding both my upper grind line and the plunge area. I also want my edge to be parallel with my scribe lines but not quite to them at this stage. I like a 50 grit Blaze belt for this purpose
022-1.jpg


I'll run a grind about 1/4" up the blade and roll out towards the tip of the blade
023.jpg


Then I'll flip to the other side and run a grind up to around 1/2" and leapfrog up the blade like this untill I'm at my desired height. Here's the opposite side about even with side 1 but I took this pic to show that I'm not concerned with the plunge and I'm staying well ahead of where my plunge will end up.
025.jpg


I'm trying to preserve the thickness of the blade right where the clip grind will be as much as possible. To do this I'll roll out the blade as I get closer to the tip. If I didn't do this the grind would stay more parallel to the edge like the dotted line
026.jpg


It's a little difficult roll out exactly the same on every pass. What I'll do is take a couple passes pushing my grind higher but go straight down the blade without following the belly or rolling out. Then I'll take a pass to blend the tip and belly back in. I had a hard time getting the light right to catch the small facets so I traced over them to show y'all where they were
027.jpg


Now that I've got a good portion of the hogging done I'll draw my proposed grind lines on just to help keep myself aware of where I'm at
029.jpg


And here we are hogged and finished with the 50 grit
031.jpg


Here's a shot of the edge showing that I've still got some meat at the edge for fine tuning and some gnarly plunge areas.
032.jpg


And here's a spine shot. Very little taper but pretty even which is just what I'm looking for
035.jpg


Before I get into grinding plunges in I always check this. This is a shot of the back side of the platen. Notice there's about 1/16" of belt hanging past the side of the platen at the top and zero at the bottom. This will cause you nightmares when trying to grind matching plunges so I check and adjust if needed. Loosen top bolt and tap the platen over until it's parallel with the belt
036.jpg

037.jpg


I colored the bevel with a sharpie just so we could see exactly where I'm removing steel while grinding the plunges in. I switched to a brand new 80 grit J-flex for this. I started by establishing a radius on the edge side of the plunge and begin pushing that plunge grind back to where I want it. I'm staying away from the top of the plunge on purpose right now.
038.jpg


As I'm working that plunge back I'll run it a little higher each pass until I'm as far back as I want and full height
039.jpg

040.jpg


With the plunge cut in I can finish grinding this side with the 80 until I've got my plunge, grind line, and edge thickness very nearly to final dimension and have something looking like this
041.jpg


Second verse... same as the first-
047.jpg

048.jpg

049.jpg


Now we're getting somewhere
052.jpg


Of course when your very nearly done and it's looking sweet... You gotta put a big ole whoop-de-doo in your grind line.
053.jpg


Somethin bout like this aught to do us fine
055.jpg

056.jpg


Boy this getting long so I'm gonna post up and take five but more to come later
 
I should mention that I did put on a new 220 for the last few passes on the bevels.

Time to grind in the clip. This is a fairly challenging grind for several reasons.

The grind is short in height. VERY little room for error !

To maintain the thickness at the grind line it takes alot of roll out over a short distance to get the spine thinned and keep from pushing the grind too low

I pretty much just free hand it in with an 80 grit J Flex as best I can. The grind on this clip sure isn't one of my best but a big part of grinding is knowing when to stop. You can see it's faceted and quite ugly but the important thing is I didn't push the grind lower than I wanted so with a little effort I should be able to clean this grind up pretty good hand sanding it.
057.jpg

058.jpg


Getting that clip cleaned up with some Norton 3x 220 grit and a G10 sanding block
001-5.jpg


Getting into this curved plunge can be challenging with a flat block so I get this last section of the clip with paper wrapped around a drill bit shank. This works great for alot of things but you do have to move the paper alot since it's only making contact on very small part of the paper.
002-5.jpg


You can see here that I didn't quite get it down to .015 at the edge. .002 variation over the length of the edge isn't too bad and will clean up beautifully with a convex edge
004-5.jpg
 
Now That I've got this sucker ground out I'll give you guys my thoughts

50grit Blaze ground this thing like butter. I didn't even use the fresh 50 on it because I just didn't need to.

The new 80 grit J flex same thing. It's not even wore out so I'll be using these same two belts on my second knife.

Dabney's thought's on belts-
I've tried a bunch of different belts. Zircs, Gators, Ceramics, Blaze, J Flex, Metaloy AO, Norax, and cork.
I like Blaze in 50 grit for rough grinding. They give alot of mileage and cut nice for a long time.
For me nothing cuts as well as a brand new J flex belt. I use these in 80 and 220 and love'em. A sharp 220 will clean up the 80 finish no problem and a clean flat grind will hand sand out to 220 pretty quickly.
If I want a belt finish I follow the 220 with a 400 J Flex then finish off with a 600 grit cork belt.

The thing I dislike about the "super belts" is that they last a long time but the don't cut like new for a long time. I prefer to trash a J Flex and have a belt that cuts like new even if it costs me a little more for that.

I tried out 120 grit belts a few times but just don't see the point when a 220 will clean up those 80 grit scratches so well.

Back to grinding my blade. This thing really ground easily which now has me wondering a little about my heat treat and how it's gonna perform. Something we should always do is grind our blades, get'em sharp and do some cutting with them to verify performance before we invest more time and materials in finishing it out.

I rough my convex edge with a 220 slack belt right to a burr then smooth everything over with a 400
005-4.jpg


Now we're shavin sharp so lets do some cutting. Got started with some cardboard
011-3.jpg


Anyone who's cut alot of 2x4's will tell ya this is your worst enemy. Knots will gladly point out potential weakness in HT or thin geometry. Too soft = flat spots on the edge. Too thin = edge deformation. Large grain would probably get ya some chipping at the edge
006-4.jpg


No problems thus far
007-4.jpg


Lets try some batoning across the grain
008-4.jpg


Batoned this 2x4 into stakes, sharpened them, bored a hole through one with the tip, and batoned one stake into pieces across the grain.
009-3.jpg


Going strong with no damage-
010-3.jpg


Why not baton through some romex
012-2.jpg


No damage from the Romex. I'd say we've got a winner here.
 
Last edited:
A winner it is,now lets see it finished :biggrin:

Great WIP Josh! Thanks for taking the time to post

God bless,Keith
 
Now that I've one of my blades ground I decided to start a little prep on my handle material so it'll be ready to go when needed. Although I got a free set of G10 liners from Boss I haven't used them yet but wanted to try it out so I picked up a sheet of black .060 for these knives and need toget the liners attatched to my scales

One thing I learned long ago is that handle material is NEVER flat. Although this micarta is close to flat there are low spots on all 4 of my scales
The scale on the left is as recieved. The one on the right is decked flat on 220 grit paper. The one in center shows the low spot after a little bit of sanding. I really want a surface plate but between the surface grinder and this $5 granit tile from Home Depot I can get thing flat so it just hasn't been top priority yet
013-2.jpg


Now I'm sure they're all flat
014-2.jpg


After flattening with 220 grit I score up all mating surfaces in a crosshatch pattern with some 60 grit paper
015-2.jpg


I clean all surfaces with alcohol in prep for glue up. Get my epoxy out. get out a popcicle stick to mix with, get out some sarand wrap, presize my clamps, and get a mixing cup. I picked up some of these mix cups when Boss had'em in a 400 pack and wouldn't give them up for anything.
http://www.usaknifemaker.com/mixing-cups-2oz-for-epoxy-paint-stain-finishing-50-count-p-3762.html

Once everything is ready mix up some epoxy and spread it on the scale then stick the liner to it and lay it on the edge of the bench. Cover with a piece of sarand wrap to prevent sticking then glue up the second one and place on top. Put a big chunck of mild steel on top and clamp it up tight.
016-3.jpg


That brings us up to where I'm currently at. Today will be a repeat of yesterday only on the second blade.

Take care all - Josh
 
Thanks for the comments fellas. WIP's are alot of fun. I really have learned alot from other's WIP threads so it's good to give back even if a little bit. I always try to remember that when I first started making knives I knew exactly ZERO about making knives and everything I now know was taught to me by other knifemakers. While some knowledge is gained through experience even that is usually just taking what others taught you and putting it to use.

I didn't take alot of pics today as I ground blade #2 as it's pretty much the same process as blade 1. Since I didn't need a bunch of pics today I thought maybe it would be interesting to record exactly how much time it took me to grind out this blade. As a rule I NEVER keep track of time while making a knife. It takes as long as it takes for me. Now that I've kept track of grinding this blade I return to following my rule of not keeping track :3:

1. 50 grit blaze 10:34 to 10:53 19 minutes
001-6.jpg

002-6.jpg


2. 80 grit J Flex 11:07 to 11:40 33 minutes Total= 52 minutes

I did wear out my 80 and grab a new one. This pic shows why I love those J Flex belts. A brand new 80 and a perfect pass. No way I could lay this grind with a 1/2 used ceramic belt.
003-6.jpg


3. 220 grit J Flex 11:59 to 12:03 4 minutes Total= 56 minutes.

This pic is 1 pass on the 220
004-6.jpg


4. clip (with an 80 grit) 12:29 to 12:47 18 minutes Total = 1:14

And here's the girls. Not identical twins but they're still very close :1:
005-5.jpg


Of course we need Maker's Marks
006-5.jpg


As etched
007-5.jpg


Cleaned up
008-5.jpg


Ready to begin working on the scales tomorrow night

-Josh
 
Last edited:
Looking really good Josh. Just got mine done today i finaly tore myself away from your wip to get some work
done. Great wip was fun and learned a few little things along the way. BRAVO!!!!!!!!!!
 
Well fellas it just wouldn't be proper WIP without at least one screw up.

I went out and un-clamped my scales and although I've glued a bunch of material just like this before this set decided to be difficult. Both scales have a graceful full length bow to them which I suspect was caused by a small piece of crud or ding in the benchtop. The lowest part of the bow is of course the center of the scales so these are a definate no-go. Even clamped up tight and epoxied on the ends of the scales would most certainly pull up eventually.
005-6.jpg


I have a trash can handy and could easily drop them in and move on but figure why not at least make an attempt to save them. First order of business is to get the liners off the scales. This is why I feel mechanical fasteners are a must on knife handles.

Grab liner with channel locks and twist. Hmmm
006-6.jpg


Pull gently to seperate...
008-6.jpg


And WhaLa Liners seperated from scale... WAY to easy !!!
007-6.jpg


Well I gues I'd better glue up the other set so I'll have something to work with in a little while. This time I put the steel under the scales and used a piece of rectangle tubing on top to keep everything flat-
011-4.jpg


Now that's done I can get back to fixing the 1st set. Here I'm taking that worn 80grit from grinding these blades and prepping it for the surface grinder. Slap it on the anvil and use this wore out Blaze to sand all the grains off the splice
009-4.jpg


Obviously the magnet isn't going to hold the micarta so I've got a piece of steel on the chuck to block them in. Then put a small drop of superglue on each scale and glue them tight against the steel. Fire up the grinder and take a .005 pass
010-4.jpg


This being my first time using corbys I figured I should check things out to see just how deep I wanted my counterbore to be.
With the corby srewed all the way together there is .335 between the shoulders so we need to end up with more distance than this from bottom of counterbore to bottom of counterbore. I also don't want the corby to be only threaded one or two turns so I threaded it to where I liked it and decided I wanted about .400 in this space will be the tang, both liners, and whatever's left below the counterbore in the scales which is what I want to determine
012-3.jpg


013-3.jpg


Since I'm not sure how much I'll be using corbys in the future I didn't wanna drop $50 on a counterbore just for this purpose but I did want to use them on this knife so I needed a different solution.

Just a block of wood chucked up in the mill and a 1/4" hole drilled into it and a little pice of tubing cut to go in the hole.
014-3.jpg


Removed the 1/4" drill bit and replace with a brand new 5/16" endmill I got off E-bay for $5 delivered
016-4.jpg


Since this is an experiment I figured maybe I should try it out on a pice of scrap wood first. I drilled a 1/4" hole through then fit the hole on the pin which is centered on the endmill
017-2.jpg


What do ya know it worked like a charm
018-2.jpg


Drilling the first scale
020-3.jpg


While it was still lined up from drilling I scribed around the tang which will help speed up profiling the scales
021-2.jpg


Put the scale on the pin and lower the mill until it just touches the scale and zero out my PoBoy DRO
023-1.jpg


Mill the counterbore to a depth of .185
024.jpg


Repeat for the second scale and check out the fit-up. Aught to work nicely I think
025-2.jpg


Check back for more tomorrow night

-Josh
 
Unfortunately not alot got done last night. Went to get our taxes done and stopped for a bite to eat so I got out to the shop a little late. Got a bit done and got a call from a bladesmith buddy about a trip to the range and a weekend visit and that was all she wrote. Anyhow lets get started-

Remember I scribed around the tang before so I could do this pre-profile on the scales. I keep this 36 grit Zirc belt just for hogging on handle material. For me this is just quicker and easier than fooling with the bandsaw. I run it full tilt and use alot of pressure for the hogging to avoid scorching the material. For the inside curves I just run the belt 1/4" off the platen and freehand it in close.
001-7.jpg


To get the placement on the front of the scales I use a straight edge to eyeball the placement in relation to the plunge then mark the edges of the scale with a sharpie to transfer my line to the scale side. Then line it up on the scale and scribe the "grind to" line
002-7.jpg

003-7.jpg


Hogging micarta will really load up the belt ! Keep your belt cleaner handy and use it often to keep the belt cutting instead of burning
004-7.jpg

005-7.jpg


Now this scale is fully pre-profiled use the corbys to allign the second scale and scribe around and then pre-profile scale 2
006-7.jpg


Now we can install the scales on the tang for our actual profiling. The reason I like to do this "pre-profile" is so I'm not searching for the tang while profiling and accidentally grind more of the tang away than intended.
007-7.jpg


Before starting profiling I square up my platen with the tool rest using a 123 block
008-7.jpg


This is a first for me but I want to profile my scales before they are attatched to the tang so I can etch the blade, tang and all, then assemble my handle pemanently. With the corbys sticking out of the handle it not too steady on the tool rest so I took my wood test piece and cut it to fit to help keep my handle flat on the tool rest for profiling
009-5.jpg


I'm usually more drawn towards thinner liner material so I thought I'd give this .060 a try and see how I like it. This is as far as I got before the phone rang but It gives us a little peek at hoe the liners are going to look. I should also mention that I'm using a 220 grit running slow for the profiling. Not alot of material to remove so it's pretty easy at this point.
010-5.jpg


Should have a bit more time tonight

-Josh
 
Moving on with profiling I used the platen for the top and back of the handle then used the top idler to get down to steel in the center section on the bottom
011-5.jpg


Here you can see that the idler isn't quite going to make it into the tighter curves toward the front and back but now I'm halfway there and will clean it up with the small wheel
012-4.jpg


Gittin-r-done with the 1" small wheel cleaning up the center section and both finger grooves
013-4.jpg


I thought I may end up with some rippling in that center section and have to clean it up with a slack belt but I got it pretty good on just the wheel
014-4.jpg


Cleaning up the notches to get a perfect match between scales and tang. Remember I drew the tang back with the torch so the 5/32" chainsaw file cut no problem.
015-4.jpg


016-5.jpg


I'm thinking that for any repetative cutting these notches will be down right brutal on the hands so attempting to improve that situation I took it back to small wheel to put tiny flats on all the sharp points. I didn't wanna go crazy grinding this so I slowed the grinder down to 5 htz (of a possibly 60 running wide open) and just gave it a single pass around that rear groove
017-3.jpg


While I had the file out I also cleaned up the notch on the spine
019-3.jpg


Now everything is final profiled except the fronts of the scales so I drew roughly what I was after then disassembled and put just the scales back together to finish the fronts off
020-4.jpg


Now the scales are 100% profiled. I'm again going to do a cold blue and bleach etch on these blades so I cleaned the blade with Acetone then again with dishsoap and water to prep for bluing then applied the blue with 4 q-tips held together
021-3.jpg


This is such a cool process ! Here we are at 1 minute in the bleach and you can see the heavy layer of surface rust already on the blade.
023-2.jpg


Comming out at 5 mintues
024-1.jpg


To clean up I hose it down with PB Blaster and scrub it out with steel wool then wash with soap and water then spray with Ballistol. Cleaned up with a 5 minute etch which is pretty mild so I went for 5 more minutes in the bleach after this
026-1.jpg


Token shot of it with the scales just bolted on for tonight's parting shot-
027-1.jpg


That all for tonight fellas- Josh :biggrin:
 
Last edited:
Before we get excited about gluing up I've only got the front faces of the scales profiled at this point. They need to be completely finished prior to glue up so I set the platen at this arbitrary angle to grind the face of the scales and also the little bottom tip ( where the scale doesn't quite reach the end of the "guard".
001-8.jpg

002-8.jpg


Now Just need to prep the scales and tang just Like I did to glue the liners to the scales
003-8.jpg


Before mixing up the epoxy a assemble everything need for the glue up so I'm not searching for anything I'm going to need
-Scales
-Blade
-Corbys
-Screwdriver
-Mix cup and craft stick
-Small c-clamp
-Q-tips
Off to the left of the pic is also a roll of paper towels and a second cup half full of alcohol for clean-up
004-8.jpg


As we all know glue-up can be a sticky messy adventure which is why it's important to have your clean-up stuff ready to go. It's near impossible to get pics of gluing up without a photographer handy so I'll be stuck with describing my process.

Before I started I alligned each scale on the tang and marked around the front with a pencil. This serves two purposes- 1. Let's me know where to prep sand. 2. Lets me know where to put the epoxy when gluing up

Mix epoxy and cover both sides of the tang with a thin even layer only getting close to my pencil line.

Then I put a thin layer across the front of each scale. This ensures I'll get full coverage with a little squeeze out on the front edge of the scales while preventing a giant glob of epoxy on the ricasso area in front of the scales. When large amounts of epoxy sqeeze out it gets on your hands, blade, outside of scales, clamps, pretty much everywhere. Been there done that so I shoot for a little squeeze out and not much more.

NOTE- Being a rookie with corbys I'm glad I assembled/disassembled this handle a few times during the process. What I learned was the fat part of the corby fits my counterbore VERY tightly. This is a good thing as it'll probably look seamless when finished but I could see where I might run into trouble while gluing up. Here's the issue- To get the threads close enough to start the 5/16" part of the corby has to be started into the counterbore a good little way. To get around this issue I pre-installed all 4 parts of the corbys into counterbores fully seated So I'd have an easy time getting them to thread together. Thought I'd mention this potential problem just in case there are other corby rookies following along.

To assemble I put the female corby side on first because the female side alligns with the 1/4" holes in the tang so it'll go right where it needs to be.

Then put a tiny dab of epoxy on the threads and get both corbys started then snugged them down, check to be sure the scales are flush with the tang and fully tighten both corbys.

Then I used two c-clamps for front and back to be sure I got the scales pulled down tight and any extra epoxy squeezed out as it should be. I could've installed the lanyard tube at this point but I'll be thinning down the back of the handle while shaping and want to wait till I'm closer to final dimension before putting it in so I used a clamp here instead.

Now we're glued up and ready for clean-up. I immediately swab around the entire perimeter with an alcohol soaked paper towel to get rid of the gross squeeze out. I also think this soaking wipe acts as a solvent to delay the epoxy from curing long enough to get thing spick and span.

Following that I do a more thorough version of the same with q-tips and alcohol.

And follow that with one more cleaning with acetone.

And here we are glued up and cleaned up
005-8.jpg
 
Tomorrow is going to strictly be an R&R Day so there probably won't be another update till saturday sometime.

Got my good buddy Rob comming up in the morning and staying the weekend. We'll be heading to the range for some rifle and pistol action then home for some dinner and brews for dessert.

Sure am excited to break in my freshly built AR :2guns::punk::gun_bandana:

Take care everyone !

-Josh
 
Back
Top