You are using an out of date browser. It may not display this or other websites correctly.
You should upgrade or use an alternative browser.
You should upgrade or use an alternative browser.
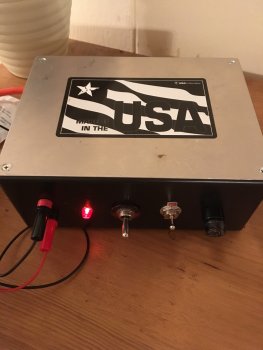
Etching machine build.
- Thread starter Daniel Macina
- Start date
Sean Jones
Well-Known Member
That looks good Daniel. I built one exactly like that a few years back. When I first turned mine on I blew a couple of the inline fuses in the unit. If I recall correctly I had something reversed. With the low voltage and amps any problems should be easy to fix.
After sitting on the shelf for a couple years, I've started using mine and it works like a charm! Yours should also.
After sitting on the shelf for a couple years, I've started using mine and it works like a charm! Yours should also.
Daniel Macina
Well-Known Member
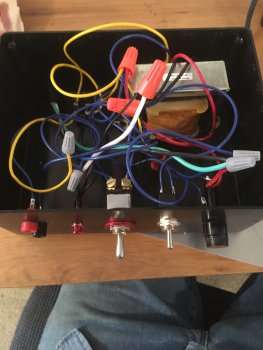
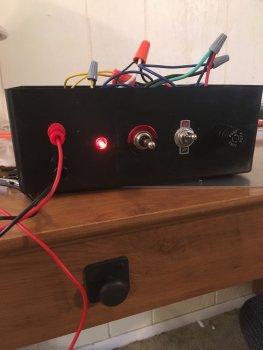
I keep blowing the fuse when switching to AC for some reason. A shower some dinner and then I’ll try and figure it out. On my last fuse
Gliden07
Well-Known Member
Nicer looking than the one I built. I went super easy. Got an old HO train transformer. Wired the the DC to one side of a DPDT center off switch and the AC to the other side. The 2 other leads to blade (positive) and other to negative or hand piece. Cranked the DC side all the way up, DONE! A tad under powered but it works good just takes a little longer.
Daniel Macina
Well-Known Member
With the fuse blowing when switching to AC wouldn’t that mean something is off with the bridge rectifier? Isn’t that what allows it to change between AC and DC? Someone also told me you have to swap the leads when you change between DC and ac is this correct?
Sean Jones
Well-Known Member
You shouldn't have to swap the leads. I'm not sure about the other part. It's been too long since I built mine to recall exactly. I think I had a couple of wires backwards. But which one's I don't remember.With the fuse blowing when switching to AC wouldn’t that mean something is off with the bridge rectifier? Isn’t that what allows it to change between AC and DC? Someone also told me you have to swap the leads when you change between DC and ac is this correct?
Sean Jones
Well-Known Member
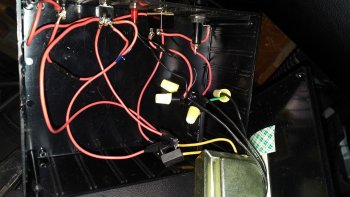
I thought about this some more and recall when I was having a similar problem I went back through the steps on the electro-etcher page one by one and verified that I had them hooked up correctly. Mine's a lot messier than yours but I opened mine up and here's a pic. Not sure if it will help as mine isn't color coded, etc. but might give you an idea.

Bill Vining
Well-Known Member
I used one of these for years until I tried to use it as a carbidizer. A little smoke and a few crackles later, it ended up in the trash. As far as an etcher goes, it always worked great.
Bruce McLeish
Well-Known Member
Bill , as an old electronic tech , the best lesson is this: if you let the smoke out of the components, they will stop working !.
Justin Presson
Well-Known Member
That's what I need to do too.I also built the same one. It should work great for you.
I'd like to build a better marker for mine, maybe out of graphite? Those of you that built your own, what kind of marker did you end up with?
Sean Jones
Well-Known Member
I could use a better one also. Mine is super simple. I took a small piece of wood drilled a hole in it ran a piece of 14 gauge wire thru it and soldered that to a brass plate. I have a bunch of felt and just wrap a piece of felt around the whole thing, wet it with solution and I'm ready to go.I also built the same one. It should work great for you.
I'd like to build a better marker for mine, maybe out of graphite? Those of you that built your own, what kind of marker did you end up with?
Gliden07
Well-Known Member
That's what I need to do too.
I took a 3/8" pcs of brass got a brass 1/4-20 screw of appropriate length had an old broken plastic gardening shovel with a plastic handle drilled through the handle and tapped the plate. Screwed the whole mess together.
Daniel Macina
Well-Known Member
Daniel Macina
Well-Known Member
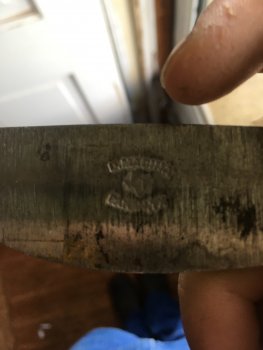
Yes I needed to clean off this piece of steel a lot better. Was itching to try it out.
Daniel Macina
Well-Known Member
Sean Jones
Well-Known Member
Looks good Daniel!
Daniel Macina
Well-Known Member
Thank you sir!
Mark Barone
Well-Known Member
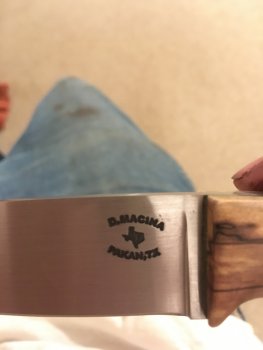
Wow very professional looking, both machine and mark. Did you buy the plans or does he offer them on a site?
Last edited:
Daniel Macina
Well-Known Member
Wow very professional looking, both machine and mark. Did you buy the plans or does he offer them on a site?
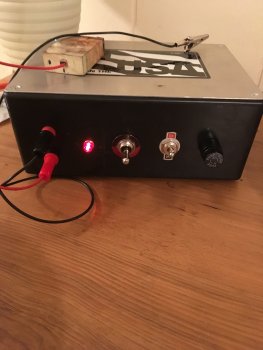
Thank you sir! Check out Chris Crawford‘s plans. They are actually Bob Warner‘s plans I believe but cleaned up and made easier to understand. I changed this one to 12 V instead of 24 because 24 was going to burn my stencils. Also some of my parts were numbered different so it was a bit of a challenge but Chris Crawford’s site will give you a good starting point. That being said though I didn’t really save any money so you might be better off just buying one.

