Couple of slip joint WIP

Thanks Tony that's pretty much what I had in mind though I hadn't thought of 4140 - that's a great idea. Did you ream the hole for the bearing and rod to go through?
 
RYAN, I suggest you ask your supplier about the best method. I also think Bladsmith would have some good ideas perhaps.
 
Dave, at first I reamed the the hole than I couldn't get some of the bushings to fit so I lapped the hole with a lap and some 600 grit compound until it was a little oversize. The way that these laps are made is the little screw on the end can be tightened up to go oversize or undersized so a set of micrometers is a must with these little buggers so can be some of the problems that Ryan is having with the bushings not fitting. I have a couple of these and keep them separate until I got them mixed up and screwed up a blade now one is pink (only color nail polish I had in the shop at the time).
Another thought is the 3/32 pins these can be a lot of trouble to deal with, 3/32 measure .0938 and all of the pins that I get from different suppliers measure anywhere from .094 to .096 so am thinking a getting special sized reamers from MSC.
I put the preload on my springs on the bottom of the spring this is the way that Terry Davis does it in his book and from the few times that I have called him it is still the way that he does it. I do it this way because it's the simplest way.
I put off making slipjoints for a long time because I was afraid of them, now they are the only ones I make. The first time I met Bill Burke a few years ago he was working on a slipjoint and he told me stay away from them, every time since that I have been in his shop that's what he messing with. They are addictive and every time I get pissed off at one and go to work on something else give it another 30 minutes and it's back in my hands and nothing else in the shop ever gets done.

Sorry for the rambling but all I can say for the guys that want to do it is to get out into the shop and do it. You will find all of the ways there is not to make one but it can be fun.

Tony
 
Thanks Sean, that helps a lot, and it's about what I'd expected. I was really wondering about the liners too. This is a great thread. Naturally, I don't have any stock for a project like this so in addition to a few new tools I need to order some steel! I love steel though, and tools.

Presumably you guys solder the bolsters onto the liners. Lately I've had a lot of trouble getting the surfaces clean enough for the solder to flow; don't know what my problem is because years ago I was a soldering fool. But not anymore. I think Tony Bose tins the surfaces and uses a pencil to mask the solder. That's what I would try unless you guys have a better idea. I'm sure open. How do you clean your surfaces?

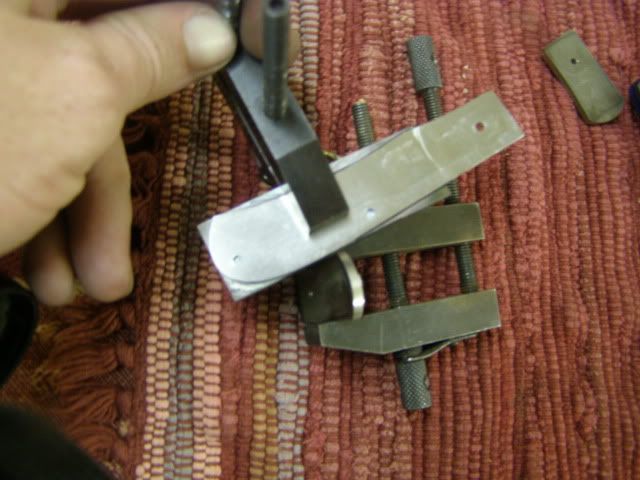
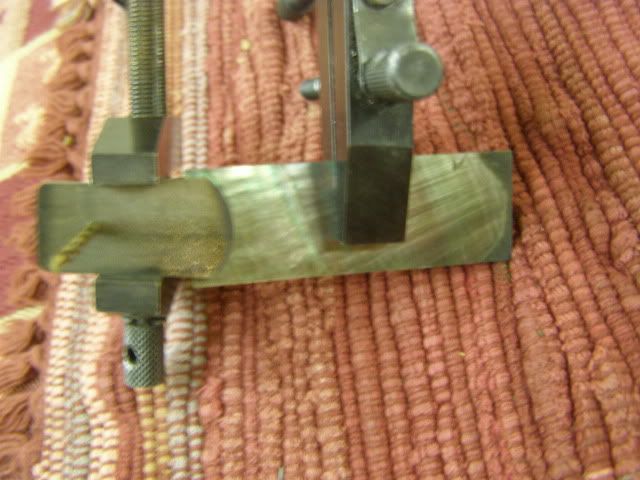
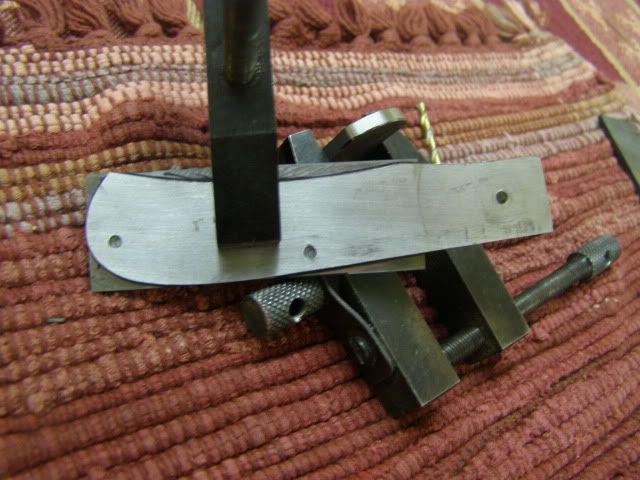
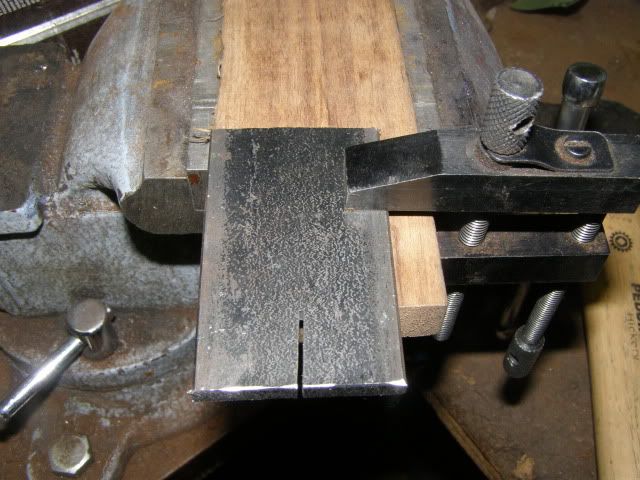
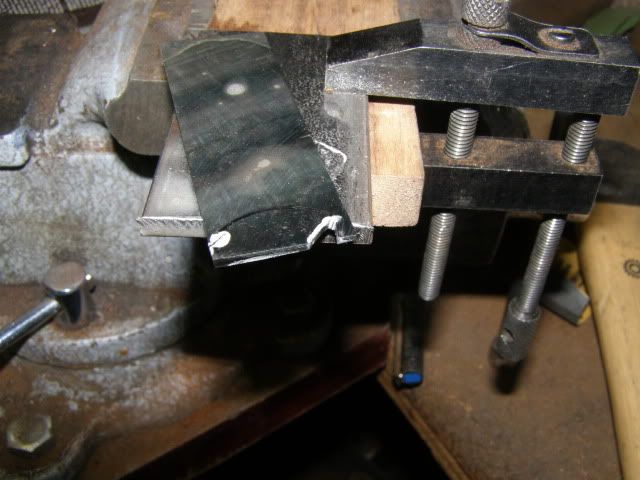
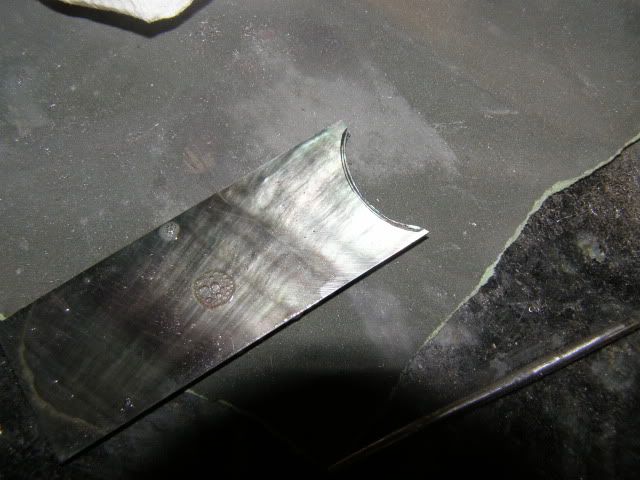
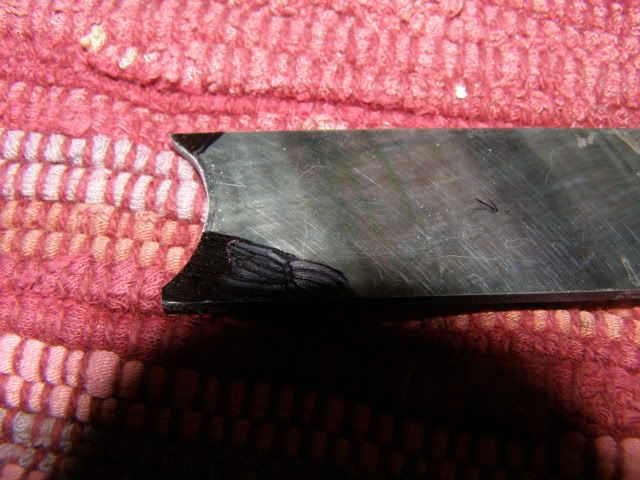
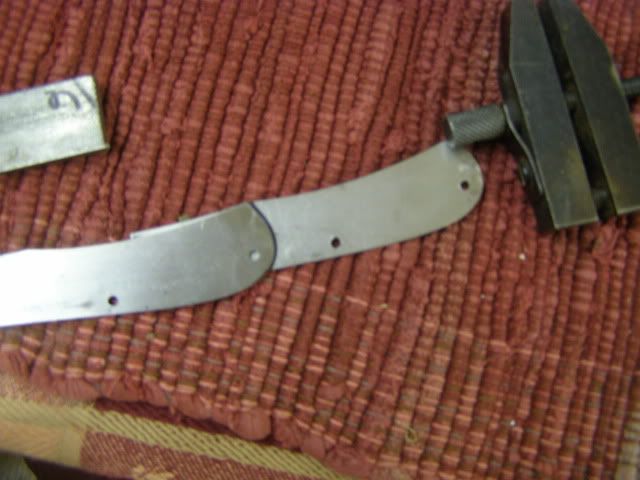
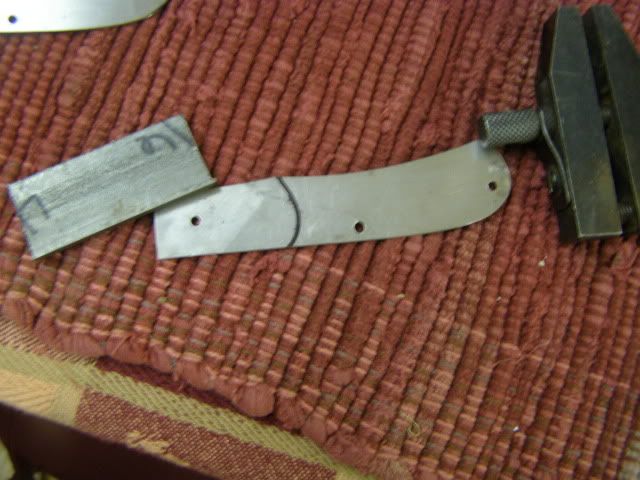
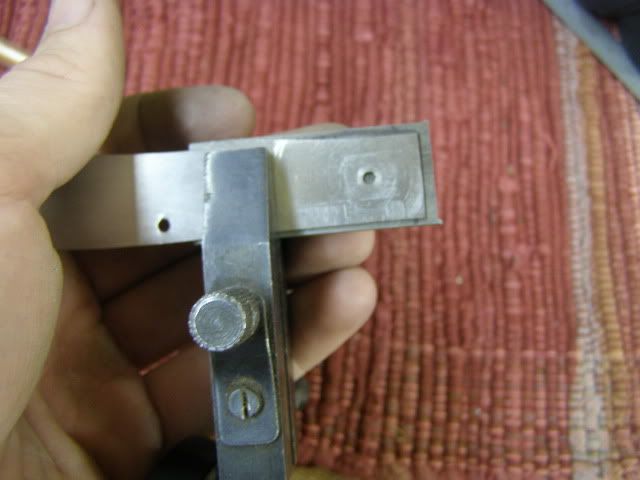
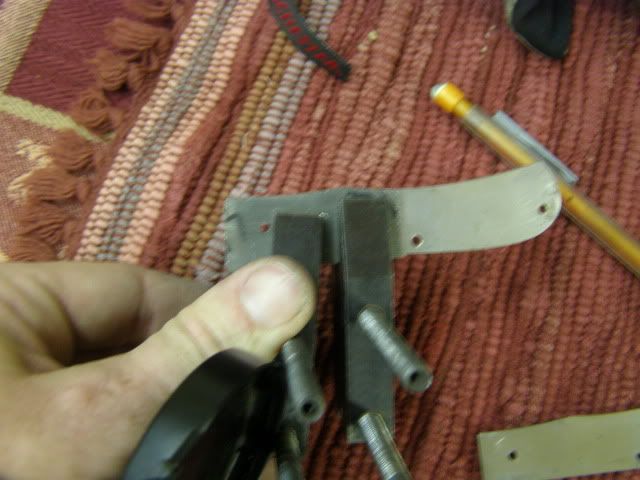
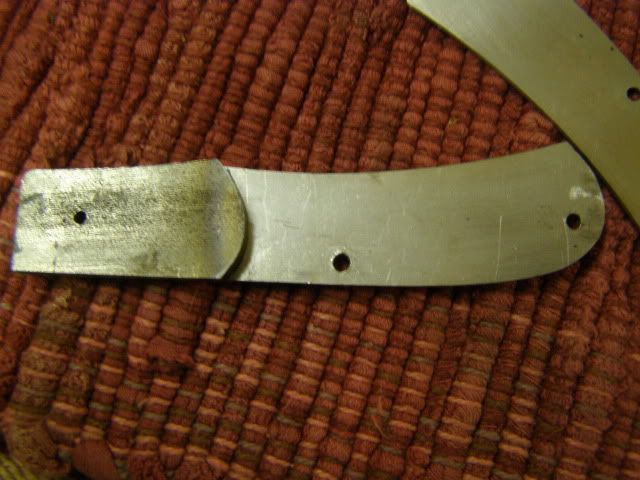
Also, it'll come up soon but I'm wondering how you hold onto the blade while grinding. Other than building a jig of some sort to clamp it to I can't think how that would work without a handle to hold onto. Only having made fixed blades, I'm a bit nervous about grinding a) such a small blade and b) one without something to hold onto it with. :)

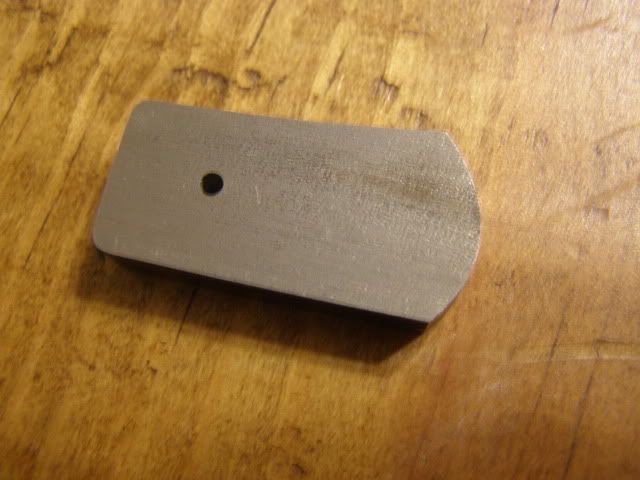
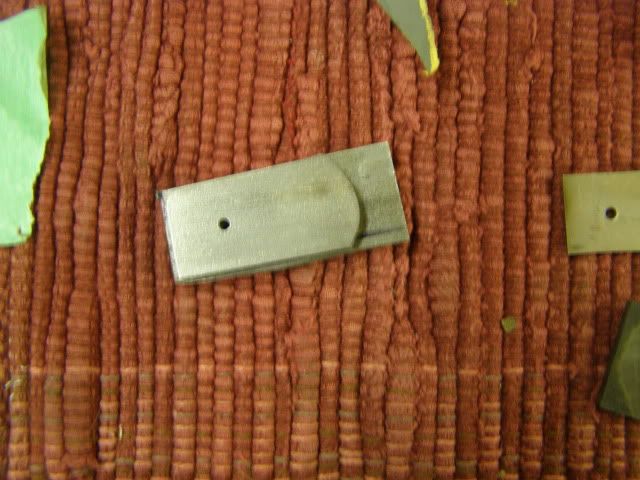
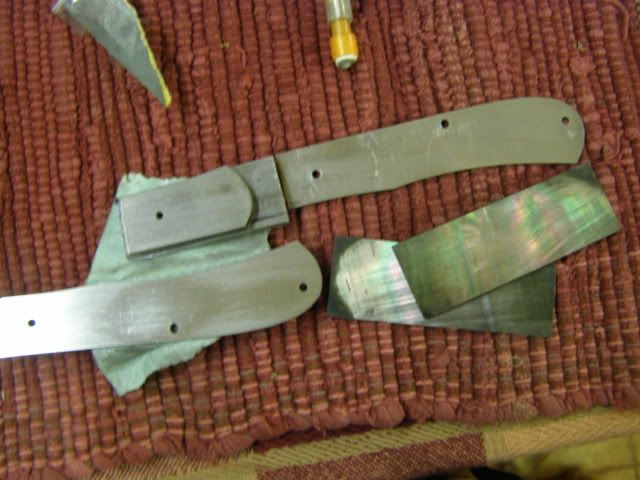
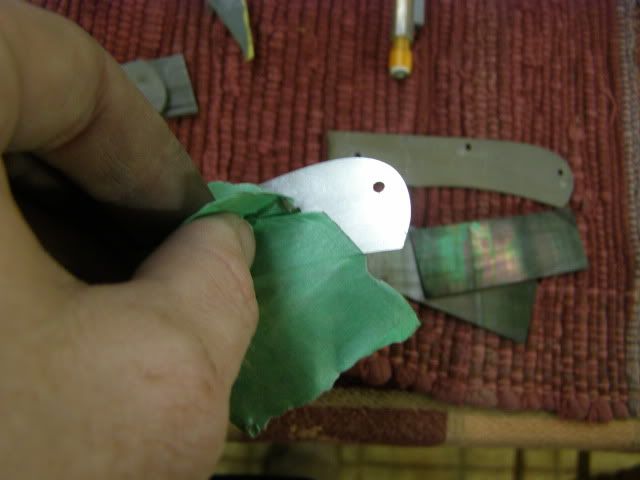
This weekend I made a couple of manicure knives (don't laugh! :D). My brother is my computer savior, has spent untold hours dealing with my various machines, so when he asked for something to replace his pocket knife for this task I got to it. It was a fun project but the blades are tiny - half an inch long - and I did not grind them well. That's sobering.

Dave,
Time for you to jump in and get your feet we, tell you what, Ive got some knives ready for HT right now that are all sold, but I will be cutting some more out next weekend, If you want Ill cut you out a blade and spring and trace out the liner pattern, I think I have some .040 ss I can send you for liners too. All you will need is to get some 1/8 416 SS for bolsters.

As for attaching the bolsters, I have spot welded which is quick and easy and it works well, the tradeoff is you have the holes left from the welding on the inside of the liners. I have also soldered using the same method as Tony bose, this works but takes some practice. (And the solder will not cross the pencil line) Chris Crawford has a little different method in his online tutorial I havent tried it yet.

Holding the blade is a little different, I have grinding jig that holds the blade and creates a handle to hold. If you think of a filing jig with one of the peices shaped into a handle. I know that sounds as clear as mud. Ill try to get you a pic later.

Hope this helps

Sean
 
As for attaching the bolsters, I have spot welded which is quick and easy and it works well, the tradeoff is you have the holes left from the welding on the inside of the liners. I have also soldered using the same method as Tony bose, this works but takes some practice. (And the solder will not cross the pencil line) Chris Crawford has a little different method in his online tutorial I havent tried it yet.

I have tried both methods and much prefer the Tony Bose method. It is more effective across different materials (Stainless and Nickel Silver) where as I couldn't get Chris Crawfords method to work on Stainless

Alistair
 
Dave,
Time for you to jump in and get your feet we, tell you what, Ive got some knives ready for HT right now that are all sold, but I will be cutting some more out next weekend, If you want Ill cut you out a blade and spring and trace out the liner pattern, I think I have some .040 ss I can send you for liners too. All you will need is to get some 1/8 416 SS for bolsters.
Sean

Sean that's absolutely cool. PM about to be on its way. :D You guys rule.
 
Well it's inevitable guys - I'm going to be building my first slippie here in a while. I'd better get my orders knocked out so I can focus on the new project! :D

Thanks for everyone's help. This is one of the best threads I've ever read. We sure have a great community; makes me think of the open source software folks. Working on a software project must be a lot like this. Very cool.

You know of course we expect pics.cool 1;)
 
Way to go Sean!!! 2thumbs

David, you will do fine once you get started. Post lots of pics :D

Honestly I can't wait to get started. I'm just afraid it's going to be as addictive you you all say it is. I'll start giving up sleep like the rest of you!

And yeah, I'll take pics. Don't worry. Just so I can take them to work a try to figure out what's next if nothing else. :)
 
Honestly I can't wait to get started. I'm just afraid it's going to be as addictive you you all say it is. I'll start giving up sleep like the rest of you!

And yeah, I'll take pics. Don't worry. Just so I can take them to work a try to figure out what's next if nothing else. :)

Ill tell you Dave, since I started them I had a customer order a skinner for his son and it is the first time making a knife felt like work. I really wanted to be working on a slippie. Maybe its just me. I guess it may be because I have liked folders since I was young.

Sean
 
[ I'm just afraid it's going to be as addictive you you all say it is. I'll start giving up sleep like the rest of you!)[/QUOTE]

quoted for truth lol

Heres a few more pictures. Started cutting and shaping bolsters. Didn't quiet get to the point of spot welding them.
When Mr. Hurst contacted me about this knife, he wanted the bolsters to have the same shape on the end as the end of the knife. He sent me a drawing of what he wanted.
Here I'm just placing one liner over the other to get the right shape for the bolster. I played with it some because I didn't want to have to cut and shape the blacklip to where it had two very thin points going around the curve.
knives762.jpg

knives763.jpg

Cut a piece of 416 and clamped it to the liner. It was way oversized which is the way I do most things the first time. Drill the hole then started shaping.
knives765.jpg

During shaping
knives766.jpg

Here the curve is very rough shaped.
knives767.jpg

Here I superglued another piece of 416 to the rough ground bolster to get it shaped close to size.
knives772.jpg

Shows the liners, bolsters, and the blacklip I'll be using
knives768.jpg

Started getting the liners ready for welding as well by flat sanding them on the granite. Used masking tape shaped like a "T" to help hold onto them.
knives769.jpg

knives770.jpg
 
You're a tease man! :D I want to see you cutting that pearl. For what it's worth, I've cut pearl once. I used a jeweler's saw with I think a #4 blade. That's fairly coarse, but it still took quite a while to cut the stuff. I lubed it with water thinking I'd keep the dust down but friction dried it quickly. I'm not sure what a better lube would be but might try beeswax. It was very slow going. I made a stake out of a window shim, and it was a bit too flexible. I think you want a fairly stiff stake with not much of a cutout for the saw blade, in order to support the pearl at all times. I didn't break mine but I did freak a couple times when the saw got jammed. ;)

Good luck Ryan and have fun. This is a great thread.
 
Dave I'm sure the pucker factor is going to be high when I'm cutting that stuff lol.
Sean Mr. Hurst is going to engrave them, should have plenty of canvas.
 
Don't worry Ryan, it'll go okay - just support the tips when you're cutting close to the edge! :D I'm really looking forward to Ken's engraving. Everything I've seen (all on Bruce Bump's stuff) has been so freakin beautiful it'll make your chest swell up. Fantastic. To have someone like Ken Hurst engrave something you made is really an honor. :cool: That's just cool as cool can be.
 
Don't worry Ryan, it'll go okay - just support the tips when you're cutting close to the edge! :D I'm really looking forward to Ken's engraving. Everything I've seen (all on Bruce Bump's stuff) has been so freakin beautiful it'll make your chest swell up. Fantastic. To have someone like Ken Hurst engrave something you made is really an honor. :cool: That's just cool as cool can be.

When he called me I was extremely excited. I just hope the knife is half as good as the engraving.

Actually cut some blacklip tonight!
First things first. I got the bolsters shaped and polished on the end that meets the pearl to 600 grit. This took a little time to line everything up, but I got there.
knives774.jpg

Didn't snap a picture but used a benzomatic to heat the bolsters enough to break the superglue bond.
Next I positioned the blacklip on the liner like I wanted it to fit. THere's a little bark on one end, but that end is thicker and when I grind off the bark it will look good from the test spot I tried. Plus 90% of the bark will be excess cut off.
knives778.jpg

Now I placed the bolster on the liner like I wanted it and placed a drill bit for a pivot pin. I used a second clamp to keep it lined up with the liners.
knives777.jpg

I traced around it with a sharpie. I did around the bolster then flipped the knife over and traced around the liner. Gives me two reference points when fitting it up.
knives779.jpg

knives780.jpg

Next I set something up to saw the pearl on. I used mild steel and cut a slit in it that the jewelers saw would fit into. Clamped that to a thick piece of wood and put it in the vice.
knives782.jpg

Now onto cutting. I'm not sure what size the blade was in the jewelers saw because the blades I have were given to me and I have never ordered any.
knives783.jpg

I used Windex for lube and didn't seem to have any problems. Or none that I'm aware of :D
In this next picture you can see I didn't get real close to the line on one part. I sanded that down some later to help rough fit. I also had two small wings on each side of the bolster cut out. I went ahead and cut them off, they were small and I figure one wrong move and I would hit one and break it in the wrong spot.
knives784.jpg

I can't find the picture of the bolster clamped up and the pearl next to it, but it obviously needed some sanding work. I used a sharpie marker to mark where it touched and I needed to remove the material.
knives786.jpg

This is what I'll be working on the next day and then I have a two day vacation coming up. My bride and family bought me a two day bowhunting trip for a ram. She said I always take people hunting for work so she's letting me see what the other side is like :cool:
 
Ryan I love watching you work. You are meticulous. This is good stuff!

Sounds like you have an interesting day job too man. Cripes, good living must be worth it! :D
 
Back
Top