You are using an out of date browser. It may not display this or other websites correctly.
You should upgrade or use an alternative browser.
You should upgrade or use an alternative browser.
Blisters in my Forge?
- Thread starter Archer Moon
- Start date
EdCaffreyMS
"The Montana Bladesmith"
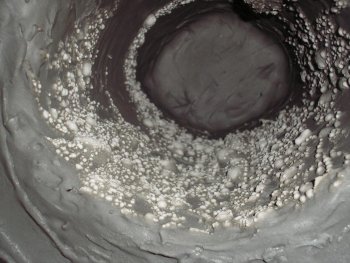
You didn't let the furnace cement dry. (I can see the moisture in the lower left of the forge photo) Anything used in a forge that contains moisture must be allowed to completely cure before firing the forge. When I reline one or more of my forges, It's generally at least a week, with a 100watt ligh bulb hanging inside it before I can even think about firing it.
The thicker you apply anything wet, the longer it must cure.
The thicker you apply anything wet, the longer it must cure.
Archer Moon
Well-Known Member
Thanks Ed. Is there any thing that I need to do it fix this? Do I have to get rid of the blisters and reline it?
EdCaffreyMS
"The Montana Bladesmith"
You MIGHT be able to gently scrap the inside to break all those bubbles, then once everything is dry, but another LIGHT coat over the inside.
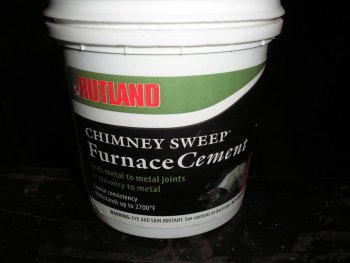
Gotta ask.... is the furnace cement covering Kawool? If so, then you applied it way too heavy. If your going to coat another insulator (ceramic blanket) the best way to do is to take the furnace cement, ITC, or whatever your using, and thin it down with a LITTLE water until it's about the consistency of latex paint. Spritz the inside of the kawool with water in a spray bottle (old windex bottle of something similar) then use a cheap paint brush to "paint" the coating onto the kawool. It will still take about 3-4 days for it to cure, but it will take a lot less time than the heavy coating in the photos....plus you won't have to use nearly as much of whatever you coat with.
Gotta ask.... is the furnace cement covering Kawool? If so, then you applied it way too heavy. If your going to coat another insulator (ceramic blanket) the best way to do is to take the furnace cement, ITC, or whatever your using, and thin it down with a LITTLE water until it's about the consistency of latex paint. Spritz the inside of the kawool with water in a spray bottle (old windex bottle of something similar) then use a cheap paint brush to "paint" the coating onto the kawool. It will still take about 3-4 days for it to cure, but it will take a lot less time than the heavy coating in the photos....plus you won't have to use nearly as much of whatever you coat with.
Wayne Coe
Forum Owner - Moderator
Opposed to Ed's way I mix the castable to the consistancy of mortor and put about a 1/2" casting over the Inswool. I let it set overnight to set well, then put it in my convection over on 500 degrees for a couple of hours. When you open the door to the oven the steam will hit you in the face. Then I mix the Plistix to a soupy consistancy and paint it on with a cheap paint brush, let it set for an hour or two, then put it back in the oven for another couple of hours. Then when you open the oven door the steam shouldn't hit you like before.
This makes a good tuff forge that you aren not going to poke holes in, even my teenage students don't.
If you don't have the ability to put the forge in an oven then you will have to let it cure for a long time. Using the light bulb, or a propane torch, or lighting the forge with the air intake closed will work. But don't light the forge with the air open. It will get hot enough to vaporize the moisture still in the casting and cause the bubbles or cause the casting to spall (like you have seen concrete when it froze before it cured.
Archer Moon
Well-Known Member
After doing a lot more reading and talking, I found out that the furnace cement is not going to do what I need it to do. So, I took my forge out, lit it, and had fun. Lots and lots of fun. I will be forging a blade out this summer.
The furnace cement do melt down. I will be getting in there with a hammer and chisel to brake it away and replace it with the right stuff.
I did get one of my blanks hard. Very, very happy about that! I did get a practice blade from Andy Franko on Monday. I did some moving on that one. Very fun! I am very happy tonite!
I do not care about the cement not working. I was very cheap. My forge does work very well. Need longer tongs, glad I had some welding gloves!
I hope to get some pics tomarow, left my camera at work today.


