The Newell .45 cal front loader

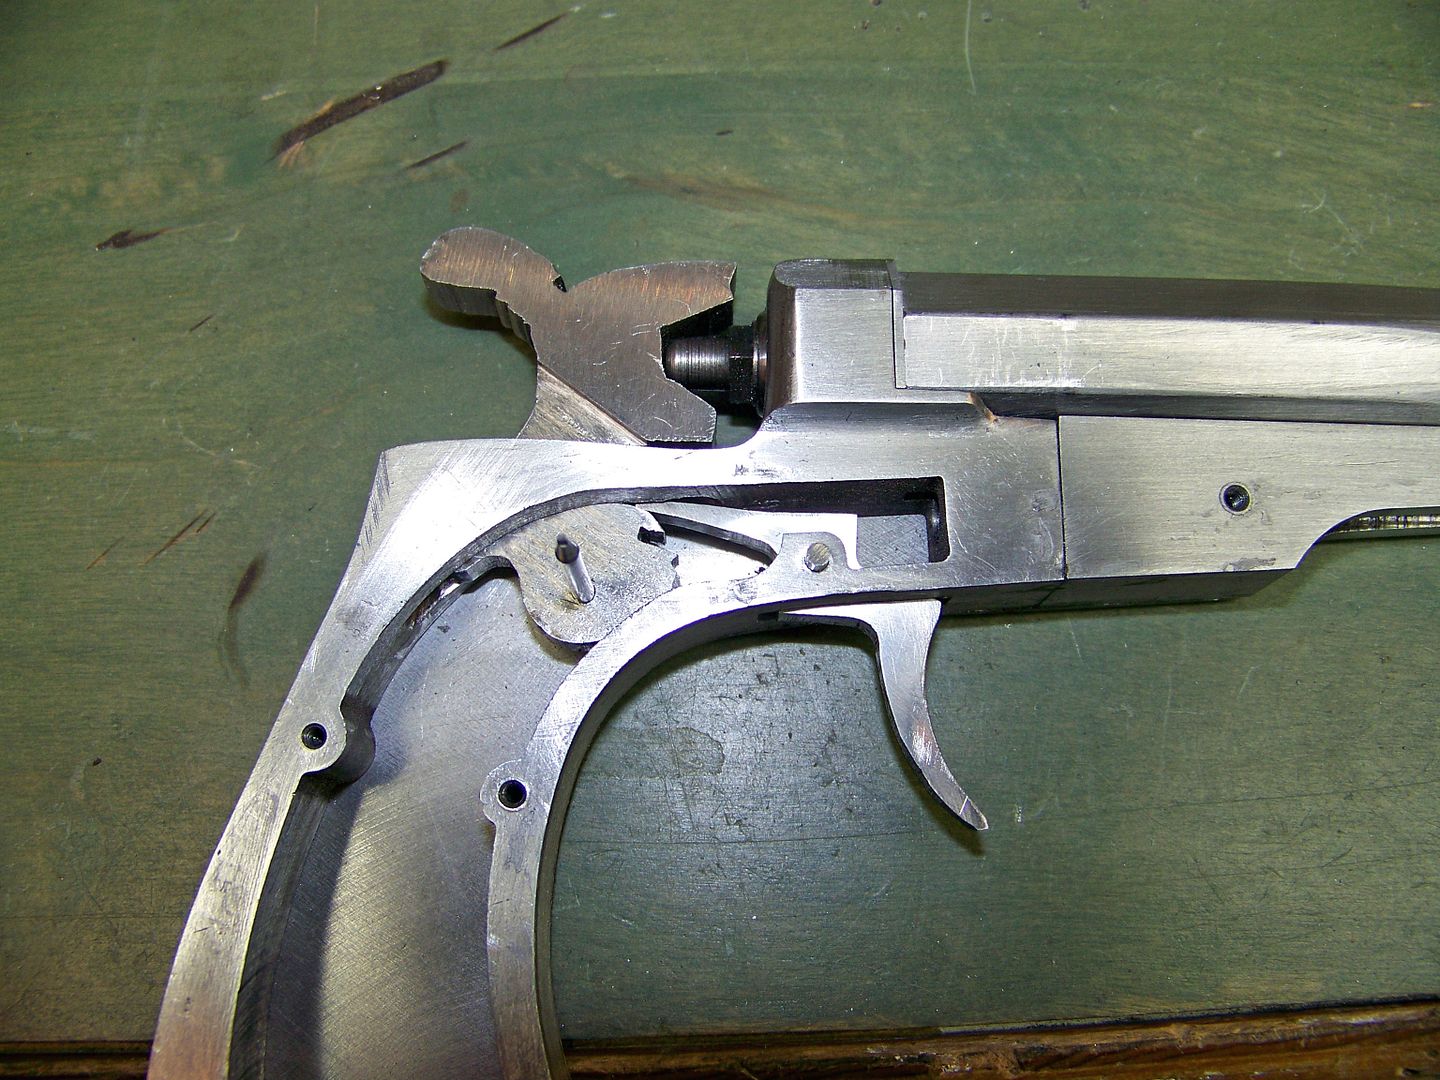
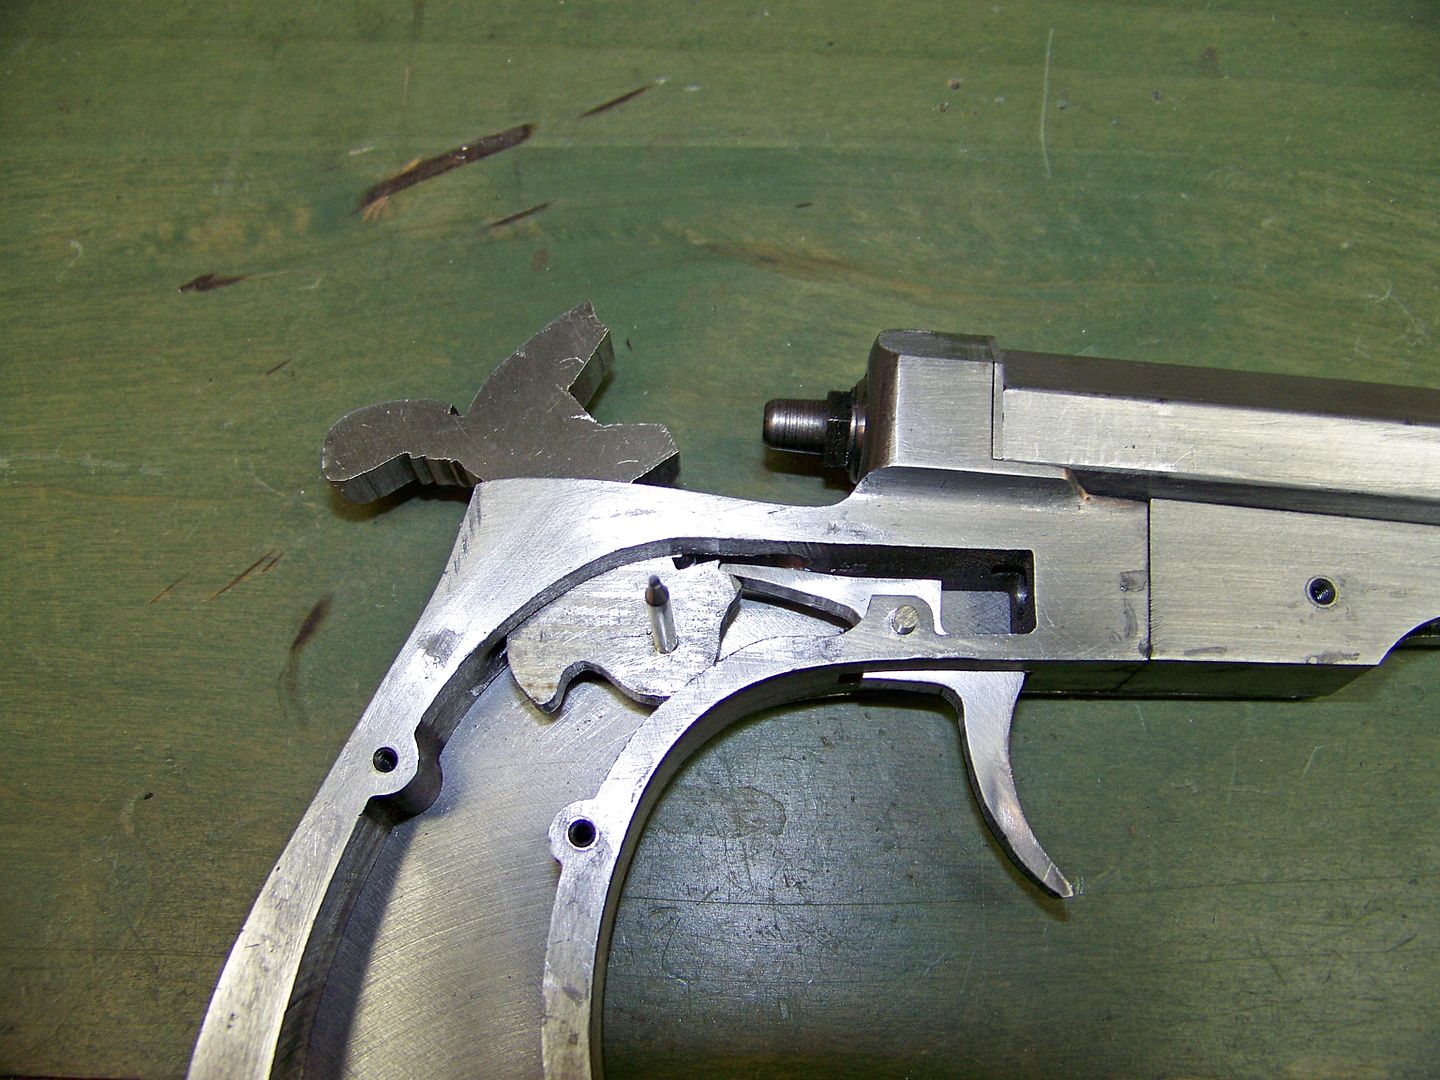
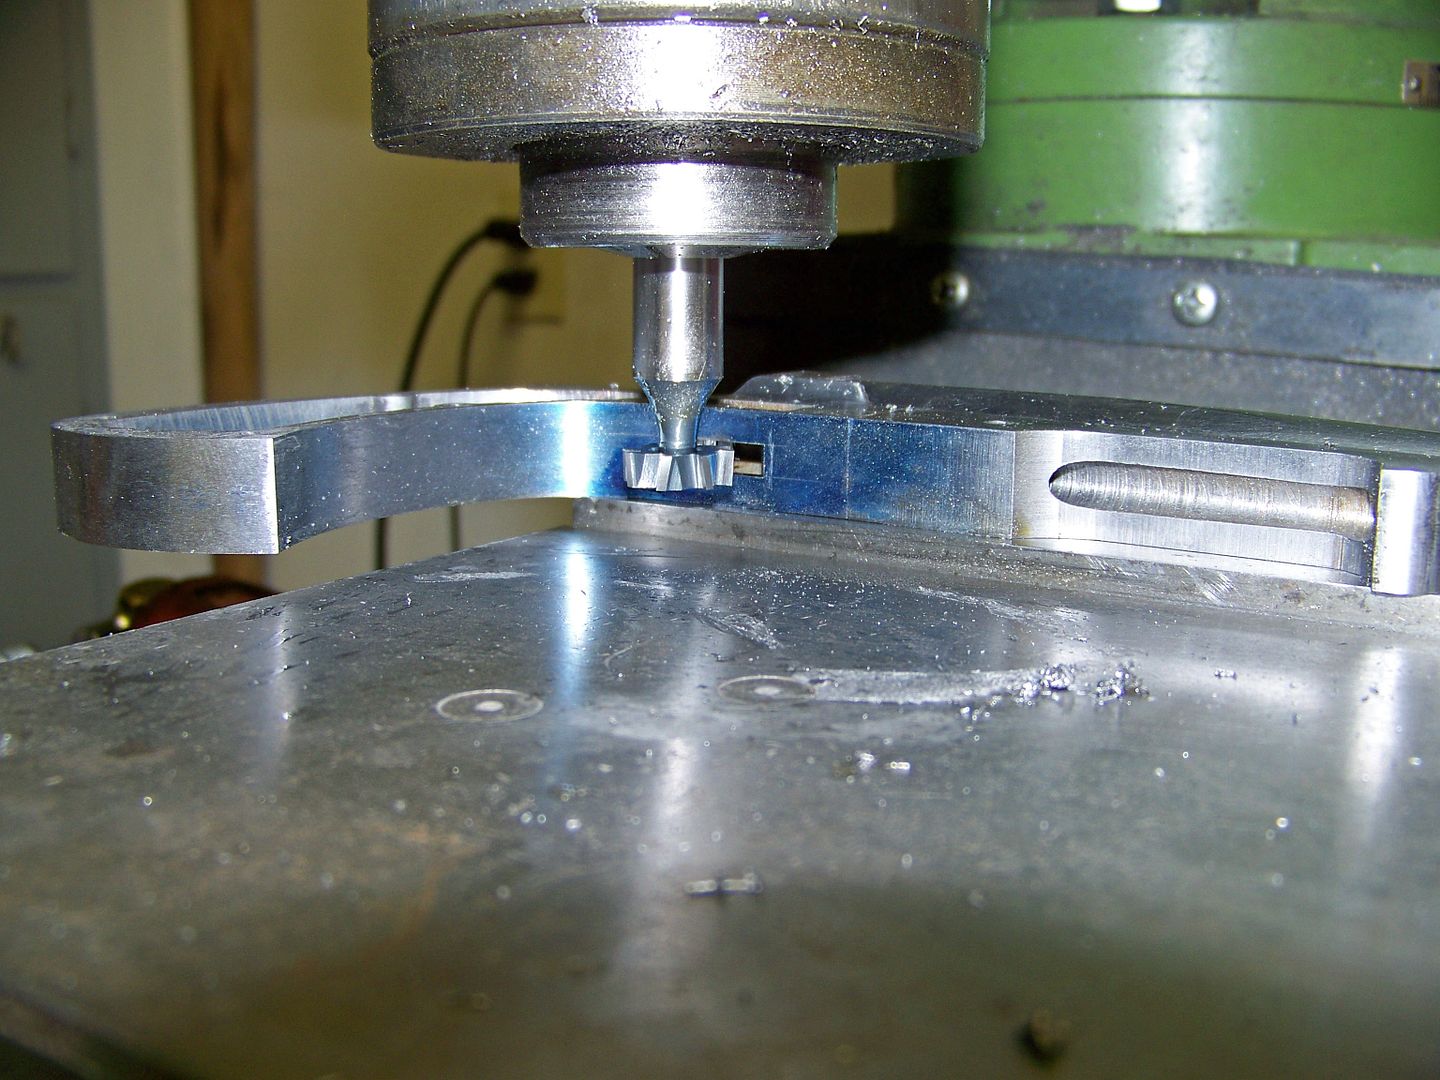
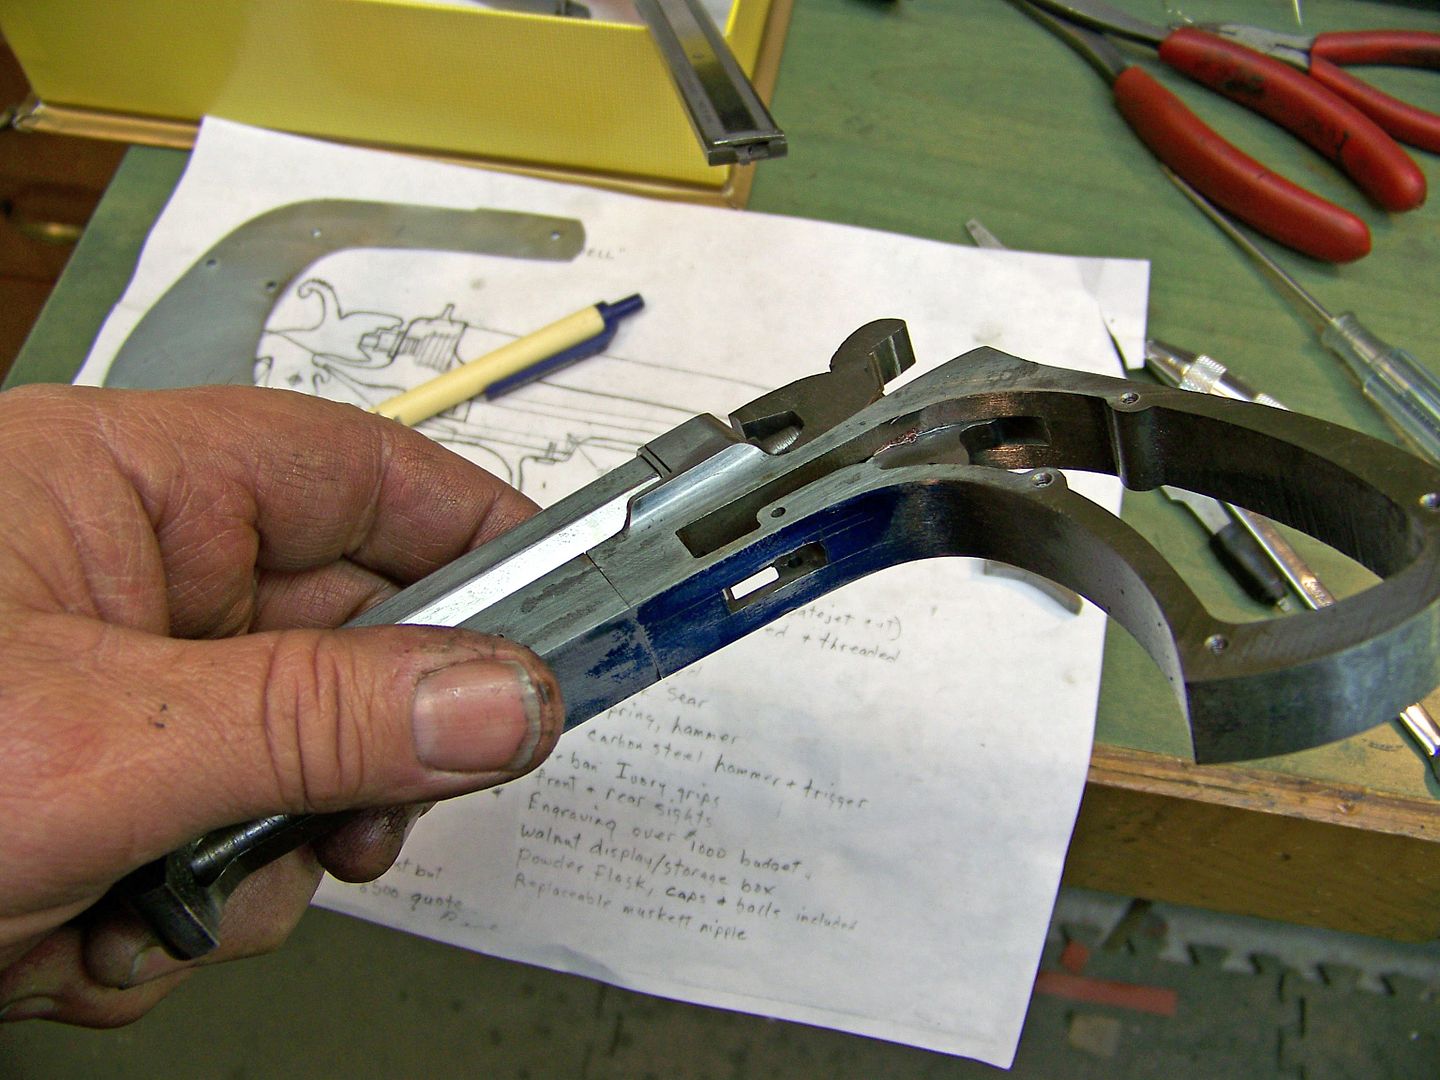
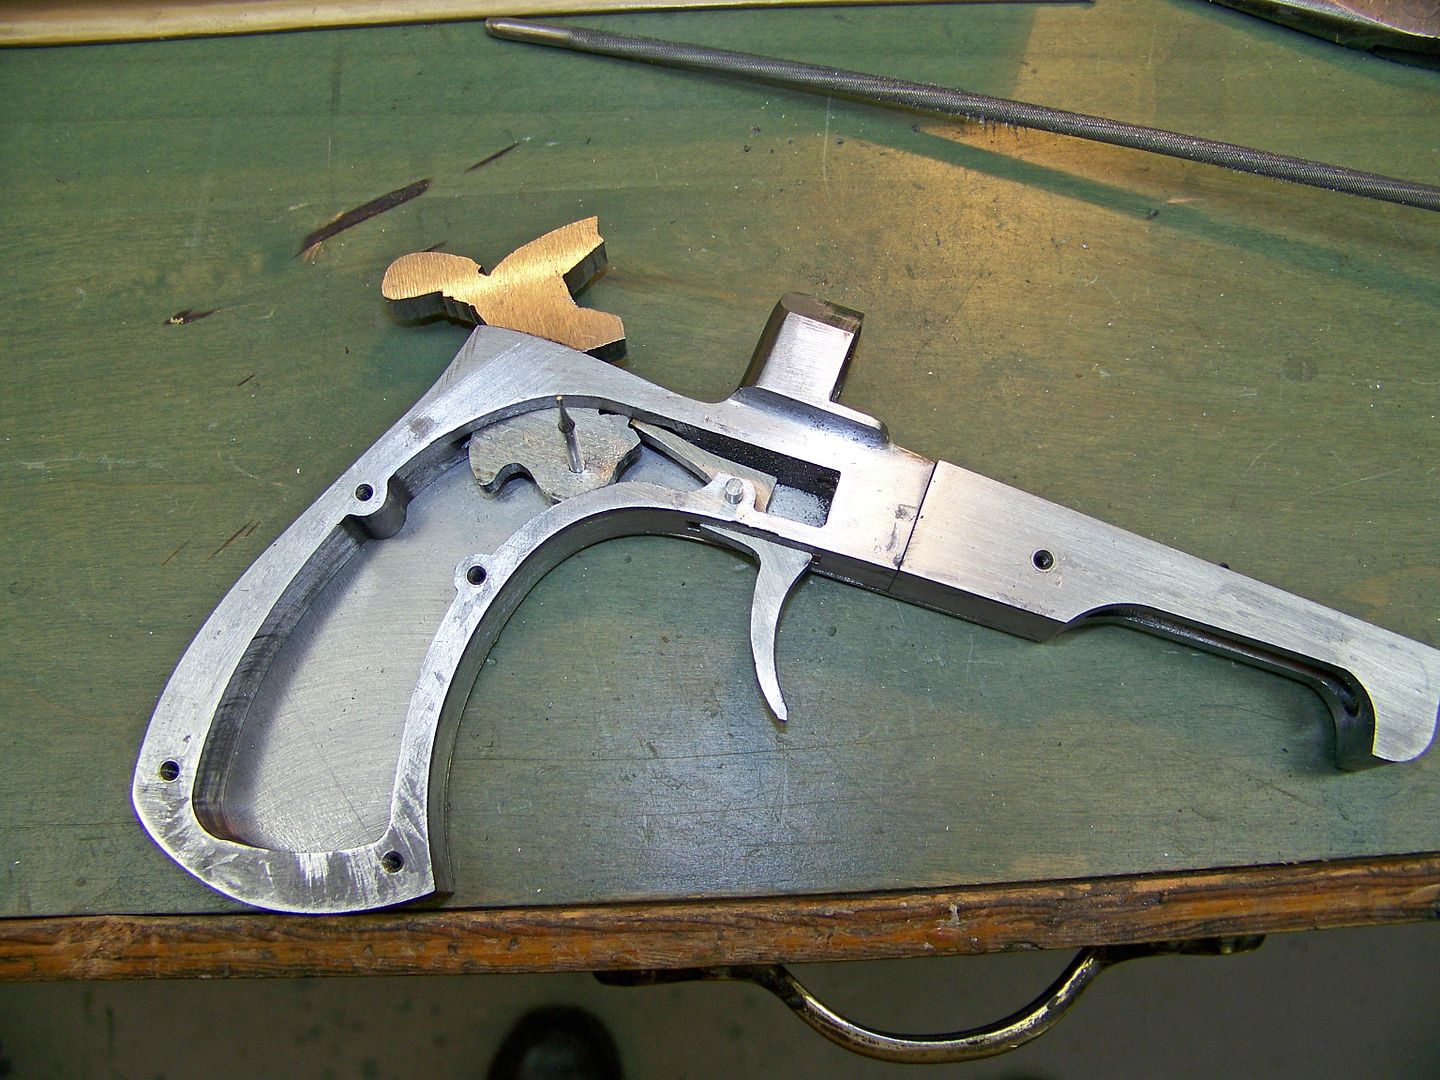
I was able to get back on the hammer and trigger slots today. I used a keyway cutter and made some squared slots in the frame. The trigger slot is still undersized and needs some file work but at least the hammer is in place and super glued there temperarily. I drilled through both side liners for the pivot and will later shim it.

100_4845_edited.jpg


100_4846_edited.jpg


100_4848_edited.jpg


100_4849_edited.jpg


100_4850_edited.jpg


100_4853_edited.jpg


100_4855_edited.jpg


100_4860_edited.jpg
 
Last edited:
Thanks For sharing the progress Bruce, I have been enjoying the process very much.

Jim

You're welcome Jim. Its coming along now but I cant rest easy until the mechanisms work together. At least the hammer and trigger are in place and look good. Its way too late to turn back so this thing is going to go forward one way or another. Believe it or not the safety is the hardest part right now.
 
The safety is very interesting to me. I'm looking forward to learning what you did.

Happy Thanksgiving to your and yours.
 
Oh my, can I be your son??
your work is amazing, I would love to come spend about the rest of my life in your shop...........a few days would be cool too. lol
 
Oh my, can I be your son??
your work is amazing, I would love to come spend about the rest of my life in your shop...........a few days would be cool too. lol

Sure you can. At least come by sometime when youre in the area. 2thumbs
 
I washed the last dish from Turkey Day and got back in the shop today.

Here you see the hammer at closed, half position (safety) and full back position.

I ordered a fine ceramic stone from Brownells that will let me face the engagement sear after the heat treatment of the hammer and trigger. I also ordered more PBC anti-scale for the heat treat also. I cant afford to have any scale to grind off. The PBC is magical stuff as it will not allow any scale to form. You'll see.

100_4870_edited.jpg

100_4871_edited.jpg

100_4874_edited.jpg
 
Today I spent some time on the push rod for the main spring. It is lathed down O-1 steel because I want to harden it.

100_4877_edited.jpg


100_4879_edited.jpg


100_4880_edited.jpg
 
More work on the main spring push rod. I turned it down and put a round end on the hammer end of it and a matching hollow in the hammer. Also had time to shorten it and drill out the other end for a 3/16" rod. Drilling it out and thinning it will lighten it allowing a faster travel of the push rod and hammer. I can use a lighter spring this way resulting in less trigger pull.

100_4889_edited.jpg


100_4890_edited.jpg
 
Bruce are you making your springs, or do you buy them? If so, I'm curious how they're designated. Is a spring's strength dependent on the wire gauge and diameter? Or some other factor? I'm just curious, not urgent. Have a great day!
 
Bruce are you making your springs, or do you buy them? If so, I'm curious how they're designated. Is a spring's strength dependent on the wire gauge and diameter? Or some other factor? I'm just curious, not urgent. Have a great day!

This spring is from a gunsmith friend of mine. I have wound my own springs on a mandrel in my lathe. The machinery handbook has a chart that gives all the info needed for wire gauge and needed mandrel sizes to arrive at a given diameter. That book puts me right to sleep.
 
Back
Top