izafireman
Well-Known Member
Following on from Gliden07's superb thread about making a tempering oven I decided to do my own with the help of my father and Timgunn who is also on the forum.
The PID control I chose was the Inkbird which was the UK version and combined with a K type thermocouple along with the largest volume toaster oven I could find.
Firstly I would like to point out that Inkbird's instructions are dire as translated from Chinese and conflicting where you look on the net as to the actual wiring.
Without the help of Timgunn this project would have either ground to a halt or cost me dear as I would have had to replace the Inkbird PID with a far more expensive unit. For this project I opted for the Inkbird as a cheap PID though when I build my HT oven I will be using a PID of a higher quality following my discussions with Tim.
Tim doesn't live far from my father so we went to see him and he sorted the issues with the unit. Wow! does Tim know his stuff where PIDs and temperature control is concerned, an highly informative and interesting few hrs spent with him and all round nice guy!
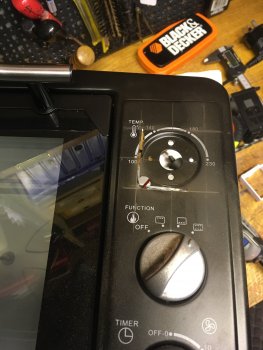
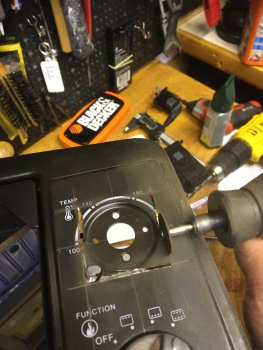
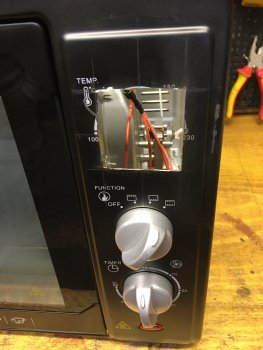
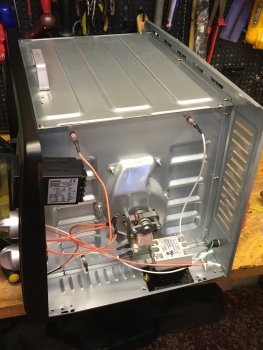
So in the images you will see my oven conversion which basically followed the same design as Gliden07 but as he had done the 'ground work' I was able 'tinker' some things.
The first one was the pesky springs that are on the door tension mechanism which tend to get in the way of the ceramic insulation. My solution was to note the travel of the springs when open and closed, mark the points and then cut triangles of ceramic wool to fit those areas. (image wouldn't load) I also covered the top with two layers of ceramic blanket along with the sides in order to protect electronics / insulate.
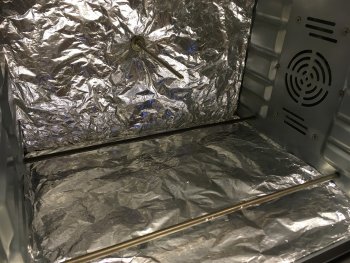
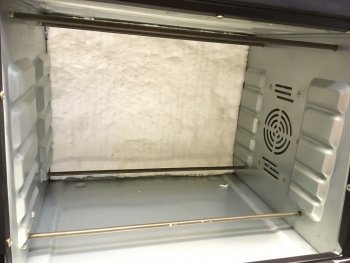
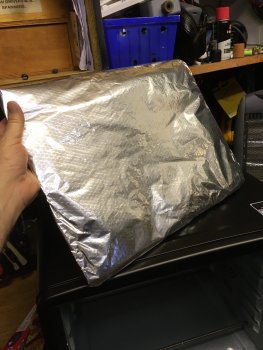
The other thing I altered was the ceramic wool sheets inside the oven. I only stumbled on this as I was in a hurry, Gliden cut the sheets and then used rigidiser on them , I did not have time to do this. So one at the rear, one on the base of the oven internally were foil covered.
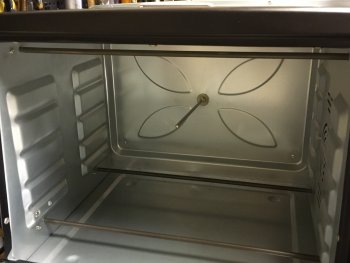
So mine are ceramic blanket sheets wrapped in aluminium foil, several layers which definitely worked and easy to replace. I also placed the thermocouple in the centre of the oven and the foil blankets.
OK now for the quick test results this evening which if the ''fuzzy logic'' of the unit works might well improve.
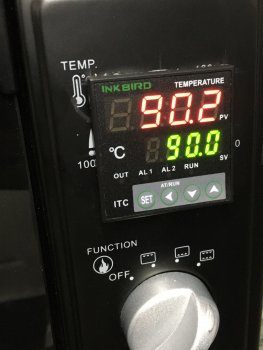
Start up from 15 c (workshop temp) to 90 C (a basic temp chosen for Cactus juice) ………………….. 7mins , accuracy of +/- 1.2 C over 4 mins once oven had stabilised.
90 c to 200c …..6 minutes , accuracy of +/- 0.3 C over 4 mins once stabilised
200c to 230 C …...4.5 mins , accuracy of +/- 1.5 C over 4 mins once stabilised
The above results after just two cycles of the PID on an EMPTY oven with zero thermal mass!
Even at 230C I could place my hand on the top of the oven such was the efficiency of the ceramic wool.
Before this project the top of the oven would have burnt flesh and the oven was useless for either curing resin or tempering as the temperatures were up to 40+ degrees off target and the temp were 'all over the place' with regards to stability.
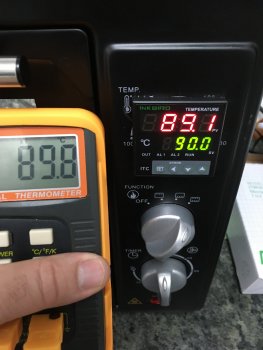
Some images are included which pretty much speak for themselves. Note the temps on the secondary device I used a smidge different as the temp probes were about two inches under the oven thermocouple.
All in all a complete success, I couldn't have wished for better results! No more smoking wooden blocks!
Oh and far more energy efficient than the original unit.
The PID control I chose was the Inkbird which was the UK version and combined with a K type thermocouple along with the largest volume toaster oven I could find.
Firstly I would like to point out that Inkbird's instructions are dire as translated from Chinese and conflicting where you look on the net as to the actual wiring.
Without the help of Timgunn this project would have either ground to a halt or cost me dear as I would have had to replace the Inkbird PID with a far more expensive unit. For this project I opted for the Inkbird as a cheap PID though when I build my HT oven I will be using a PID of a higher quality following my discussions with Tim.
Tim doesn't live far from my father so we went to see him and he sorted the issues with the unit. Wow! does Tim know his stuff where PIDs and temperature control is concerned, an highly informative and interesting few hrs spent with him and all round nice guy!
So in the images you will see my oven conversion which basically followed the same design as Gliden07 but as he had done the 'ground work' I was able 'tinker' some things.
The first one was the pesky springs that are on the door tension mechanism which tend to get in the way of the ceramic insulation. My solution was to note the travel of the springs when open and closed, mark the points and then cut triangles of ceramic wool to fit those areas. (image wouldn't load) I also covered the top with two layers of ceramic blanket along with the sides in order to protect electronics / insulate.
The other thing I altered was the ceramic wool sheets inside the oven. I only stumbled on this as I was in a hurry, Gliden cut the sheets and then used rigidiser on them , I did not have time to do this. So one at the rear, one on the base of the oven internally were foil covered.
So mine are ceramic blanket sheets wrapped in aluminium foil, several layers which definitely worked and easy to replace. I also placed the thermocouple in the centre of the oven and the foil blankets.
OK now for the quick test results this evening which if the ''fuzzy logic'' of the unit works might well improve.
Start up from 15 c (workshop temp) to 90 C (a basic temp chosen for Cactus juice) ………………….. 7mins , accuracy of +/- 1.2 C over 4 mins once oven had stabilised.
90 c to 200c …..6 minutes , accuracy of +/- 0.3 C over 4 mins once stabilised
200c to 230 C …...4.5 mins , accuracy of +/- 1.5 C over 4 mins once stabilised
The above results after just two cycles of the PID on an EMPTY oven with zero thermal mass!
Even at 230C I could place my hand on the top of the oven such was the efficiency of the ceramic wool.
Before this project the top of the oven would have burnt flesh and the oven was useless for either curing resin or tempering as the temperatures were up to 40+ degrees off target and the temp were 'all over the place' with regards to stability.
Some images are included which pretty much speak for themselves. Note the temps on the secondary device I used a smidge different as the temp probes were about two inches under the oven thermocouple.
All in all a complete success, I couldn't have wished for better results! No more smoking wooden blocks!
Oh and far more energy efficient than the original unit.
Attachments
Last edited:
") . Note the K type thermocouple in the centre of the oven.
. Note the K type thermocouple in the centre of the oven.