PetrifiedWood
Well-Known Member
Here's a "step by step" on how I made a sheath for my most recent knife build.
Certainly not the only way, and probably not the best. But this might give some folks some ideas to use on their own projects.
I recently finished a knife that needs a leather sheath. I wanted to do a bit of tooling, and use a snap for retention.
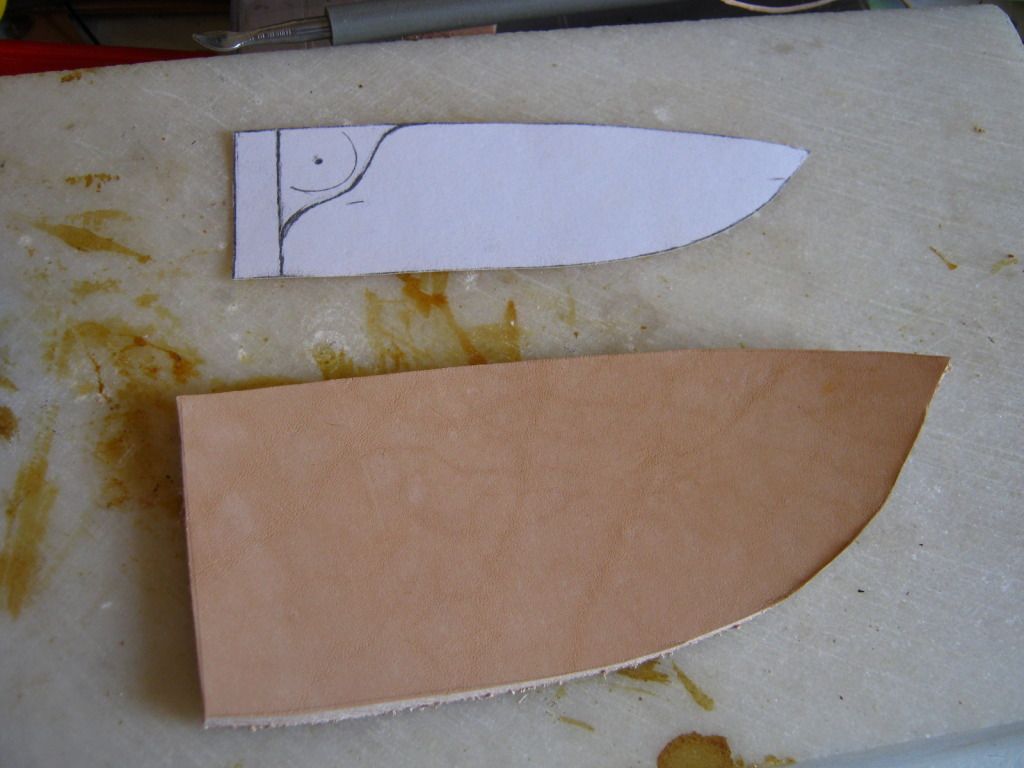
The process starts with a idea, and then a sketch. I used the actual knife blade template in this case to create a sketch of the sheath on paper. I made three copies of the sketch on my printer because I'll need to cut out different parts to form the front and back, belt loop, liner, and welts.
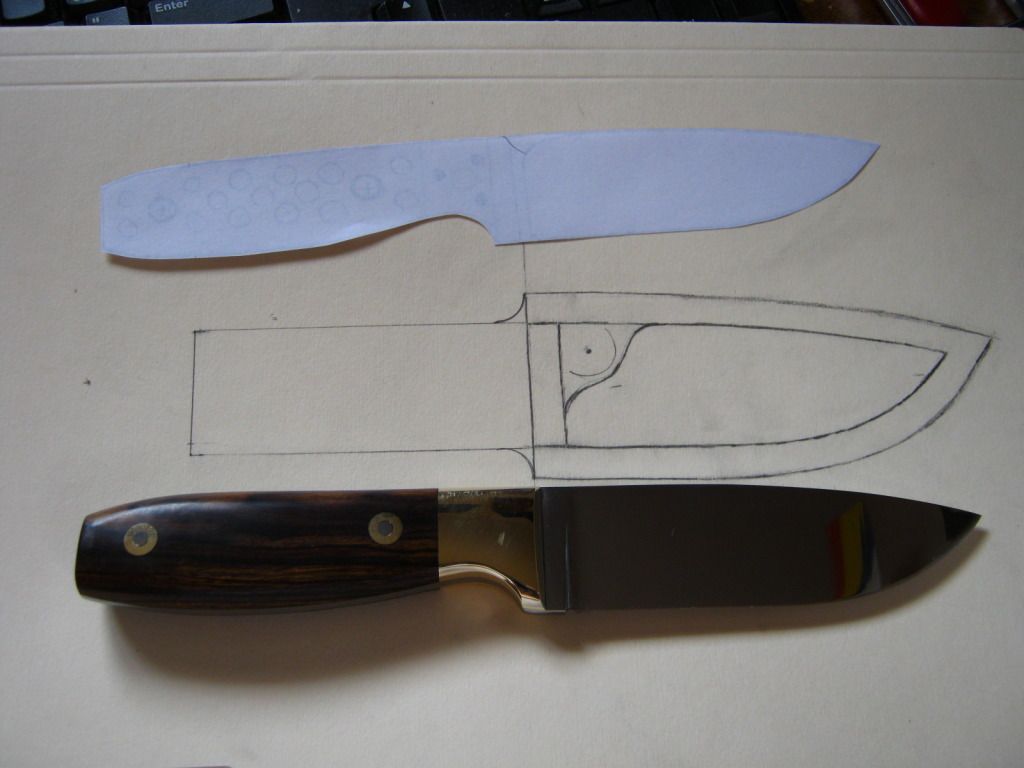
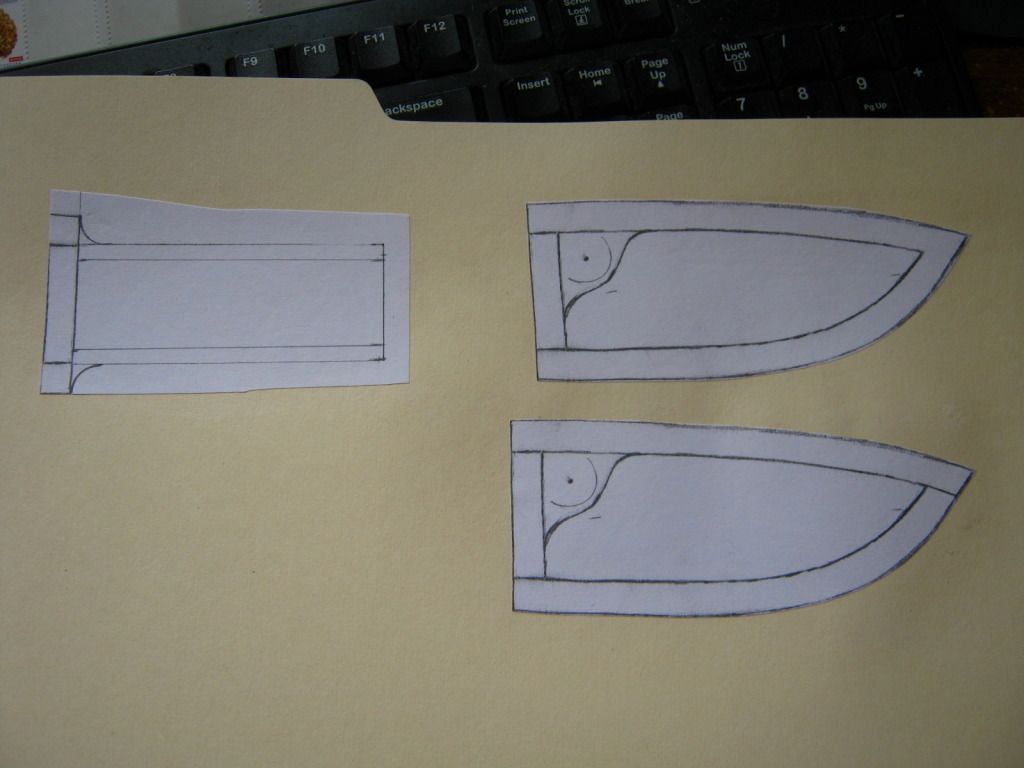
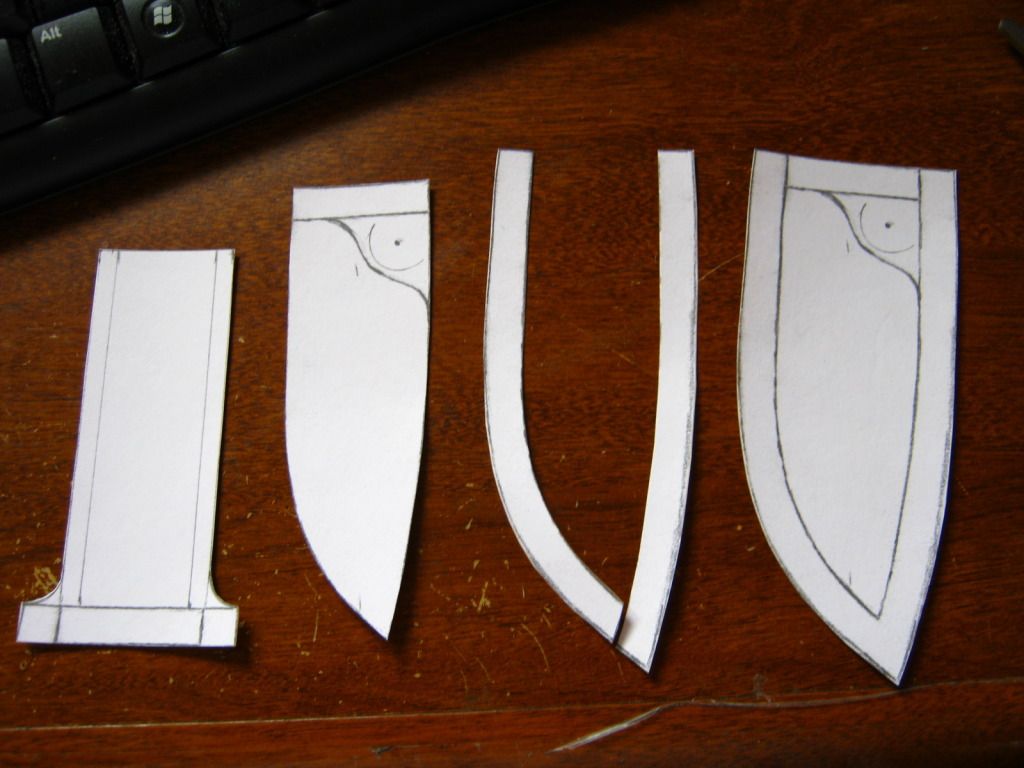
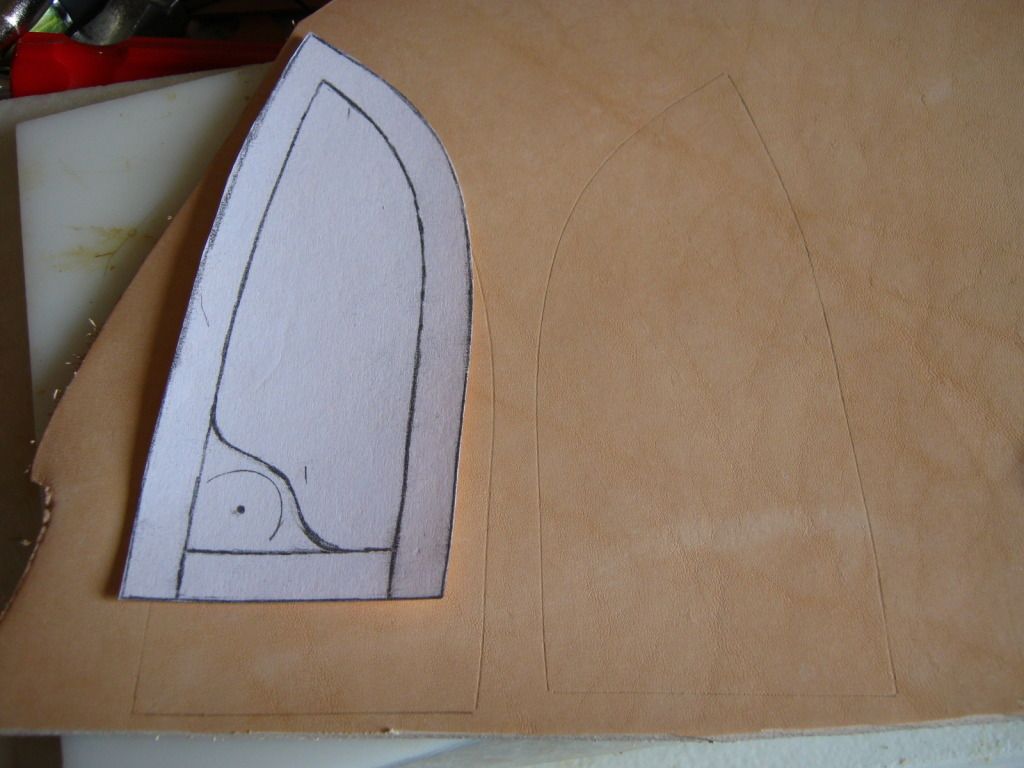
As you can see in the above pictures, I like to glue the paper pattern to a manilla folder before cutting it out. This gives me a stiffer, more durable template to trace around when transferring the pattern to the leather.
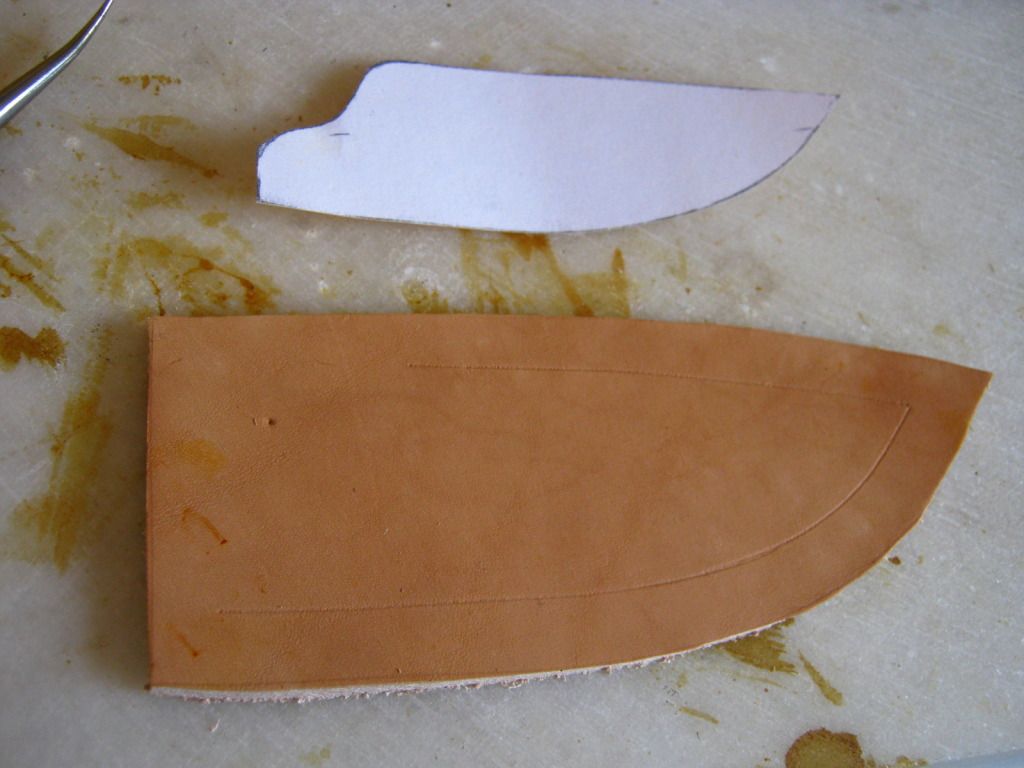
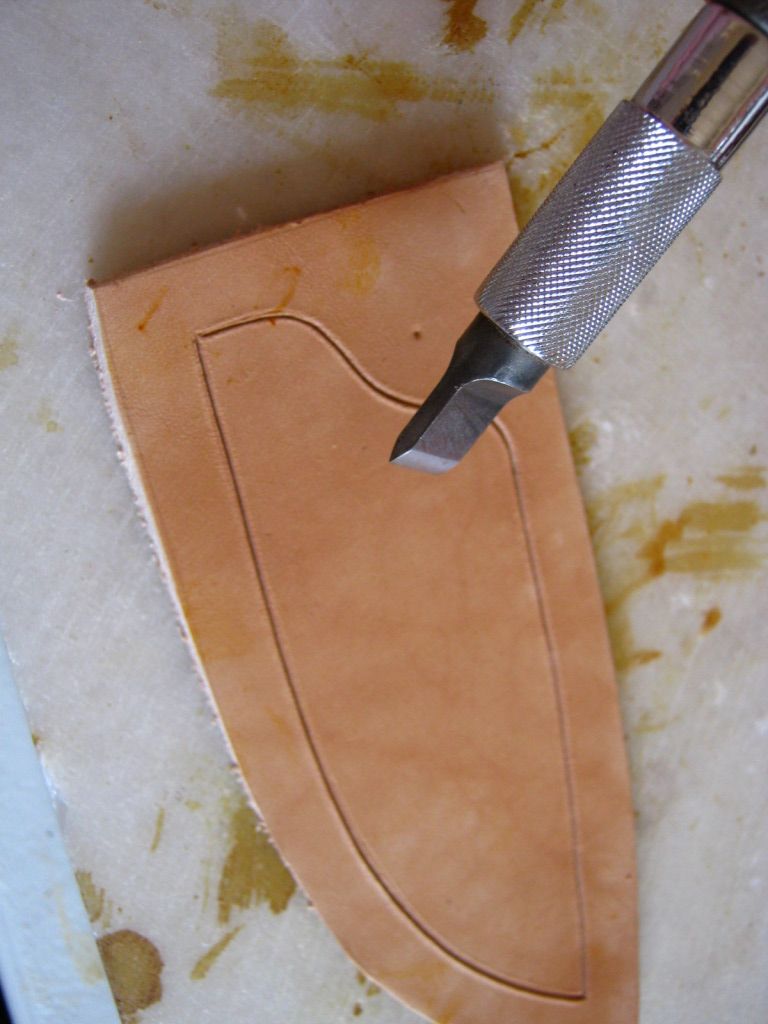
So, after cutting out the leather pieces, I do some tooling. I've marked the border and cut it with a swivel knife, then I mark the center line to establish a straight basketweave stamping pattern. This is done using the stylus on a modeling tool, and you have to case the leather first.
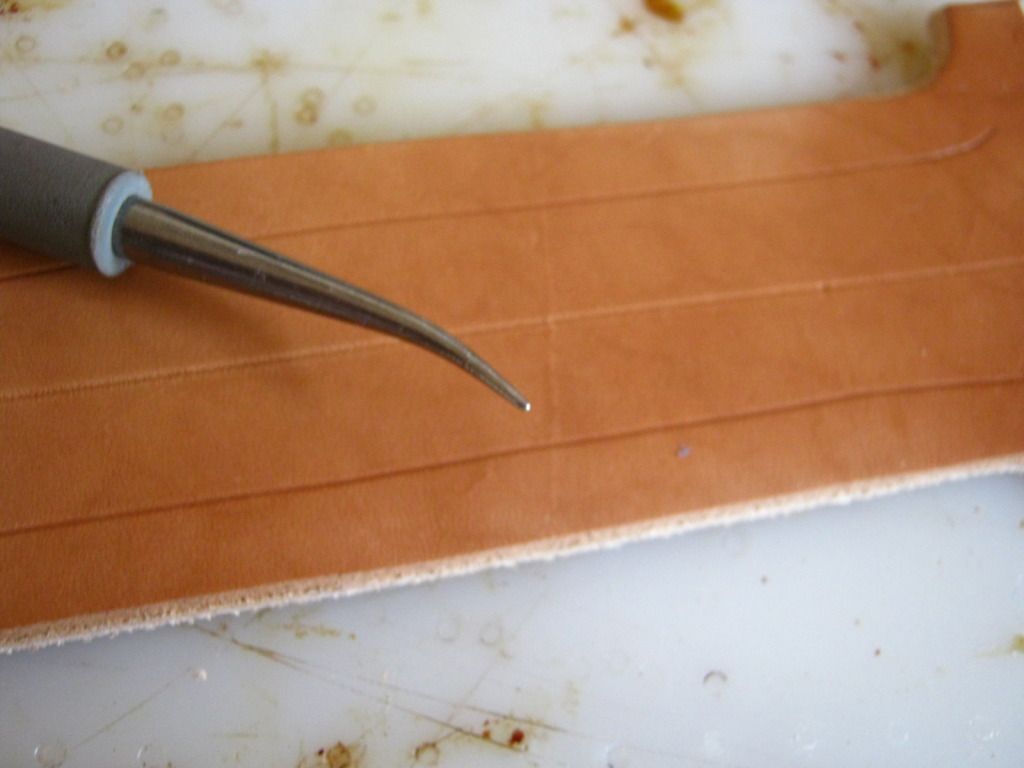
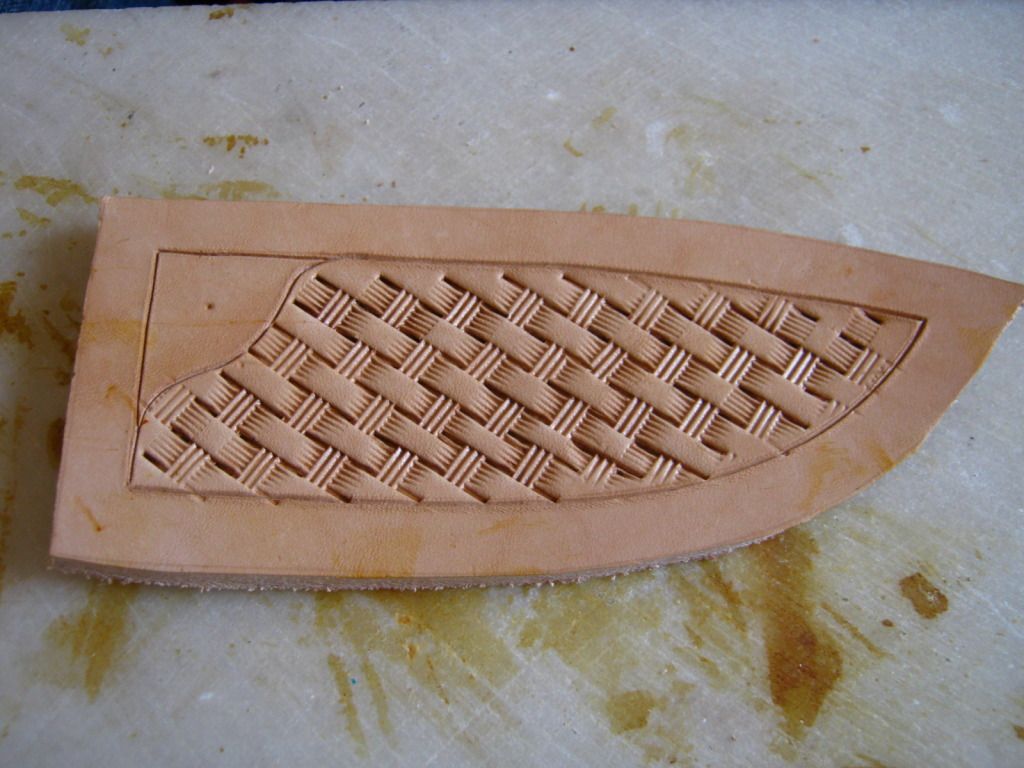
To do basketweave stamping, I put the diagonal corners of the tool on the center line and make the first stamp. the for each following stamp, I place one of the straight "bars" on the corner of the stamp in the opposite corner of the previous impression. Tandy has a good video demonstrating this technique.
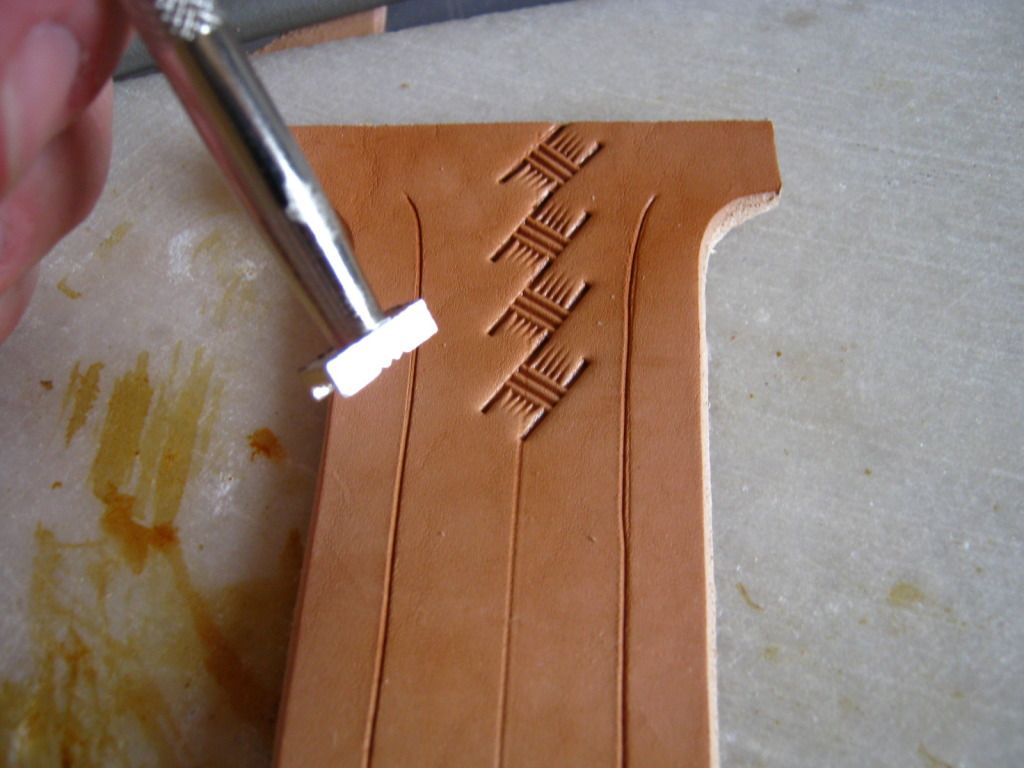
After following the pattern to the end, I connect a second row of stamps.

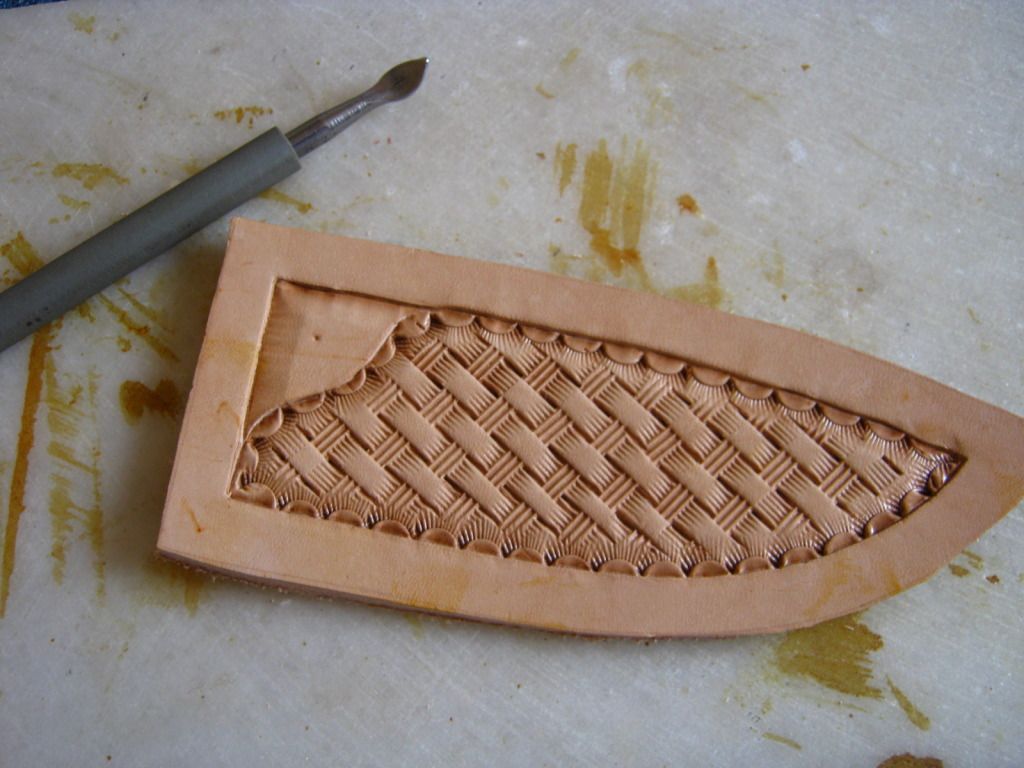
When the pattern is filled out, I go around the outside edge that I cut with my swivel knife, and use a beveling tool to stamp the pattern down to give nice contrast with the border. I then use a small camouflage tool to blend the pattern around the edges.
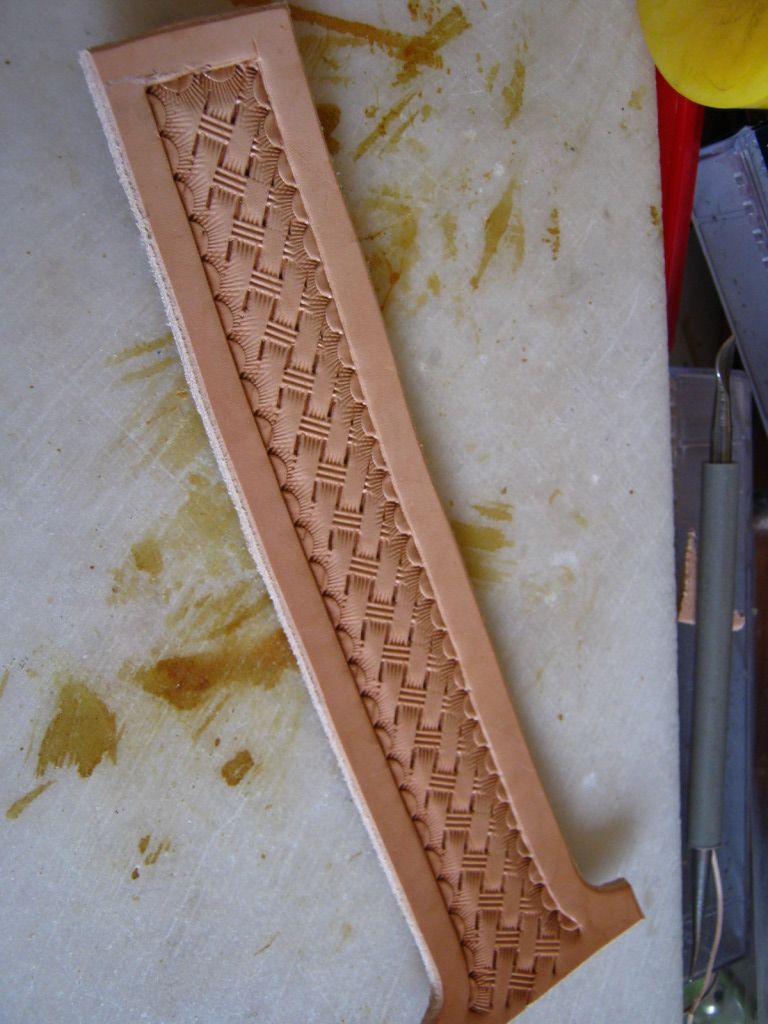
A quick coat of tan dye. It will dry lighter in color than this, I'm counting on it.")
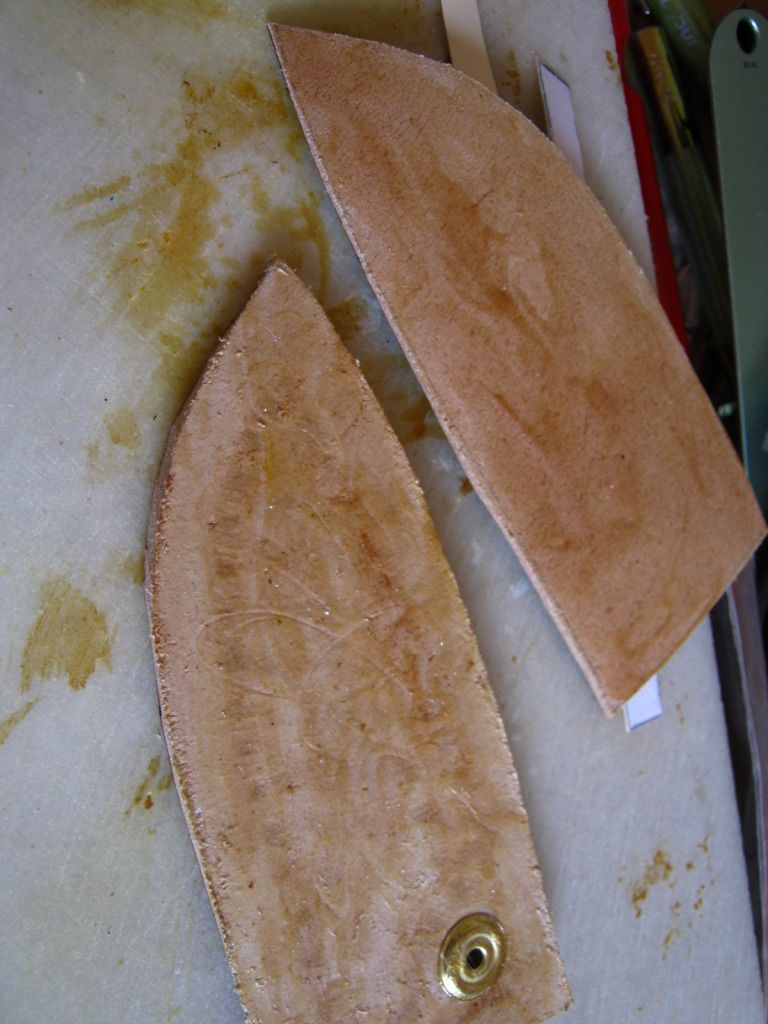
Now to case, mark, and cut the front of the sheath to prep for tooling. As you can see, I cut out another part from my original pattern to use as a tooling template, and to mark the snap retention position.
Cut the border with a swivel knife. I later finish the border around the snap as well.
Basketweave stamped in.
The border beveled and camouflaged. I use the modeling tool again to touch it up here and there.
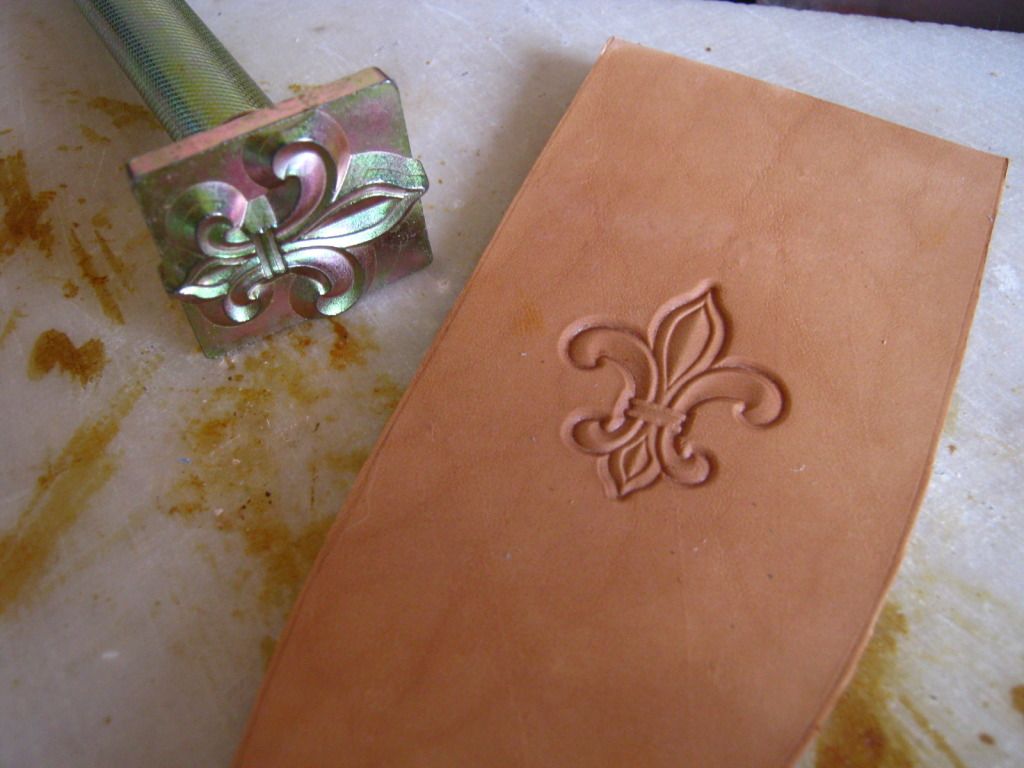
Maker's mark on the back of the sheath.
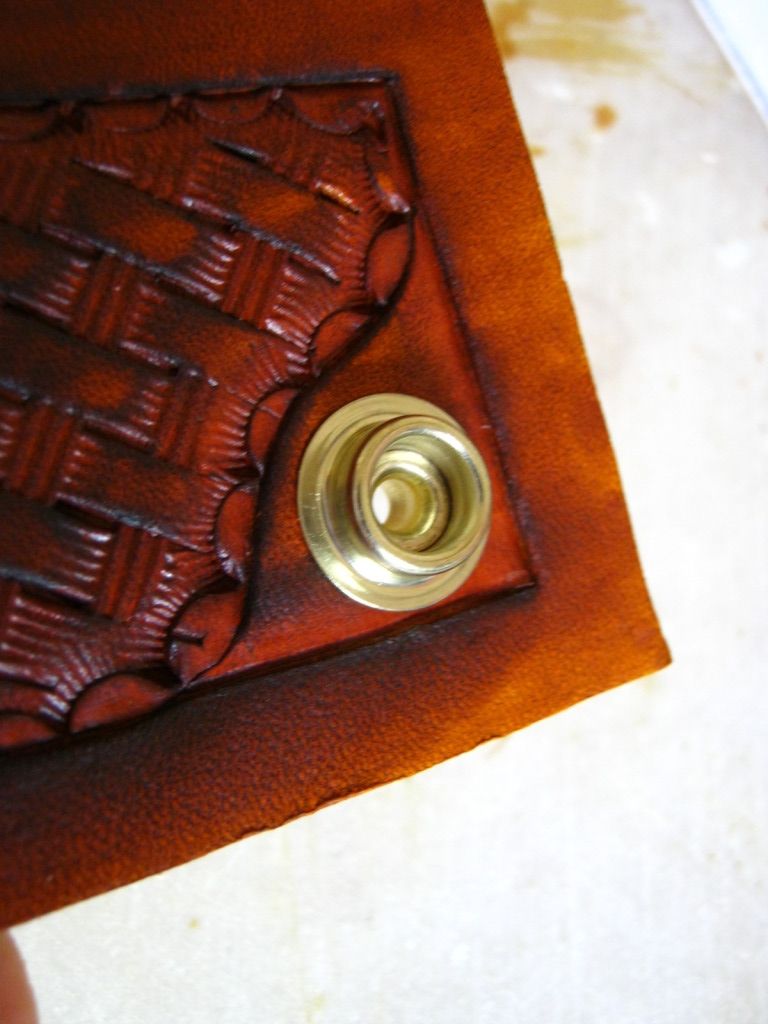
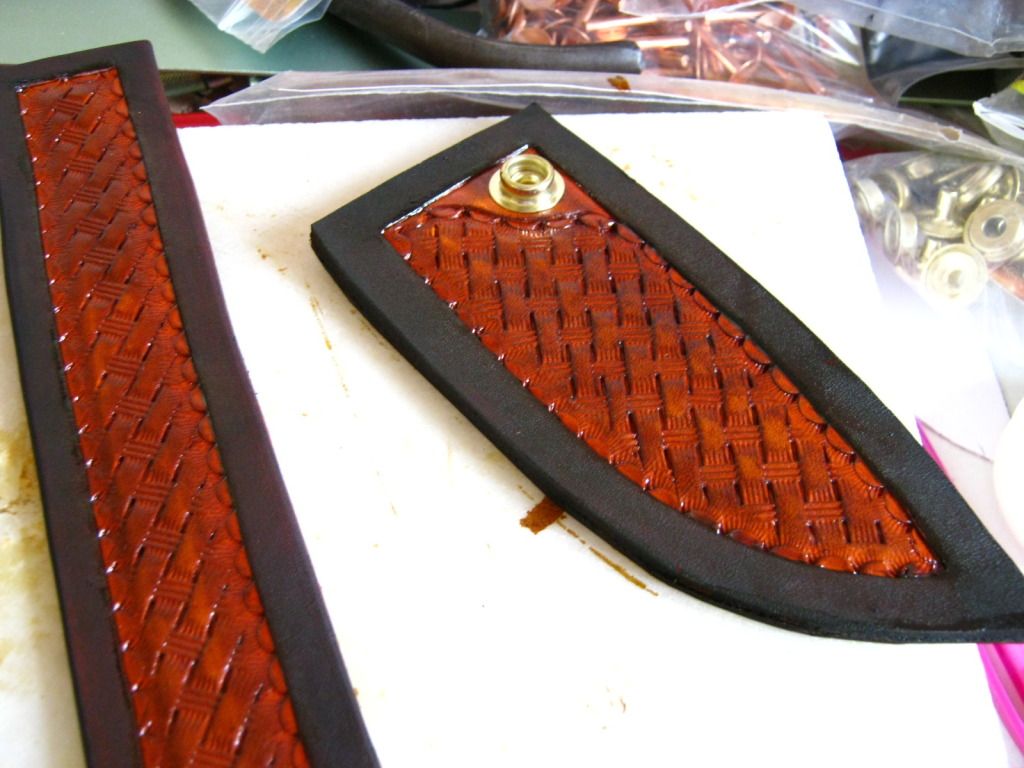
Dyed with tan again, punched the hole, and set the snap.
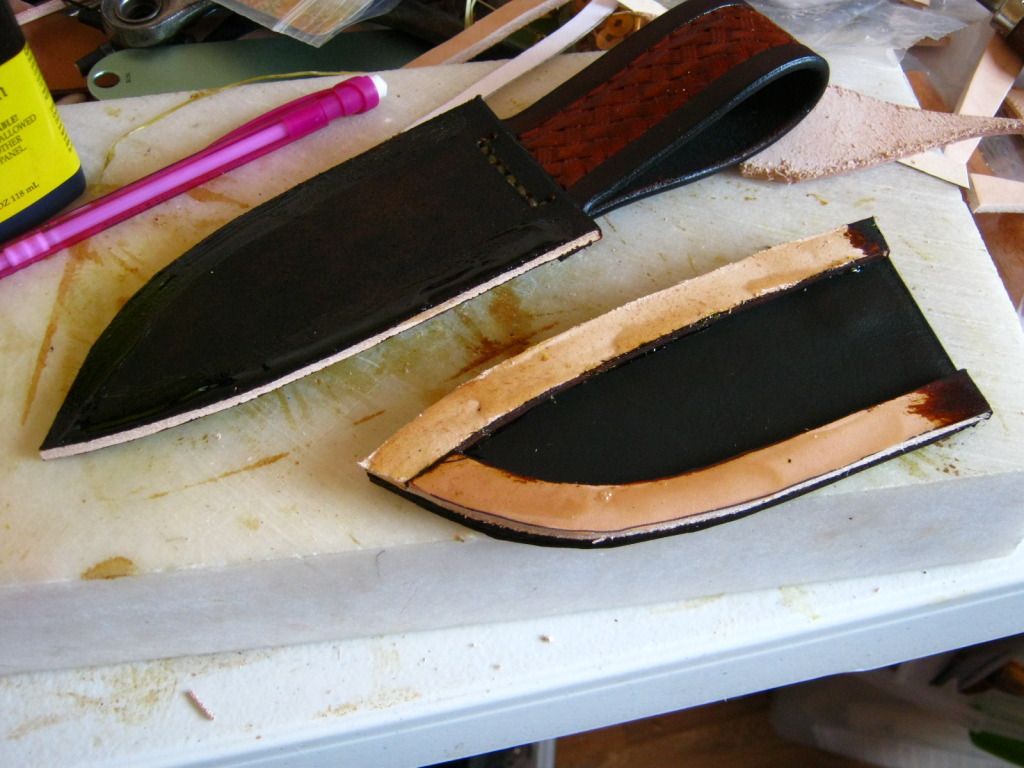
I've turned over the front of the sheath, and applied Barge cement to the back of it, and to the back of the liner. Normally I wouldn't use a liner but since this sheath has a snap, it is needed to prevent the snap from scratching the blade.
After 10-15 minutes you can stick the two pieces together. Make sure you have them properly aligned because once this stuff grabs it's permanent.

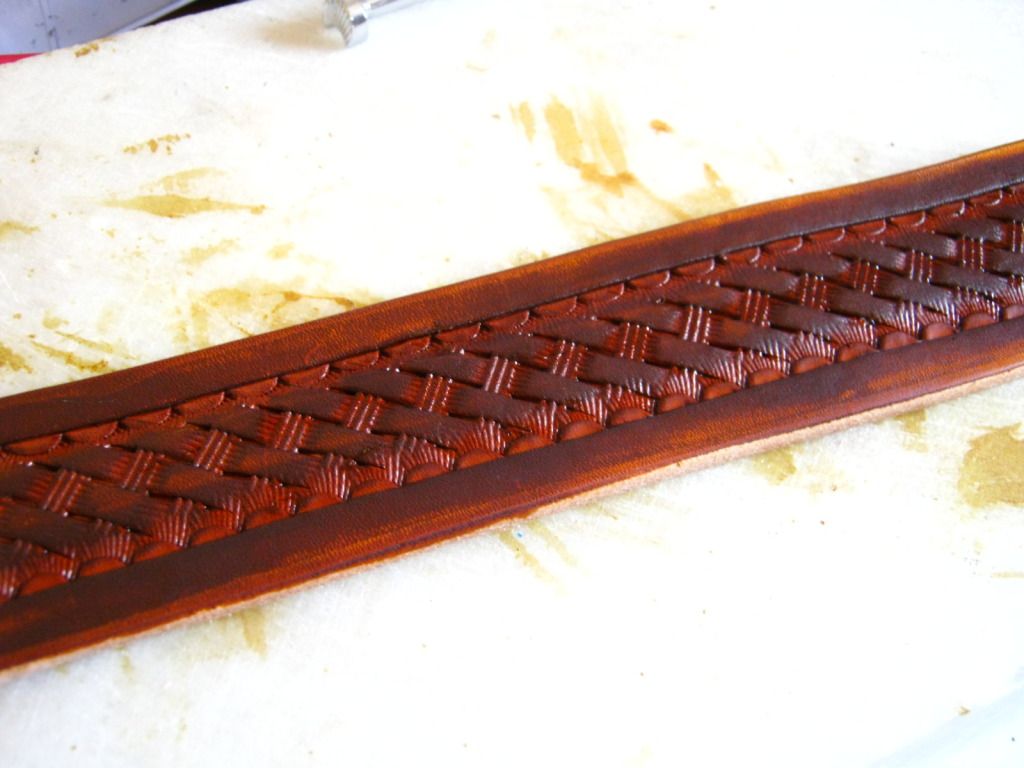
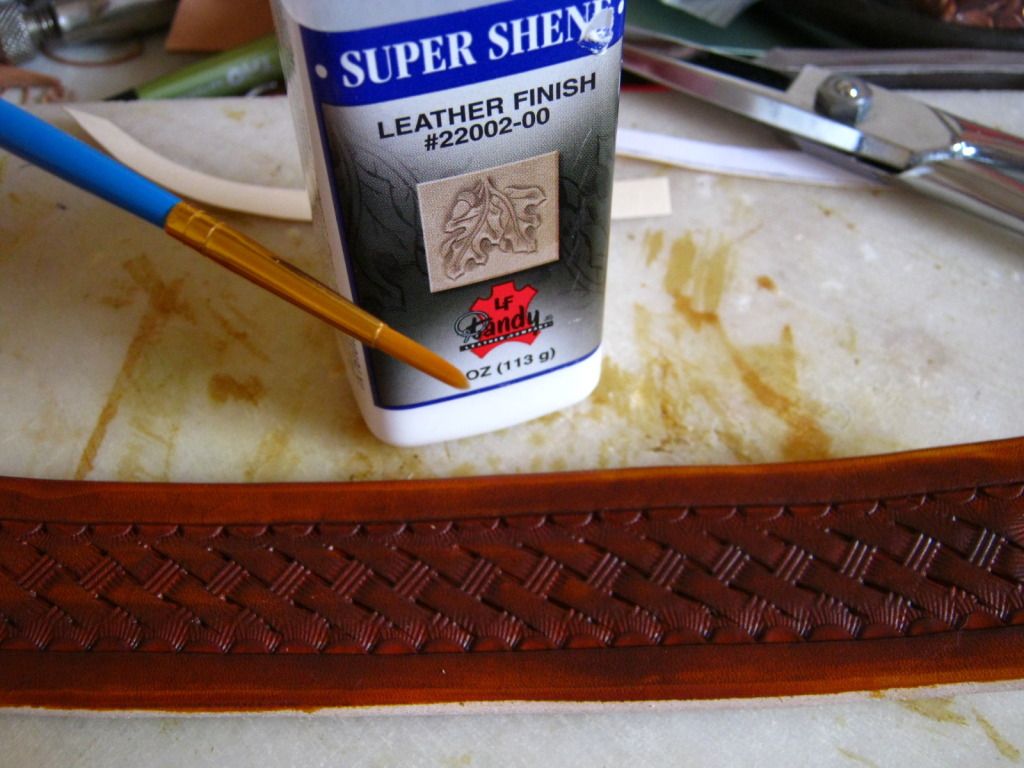
Next comes the neat part... using Tandy's "Super Shene" as a resist. I use a pointy little brush to apply the finish to the center, tooled portion only. After this dries, I can then go back with the brush and apply a darker dye to the border to make the weave really stand out.
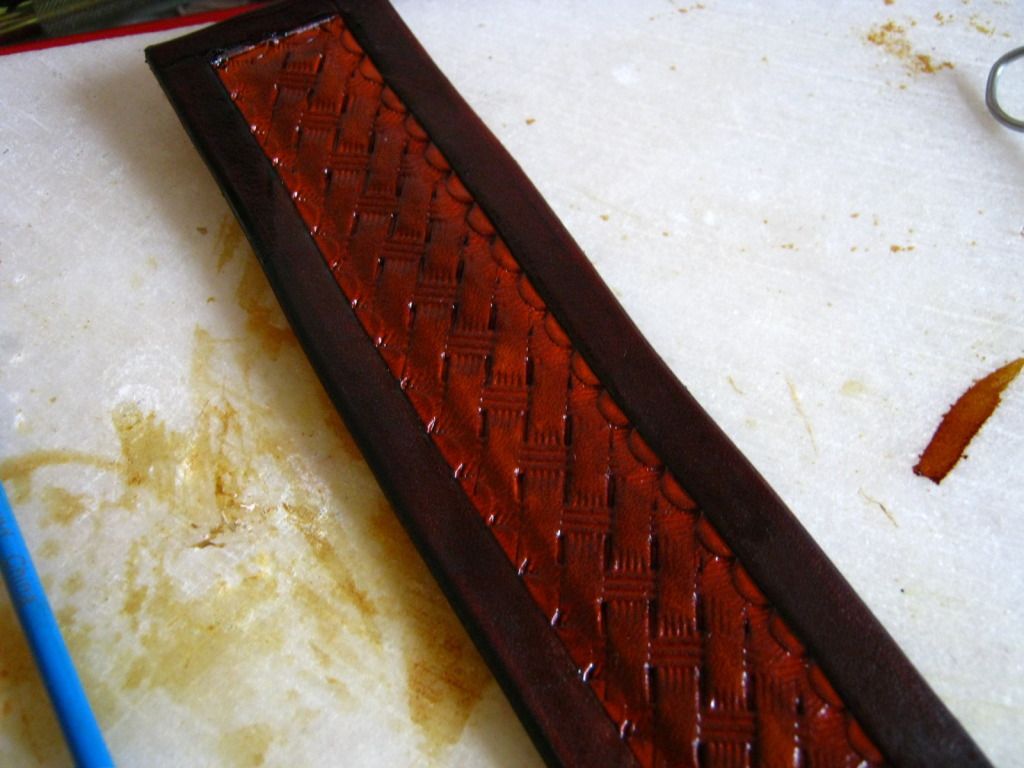
Ok, so here's the medium brown applied thick to the borders...
I won't apply super shene to the borders because they will need to be cased again so I can mark, cut and drill for the stitches. Then the stitch grooves will need to be re-dyed as well.
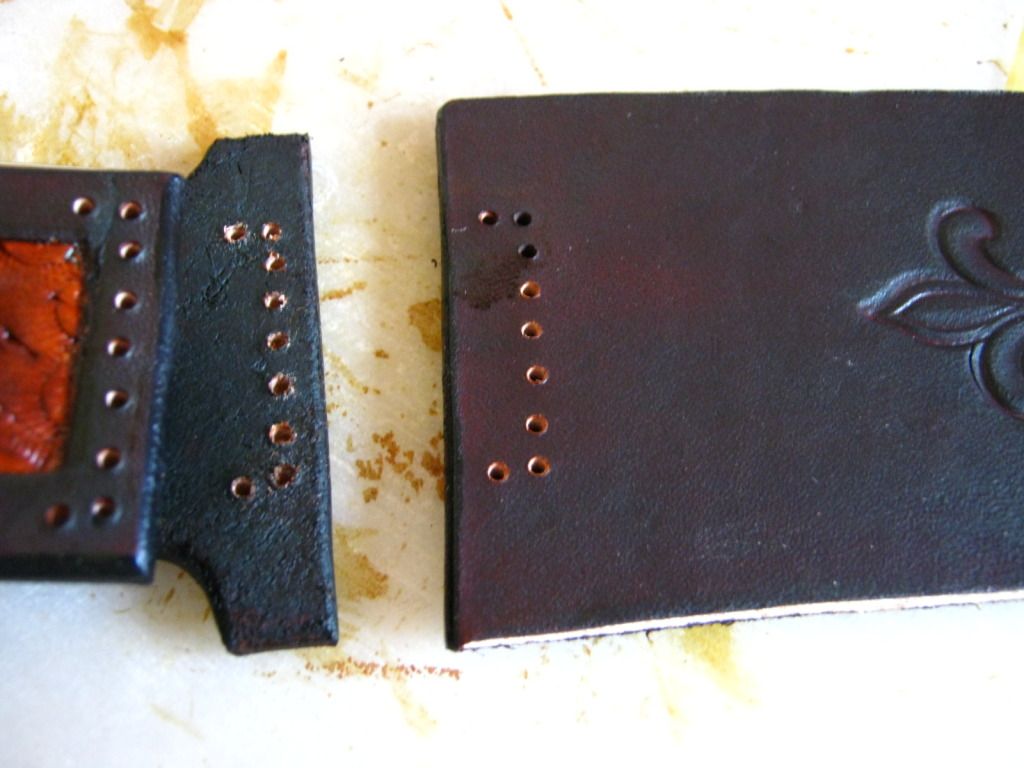
I use a stitching groover and overstitch wheel to groove and mark for the stitches for the front piece only.
I mark and drill the belt loop and the back piece to stitch the two together. By attaching the belt loop to the outside of the sheath I am able to provide clearance for the bolster and make it a better fit. If I had just folded the back over to form the belt loop it wouldn't fit the knife as nicely.
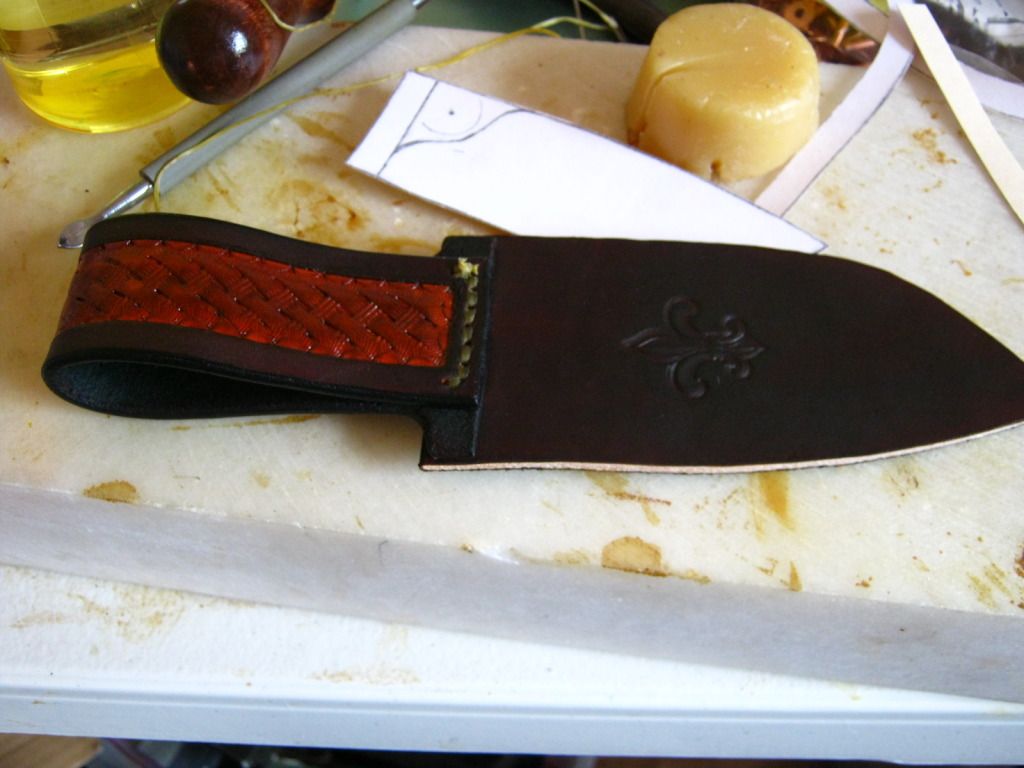
Here they are together. I used tan artificial sinew.
Gluing up the welts.
The whole thing glued together, I use Barge cement.
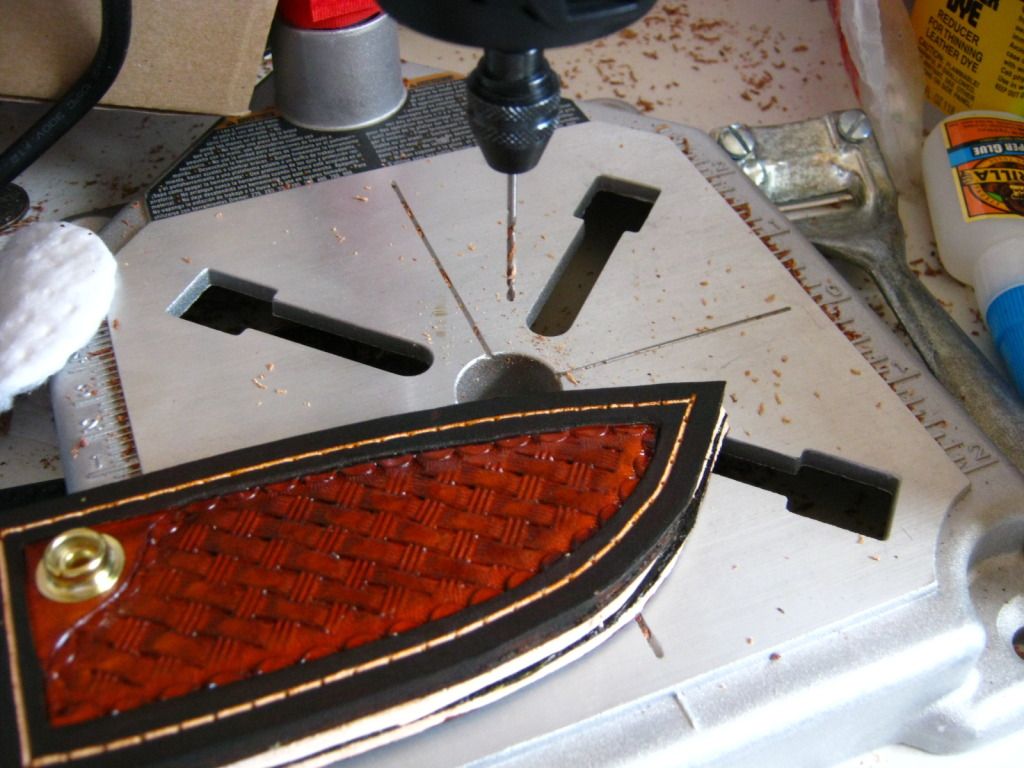
Drilling the stitch holes with a Dremel drill press attachment.
After drilling, I touch up the dye with a Q-Tip.

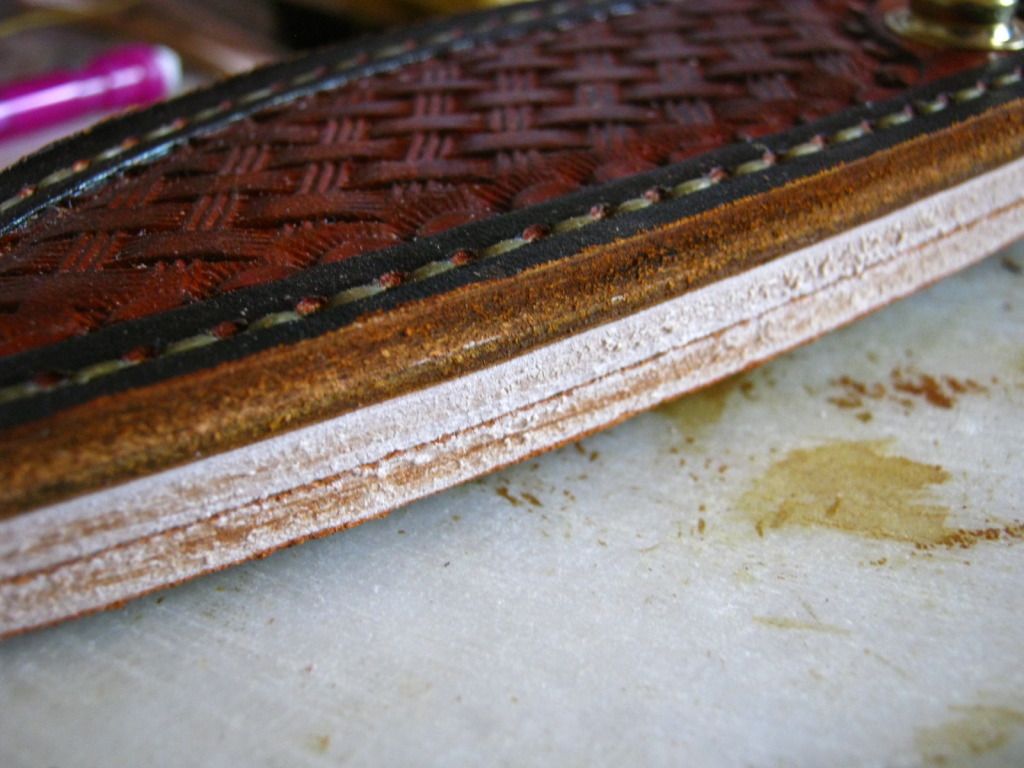
Then it's out to the shop to use a 36 grit belt on the grinder to even up the edges.
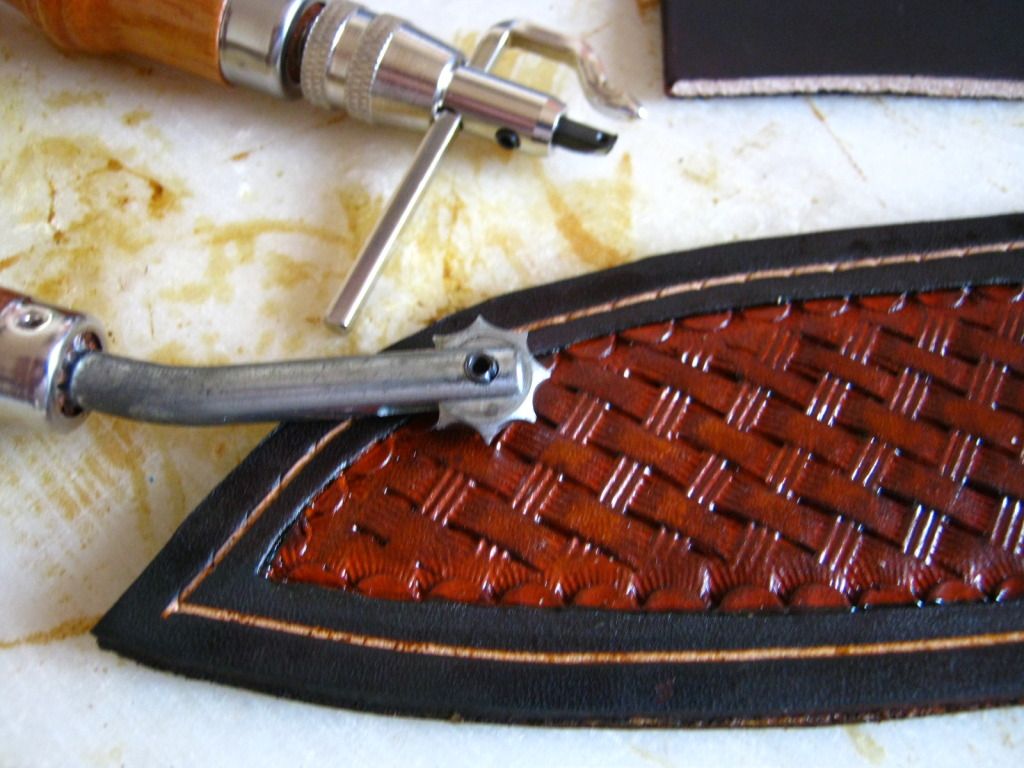
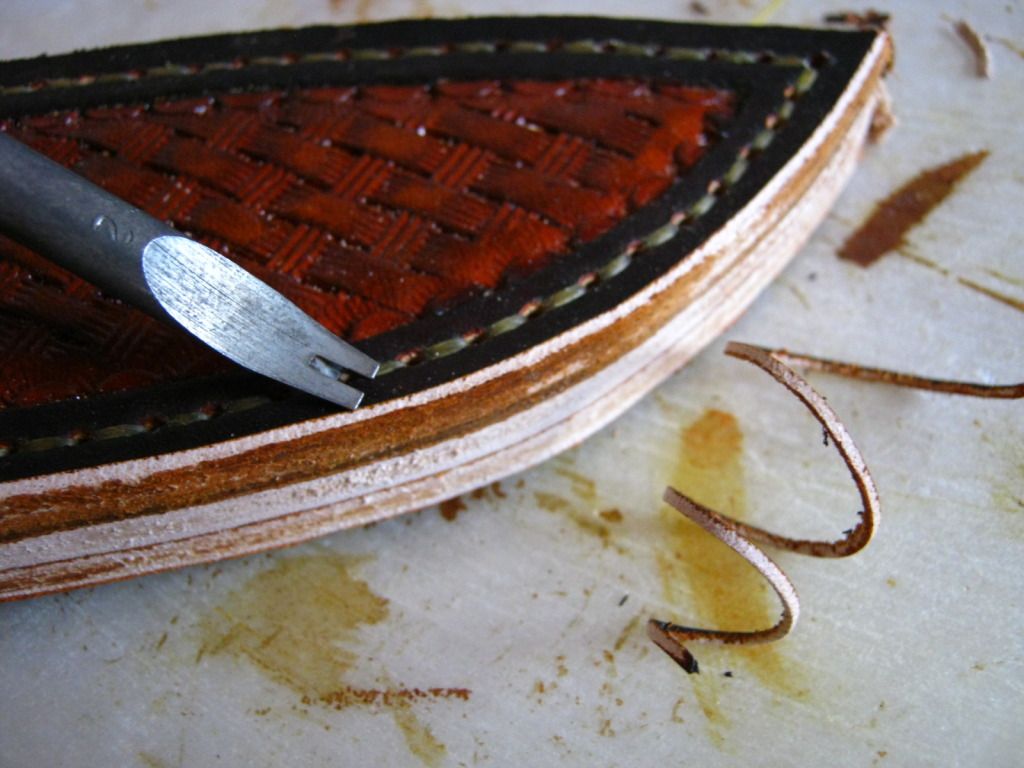
And then I remove the sharp edges with a #2 edge beveler.
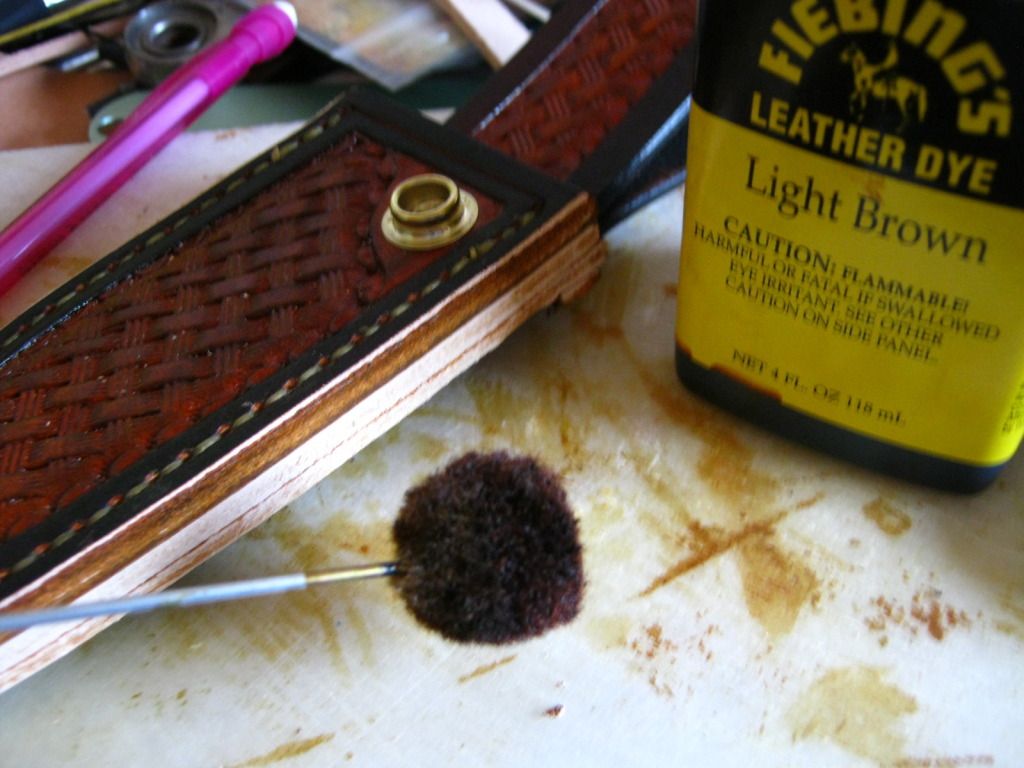
Dying the edges to match. I follow this with some gum tragacanth to slick them, then some black Fiebing's Edge Kote.
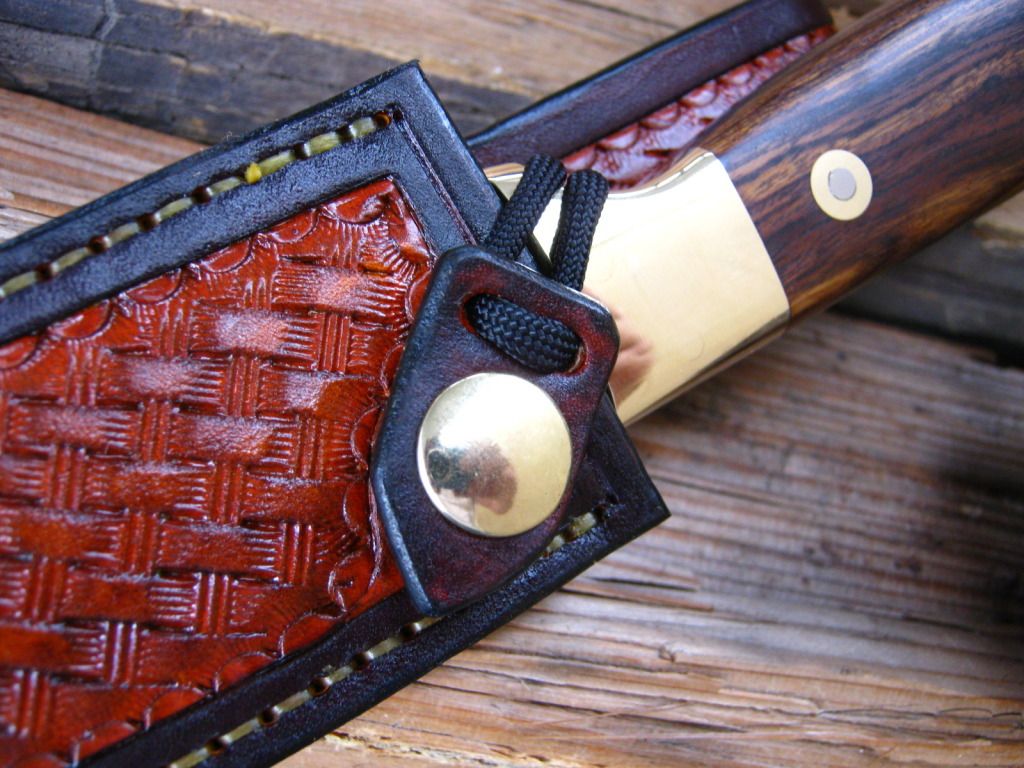
Now to make the retention snap. I like using paracord with a little snap tab like this so that tension can be adjusted and the cord can be replaced if it gets dirty or gets cut when removing the knife in a hurry. Leather straps stitched or riveted onto the sheath are ruined if they get cut, and aren't easily replaced by the user.
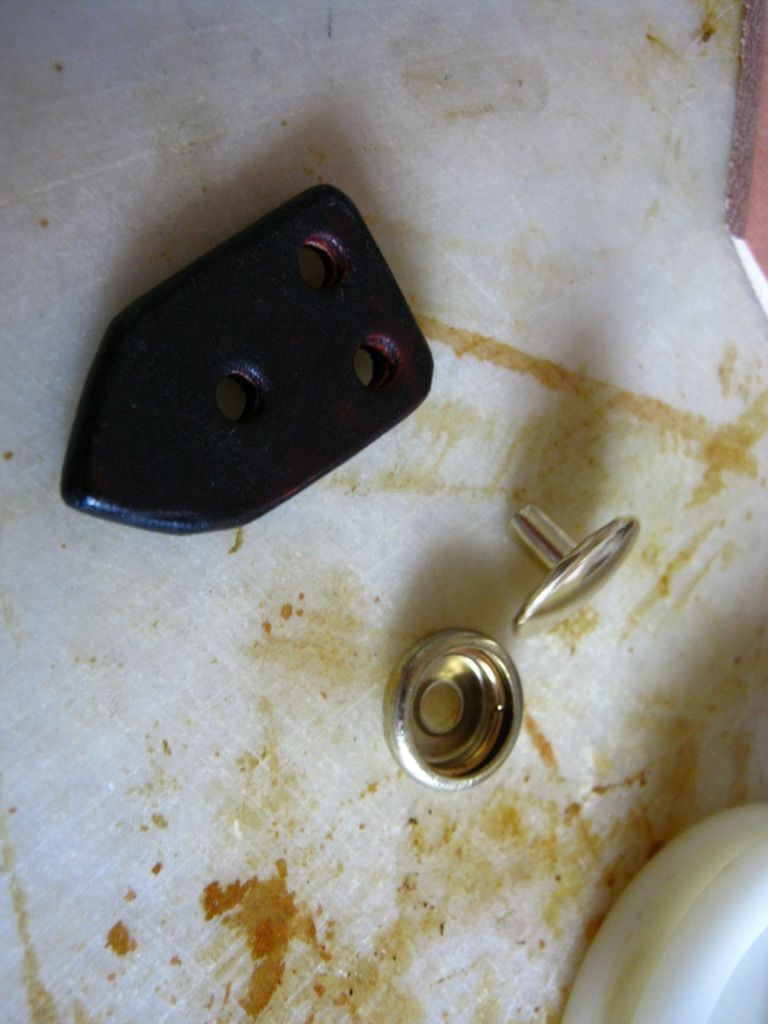
Punch some holes in the belt loop to attach the retention strap.
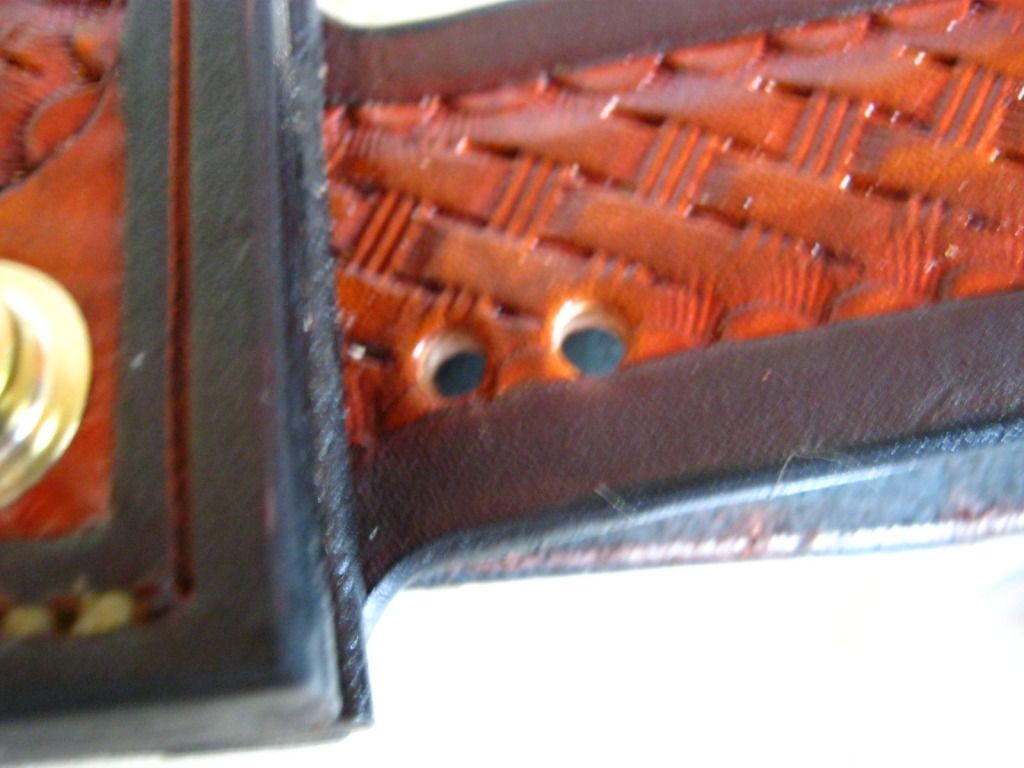
All that remains is to rivet the snap onto the tab, then feed 550 cord through it and knot that inside the belt loop.
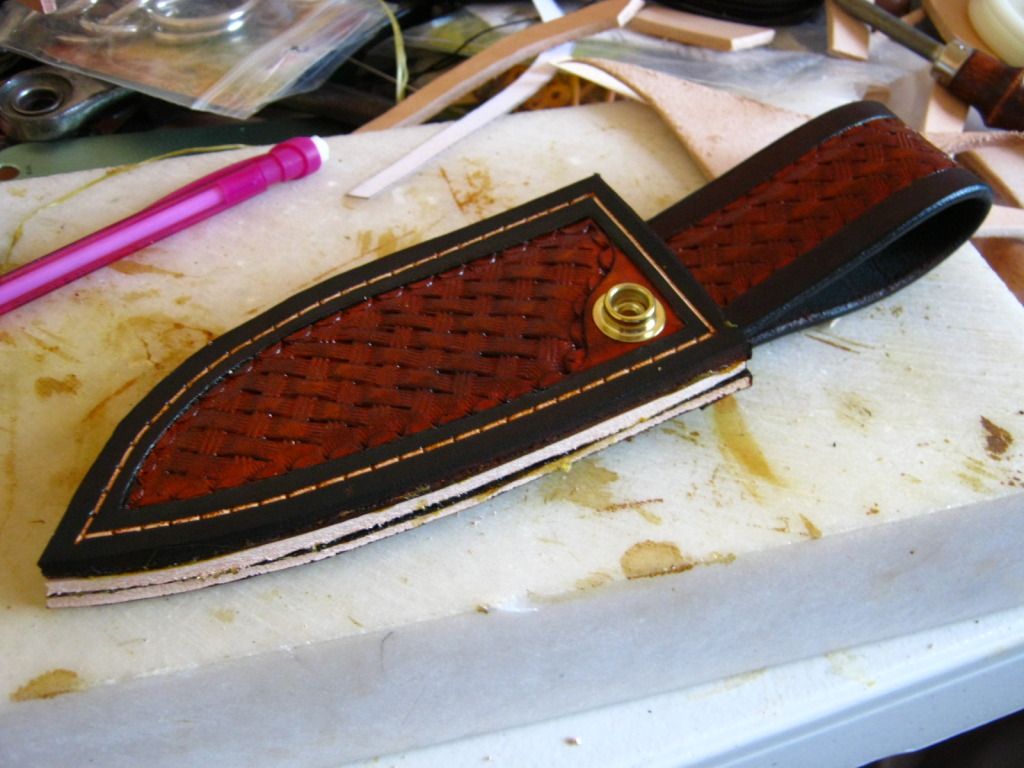
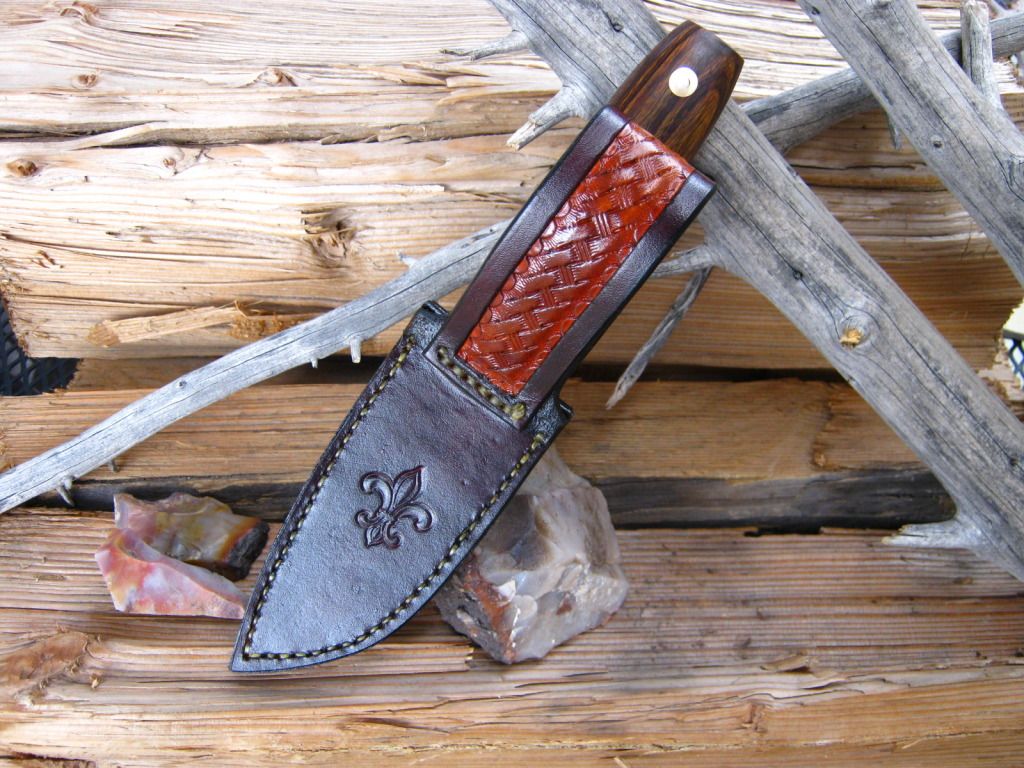
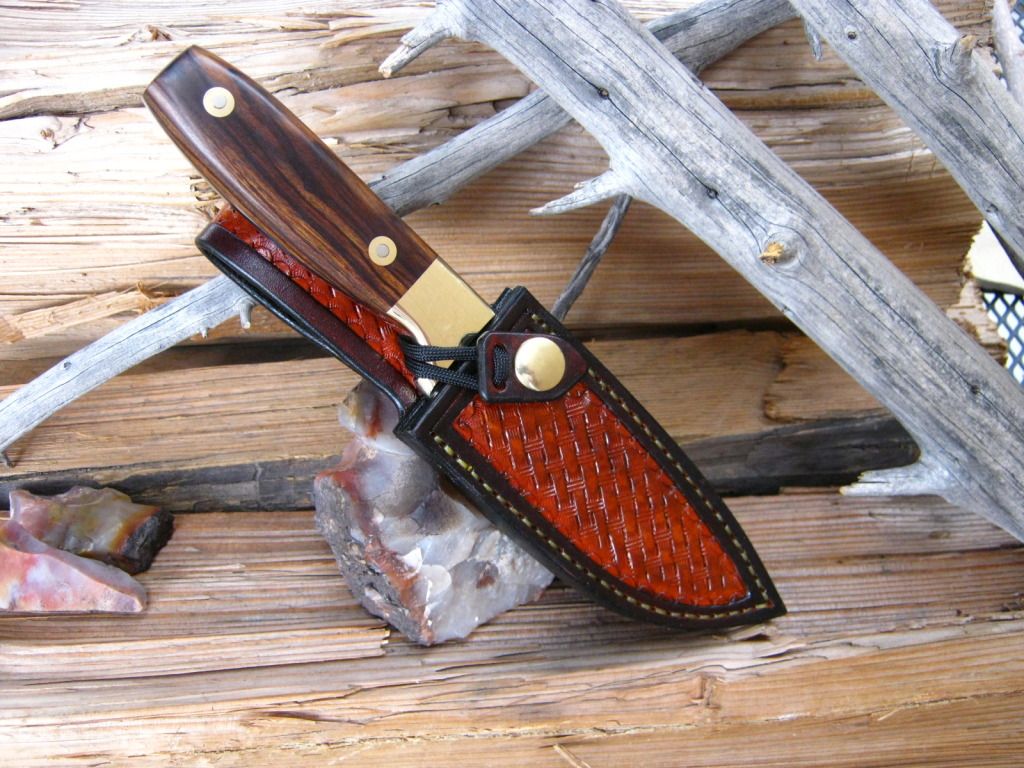
Here are some finished pics.
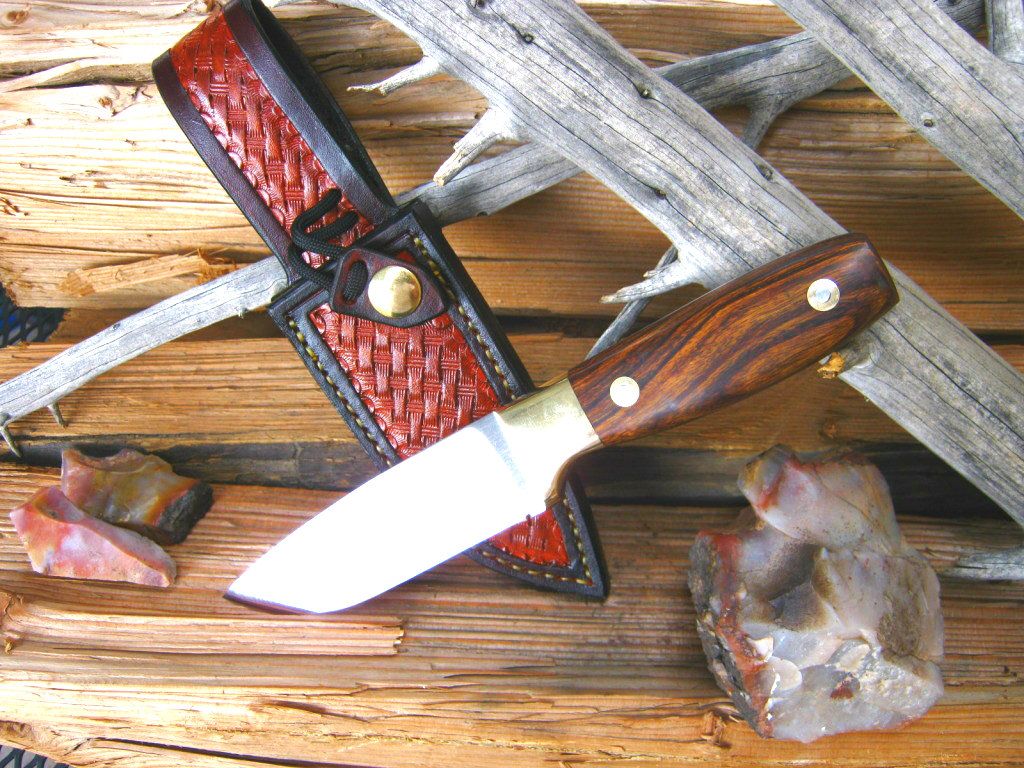
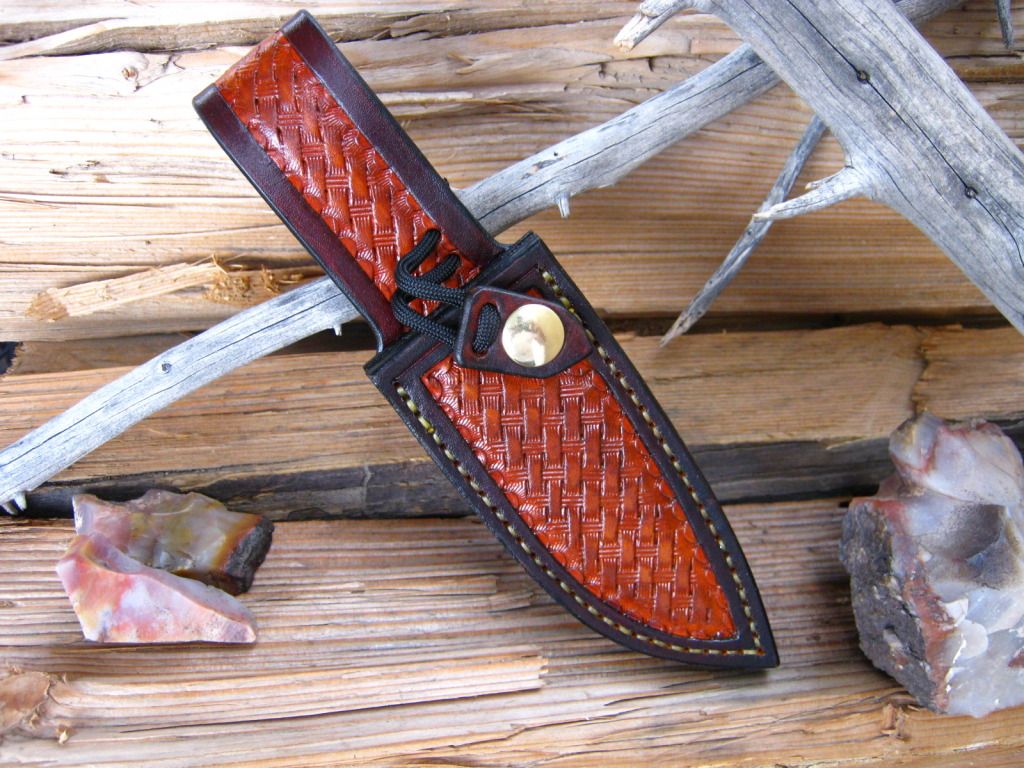
Hope you enjoyed the pictorial!
Certainly not the only way, and probably not the best. But this might give some folks some ideas to use on their own projects.
I recently finished a knife that needs a leather sheath. I wanted to do a bit of tooling, and use a snap for retention.
The process starts with a idea, and then a sketch. I used the actual knife blade template in this case to create a sketch of the sheath on paper. I made three copies of the sketch on my printer because I'll need to cut out different parts to form the front and back, belt loop, liner, and welts.
As you can see in the above pictures, I like to glue the paper pattern to a manilla folder before cutting it out. This gives me a stiffer, more durable template to trace around when transferring the pattern to the leather.
So, after cutting out the leather pieces, I do some tooling. I've marked the border and cut it with a swivel knife, then I mark the center line to establish a straight basketweave stamping pattern. This is done using the stylus on a modeling tool, and you have to case the leather first.
To do basketweave stamping, I put the diagonal corners of the tool on the center line and make the first stamp. the for each following stamp, I place one of the straight "bars" on the corner of the stamp in the opposite corner of the previous impression. Tandy has a good video demonstrating this technique.
After following the pattern to the end, I connect a second row of stamps.
When the pattern is filled out, I go around the outside edge that I cut with my swivel knife, and use a beveling tool to stamp the pattern down to give nice contrast with the border. I then use a small camouflage tool to blend the pattern around the edges.
A quick coat of tan dye. It will dry lighter in color than this, I'm counting on it.
Now to case, mark, and cut the front of the sheath to prep for tooling. As you can see, I cut out another part from my original pattern to use as a tooling template, and to mark the snap retention position.
Cut the border with a swivel knife. I later finish the border around the snap as well.
Basketweave stamped in.
The border beveled and camouflaged. I use the modeling tool again to touch it up here and there.
Maker's mark on the back of the sheath.
Dyed with tan again, punched the hole, and set the snap.
I've turned over the front of the sheath, and applied Barge cement to the back of it, and to the back of the liner. Normally I wouldn't use a liner but since this sheath has a snap, it is needed to prevent the snap from scratching the blade.
After 10-15 minutes you can stick the two pieces together. Make sure you have them properly aligned because once this stuff grabs it's permanent.
Next comes the neat part... using Tandy's "Super Shene" as a resist. I use a pointy little brush to apply the finish to the center, tooled portion only. After this dries, I can then go back with the brush and apply a darker dye to the border to make the weave really stand out.
Ok, so here's the medium brown applied thick to the borders...
I won't apply super shene to the borders because they will need to be cased again so I can mark, cut and drill for the stitches. Then the stitch grooves will need to be re-dyed as well.
I use a stitching groover and overstitch wheel to groove and mark for the stitches for the front piece only.
I mark and drill the belt loop and the back piece to stitch the two together. By attaching the belt loop to the outside of the sheath I am able to provide clearance for the bolster and make it a better fit. If I had just folded the back over to form the belt loop it wouldn't fit the knife as nicely.
Here they are together. I used tan artificial sinew.
Gluing up the welts.
The whole thing glued together, I use Barge cement.
Drilling the stitch holes with a Dremel drill press attachment.
After drilling, I touch up the dye with a Q-Tip.
Then it's out to the shop to use a 36 grit belt on the grinder to even up the edges.
And then I remove the sharp edges with a #2 edge beveler.
Dying the edges to match. I follow this with some gum tragacanth to slick them, then some black Fiebing's Edge Kote.
Now to make the retention snap. I like using paracord with a little snap tab like this so that tension can be adjusted and the cord can be replaced if it gets dirty or gets cut when removing the knife in a hurry. Leather straps stitched or riveted onto the sheath are ruined if they get cut, and aren't easily replaced by the user.
Punch some holes in the belt loop to attach the retention strap.
All that remains is to rivet the snap onto the tab, then feed 550 cord through it and knot that inside the belt loop.
Here are some finished pics.
Hope you enjoyed the pictorial!