Titanium Damascus thread

I am trying to avoid using anyone's brand name so I keep saying pattern welded Ti. Those guys are making pattern welded Ti but I do not know their exact process. I am trying to figure out a process that I can do in my shop with what I have. I am not selling it and this is just for personal use so I am not worried about infringing on any patents. This is the first I've even heard a patent around this material. You can make your own anything that is patented if it for personal use.

Mokume has been around for centuries and in many ways, this is the same, just different materials.

I'm assuming you've already thought of this...
Isn't Timascus patented by Tom Ferry?
Not sure about Mokume. I know Chad Nichols makes Ti Mokume without stepping on the patent.
I guess you're doing something similar?
 
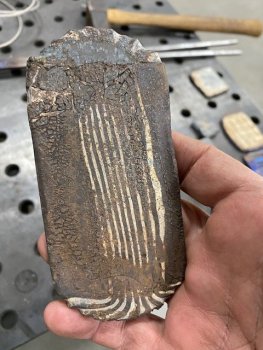
This is the can billet.
It had thin strips chunked in a can and topped off with Ti powder.
I squeezed it flat and you can see the edges of the strip material pretty clearly.
It's pretty cooked on the surface.
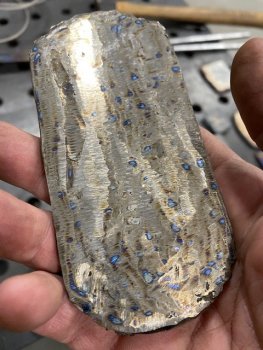
Here is the back side.
IMG_0821.jpg

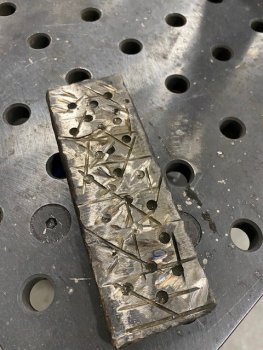
I spent quite a bit of time on the angle grinder trying to remove pits and real thin delams.
I am guessing the powder in the can was pretty thin in many spots. The pits run pretty deep. I think that is less too hot and more just the powder didn't like the process. I would not repeat this.

IMG_0822.jpg

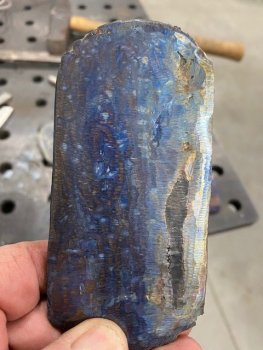
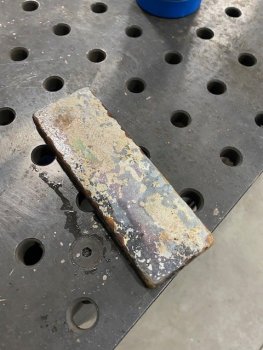
I heat colored it to see if anything showed up. It's a blurry mess with way too many pits to be usable but now I learned something.

IMG_0823.jpg

I will concentrate on stacks instead of can's for awhile. My next test will be making a stack in the .300" range thick, weld it, drill it on one side like you would with a rain drop pattern and then hit with the power hammer.
 
This is a billet of damascus titanium 10"x2"x.200"
The pattern is just horrible but we can do better on the next one.
12 layer stack.


IMG_0866.jpg

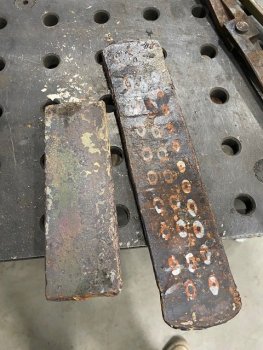
Here is this billet before getting the power hammer.
I drilled some divots and drilling Ti is not fun. Nothing about Ti is fun. Ti is brutal.
IMG_0849.jpg

Here it is after running it out. It is sitting next to another billet that was the same size to give you an idea of how it stretched out. Ti, at temp, moves easily under the hammer.
IMG_0856.jpg

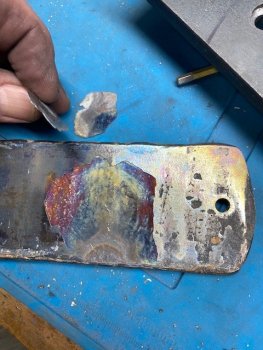
I did get some delam on the outer layers in one spot on the back. It could be one of several different things.
It could be: a hot spot from the forge, a cold spot from pressing, a pin hole leak (not likely), something weird under the hammer.
My guess right now is this is from the press that sucks the heat out so fast it blistered when getting squeezed. Guess away if you like.

IMG_0867.jpg

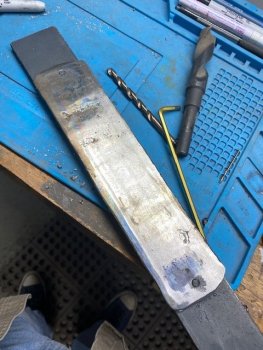
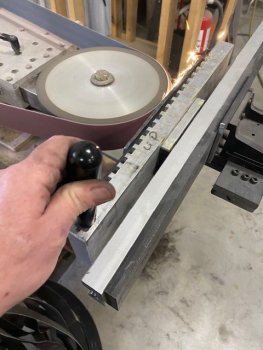
Removing excess Ti is (saying it again) brutal. I drilled, tapped and screwed it to some mild steel and ran it on my surface grinding attachment.
IMG_0865.jpg

This took an hour just to get it kinda flat. I definitely need to figure out how to mill this. I wish I had a Blanchard grinder.
IMG_0864.jpg

Stay tuned. More to come.
 
This process sounds like a mission! It is very entertaining from a spectator's perspective though :cool:
 
Pretty much a mission. I am going to understand how this works.
Peter Martin and I have been comparing notes and pictures daily. He is doing the same thing but we are using slightly different processes.

This process sounds like a mission! It is very entertaining from a spectator's perspective though :cool:
 
Looks like you're making some good progress but geez, all that Ti has got to cost a fortune

And I agree 100% Ti is brutal to work with
 
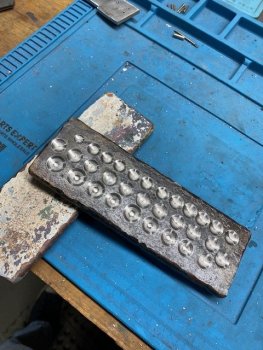
This billet got some drill holes and cuts for a pattern.
The billet is around .450" thick x 2" wide and 6" long. It ended .210 thick (roughly) x 2.25 x 10" after going through the hammer.
IMG_0869.jpg

The back side.

IMG_0870.jpg

The bottom billet is the one just finished. I had some delams on the surface layer again on one end. I believe it is from the press. I pressed one end and not the other to test this and the pressed end showed up with delams.

So after the first press to stick it all. I will be avoiding using the press as much as possible.
This bar was forged around 1900F.

I would guess 50% is usable. 25% will be after milling it down a bit and the rest is scrap.
The areas that have surface delam can still be used I think but don't know that for sure yet.
I need to brush up on my face milling speeds, feeds and stuff to use the mill. A 36 grit ceramic grinder belt just annoys this stuff.


IMG_0878.jpg

Next I will try some in a can to see if the mild steel jacket of the can helps minimize the surface layer delam.
 
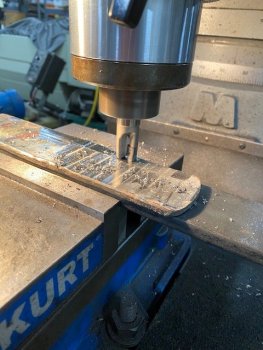
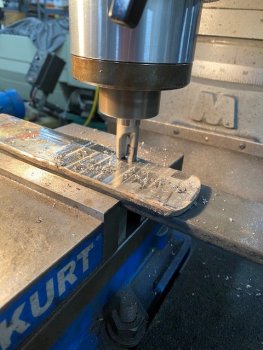
Today was about milling the two billets flat or kind of flat. Maybe skinned is better.

I used a 3/4", 2 flute carbide insert end mill.
300RPM and slow feed at .015" a pass. This worked but was pretty tedious even with the table power feed.

IMG_0881.jpg

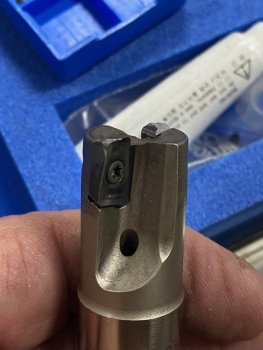
The inserts hit a couple delams and chipped pretty good. I knew they were chipped from the finish but pushed them through anyway. I changed them when I got done with one side.
IMG_0882.jpg

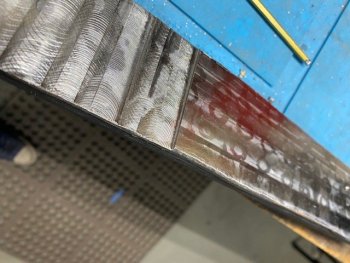
Here is one billet mostly flat. The left side I took quite bit more off to see how far the delams went. They were deep and you could not tell they were there until you milled it and they flaked off.
IMG_0883.jpg


I did some noodling around the net on heat treating titanium. No one does it that I am aware of in the knife community. The tech information is super techy and sketchy with lot's of conflicting information. Just like heat treating steel. I wanted to anneal a bar to see if with be easier to work. It was. The recipe is pretty simple. Bake at 1350 for 30 minutes, air cool. If you can anneal something, that means you should be able to make it harder. You can. I will have to do more research but Ti is such a bugger I am not sure if there is an upside in knife making to making it any harder.

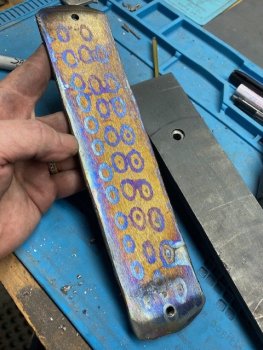
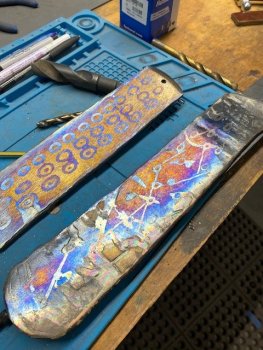
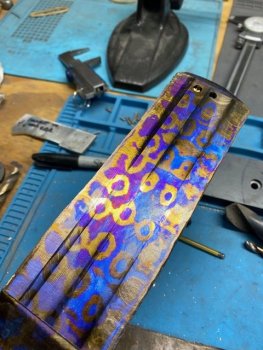
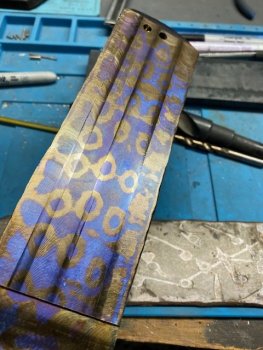
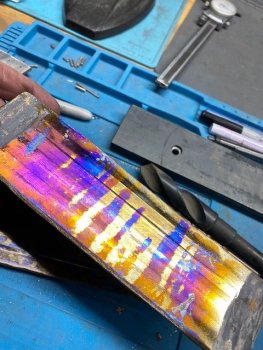
Here is a heat colored billet. Nice right?
IMG_0885.jpg

If you touch it the beautiful purple rubs away and you are left with this washed out blue. I am doing something wrong, I just don't know what it is yet.
IMG_0886.jpg

Here is the second billet. Most of the pattern that was there got milled way removing scale and making it flat.
IMG_0887.jpg
 

Attachments

  • IMG_0881.jpg
    IMG_0881.jpg
    75.4 KB · Views: 0
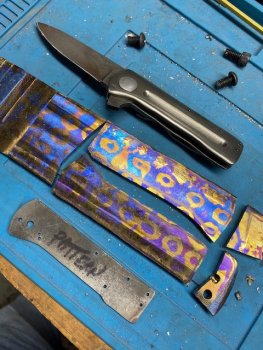
I cut one of the billets up for a frame lock.
This billet is still around 3/16" thick. I'll thin it a bit but basically just to get the back flat and cleaned up. I will contour it heavily to bring out the layers. Now I need to make some steel damascus for the blade.

IMG_0888.jpg
 
Back
Top