Stormcrow
Well-Known Member
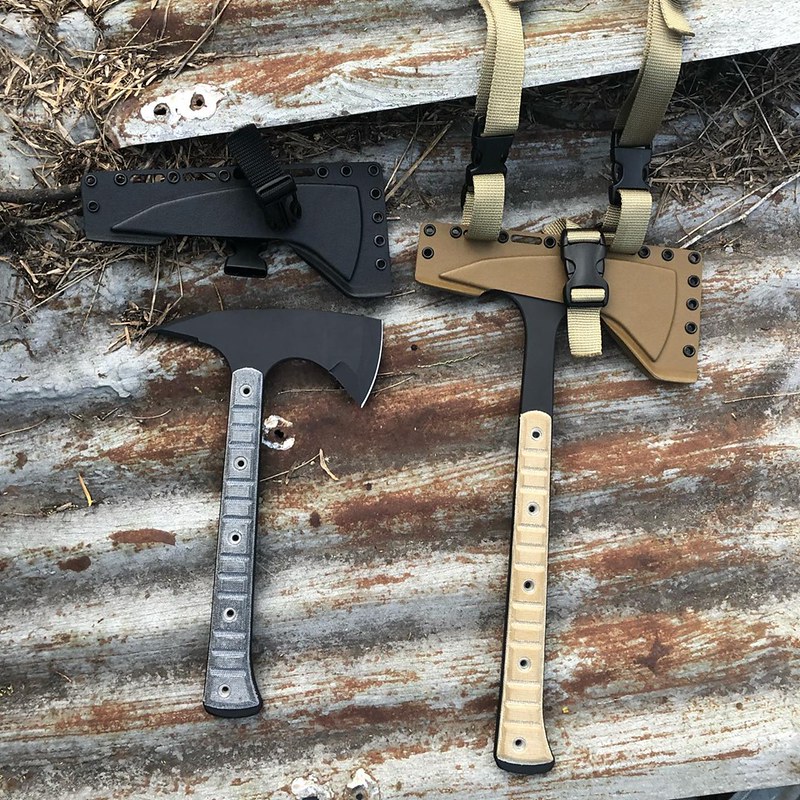
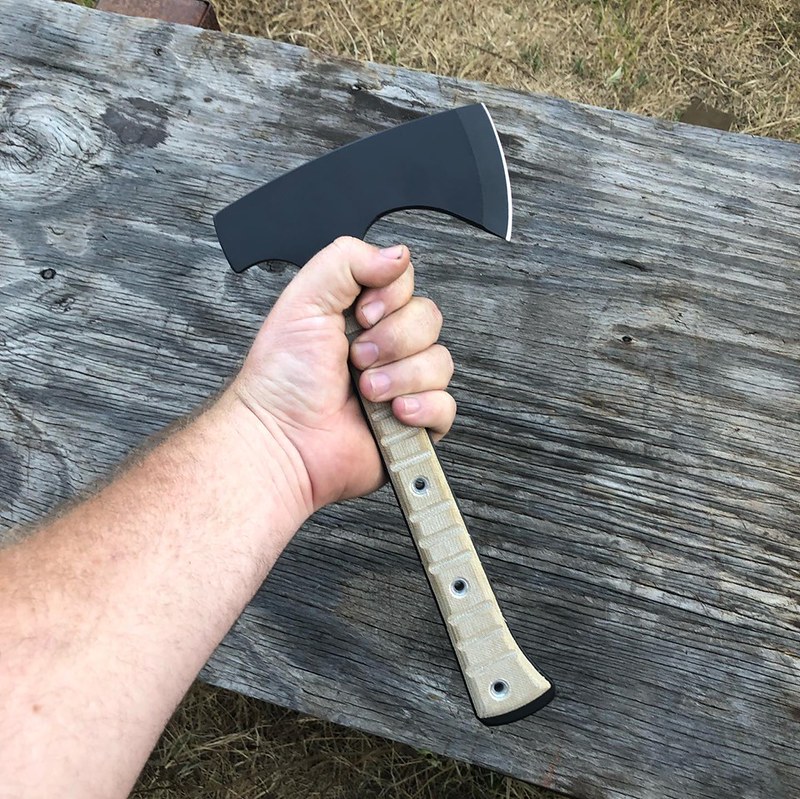
I've been making full-tang tactical tomahawks since 2013, with the prototype process beginning with nylon-handled punched-eye 'hawks extending several years before that. The 'hawks were my first foray into making mid-techs, which I define as using modern manufacturing processes to build small batches of blades. Within my usage of the term, this can range everywhere from full-on CNC machined everything to hand-ground blades that start as waterjet-cut blanks. The goal is greater levels of production than hand-making every aspect of a knife, allowing higher quality than an average factory-made knife but a lower price than a full-on custom.
For the last little bit I've been pooling resources with JB Knife and Tool to help both companies move toward getting more work out into the hands of customers. Brian and John of JB Knife and Tool are good guys with a great deal of practical experience on the knife making and using sides of things.
For Blade Show this year, we threw some tech at the tomahawks and the result was me building the largest batch of tomahawks I've done so far. The blanks are waterjet cut and hand ground with an angled workrest, as it has been since I started. The grinder has been upgraded to an AmeriBrade and the work rest is the far more adjustable D-D Work Rest, but the basic process is the same.
 blanks by James Helm, on Flickr
 workrest by James Helm, on Flickr
When it came time to make handles and sheaths, we made use of a tabletop CNC router. The handle slabs were shaped in three stages, with three different tool changes. This meant someone tending the machine and manually changing out the bit and collet, then re-zeroing the router before starting the next stage. It was still quicker and more consistent than the old way, using jigs with table routers. We're looking at a larger CNC router with an automatic tool changer for a future upgrade.
 handles01 by James Helm, on Flickr
You can see some of the stainless steel tube rivets cut out in the little container at the top of this picture.
 handles02 by James Helm, on Flickr
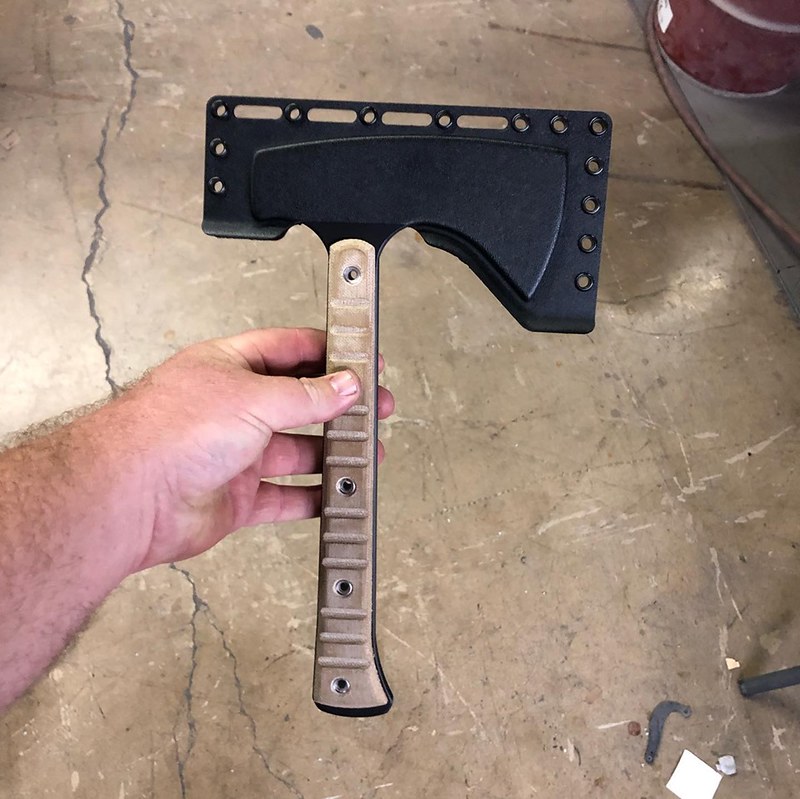
Sheaths were molded on forming molds I made a while back using steel layers waterjet cut and assembled to create a three dimensional form, pressed with my big hydraulic forging press. We are working on a design to be machined from one chunk of polymer to be used for vacuum forming the sheath halves. We rigged a temporary fixture for drilling holes and trimming the outside of the sheath halves using the tabletop CNC router. A more permanent holding fixture for trimming the molded sheaths is next up after the vacuum mold.
Even with the older molds and temporary fixture, the results on trimming sheaths was quicker and more consistent than the old method.
 hawks04 by James Helm, on Flickr
 hawks05 by James Helm, on Flickr
In addition to inventory for my own tables at the Blade Show, I made deliveries to a couple of dealers at the show. Here I am loaded down with two different deliveries.
 delivery01 by James Helm, on Flickr
 delivery02 by James Helm, on Flickr
A video showing some of the process of laser engraving the touchmark, shaping handle slabs, and trimming sheaths.
The 'hawks are made from 1/4" 80CrV2 steel, coated with Cerakote, handles are TeroTuf, sheaths are Boltaron.
 hawks03 by James Helm, on Flickr
 hawk03 by James Helm, on Flickr
The techniques used on the tomahawks are in the process of being implemented on my line of mid-tech knives as well. The first batch of knives that will be getting CNC routed handles is being Cerakoted at the moment.
For the last little bit I've been pooling resources with JB Knife and Tool to help both companies move toward getting more work out into the hands of customers. Brian and John of JB Knife and Tool are good guys with a great deal of practical experience on the knife making and using sides of things.
For Blade Show this year, we threw some tech at the tomahawks and the result was me building the largest batch of tomahawks I've done so far. The blanks are waterjet cut and hand ground with an angled workrest, as it has been since I started. The grinder has been upgraded to an AmeriBrade and the work rest is the far more adjustable D-D Work Rest, but the basic process is the same.
 blanks by James Helm, on Flickr
 workrest by James Helm, on Flickr
When it came time to make handles and sheaths, we made use of a tabletop CNC router. The handle slabs were shaped in three stages, with three different tool changes. This meant someone tending the machine and manually changing out the bit and collet, then re-zeroing the router before starting the next stage. It was still quicker and more consistent than the old way, using jigs with table routers. We're looking at a larger CNC router with an automatic tool changer for a future upgrade.
 handles01 by James Helm, on Flickr
You can see some of the stainless steel tube rivets cut out in the little container at the top of this picture.
 handles02 by James Helm, on Flickr
Sheaths were molded on forming molds I made a while back using steel layers waterjet cut and assembled to create a three dimensional form, pressed with my big hydraulic forging press. We are working on a design to be machined from one chunk of polymer to be used for vacuum forming the sheath halves. We rigged a temporary fixture for drilling holes and trimming the outside of the sheath halves using the tabletop CNC router. A more permanent holding fixture for trimming the molded sheaths is next up after the vacuum mold.
Even with the older molds and temporary fixture, the results on trimming sheaths was quicker and more consistent than the old method.
 hawks04 by James Helm, on Flickr
 hawks05 by James Helm, on Flickr
In addition to inventory for my own tables at the Blade Show, I made deliveries to a couple of dealers at the show. Here I am loaded down with two different deliveries.
 delivery01 by James Helm, on Flickr
 delivery02 by James Helm, on Flickr
A video showing some of the process of laser engraving the touchmark, shaping handle slabs, and trimming sheaths.
The 'hawks are made from 1/4" 80CrV2 steel, coated with Cerakote, handles are TeroTuf, sheaths are Boltaron.
 hawks03 by James Helm, on Flickr
 hawk03 by James Helm, on Flickr
The techniques used on the tomahawks are in the process of being implemented on my line of mid-tech knives as well. The first batch of knives that will be getting CNC routed handles is being Cerakoted at the moment.

 hawk04
 hawk05
 hawk02
 hawk01
 hawk03
 sheath01
 sheath02
 sheath04
 mold
mold bob01
bob01 bob02
bob02 bob03
bob03