Texas Cowboy Bowie

J. Doyle

Dealer - Purveyor
I haven't posted much in a while. I've been super busy in the shop. Thought I'd post this one up though.

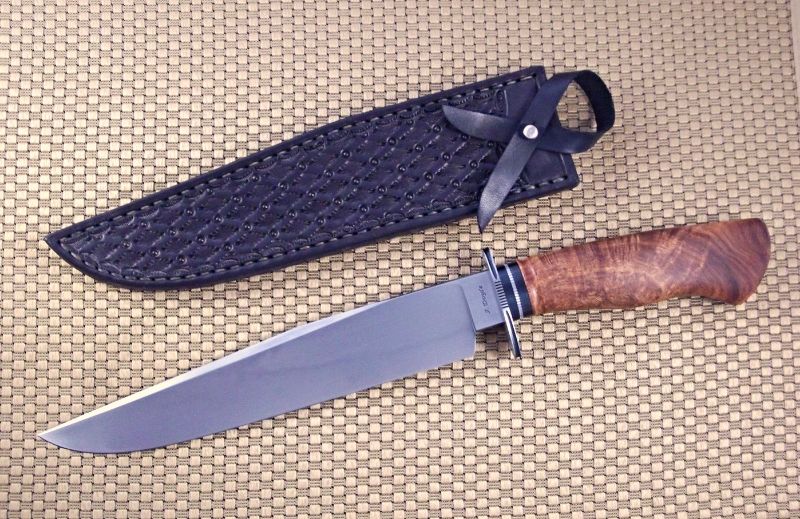
This is a mid sized cowboy bowie I finished just before Christmas for a great collector and friend of mine in Texas.

Hand forged from 1075 steel
Differentially hardened with time/temp control of my salts
13 1/4" overall, 8 1/4" blade, .220" thick at the ricasso w/ sharp distal taper
Clip is just shy of sharp
Rounded spine and ricasso edge
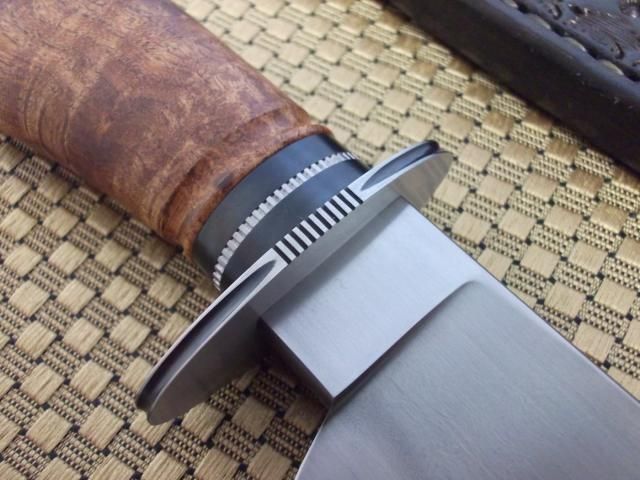
Hardened and blued 1084 steel fittings
Coined stainless steel spacer and finial
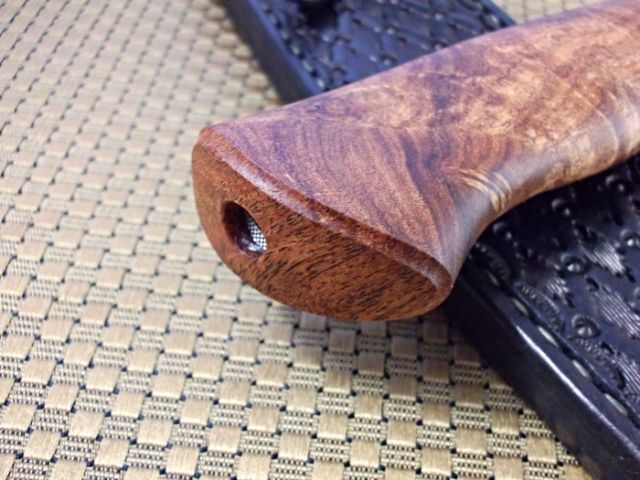
Texas Mesquite handle

All comments and discussion welcome. :)


Here's a couple bad pics of the blade but they show the activity in the hamon pretty good:
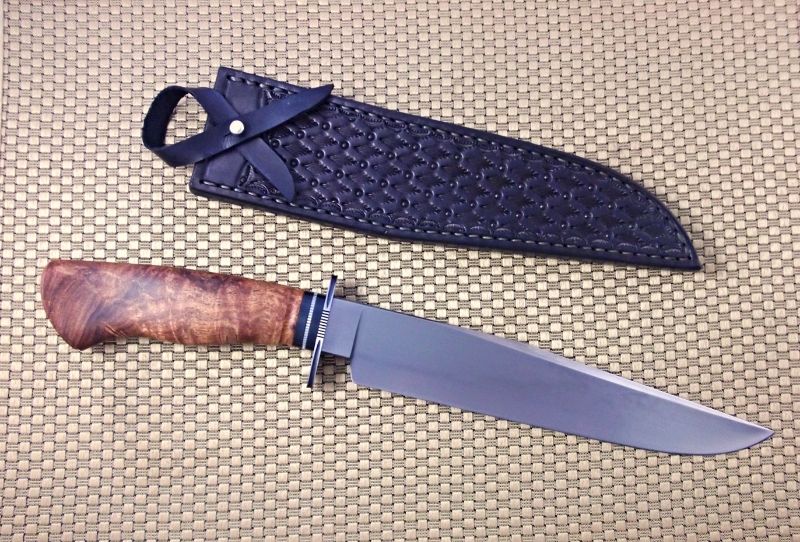

 
Awesome as usual. I'll take 3 (I wish!) I always try to figure out how you do certain things and the coined spacers intrigue me. Are you using a checkering file on those once they're shaped? Maybe have a file with some sort of a spacing file guide on it? I keep thinking the spacing is so perfect it couldn't possibly be by hand. Do you make them take-downs mainly so you can incorporate details like that? I know too many questions about secret stuff, but your work always amazes me and makes me think.

One more question, or request. I want to see your very first knife, like Ken posted his the other day. I'm curious if you started out as pitiful as the rest of us or were you just born a knife making savant. :1:
 
Yes, another Great knife! The guard looks sweet as hell, and that burl is beautiful! You did a great job with the hamon as well.


Don
 
Nice knife John, as usual it's a show winner, you may not be able to answer me on this topic without some type of drawing, but how do you attach the handle? I can see some type of stud/bolt in the end, but not sure how exactly it works. I've been making scores of hunting/skinning knives lately, but I really love the big bowies, and would like to make one if I can finish up these other on the bench. Thanks John.


Wayne
 
Wow John,beautiful! What impresses me is all the fine details. I can't imagin how many hours you spent on the gaurd and spacer alone. All those hours were well spent though. I've heard it said that in order to build a masterpiece every part must be a masterpiece and that's what you have done here.
Well done!:35:
 
Thank you guys. I really appreciate the kind words. It means a lot to me.

I will go back through and answer these questions when I have a bit more time. Got to head out here in a few minutes. I think I also have a pic of my first knife. I'll post it too.

Thanks again guys.
 
That's a great looking knife John. I applaud your workmanship and attention to detail. Gorgeous!
 
I concur with all of the compliments above. I haven't been around here much lately myself. I wish I had something like this beauty to blame it on! I have been letting a friend of mine come and use my shop to make his first couple of knives. We spend much time talking knives and when he asked who my favorite makers were, you were at the top of the list. Form, function, artistry and attention to detail like no other.
 
Thanks again for the comments guys.

Anthony, I'll answer your questions in the quote below:

I always try to figure out how you do certain things and the coined spacers intrigue me. Are you using a checkering file on those once they're shaped?

I use a checkering file sometimes when possible but on round and oval shapes it doesn't always work out, especially where the start and finish point blend and around tight curves. In those cases, I use a single three corner file by hand. Even the checkering file takes some practice and care to get the cuts consistent.

Do you make them take-downs mainly so you can incorporate details like that?

Making them take down does certainly help during assembly in the fact that there isn't that finality that the 'glue up and finish' method imparts. To do some of the details, there'd be no way to do it if it wasn't a take down. The convenience comes at the price of precision, careful planning and forethought and a lot of extra time.

One more question, or request. I want to see your very first knife, like Ken posted his the other day. I'm curious if you started out as pitiful as the rest of us or were you just born a knife making savant. :1:

Here you go: Ignore the finger prints and stains/corrosion. I use it around the shop for all the things you shouldn't use a knife for. When it was new, it looked okay as my finishing skills were decent. It has a pretty good list of other issues though. :)

 
....how do you attach the handle? I can see some type of stud/bolt in the end, but not sure how exactly it works.

Hi Wayne. I turn the last 1/2" or so of the tang down to an actual bolt. I do it after heat treat by hand with my belt grinder and files. It's not as daunting as it may sound. :) It takes me about 5 minutes or so. This fastener is 8-32 threads so I turn the tang down to .160" in diameter and cut 8-32 threads on it. Then the finial is inset, basically it's a step bolt like the female half of a corby bolt except I make my own as it's quite a bit cheaper.

Again it takes some care and planning to drill the handle out correctly so everything lines up but if you take your time, it always works out okay.

Thanks for the comment.
 
You are a natural! That first one looks pretty darn good too. And, I think those take downs have to be a lot harder than you're letting on. :1:
 
Back
Top