Chris Railey
Well-Known Member
Two words my friend, file guide. Make it, buy it or borrow it just use it. That is the only way I get mine right.I’ll just be happy when I get 2 the same.... lol
Two words my friend, file guide. Make it, buy it or borrow it just use it. That is the only way I get mine right.I’ll just be happy when I get 2 the same.... lol
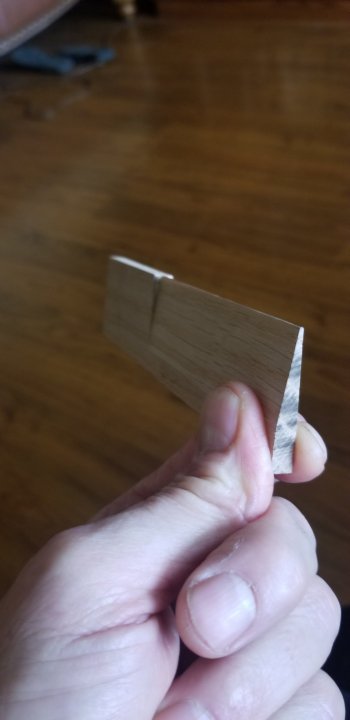
 Next, I set my file at a 1* angle relative to the blade. Just going for shape here.

 Iuse these little cross hatches to gauge progress
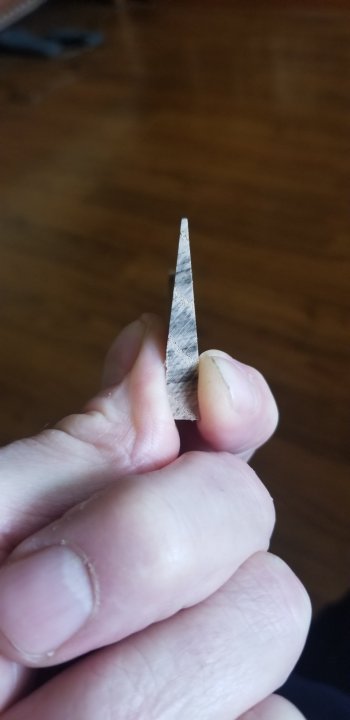
 After a few file swipes, no filing toward the plunge line is progressing, so I change the angle again
 Repeat filing and watching the line
 After a short time, the plunge line appears pretty close. we'll further define it during the sanding phase. The next step would be to change the file angle to it's final angle - in this case 5*. and start filing the bevel. Remember to watch that topline.
I don’t think I’m smart enough to make this happen ... lolHere is the tutorial I promised. Step 1: cover the blade with some metal marker and scribe (using a carbide pen if possibleView attachment 76743Next, I set my file at a 1* angle relative to the blade. Just going for shape here.View attachment 76744View attachment 76746View attachment 76747Iuse these little cross hatches to gauge progressView attachment 76748View attachment 76749After a few file swipes, no filing toward the plunge line is progressing, so I change the angle againView attachment 76751View attachment 76752Repeat filing and watching the lineView attachment 76753After a short time, the plunge line appears pretty close. we'll further define it during the sanding phase. The next step would be to change the file angle to it's final angle - in this case 5*. and start filing the bevel. Remember to watch that topline.
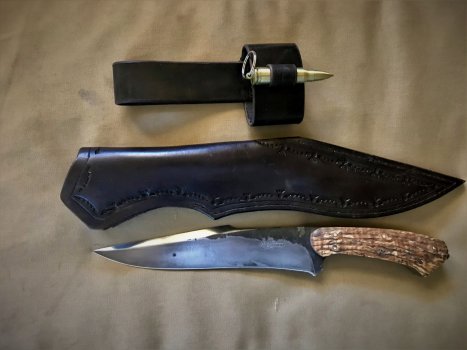
Hope this helps, I'll answer any questions that I can.
Bob, I don't know what that means. I hope it's good though.