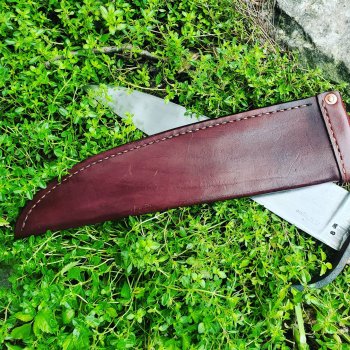
Hey everyone reaching out for some advice. I’m fairly new to knife and sheath making. So here it goes…..looking for recommendations for sewing machine for my sheath making. Tried the pitch fork method and hate it. You folks care to offer any of your well earned experience in this area pls. TIA
You are using an out of date browser. It may not display this or other websites correctly.
You should upgrade or use an alternative browser.
You should upgrade or use an alternative browser.
Sheath making
- Thread starter Huck
- Start date
Edwardshandmadeknives
Well-Known Member
My well earned experience says to have someone else do it. After messing with leather for the better part of 20 years, I finally just started paying a leather worker to make sheaths. He does nicer work than me, so I don’t bother with it.Hey everyone reaching out for some advice. I’m fairly new to knife and sheath making. So here it goes…..looking for recommendations for sewing machine for my sheath making. Tried the pitch fork method and hate it. You folks care to offer any of your well earned experience in this area pls. TIA
Dennis Morland
KNIFE MAKER
I am a pitch fork type of maker. I have never used a machine. I cannot give you any advice on a machine. They all have problems associated with their use. Hand cramping is probably not one of them.
I have however used about every way imaginable to keep stitches straight, even and consistent. Single punches, nail, drill press, roller stitch markers, etc. Like many, I have changed techniques in search of the perfect handstitch. Unfortuantely, I have failed. Sometimes, miserably.
Currently, I am using a 8, 4, 2, 1 cheap convertible punching set from Tandy. With thicker material it runs out of length and I will eventually upgrade to something with a bit more tooth length. But, for now I will just keep practicing.
Good luck in your quest.
52 Ford
Well-Known Member
I never bought the pitch fork style punches. I started out with a stitching awl, then decided that sort of sucked for the 7 to 10 ounce leather I work with. I ended up using a rotary hole punch (on the smallest setting). I can make a sheath that I'm proud of in a few hours. That includes everything from initial layout to burnishing the edges when I'm done.
Dennis makes pretty darn nice sheaths! For sure hand sewing is my far the last expensive.
There are two options for sewing machines - spend $2500 for a Cowboy or the like...... OR, spend $125 for the Chinese ShoePatcher machine. That one will take some time getting it to sew like you want, I got my machine sewing pretty good with #207 thread. I did add an servo motor so I don't have to handcrank it. Since I've been thru it, I can tell you for the amount of time 'n money I put into that machine I could have purchased several sheaths.... I've got maybe $250 and many hours work working with it.
There are two options for sewing machines - spend $2500 for a Cowboy or the like...... OR, spend $125 for the Chinese ShoePatcher machine. That one will take some time getting it to sew like you want, I got my machine sewing pretty good with #207 thread. I did add an servo motor so I don't have to handcrank it. Since I've been thru it, I can tell you for the amount of time 'n money I put into that machine I could have purchased several sheaths.... I've got maybe $250 and many hours work working with it.
Gliden07
Well-Known Member
Unless you are willing to spend a good bit of money for a machine the only option is a Chinese Shoe Patcher! As Dennis said all of the machines are figidy! The Shoe Patcher is super figidy. I have one and it works pretty good but, I spent a lot of time dialing it in and it still drops a stich or some other problem at the worse possible time! I recently bought an old Singer Model 29-4 (built in 1911) it needs some refreshing but should do what I want. It will be at the max of what the machine is capable of. Pending any issues it will be $500 to $700 all in when done! If I was going to buy a serious machine I would get a Cobra class 26. It's about $2400. With the extra table to make it super functional and a few doodads probably closer to $2600 before shipping! This is a serious machine and if I remember will sew up to 5/8" of leather! Not with my budget constraints however!! All said a good Saddle stich with Ritza Tiger thread in 1mm is far superior to machine stiching as far as durability! With some practice and attention to detail you will be able to produce great looking products!! If you don't have one a stiching grover or creaser will seriously help with straightening out the stiching. If drilling mark holes on your welt with pricking irons and use a drill press with the welt supported by a price of wood (to level off the welt), drill all your holes (1/16" bit) then saddle stich.
PS I finish assemble all my sheaths with contact cement first, sand the welt even, groove the welt, drill holes, stich, then finish the welt.
PS I finish assemble all my sheaths with contact cement first, sand the welt even, groove the welt, drill holes, stich, then finish the welt.
tkroenlein
Well-Known Member
IF I was buying a machine, it would be the Cowboy Outlaw.
But, I have finally settled on a method that works for me. Once I have the it all put together and the welt sanded and all squared up, I run a fairly shallow stitch groove and mark with an over stitch wheel. I then use a dremel with a 5/64" bit to drill through into a piece of scrap leather on a block of wood. I then flip it over and run the over stitch wheel over the newly drilled holes, and then the stitch groover. Then I use the blunt stitching awl to kinda swage the hole on both sides. This is to eliminate all signs of the "pucker flap" which I've complained about here in a thread I started in the sheath forum.
I use John James 1/0 needles and Ritza Tiger thread in .8mm or 1.0mm.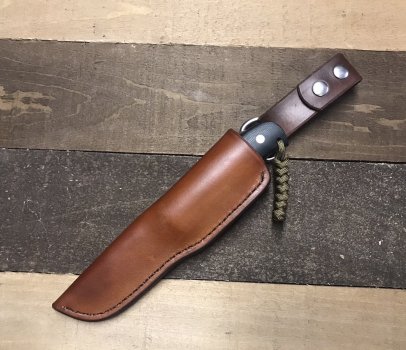
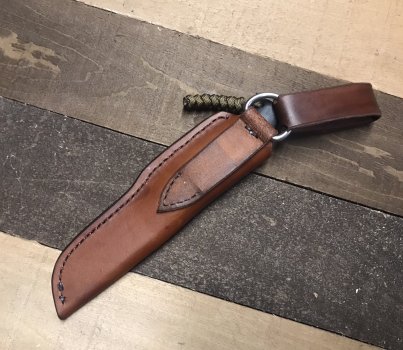


jmforge
Well-Known Member
The Cowboy Outlaw appears to have become the "replacement" for the old Tippman Boss. I know that some say that the current Boss is not of the same quality as the old one. but I did notice that it is being sold by Tippman for for maybe $250-300 less than it used to sell for. and $400-500 less what Tandy and others are getting for the Outlaw. ($1395-1495 vs $999) Still worth a look maybe?
52 Ford
Well-Known Member
One of the benefits of punching the holes is that it pulls the edges of the punched hole in. I haven't used a grooving tool since I was probably 14 or 15 years old (first time I went to Tandy leather) I find that with the thread pulled tight enough, if makes enough of a groove on it's own. I also gave up on the stitching wheel for layout shortly after. I mark all the holes with a pencil and ruler or just eye ball it. Close enough is good enough. I aim for maybe 1/32" or 1/64" accuracy. Can't see any discrepancies in the spacing when it's done.
52 Ford
Well-Known Member
I like that sheath.IF I was buying a machine, it would be the Cowboy Outlaw.
But, I have finally settled on a method that works for me. Once I have the it all put together and the welt sanded and all squared up, I run a fairly shallow stitch groove and mark with an over stitch wheel. I then use a dremel with a 5/64" bit to drill through into a piece of scrap leather on a block of wood. I then flip it over and run the over stitch wheel over the newly drilled holes, and then the stitch groover. Then I use the blunt stitching awl to kinda swage the hole on both sides. This is to eliminate all signs of the "pucker flap" which I've complained about here in a thread I started in the sheath forum.
I use John James 1/0 needles and Ritza Tiger thread in .8mm or 1.0mm. View attachment 80475View attachment 80476
Are you using that Dremel in a drill press stand?
If so, and if you ever wanted to step up to a dedicated "small hole" drill press, Proxxon has some that look pretty well made.
Anyone have experience with the Weaver hand crank stitching tool. Looks pretty sweat but I went to get a link and see it's JUMPED in price lately. But what hasn't I suppose.
 www.weaverleathersupply.com
Item Detail
tkroenlein
Well-Known Member
Nope, I'm free handing it. I think it's the lighter pressure and feel that keeps the hole from wandering as bad.I like that sheath.
Are you using that Dremel in a drill press stand?
If so, and if you ever wanted to step up to a dedicated "small hole" drill press, Proxxon has some that look pretty well made.
52 Ford
Well-Known Member
Gotcha. I'd you don't have one already, you can get a flex-shaft hand piece for Dremels. I think I paid 20 or 25 dollars for it. There's a button on it to lock the spindle so you can loosen the collet (like on the Dremel body). If you let someone else use it, make sure they know what the button does. Someone was using mine and I hear this horrible grinding noise, turn around, and they had a funny look on their face. Like "uhhhhh, did I do that?". Nothing I got upset over, but it's something to pay mind to.
Sorta funny. I did the same thing to an angle grinder... bumped the lock button while it was running. Sheared the pin off. OOPS.
Sorta funny. I did the same thing to an angle grinder... bumped the lock button while it was running. Sheared the pin off. OOPS.
Gliden07
Well-Known Member
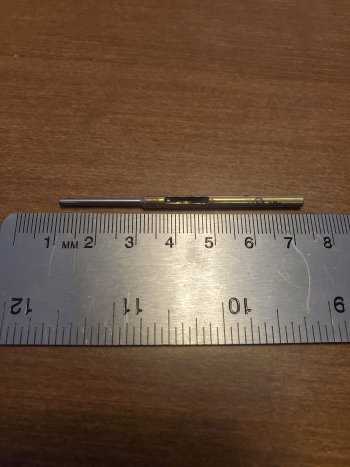
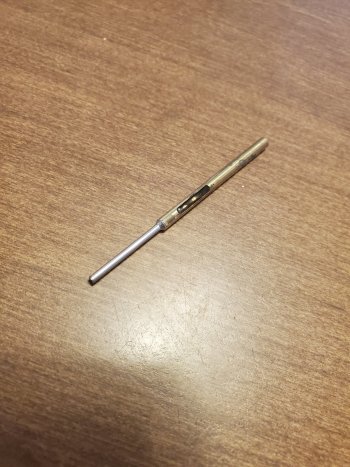
I actually have tiny holesaws (made by a member on here that no longer makes them) that I cut the holes out with my drill press on my heavier sheaths. Assemble sheath with contact cement, square welt up, cut a stiching groove, I use pricking iron to layout spacing, drill holes with holesaw on drill press with a wood backer so holes go thru straight, after holes are drilled I flip the sheath over and cut second stiching groove (connect the holes), stain groove, saddle stich, then finish welt edge, hammer down stiching to help close up the holes.
Attachments
52 Ford
Well-Known Member
Specifically, what's the cutting geometry like?
Saw tooth or knife edge? If it's knife edge, is the bevel on the inside or the outside?
What I'm thinking is an outside bevel and a "wavy" edge. Like a bread knife or a meat slicer blade.
Like this. https://www.simpleitaliancooking.com/wp-content/uploads/2016/05/serrated-blade-for-meat-slicer.jpg
The outside bevel would produce a taper like I get with the a rotary punch and the "wavy knife edge" sort of geometry would slice the leather, versus tearing it.
Last edited:
We're talking about a hole saw that's cutting a 1/16" diameter hole thru the leather for stitching? I suspect a smooth cutting edge would be just fine as it's spinning in the drill press. I'd like to know about this also - a 1!6" hole with a holesaw sure does seem like a tiny holesaw.
Thanks for the photos and explanation. Looks like that wouldn't be that hard to make, take some small 1/16" to 3/32" tubing and go from there. That would make a clean hole. The clean hole would make pulling needle 'n thread thru easy, and once it's sewn up, a little hammering to flatten I'll bet the holes close up so they don't look large at all. I think I would use that if I wasn't using the ShePatcher to sew with now.

