Question on handle finishing

Nikolai

Member
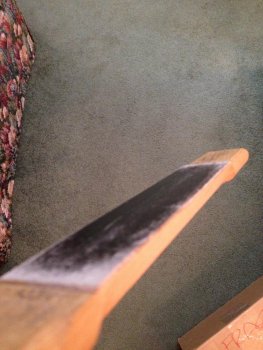
I've been making knives for just under a year now, and there is one thing that I seem to have trouble with. When I go to do the final finishing on the handle of a full tang knife I always end up getting the grey steel dust, from sanding where the tang and wood (or other material) meet, on the handle material and I have trouble getting it to look clean again. I haven't seen anything regarding this problem on any videos, etc, and I have been coping with it by just pinning the handle scales on tightly without glue, then popping out the pins to do the final finishing on the steel, then gluing the handles onto the knife (i still have to re-sand after to get the extra epoxy residue off).

Any suggestions on this would be greatly appreciated.

Thanks, Nick
 
Some suggestions

There are a bunch of things that could be happening and also a number of things you can try:


  • The grey is not just metal filings, but a mixture of metal and whatever compound you are using on your wheel to do the finishing. If you are using black or red compound, then change to white. If you are using white compound, then
  • Sand your handle scale material differently as well as your knife tang where the handle material is attached. The flatter both of these surfaces are, the better match they will make and there will be less potential gaps. For the handle material, take a piece of flat steel and epoxy, not rubber cement, several grits of sandpaper to it. Rubber cement will give and the sandpaper underneath will move. Epoxy the sandpaper to the steel and then push your handle material over it by hand making sure you are completely flat. This will remove sanding grooves from the back of the handle material which will accumulate compound.
  • You should do the same thing with the steel, only you can use a mill or other piece of equipment to help with the labor. The key is to make sure there are no grooves along the edge to catch filings and compound.

    (As a caveat, removing many of the small grooves in the back of handle material can greatly effect the adhesive. Any adhesive or epoxy needs surface area to bind. By removing the micro scratches from the back of the handles, the surface area is greatly reduced and the epoxy won't work as well. After flattening the backs of the handle scales, score the area at least 1/4" in from the edge so the epoxy has more surface area to grab. This will make a surprisingly big difference in the holding power of the adhesive. Do the same thing with the steel, but stay away from the edges that you have worked so hard to flatten.)
  • Take a good look at the wheel you are using for finishing. It is a common thing to use a hard wheel. If you are doing this, then follow up with a more loose cloth wheel that will reach into the crevices and 'clean' things out for you. Many times the wheel you use for finishing will pack the corners and imperfections with compound and filings because it is hard at work doing the finish. Use a cloth wheel with longer "fingers" to clean things up.
  • The cleaning wheel should be operating at a much higher speed than your harder wheel. This allows you to focus on the specific areas you need cleaned without damage to the rest of the knife. If you are ginger with the longer fingers, and the wheel is going fast enough, you can effectively clean things out with very light pressure and little effort.
  • I am a big fan of epoxy for the handle scales, particularly when using natural materials. The adhesive can help the natural materials move less with variations in temperature and humidity. However, you have to use the right epoxy that has a very high cure temperature AND a very high melting point after it is cured. If the epoxy along your nicely fit edges begins to get soft from the heat from the wheels, then it will accumulate filings and compound actually in the epoxy. Then it hardens up and it is there permanently. There are guys that use no epoxy, and that's ok. I think it's good in the right circumstance if you use the right epoxy. Use the wrong one, and you will create a permanent grey line where the epoxy melted and allowed filings to get embedded in it.
  • If you have done these things, and still have a bit of a problem, get yourself some methyl ethyl keytone (butanone) for clean up. It is designed to dissolve epoxy and plastics. It will also weld plastic, so be very careful with it. If you are using plastic handles, don't use MEK. It will successfully clean compound away from natural materials and steel. It will also leave no residue as it evaporates very quickly. Wear a mask. Do not have plastic glasses on, those must be glass as the MEK will melt plastics. MEK is a last resort and should be used very carefully.
  • If you want to clean things, and don't want to mess with the MEK, the old standard is WD-40. It will dissolve most compounds and won't hurt much along the way. It is fairly harmless. Cleans like a dream too.
  • And last, but not least, if you are trying to simply clean compound and filings out of crevices, use Dawn dishwashing liquid. Most compounds are oil based and the Dawn will break it right down. I like to clean up my hands with WD-40 and then follow up with Dawn for under my nails, etc.
I am sure there are more ways to attack your issue. This is what I could remember off hand.
Hope it helps.
I'm sure others will chime in to fill in the gaps.

Good luck.

Take Care of yourself.

t
 
It can also be cheap or the wrong sandpaper too!

I use Norton Ice sandpaper and I don't have any problems or as little as could be expected from a black, wet & dry paper but anytime you finish lighter handle materials problems like this can arise.

Change things around and see where its coming from? I don't mess with the MEK as I don't find it necessary and I limit my exposure to harsh & caustic chemicals because I have had reactions to them and long term all of that kind of stuff will kill us!:biggrin:
 
After glue-up, clean any epoxy residue before it hardens with a rag and acetone. Check the handle a few times because there will be more seepage in areas. Whether sanding by hand or on a machine, try to only sand length ways with a hard backing so you don't drag the dust sideways into your handle material. I haven't found this to be such a problem unless it's white handle material or unstabilized maple. Are you using fresh paper/belts often or trying to stretch out used peices ? Silicon carbide paper can be a nightmare on some materials if it's wet and/or really used. Try cleaning the handle with alchohol after you're done.

Rudy
 
Thanks for the replies. The problem i'm experiencing is from sanding and not buffing, although I did learn several tips from the first post. I think it may be a problem with my sand paper, I just got it from the local hardware store and it is not a quality brand. The sand paper is also black/gray which could be where the dust is coming from. I was using sandpaper with a piece of leather glued to wood as backing (it is also a strop for my carving knives), but I may try a harder backing thanks to your comments.

Thanks!
Nick
 
Nick,

If you are using sandpaper with leather glued to wood, you are not getting things flat.
The leather compresses and rounds over edges.

I am a professional wood carver and earn part of my living doing carving.
Been doing so for about 20 years now.
If you are using a leather strop on your carving knives, use the thinnest of leather, perforated, and use a fine compound directly on the leather.
If the leather is too thick. the knife edge rolls and the v-wedge bevel on the carving knife is lost.

If you were using sandpaper on a carving knife, you were making your life way too difficult.
Sandpaper puts fine lines in the steel, AND it does not line up the steel "feathers" on the cutting edge.
This makes for rough cutting, leaves lines in the wood, and can be a source of repeat-use injury, like carpel-tunnel inflammation.
Also, a leather strop with compound directly on it polishes the steel, which makes it a better parting tool.

The attached pic is my strop.
It is a simple tool, but very effective.
It's made with pigskin, very thin, perforated to hold the compound.

Hope this info helps.


2013-12-16 18.11.23.jpg


If you need a good strop, compound or even a good carving knife, email John Dunkle at

jcdblade@gmail.com

He can fix you right up. He's a good guy.

Let me know if I can be of any help.

Take Care of yourself.

t
 
Sorry for the confusion, I use the strop on my carving knives, but in this instance it was just to provide a backing for sanding other parts of knives i was working on. I would never use sandpaper on my carving knives!

Thanks, Nick
 
The best most easily available sandpaper is make by Norton. Get their "Ice" line. 3M will work but isn't quite as good in my experience The Indasa Rhynowet paper is a second favorite of mine.
 
Rhynowet paper is what I use for final finishing all my handles except the horse stall mat ones. I also would like to recommend that you try gFlex epoxy if your not using it now. Cleans up with denatured alcohol very easily. It also has a reasonable cure time.
 
Back
Top