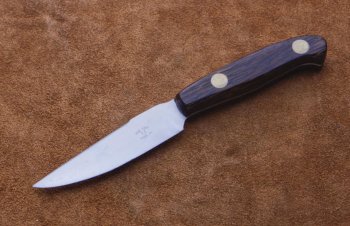
Number 6 and 7, please critique.

Pelallito

Well-Known Member
George, Tactically Sharp, was nice enough to photo 6 and 7 for me. #5 is phone photo. Added #5 as an after thought.

5-photo (5).jpg
6-Knife-02-001.jpg O1, Black Palm handle, homemade brass Loveless bolts.
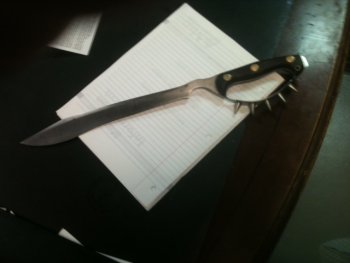
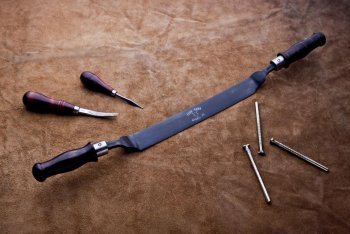
7- FleshingKnife-001.jpg 5160, Oak handles, SS ferrules.
Thanks,
Fred
PS # 5 turned into a large knife shaped object. Has a cracked blade.:(
PPS-#6 is his as soon as I make a sheath for it.
 
Last edited:
Thank you, Fred. Can't wait to add it to my collection.

George

PS: I really like how the fleshing knife came out looking very true to form based on the period style for this type of tool. The photo does not do it justice.
 
I had the pleasure seeing these in person the other night. Really freaking nice work Fred! I loved the grip on the handles for both of them.
 
Short reply, I like your paring knife. Nice work. I'd think about peening the loveless rivets so that the gap from the thread is not seen. Either that or you can buy/make corby style rivets. I have made my own loveless rivets for decades and even have a small mandrel that I grind a slight taper. I just don't care for the gap from the thread so I've turned to peening or use a different rivet.
 
Hi Jeff,
Thanks for the advice! I also do not like the thread gap. I did not think about peening it. Please tell me more about the mandrel and taper.
Before peening it, would you put a light chamfer or maybe use a small taper pin?
Thanks again,
Fred
 
My mandrel is threaded rod about 6 inches. If you have a flat tool rest with a "U" shape cut where the grinding wheel will fit into, then that is also your tool rest for this mandrel. I can control cutting the hexagon brass nuts round and then slightly bring one end of the mandrel away from the wheel allowing me to taper one of the rounded rivet nuts and then swap ends and slightly taper the other one. Thus I do 2 at a time. Be sure to screw them down against each other but not to tight or you have to mar the surface to unscrew them.

Once you have ground everything to final size and shape but not final finish (assuming you didn't fill the bolt thread or nut thread with epoxy, now you can lightly peen the bolt center out and the nut in. It's a dance I have to play to get them peened in and then finish sanding but not too much or I sand past the peening. I do my rough sanding with 36 gt and then go straight to a half round file. Once I'm done with the file I do the peening. Then I do only hand sanding with 220 and 400 (depending on the handle material).
 
Jeff,
Thank you for the explanation. I drill and tap brass round stock that I turned to size. Then I cut off the pieces from that to get 4 semi identical in length, pieces.
I don't think that I could hold a mandrel like yours accurately enough to do it your way. My hats off to you!
In machine shop class(centuries ago) I was taught to do a light countersink, before peening pins. I never crossed my mind, to try it with these bolts.
I will make some to test and learn how to do this correctly.
A friend gave me some Corby bolts for my next knife. It should be interesting to see how they work.
Thanks again.
Fred
Fred
 
Well I am glad you guys turn your own, I buy my Loveless Type bolts from Jantz supply and don't really have that gap problem once they are assembled, Ground down and hand sanded.

Laurence

www.rhinoknives.com
 
Laurence,
I will order some and find out what I am doing wrong! On second thought, I will also get some from Tracy.
Thanks,
Fred
 
Last edited:
Back
Top