New Maker's Designs

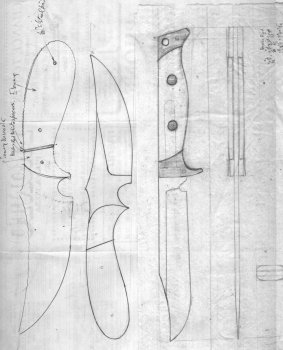
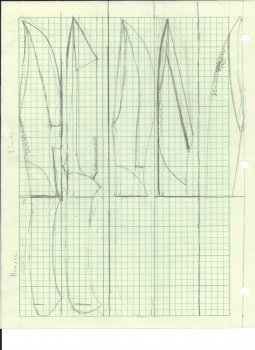
I'm going to start work here on a second knife about as soon as I can settle on a design. My first knife came out ok, nothing special, but was a great learning experience. With my second knife I'm hoping it would come out better, and I began drawing out designs. I want to get some opinions from the more experienced makers as to whether or not the designs are worth trying, and if so, can any improvements be made.Scan.jpg
 
I know that at this stage your mind is abuzz with ideas, but after viewing the drawings, I think you're setting yourself up for failure with all the compound grinds, false edges and "saw teeth". Personally I dislike the profiles of the images because they all are "broke back". But that's just me. I would encourage simple designs with single grinds of your choice......and try to make those grinds and finishes the best you can. The skills required for a knifemaker are learned skills that very few come by naturally....meaning they require time and repetition. Concentrate on simple designs, and learn the elements that make a great knife..... beyond profile design, think about how and why a knife cuts well (grind gemoetry, edge geometry, etc) and learn how to incorporate those things into what you build. As your skills and confidence increase, add small elements a little at a time, otherwise you're desires will overshadow your skills, and you will get frustrated beyond belief. I think it's important for newer makers to have early successes, which means understanding what you're capable of doing, and only pushing yourself in small increments.
 
I agree with Ed, you might need put those on the back burner for a while. Hey, let's see a pic of the first one, maybe you're a natural and those are within range.:1:
 
Let me repeat what was said on another site about knife design: there's a reason for all the "standard" designs. They are the ones that work. I will admit that you can find compound edges and teeth on the spines of some commercially made knives but they were made to catch the eye and serve no real function.

Doug
 
Being a newer maker, I totally agree with Ed.
I just finished my 5th knife, and I really desire to try new and more complex things. But here is my goal for each new knife: Try a new design with small changes as I make the basis for each knife better. To me it is critical that I get plunge lines, symmetry, bolster and handle fit better on EVERY knife I make. I have not yet tried to use a liner between the handle and tang, so I will try that next. I know it is not a ground breaking change...but it is a new process to me. After that, I am going to ditch the bolster and try fitting my first guard. I want to try a blade with compound grinds, but until my single grinds are really good, that will have to wait.
My 2 cents,

- J
 
I can post a picture, but I'm definitely not a natural. I've probably got the beginner idea disease, it wouldn't surprise me. As to a design, is there one the more experienced makers would recommend as a more beginner design?
 
I expected the serrations to not show up in the final design. They really aren't practical; if I want to saw something I'll get a saw.

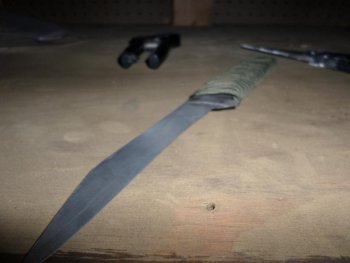
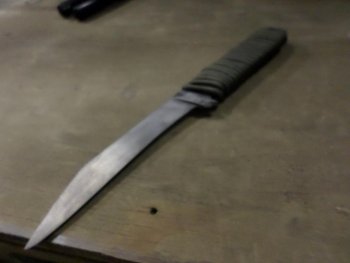
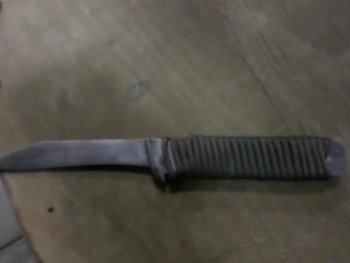
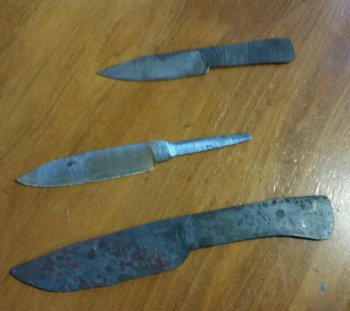
Here is a picture of my first knife. It was made from 1/4" thick ULSS (Unknown Leaf Spring Steel.) I flat ground it, but in the end I believe it ended up as a convex grind after all the work I put into getting rid of nasty deep file marks. (If anyone has a tip on how to get rid of those, or stop them from happening in the first place, please let me know.) I built a filing jig based off of a video by Gough Custom, and that has served me well. I ended up with a para-cord handle because not knowing what I was doing, I had done some sanding or something on the handle, and it would take a lot of work to make it flat. (Should have done more reading before I started, I'll try not to make that mistake again.) After heat treating, which was interesting to say the least (I'm building a better forge and method here soon,) I etched it in vinegar to get the dark grey look I prefer on my knives. In the end, I wish I was better, but that's why I keep working toward that unobtainable goal of perfection. It's a learning process. I can't wait for knife #2.

SAM_0377.jpgSAM_0378.jpgSAM_0379.jpg
(I apologize for the bad pictures. I don't know the best way to take pictures of knives.)
 
It can be a little intimidating to post a pic of something the first time, but now the ice is broke. I'm a newbie too and there is so much to learn, it's hard not to get in a hurry. I started with a filing jig based on Gough's also. If you're working with files, the first thing I'd recommend is starting with much thinner stock, like 1/8". It takes so long to file the bevels anyway, 1/4" material is just too much by hand. I'd say for your next knife, just Google some pics of a fairly small drop point hunter and try to copy it. You can make very simple handles with about any hardwood you can find. As for file marks, look at different file types. You can rough it out with a very coarse file and finish it with a very fine cutting file. Then, get out the sandpaper, make a good sanding stick, and progress through the grits. File and sandpaper is a very labor intensive way to make a knife, but I believe you can make a beautiful, functional blade with those and a ton of patience.
 
I'm starting with 1084 .140" thickness this time, so thankfully it won't involve so much grinding and whatnot. I got my last piece from a local blade-smith who offered some, so it was a great test. I was looking through Lloyd Harding's Knife patterns and was considering doing the center one in this picture as well.

Lloyd 255.jpg
 
That looks like a great design providing you have a small wheel attachment and are going with a nice flat grind.
 
rps20140907_201032.jpg

Make one along the lines of the bottom knife. Keep it simple. Make the the same one with something different at least 6 times. Then pick another one and do that one 6 times, changing it a little each time. Repeating the same design over several times will build muscle memory.

Small wheel normally means belt grinder but, if you are careful can mean dremel tool also. I started with a hack saw, dremel tool, files, and sandpaper. Once I got a couple of knives finished I graduate to better tools.

Crawl, walk, run! The fun and journey are just beginning.
 
One thing about starting out with hand tools is that they will make you want to save up for a belt grinder (not belt sander):biggrin:. Actually it will help you see how all the elements of the blade go together and even after you've gotten yourself a belt grinder there are some things you just can't beat a hand tool for.

Doug
 
I am new also, here is my idea since the blade shaping seems over my head for now. I bought some Russell Green River blades to practice my handle making skills. I have next week off for vacation I hope they arrive in time to play with. My idea was I could learn and not frustrate myself and get a look at some styles of blades. I bought a about 8 blades in different patterns and it was about $100... I love the history of the Russell blades.
 
I think I've decided to go with this Bob Loveless Texas Camp Knife Pattern. It has a single main bevel, and while he did some fancy stuff to them, I think I can pull of a basic version for knife #2. It has a hidden tang, but I may decide to make it into a full tang, we'll just have to wait and see.
 
Now you're talking. For now, I'd make it full tang though. That's still kind of a long blade, but the shape will be much easier to work with.
 
That's a good straight forward knife blade and who could argue with a Bob Loveless design. Stick tangs do have their own level of frustration, especially if you try to install a guard, so a full tang might be the way to go with your first few knives.

Doug
 
Back
Top