RickA
Well-Known Member
Hi Everyone
Late last year when I was looking for ideas for making a hunting knife for my boss , one of the suggestions I got on my local forum (SABlade), was to make a Loveless style Drop Point Hunter. I have always like the DPH so I did some searching and found a template online, (as it turns out the template was inaccurate (I have found an accurate template since then). You may pick up an impression of "imbalance" when looking at it - this is due to the length of the blade being about 10mm too short, the curve at the end of the back of the handle profile is also slightly off, but it is fairly close.
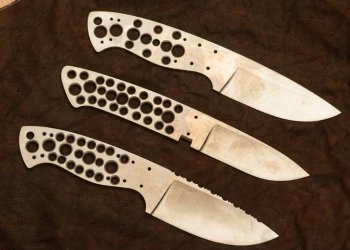
I eventually decided to use my own design for my boss's knife (http://knifedogs.com/showthread.php...-my-competition-Bowie&highlight=ideas+hunting), but at the time I cut and profiled three blanks (seen below) one of which was the Loveless DPH in this post. The fileworked blank below the Loveless is the one I used for my boss's knife.
I finally got round to finishing the Loveless style DPH it a few weeks ago, and decided that I had better take some pictures of it before it gets sent to its new owner tomorrow.
Unfortunately during the assembly of the DPH I experimented with doing a few things differently to my usual methods which had mixed results
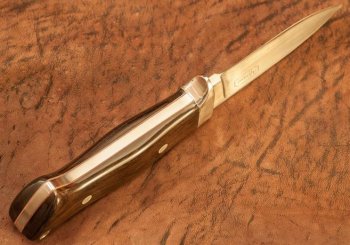
1) I made the mistake of trying out a different epoxy than the one i'm used to (I usually use a slow setting epoxy which gives plenty of time (8 - 12h) for positioning of scales / liners and clean up of the excess epoxy. This time I tried a quick setting epoxy -> Bad idea, this was a very different experience, i'm not used to trying to get epoxy applied, aligned, clamped up and the excess cleaned off within 3 min. Given that it sets so quickly, trying to mix in some sawdust from the scales to get the color of the epoxy closer to the scales didn't work. I ended up with white lines between liner and scale / liner and tang - sadly the lines are not consistent either, i'll take it as a learning experience, but will stick to slow setting epoxies from now on.
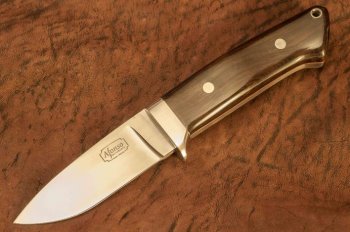
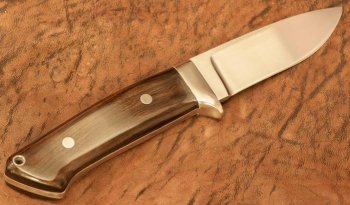
2) The African Blackwood piece I used for the scales had some tiny holes in a couple of areas, these didn't appear to be sanding scratches and looked more like tiny pores, which didnt look great - so I tried a Superglue finish. Again maybe not the greatest idea (without some practice first). I ended up sanding most of it off in trying to get a nice smooth surface. After re-applying and re-sanding a few times (with 0000 steel wool) I eventually got it to the point where it looks ok. I tried buffing the scales - as explained in a superglue finish tutorial I read , but the result ends up looking totally plastic, so I re-sanded with the steel wool and hand buffed to the result as seen in the pictures.
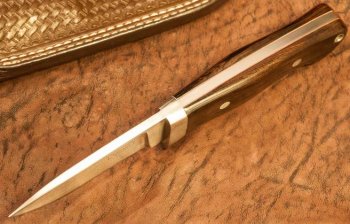
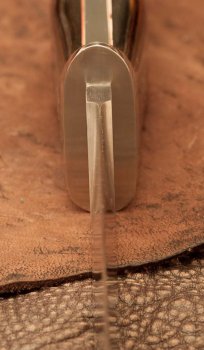
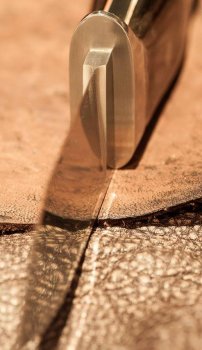
3) One thing I was very happy with was the fit and shaping of the guard, this was my first attempt at milling a guard slot, with my MD30 mill/drill, and it worked perfectly! Despite the fact that I had to flip the guard over and cut from the other side halfway through due to the short length (5/16") of the cutting surface on the 3mm TC milling cutter with 1/2" thick guard material. This time I had good success when peening the pins, so there was no need for stippling to hide them.
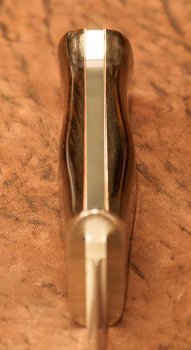
4) I shaped the scales on the 10" wheel using the method explained in "Making Knives by Richard Barney & Robert Loveless", and I must say it makes for a very comfortable handle.
Blade length - 3.5"
Overall length - 8"
Blade - 0.2" Bohler N690 - at 60Rc
Guard - 1/2" 316 stainless
Pins - 316 stainless - 3/32" in the guard and 1/4" in the scales
Handle Scales - African Blackwood (superglue finish)
Red formica liner
Lanyard tube - 1/4" 304 stainless
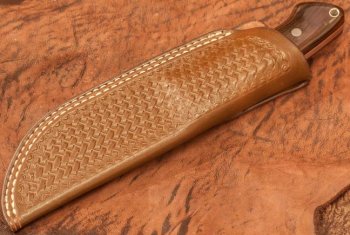
Pouch Sheath - 9/64" Buffalo leather with basketweave stamping
Late last year when I was looking for ideas for making a hunting knife for my boss , one of the suggestions I got on my local forum (SABlade), was to make a Loveless style Drop Point Hunter. I have always like the DPH so I did some searching and found a template online, (as it turns out the template was inaccurate (I have found an accurate template since then). You may pick up an impression of "imbalance" when looking at it - this is due to the length of the blade being about 10mm too short, the curve at the end of the back of the handle profile is also slightly off, but it is fairly close.
I eventually decided to use my own design for my boss's knife (http://knifedogs.com/showthread.php...-my-competition-Bowie&highlight=ideas+hunting), but at the time I cut and profiled three blanks (seen below) one of which was the Loveless DPH in this post. The fileworked blank below the Loveless is the one I used for my boss's knife.
I finally got round to finishing the Loveless style DPH it a few weeks ago, and decided that I had better take some pictures of it before it gets sent to its new owner tomorrow.

Unfortunately during the assembly of the DPH I experimented with doing a few things differently to my usual methods which had mixed results
1) I made the mistake of trying out a different epoxy than the one i'm used to (I usually use a slow setting epoxy which gives plenty of time (8 - 12h) for positioning of scales / liners and clean up of the excess epoxy. This time I tried a quick setting epoxy -> Bad idea, this was a very different experience, i'm not used to trying to get epoxy applied, aligned, clamped up and the excess cleaned off within 3 min. Given that it sets so quickly, trying to mix in some sawdust from the scales to get the color of the epoxy closer to the scales didn't work. I ended up with white lines between liner and scale / liner and tang - sadly the lines are not consistent either, i'll take it as a learning experience, but will stick to slow setting epoxies from now on.
2) The African Blackwood piece I used for the scales had some tiny holes in a couple of areas, these didn't appear to be sanding scratches and looked more like tiny pores, which didnt look great - so I tried a Superglue finish. Again maybe not the greatest idea (without some practice first). I ended up sanding most of it off in trying to get a nice smooth surface. After re-applying and re-sanding a few times (with 0000 steel wool) I eventually got it to the point where it looks ok. I tried buffing the scales - as explained in a superglue finish tutorial I read , but the result ends up looking totally plastic, so I re-sanded with the steel wool and hand buffed to the result as seen in the pictures.
3) One thing I was very happy with was the fit and shaping of the guard, this was my first attempt at milling a guard slot, with my MD30 mill/drill, and it worked perfectly! Despite the fact that I had to flip the guard over and cut from the other side halfway through due to the short length (5/16") of the cutting surface on the 3mm TC milling cutter with 1/2" thick guard material. This time I had good success when peening the pins, so there was no need for stippling to hide them.
4) I shaped the scales on the 10" wheel using the method explained in "Making Knives by Richard Barney & Robert Loveless", and I must say it makes for a very comfortable handle.
Blade length - 3.5"
Overall length - 8"
Blade - 0.2" Bohler N690 - at 60Rc
Guard - 1/2" 316 stainless
Pins - 316 stainless - 3/32" in the guard and 1/4" in the scales
Handle Scales - African Blackwood (superglue finish)
Red formica liner
Lanyard tube - 1/4" 304 stainless
Pouch Sheath - 9/64" Buffalo leather with basketweave stamping


