My homemade vacuum chamber for stabilizing

Edwardshandmadeknives

Well-Known Member
91FE3D37-25C2-489A-BD6F-4C01201E0306.jpeg
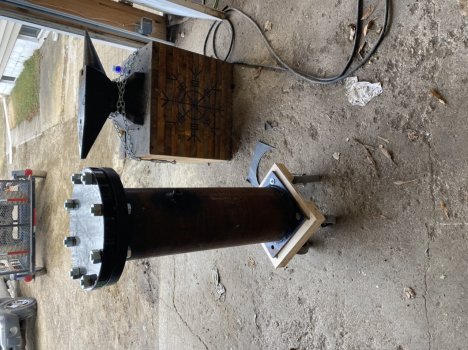
I don’t know why the picture insists on loading sideways, but here is what I built. I started trying to stabilize with a stainless vessel with a 1/2” Lexan lid, and first my vacuum pump crushed the chamber, so I built a stronger one, then it broke the lid. I decided to go a little heavier this time, and built this. It’s 28” of 8” diameter steel pipe, with a weld-on steel flange. I got the steel pipe scrap from a local plumbing shop, and had them order me the flanges and gasket. If anyone is thinking of going this route, it’s not terribly expensive. The scrap of pipe was free, and the flanges, bolts, and gasket set me back about $300. I paid a certified high pressure steam welder $100 to weld it all up, with a 1/2” threaded port to connect the piping to. It will handle all the vacuum I can throw at it (29.98”), plus I was told it should handle 500 psi. It’s going to be outfitted with a digital micron gauge for the vacuum and an analog 0-1000 psi pressure gauge. Now I just have to pipe it!
 
stabilizing is so much more than pulling a extreme vacuum. Wish you the best.
Absolutely. The chambers that are sold for the diy stabilizing don’t allow any pressure, and paint pots and the like can’t handle much pressure either, which is where this comes into play. I’ve found that it takes a combination of vacuum, pressure, and time. The more of the first two that you can apply, the less of the third it takes. When I first tried it, I used vacuum only, and sectioned the wood and looked at it under a microscope, it was pretty interesting to see how porous it still was. I used 2” basswood cubes to test how well it was getting in there. It went all the way through, but not real well, which is why I built this. I’ll be trying some more basswood samples once I get this piped in and see how it goes with a lot more time and pressure involved. Everyone claims you can do this in an old Mason jar in your kitchen. Um, not so much. You “can”, but the results are not great.
 
Nice pressure vessel! Reminds me of my lab back in the day.

How are you intending to deal with foaming overflow?

Have you settled on a polymer?
 
Nice pressure vessel! Reminds me of my lab back in the day.

How are you intending to deal with foaming overflow?

Have you settled on a polymer?
For foaming, the intake port is located 20” above the bottom of the vessel, so nothing should get in there. I am going to be placing a 7” x 17” stainless container inside of this to contain the resin. I haven’t settled on a polymer. I’ve tried Cactus Juice so far. It seems to work pretty good, but I’ll try some others before I settle on one. From reading other posts on this forum and others, it seems that the vessel is one of the biggest setbacks in getting decent penetration. I know for me, I haven’t had any issues with generating enough vacuum. I do want to try it with significant pressure after vacuuming, and this should allow that. Pressure will come from the nitrogen bottle I use for inert atmosphere in my heat treating kiln. That runs over 2000 psi, so I should have plenty of pressure on tap.
 
Cool project. I got to the paint pot/vacuum pump/air compressor level a dozen years ago experimenting with Nelsonite and mostly mesquite for Robert Hensarling. The only part of that which was up to the task was the vacuum pump. The only thing I ever got total penetration on was pine lumber, which almost sucked it up without coercion. LOL

I look forward to your results, sir!
Next in line is a new microscope that I can get pictures with. I’ll post some pictures at 400x. It’s pretty neat to see the wood like that
 
While you had that welder you should have had him put a couple of 1/4" weld-o-lets on the flange.
I have to say after reading and hearing of all the efforts over the years of folks trying to stabilize at home, that's the best vacuum vessel I've seen yet and pressurizing with nitrogen should make a difference. before putting 2000# on it first I would bring it to a dive shop that refill air tanks, their supposed to have a chamber they put it in in case things go south.
I used to work around natural gas pipelines that carried 700-1000 psi and just hearing that gas flowing thru those pipes and see those gauges gave me the willies...that's just me though, normally the lines I worked on carried 60#. anyways... good luck with this project and keep us posted.
 
not to derail your thread but I thought you might like these pics, the welder where I use to work made these quench tanks for me, one 4" and one 6" epoxy coated steel.
unkxGO3.jpg
 
While you had that welder you should have had him put a couple of 1/4" weld-o-lets on the flange.
I have to say after reading and hearing of all the efforts over the years of folks trying to stabilize at home, that's the best vacuum vessel I've seen yet and pressurizing with nitrogen should make a difference. before putting 2000# on it first I would bring it to a dive shop that refill air tanks, their supposed to have a chamber they put it in in case things go south.
I used to work around natural gas pipelines that carried 700-1000 psi and just hearing that gas flowing thru those pipes and see those gauges gave me the willies...that's just me though, normally the lines I worked on carried 60#. anyways... good luck with this project and keep us posted.
Good tip with the dive shop. There’s one not far from me. Thought about those o-let’s on the flange. Might do that yet. I figured I can always add them.
 
View attachment 80463
I don’t know why the picture insists on loading sideways, but here is what I built. I started trying to stabilize with a stainless vessel with a 1/2” Lexan lid, and first my vacuum pump crushed the chamber, so I built a stronger one, then it broke the lid. I decided to go a little heavier this time, and built this. It’s 28” of 8” diameter steel pipe, with a weld-on steel flange. I got the steel pipe scrap from a local plumbing shop, and had them order me the flanges and gasket. If anyone is thinking of going this route, it’s not terribly expensive. The scrap of pipe was free, and the flanges, bolts, and gasket set me back about $300. I paid a certified high pressure steam welder $100 to weld it all up, with a 1/2” threaded port to connect the piping to. It will handle all the vacuum I can throw at it (29.98”), plus I was told it should handle 500 psi. It’s going to be outfitted with a digital micron gauge for the vacuum and an analog 0-1000 psi pressure gauge. Now I just have to pipe it!
Are you SURE that chamber is strong enough? :D

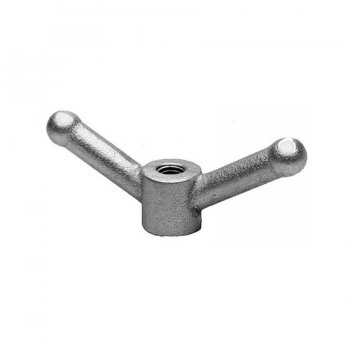
If I were you, I'd weld some bar stock onto the nuts, so you don't need to use a wrench. As long as you're gasket is in good shape, you don't need much torque on the bolts.

Being able to cure resin at high pressure is really nice. It shrinks any bubbles down to the point that they aren't an issue.

You know, that’s not a bad idea, making big wing nuts out of the existing ones.
 
Back
Top